Windows 11 is yet to come into the public domain; most people have started installing and testing it on VirtualBox. While many people are installing on a virtual, a few folks have installed Windows 11 and using it as the primary OS. Since Windows 11 is still in the Beta stage, Microsoft does not recommend installing and use on a primary PC.
If you want to install Windows 11 without compromising your primary work PC, the best way is to use Hyper-V or VirtualBox. Hyper-V is a built-in feature of Windows that allows you to install Linux Distros, Windows Development version, and any other Windows version. In this gearupwindows post, we will guide you to install Windows 11 using Hyper-V in Windows 10.
What is Hyper-V, and how can I use it?
Hyper-V technology offers a virtual environment to install an operating system and use physical computer resources. It is a safe way to test any operating system or software over it. Using Hyper-V, your primary operating system will not be affected. Further, there is no need to make your PC dual boot. Simultaneously you can use the host and guest operating systems on a single machine. By default, Hyper-V remains turned off on Windows PC, which means you need to enable it to use it.
How do I Check if my PC supports Hyper-V?
To run Hyper-V, your computer must meet the minimum hardware specifications:-
- 64-bit processor with Second Level Address Translation (SLAT).
- A processor must support VM Monitor Mode Extension (VT-c on Intel chips).
- Minimum 4GB RAM.
In addition to the above requirement, you need to check whether the Virtualization Technology and Hardware Enforced Data Execution Prevention options are enabled on the system firmware. To confirm, do the following:-
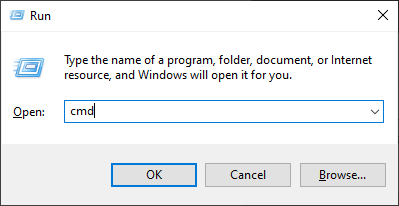
Step 1. Press Windows + R from the keyboard to open the Run dialog box.
Step 2. In the Run box, type the following and hit Enter from the keyboard:-
cmd
Step 3. In the Command Prompt window that opens, type the following and hit Enter from the keyboard:-
systeminfo
Under the Hyper-V Requirements section, check the results; all should be Yes.

How to Enable or Turn On Hyper-V in Windows?
Note: Hyper-V virtualization platform is available on the Pro and higher editions. It is not a part of Windows 11/10 Home edition.
The process of enabling Hyper-V on any Windows operating system is similar. To do that, you need to perform the following:-
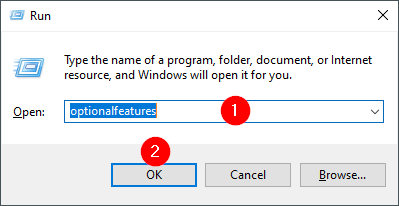
Step 1. Press the Windows + R hotkey from the keyboard to open the Run dialog box.
Step 2. In the Run box, type optionalfeatures and click the OK button to open the Windows Features dialog.
Step 3. Check the Hyper-V and all its components in the Windows Features.
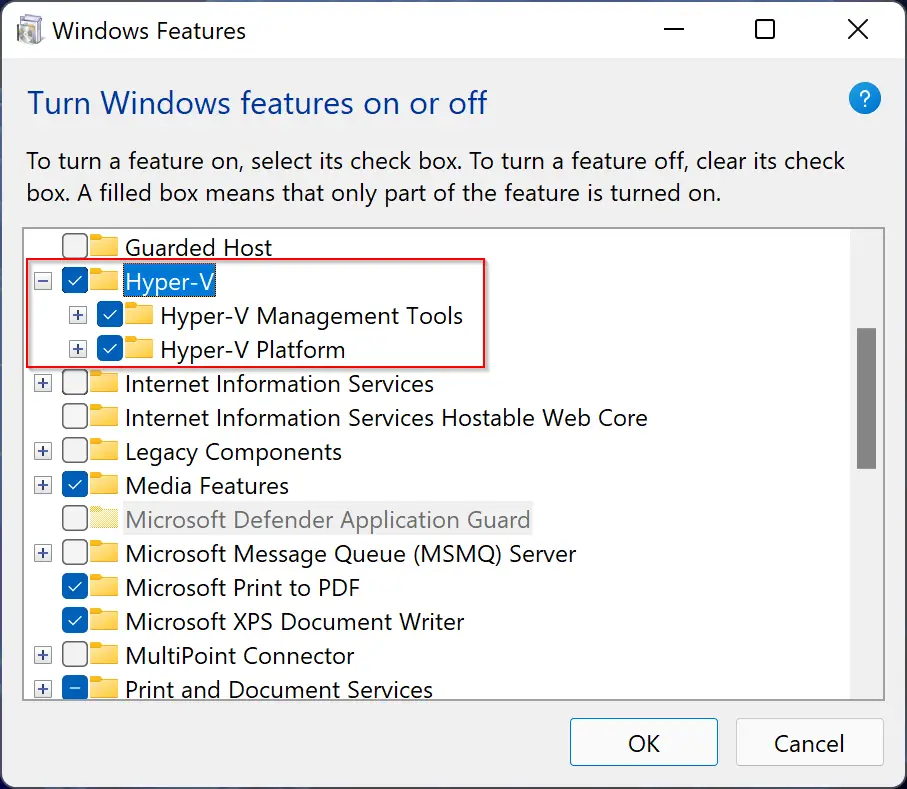
Step 4. Finally, click on the OK button.
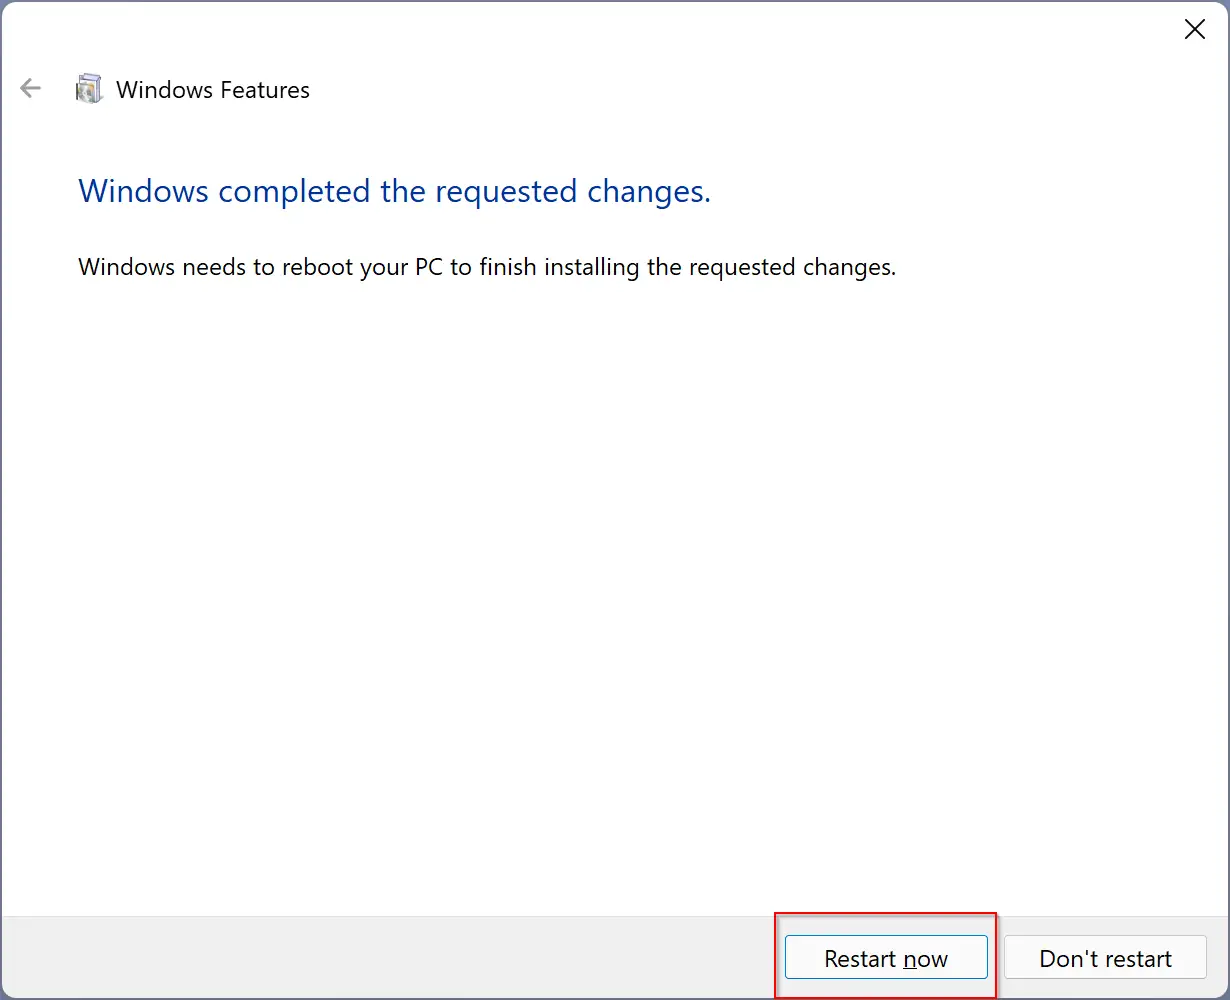
Step 5. Click on the Restart now button to reboot your computer and complete the setup of Hyper-V.
How to install Hyper-V on Windows 11 or 10 Home?
Hyper-V is not a part of Windows 11 or 10 Home Edition. To enable the same, do the following:-
Step 1. Open Notepad.
To do that, press the Start button and type Notepad. Click on its entry in the search to open the Notepad application.
Step 2. Paste the following in the notepad:-
pushd "%~dp0"
dir /b %SystemRoot%\servicing\Packages\*Hyper-V*.mum >hv.txt
for /f %%i in ('findstr /i . hv.txt 2^>nul') do dism /online /norestart /add-package:"%SystemRoot%\servicing\Packages\%%i"
del hv.txt
Dism /online /enable-feature /featurename:Microsoft-Hyper-V -All /LimitAccess /ALL
pause
Step 3. Navigate to File > Save as.
Step 4. Name the file vm.bat.
Step 5. Finally, right-click the file and choose Run as administrator.
Once you complete the above steps, Hyper-V will be installed on your PC.
How to Install Windows 11 Using Hyper-V in Windows?
Follow these steps to Install Windows 11 using Hyper-V in Windows:-
Step 1. Download Windows 11 ISO from the Microsoft server.
Step 2. Open the Hyper-V Manager.
To do that, type Hyper-V in the Start Menu, and then click on the Hyper-V Manager in the search result.
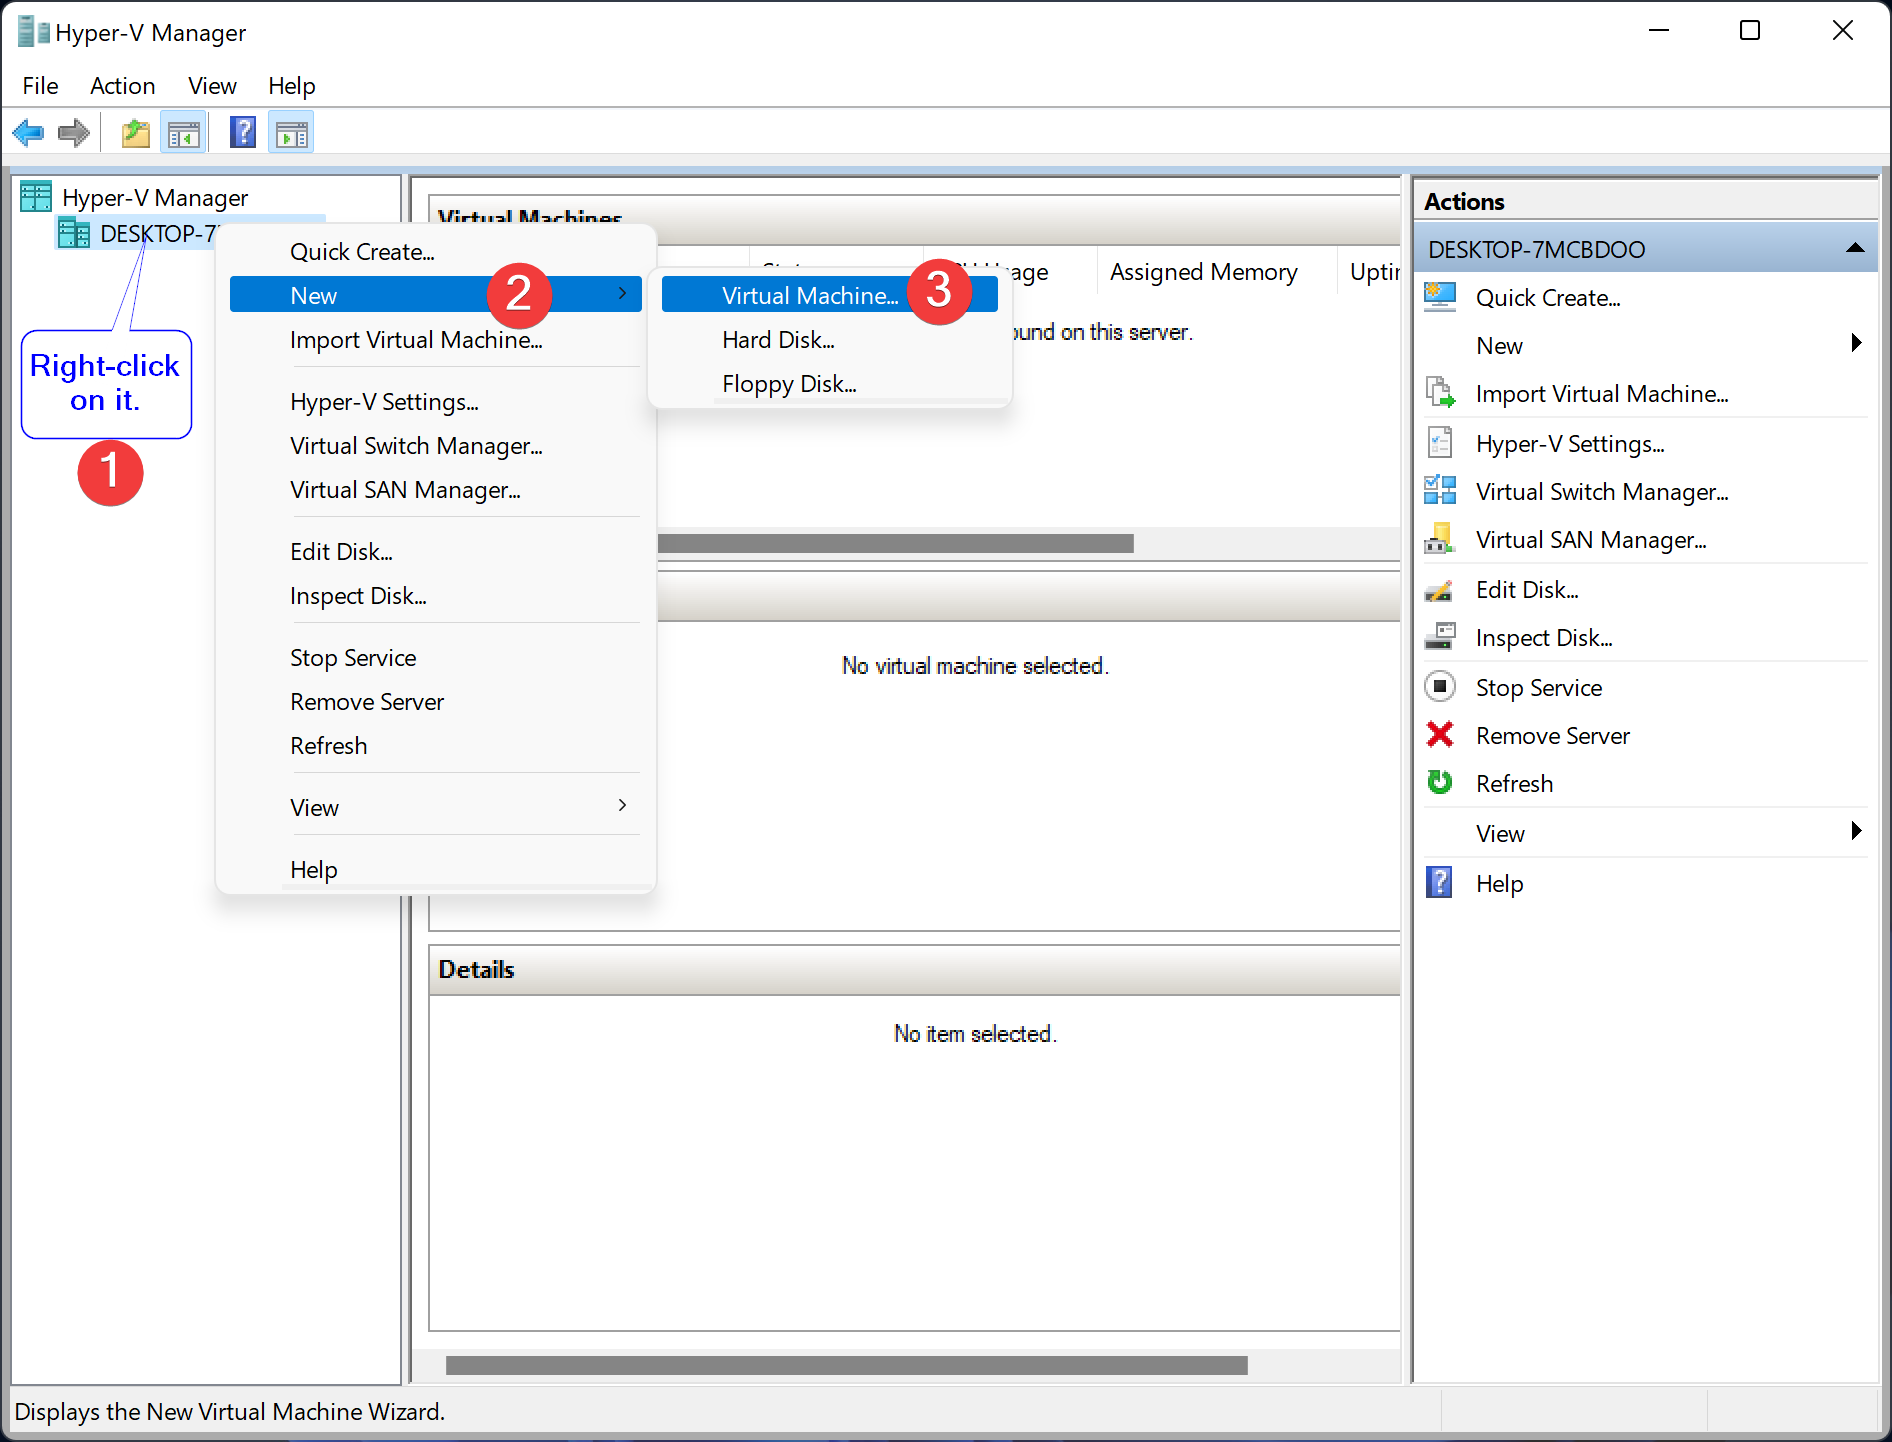
Step 3. Under Hyper-V Manager, you will see the computer’s name. Right-click on it and then select New > Virtual Machine.
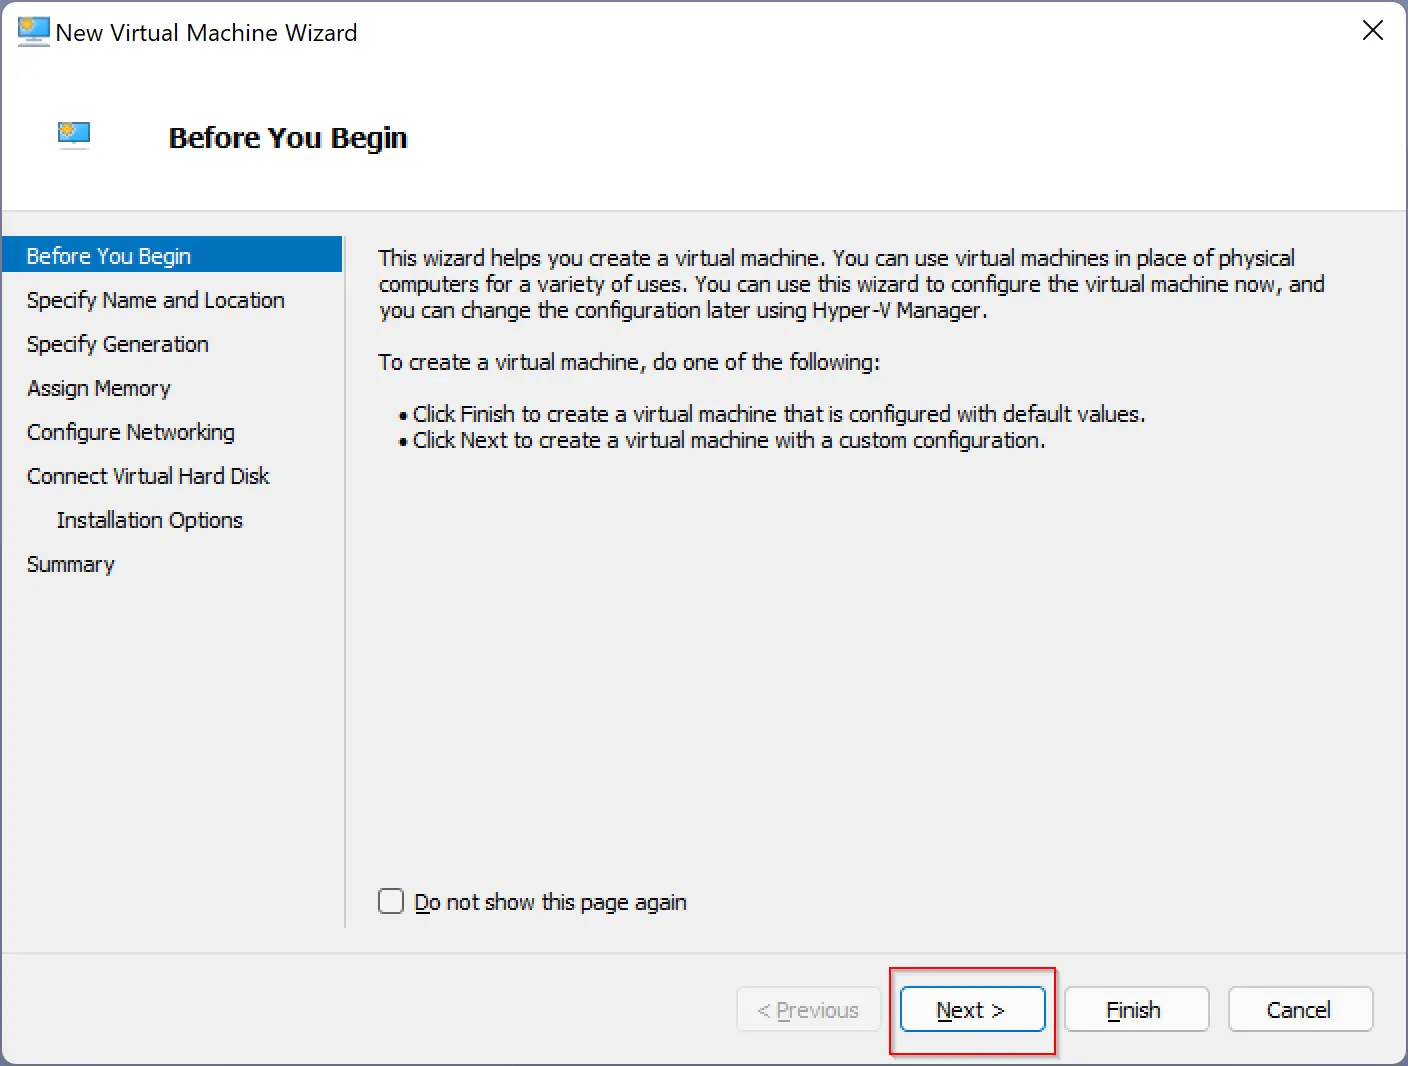
Step 4. On the new window that appears, click on the Next button.
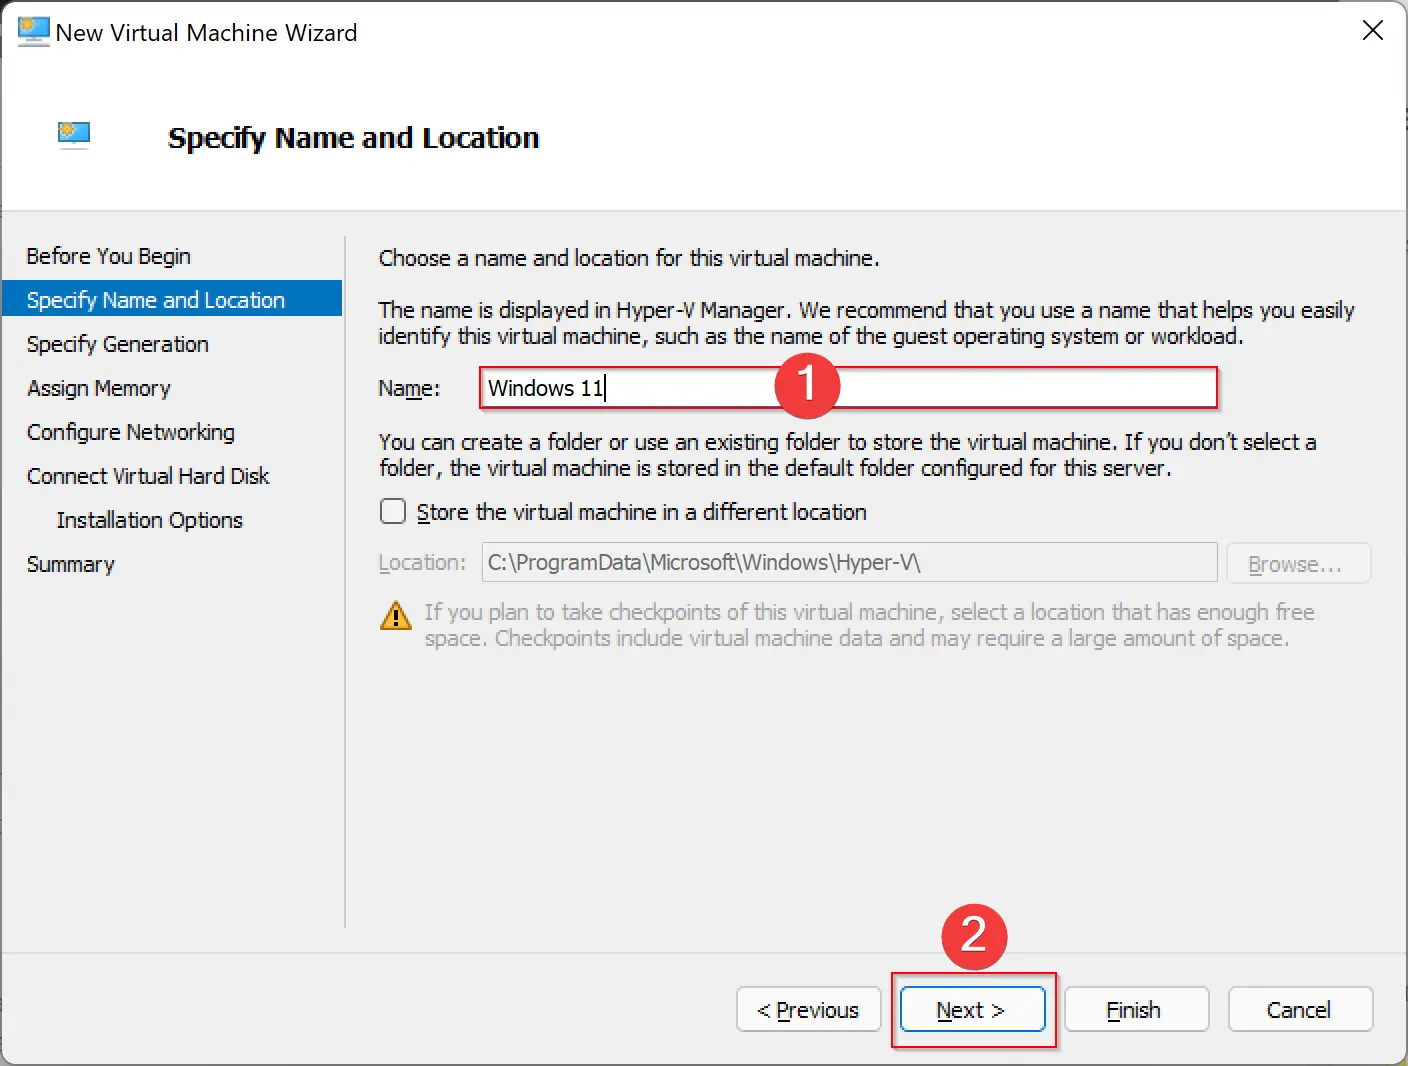
Step 5. Name the virtual machine as Windows 11, and then click on the Next button.
Note: If you do not have enough space in the primary drive, then before clicking the Next button, check the checkbox Store the virtual machine in a different location and select the desired drive.
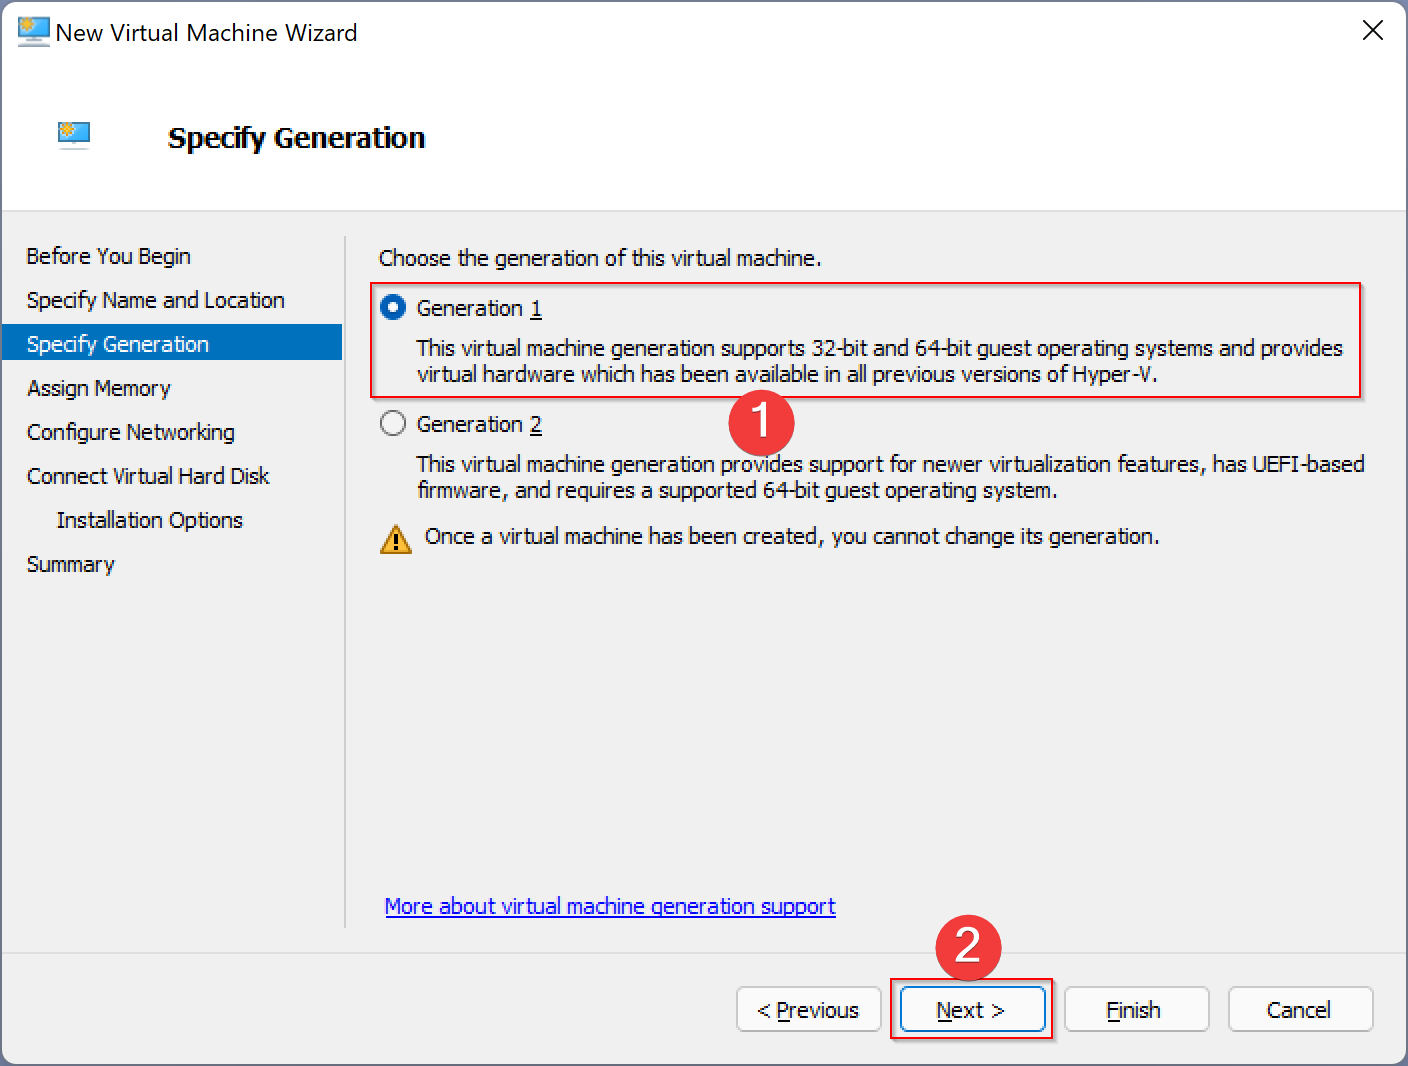
Step 6. Next, select Generation 2 if you have UEFI-based firmware on your PC. If you are unsure, select the first option, Generation 1.
Step 7. Click Next.
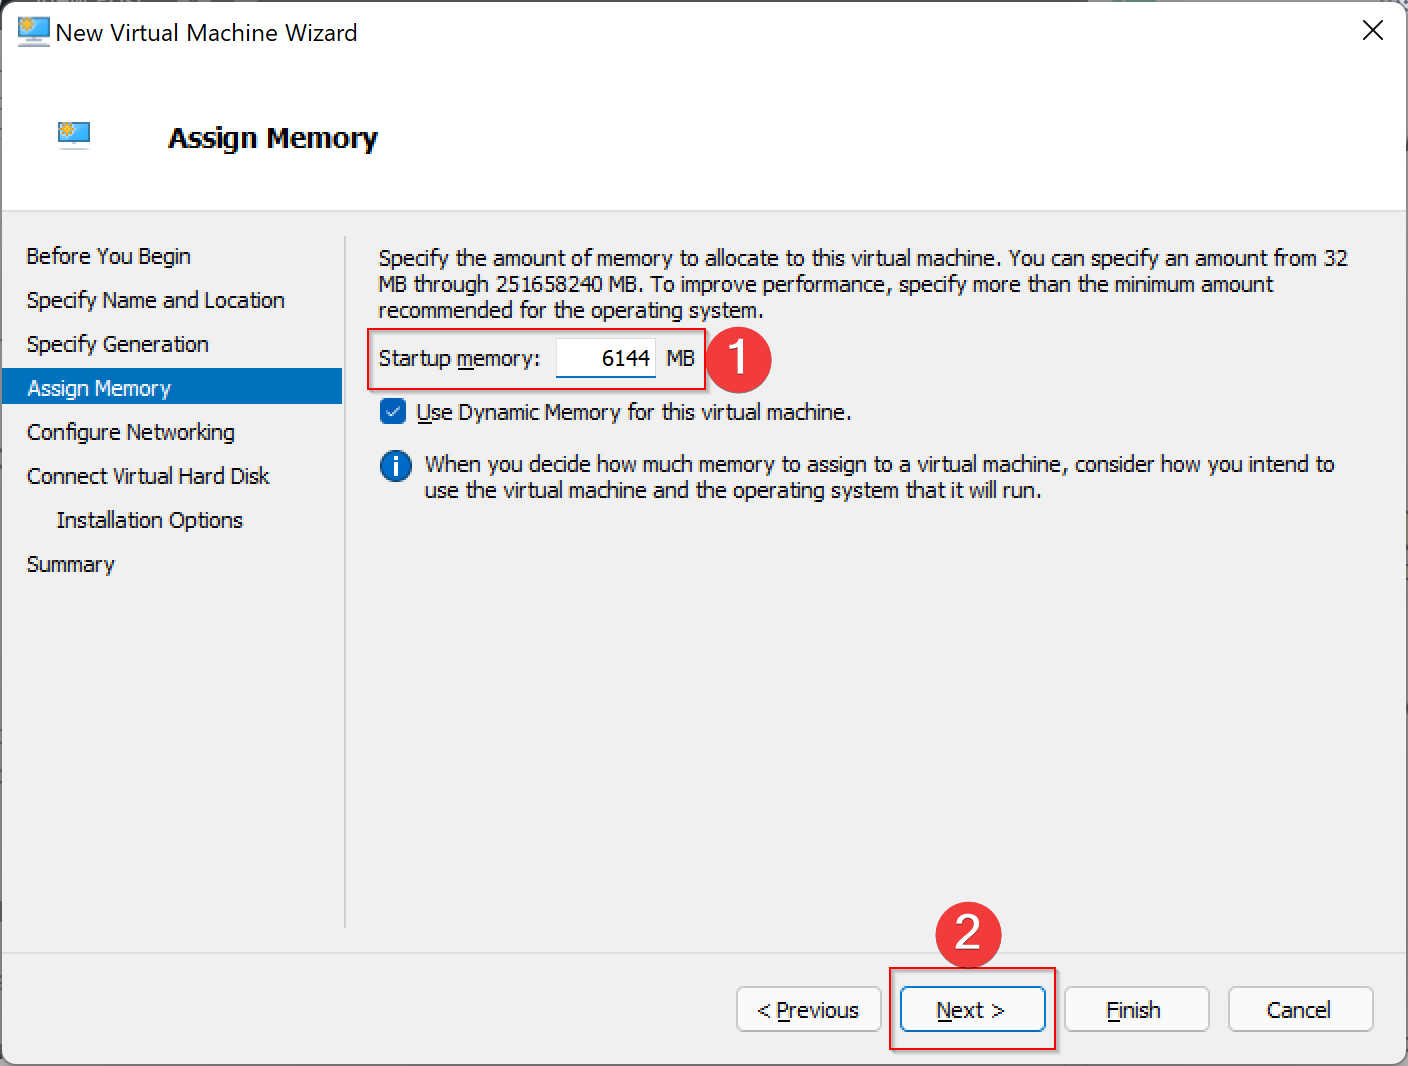
Step 8. Now, assign more than 4GB of memory and click the Next button.
Note: 1GB = 1024 MB.
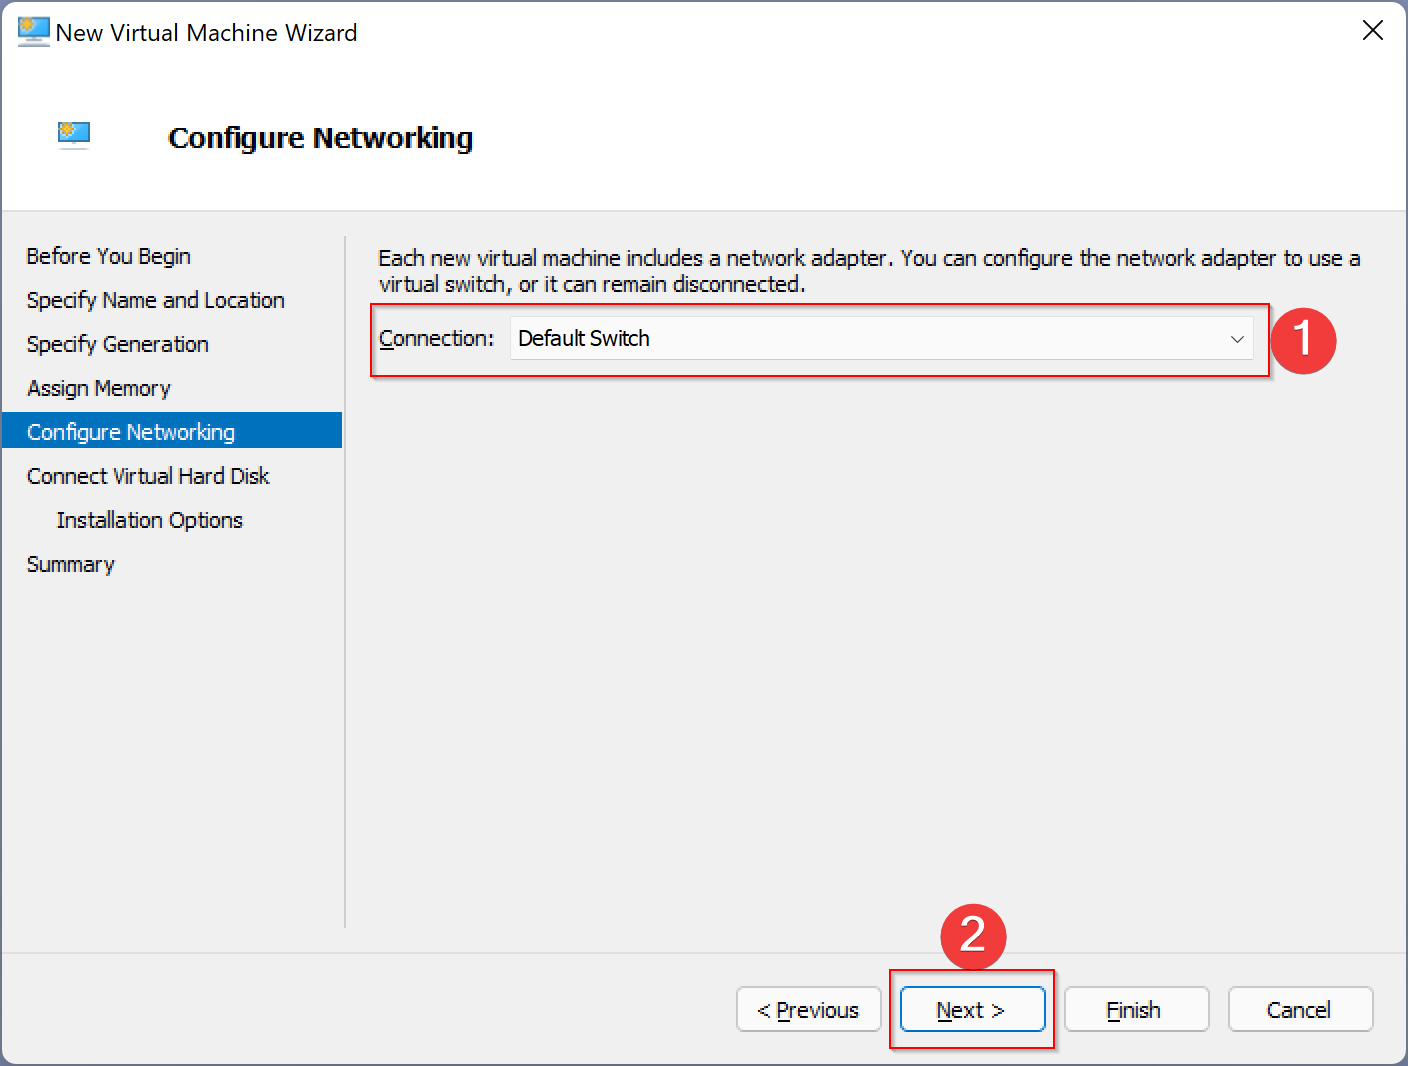
Step 9. Under Configure Networking screen, select the option Default Switch from the drop-down menu. Click Next.
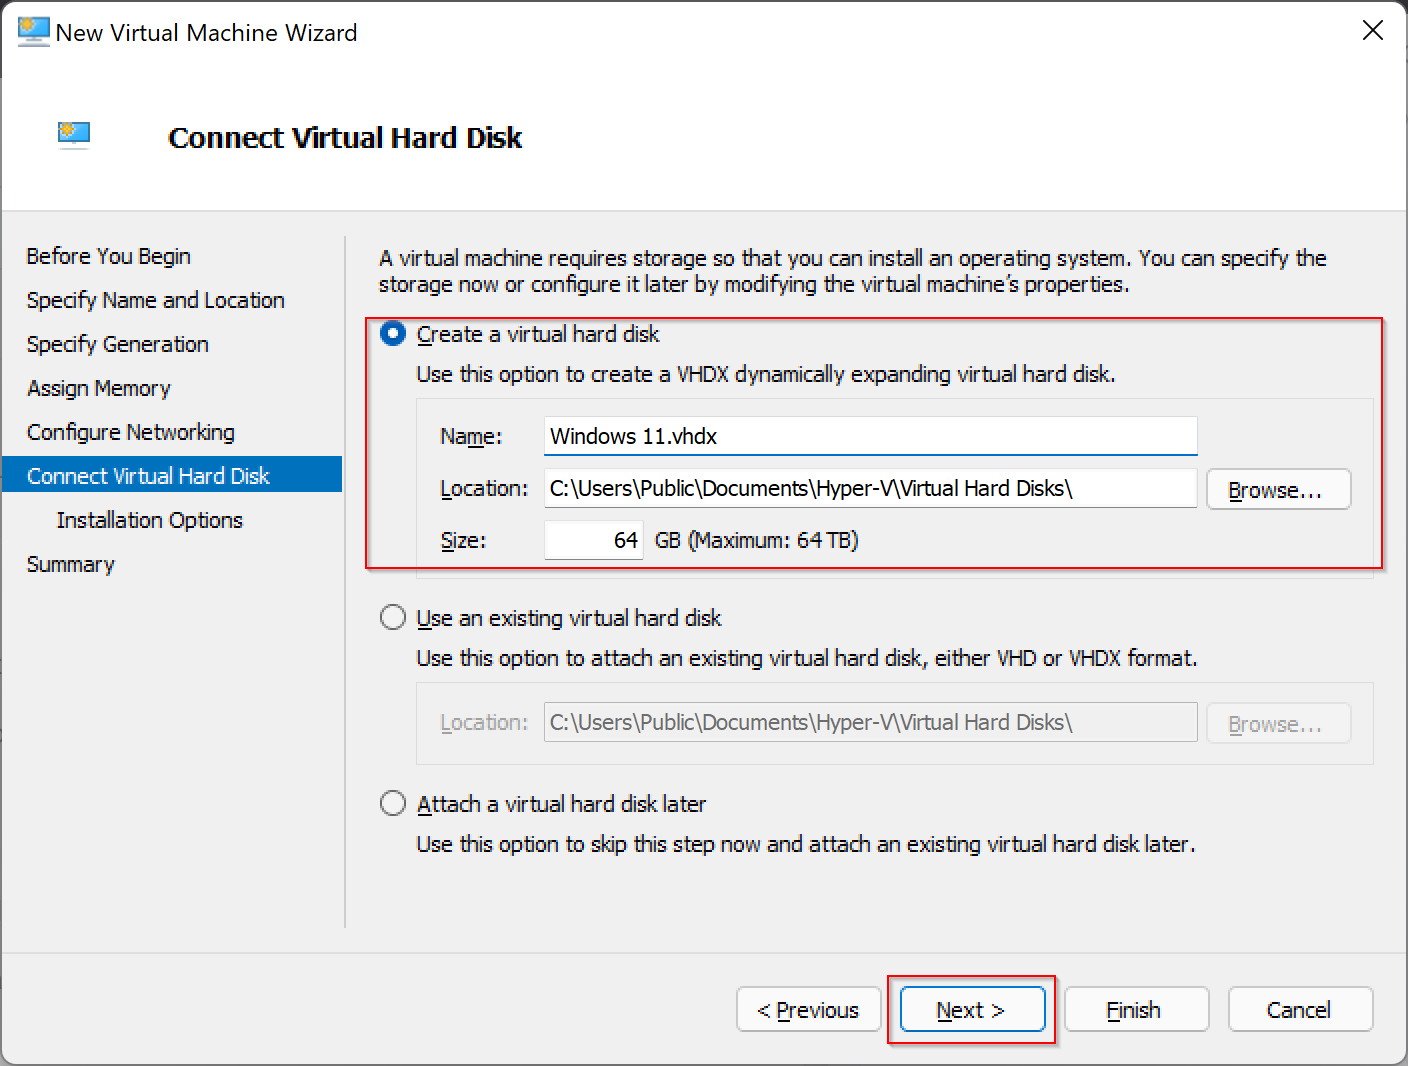
Step 10. Now, under Connect Virtual Hard Disk, set the Virtual HDD Location, Name, and Size. Click Next.
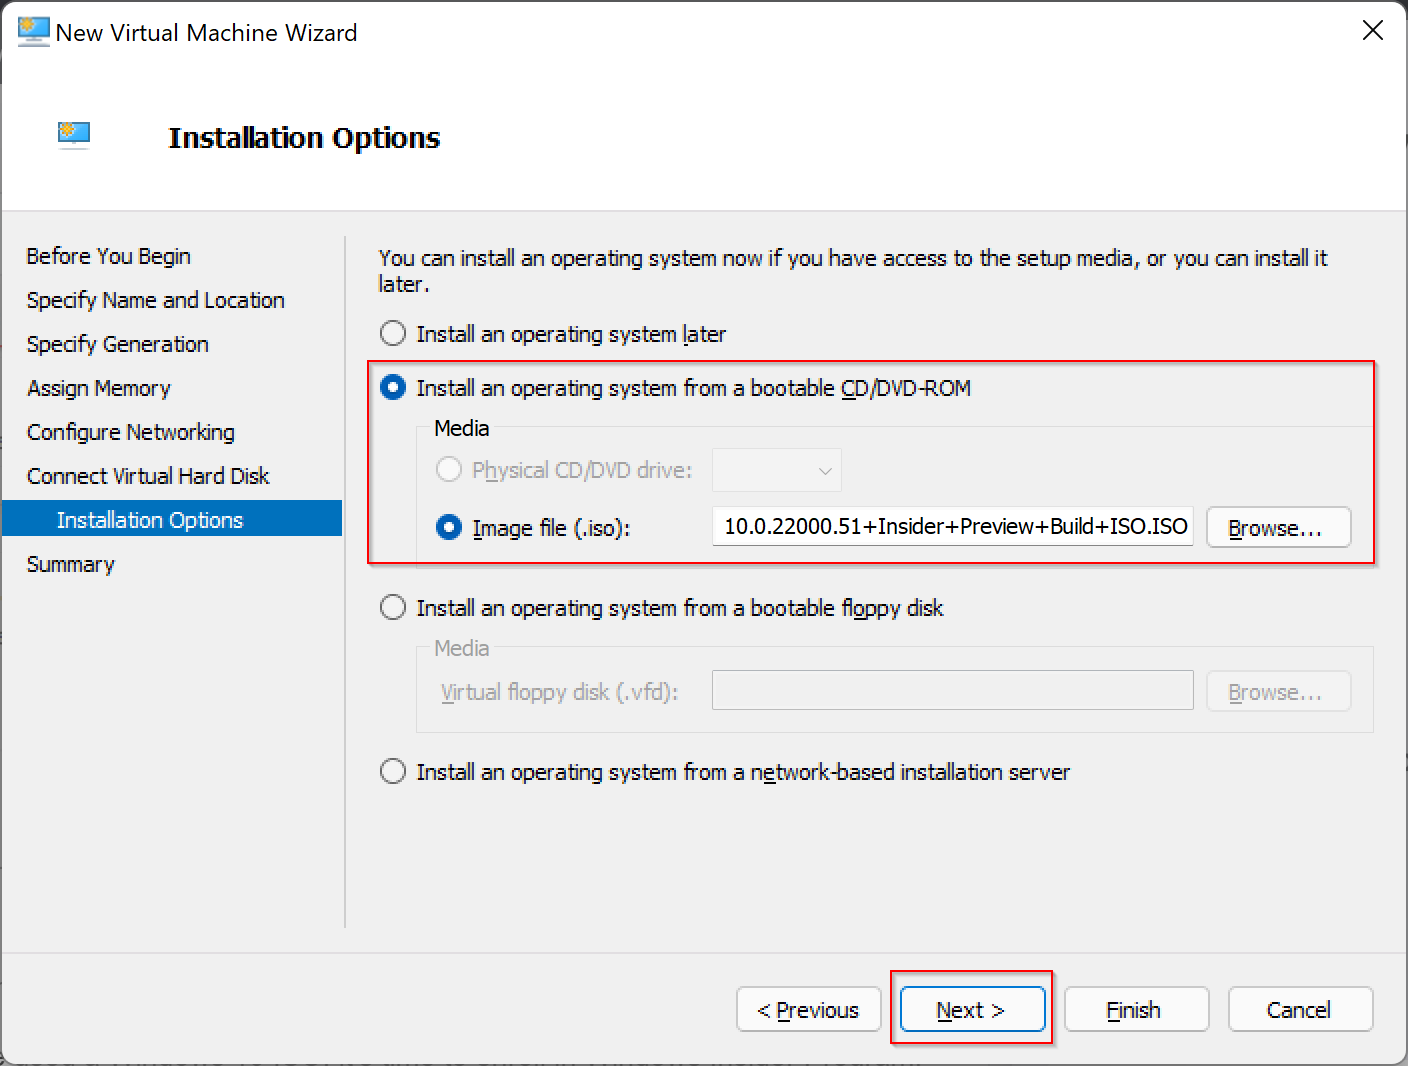
Step 11. Choose the second option, Install an operating system from a bootable CD/DVD-ROM. Then, select the Windows 11 ISO file from your computer. Once done, click the Next button.
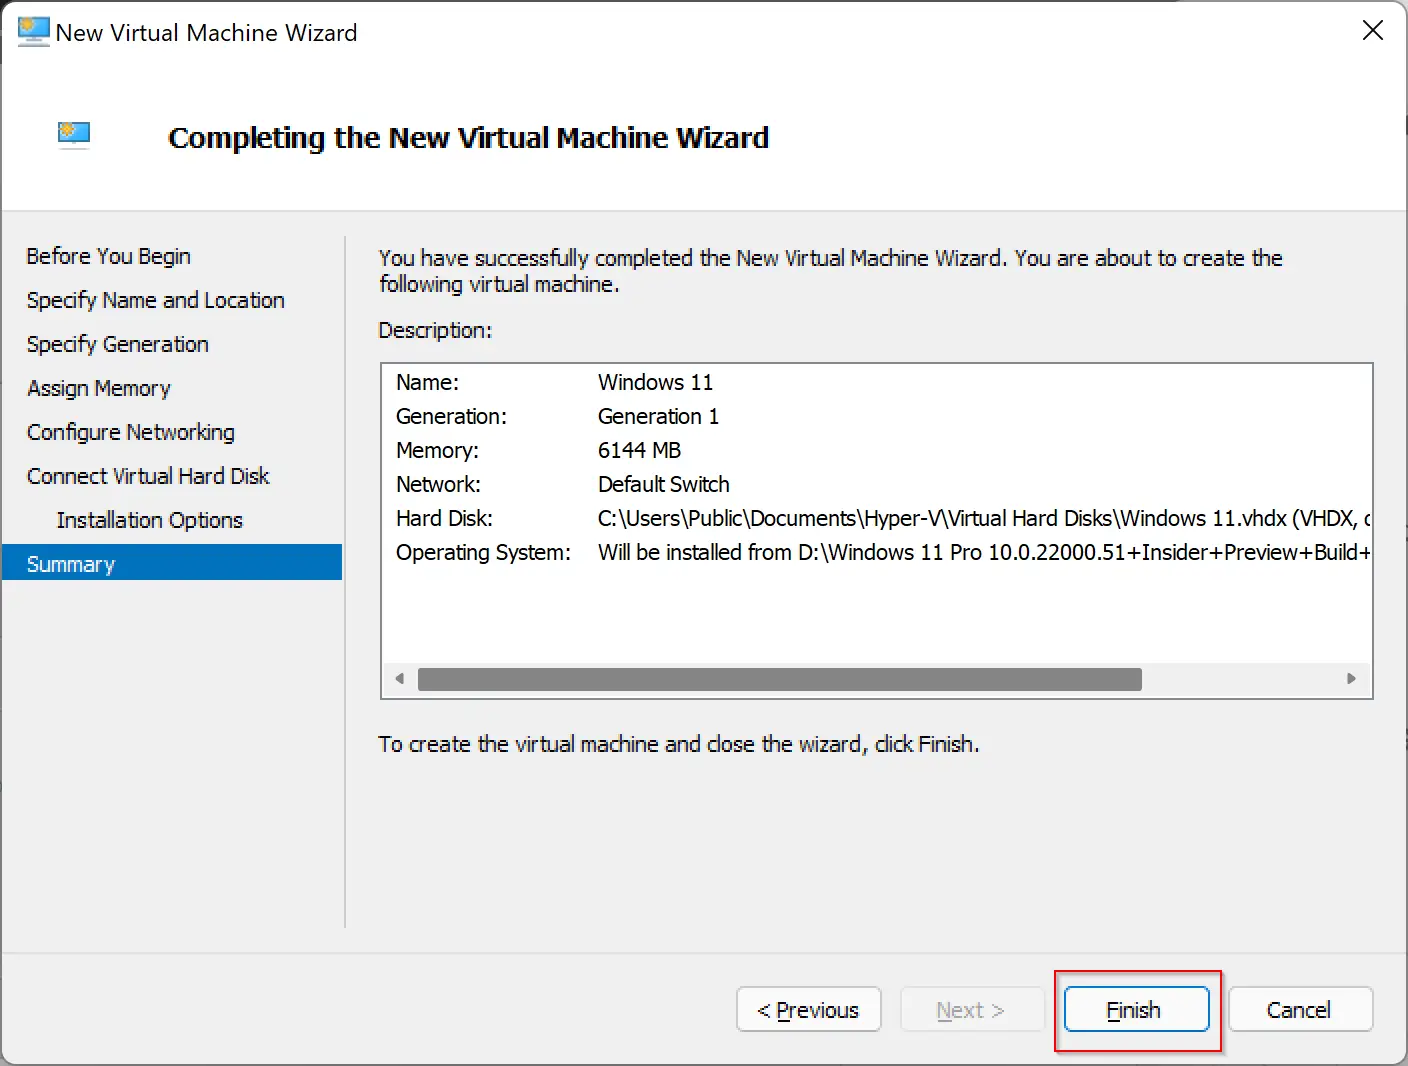
Step 12. You will be greeted with a summary that you have set up in previous steps in the next window. Click on the Finish button to start installing Windows 11.
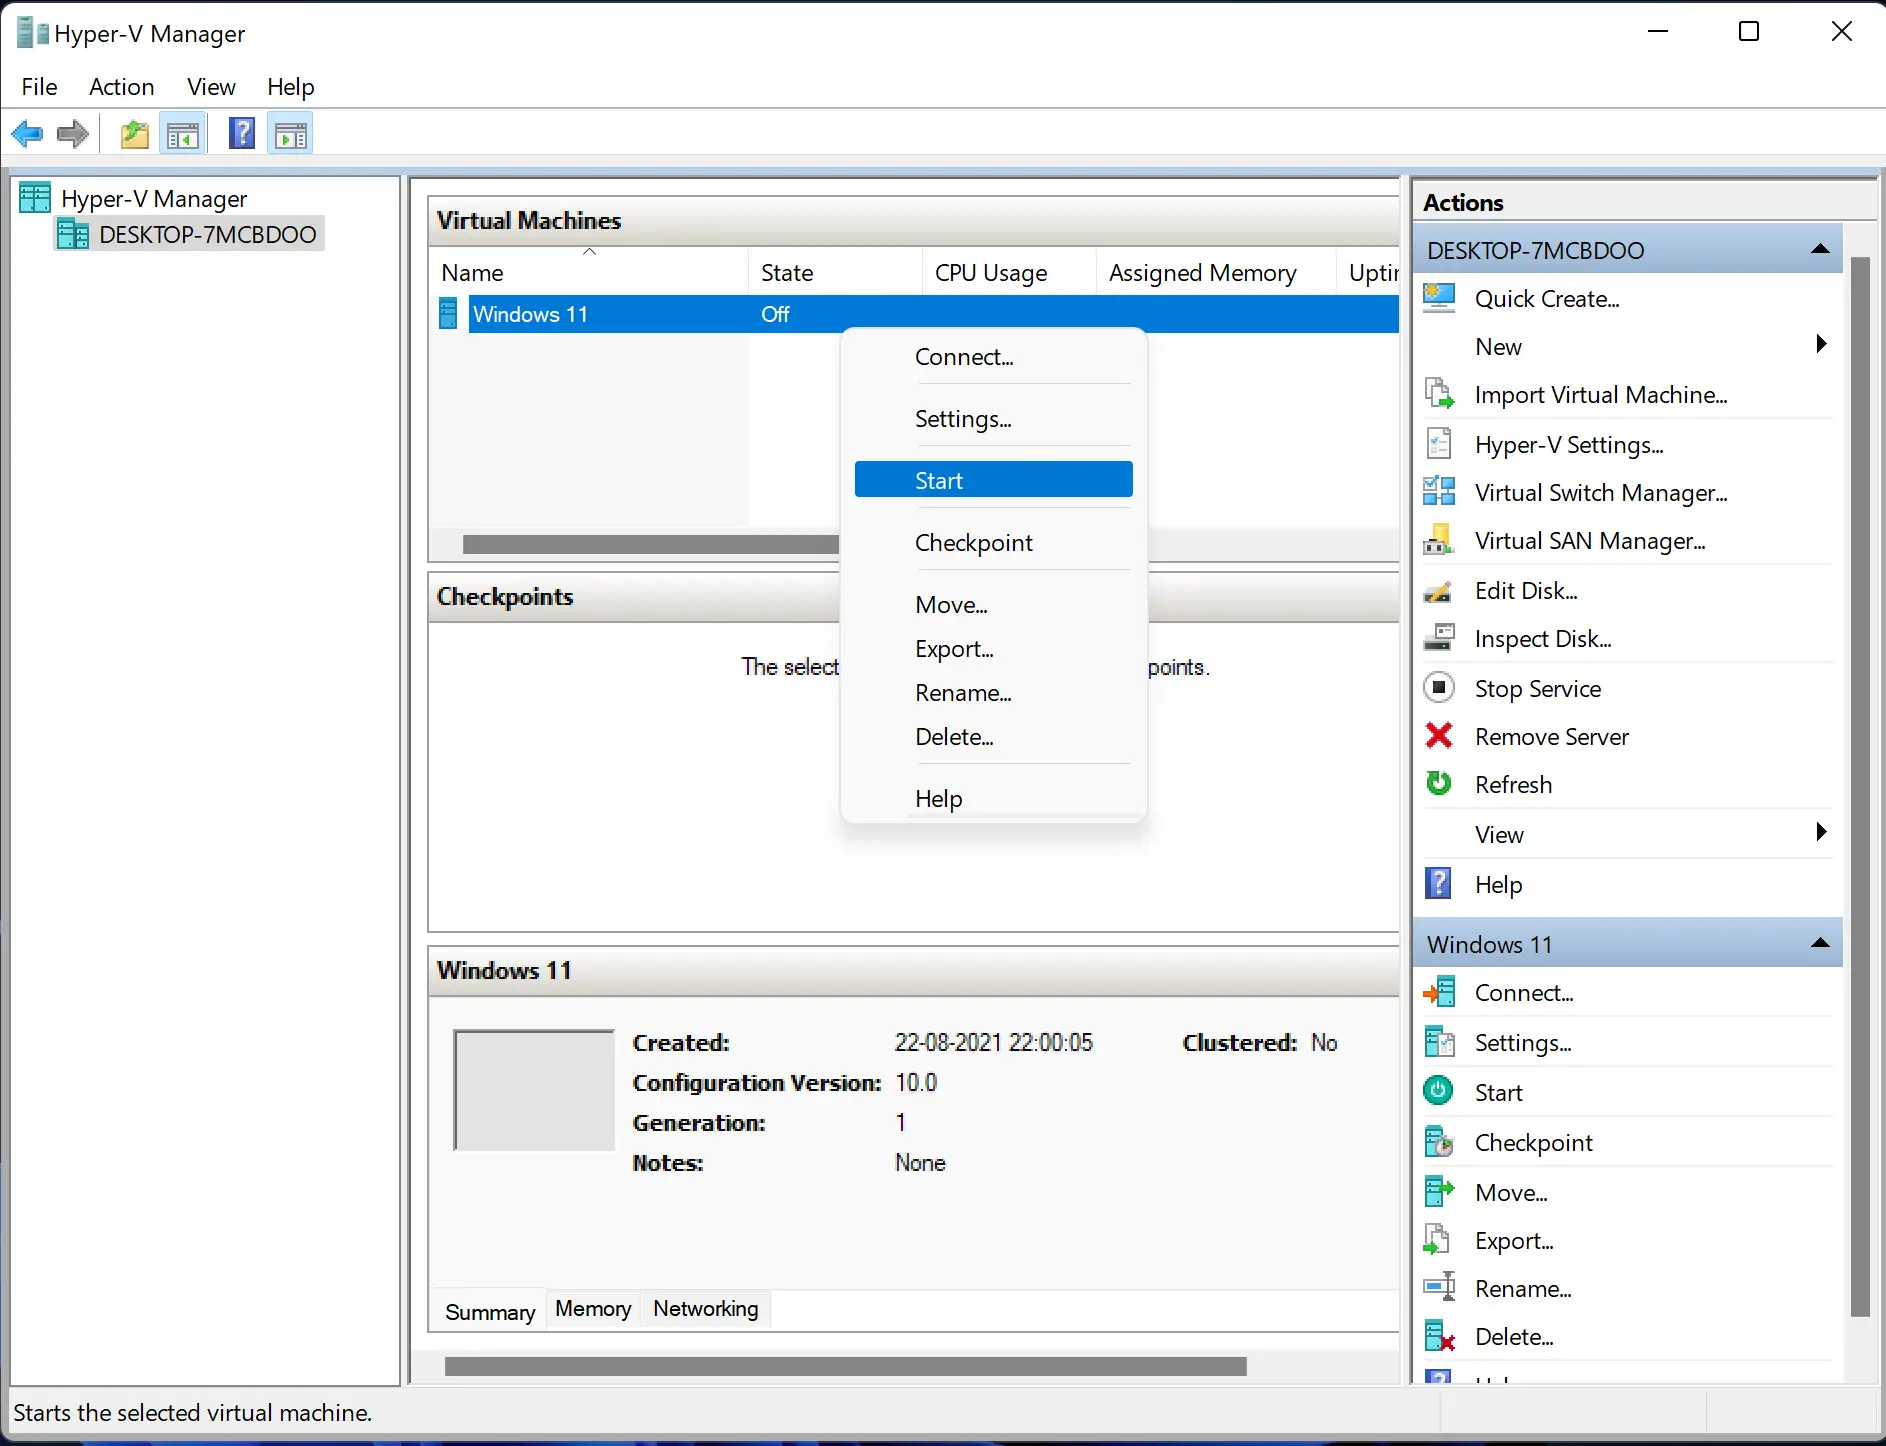
Step 13. Now, in Hyper-V Manager, under Virtual Machines, you will see Windows 11. Right-click on it and select Start.
Finally, Windows 11 installation will start. You can follow the on-screen instructions. If you are totally new to Windows, you can refer to steps 23 to 41 of this post for further process.
Conclusion
In conclusion, while Windows 11 is still in the beta stage, many people have started installing and testing it on VirtualBox. However, Microsoft recommends against installing it on a primary PC. The best way to install Windows 11 without compromising your primary work PC is to use Hyper-V or VirtualBox. Hyper-V technology provides a virtual environment to install an operating system and use physical computer resources safely. If your computer meets the minimum hardware specifications and has the Virtualization Technology and Hardware Enforced Data Execution Prevention options enabled on the system firmware, you can enable or turn on Hyper-V in Windows. Once enabled, you can install Windows 11 using Hyper-V in Windows by following a few simple steps. Overall, it is recommended that users exercise caution and follow Microsoft’s guidance while using beta versions of any operating system.
