Excel is a powerful spreadsheet program that allows you to organize, analyze, and manipulate data. When working with sensitive or important data, it’s crucial to ensure that the information remains secure and unchanged. One way to achieve this is by locking cells in Excel. In this user-friendly guide, we’ll walk you through the steps to lock cells in Excel, providing you with the necessary knowledge to protect your data effectively.
How to Lock Cells in Microsoft Excel?
Follow these simple steps to lock cells in Excel quickly:-
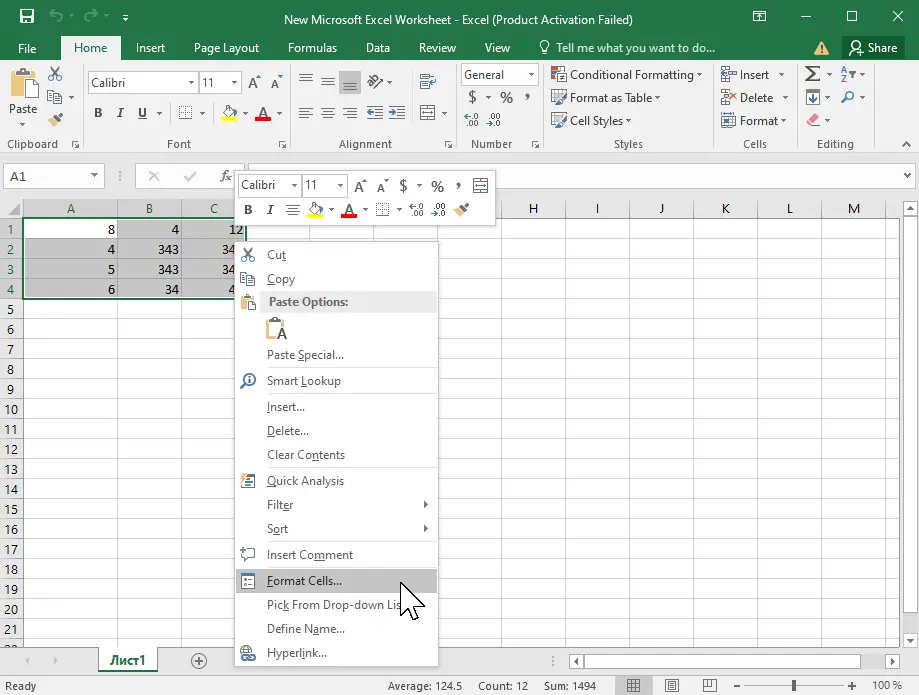
Step 1. Open your Excel spreadsheet and navigate to the worksheet where you want to lock cells. Click and drag to select the cells you wish to lock. You can select multiple cells or even an entire column or row by clicking on the column or row header.
Step 2. Once the desired cells are selected, right-click on any of the selected cells to open a context menu. From the menu, select “Format Cells” to access the formatting options.
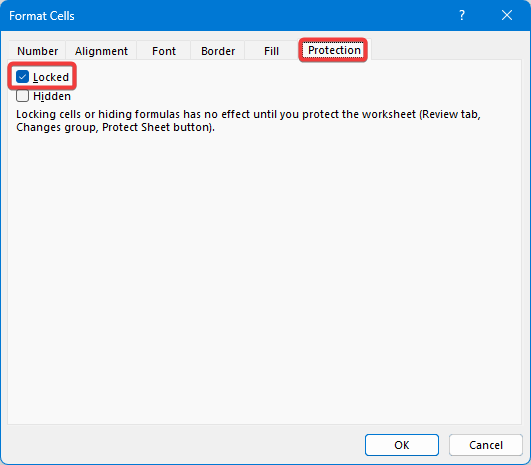
Step 3. In the “Format Cells” dialog box that appears, click on the “Protection” tab. Here, you will find options related to locking and unlocking cells.
Step 4. Under the “Protection” tab, you will see a checkbox labeled “Locked.” By default, this option is enabled for all cells. To lock the selected cells, ensure that the checkbox is ticked. This step only specifies that the cells should be locked but doesn’t enforce the protection yet.
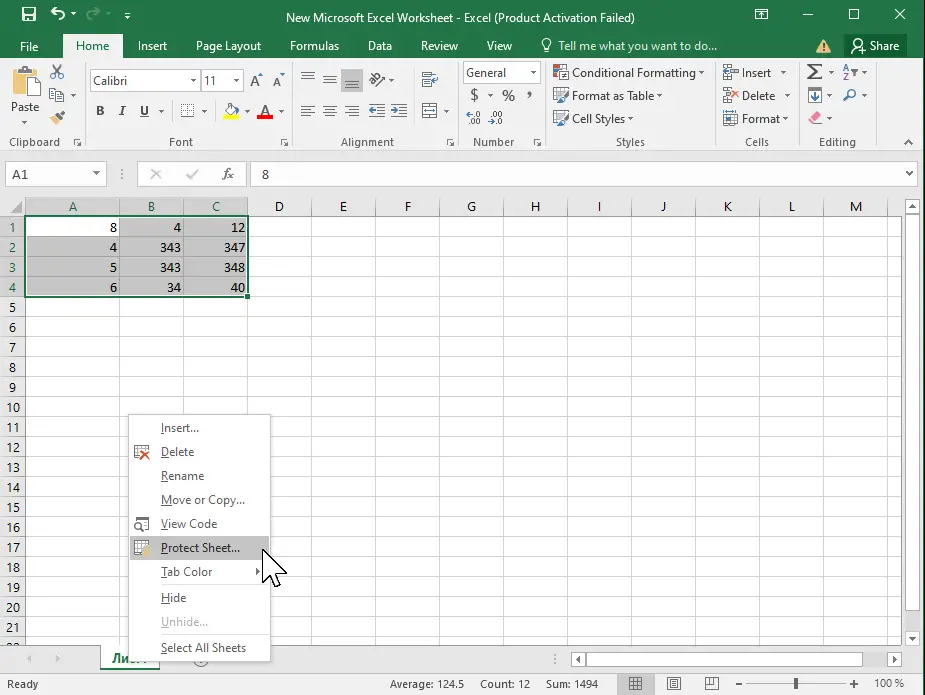
Step 5. To enforce the cell locking, you need to protect the worksheet. Right-click on any sheet name tab at the bottom of the Excel window and select “Protect Sheet” from the context menu.
Step 6. If you want to prevent unauthorized users from modifying the locked cells, you can set a password to protect the worksheet. In the “Protect Sheet” dialog box, enter a password of your choice. Make sure to choose a strong password and remember it, as you’ll need it to unlock the sheet later if required.
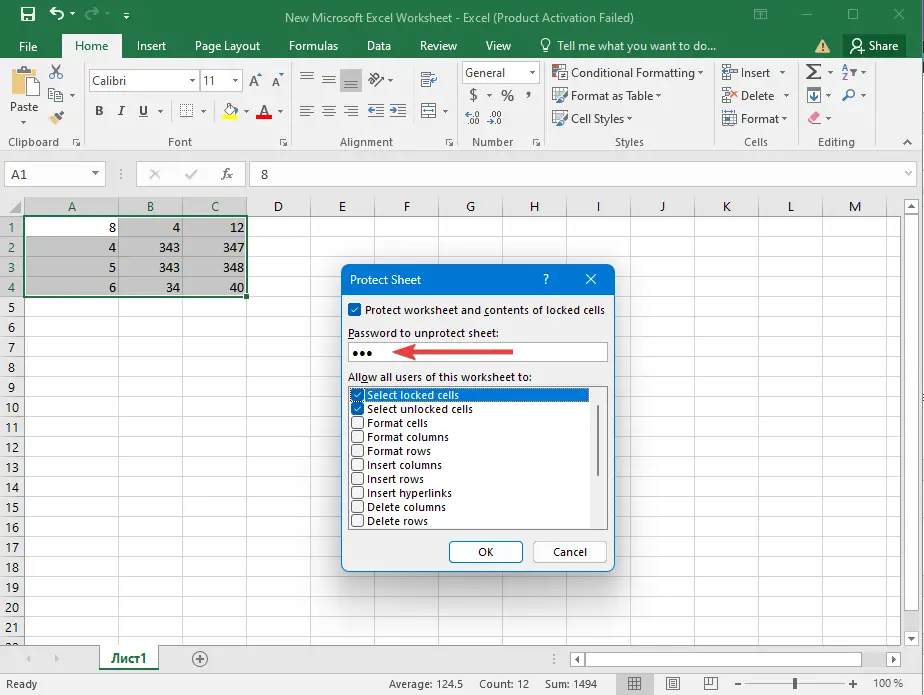
Step 7. After setting the desired options, click “OK” in the “Protect Sheet” dialog box.
Step 8. Excel will prompt you to confirm the password. Re-enter the password and click OK.
Excel will now protect the worksheet and lock the selected cells. The locked cells will be read-only, preventing any modifications until the worksheet is unprotected.
To unprotect the worksheet, right-click on the sheet name tab at the bottom of the Excel window and select “Unprotect Sheet” from the context menu. Enter the password and click OK. Ensure you need to protect the sheet again after making the necessary changes to secure it.
Conclusion
Locking cells in Excel provides an effective way to safeguard your important data from accidental or unauthorized changes. By following these simple steps, you can easily lock cells in Excel and ensure the integrity of your data. Remember to protect the worksheet with a password if you want to add an extra layer of security. Utilize these cell-locking techniques to maintain control over your data and work with confidence in Excel.