Microsoft Excel and Microsoft Word are two powerful tools that complement each other when it comes to data management and documentation. Although Excel is typically used for data analysis and calculations, you can leverage its formulas within Word documents to display and update dynamic data. In this guide, we will walk you through the simple steps to incorporate Excel formulas into your Word documents, allowing you to create professional and data-driven reports effortlessly.
How to Use Excel Formulas in Word Documents?
To use Excel Formulas in Word Documents, follow these simple steps:-
Step 1. Before you can use Excel formulas in a Word document, you need to create and format your spreadsheet in Excel. Ensure that your data is organized into rows and columns and that you have defined any necessary formulas to perform calculations or manipulate the data. Take note of the cells containing the formulas you wish to include in your Word document.
Step 2. To begin, open Microsoft Word and create a new document or open an existing one where you want to insert your Excel data. Here’s how you can embed an Excel spreadsheet:-
(a) Go to the “Insert” tab in Word.
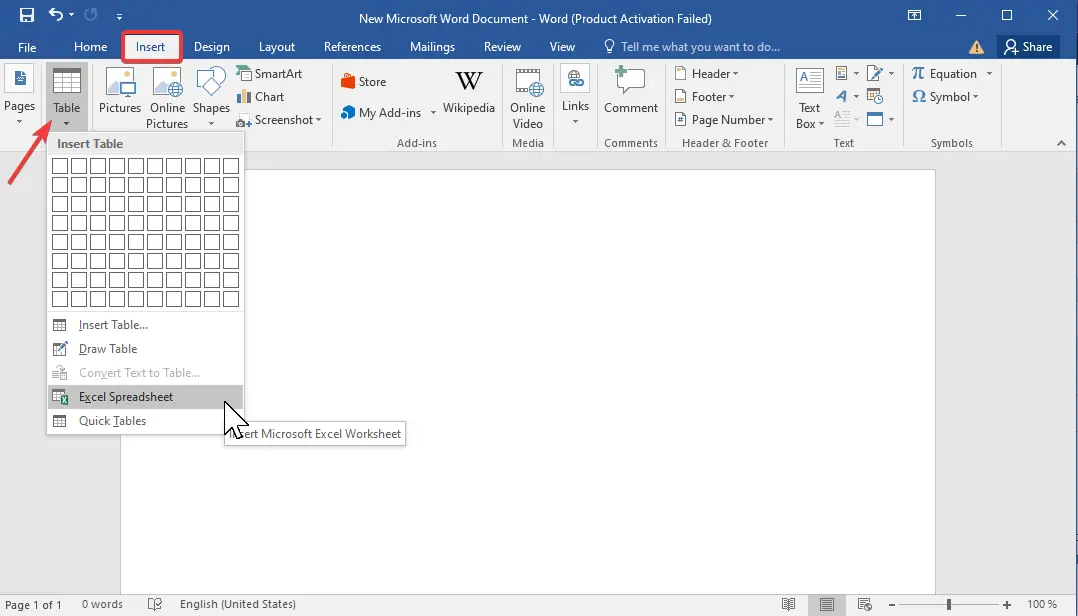
(b) Click on the “Table” drop-down menu.
(c) Select “Excel Spreadsheet” from the options.
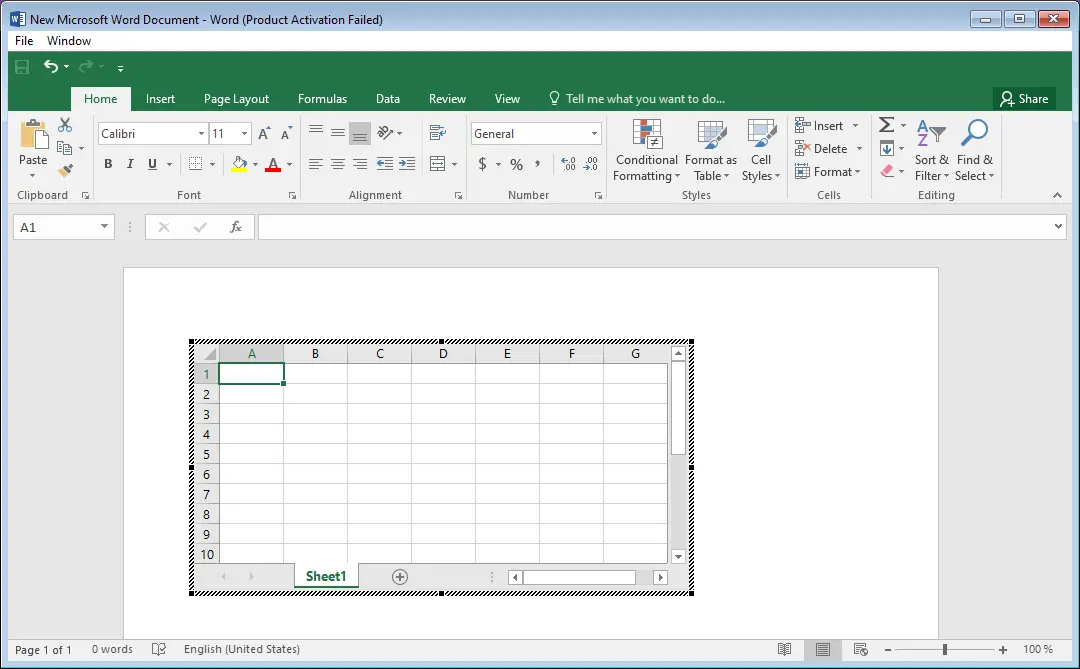
(d) A new Excel spreadsheet will appear within your Word document.
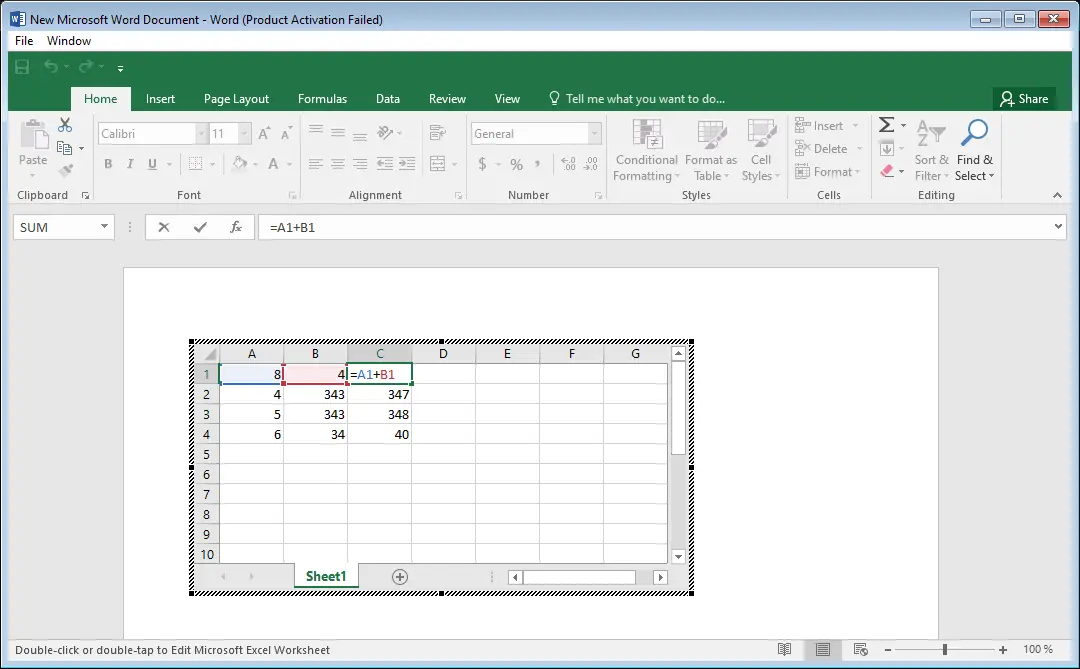
Step 3. Now that you have the embedded Excel spreadsheet in your Word document, you can copy and paste the formulas from your Excel worksheet into the desired Word cells. Here’s how:-
(a) Open the Excel worksheet containing the formulas you want to use.
(b) Select the cells that contain the formulas you wish to copy.
(c) Right-click on the selected cells and choose “Copy” from the context menu.
(d) Return to your Word document.
(e) Click on the desired cell within the embedded Excel spreadsheet where you want to paste the formula.
(f) Right-click on the cell and select “Paste” from the context menu.
(g) The formula will now be pasted into the Word document, and the result will be displayed.
Step 4. If you need to update the data or formulas in your Word document, you can easily do so by editing the embedded Excel spreadsheet. Here’s how:-
(a) Double-click on the embedded Excel spreadsheet in your Word document.
(b) The spreadsheet will be populated, allowing you to make any necessary changes.
(c) Update the data or formulas as required.
(d) Click outside of the Excel spreadsheet.
(e) The changes will be automatically reflected in the Word document.
Step 5. To make the embedded Excel spreadsheet blend seamlessly with your Word document, you can customize its appearance. Here are a few customization options:-
(a) Formatting: Apply formatting options such as font styles, cell borders, and background colors to match your Word document’s style.
(b) Adjusting column widths and row heights: Modify the dimensions of the columns and rows to optimize readability.
(c) Adding charts and graphs: If your Excel data includes visual representations, you can include them in the embedded spreadsheet to enhance data visualization.
(d) Locking cells: Prevent accidental changes to specific cells by locking them in the Excel spreadsheet.
Conclusion
By following these simple steps, you can effectively integrate Excel formulas into your Word documents, creating dynamic and data-rich reports. Utilizing the strengths of both Microsoft Excel and Microsoft Word allows you to present complex information with clarity and professionalism. So go ahead, harness the power of Excel formulas in your Word documents, and take your data reporting to the next level!