On Windows 11 or 10, whenever you play audio or video, you might have noticed different levels of sounds on your computer. Even when watching an online video, you may see that the advertisement volume is much higher than the actual video. The disparity in the sound volume is for both videos and audio content.
Usually, you can adjust the volume manually for each content, but this may not be very pleasant. So, suppose you are dealing with different sound levels in videos or any other type of content with audio. In that case, you can quickly normalize the audio on Windows 11/10 to have a consistent sound volume level across applications and web browsers.
In this gearupwindows article, we will guide you on normalizing the output sound on Windows 11 and 10.
How to Normalize Volume on Windows 11?
To set the sound settings to normalize the volume on Windows 11, use these steps:-
Step 1. Open Windows 11 Settings.
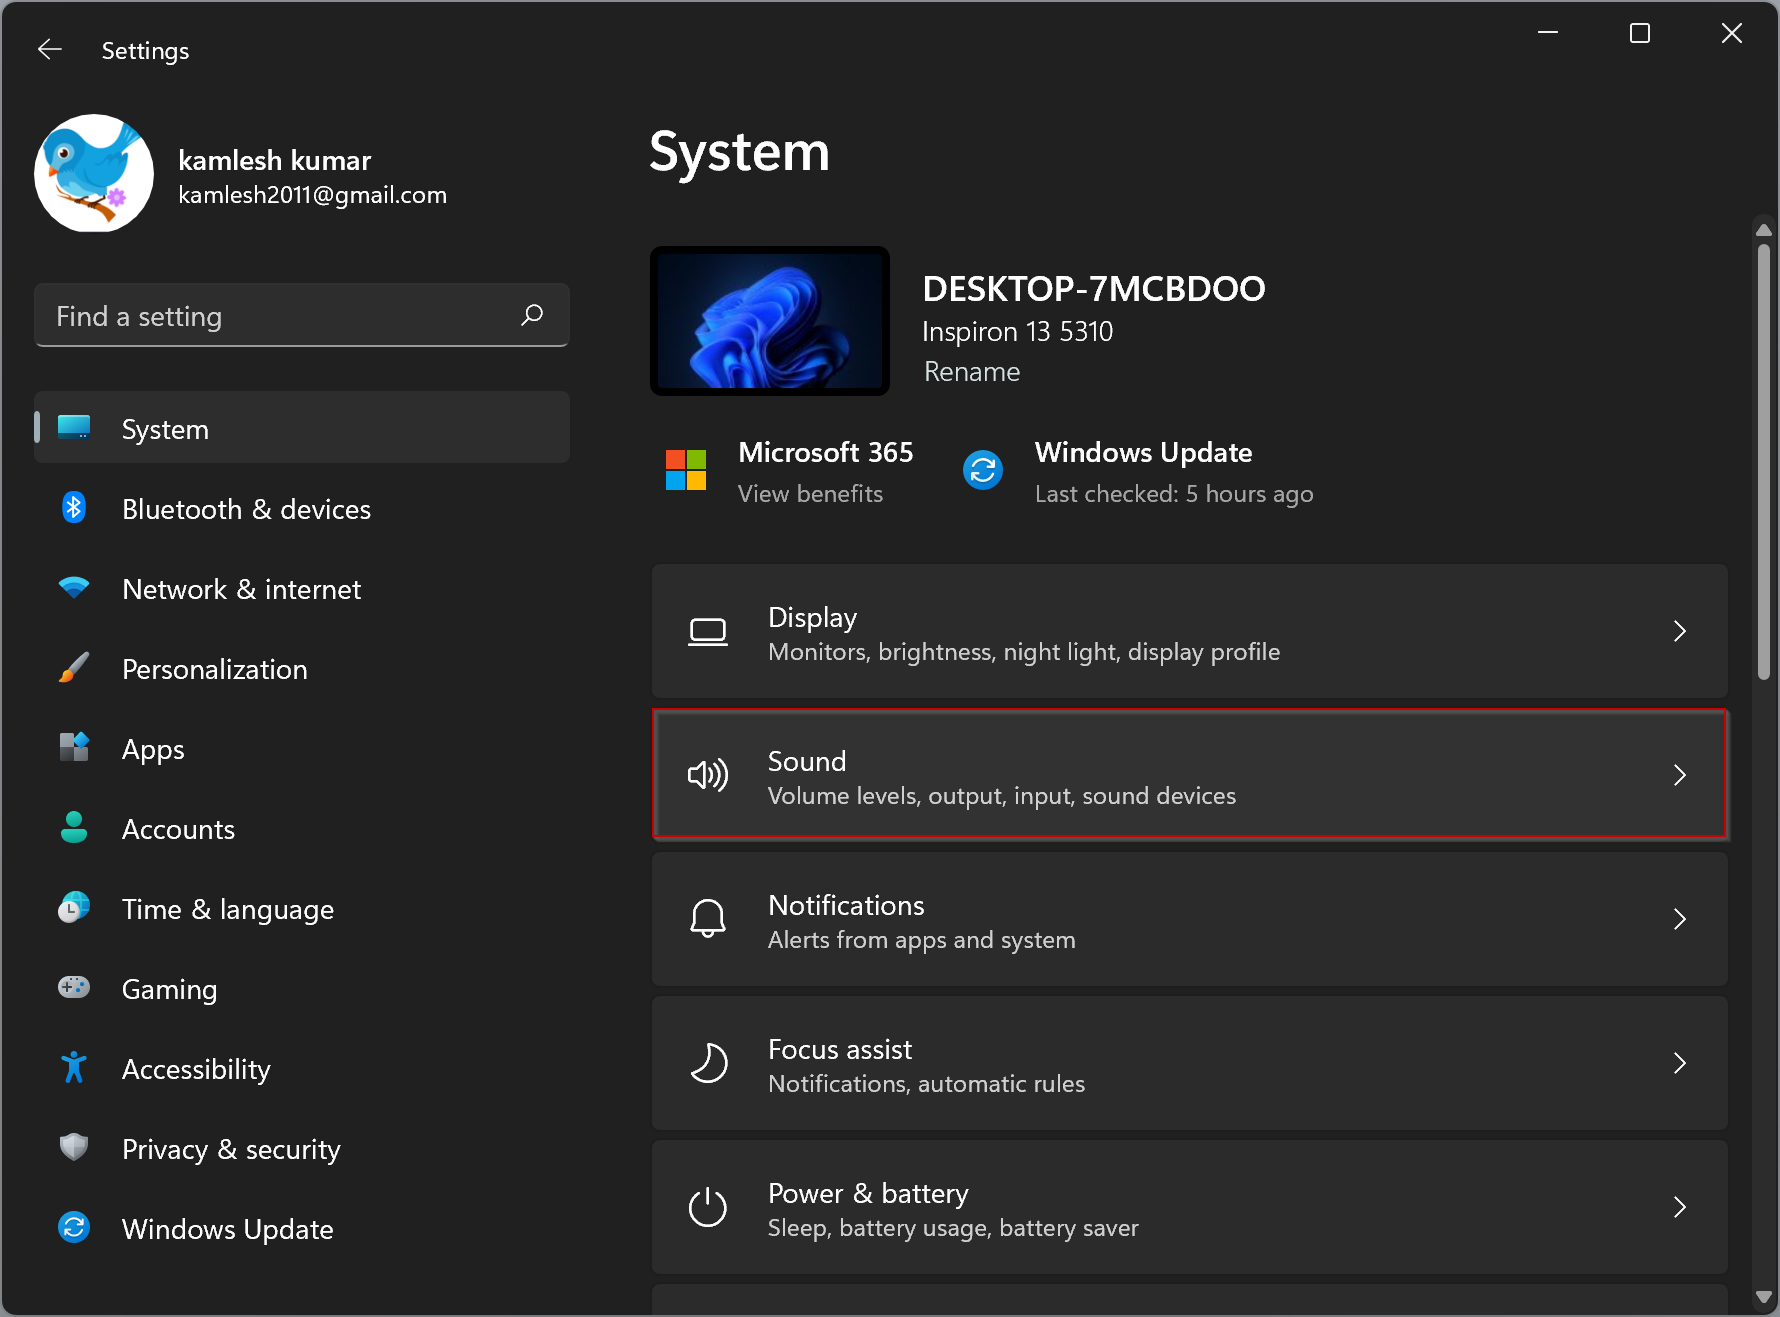
Step 2. Then, select System on the left sidebar of Settings.

Step 3. On the right sidebar of “System,” click the Sound tab.
Step 4. Under the “Output” section, select your output device.
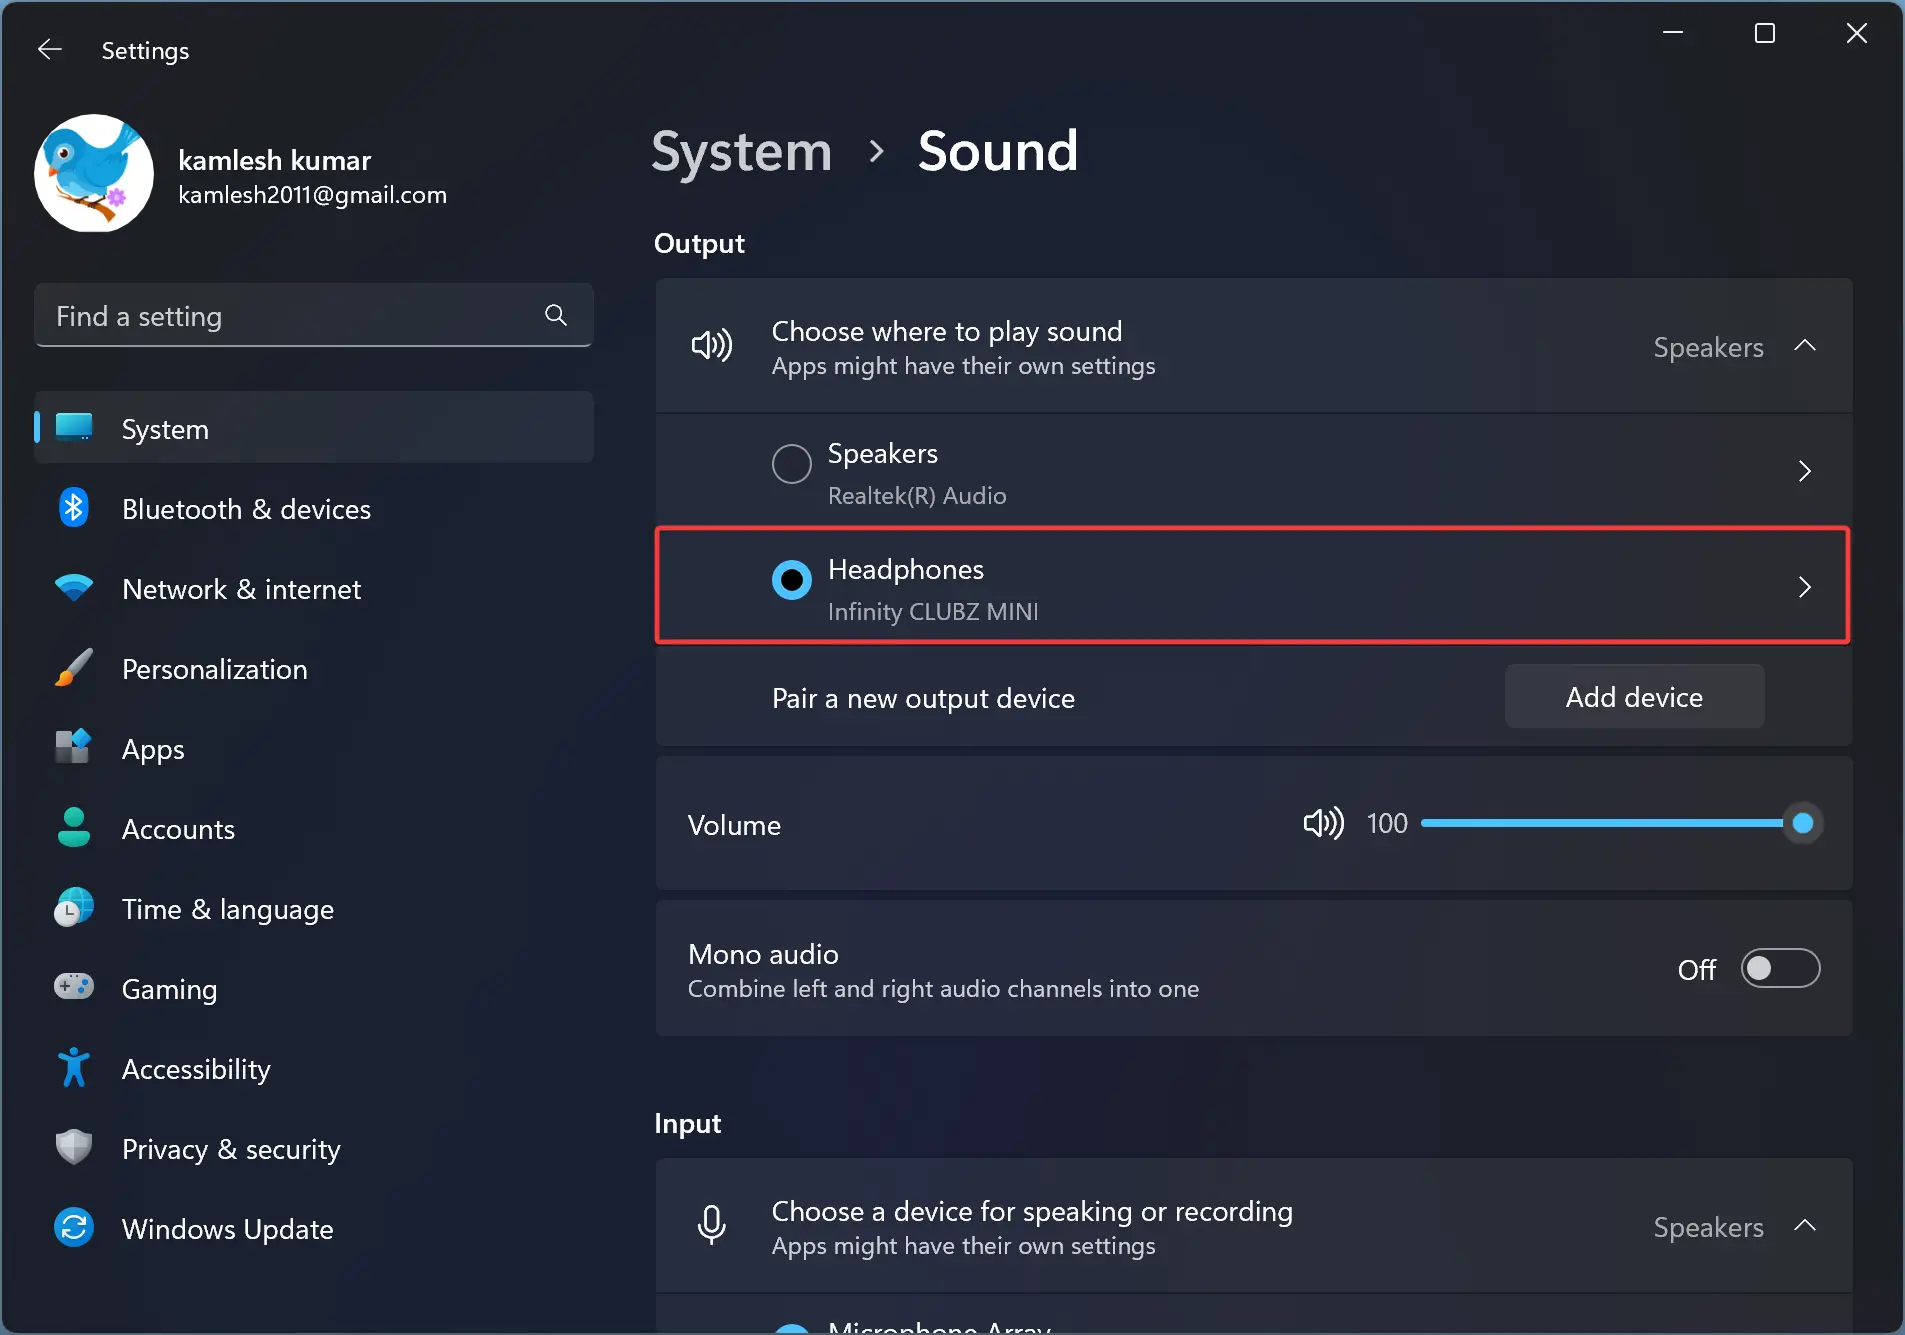
Step 5. Then, scroll down and click on the More sound settings option.

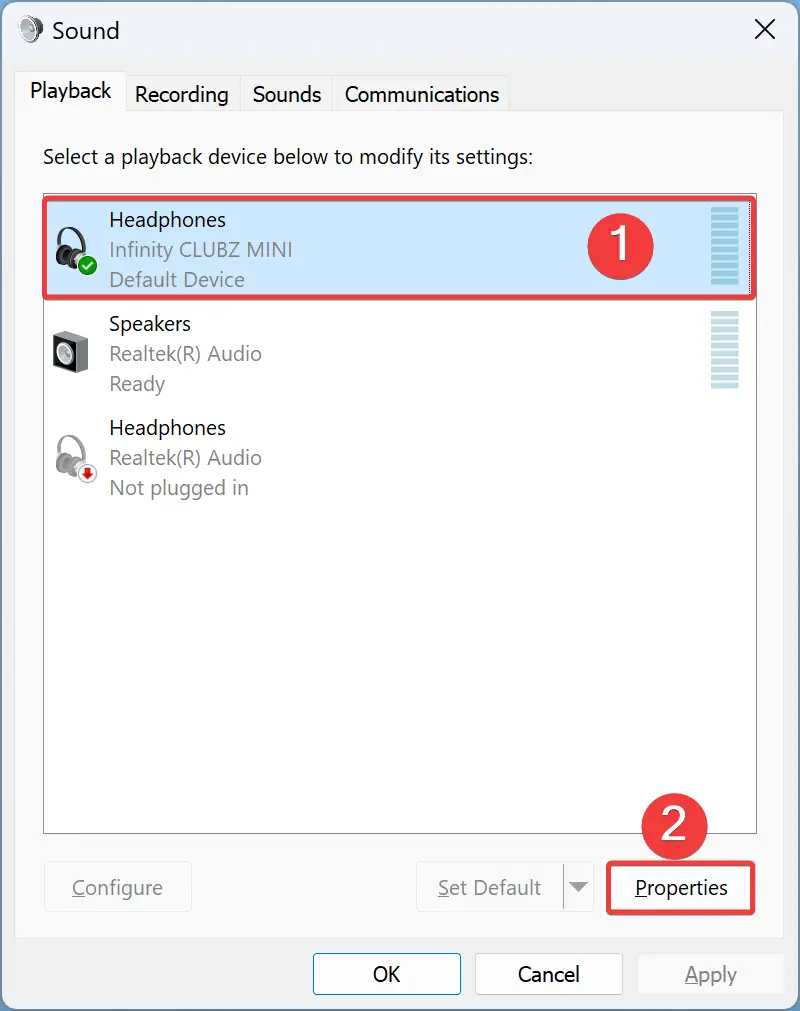
Step 6. In the pop-up window, select the output device and click on the Properties button.
Step 7. Switch to the Enhancements tab.
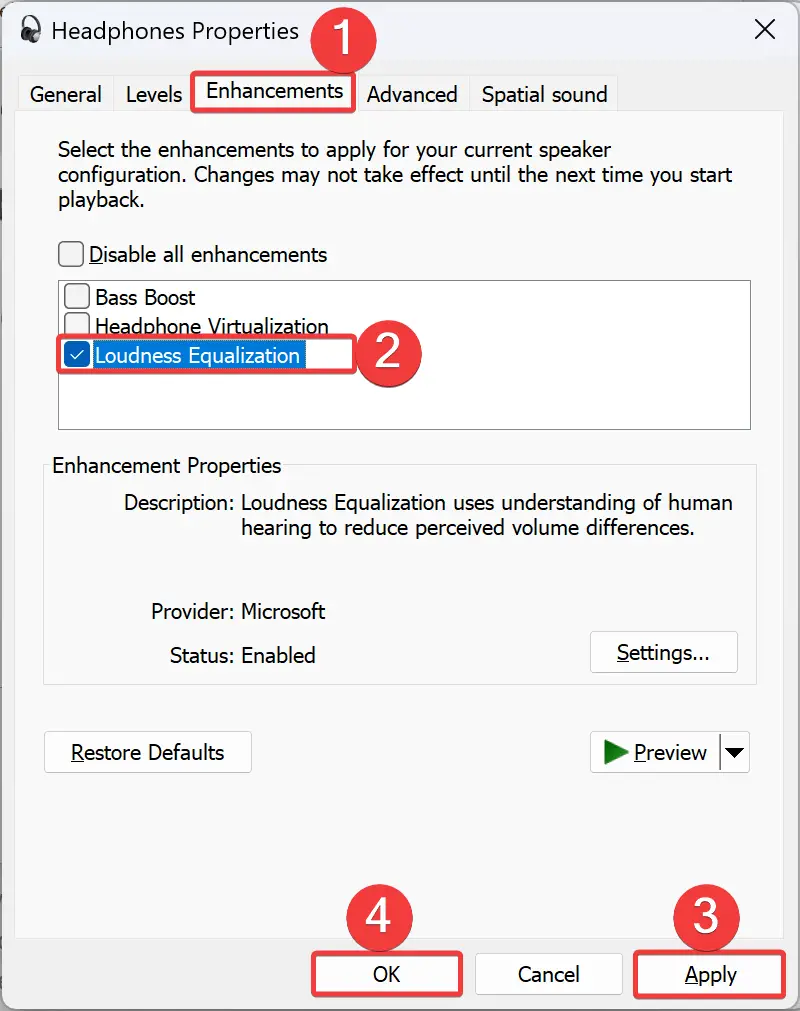
Step 8. Check the Loudness Equalization option to normalize the volume.
Step 9. Click Apply.
Step 10. Click OK.
Step 11. Click OK.
Once you complete the above steps, you should now be able to watch online videos or listen to music with a consistent volume level on your Windows 11 system. In addition, you can also use the “Loudness Equalization” option to boost sound volume.
Please note that turning on this feature normalizes the audio for the entire system.
How to Normalize Volume on Windows 11 or 10 using Control Panel?
To normalize the volume on Windows 11 or 10 through Control Panel, use these steps:-
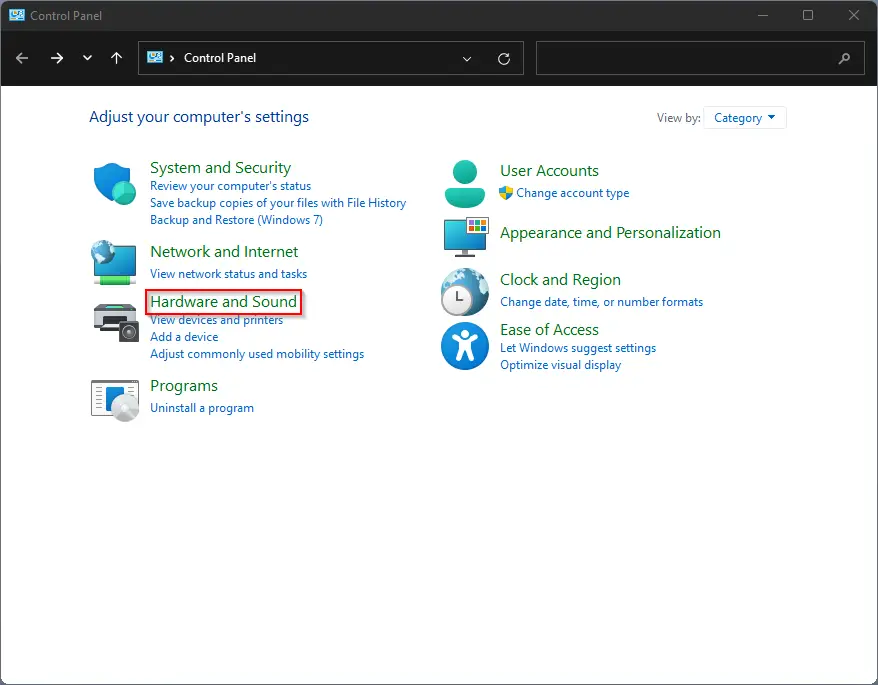
Step 1. Open Control Panel.
Step 2. Click on Hardware and Sound.
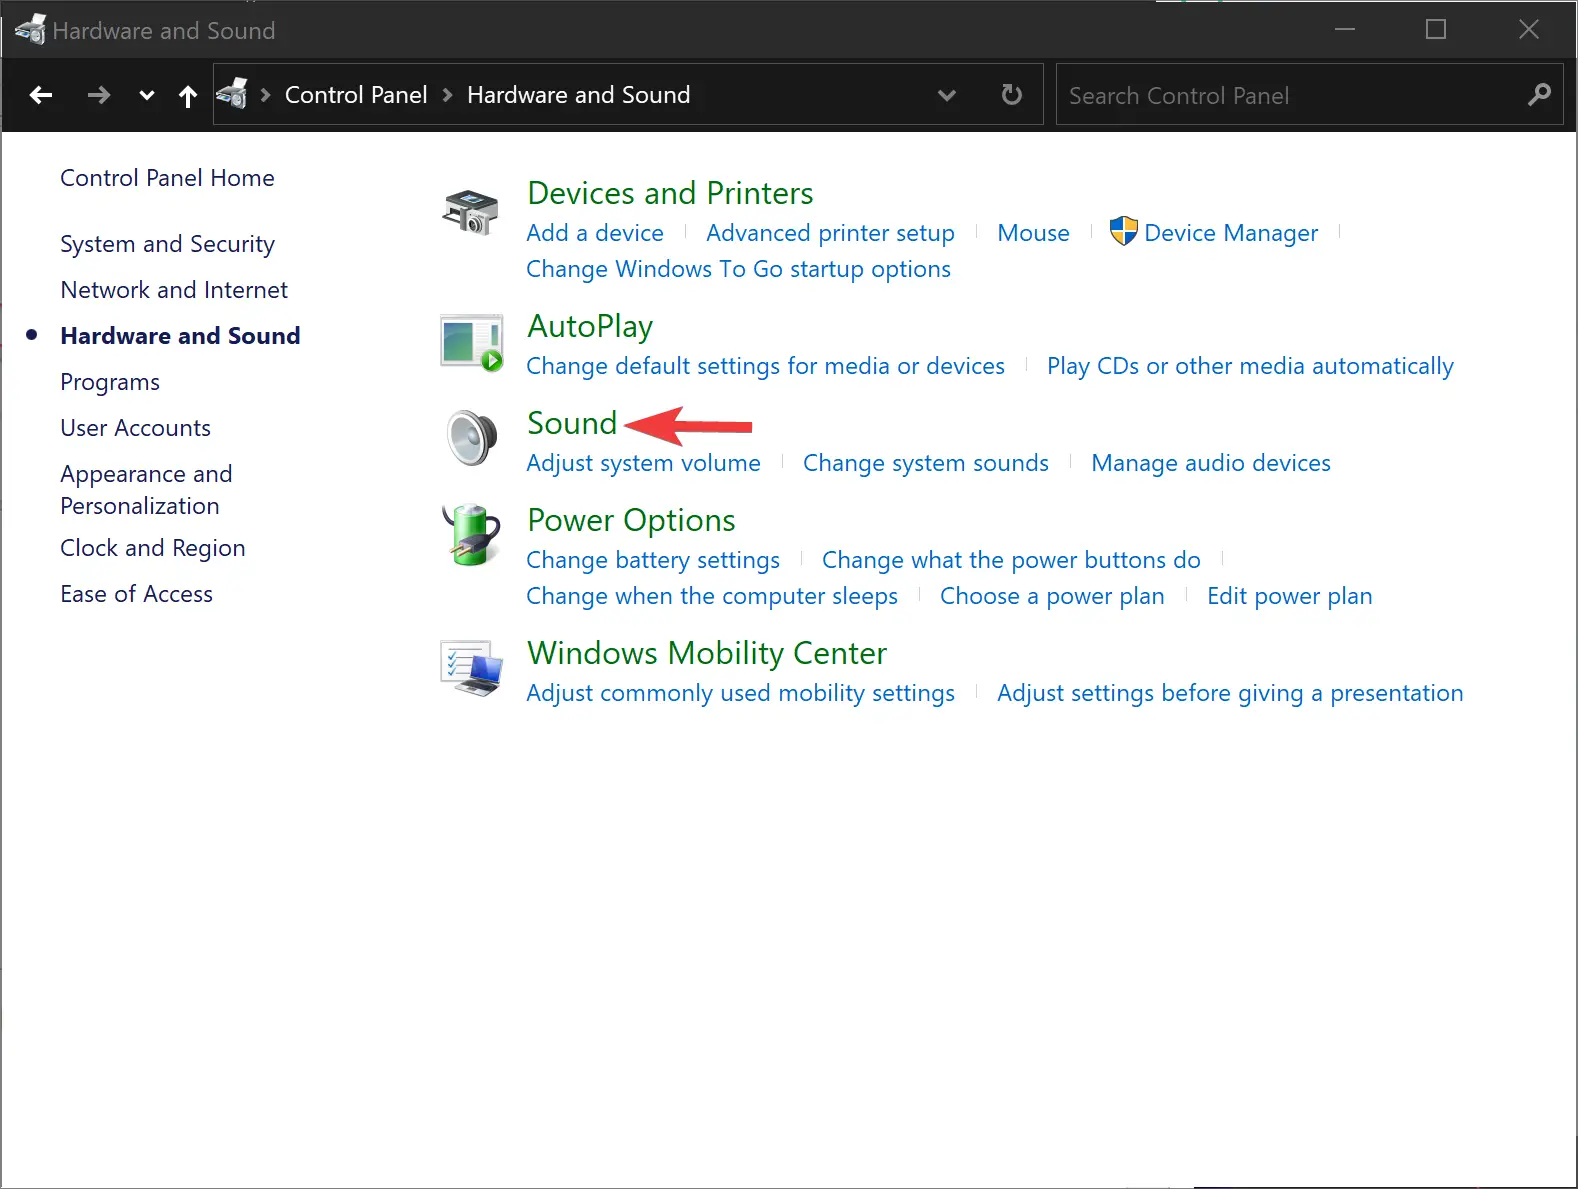
Step 3. Click Sound.
Step 4. When you’re done, A Sound window will appear on the screen. Select the output device and click on the Properties button.
Step 5. Switch to the Enhancements tab.
Step 6. Check the Loudness Equalization option to normalize the volume.
Step 7. Click Apply.
Step 8. Click OK.
Step 9. Click OK.
Once you complete the above steps, you should now be able to watch online videos or listen to music with a consistent volume level on your Windows 11 or 10 machine. In addition, you can also use the “Loudness Equalization” option to boost sound volume.
Please note that turning on this feature normalizes the audio for the entire system.
