Suppose you have some sensitive data on a Microsoft Office Word document, Excel sheets, or PowerPoint presentations on Windows 11 or 10 machines, and you want to protect that with a password. In that case, this gearupwindows article will guide you.
Using the built-in options of Microsoft Office, you can secure your documents/files on a Windows system. That means you don’t need to install a third-party application on your computer to protect office files.
How to Password Protect Microsoft Word in Windows 11 or 10?
To secure your MS Word document in Windows 11 or 10, use these steps:-
Step 1. Open a Word document you want to set a password.
Step 2. Click on the File menu.
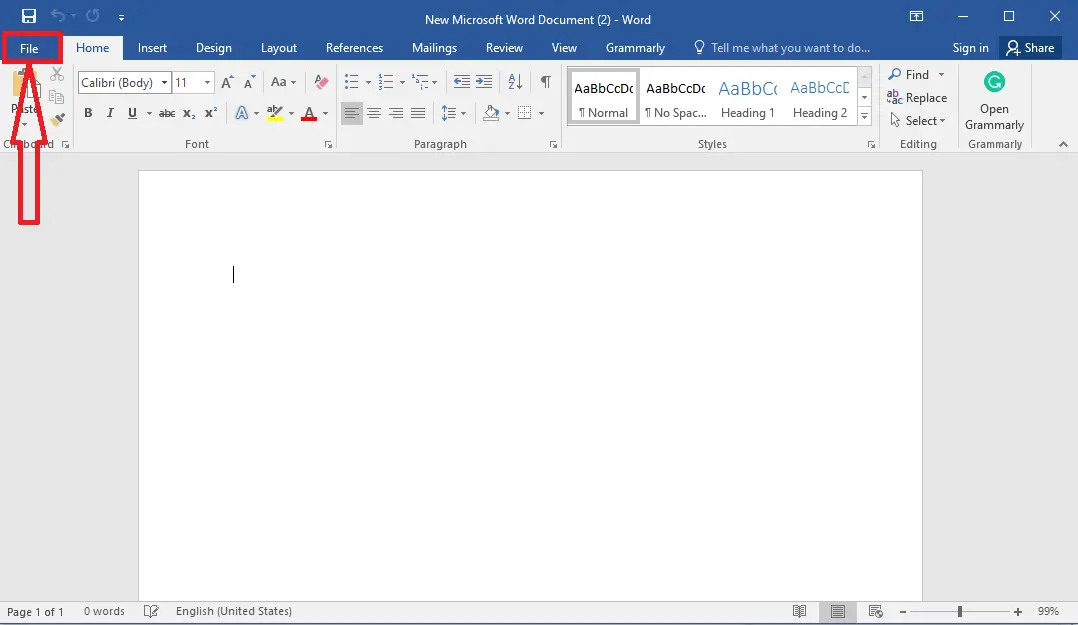
Step 3. Select Info in the left sidebar.
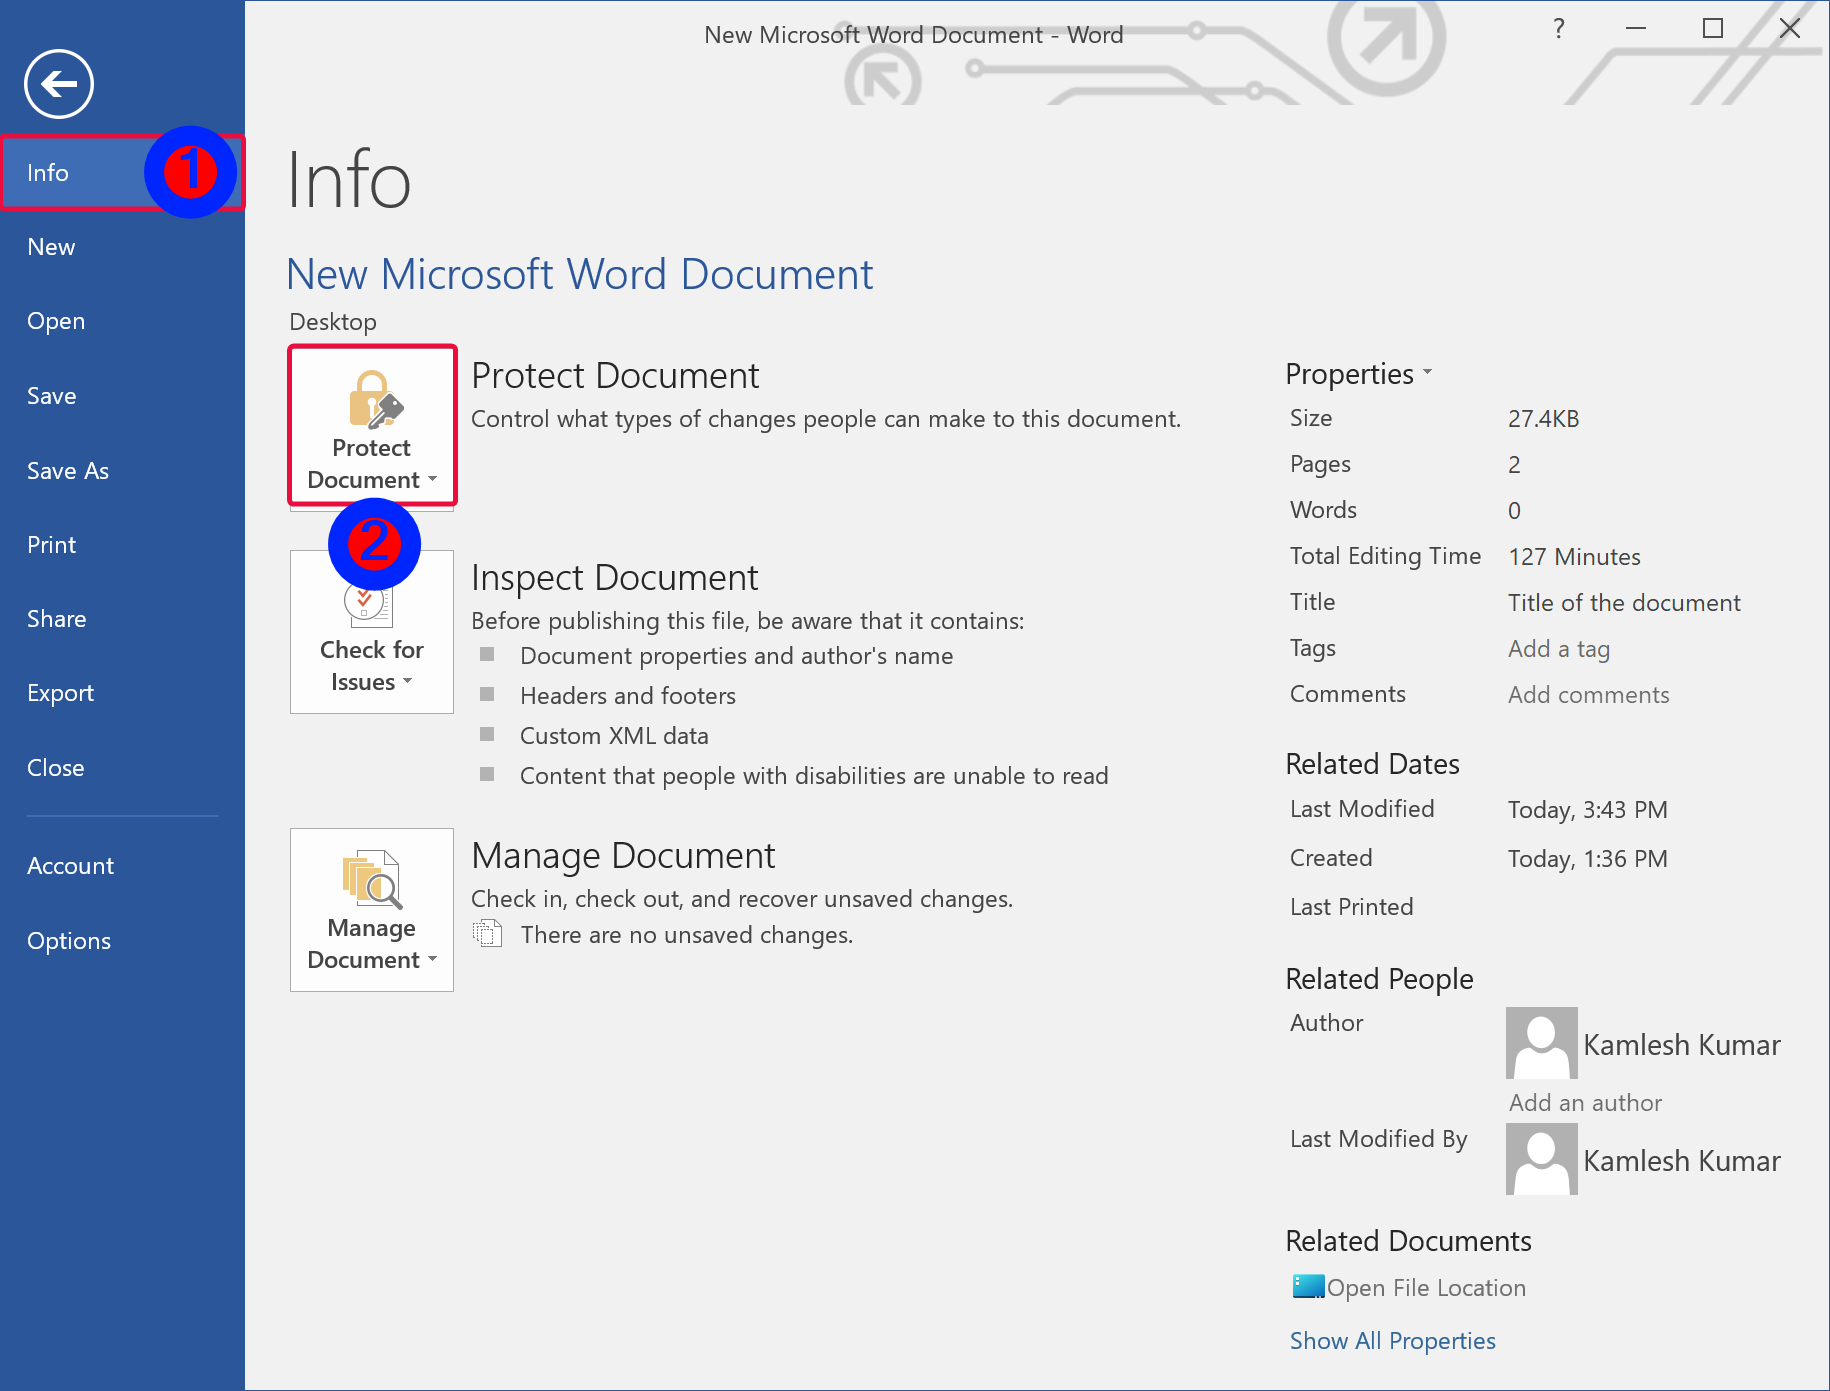
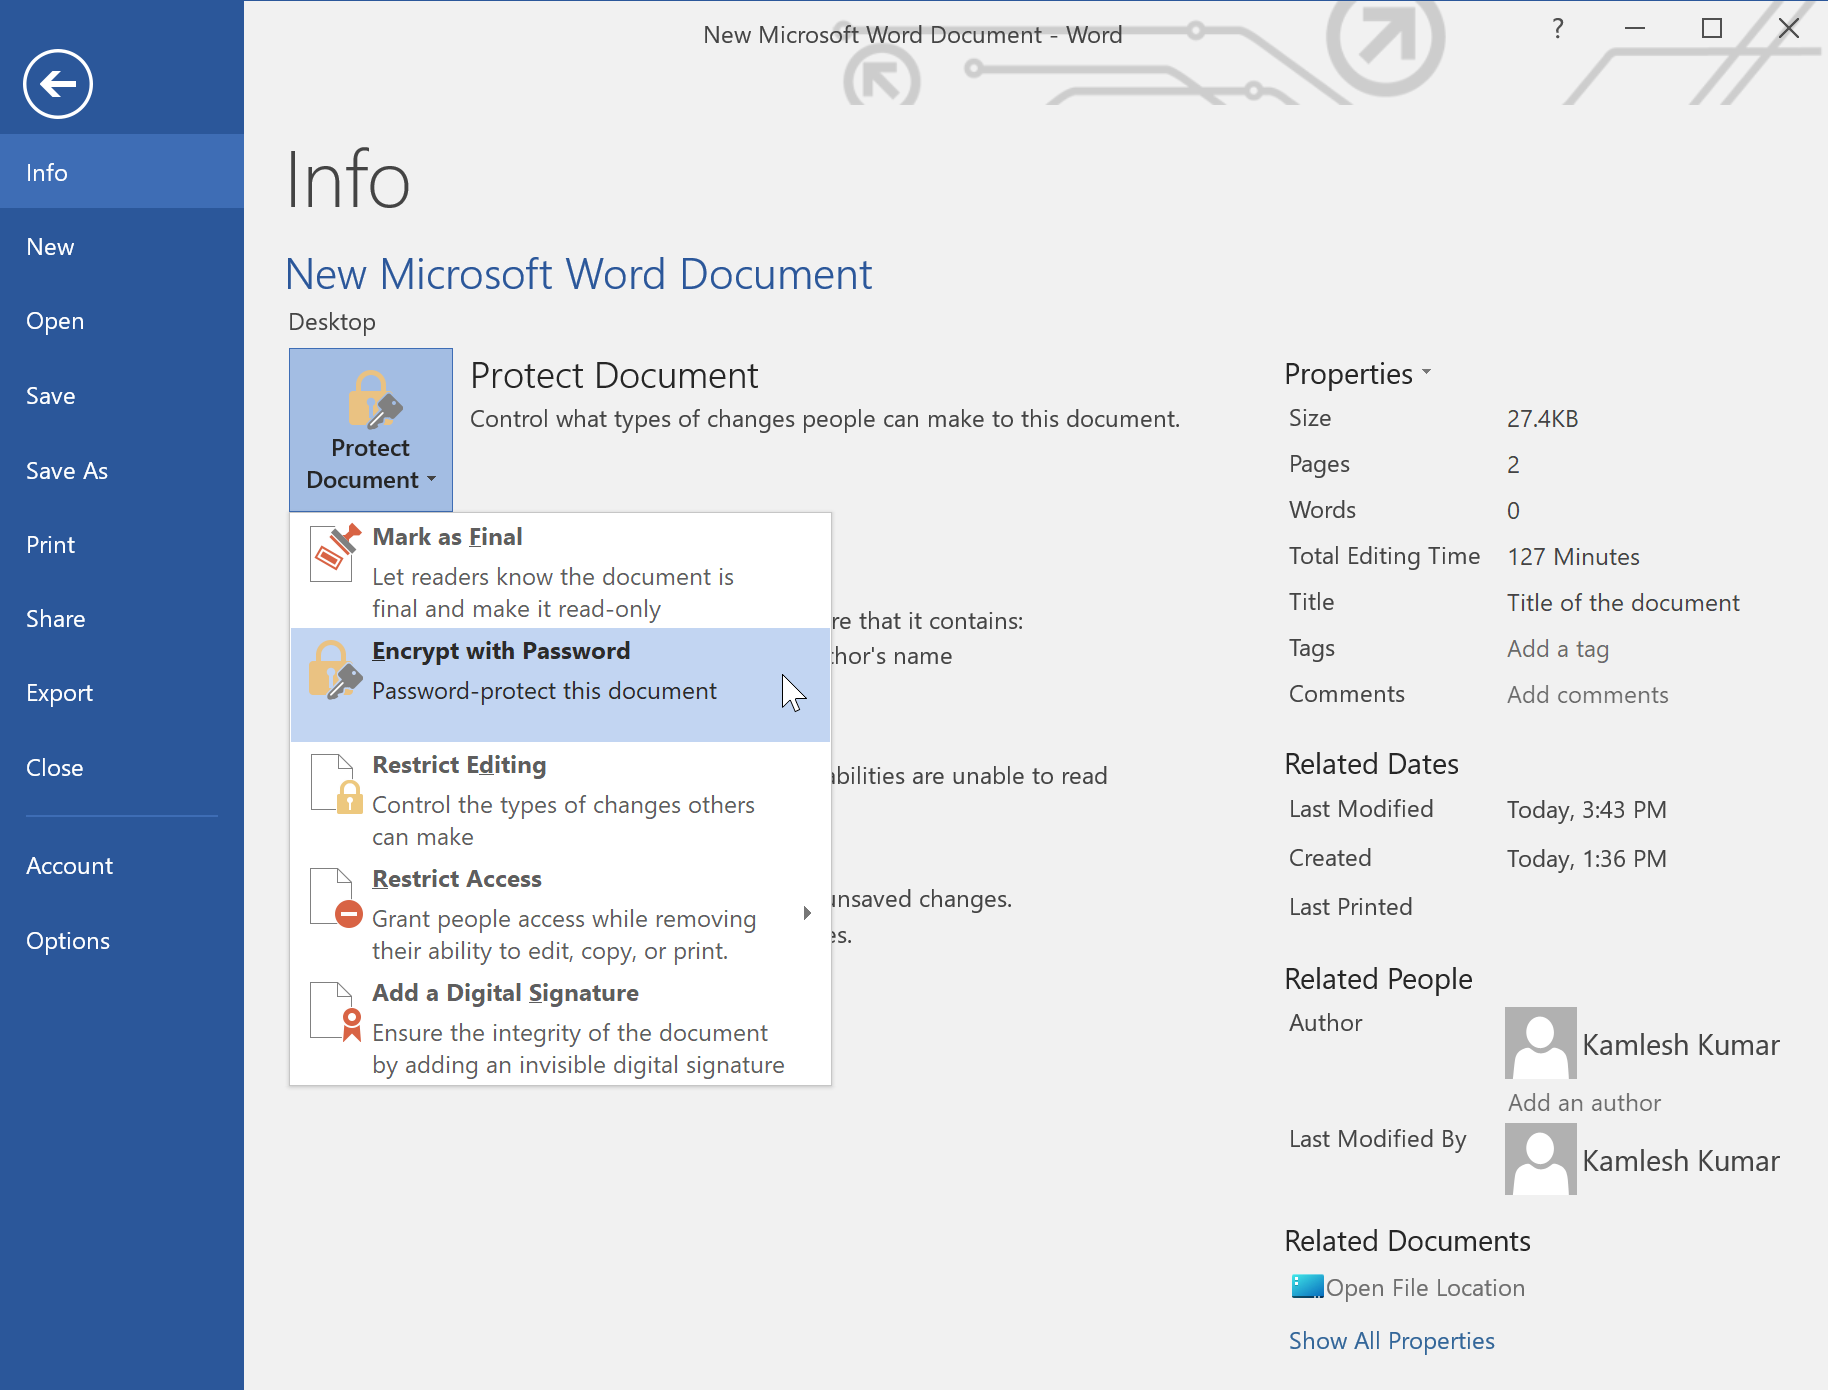
Step 4. Then, click on the Protect Document option.
Step 5. In the drop-down list that appears, choose the Encrypt with Password option.
Step 6. When you’re done, the “Encrypt Document” dialog will appear.
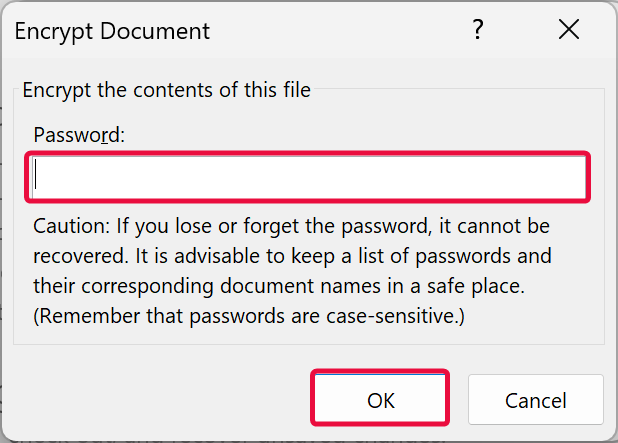
Step 7. Type a password in the “Password” field.
Step 8. Click the OK button.
Step 9. Again, type the same password in the “Reenter password” field.
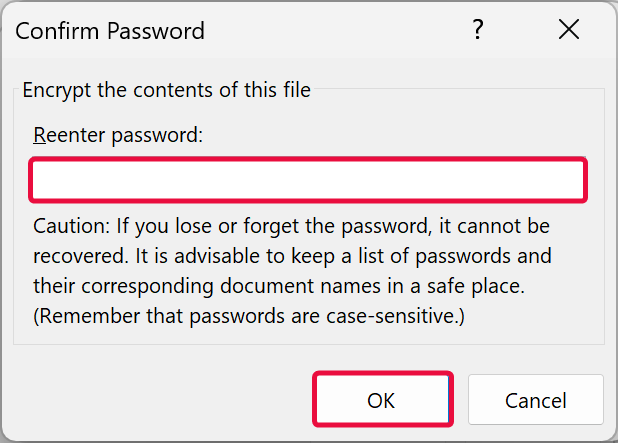
Step 10. Click the OK button.
Step 11. Close the document.
Step 12. Click the Save button when prompted.
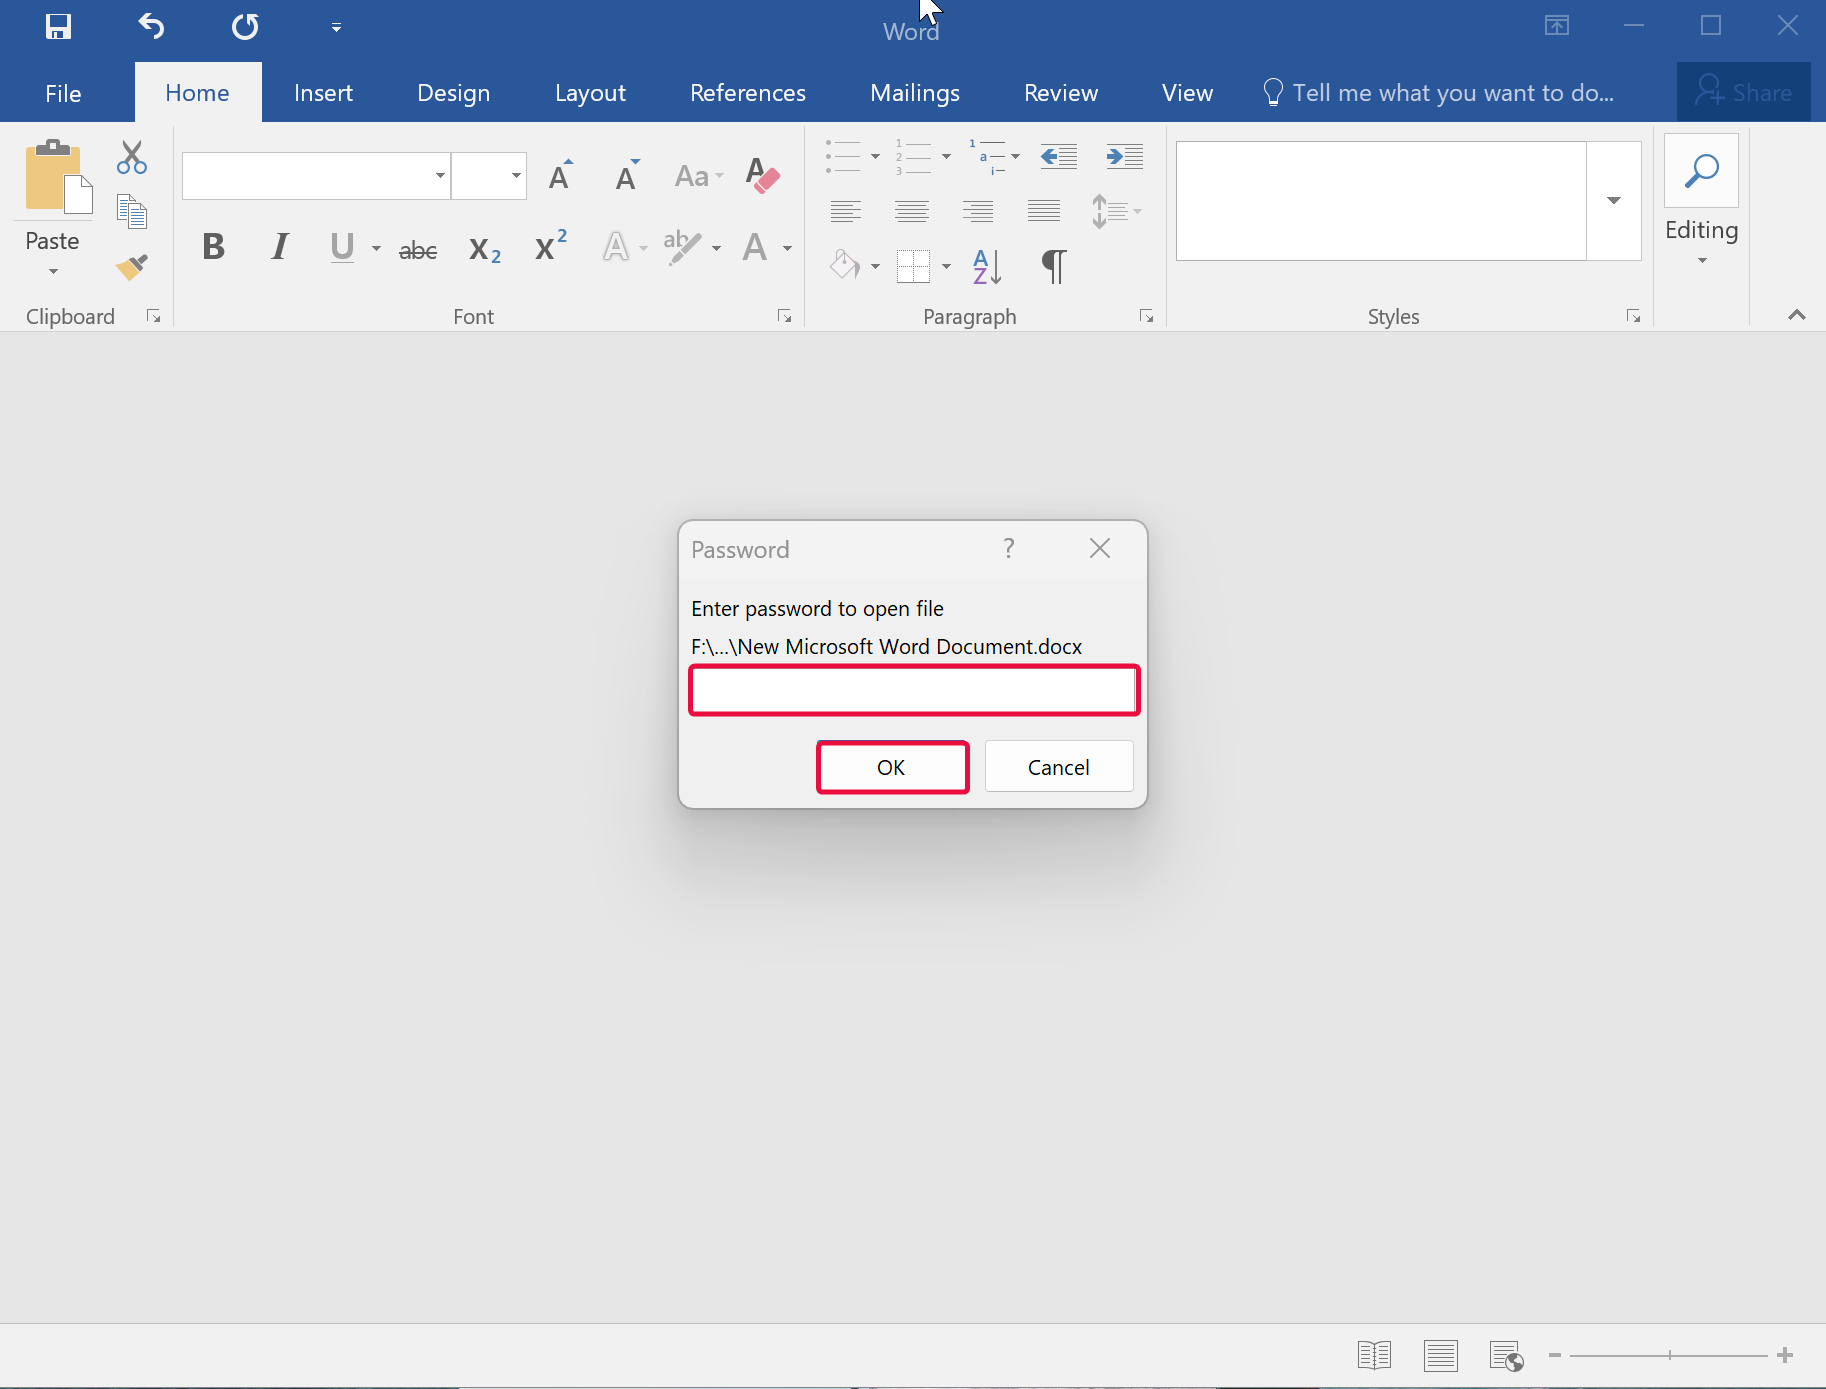
That’s it. Using the above steps, you can protect your Word document with a password. The next time you want to open that file, it will prompt you for a password. Enter the password you set and click the OK button.
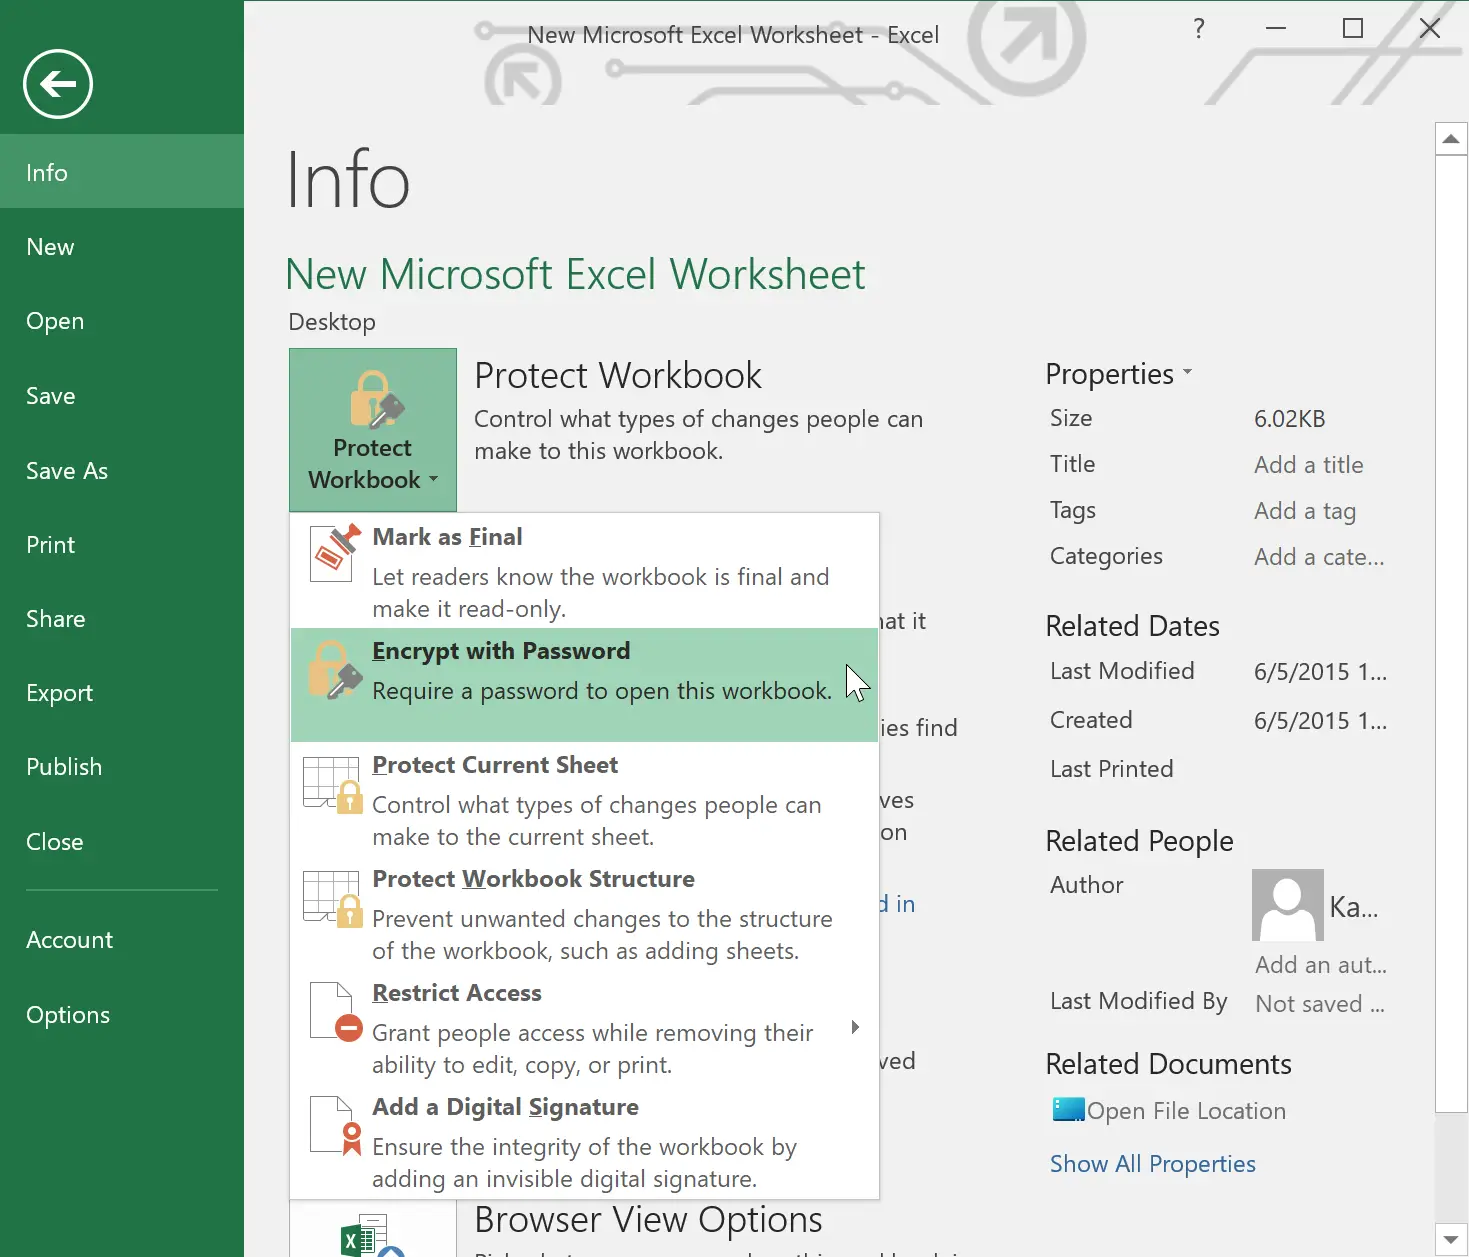
How to Password Protect Excel Worksheet in Windows 11 or 10?
To secure your Excel worksheet in Windows 11 or 10, use these steps:-
Step 1. Open a Microsoft Excel Worksheet you want to set a password.
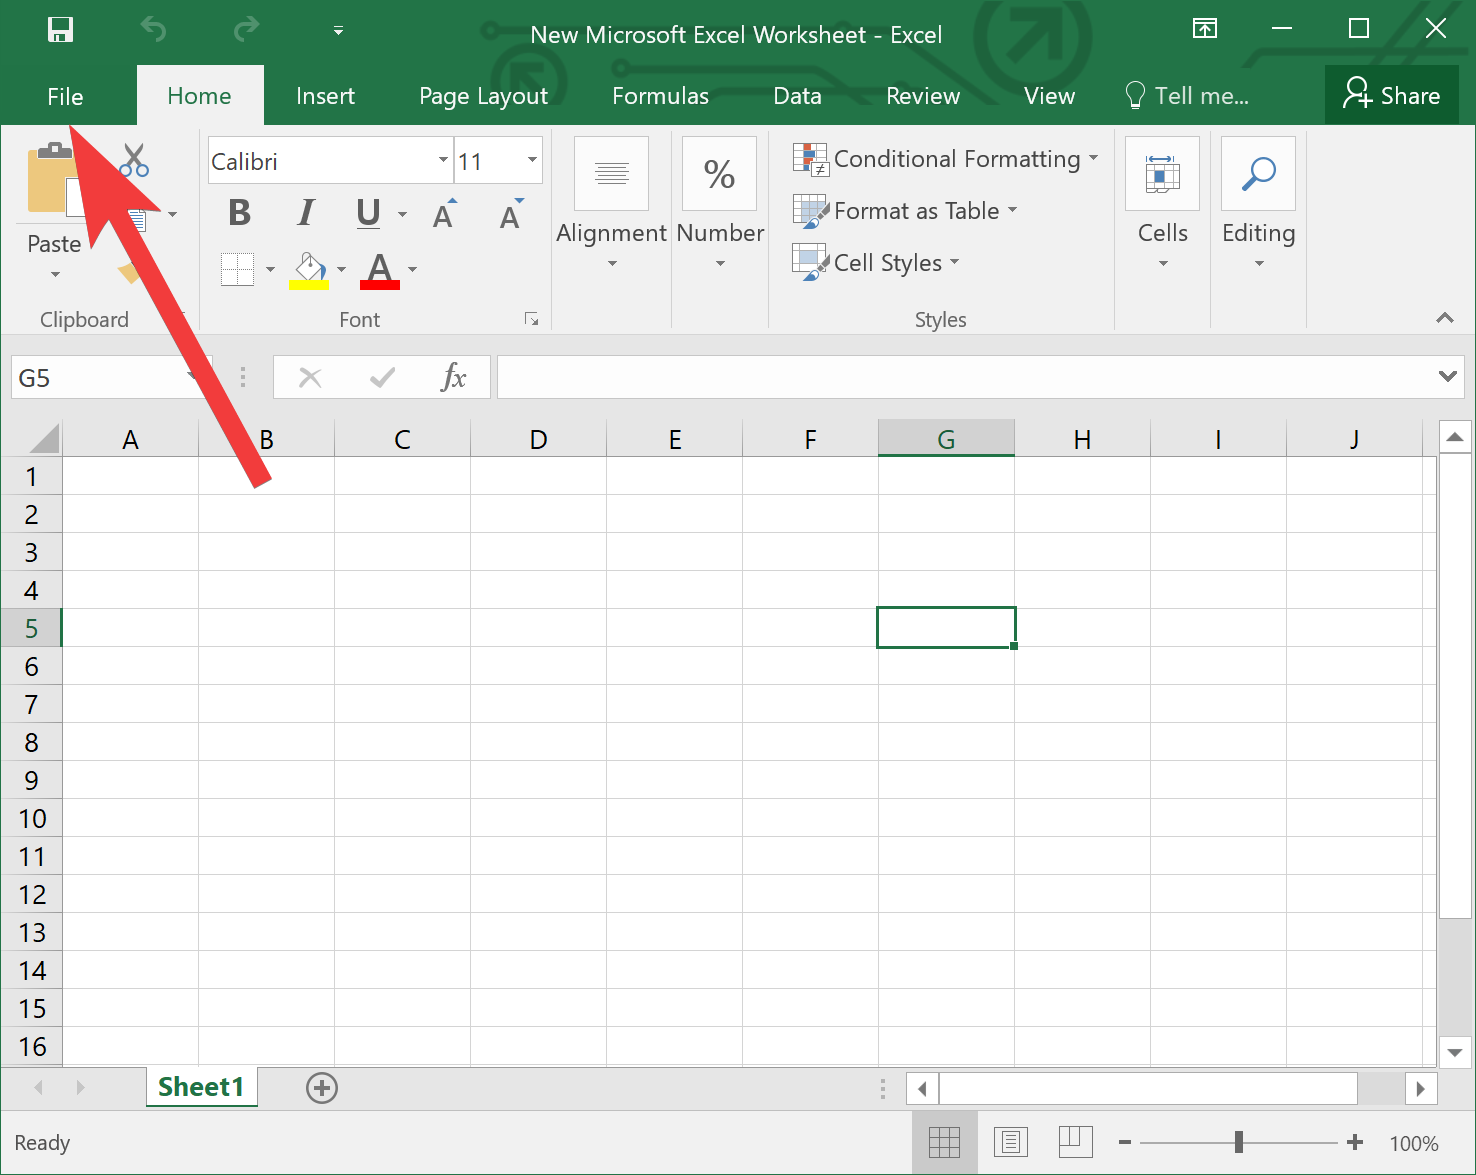
Step 2. Click on the File menu.
Step 3. Select Info in the left sidebar.
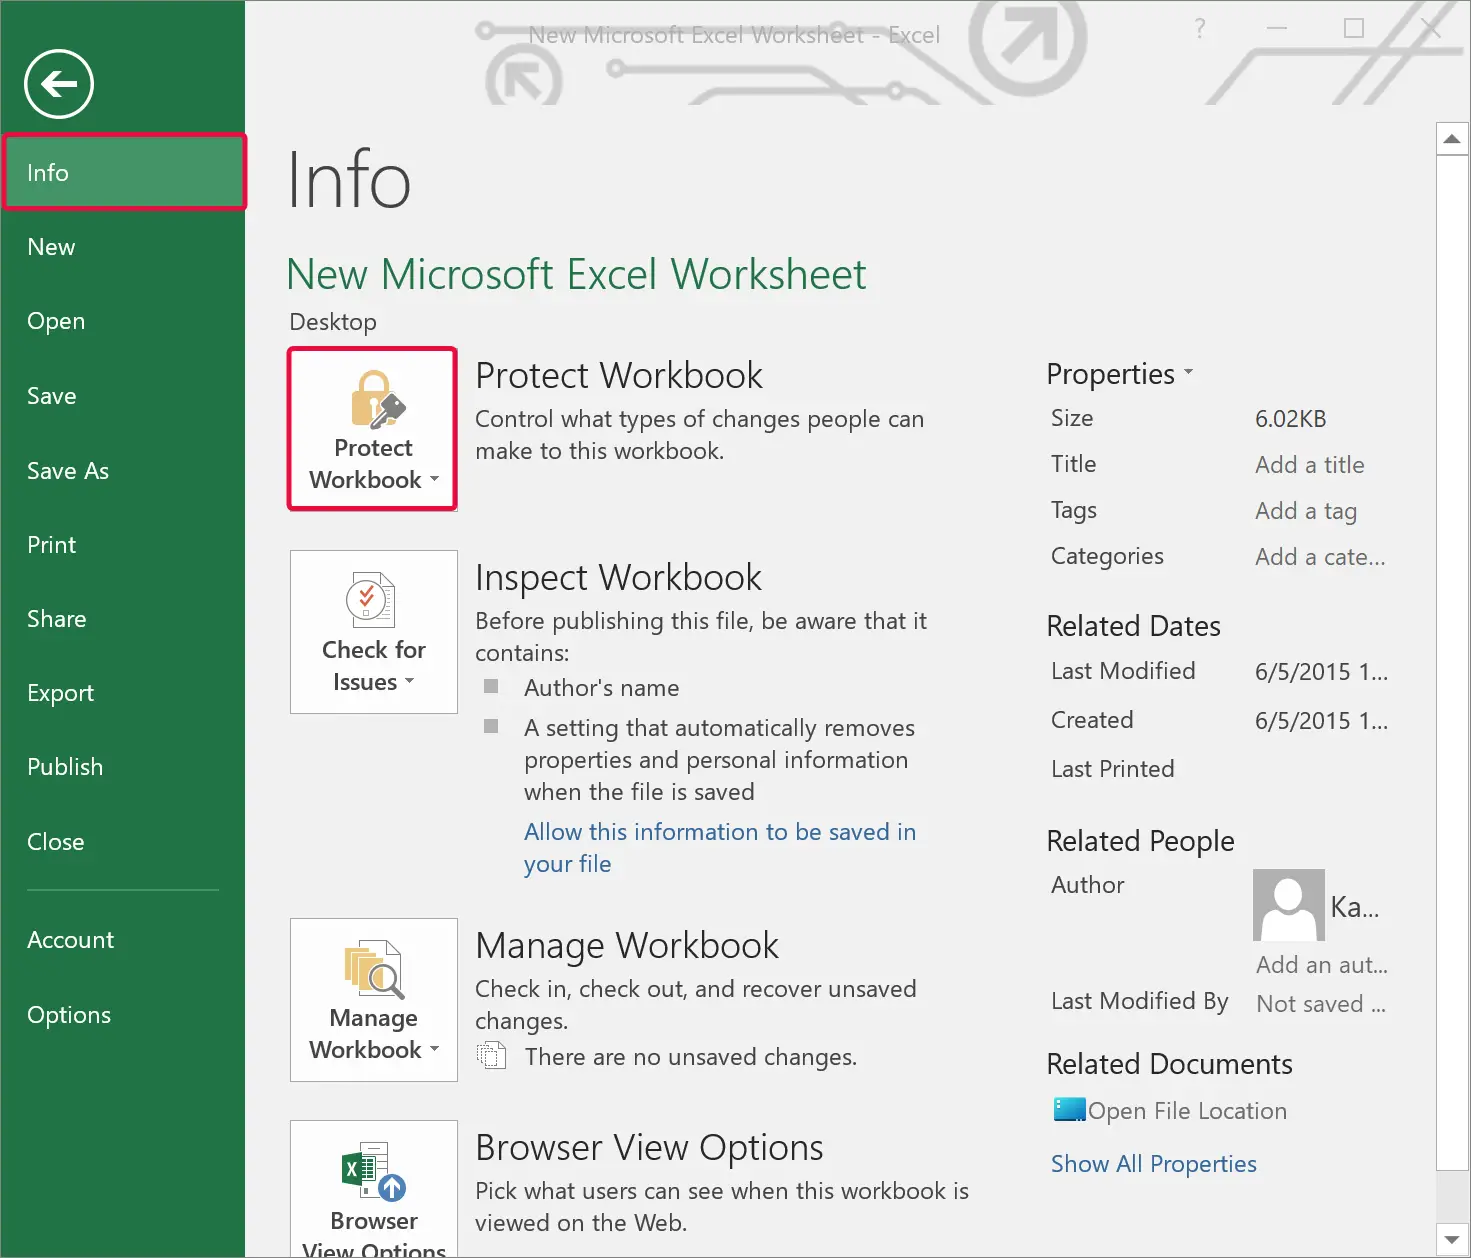
Step 4. Then, click on the Protect Workbook option.
Step 5. In the drop-down list that appears, choose the Encrypt with Password option.
Step 6. When you’re done, the “Encrypt Document” dialog will appear.
Step 7. Type a password in the “Password” field.
Step 8. Click the OK button.
Step 9. Again, type the same password in the “Reenter password” field.
Step 10. Click the OK button.
Step 11. Close the file.
Step 12. Click the Save button when prompted.
That’s it. Using the above steps, you can protect your Excel Workbook with a password. The next time you want to open that file, it will prompt you for a password. Enter the password you set and click the OK button.
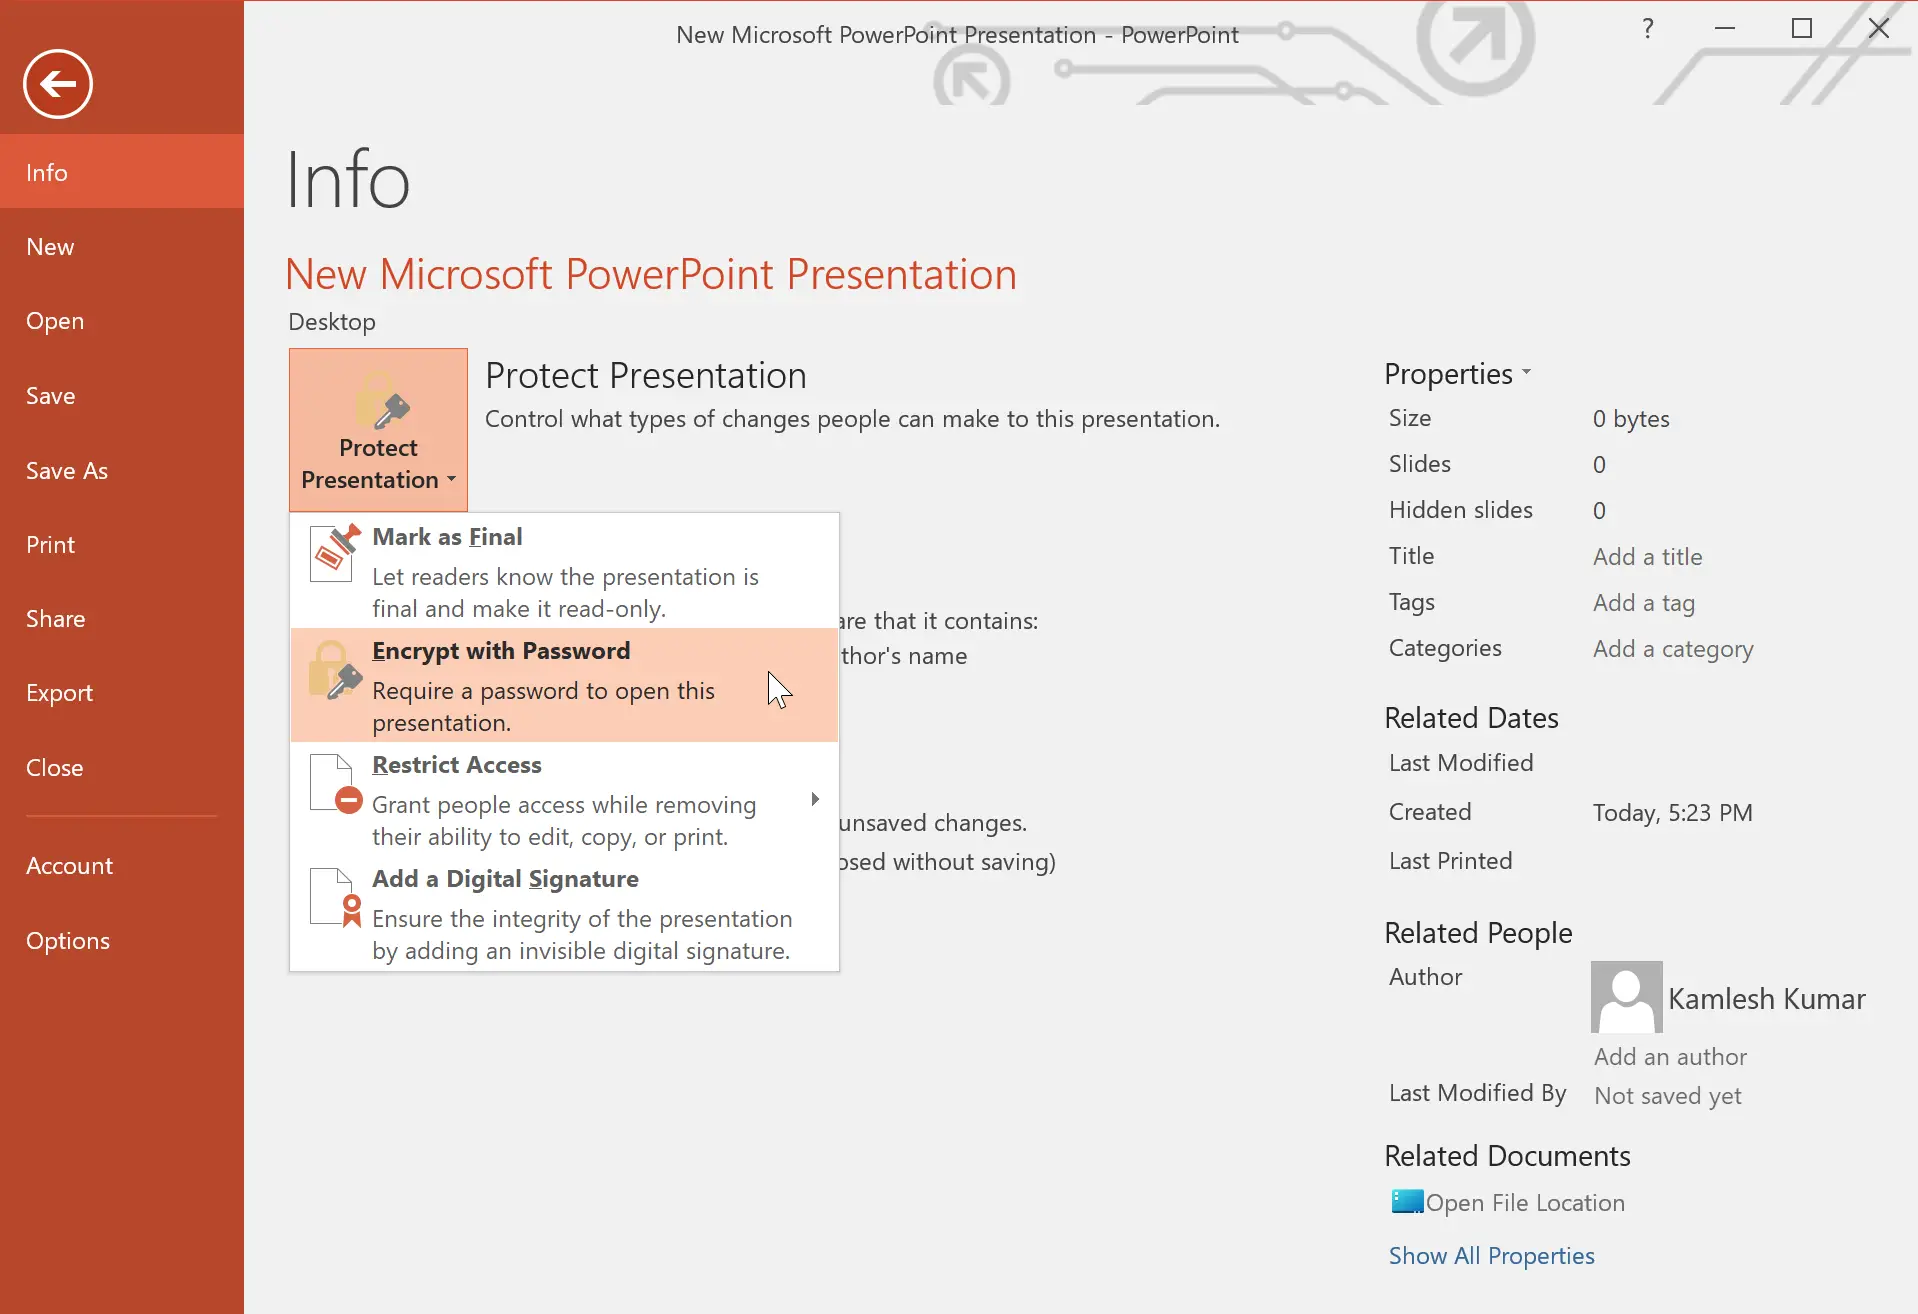
How to Password Protect Microsoft PowerPoint Presentation in Windows 11 or 10?
To secure your PowerPoint Presentation in Windows 11 or 10, use these steps:-
Step 1. Open a Microsoft PowerPoint Presentation; you want to set a password.
Step 2. Click on the File menu.
Step 3. Select Info in the left sidebar.
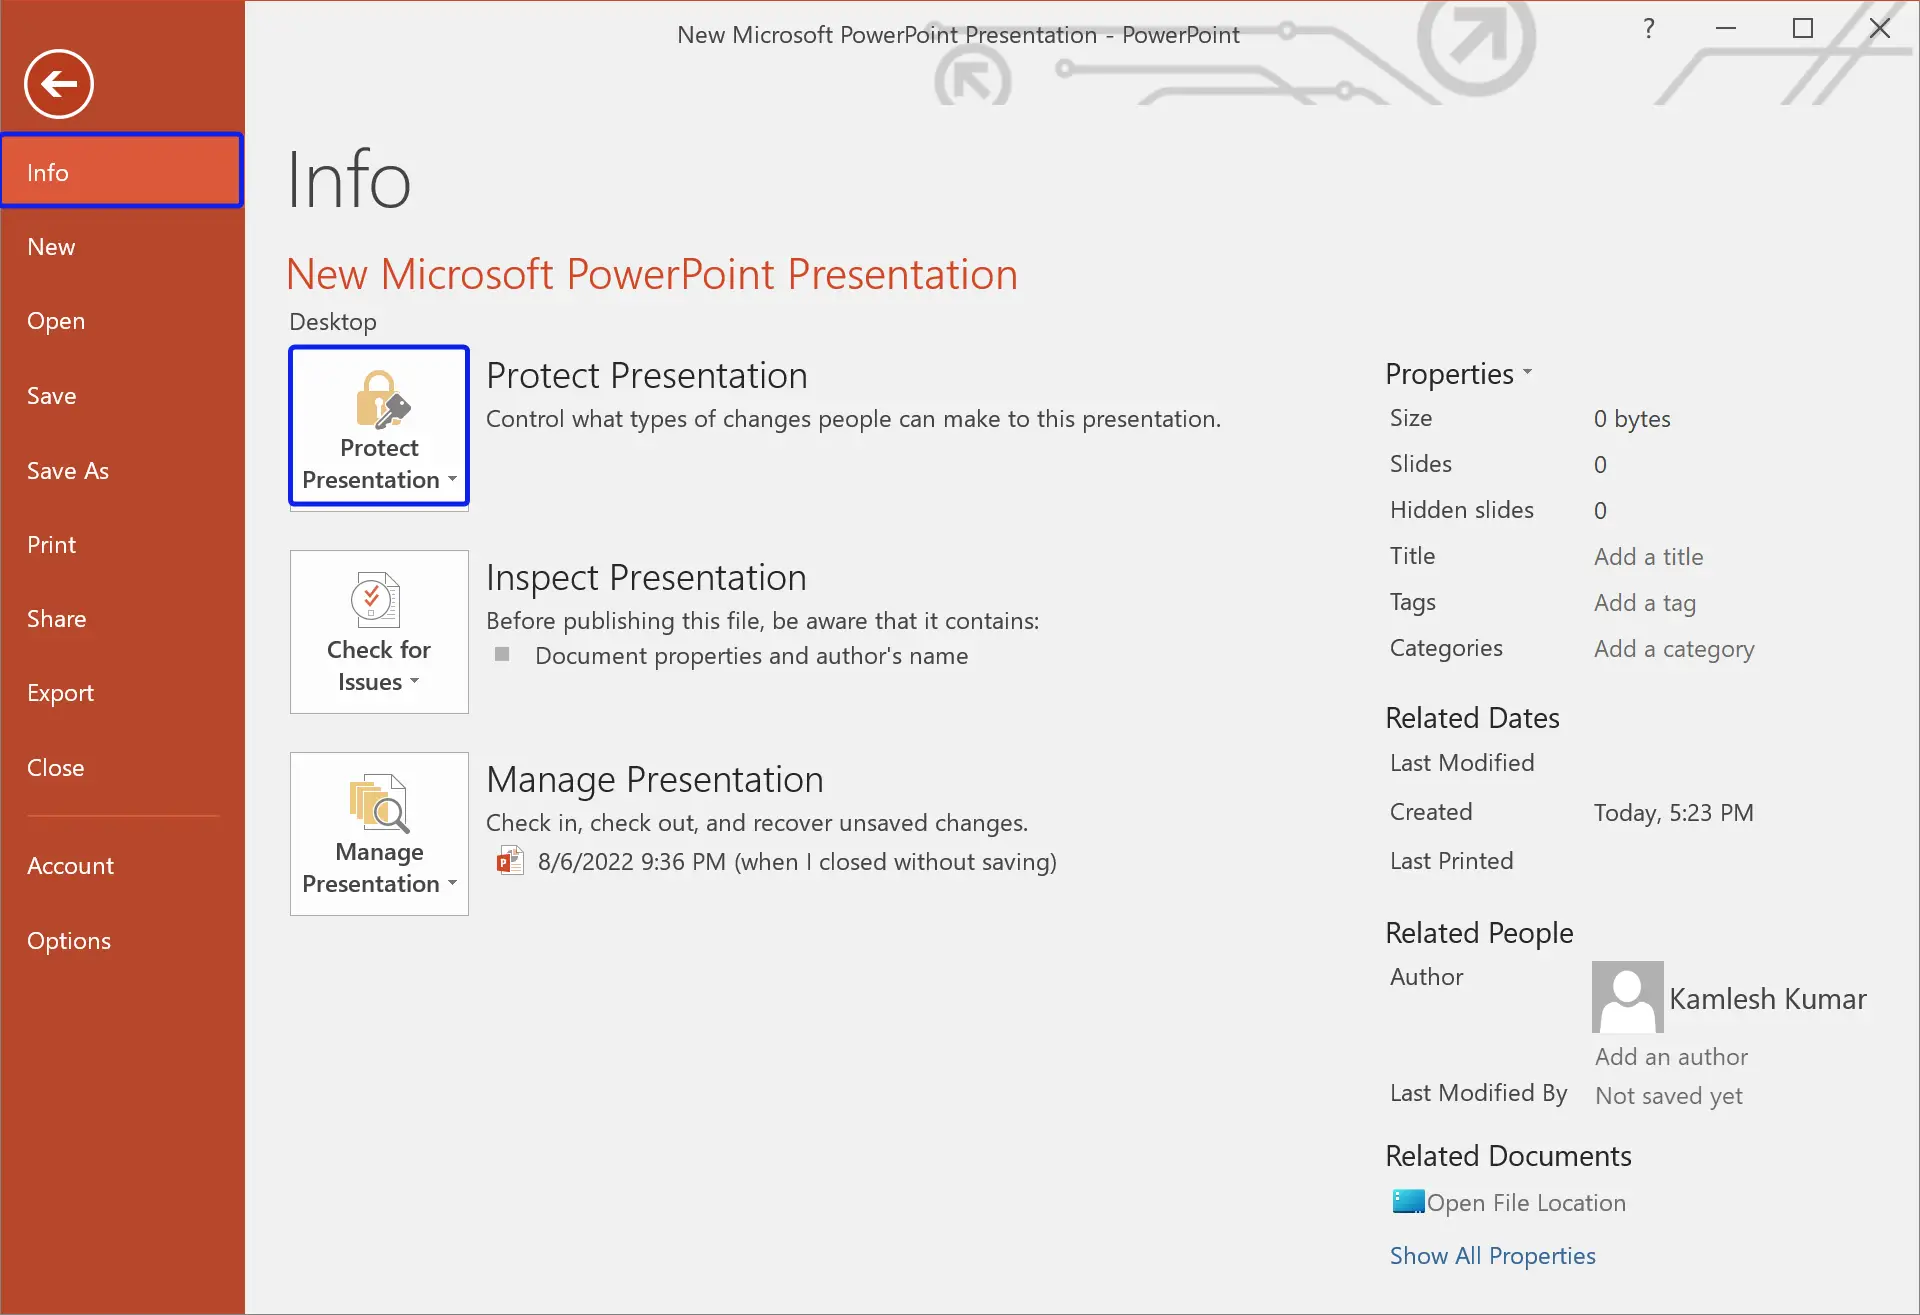
Step 4. Then, click on the Protect Presentation option.
Step 5. In the drop-down list that appears, choose the Encrypt with Password option.
Step 6. When you’re done, the “Encrypt Document” dialog will appear.
Step 7. Type a password in the “Password” field.
Step 8. Click the OK button.
Step 9. Again, type the same password in the “Reenter password” field.
Step 10. Click the OK button.
Step 11. Close the file.
Step 12. Click the Save button when prompted.
That’s it. Using the above steps, you can protect your PowerPoint Presentation with a password. The next time you want to open that file, it will prompt you for a password. Enter the password you set and click the OK button.
Conclusion
In conclusion, protecting sensitive data on Microsoft Office files can be easily achieved on Windows 11 or 10 machines without the need for third-party software. By following the simple steps outlined in this guide, you can password-protect your Word documents, Excel worksheets, and PowerPoint presentations, ensuring that only authorized users can access them. Taking the time to secure your important files can provide peace of mind, knowing that your confidential information is safeguarded against unauthorized access.