While trying to make your Windows 11 computer sound better, if you have changed several settings and now you can’t remember how to fix it, it is possible to reset the sound settings to start from scratch and start all over. Or, if you’re experiencing audio issues in a Windows 11 machine, it’s possible that your audio settings have been changed by someone. In some cases, resetting your audio settings can help to fix the problem.
If you’re experiencing audio issues on your Windows 11 PC, resetting the audio settings to their defaults can help resolve them.
How to Reset Audio Settings to Defaults on Windows 11?
Here’s how to reset audio settings to defaults on Windows 11:-
Method 1: Using the Settings app
Step 1. First, open the Settings app.
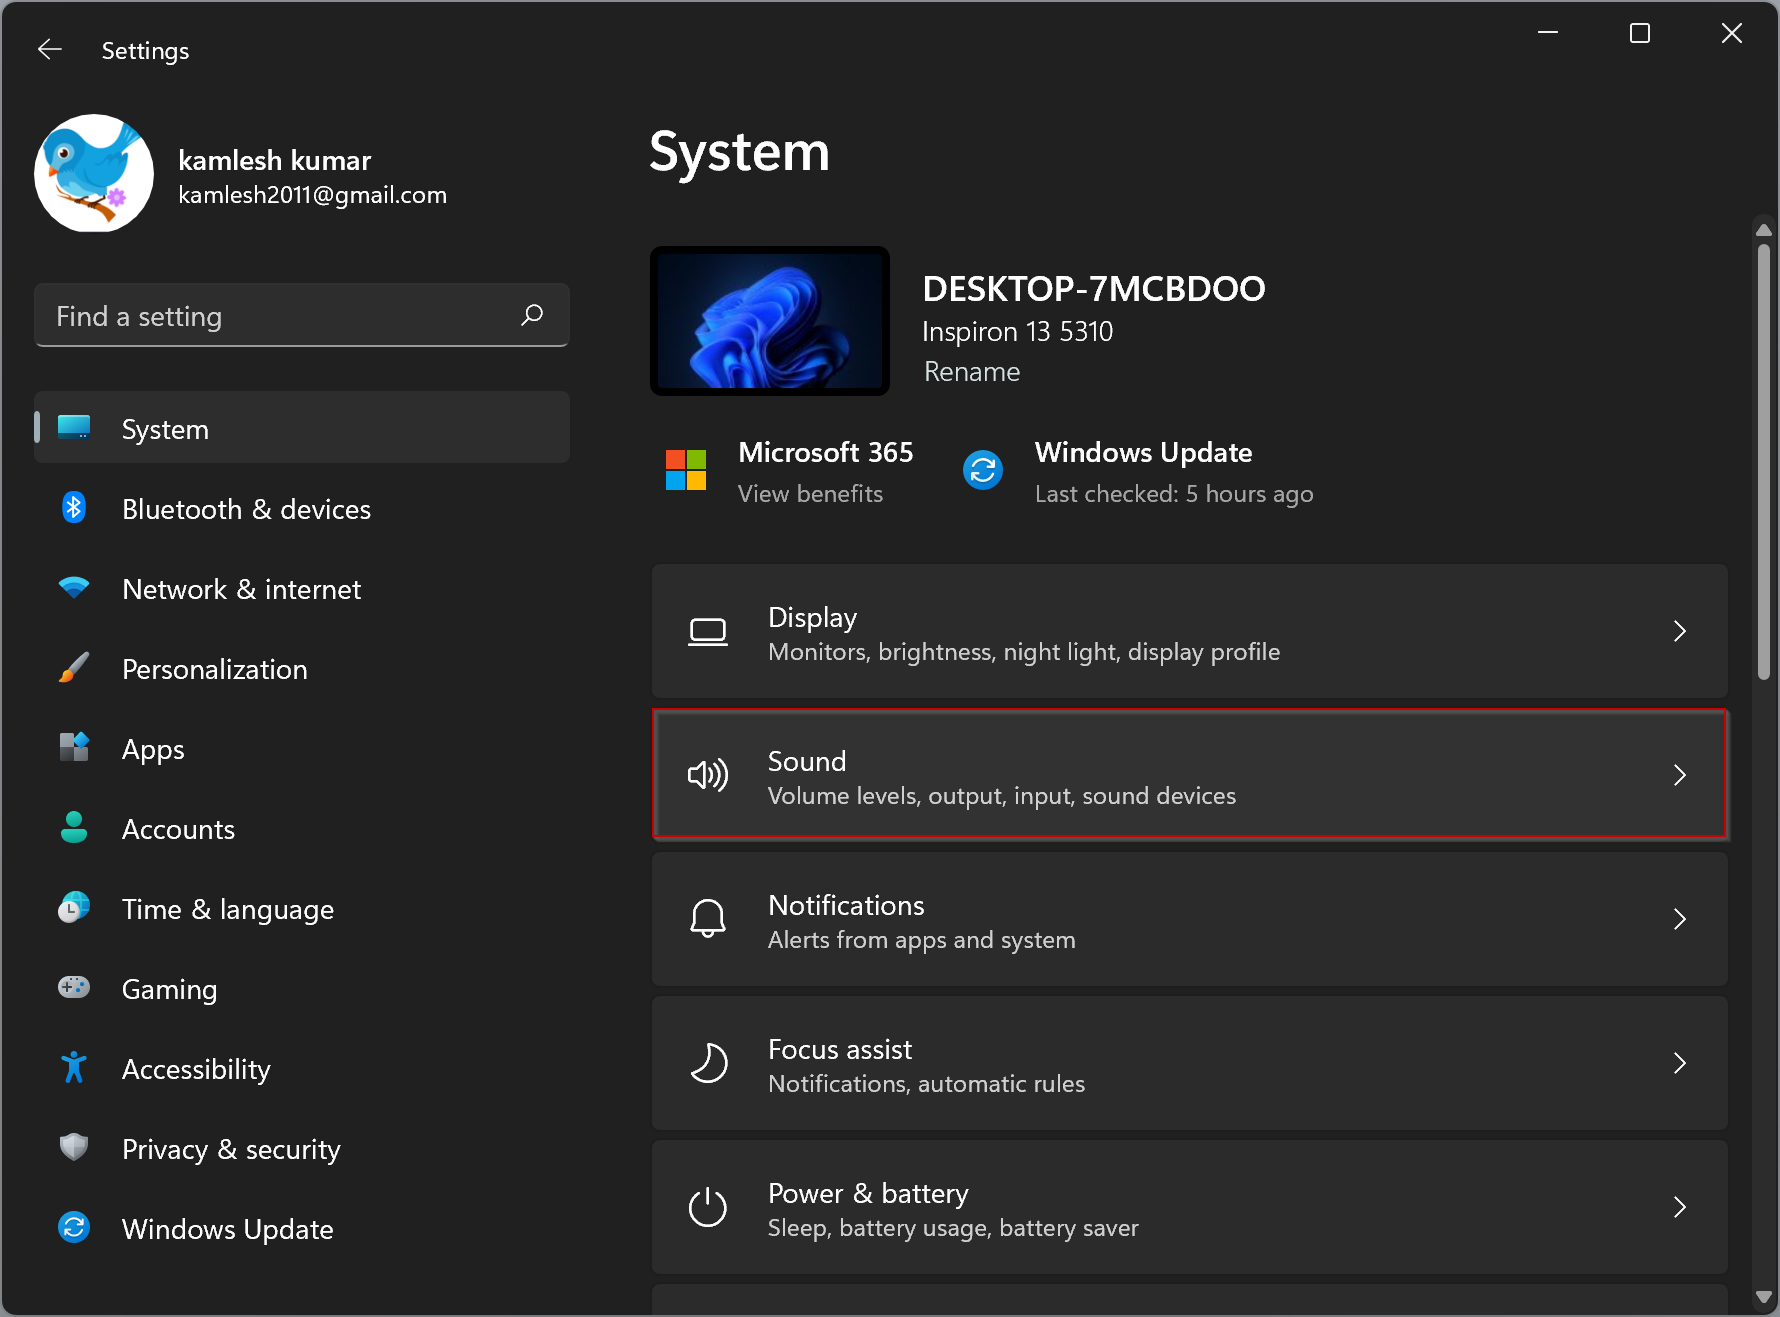
Step 2. Then, click on System.

Step 3. Next, click on Sound in the left-hand menu.
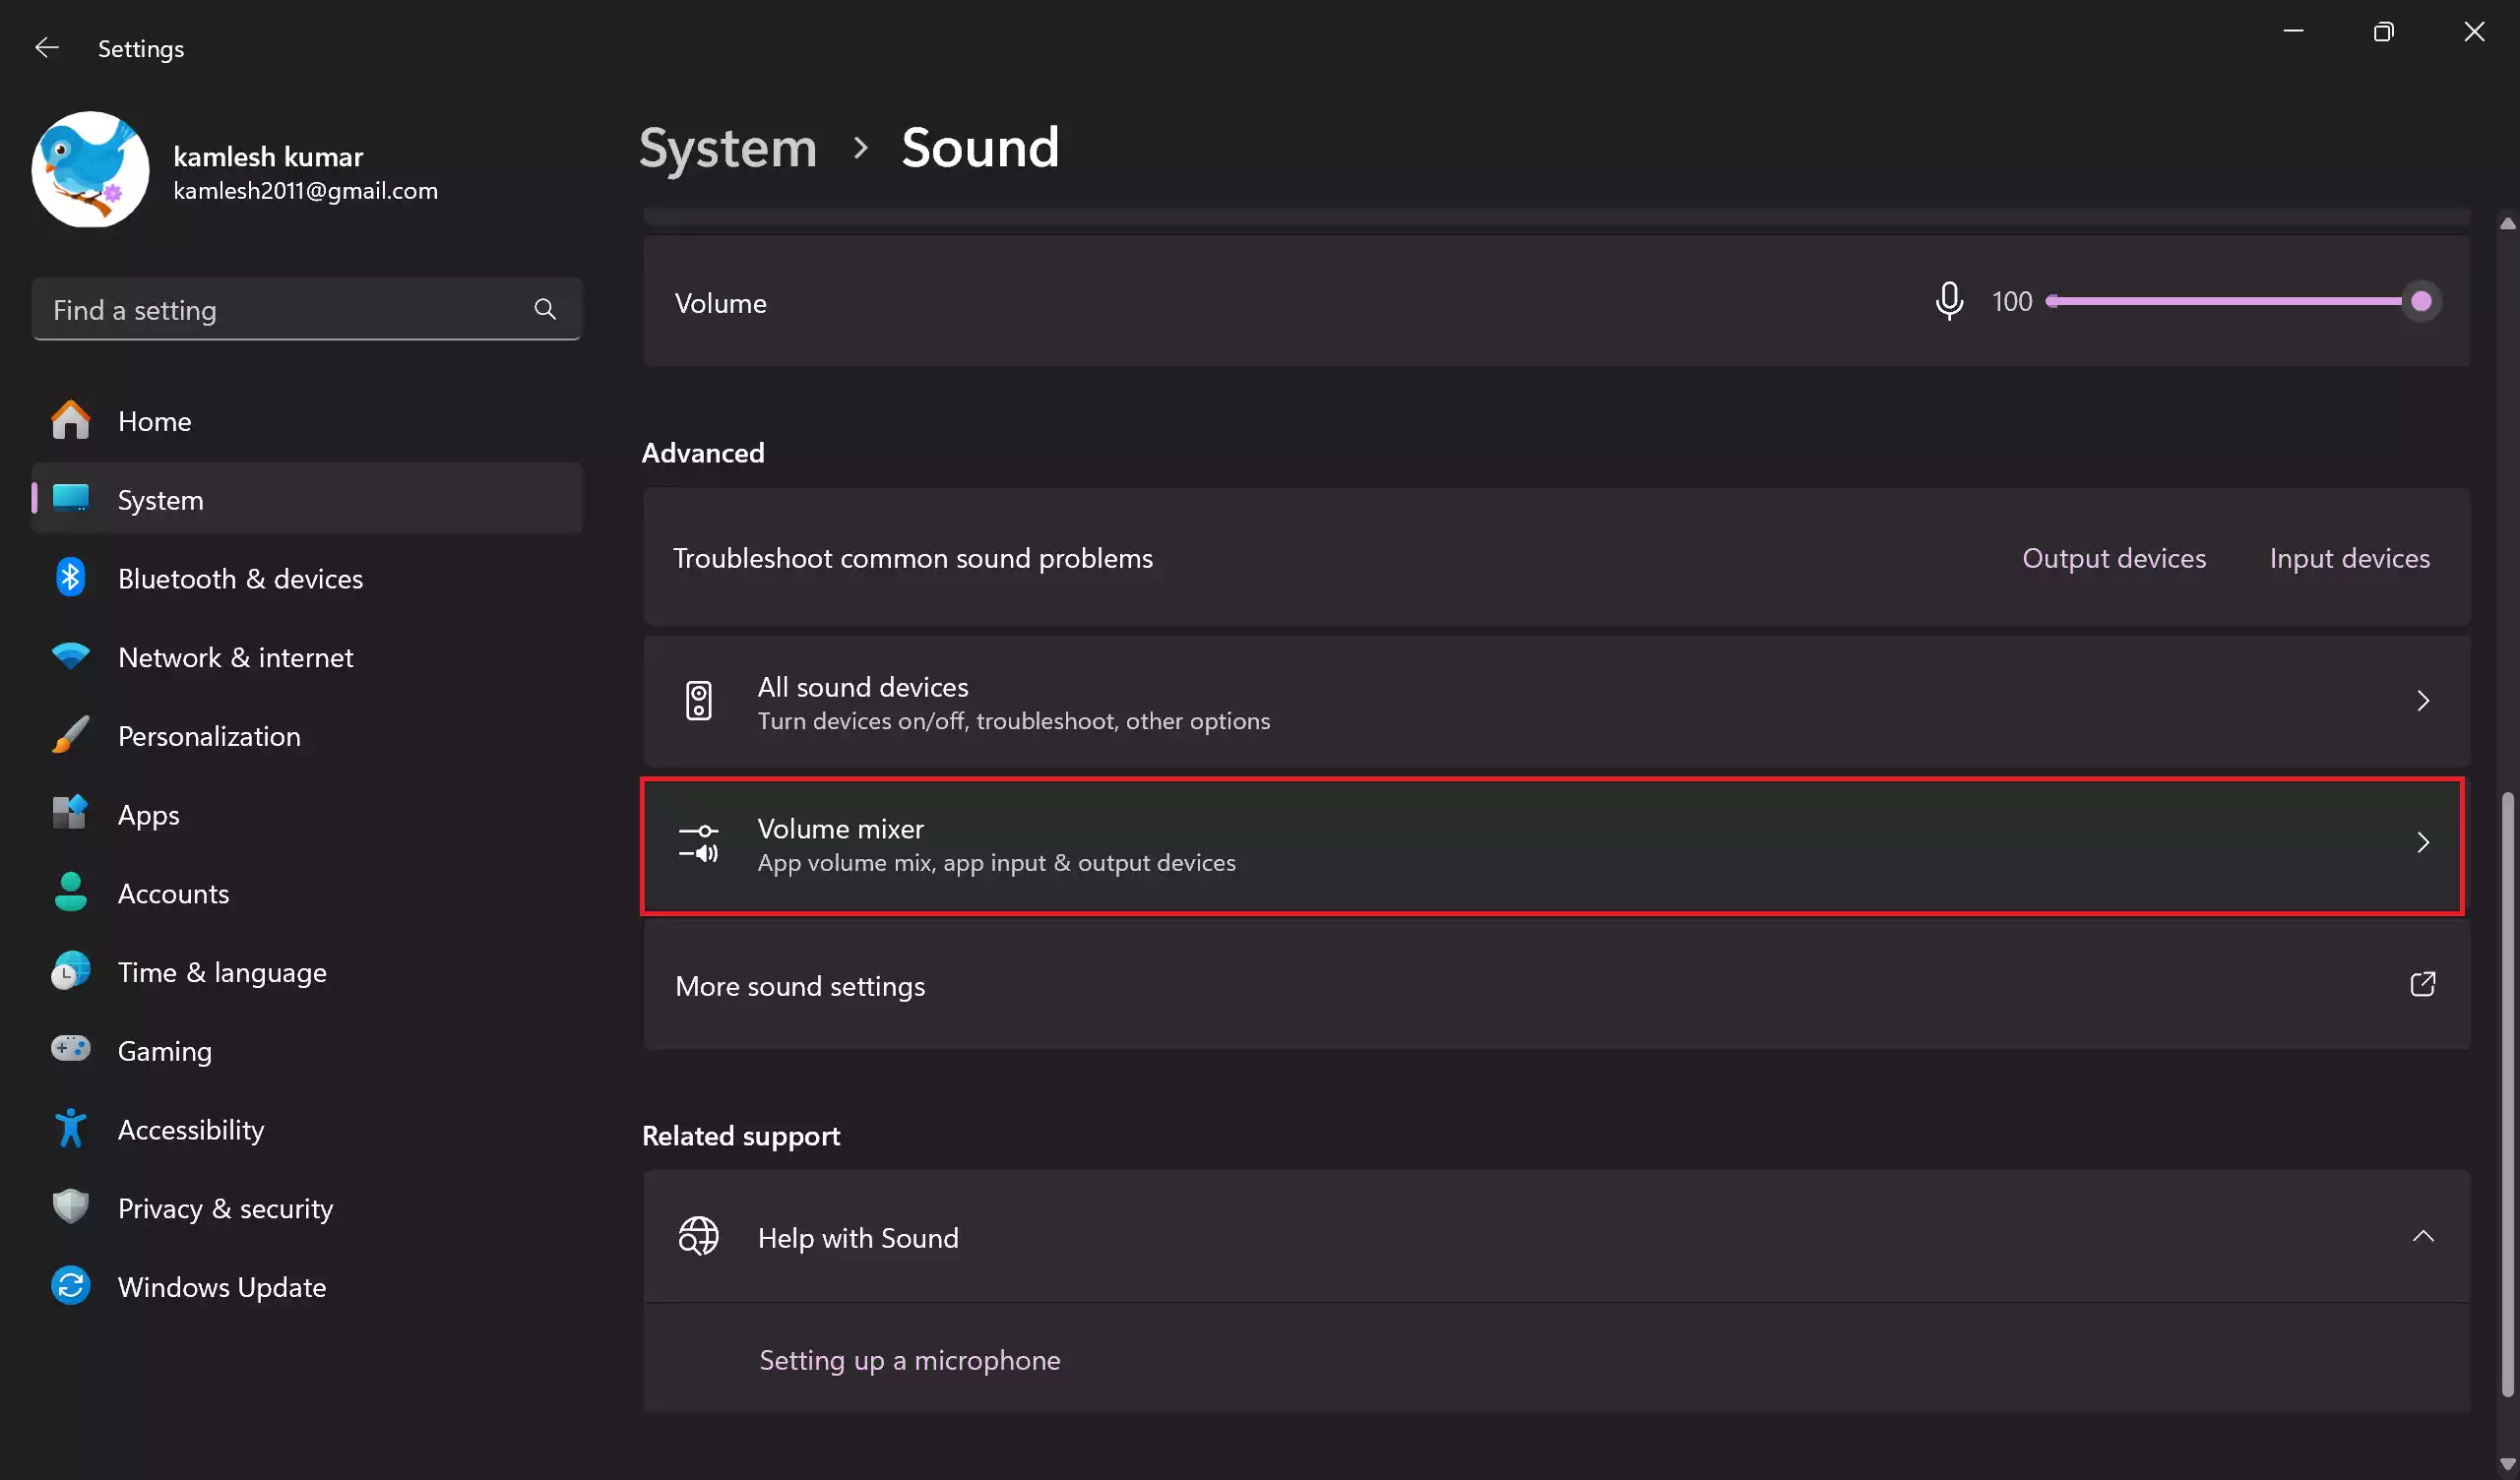
Step 4. Now, scroll down a bit to find the Advanced section and click on the “Volume mixer” option.
Step 5. Click on the “Reset” button located at the bottom of the page under the “Apps” section.
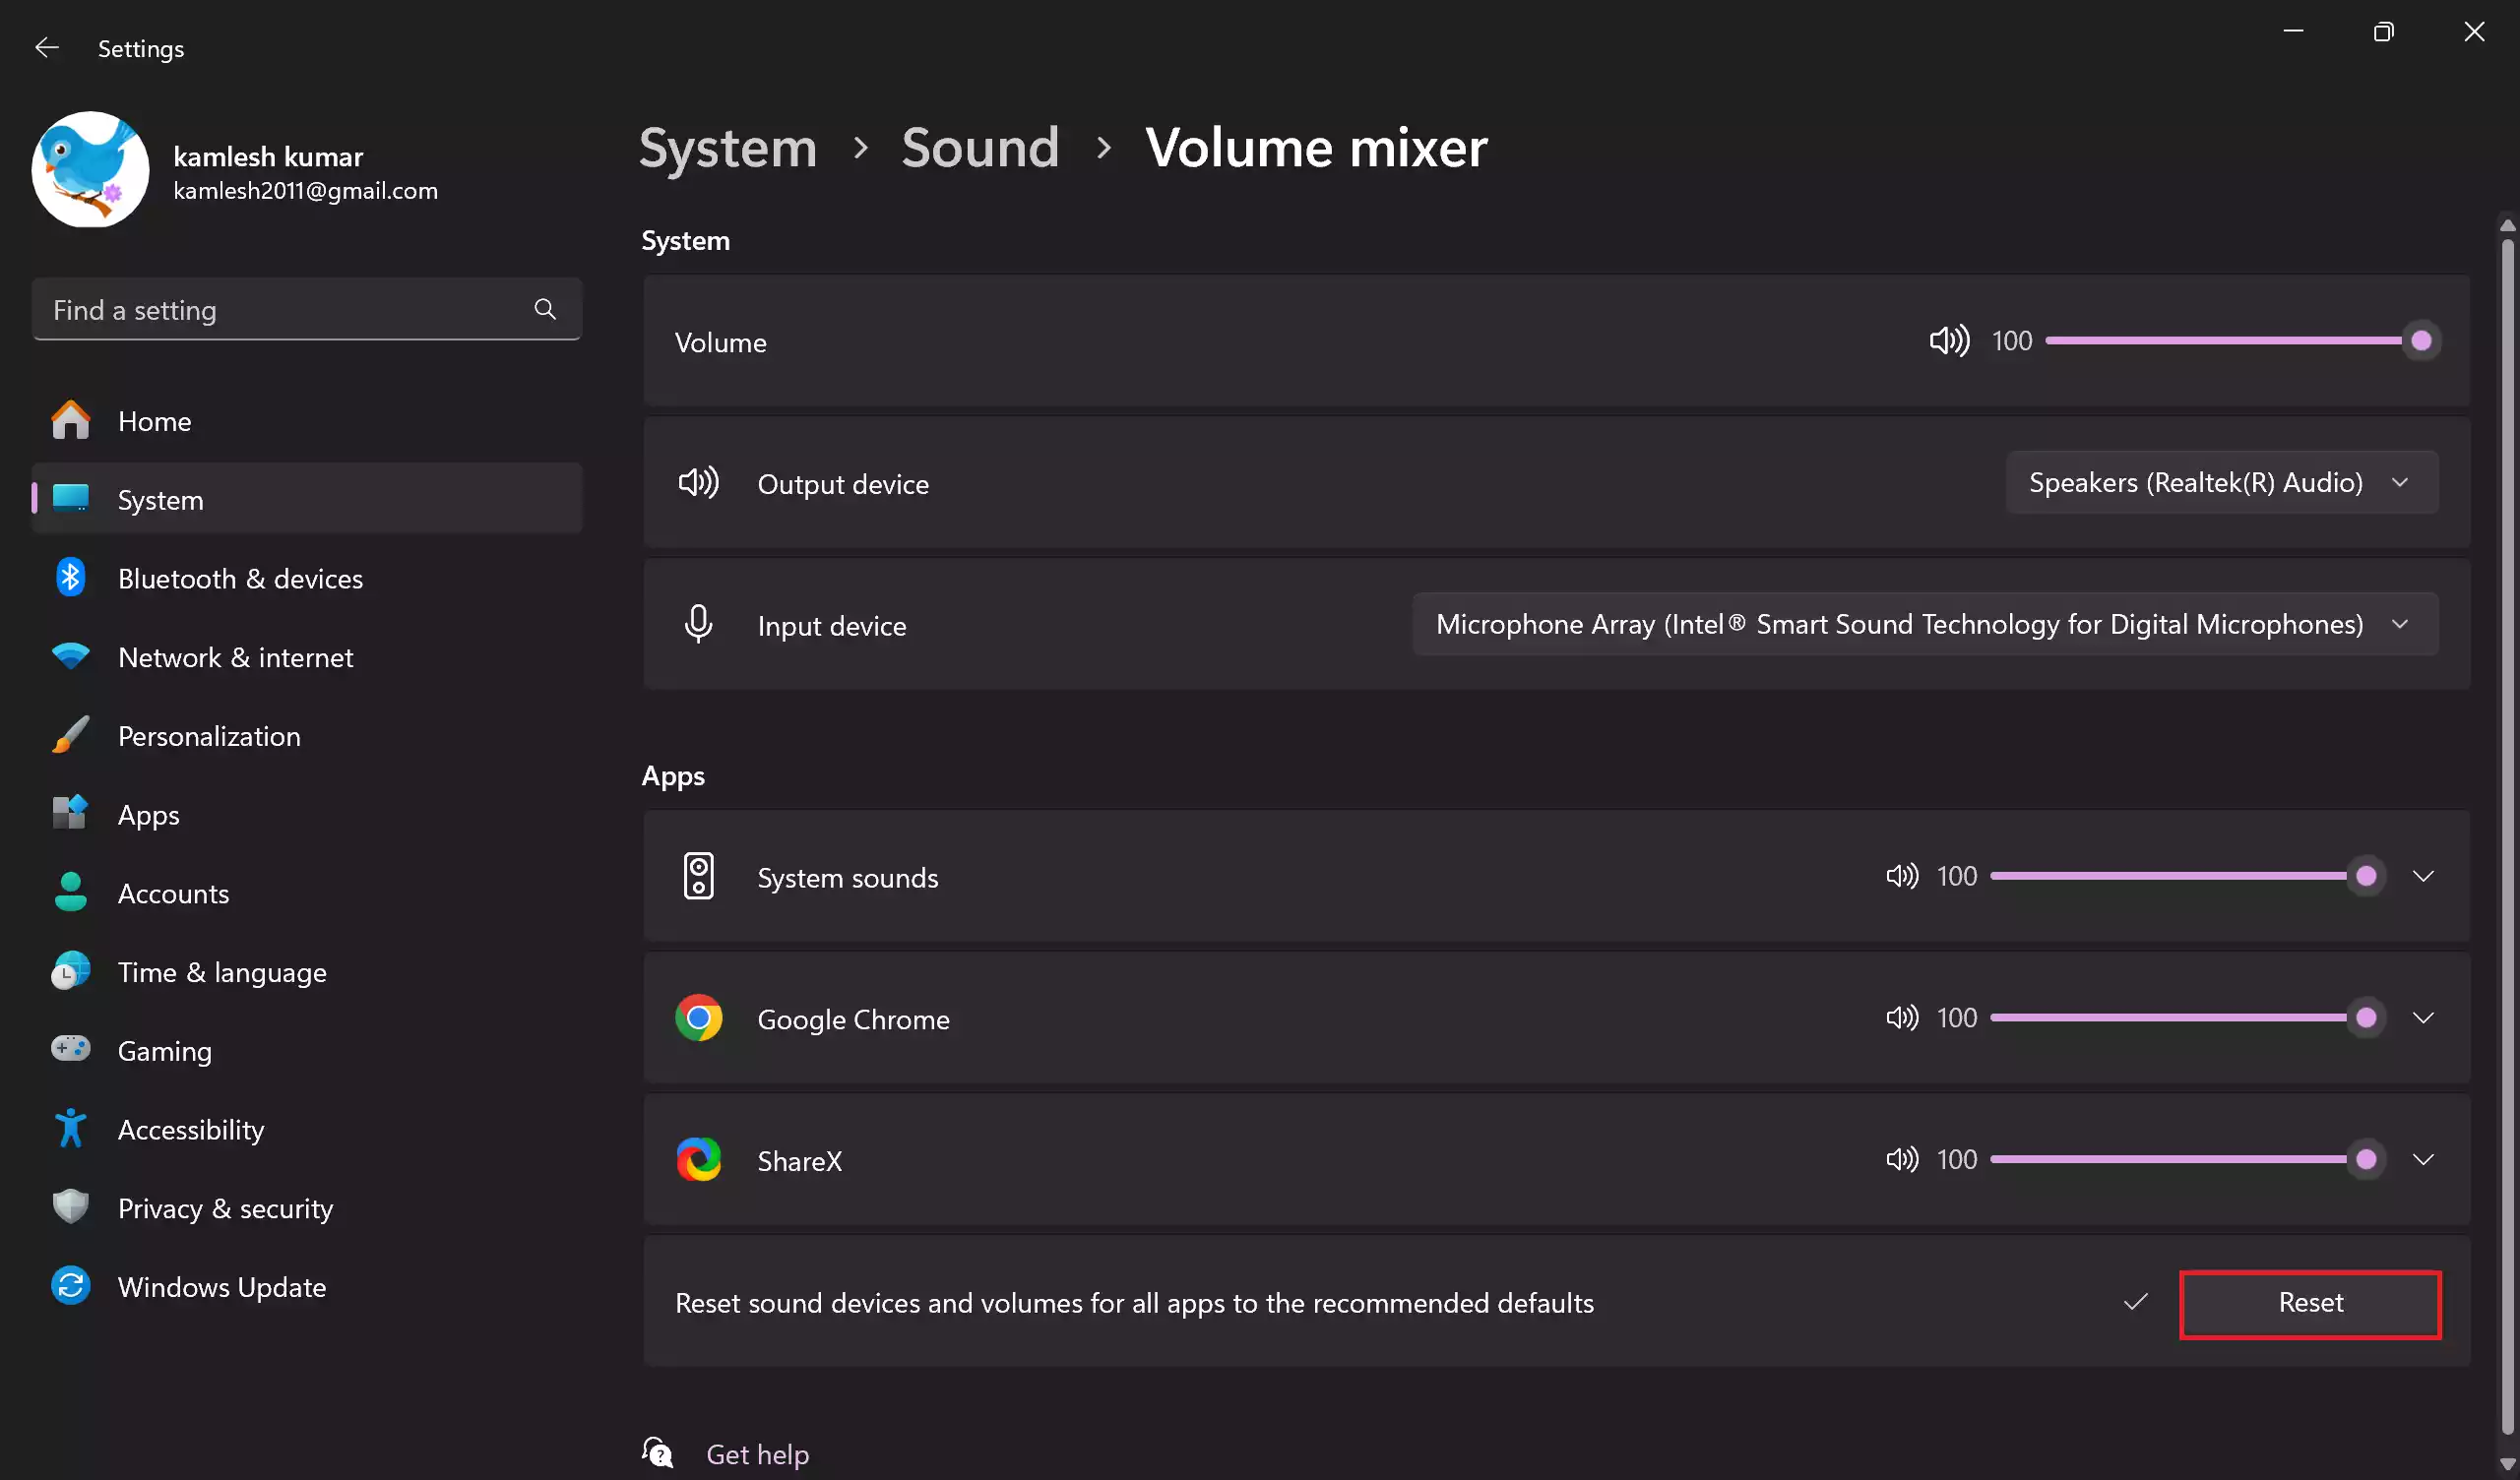
The audio settings will be reset to their defaults.
Note: Resetting the audio settings to their defaults will remove any custom settings you have configured for individual apps. You may need to reconfigure these settings after resetting the audio preferences.
Method 2: Using Advanced Audio Settings
To reset advanced audio settings on your system, follow these steps:-
Step 1. Begin by accessing your device’s settings. You can do it by pressing the Windows + I keyboard shortcut.
Step 2. Within the settings menu, locate and select the “System” option.
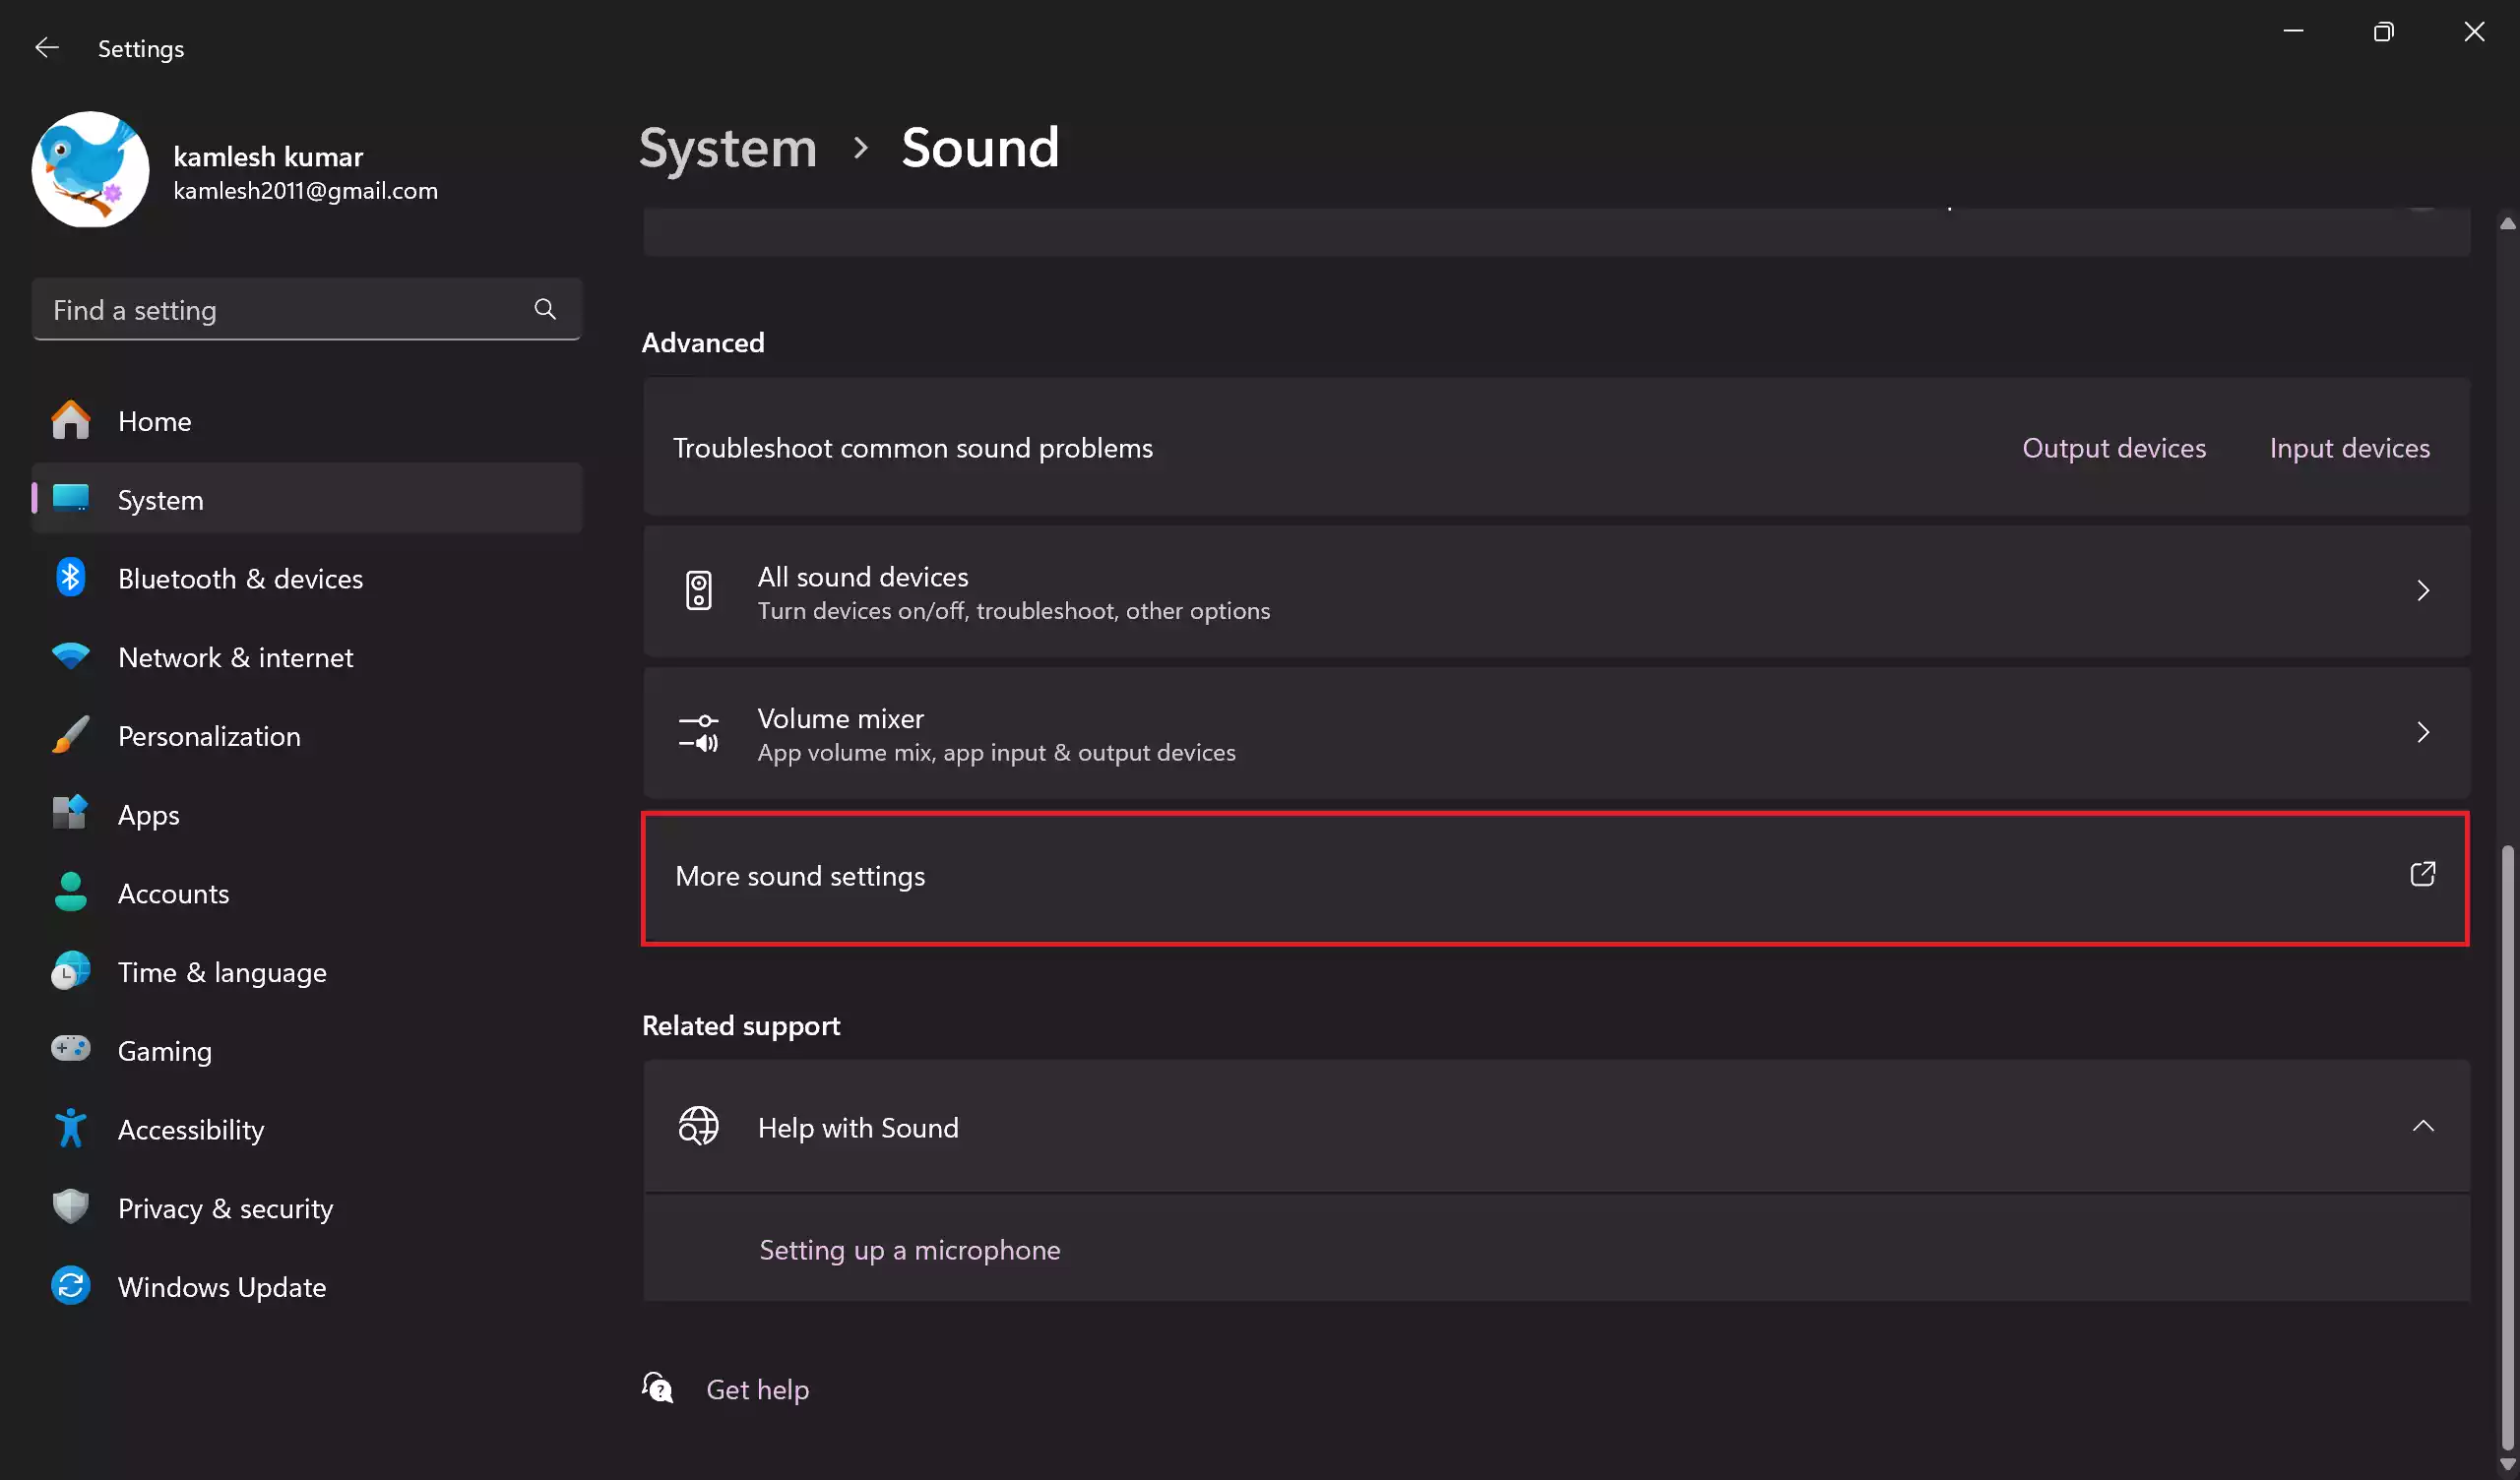
Step 3. Now, navigate to the “Sound” tab within the System settings.
Step 4. Under the “Advanced” section, look for and click on the “More sound settings” option.
Step 5. Within the Sound window, click on the “Playback” tab.
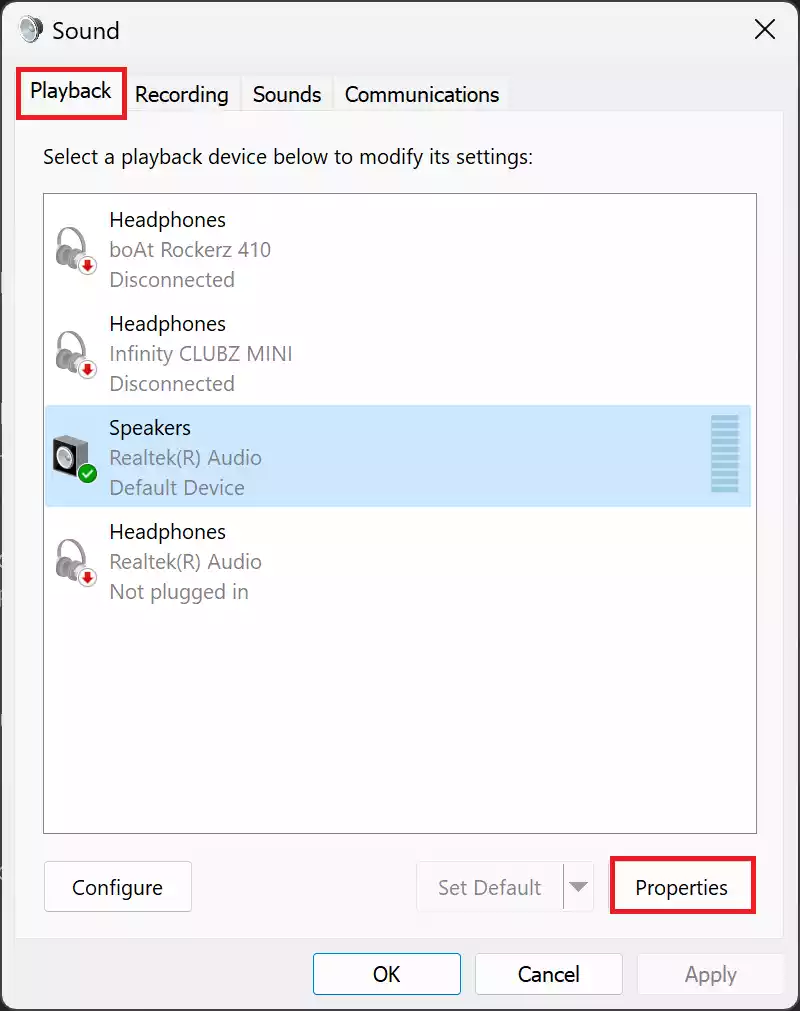
Step 6. From the list of available speakers, choose the one you wish to reset and click on the “Properties” button associated with it.
Step 7. A new window for “Sound Device Properties” will appear; within this window, click on the “Enhancements” tab.
Step 8. On the Enhancements tab, locate and click the “Restore Defaults” button.
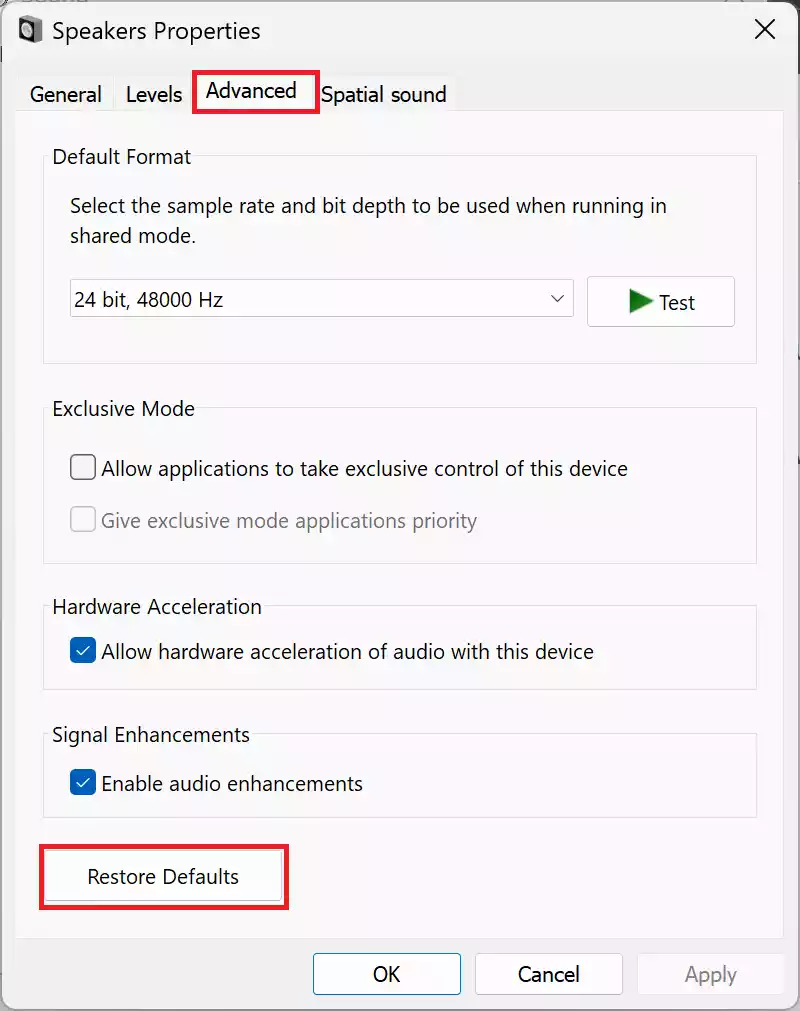
Step 9. Next, switch to the “Advanced” tab in the Sound Device Properties window.
Step 10. Within the Advanced tab, you will find another “Restore Defaults” button. Click on it.
Step 11. To continue, switch to the “Spatial Sound” tab.
Step 12. On the Spatial Sound tab, locate and click the “Restore Defaults” button.
Once you have completed these steps, your advanced audio settings will be successfully reset to their original factory defaults.
By following these unique and detailed steps, you can easily reset your advanced audio settings to their default configuration.
Method 3: Using Device Manager
To reset the audio driver on Windows 11, follow these steps:-
Step 1. Begin by opening the Start menu.
Step 2. In the search bar, type “Device Manager” and then click on the top result to open the Device Manager.
Step 3. Within Device Manager, look for and expand the “Sound, video and game controllers” category.

Step 4. Right-click on the audio adapter listed in this category and select the “Uninstall device” option from the context menu.
Step 5. A confirmation window will appear. Click the “Uninstall” button to proceed with the driver removal.
Step 6. After uninstalling the audio driver, it’s essential to restart your device.
Step 7. Upon reboot, the audio driver will automatically reinstall itself, effectively addressing common audio issues on your computer.
If you find that re-installing the audio driver does not resolve the problem, you can also consider rolling back the driver to a previous version on Windows 11.
Conclusion
Audio troubles on your Windows 11 computer can be frustrating, but resetting your audio settings to their defaults is a practical solution. Whether you’ve made numerous adjustments and can’t remember the original settings or suspect that someone tampered with your audio settings, these step-by-step methods will help you get your sound back on track. Choose the method that suits your needs best, and you’ll be enjoying clear audio in no time.