Microsoft Word, renowned for its word processing capabilities, also offers some useful image editing tools. One of the fundamental tasks you might need to do is rotate an image within your document. Fortunately, Word makes this task quite intuitive. This article will provide a comprehensive guide on how to rotate a picture in Microsoft Word.
While Microsoft Word is not an image editing software, it does offer essential tools for basic image manipulations. Rotating images is a straightforward process, and with a few steps, you can adjust your picture to your desired orientation.
How to Rotate Picture in Microsoft Word?
Rotate Pictures Using the Mouse
Step 1. Start by opening your Microsoft Word document containing the image you want to rotate.
Step 2. Click on the image to select it. Upon doing so, you will notice an outline appear around its edges.
Step 3. At the top of the image, there will be a circular arrow icon.
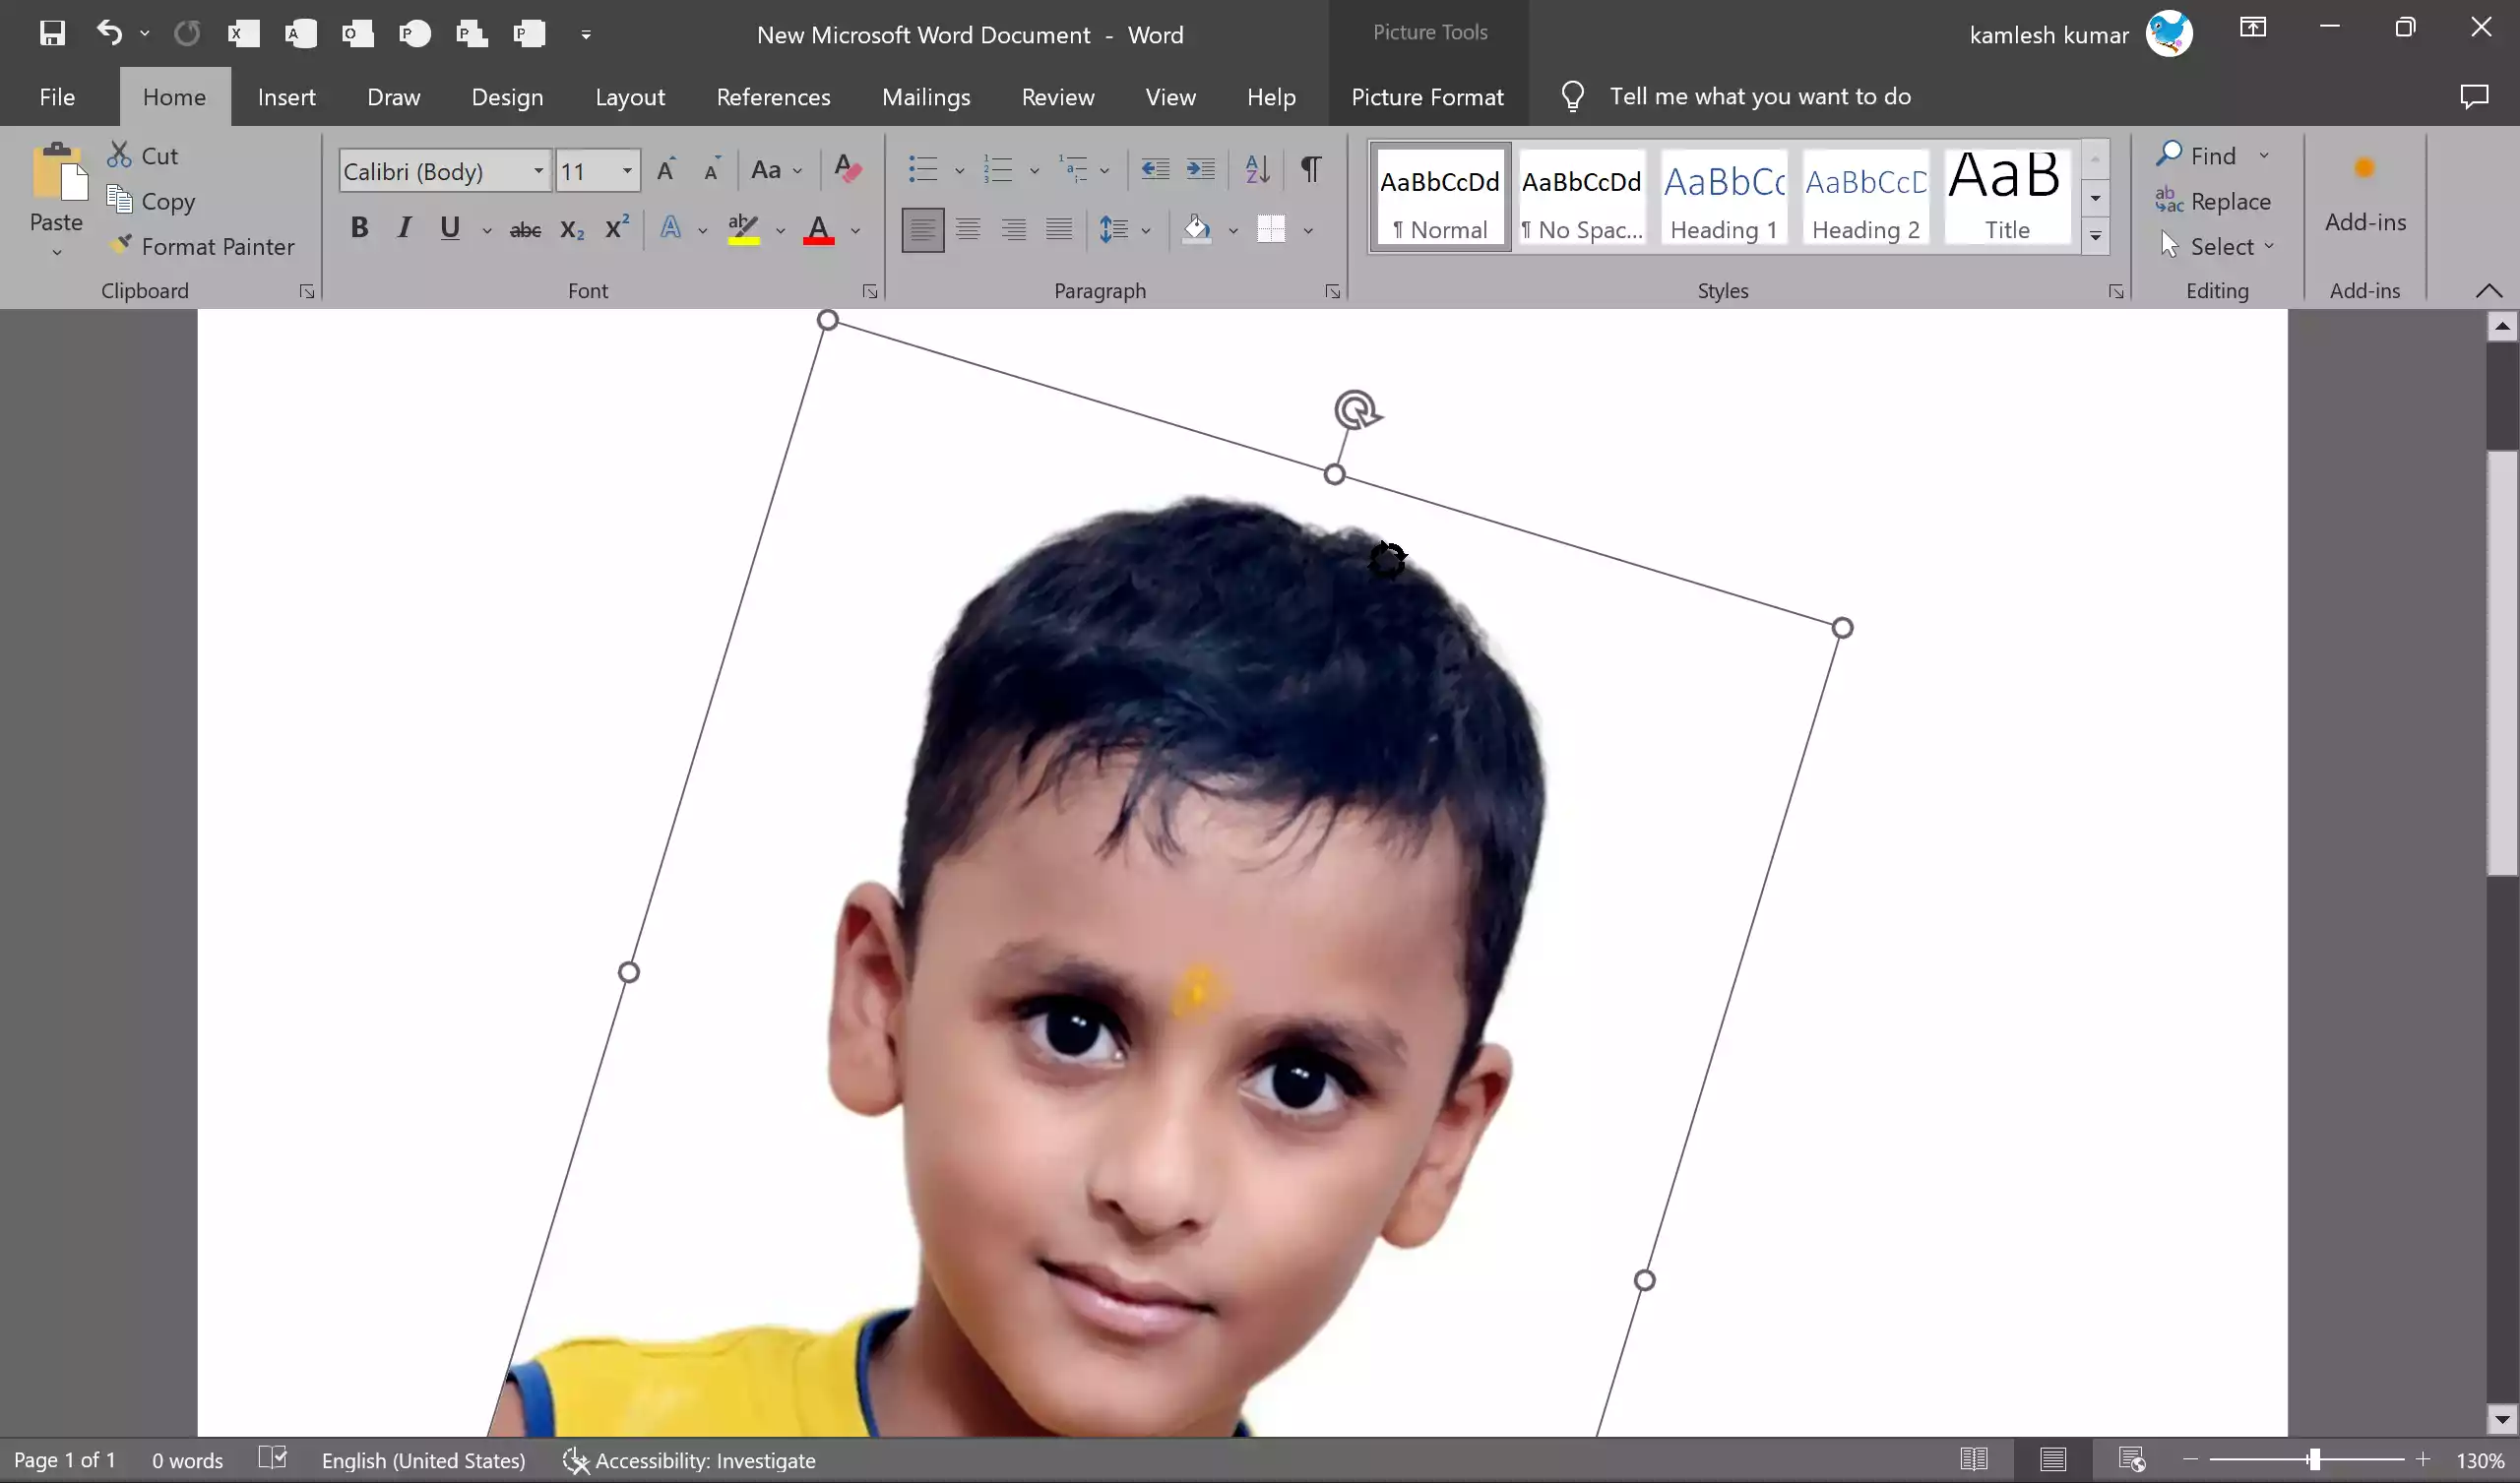
Step 4. Click and hold on to this circular arrow, and then drag your mouse in the direction you wish to rotate the image.
Step 5. Release the mouse button once you’ve achieved the desired rotation angle. Your image will now stay in that position.
Step 6. Remember to save your document to retain the changes.
Rotate Images by Degrees
Step 1. Again, begin by clicking on the image in your Word document.
Step 2. Once the image is selected, go to the “Picture Format” tab in the Ribbon.

Step 3. Within this tab, navigate to the “Arrange” group.
Step 4. Click on the small triangle icon (often referred to as the Rotate button). A dropdown menu will appear.
Step 5. In this menu, you’ll see preset rotation options, such as Rotate Right 90° or Flip Vertical.
Step 6. For a more customized rotation, click on “More Rotation Options.” Here, you can input specific degree values for precise rotations.
Employ the 3D Rotation Feature
Step 1. Start by right-clicking on the image within your document.
Step 2. From the context menu that appears, select “Format Picture.”

Step 3. In the panel that opens, opt for the 3-D Rotation option.

Step 4. You can then select from various 3D rotation presets. If you want a custom rotation, input your desired degree values.

Frequently Asked Questions
How do I rotate a picture by 90 degrees in Word?
- Simply click on the image, then navigate to Picture Format > Arrange > Rotate and select ‘Rotate Right 90°‘ or ‘Rotate Left 90°.’
How do you insert a picture with text in Word?
- Click on the Insert tab in the Ribbon and select Pictures. Once you’ve inserted the image, you can use the Wrap Text option in the Picture Format tab to choose how the text should flow around the image.
Conclusion
Microsoft Word’s easy-to-use features make it possible to rotate images without needing advanced graphic design tools. Whether you need a slight adjustment or a complete 180° flip, Word’s intuitive interface ensures that you can modify your images quickly and effectively. So, the next time you want to adjust the orientation of an image in your document, remember these simple steps, and you’ll have it done in no time.