Windows 11 brings with it a range of exciting features and updates, including enhancements to PowerShell, Microsoft’s powerful command-line interface. While many users are familiar with Command Prompt, PowerShell offers even more capabilities and flexibility. If you’re transitioning from Command Prompt to PowerShell on Windows 11, fear not! This gearupwindows guide will walk you through the process of running Command Prompt commands within PowerShell, helping you harness the full potential of this advanced tool.
How to Run Command Prompt Commands in PowerShell on Windows 11?
Follow these steps to execute Command Prompt Commands in PowerShell on Windows 11:-
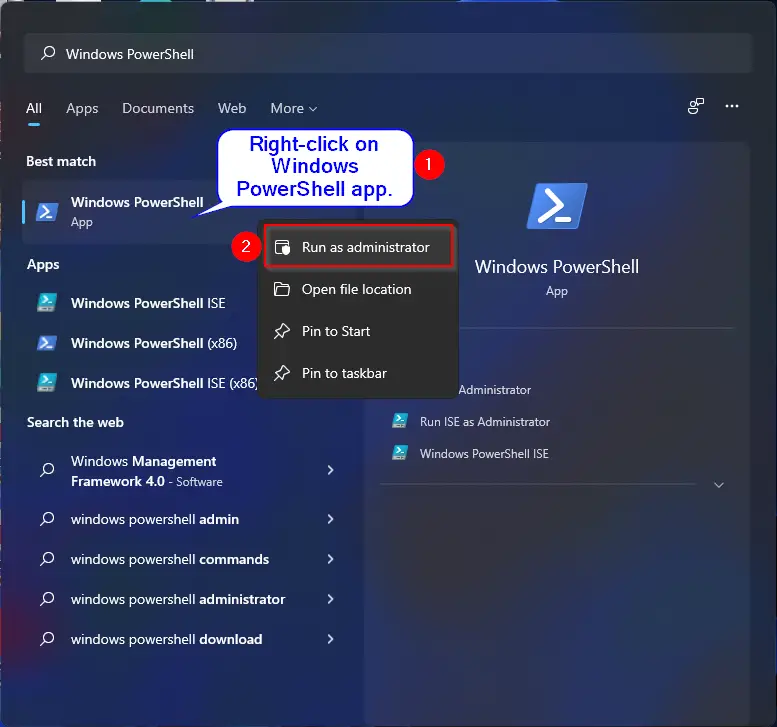
Step 1. To begin, open PowerShell or PowerShell as an administrator on your Windows 11 system.
Step 2. Once PowerShell is open, you can start running Command Prompt commands directly within it. The syntax for running Command Prompt commands in PowerShell is straightforward. Simply type the command you want to execute, exactly as you would in Command Prompt, and then press Enter.
For example, if you want to list all the files and directories in the current directory, you would use the “dir” command. In PowerShell, you would type:-
dir
And then press Enter.
Step 3. PowerShell is designed to be backward compatible with Command Prompt, meaning that many Command Prompt commands will work seamlessly within PowerShell. However, there may be instances where you need to use Command Prompt specific commands that are not available in PowerShell.
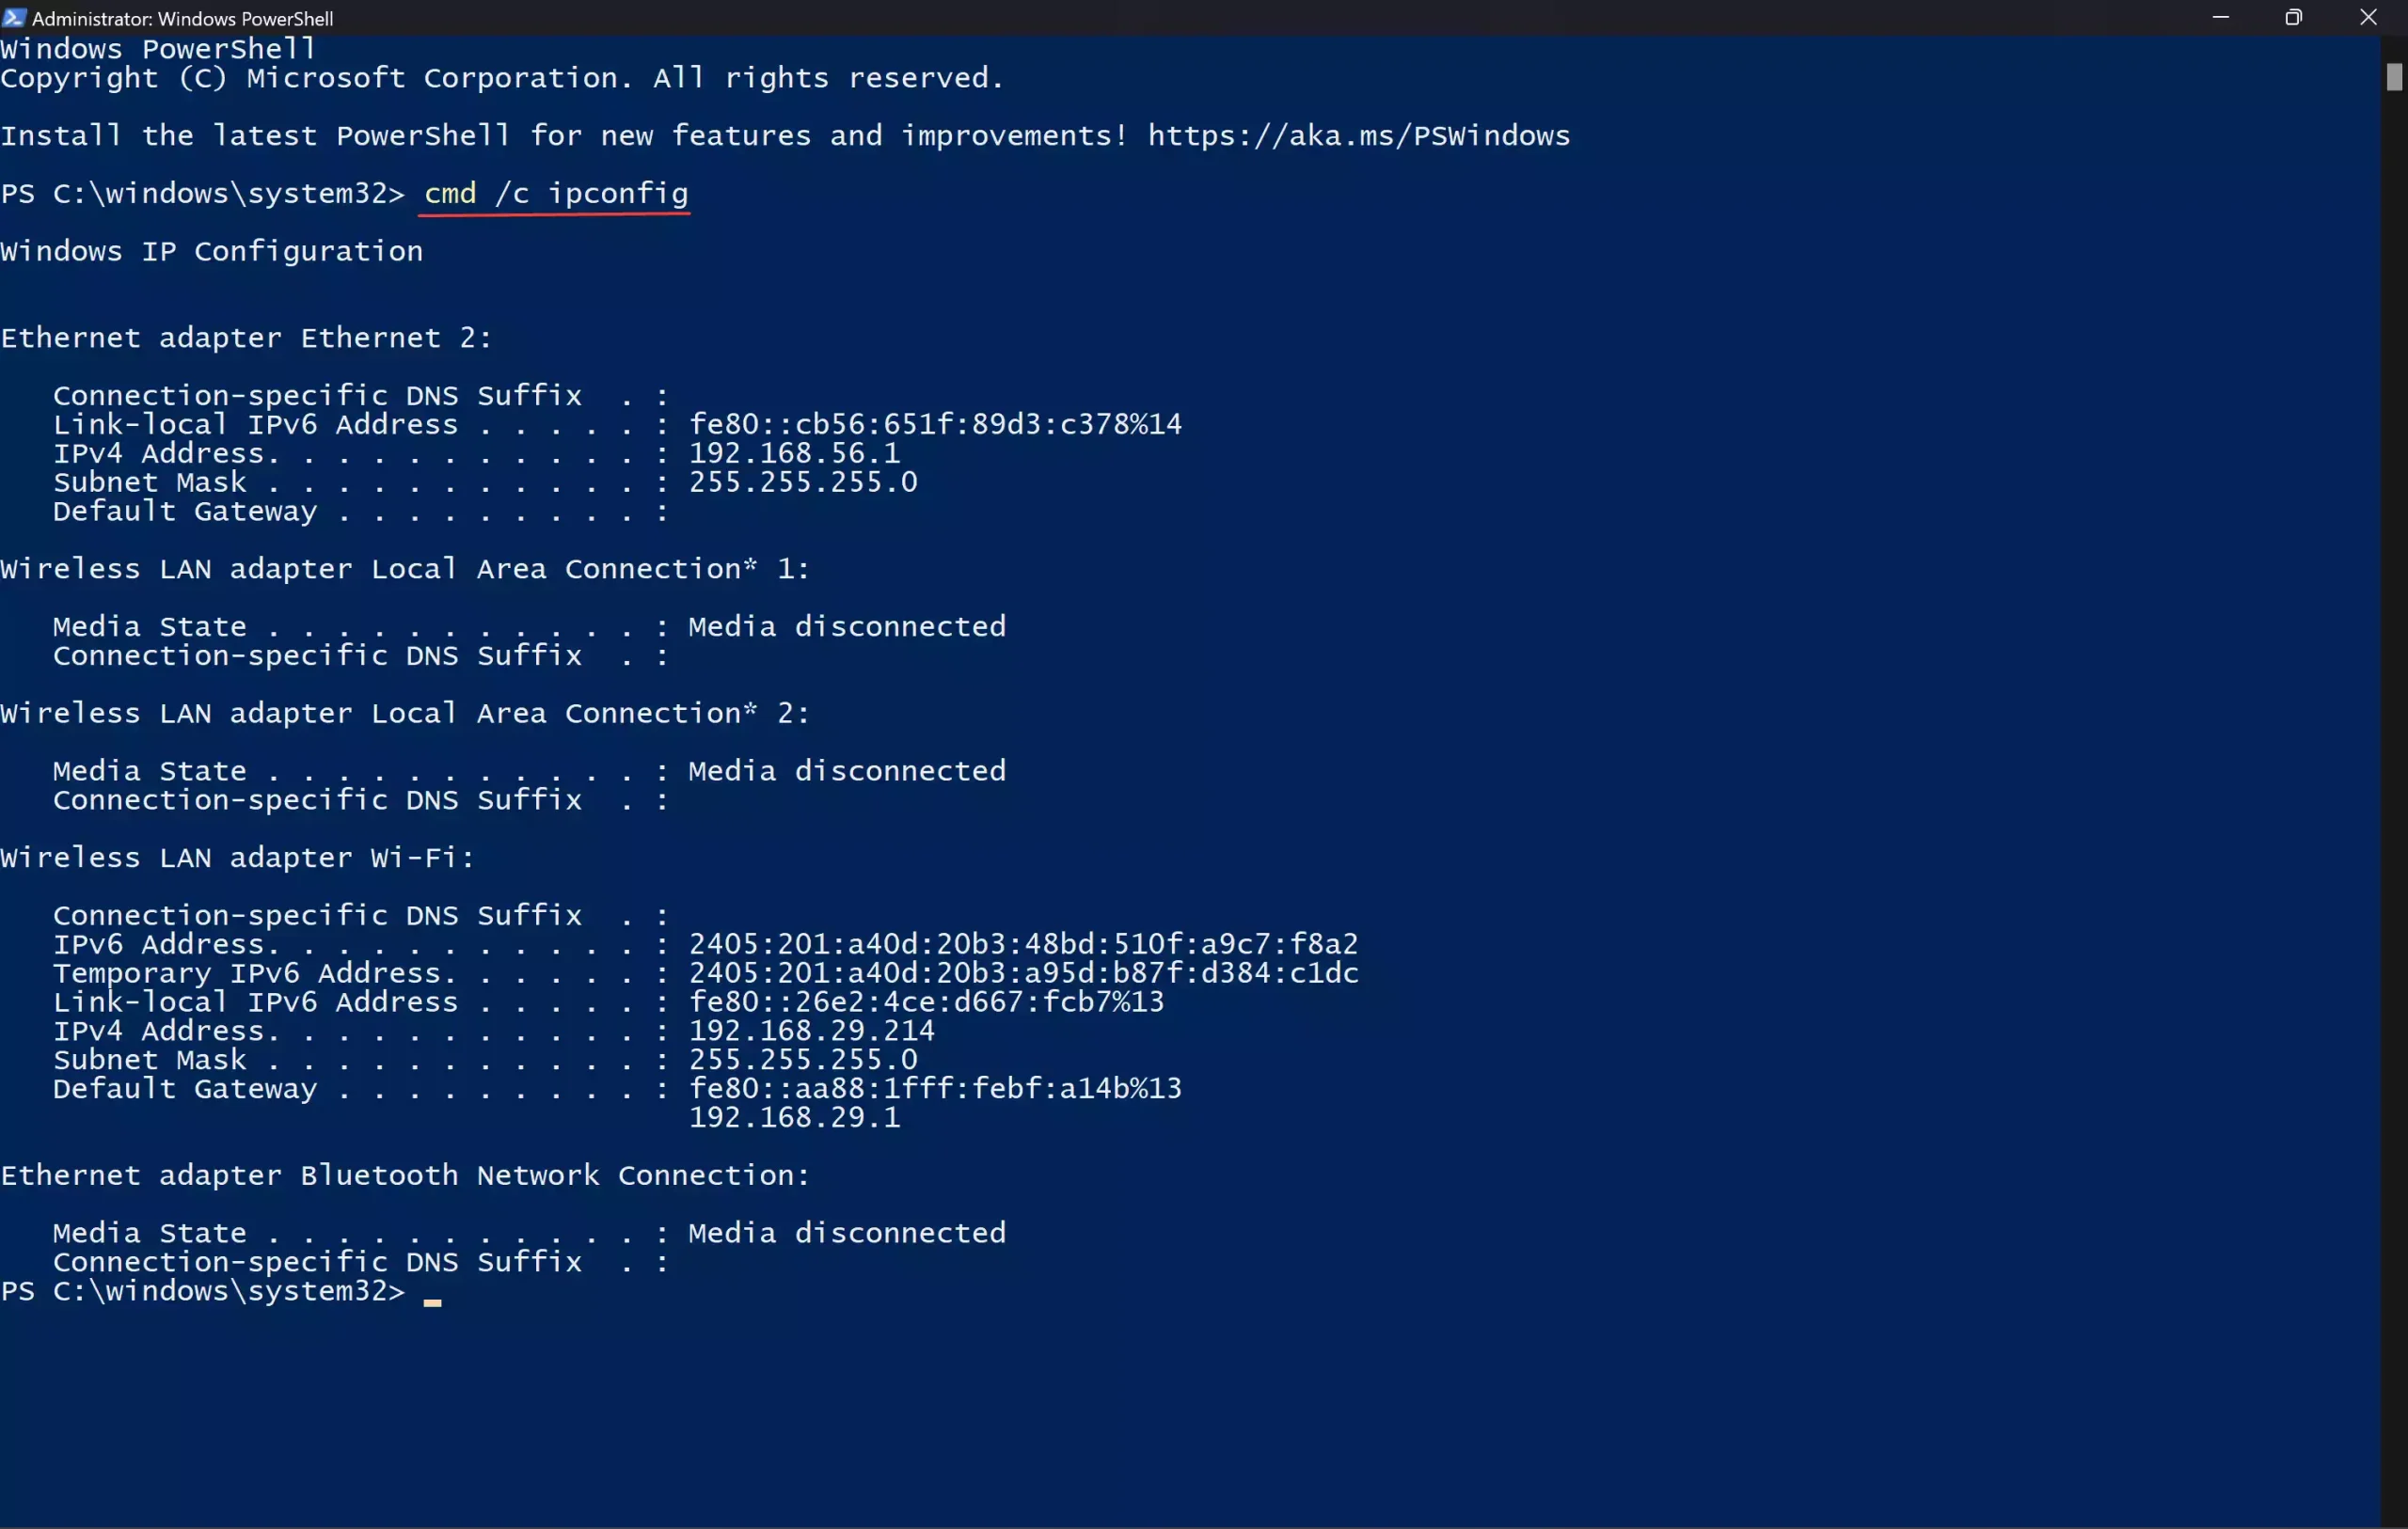
To run Command Prompt specific commands in PowerShell, simply prepend “cmd /c” before the command. For example, if you want to use the “ipconfig” command, which is specific to Command Prompt, you would type:-
cmd /c ipconfig
And then press Enter.
Step 4. By running Command Prompt commands within PowerShell, you can take advantage of PowerShell’s enhanced functionality and features. For example, PowerShell offers robust scripting capabilities, advanced automation options, and access to a vast array of system administration tools and commands.
Additionally, PowerShell supports object-based output, allowing you to manipulate and format command output more effectively. This can be particularly useful when working with complex data sets or performing system administration tasks.
Alternate Method
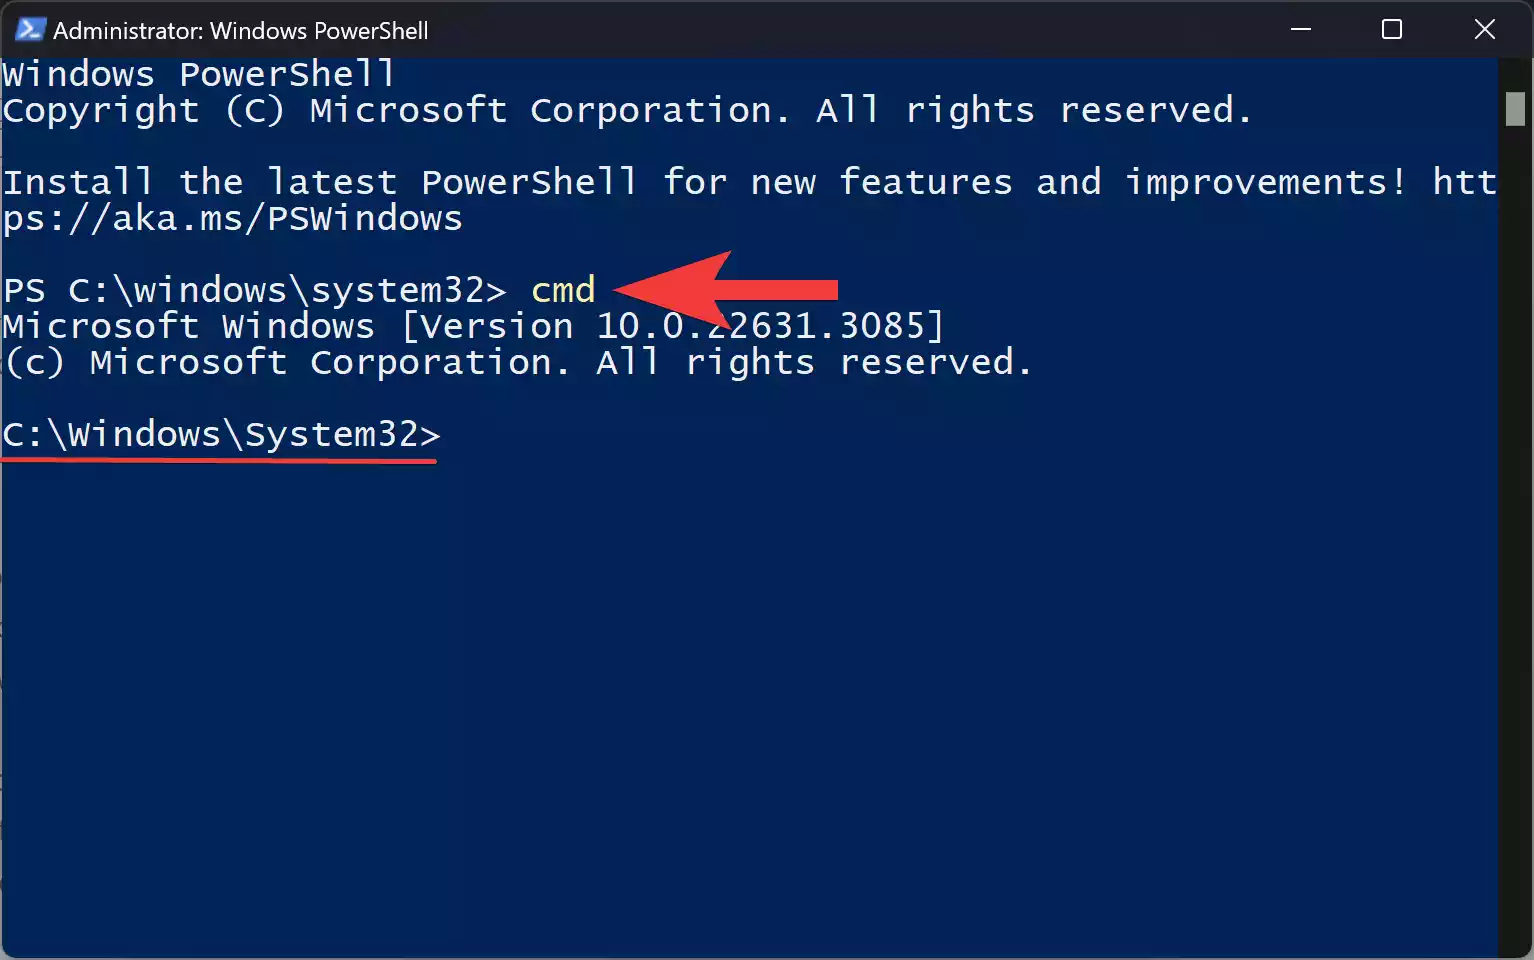
Once PowerShell is open, you can switch to Command Prompt mode by simply typing “cmd” and pressing Enter. This command tells PowerShell to change its prompt to that of Command Prompt, enabling you to enter and execute Command Prompt commands directly within the PowerShell window.
With the prompt switched to Command Prompt mode, you can now enter as many Command Prompt commands as you’d like. Whether it’s basic file operations, network diagnostics, or system configuration tasks, you can leverage the familiar syntax of Command Prompt commands within PowerShell.
After running your Command Prompt commands, you may want to return to PowerShell mode to execute PowerShell commands or tasks. To do this, simply type “exit” and press Enter. This command will exit Command Prompt mode and return you to the default PowerShell prompt.
Conclusion
Transitioning from Command Prompt to PowerShell on Windows 11 opens up a world of possibilities for users seeking enhanced command-line capabilities. By following the simple steps outlined in this guide, you can seamlessly run Command Prompt commands within PowerShell and leverage its advanced features to streamline your workflow and accomplish tasks more efficiently. So, why wait? Start exploring the power of PowerShell today!
Also Read: How to Run PowerShell Commands in Command Prompt on Windows 11?