In Excel, Microsoft uses Calibri as the default font and 11px size. However, if you want to change the default font in Excel, you can use the program settings. For some reason, if you need an alternate method, you can use REGEDIT or GPEDIT.
Why should I Change the Default Font in Excel?
There may be several reasons you might want to change the default font in the MS Office Excel program, such as you might be bored with the same old font. Using a new default font may be just what you need to revive your motivation. Also, many companies have their own fonts that they use as part of their branding strategy.
Whatever the reason may be, changing the default font in Excel is very easy, and you just need to do it once. The new default font is applied when you create a new blank worksheet or workbook.
In this gearupwindows article, we will guide you on setting the default font for the Excel program. We will use the Excel settings to change the font. We will also show you to configure the same using Registry Editor and Local Group Policy Editor if you are using Windows 11 or 10.
How to Set Default Font in Excel using Program Settings?
To set the default font in Excel using its settings, do the following:-
Step 1. Open a new Excel Worksheet.
Step 2. Then, click on File.
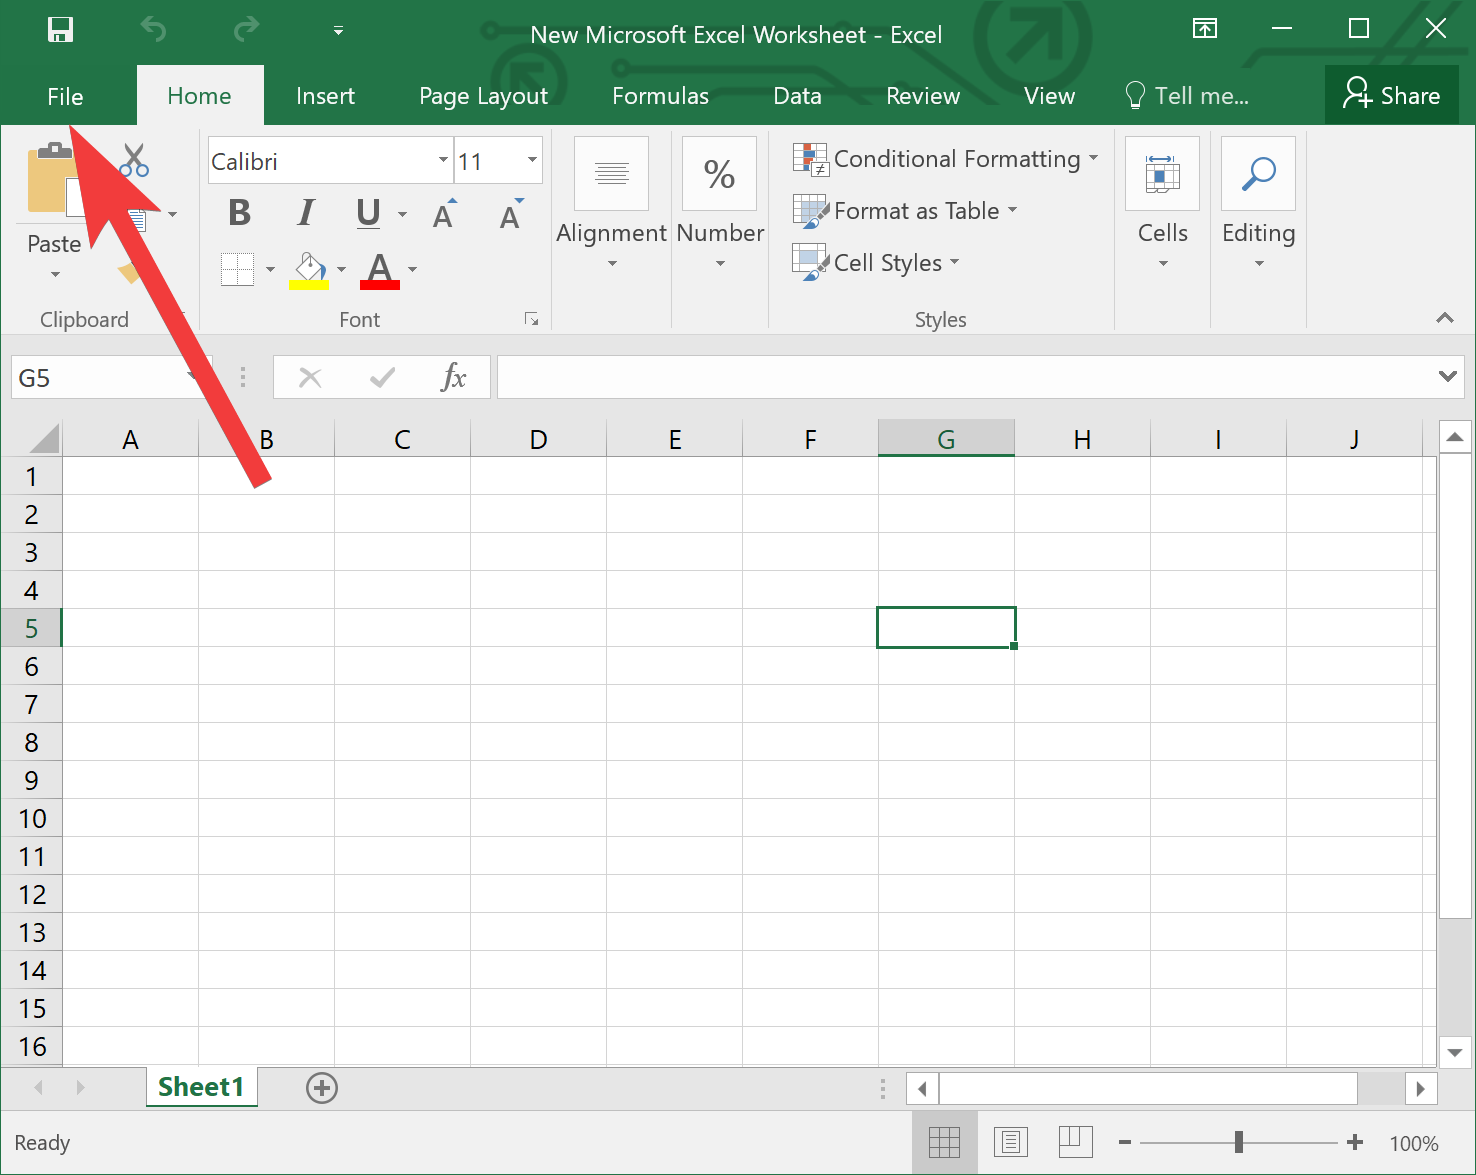
Step 3. After that, click Options.
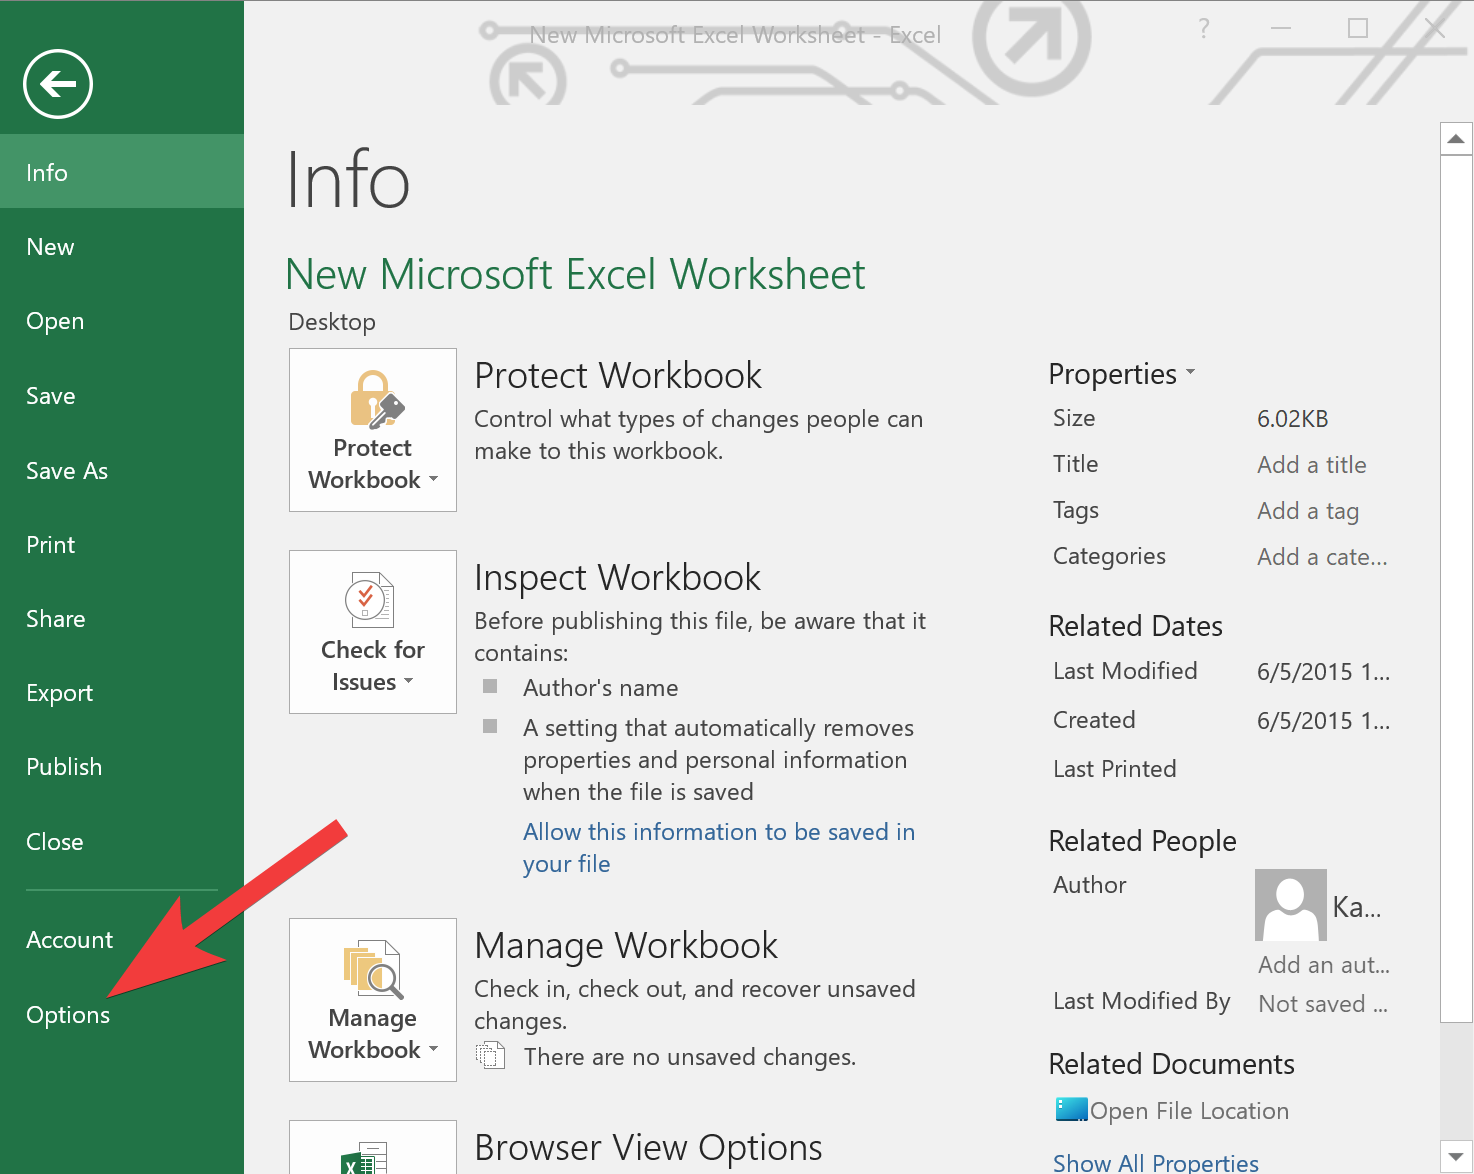
Step 4. When you’re done, the Excel Options window will appear on your computer. Select General tab in the left sidebar. Then under the “When creating new workbooks” section, choose the font and its size according to your needs.
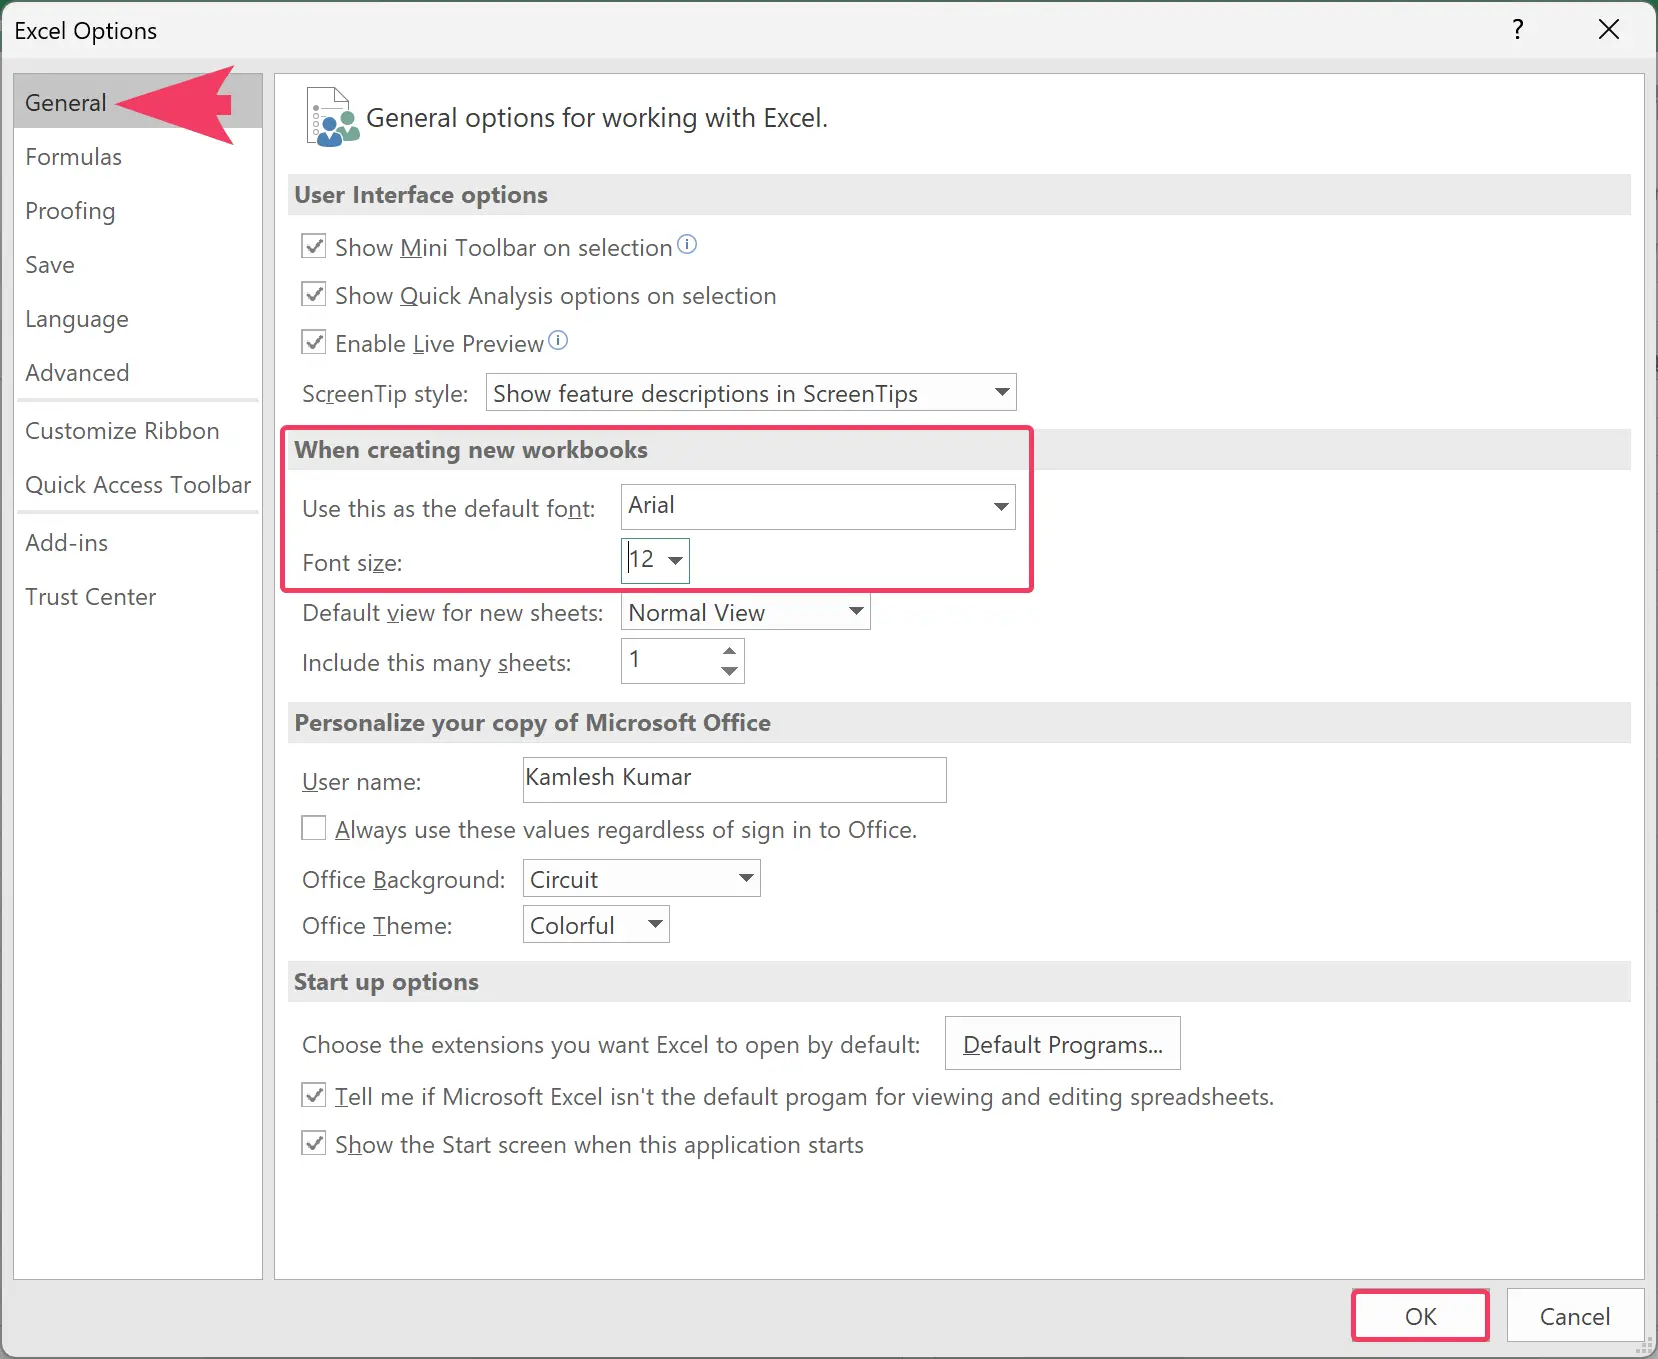
Step 5. Next, click OK.
That’s it. The new default font is applied when you create a new blank worksheet or workbook.
How to Set the Default Font in Excel using Registry Editor?
To set the default font in Excel using Windows 11 or 10 Registry Editor, do the following:-
Step 1. First, open the Registry Editor.
Step 2. Then, navigate to the following path on the left side of Registry Editor:-
HKEY_CURRENT_USER\Software\Policies\Microsoft\office\16.0
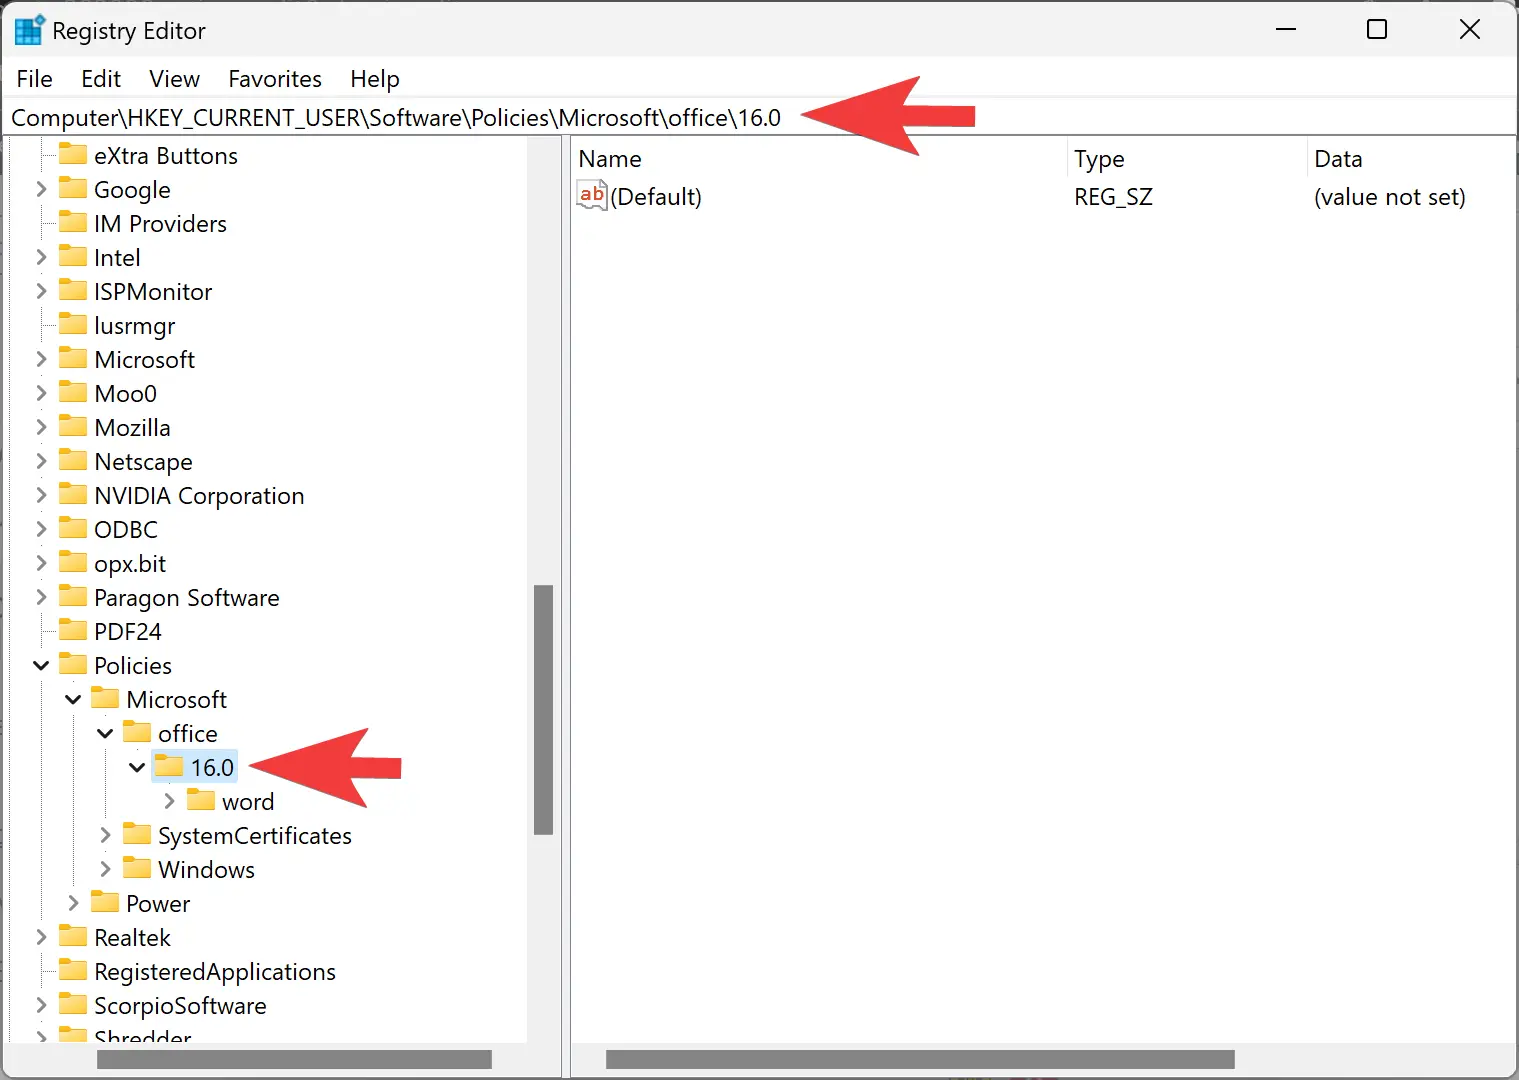
Step 3. Next, right-click on the 16.0 folder and select New > Key.
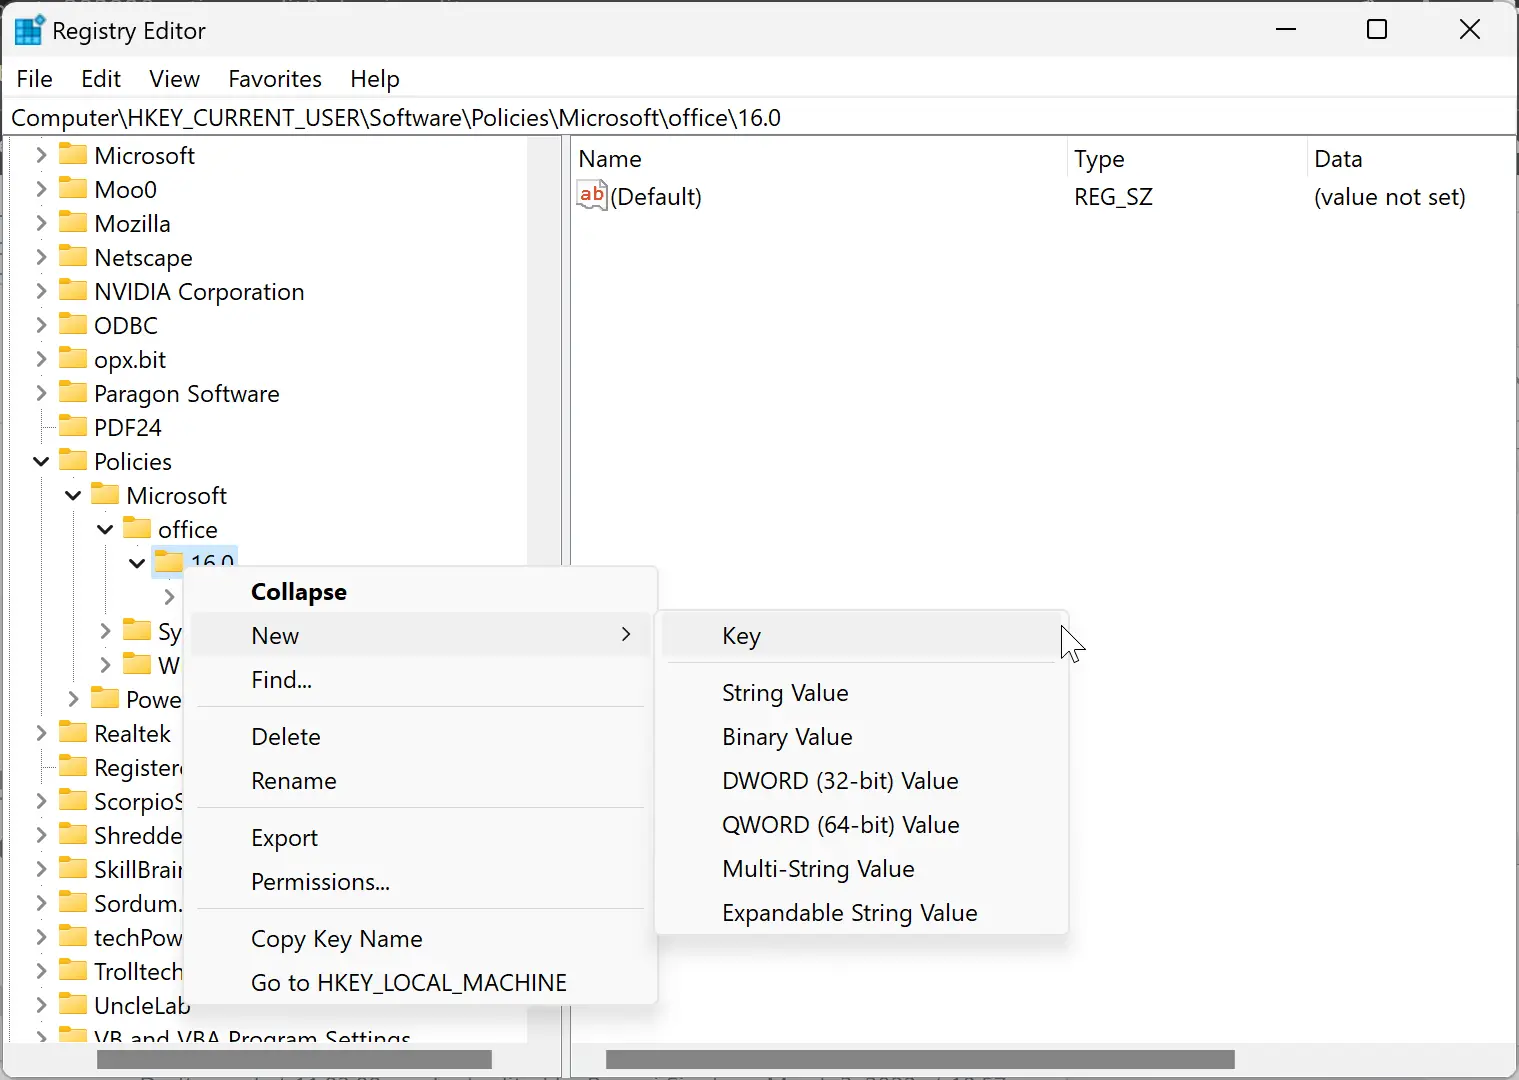
Step 4. Name the newly created key as excel.
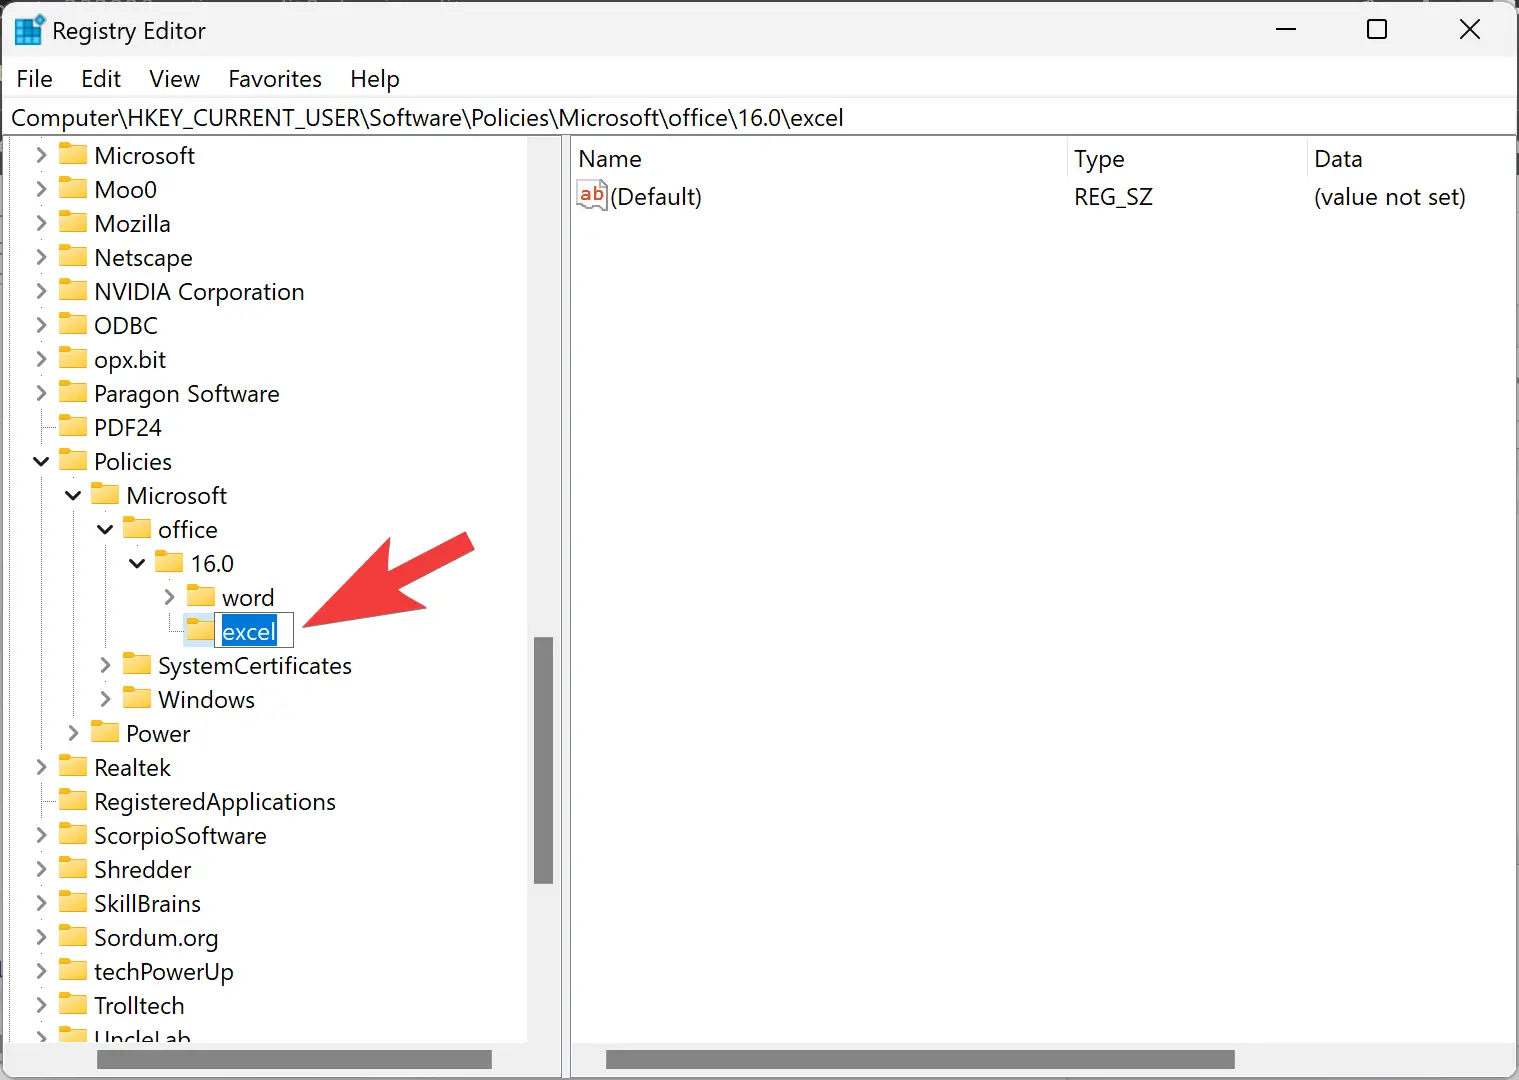
Step 5. Now, right-click the excel folder and pick New > Key. Name the newly created key as options.

Step 6. Next, right-click on the options key and choose New > String Value.
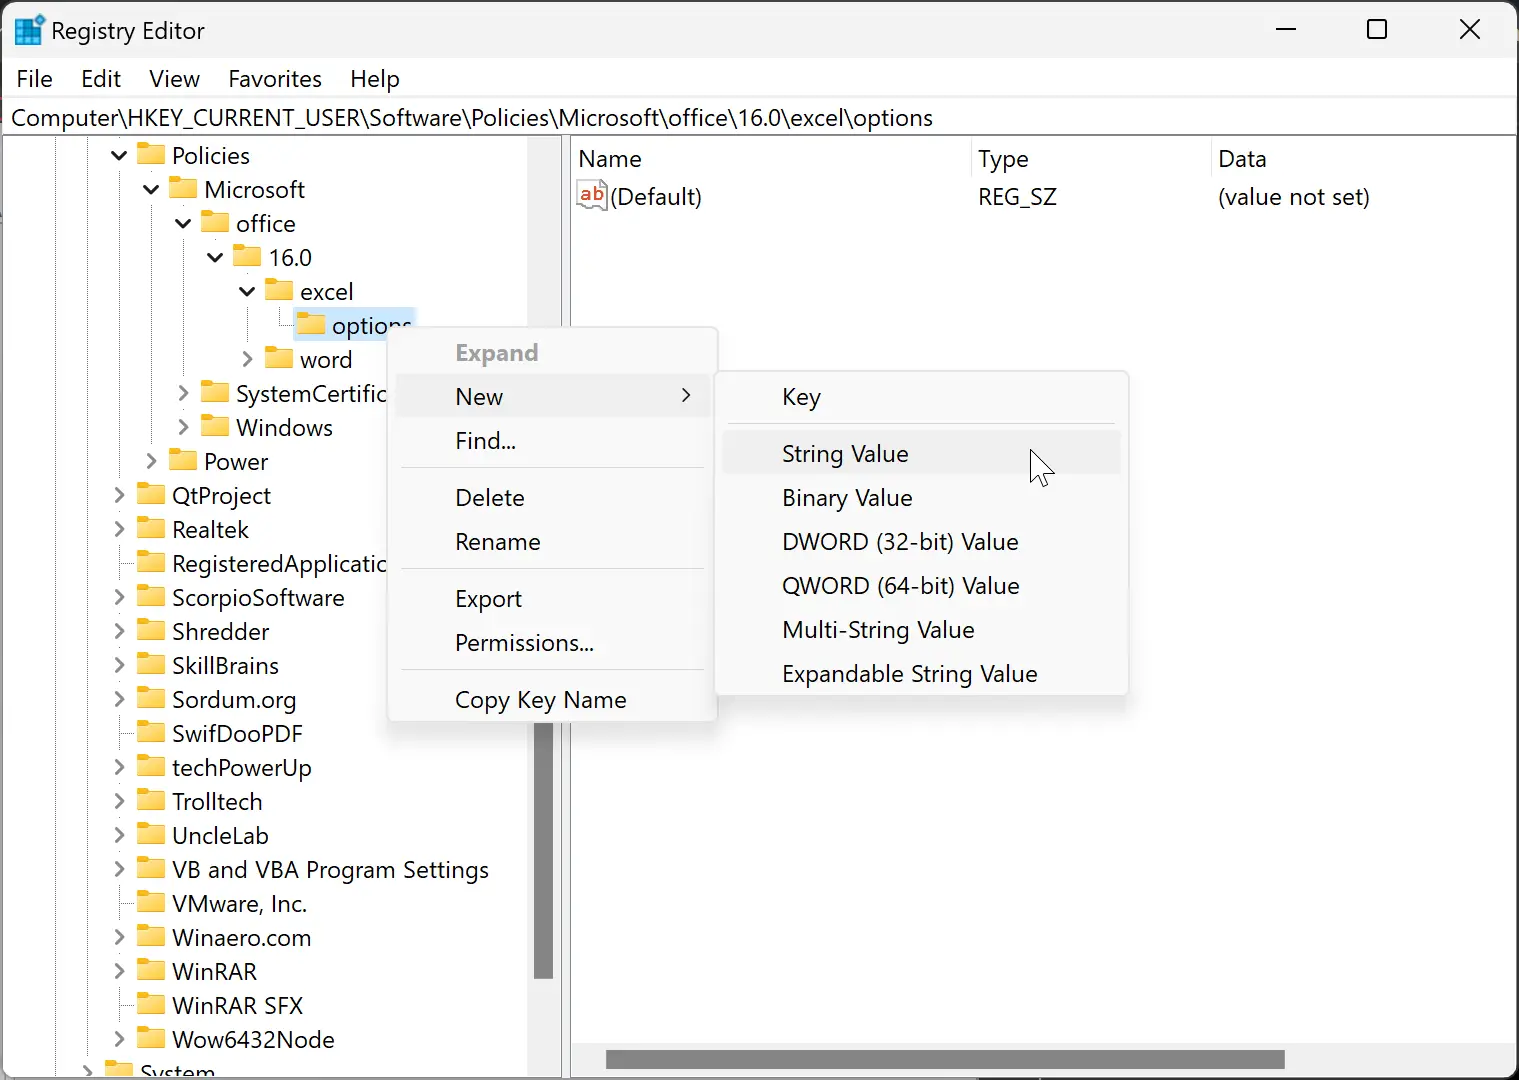
Step 7. Name the newly created REG_String font.
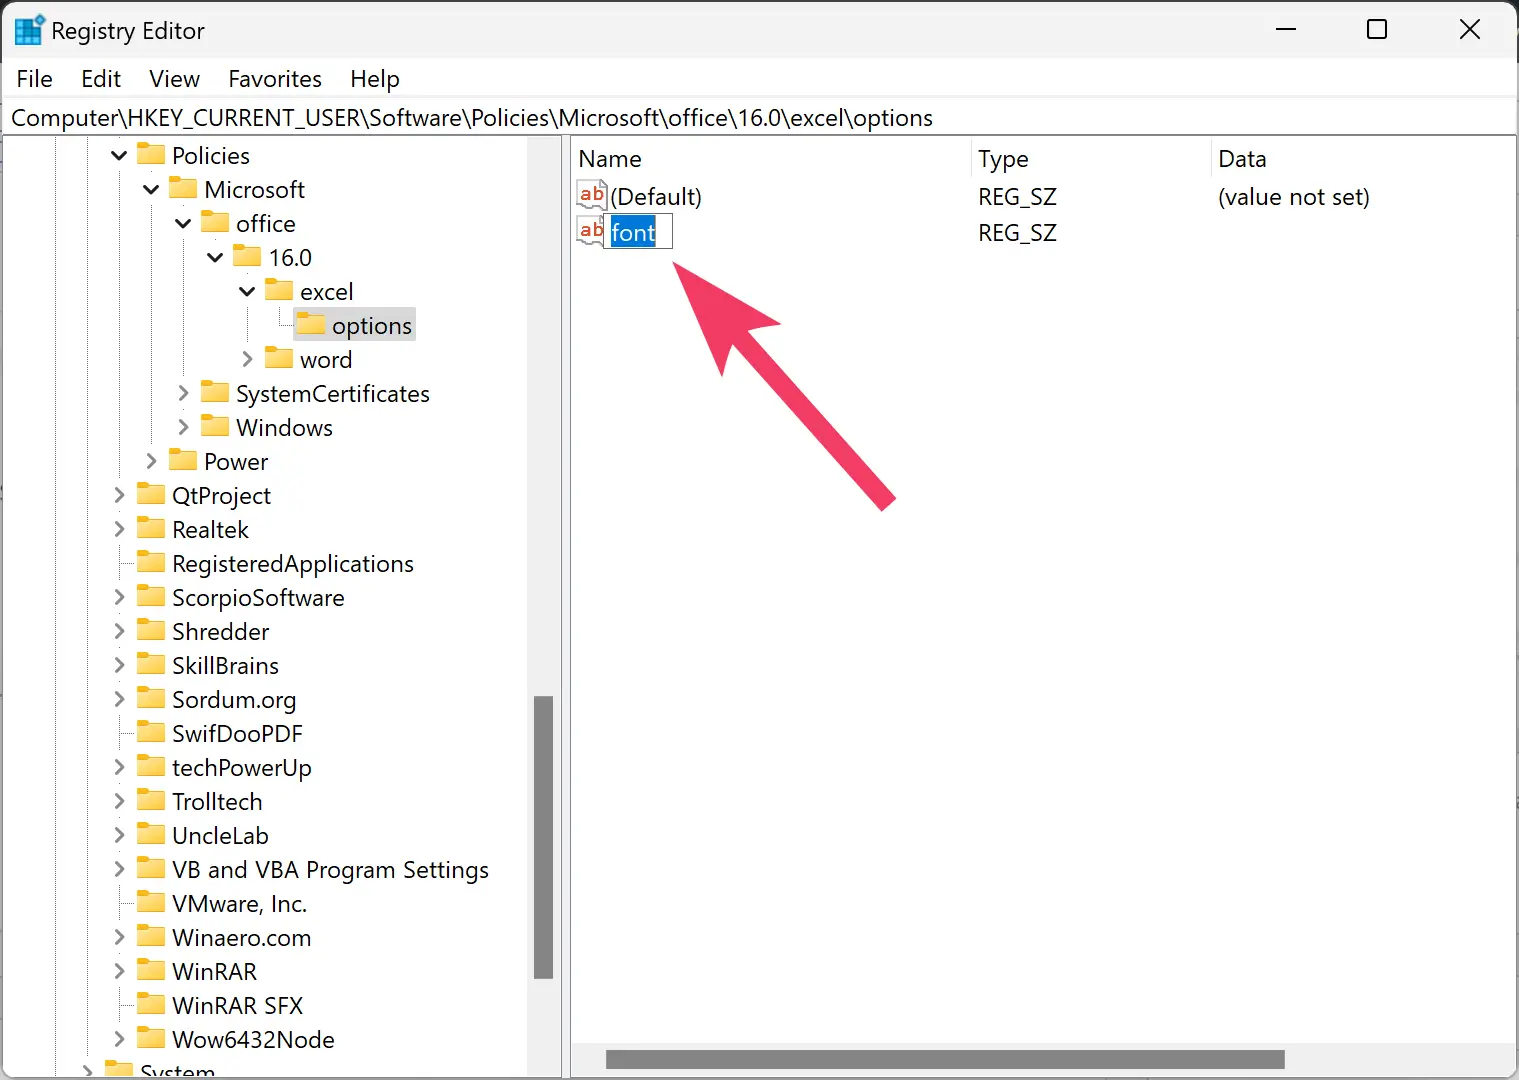
Step 8. After that, double-click on the font String Value and set the Value data in the following format:-
font-name, font-size
For example, to set Arial at 12px, you need to enter the Value data as Arial, 12.
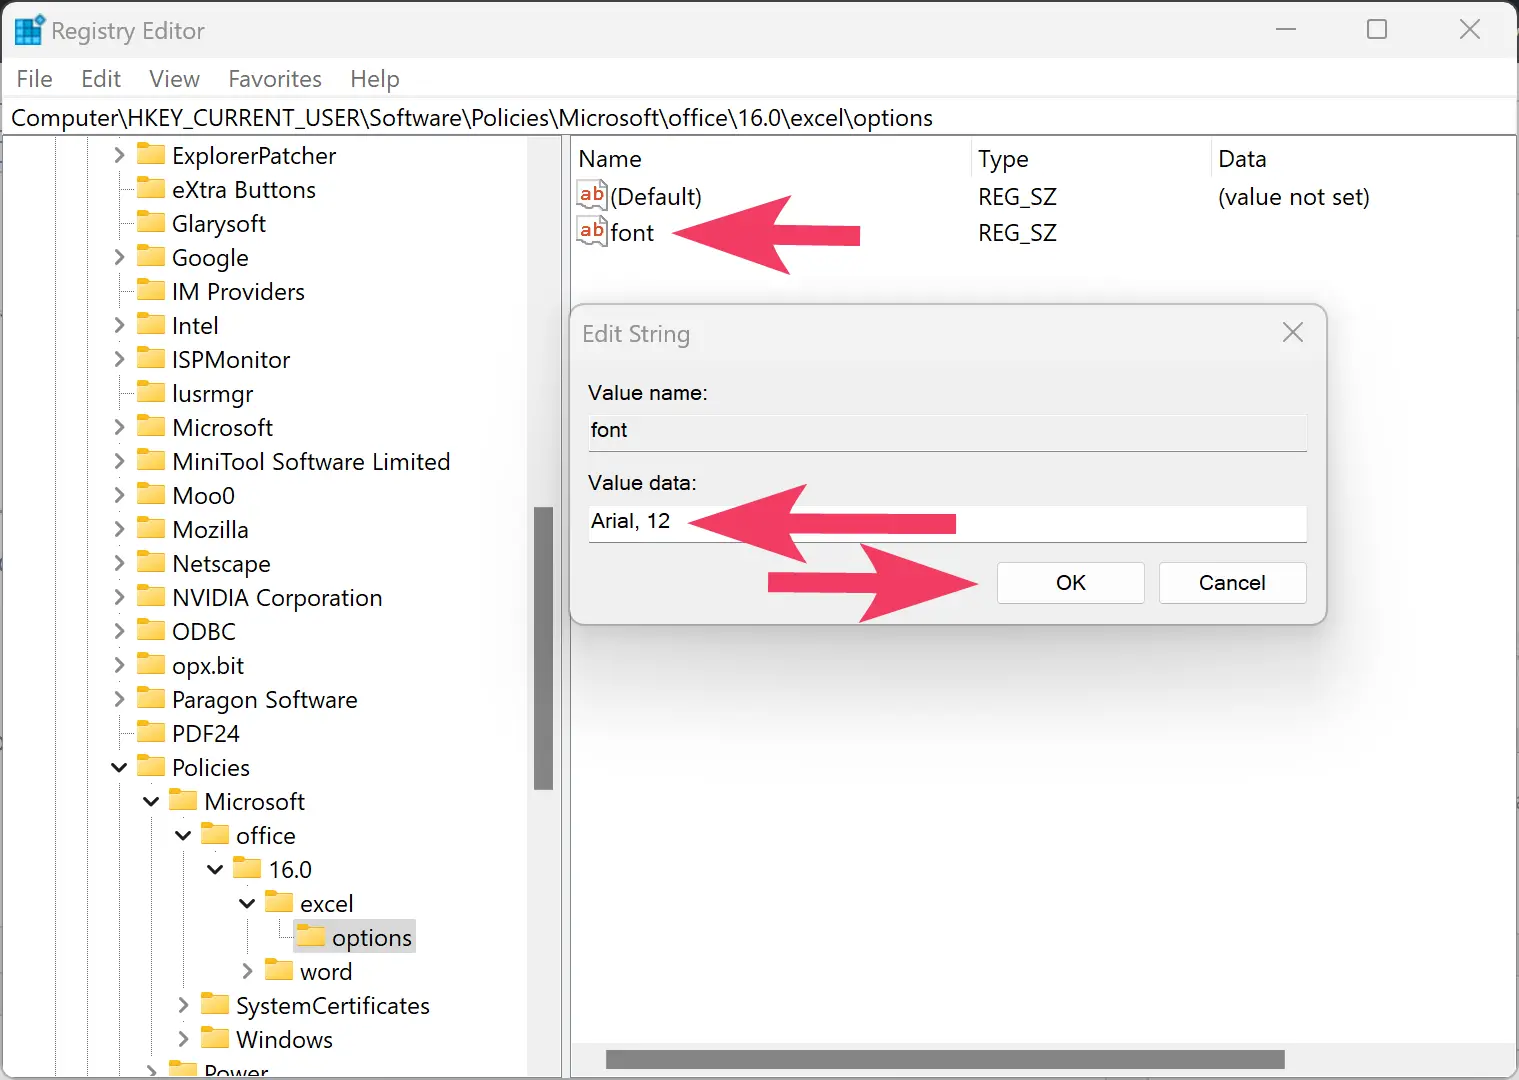
Step 9. Click OK.
Step 10. Finally, restart your computer to apply the change.
How to Change Default Font in Excel using Group Policy Editor?
If your Windows 11 or 10 PC supports Local Group Policy Editor, use the following steps to set or change the default font in Excel:-
Step 1. Open Local Group Policy Editor.
Step 2. When the Local Group Policy Editor appears on your computer, navigate to the following path:-
User Configuration > Administrative Templates > Microsoft Excel 2016 > Excel Options > General
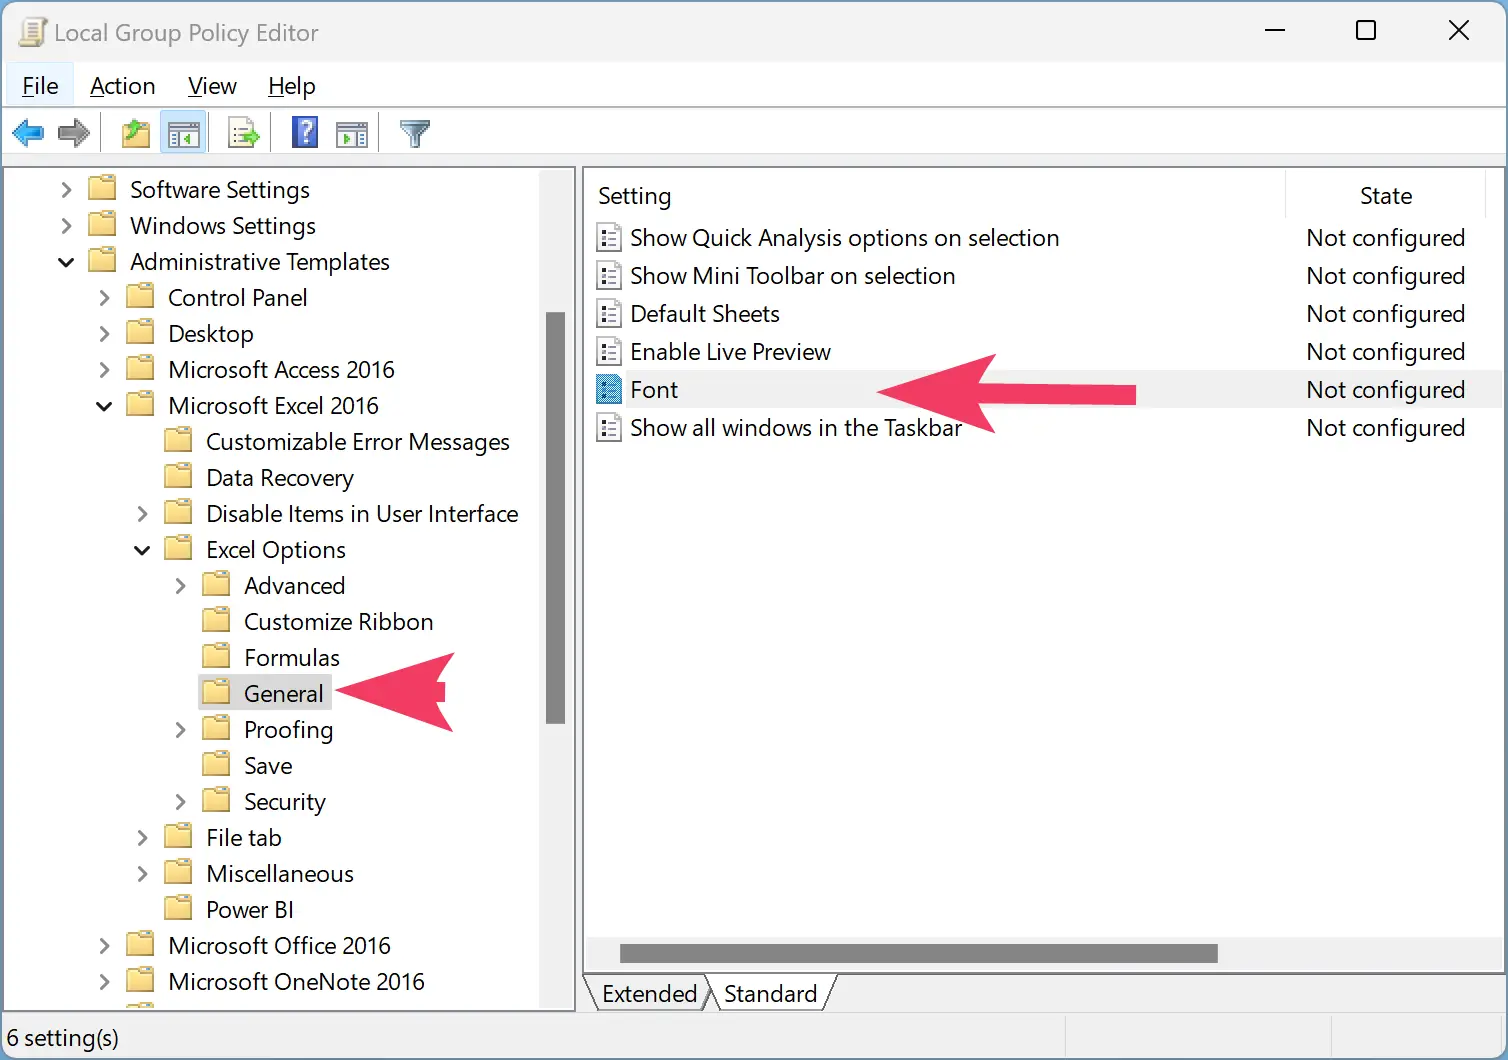
Step 3. Then, double-click on the Font setting on the right side of General and select the Enabled option.
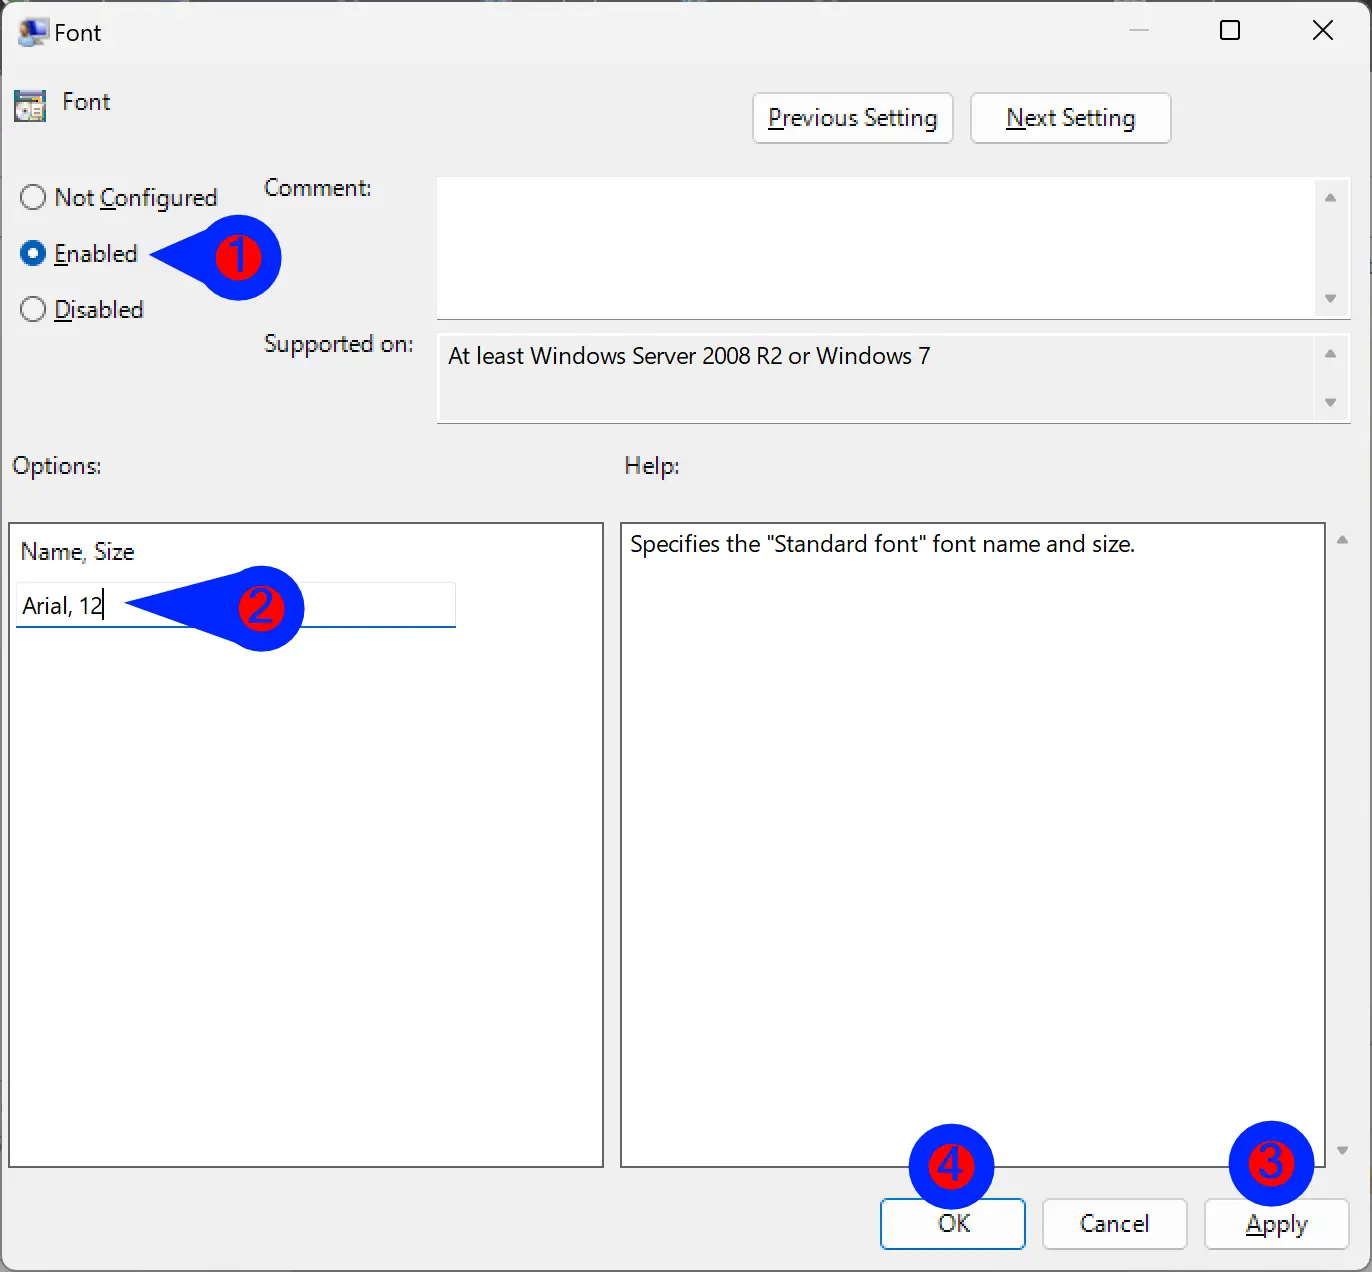
Step 4. Next, enter the font name and size in the following format:-
font-name, font-size
Step 5. Click Apply.
Step 6. Click OK.
Step 7. Finally, restart your computer to apply the changes.
Conclusion
In conclusion, changing the default font in Excel can be useful for various reasons, such as personal preference or branding requirements. Microsoft offers a straightforward method for changing the default font in Excel using program settings. However, for those who need alternate methods, the Registry Editor and Local Group Policy Editor can also be used. Regardless of the method chosen, the new default font will be applied to all new blank worksheets or workbooks, providing a refreshed look and feel for Excel users.