Windows 10 comes with its built-in default PDF viewer, Microsoft Edge. While it is a functional PDF reader, some users prefer to use Google Chrome for its familiarity and additional features. Setting Chrome as your default PDF viewer is a straightforward process and can enhance your PDF viewing experience. In this article, we will guide you through the steps to make Google Chrome your default PDF viewer on Windows 10.
How to Set Google Chrome as Your Default PDF Viewer in Windows 10?
Using Context Menu
To set Google Chrome as your default PDF viewer in Windows 10, follow these steps:-
Step 1. Before you can set Chrome as your default PDF viewer, ensure that you have Google Chrome installed on your computer. If it’s not already installed, you can download it from the official Chrome website.
Step 2. To set Chrome as the default PDF viewer, you’ll first need to locate a PDF file on your computer. You can do this by searching for PDF files in your file explorer or by opening any PDF document you have.
Step 3. Once you’ve located a PDF file, right-click on it. A context menu will appear with various options.
Step 4. In the context menu, hover your cursor over the “Open with” option. A submenu will appear with a list of recommended applications to open the PDF file.

Step 5. From the submenu, select “Choose another app.” This action will open a window that allows you to select a different application for opening PDF files.
Step 6. In the “Choose an app” window, you will see a list of applications installed on your computer that can open PDF files. Scroll down and locate “Google Chrome.” Click on it to select it.
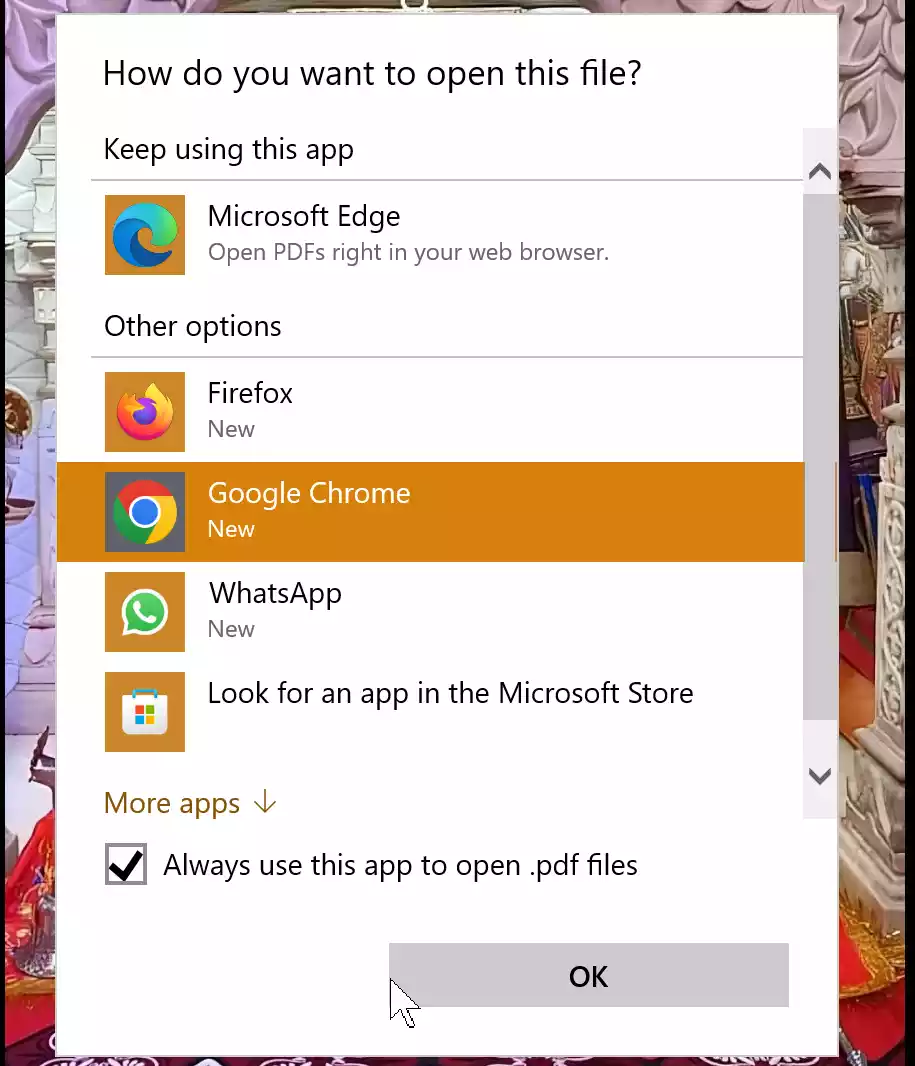
Step 7. Below the list of apps, you will find a checkbox that says, “Always use this app to open .pdf files.” Make sure this box is checked. This will ensure that all PDF files on your computer will be opened with Google Chrome by default.
Step 8. After checking the box, click the “OK” button at the bottom of the window. This action confirms your selection and sets Google Chrome as the default PDF viewer.
Step 9. To ensure that Google Chrome is now your default PDF viewer, double-click on any PDF file on your computer or open a PDF file from a web browser. It should open automatically in Google Chrome.
Using Windows 10 Settings
To set Google Chrome as your default PDF viewer in Windows 10, follow these steps:-
Step 1. Open Windows 10 Settings.
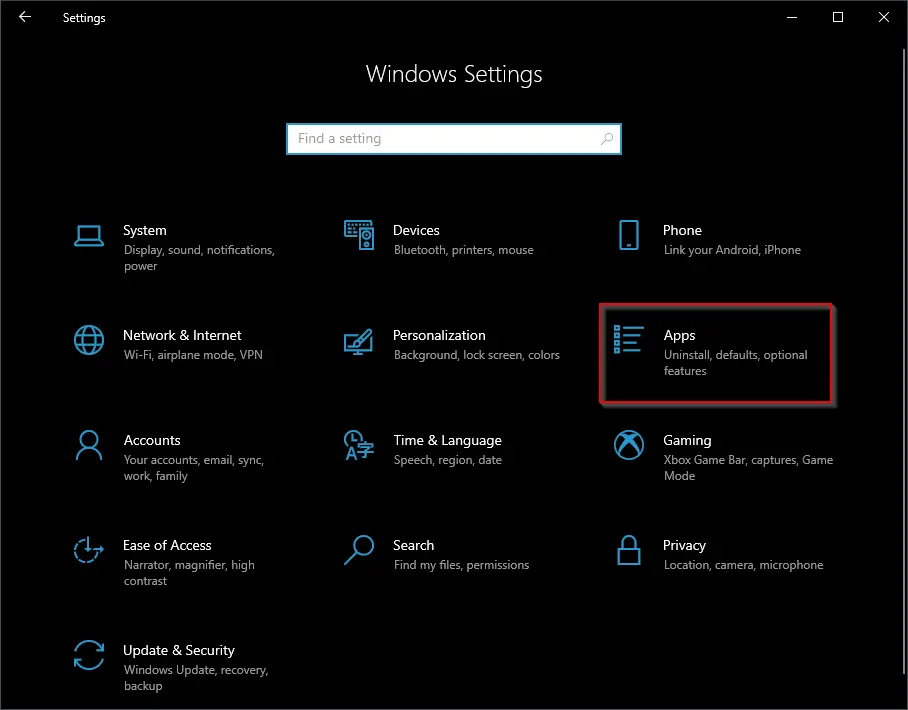
Step 2. Select Apps.
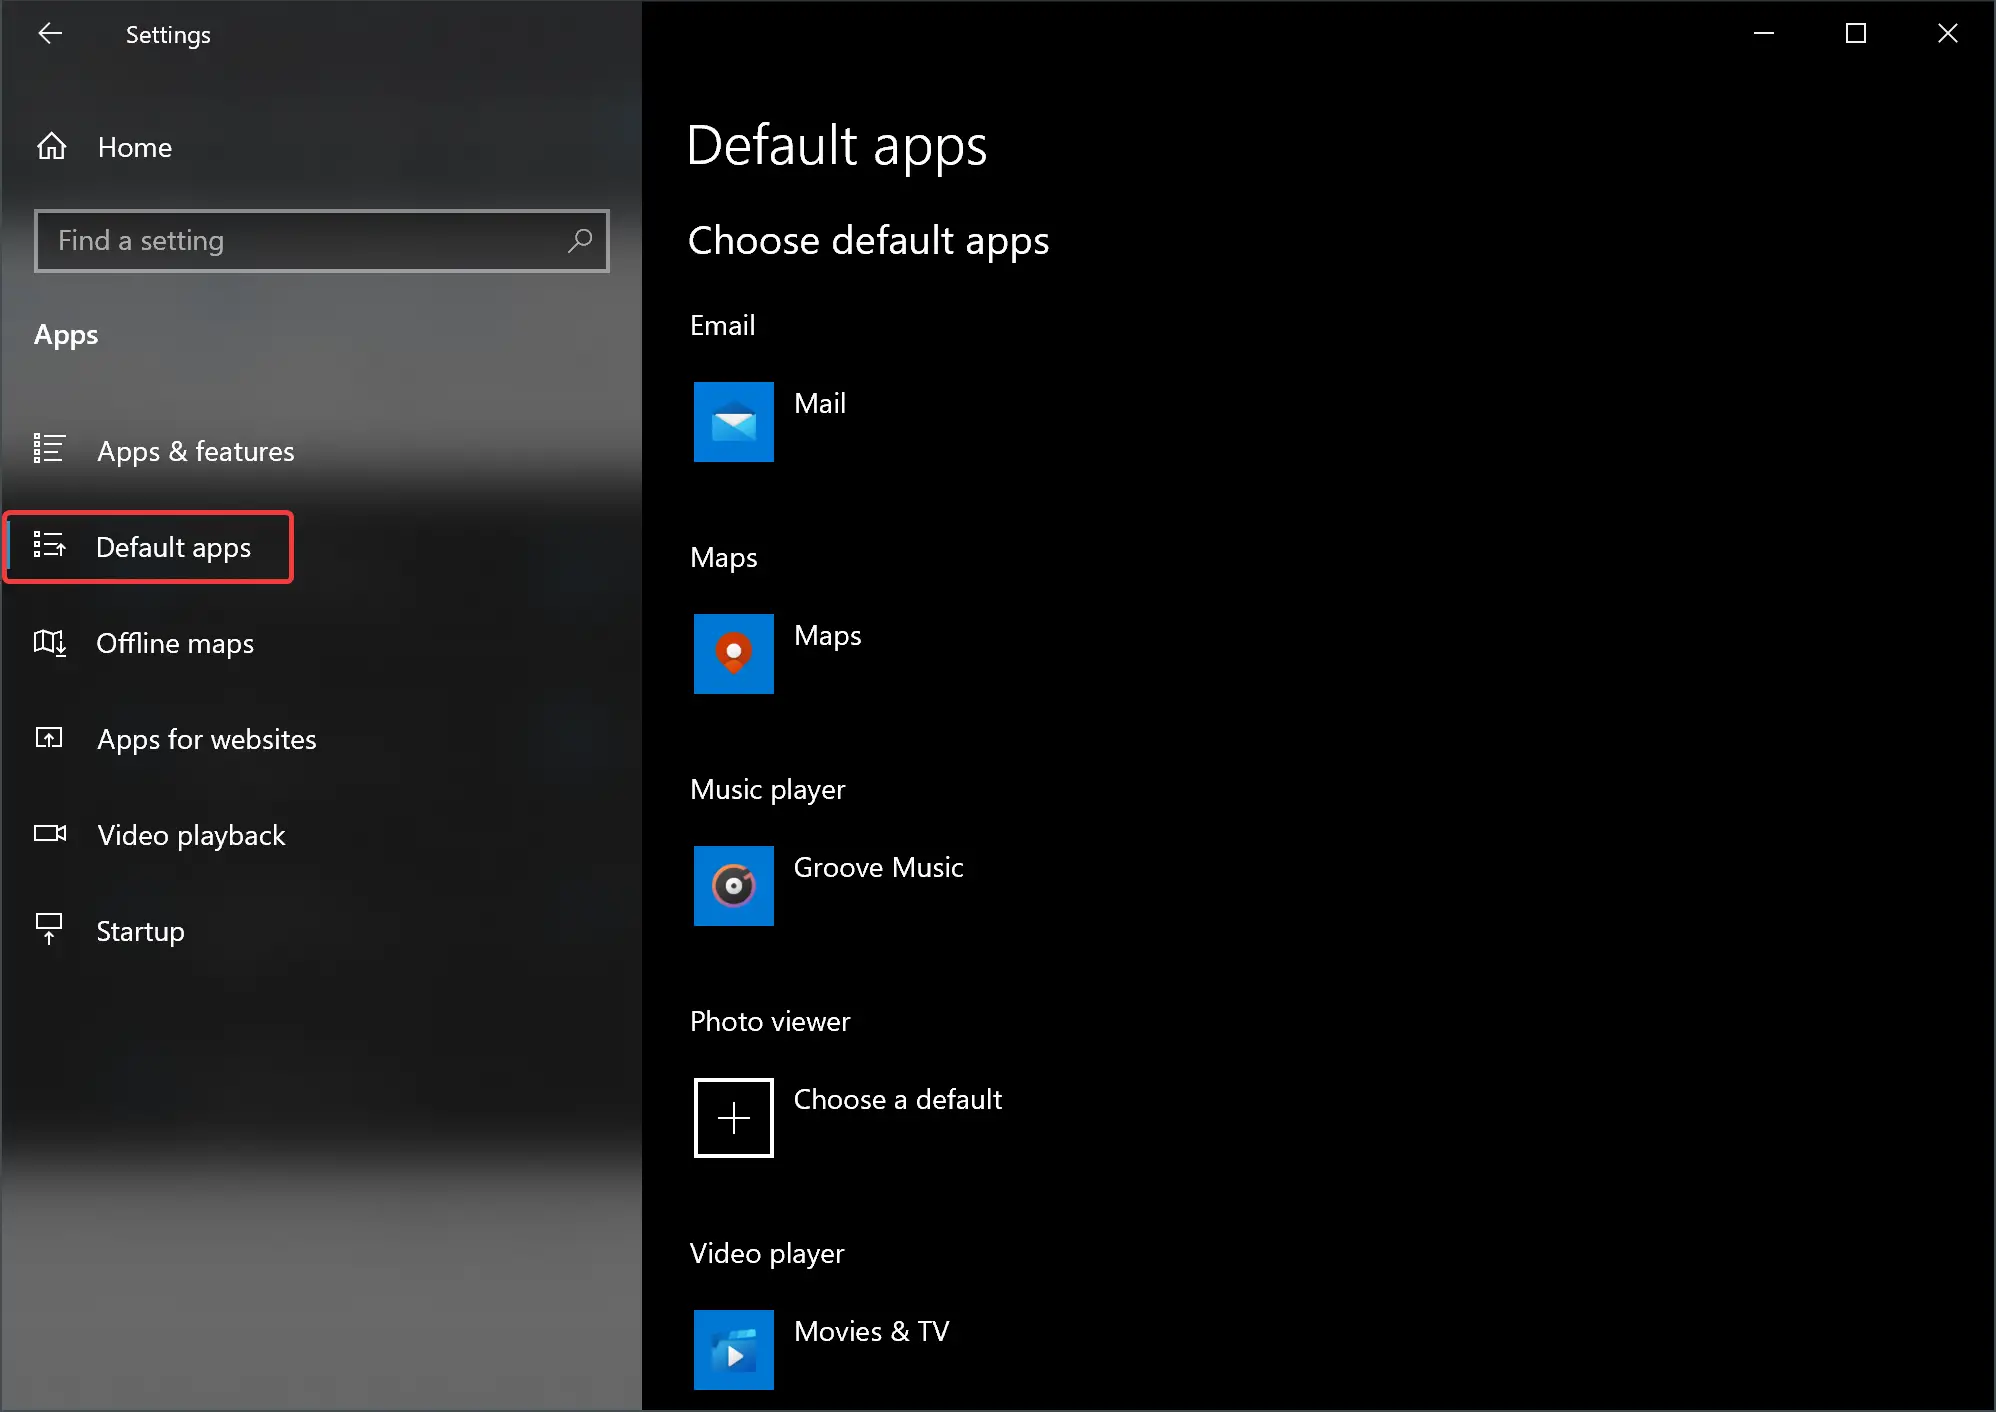
Step 3. Choose “Default apps” in the left sidebar.
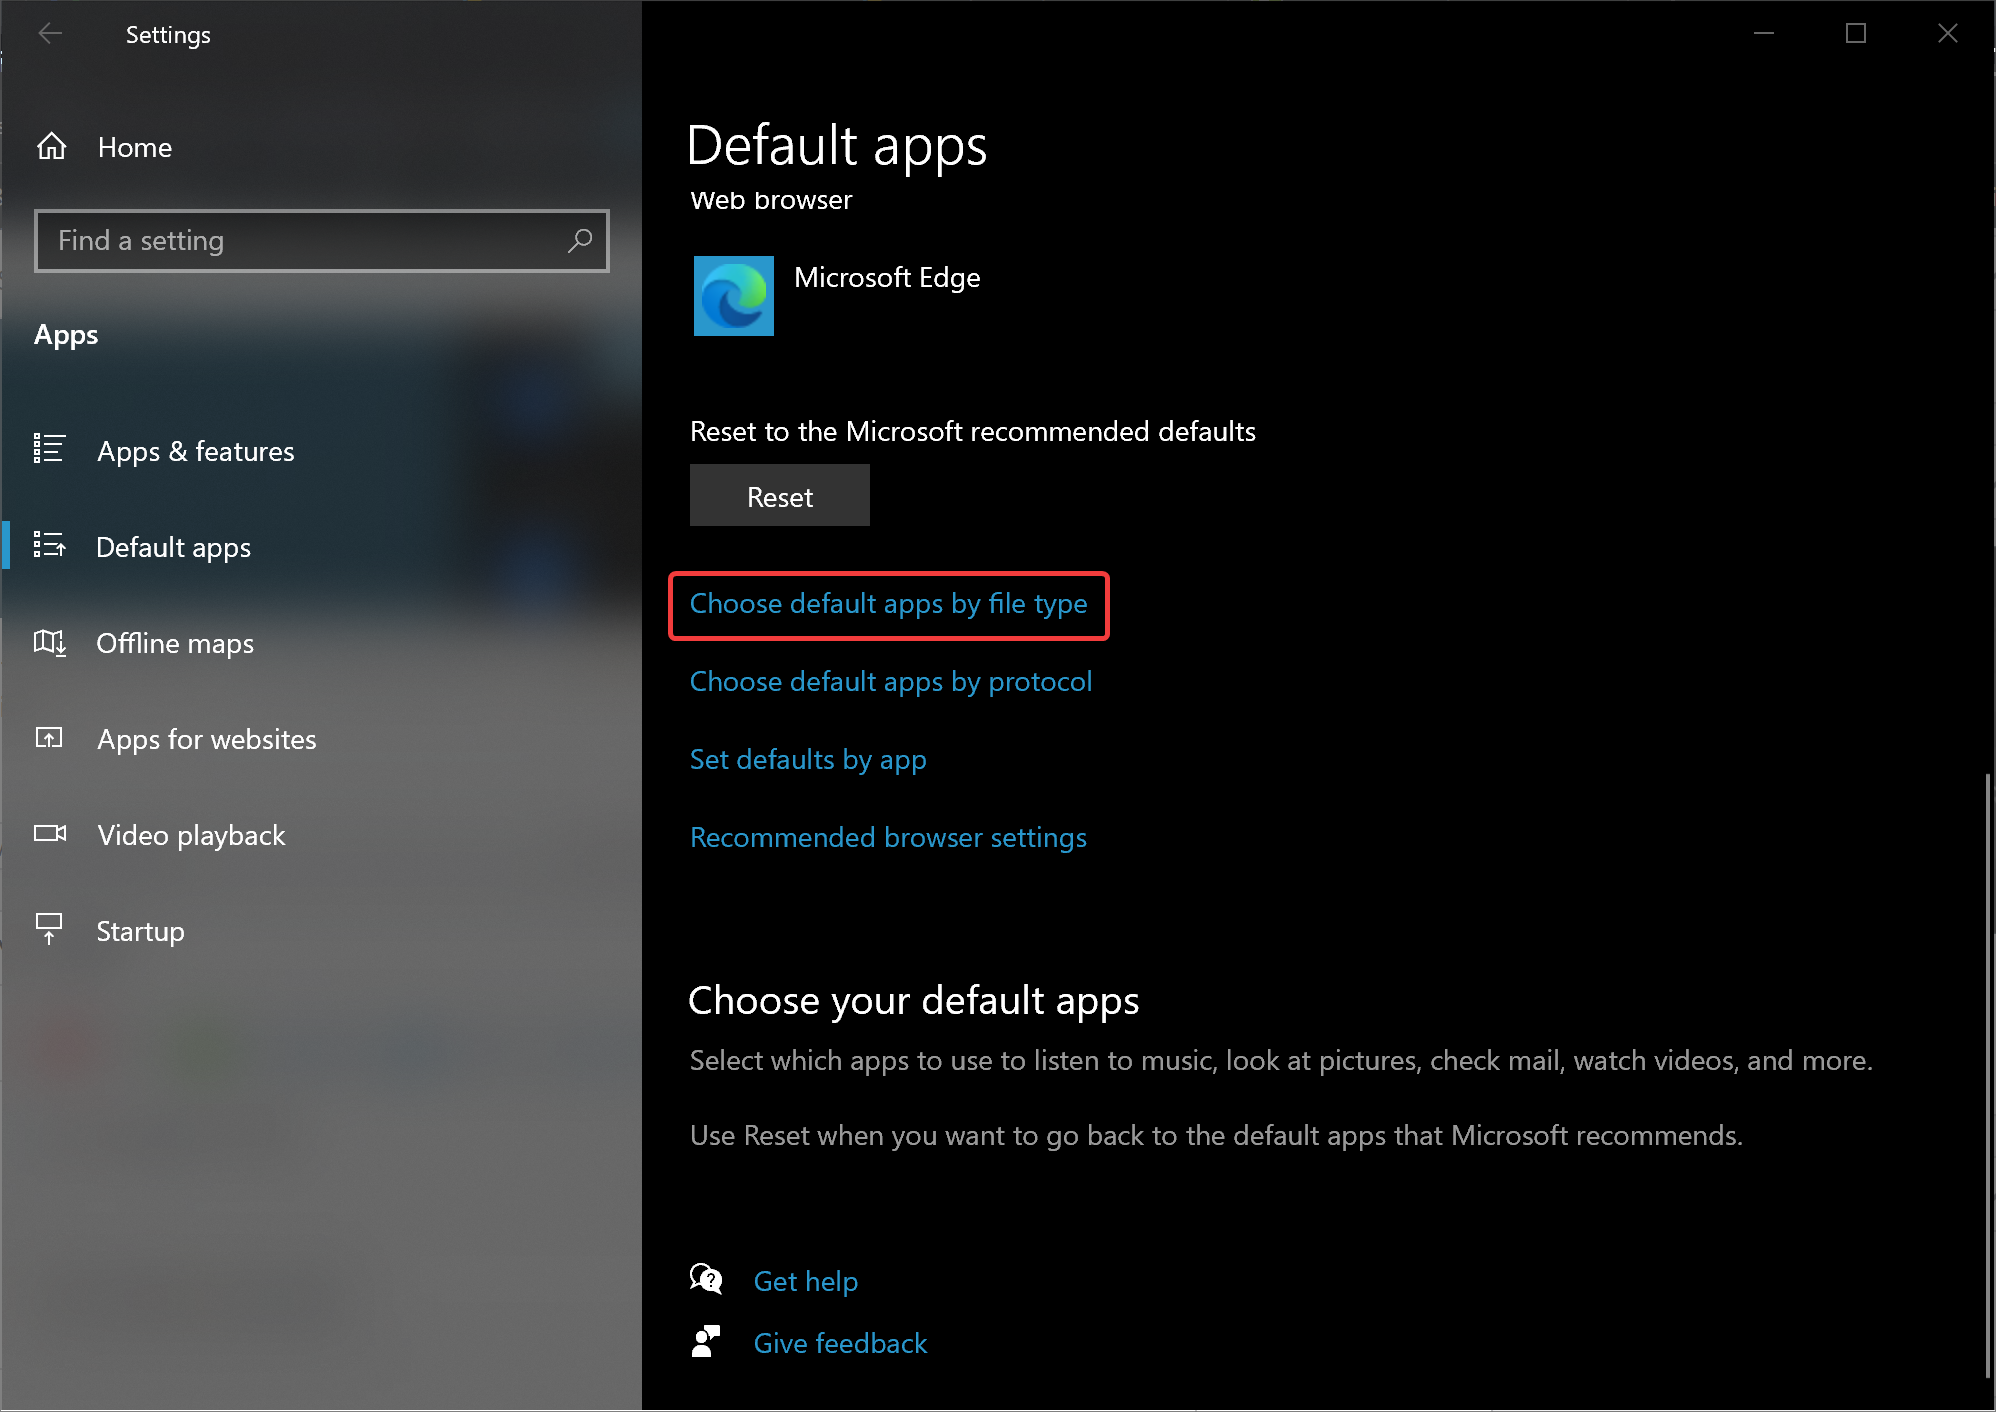
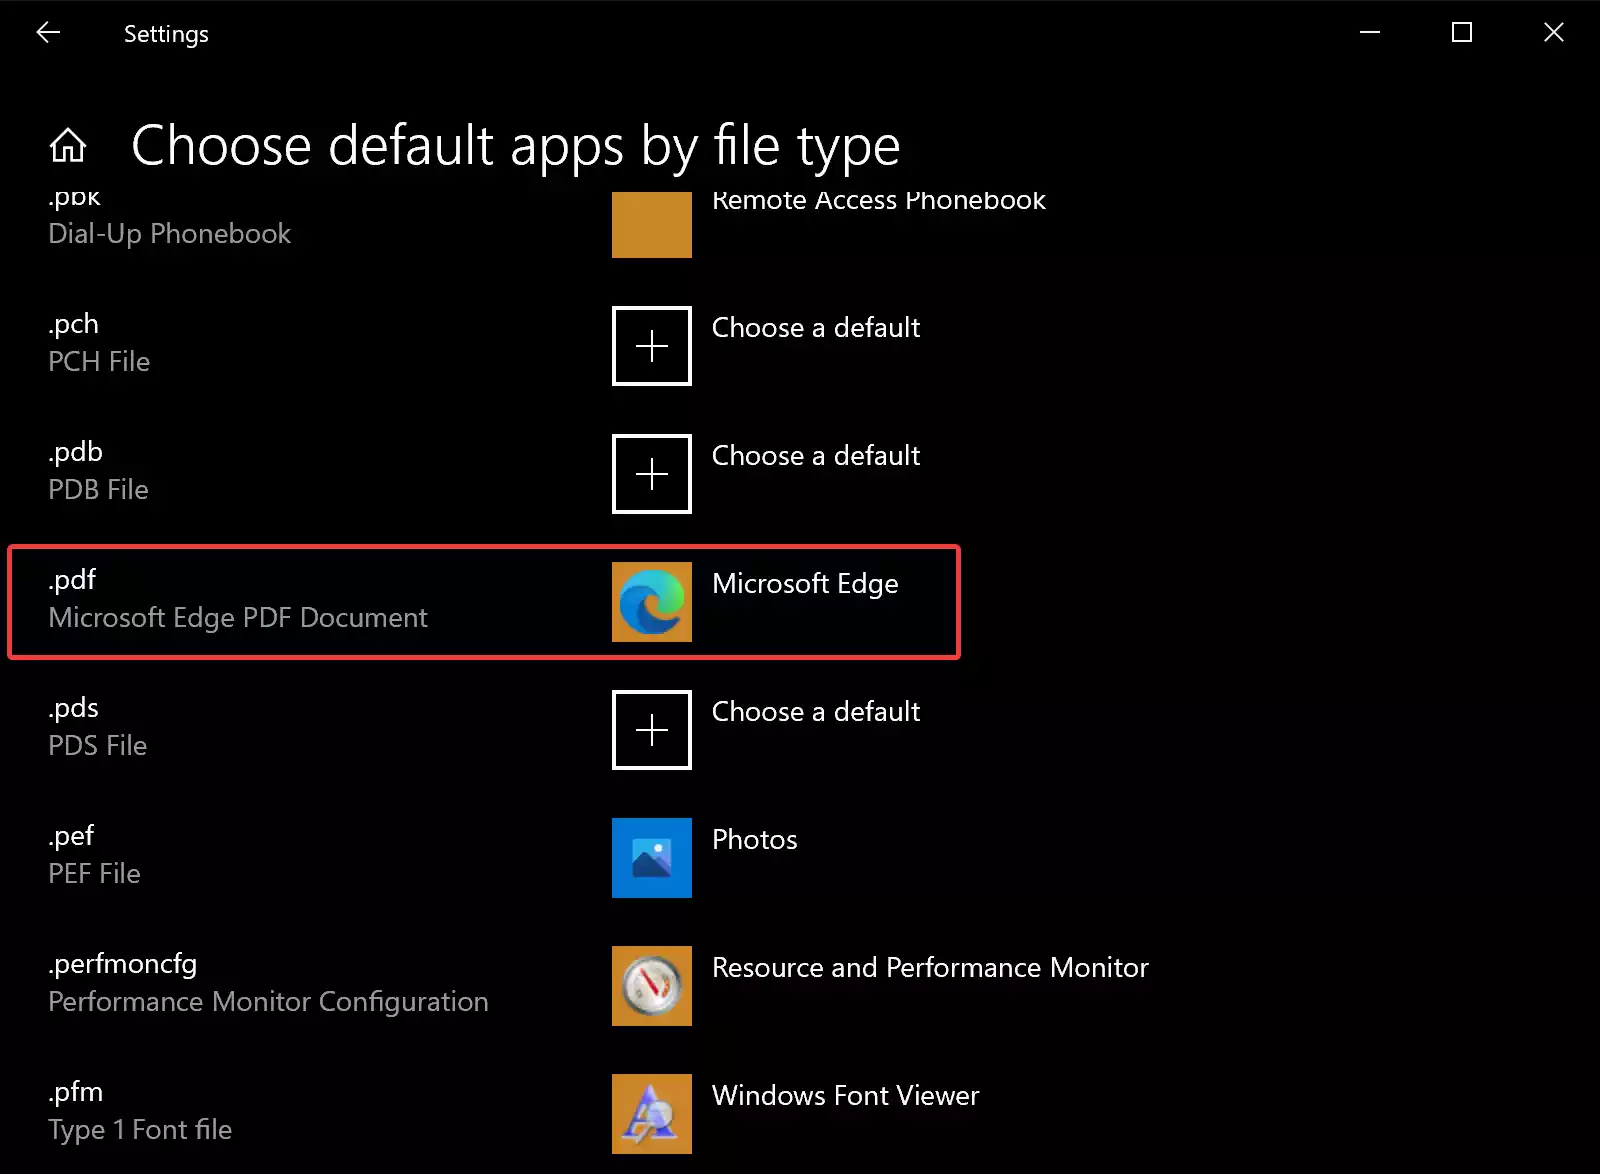
Step 4. Click on the “Choose default apps by file type” link in the right sidebar.
Step 5. Scroll down to the list and click “Microsoft Edge” beside the “.pdf” option.
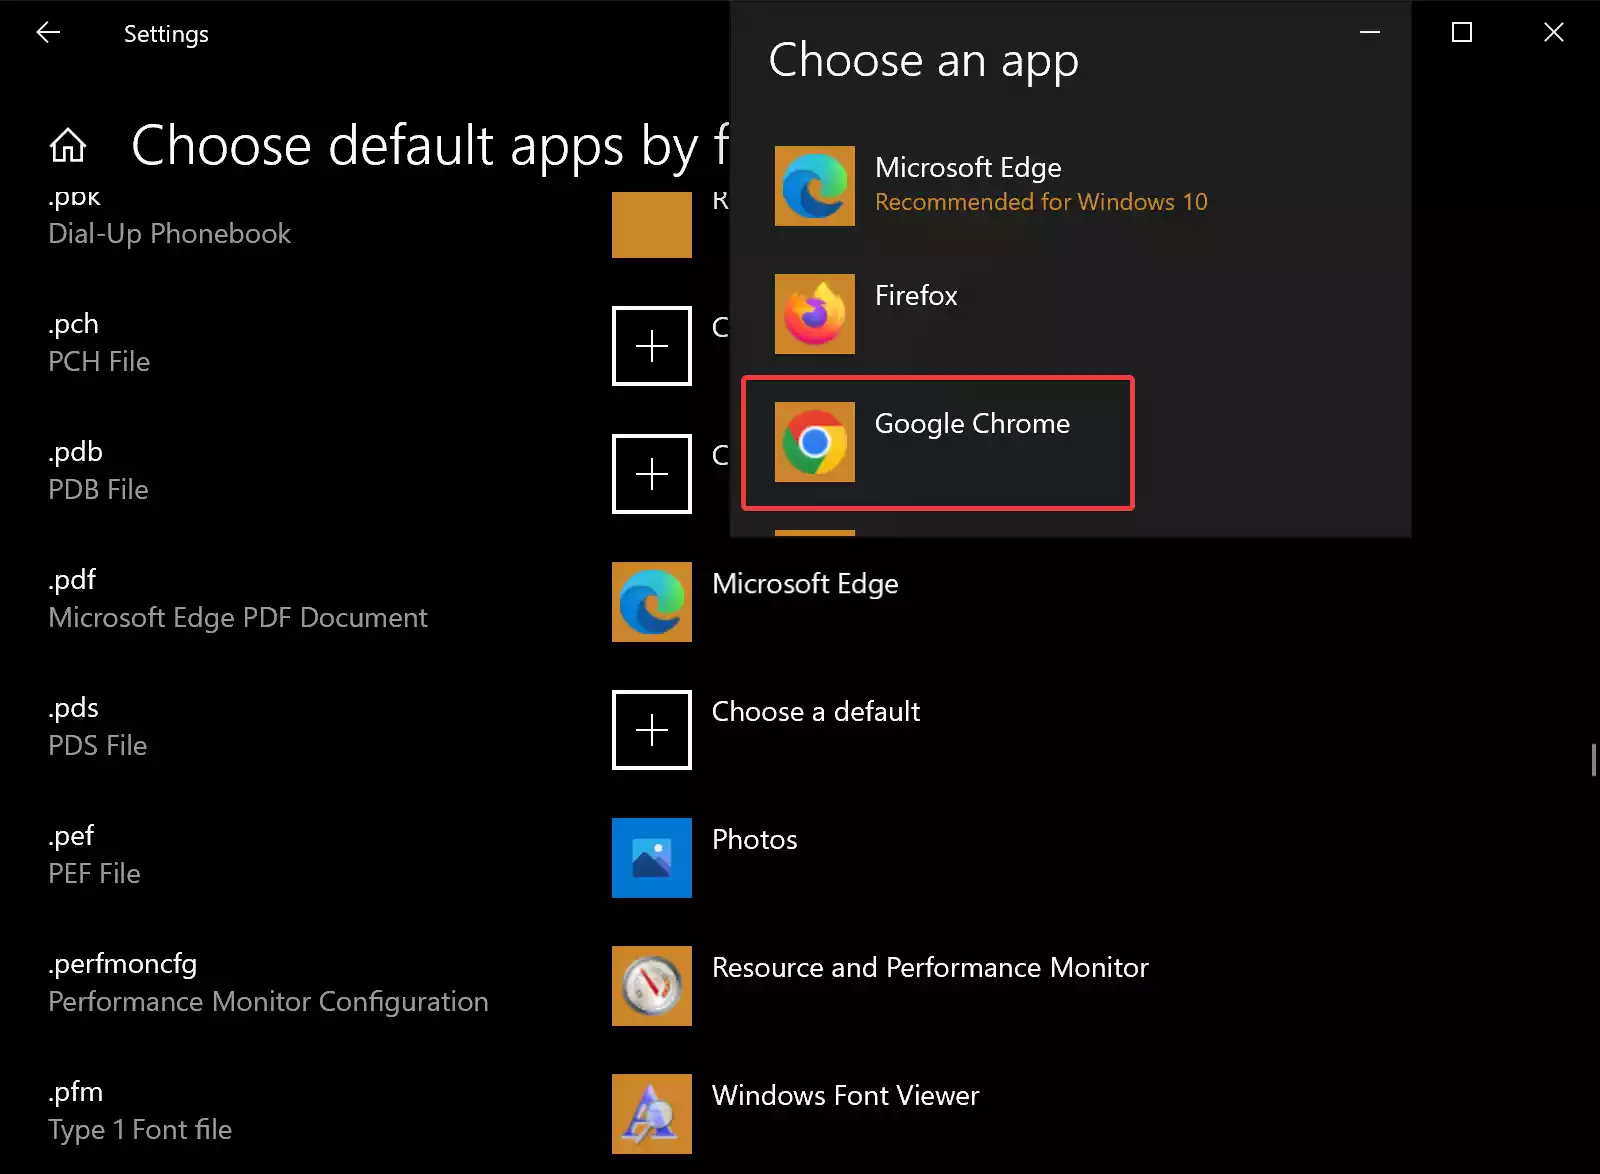
Step 6. Click on “Google Chrome” in the pop-up menu.
That’s it. Close the Settings app now.
To confirm that Google Chrome is set as your default PDF viewer, simply double-click on any PDF file stored on your computer or access a PDF file through a web browser. The PDF should launch directly in Google Chrome.
Conclusion
Setting Google Chrome as your default PDF viewer in Windows 10 is a simple process that can enhance your PDF viewing experience. With the ability to use Chrome’s familiar interface and additional features, you can seamlessly open and read PDF files on your computer. By following the steps outlined in this article, you can make Chrome your default PDF viewer and enjoy a more tailored and efficient PDF reading experience on your Windows 10 system.