In the fast-paced digital world we inhabit today, keeping track of time is essential for staying organized and productive. Windows 11, Microsoft’s latest operating system, offers a range of features designed to streamline user experience, including the ability to set time automatically. By enabling this function, your computer will regularly synchronize with an internet time server, ensuring that your system clock remains accurate and up-to-date without manual intervention. In this gearupwindows guide, we’ll explore how to harness the power of automatic time synchronization in Windows 11, empowering you to manage your time effectively and focus on what matters most.
Understanding Automatic Time Synchronization
Before diving into the step-by-step process of setting time automatically in Windows 11, it’s essential to understand the concept of automatic time synchronization. Windows leverages a network of internet time servers to retrieve the current time and date information, ensuring that your computer’s clock aligns with the global standard. By enabling this feature, you eliminate the need to manually adjust your system time, reducing the risk of inaccuracies and ensuring consistency across devices.
How to Set Time Automatically in Windows 11?
Follow one of the following methods to set time automatically on Windows 11:-
Method 1: Utilizing Windows Settings
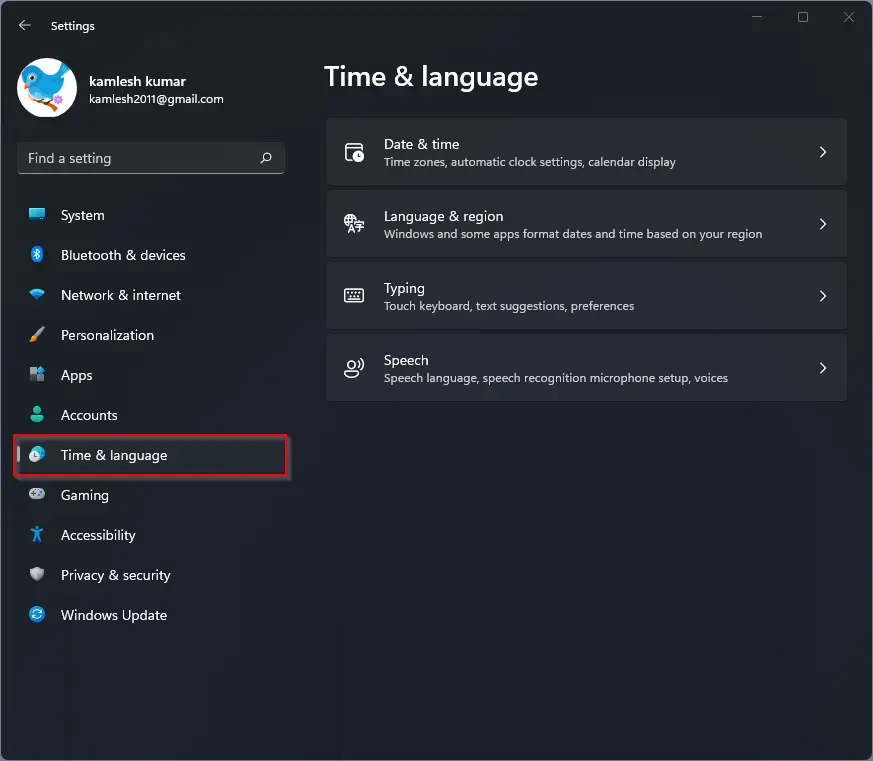
Step 1. To begin, navigate to the Settings app in Windows 11. You can do this by clicking on the Start button and selecting the gear icon, or by pressing the Windows key + I on your keyboard.
Step 2. Within the Settings menu, locate and click on the “Time & Language” option in the left sidebar. This will open a new window with various time-related settings.
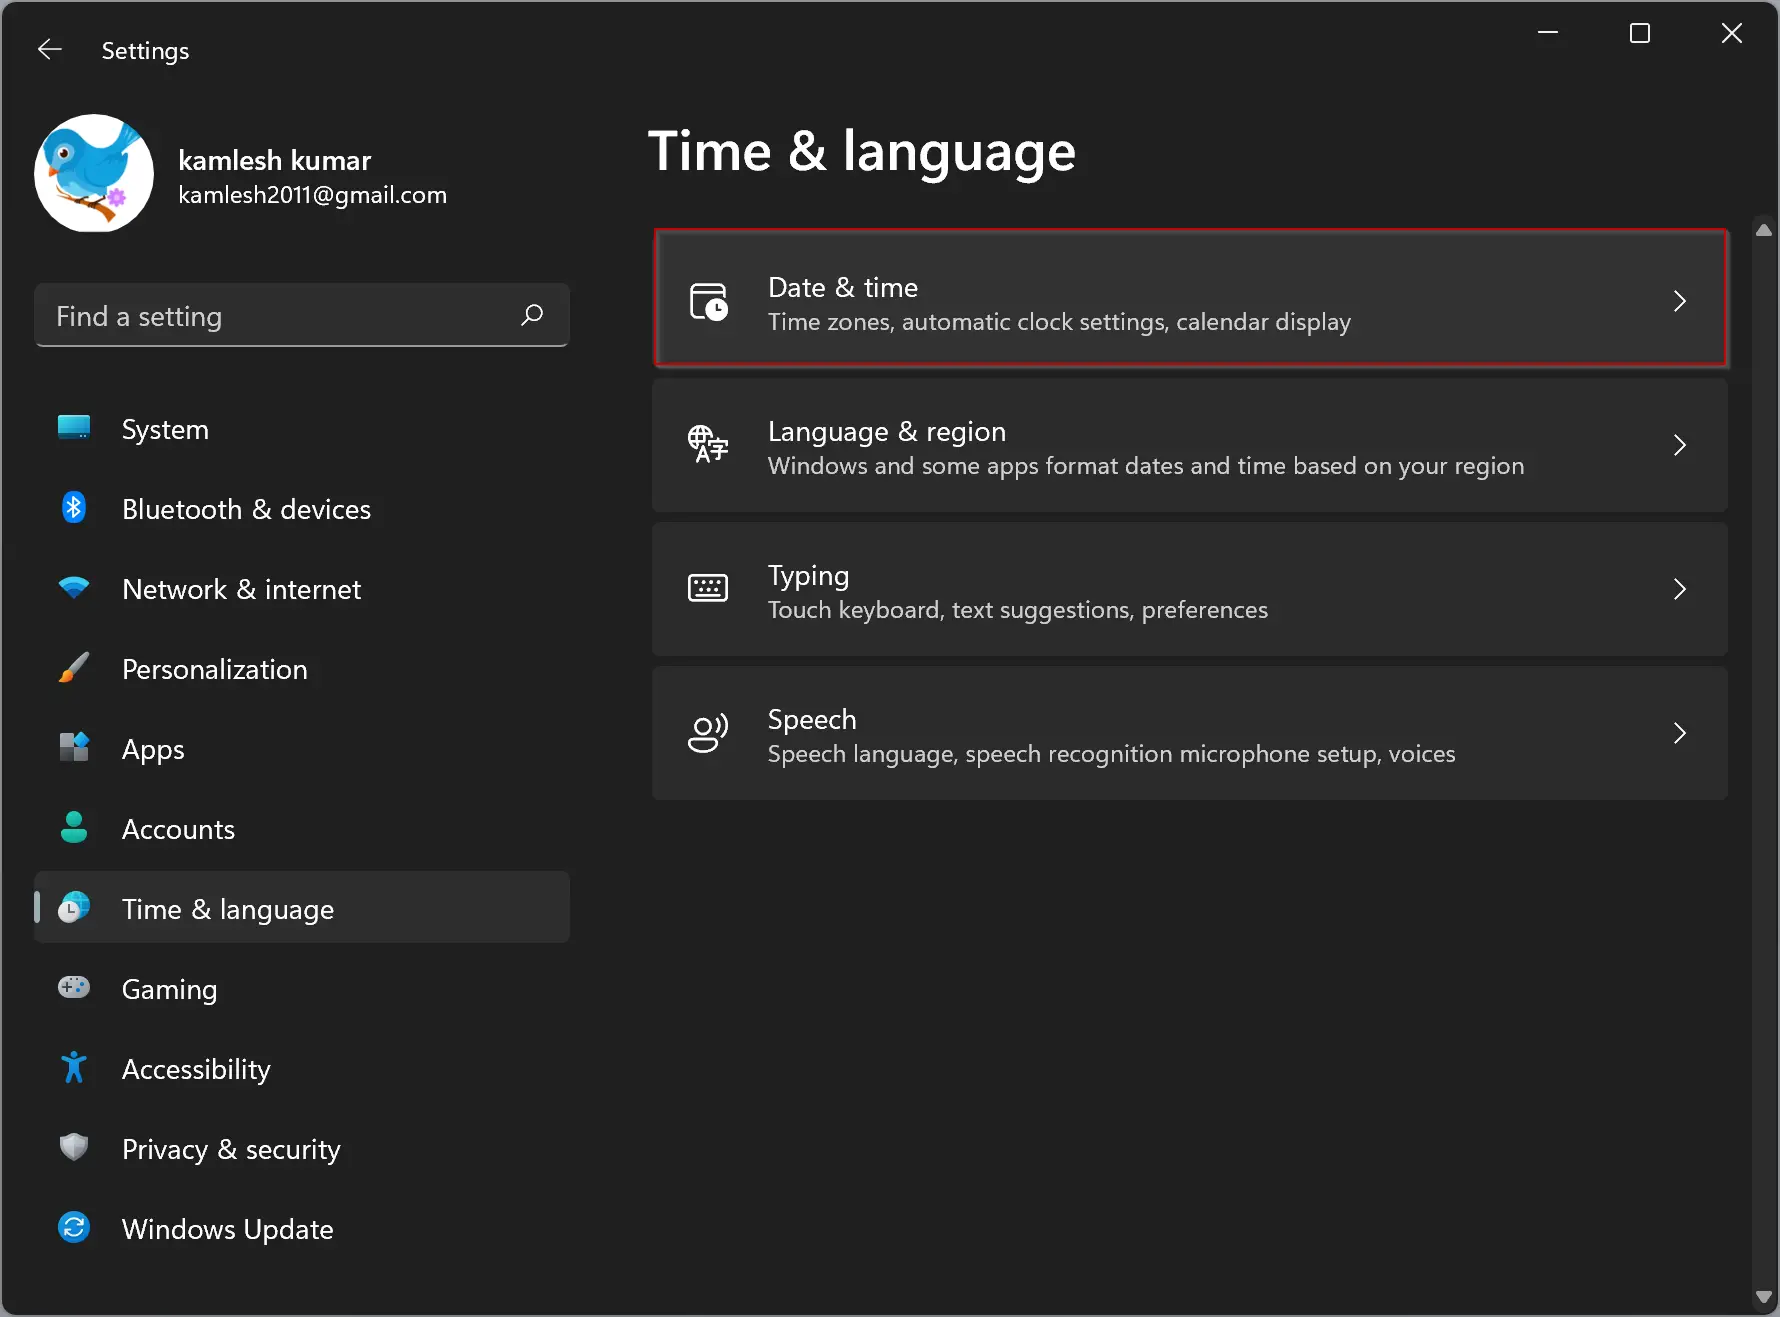
Step 3. In the Time & Language menu, select the “Date & time” tab from the sidebar. Here, you’ll find options to customize your date and time preferences.
Step 4. Locate the “Set the time automatically” toggle switch and ensure that it is turned on. This will instruct Windows to synchronize your system time with the internet time server automatically.
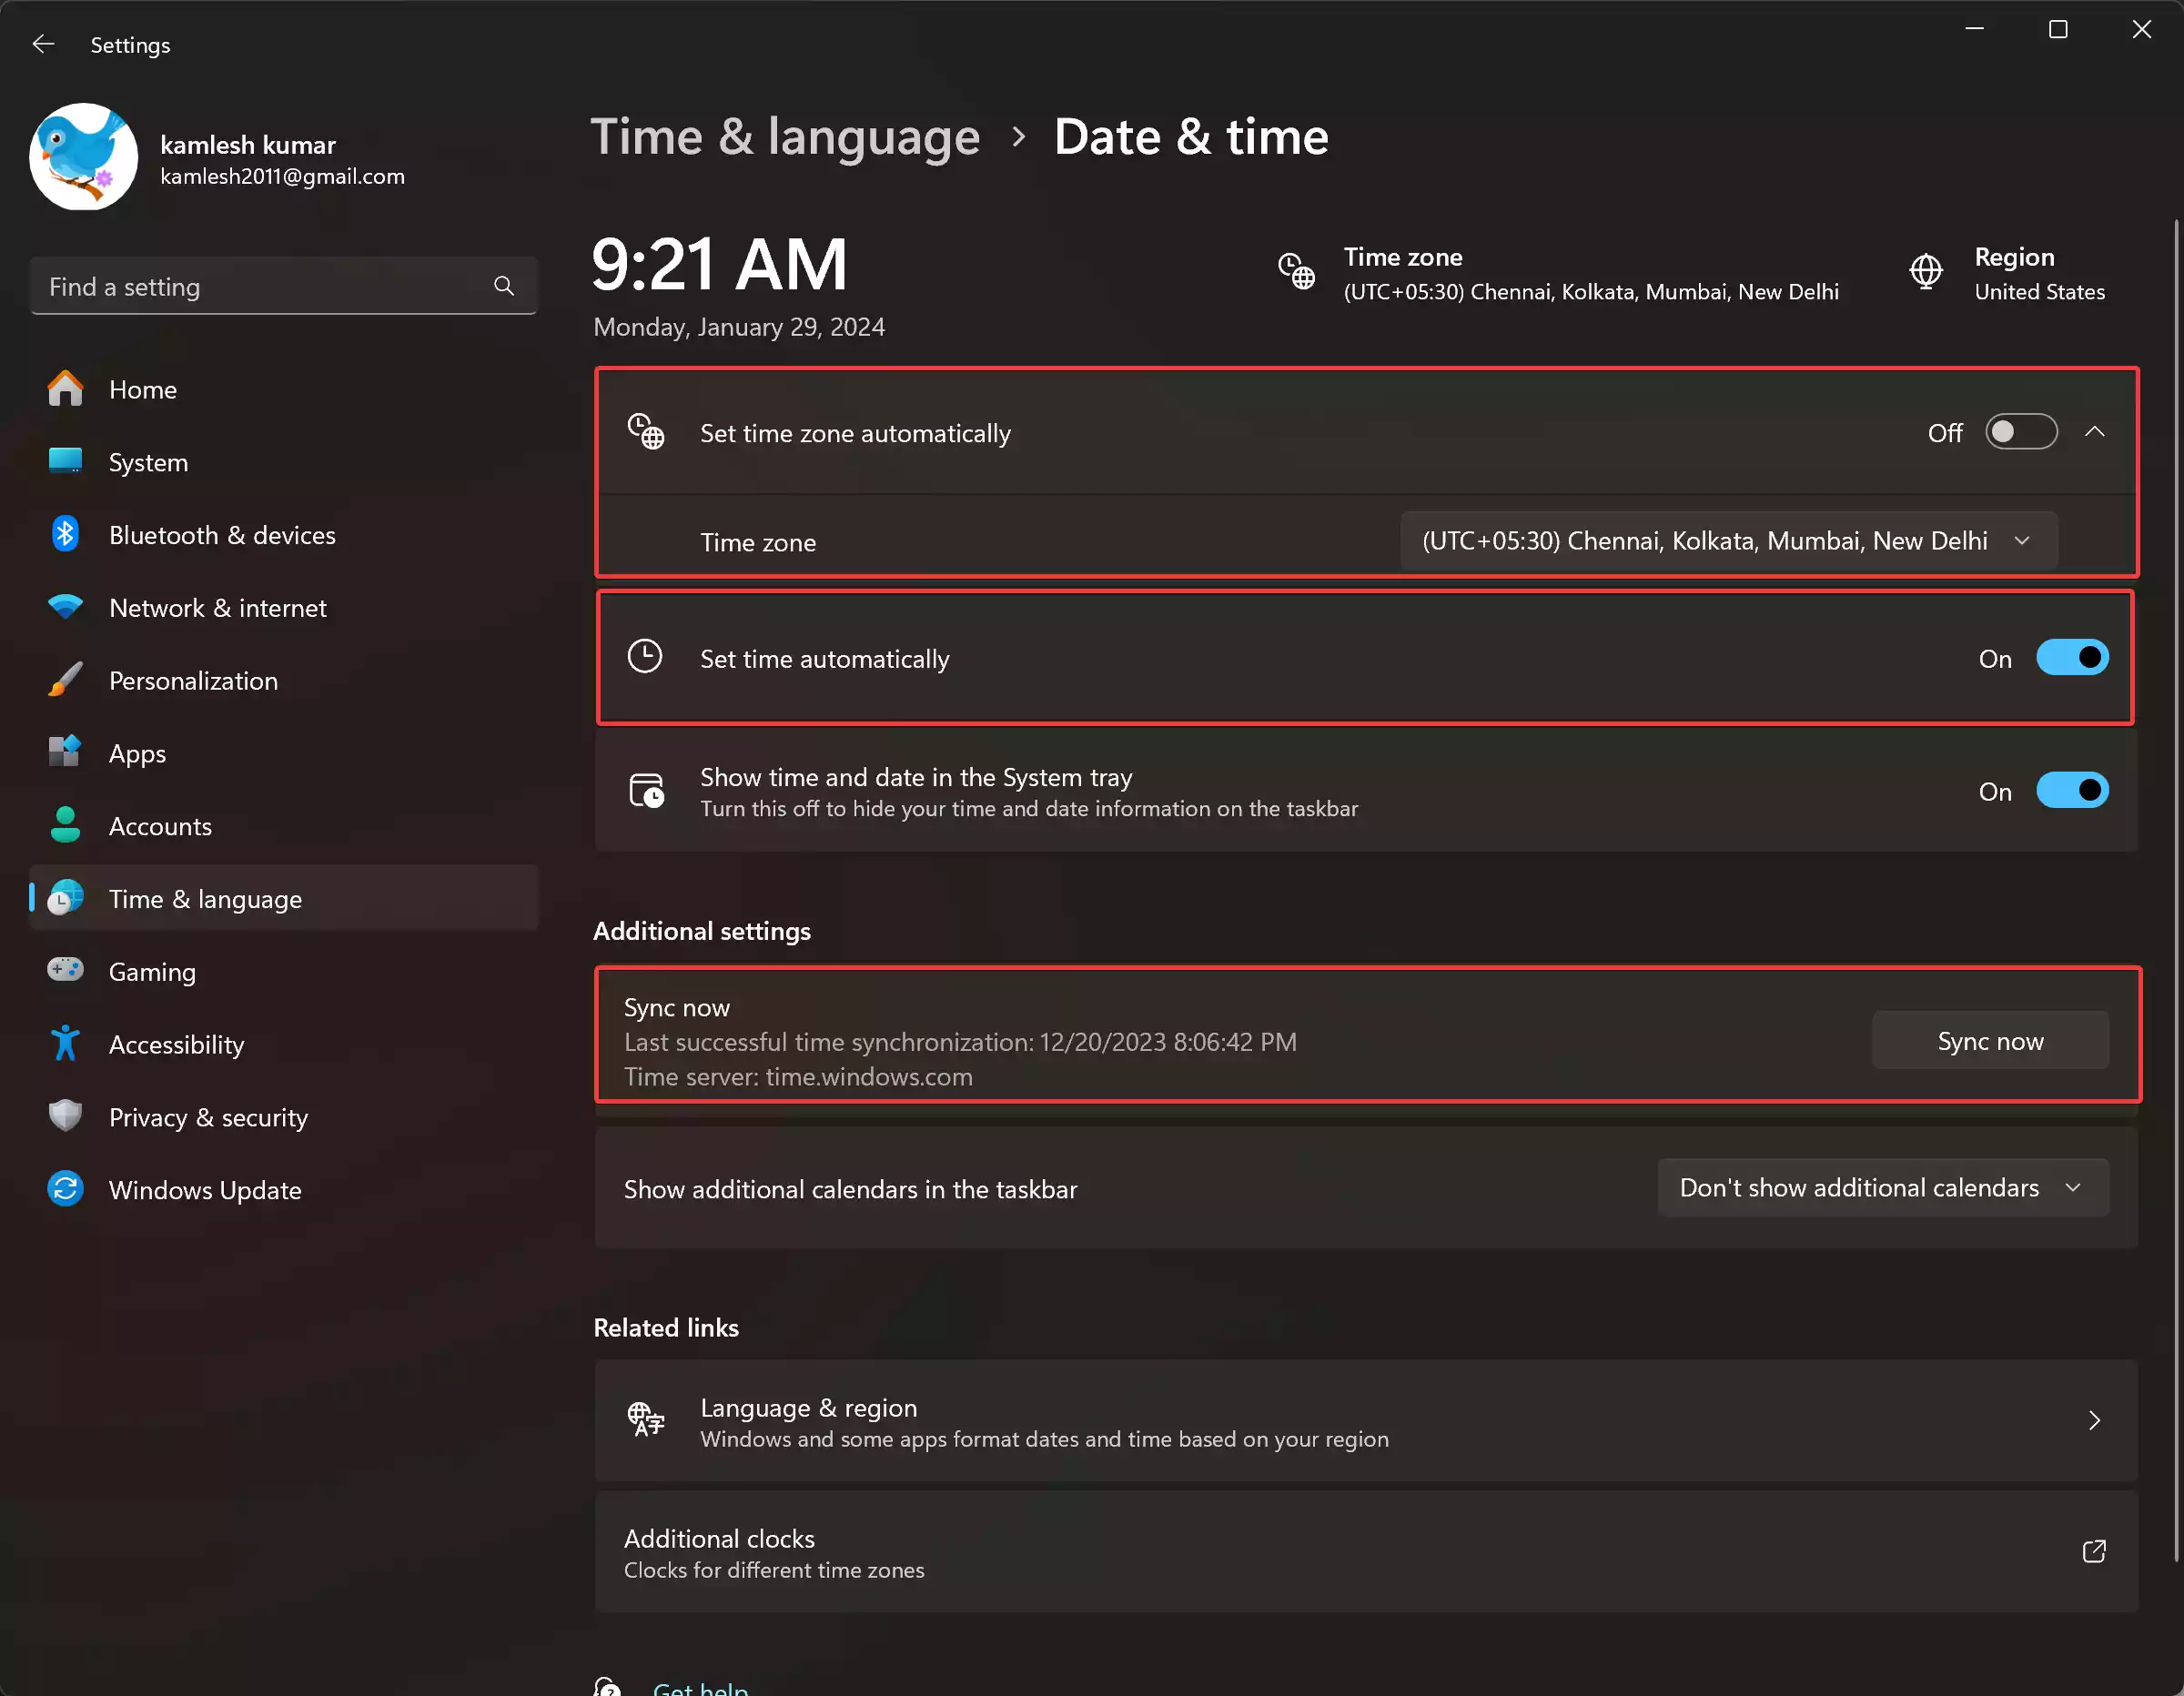
Step 5. Forcing Time Sync: If your computer fails to update the time automatically, you can scroll down to the Additional Settings section and click on the “Sync Now” button. This will initiate a manual time synchronization process.
Step 6. Adjusting Time Zone Settings: To ensure accurate timekeeping, select your desired time zone from the drop-down menu under the Time Zone section. You can also enable the “Set Time Zone automatically” toggle switch for automatic time zone adjustments.
Method 2: Modifying Registry Editor Settings
Step 1. Press the Windows key + R on your keyboard to open the Run dialog box. Type “regedit” and press Enter to launch the Registry Editor.
Step 2. In the Registry Editor, navigate to the following path:-
HKEY_LOCAL_MACHINE\SYSTEM\CurrentControlSet\Services\W32Time\Parameters
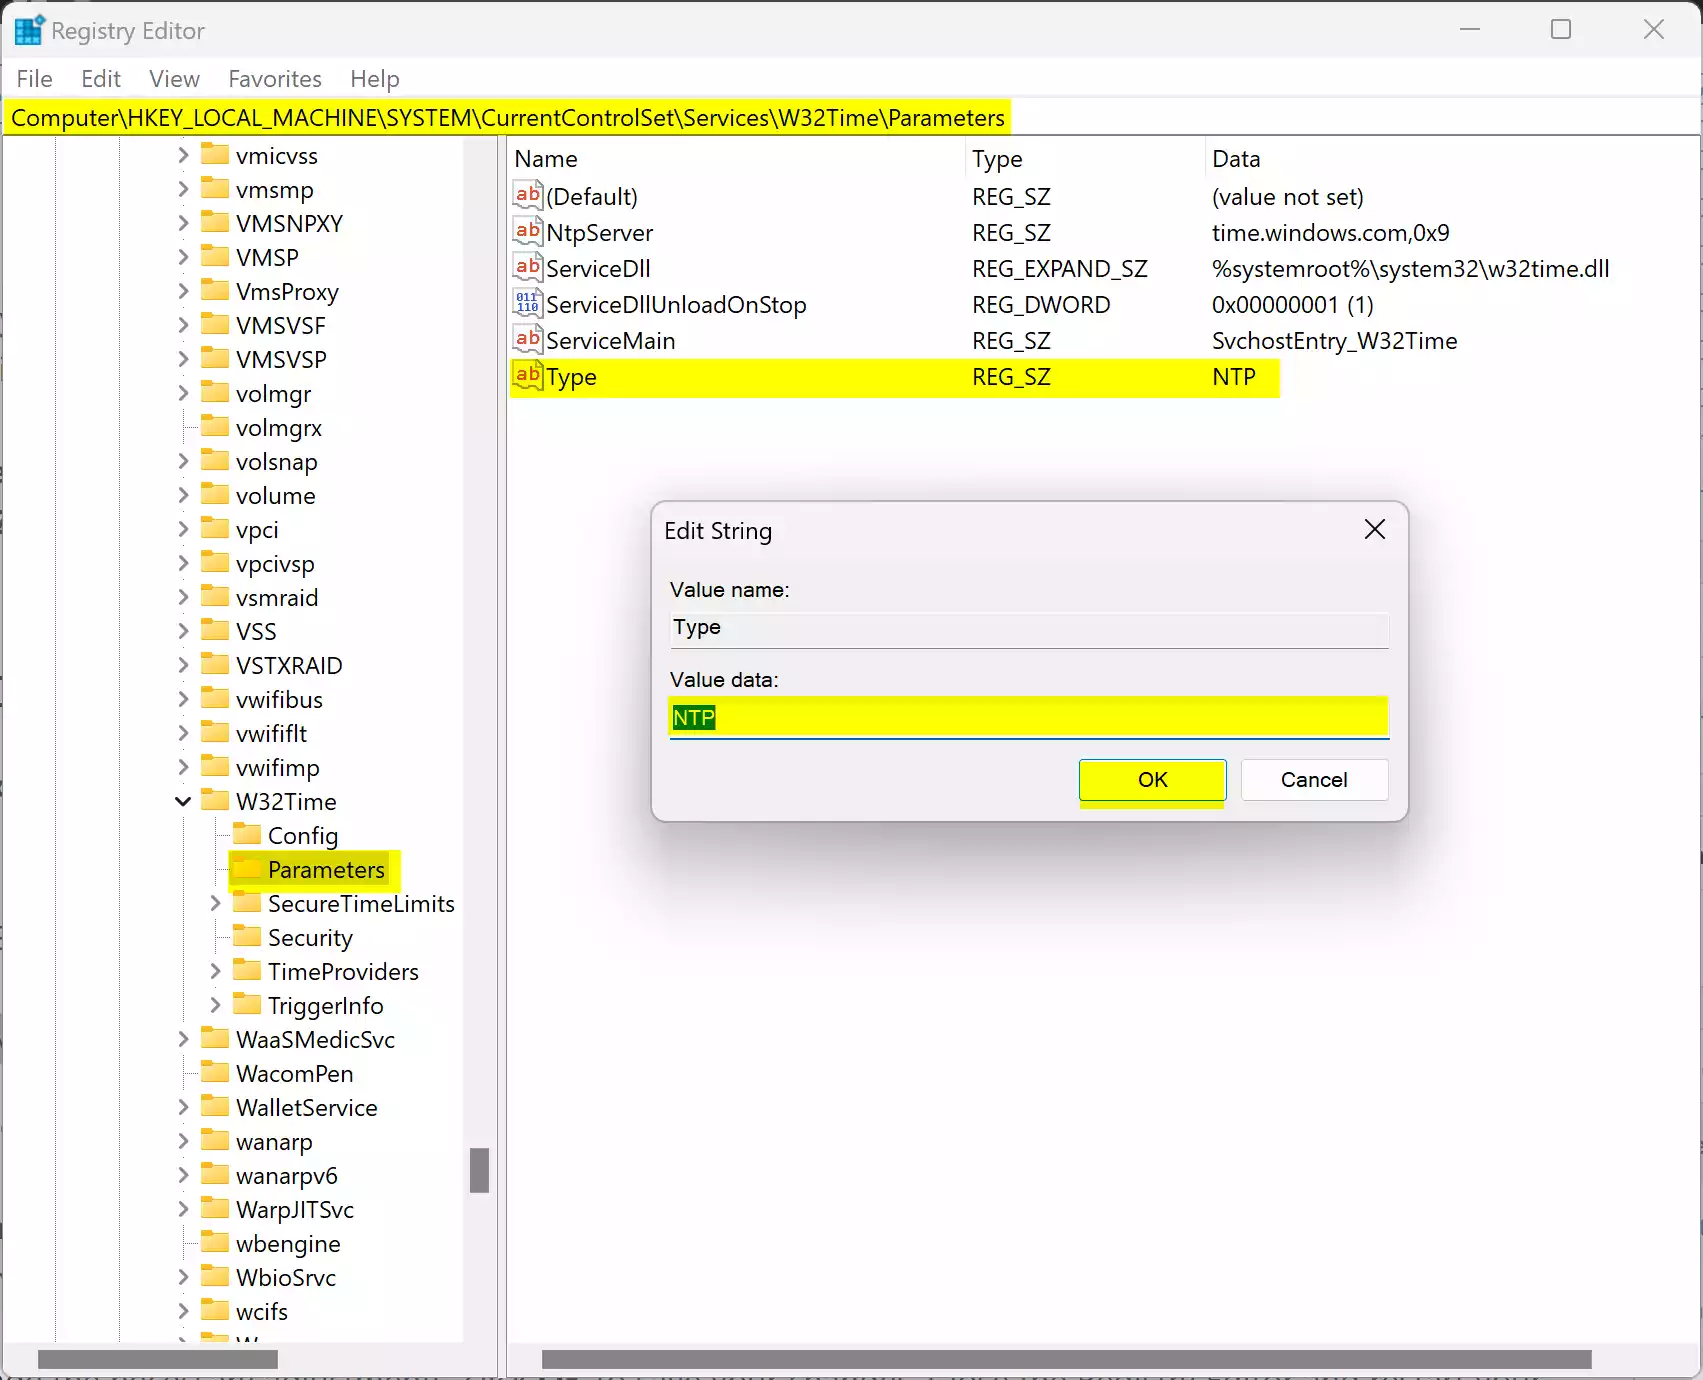
Step 3. Locate the “Type” string value on the right-hand side of the window. Double-click on it to modify its properties.
Step 4. In the Edit String dialog box, set the “Value data” field to “NTP” to enable automatic time synchronization. If you prefer to disable automatic time sync, set the “Value data” field to “NoSync.”
Step 5. Once you’ve made the necessary adjustments, click OK to save your changes. Close the Registry Editor and restart your computer to apply the new settings.
By following these straightforward steps, you can harness the power of automatic time synchronization in Windows 11, ensuring that your system clock remains accurate and reliable. Whether you’re a busy professional, a diligent student, or a tech-savvy enthusiast, mastering time management is key to maximizing productivity and achieving your goals. With Windows 11’s built-in tools and features, staying on top of your schedule has never been easier.
Conclusion
In conclusion, setting time automatically in Windows 11 is a simple yet powerful way to streamline your daily workflow and maintain an organized digital environment. By leveraging the intuitive interface of the Settings app or delving into the advanced configurations of the Registry Editor, you can tailor your timekeeping preferences to suit your individual needs. Embrace the convenience of automatic time synchronization and unlock new levels of efficiency and productivity in your Windows 11 experience.
