In today’s fast-paced digital world, keeping your computer’s clock accurate is essential for various tasks, from scheduling appointments to ensuring synchronization with online services. Windows 10 offers a convenient feature that automatically sets your system time, sparing you the hassle of manually adjusting it. In this gearupwindows guide, we’ll walk you through the process of enabling automatic time synchronization on your Windows 10 device, ensuring that your clock remains precise and up-to-date.
Why Set Time Automatically?
Before delving into the specifics of setting time automatically in Windows 10, let’s understand the importance of this feature. Accurate timekeeping is crucial for various reasons:-
1. Synchronization with Online Services: Many online services, such as email clients, cloud storage platforms, and collaboration tools, rely on accurate timekeeping for proper functionality. By setting your system time automatically, you ensure synchronization with these services.
2. Scheduled Tasks: Time-sensitive tasks, including backups, updates, and system maintenance activities, depend on precise timekeeping to execute at the designated intervals.
3. Security Protocols: Timestamps play a vital role in security protocols, such as digital signatures and authentication mechanisms. Maintaining accurate system time is essential for ensuring the integrity and security of digital transactions.
How to Set Time Automatically in Windows 10?
Follow either method to set time automatically in Windows 10:-
Method 1: Using Windows Settings
Step 1. Press the `Windows key` + `I` to open the Settings app.
Step 2. In the Settings window, click on “Time & Language” to access date and time settings.

Step 3. Under the “Current date and time” section, locate the “Set time automatically” option. Toggle the switch to the “On” position to enable automatic time synchronization.
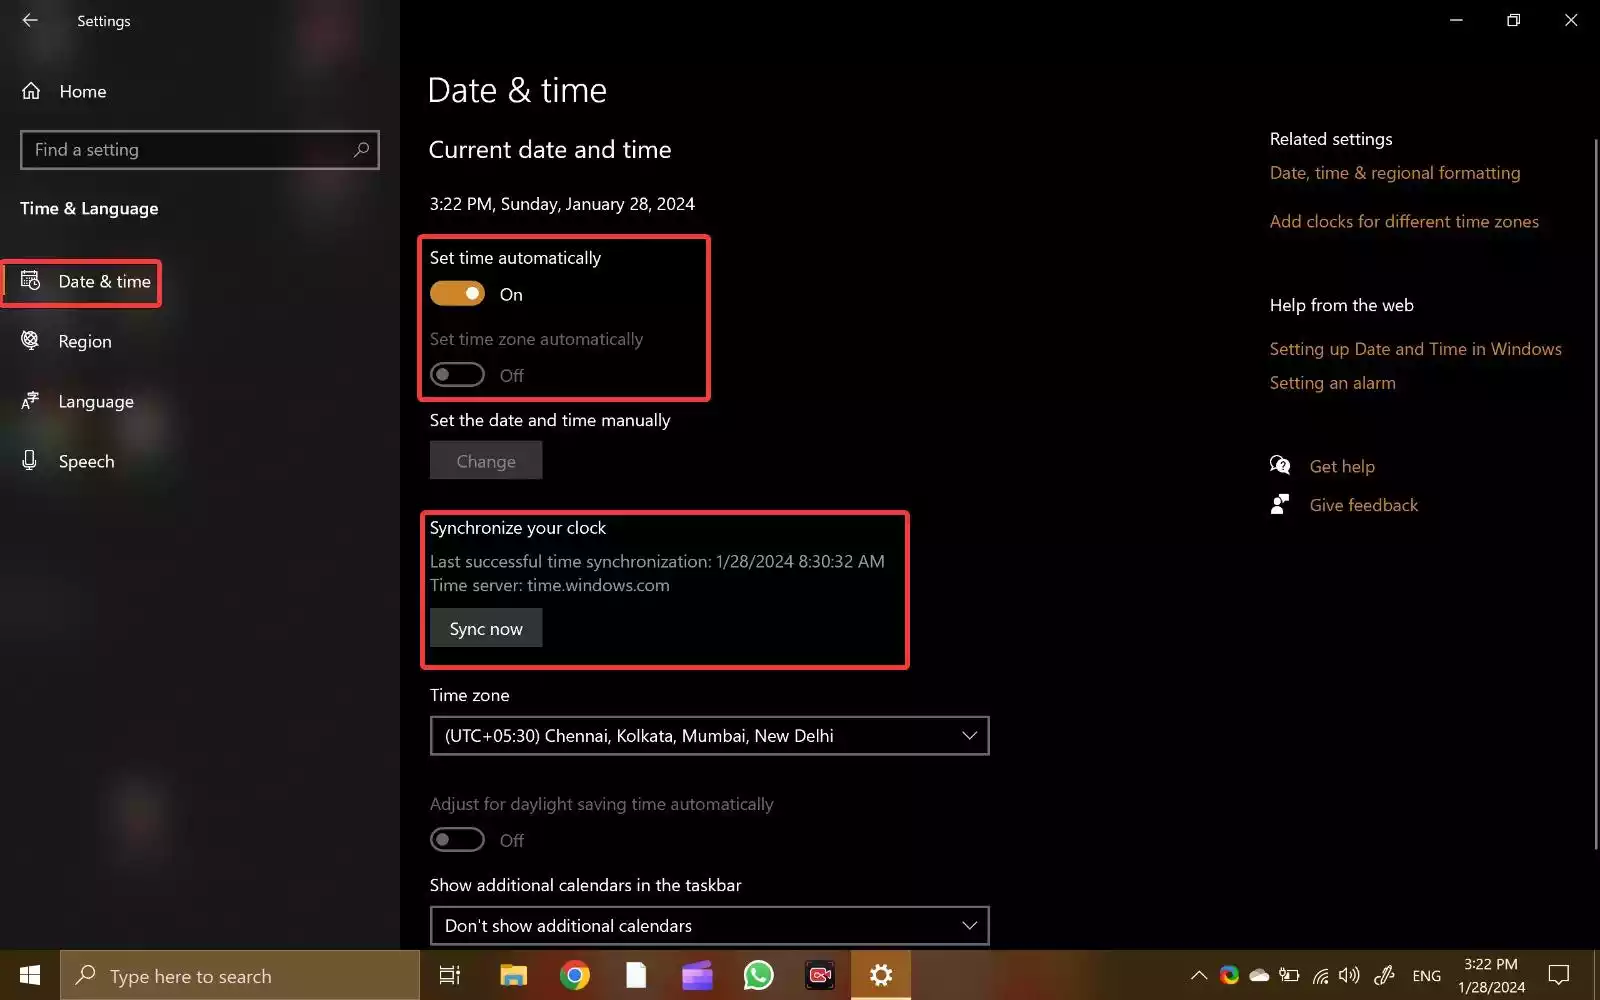
Step 4. Forcing Time Sync (Optional): If your PC fails to update the time automatically, scroll down to “Synchronize your clock.” Click on the “Sync now” button to force your computer to initiate a time sync with the server.
Step 5. Adjusting Time Zone (Optional): Select your desired time zone from the drop-down menu under the “Time zone” section. Enable the “Set time zone automatically” toggle switch to allow your PC to automatically adjust the time zone when traveling.
Method 2: Using the Registry Editor
Step 1. Press the `Windows key` + `R`, type “regedit” in the Run dialog, and press Enter to open the Registry Editor.
Step 2. Navigate to the following registry path:-
HKEY_LOCAL_MACHINE\SYSTEM\CurrentControlSet\Services\W32Time\Parameters
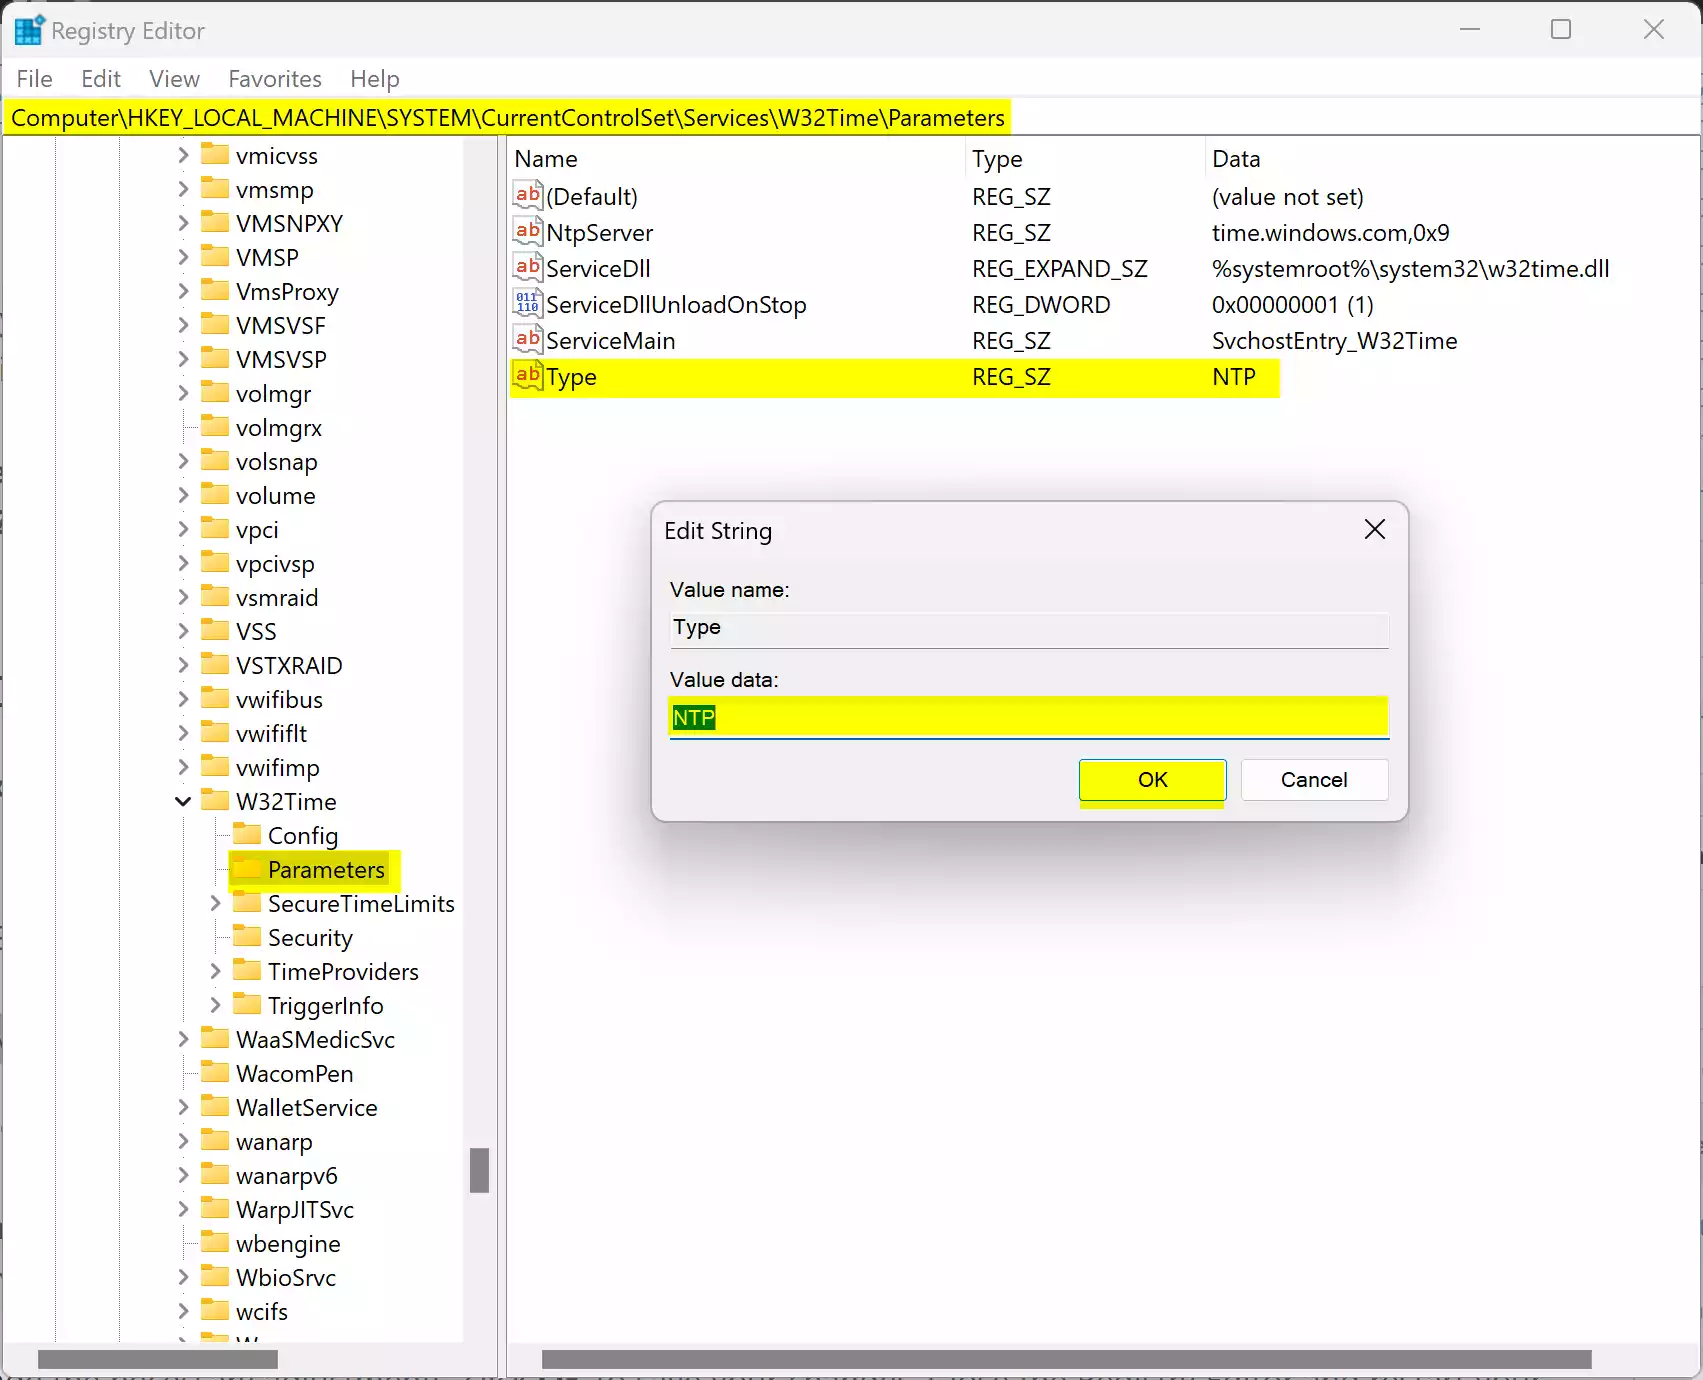 Step 3. Locate the “Type” string value on the right-hand side. Double-click on “Type” to open the Edit String dialogue.
Step 4. Set the “Value data” field to “NTP” to enable automatic time synchronization. Optionally, set the “Value data” field to “NoSync” if you prefer not to synchronize time automatically.
Step 5. Click OK to save the changes.
Step 6. Close the Registry Editor and restart your PC for the changes to take effect.
Conclusion
By following these step-by-step instructions, you can easily set time automatically in Windows 10, ensuring that your system clock remains accurate and synchronized with global time servers. Whether you prefer using the Windows Settings app or the Registry Editor, enabling automatic time synchronization is a simple yet essential task that enhances the functionality and reliability of your Windows 10 device. Stay punctual, stay synchronized, and enjoy the seamless operation of your computer’s clock!
