On Windows 11 or 10, the metered connection is an Internet connection that has limited data associated with it. By default, a cellular data connection is set as metered. However, there is no restriction with Wi-Fi and Ethernet network connections. But if you need, you can set it to metered. When the metered connection is turned on, Windows stops downloading updates to save your data. Also, some apps might work differently on a metered connection to help reduce your data usage.
Whether you’re tethered to a mobile network with a limited amount of data or you just don’t want to absorb too much bandwidth from your home network, Windows 11 has a solution. The operating system features a built-in “Metered connection” mode that reduces bandwidth usage when connected to the preferred networks.
How to Turn On a Metered Connection in Windows 11?
To set up or enable metered connection in Windows 11, do the following:-
Step 1. Open the Settings app by pressing the Windows + I keyboard shortcut.
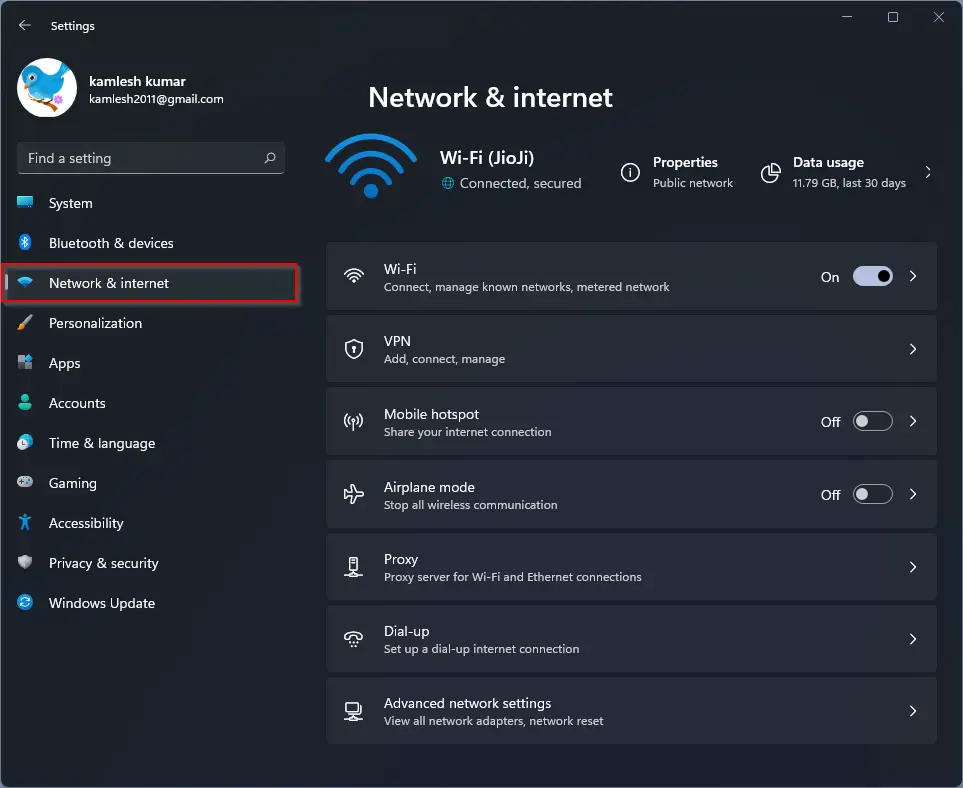
Step 2. When Windows Settings opens, select the Network & internet on the left side.
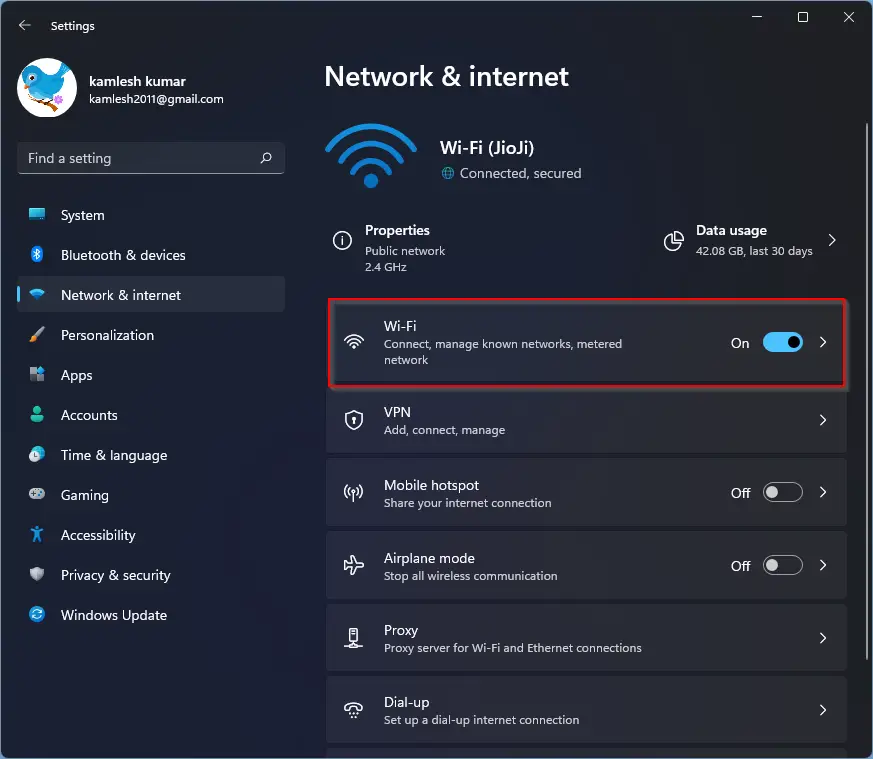
Step 3. Click the “Wi-Fi” or “Ethernet” on the right-side pane to set “Metered connection.” For example, in this post, we will use the metered connection for a Wi-Fi network.
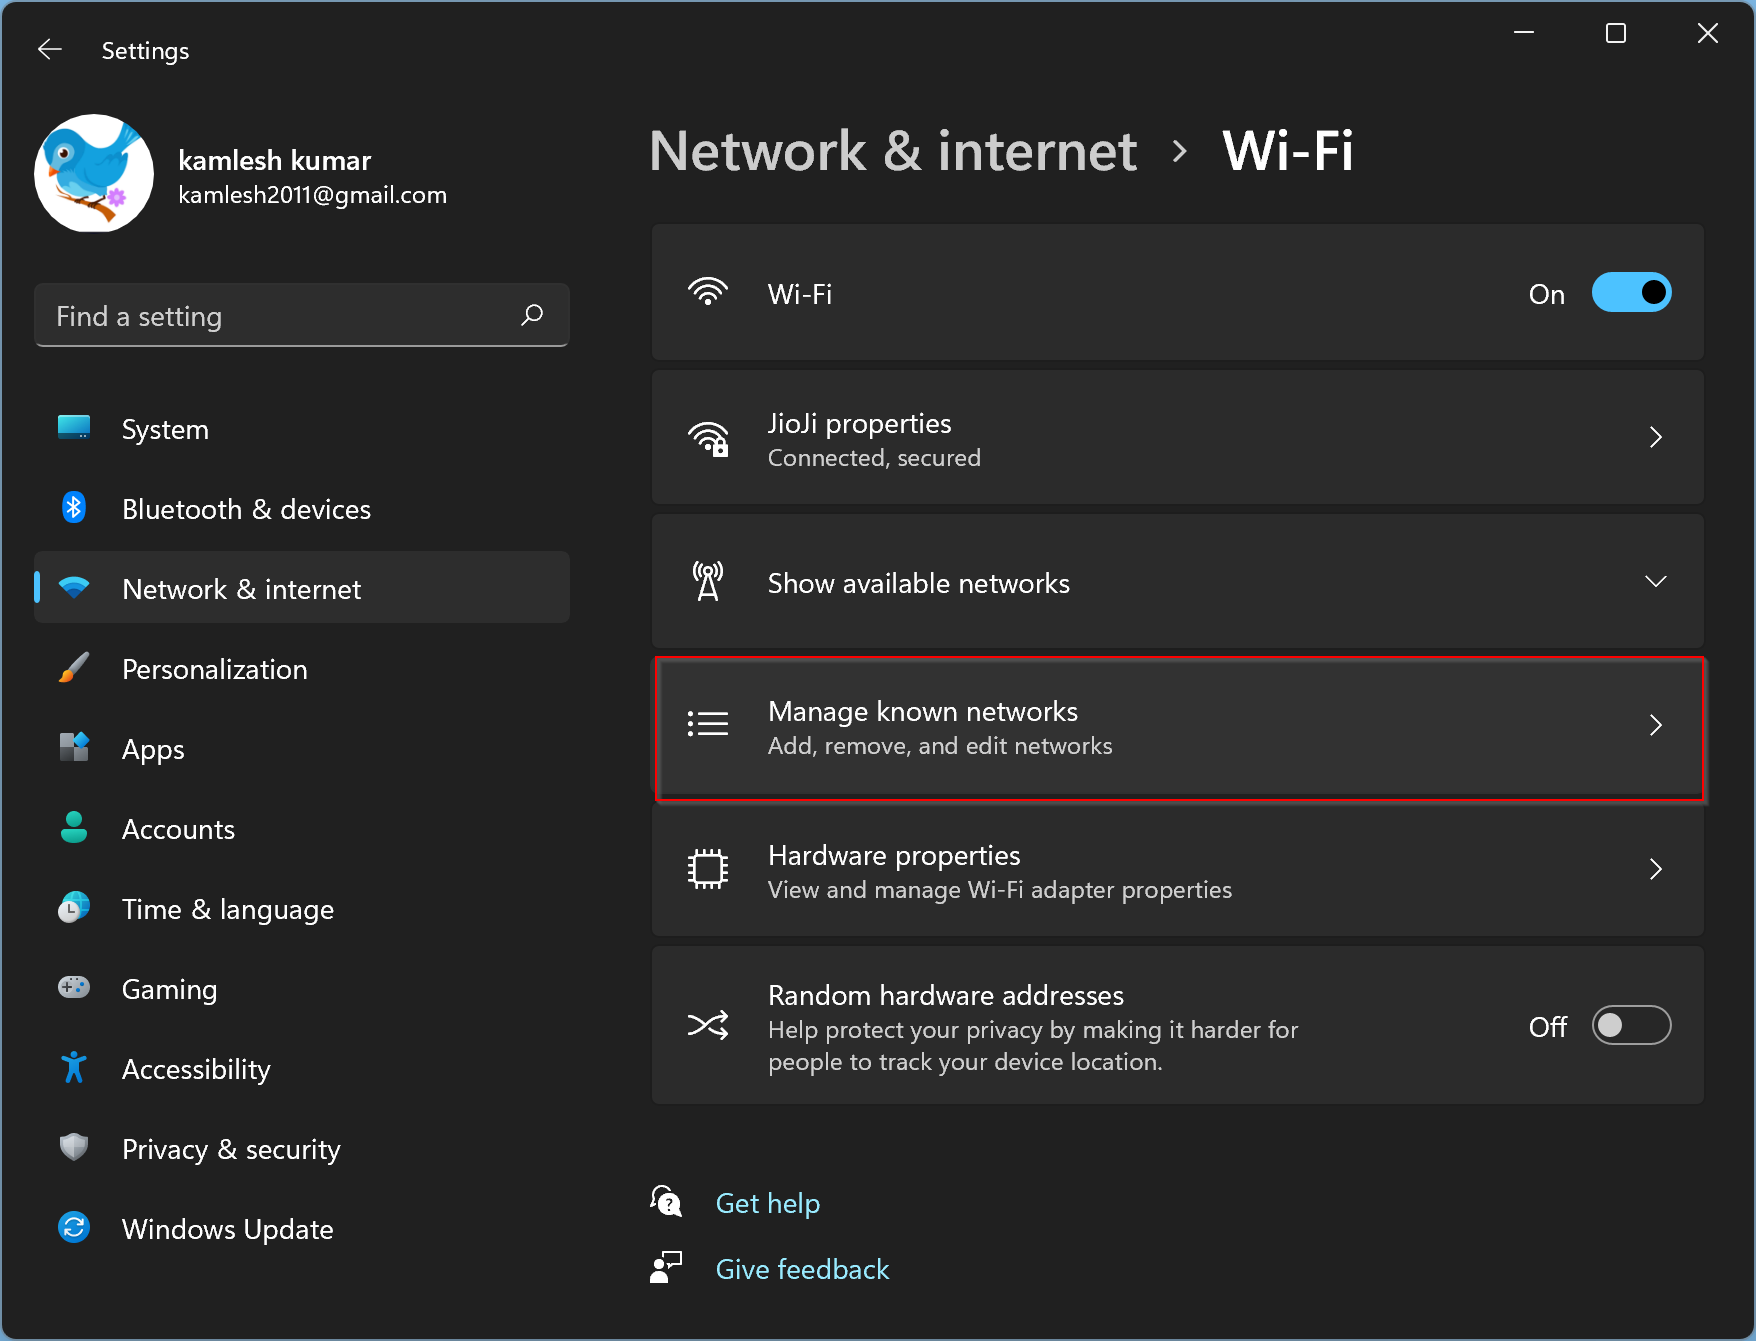
Step 4. Then, select the Manage known networks option.
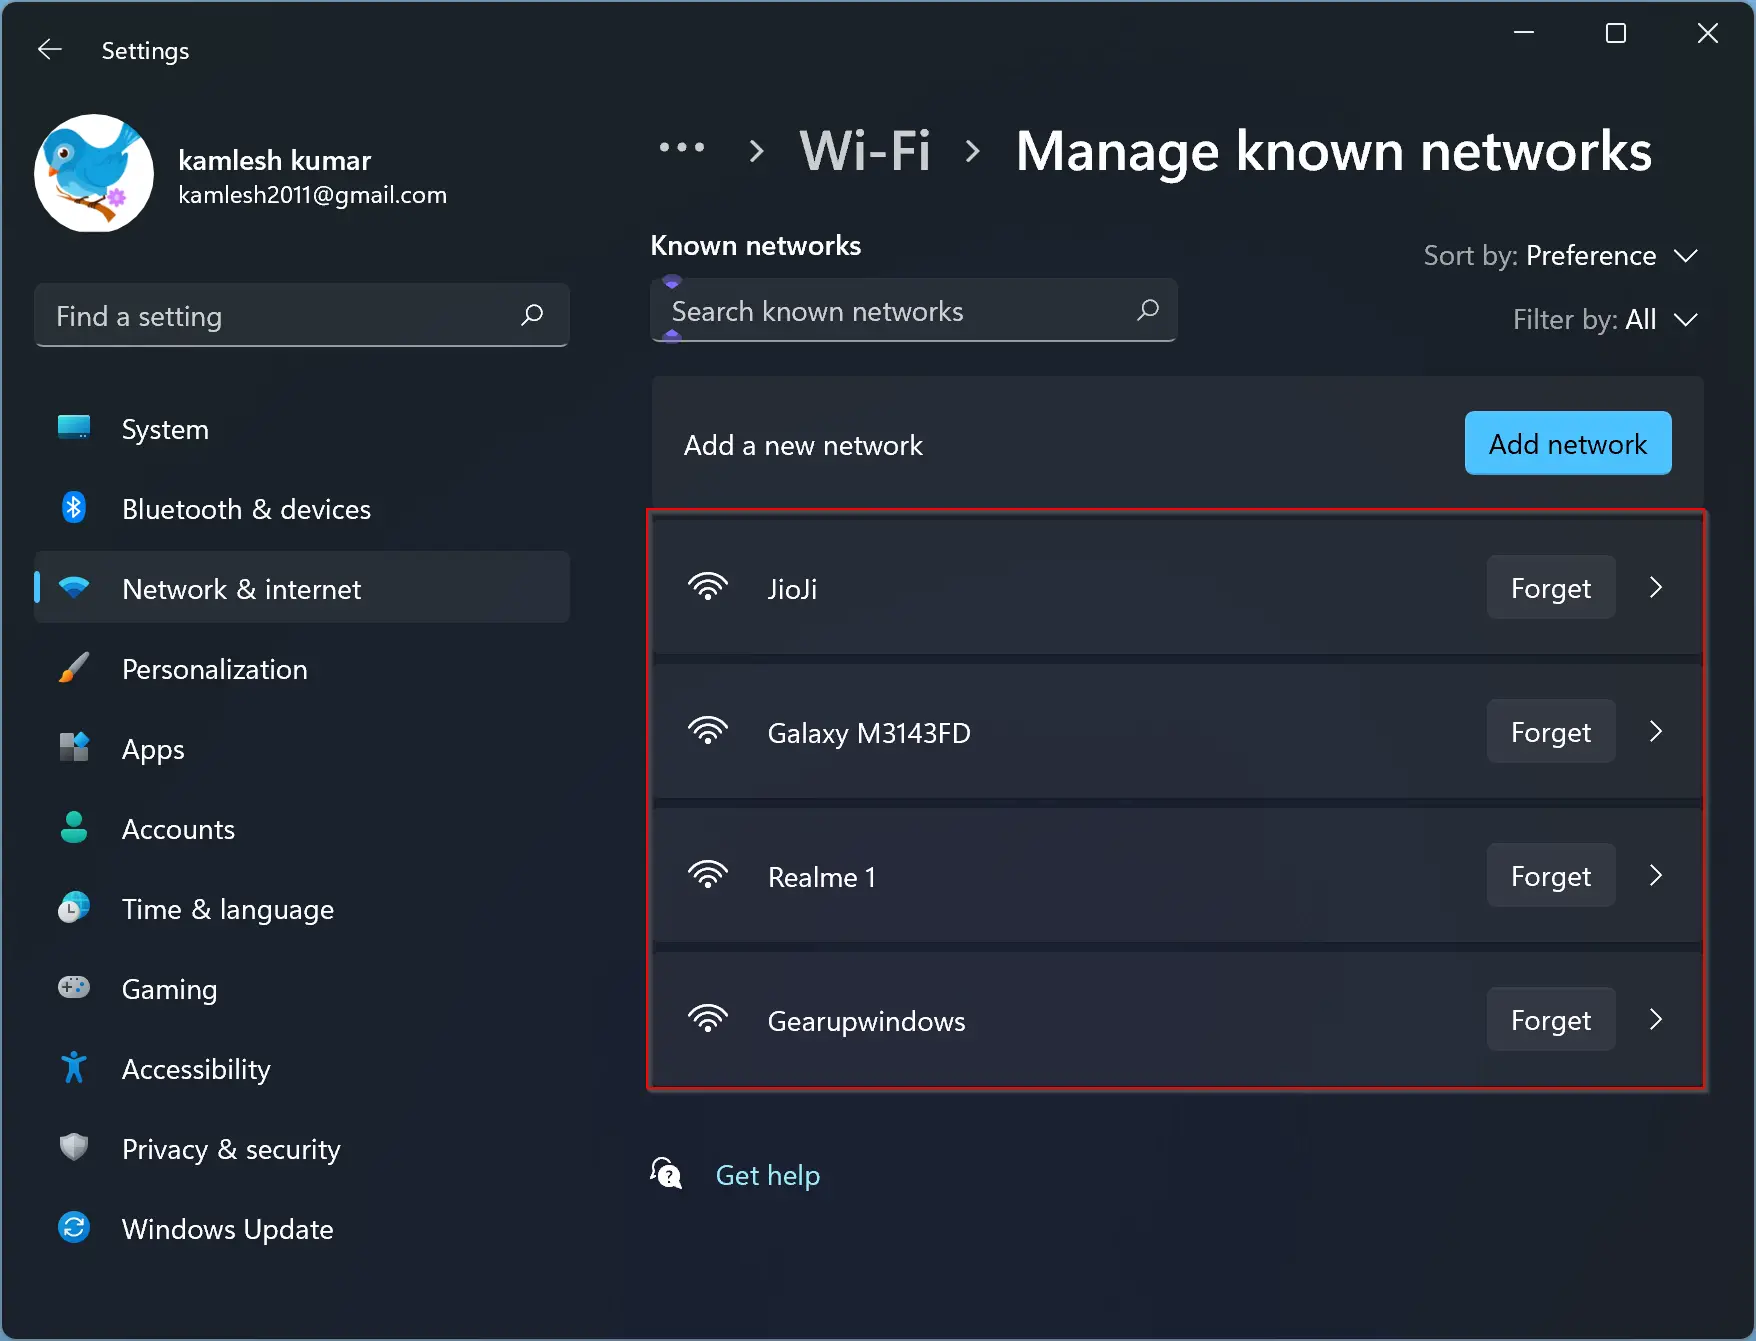
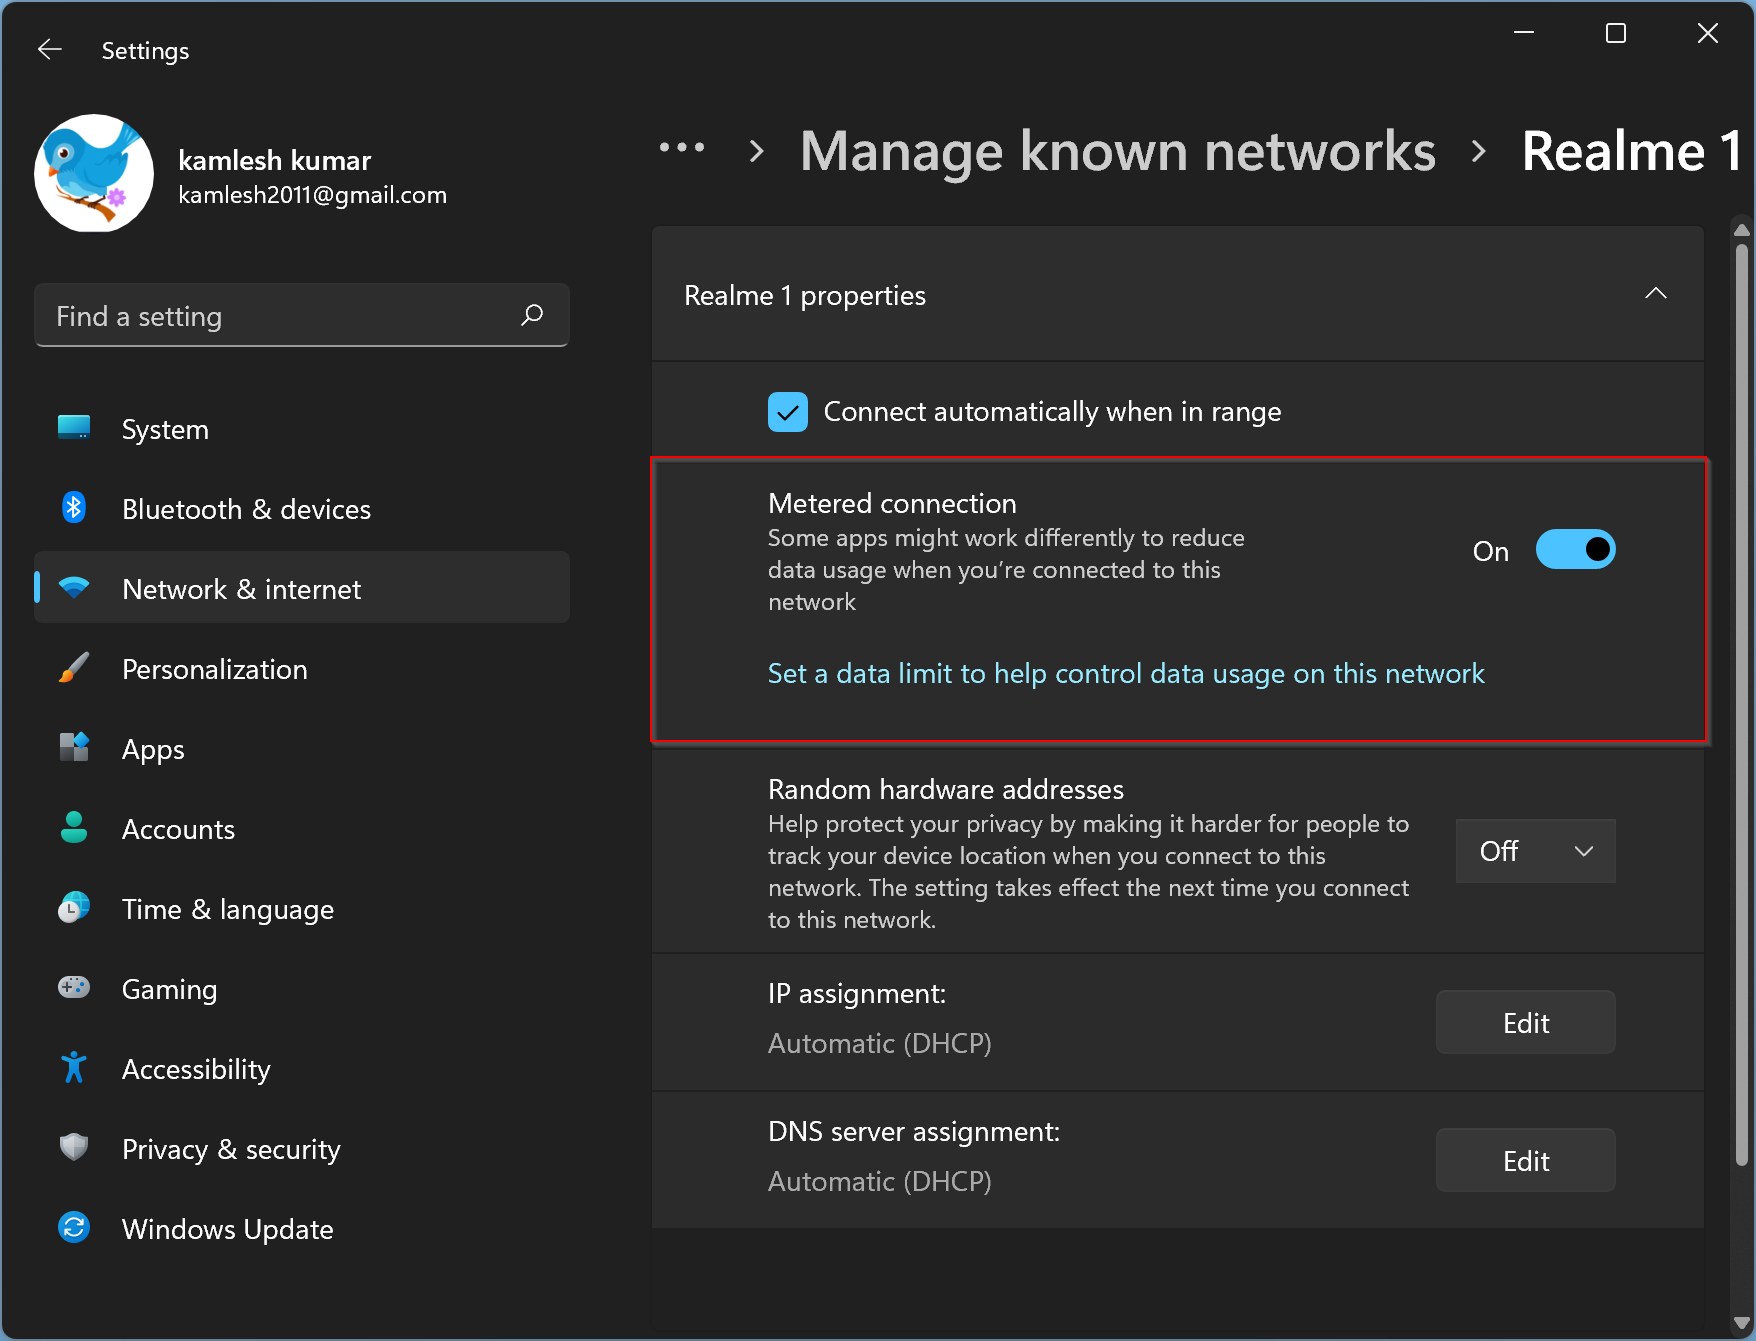
Step 5. In the next window, you will see all the Wi-Fi profiles are listed that you have ever used to connect to the internet. Select a network profile by clicking on it.
Step 6. Turn the toggle switch On beside “Metered connection” to enable it.
That’s it. You need to repeat the steps for each Wi-Fi profile if you want to set metered connection for all.
How to Turn Off Metered Connection in Windows 11?
To disable or turn off the metered connection in Windows 11, do the following recommended steps:-
Step 1. Open the Settings app by pressing the Windows + I keyboard shortcut.
Step 2. When Windows Settings opens, select the Network & internet from the left sidebar.
Step 3. Click the “Wi-Fi” or “Ethernet” on the right-side pane to set “Metered connection.” For example, in this post, we are going to disable metered connection for a Wi-Fi network.
Step 4. Then, select the Manage known networks option.
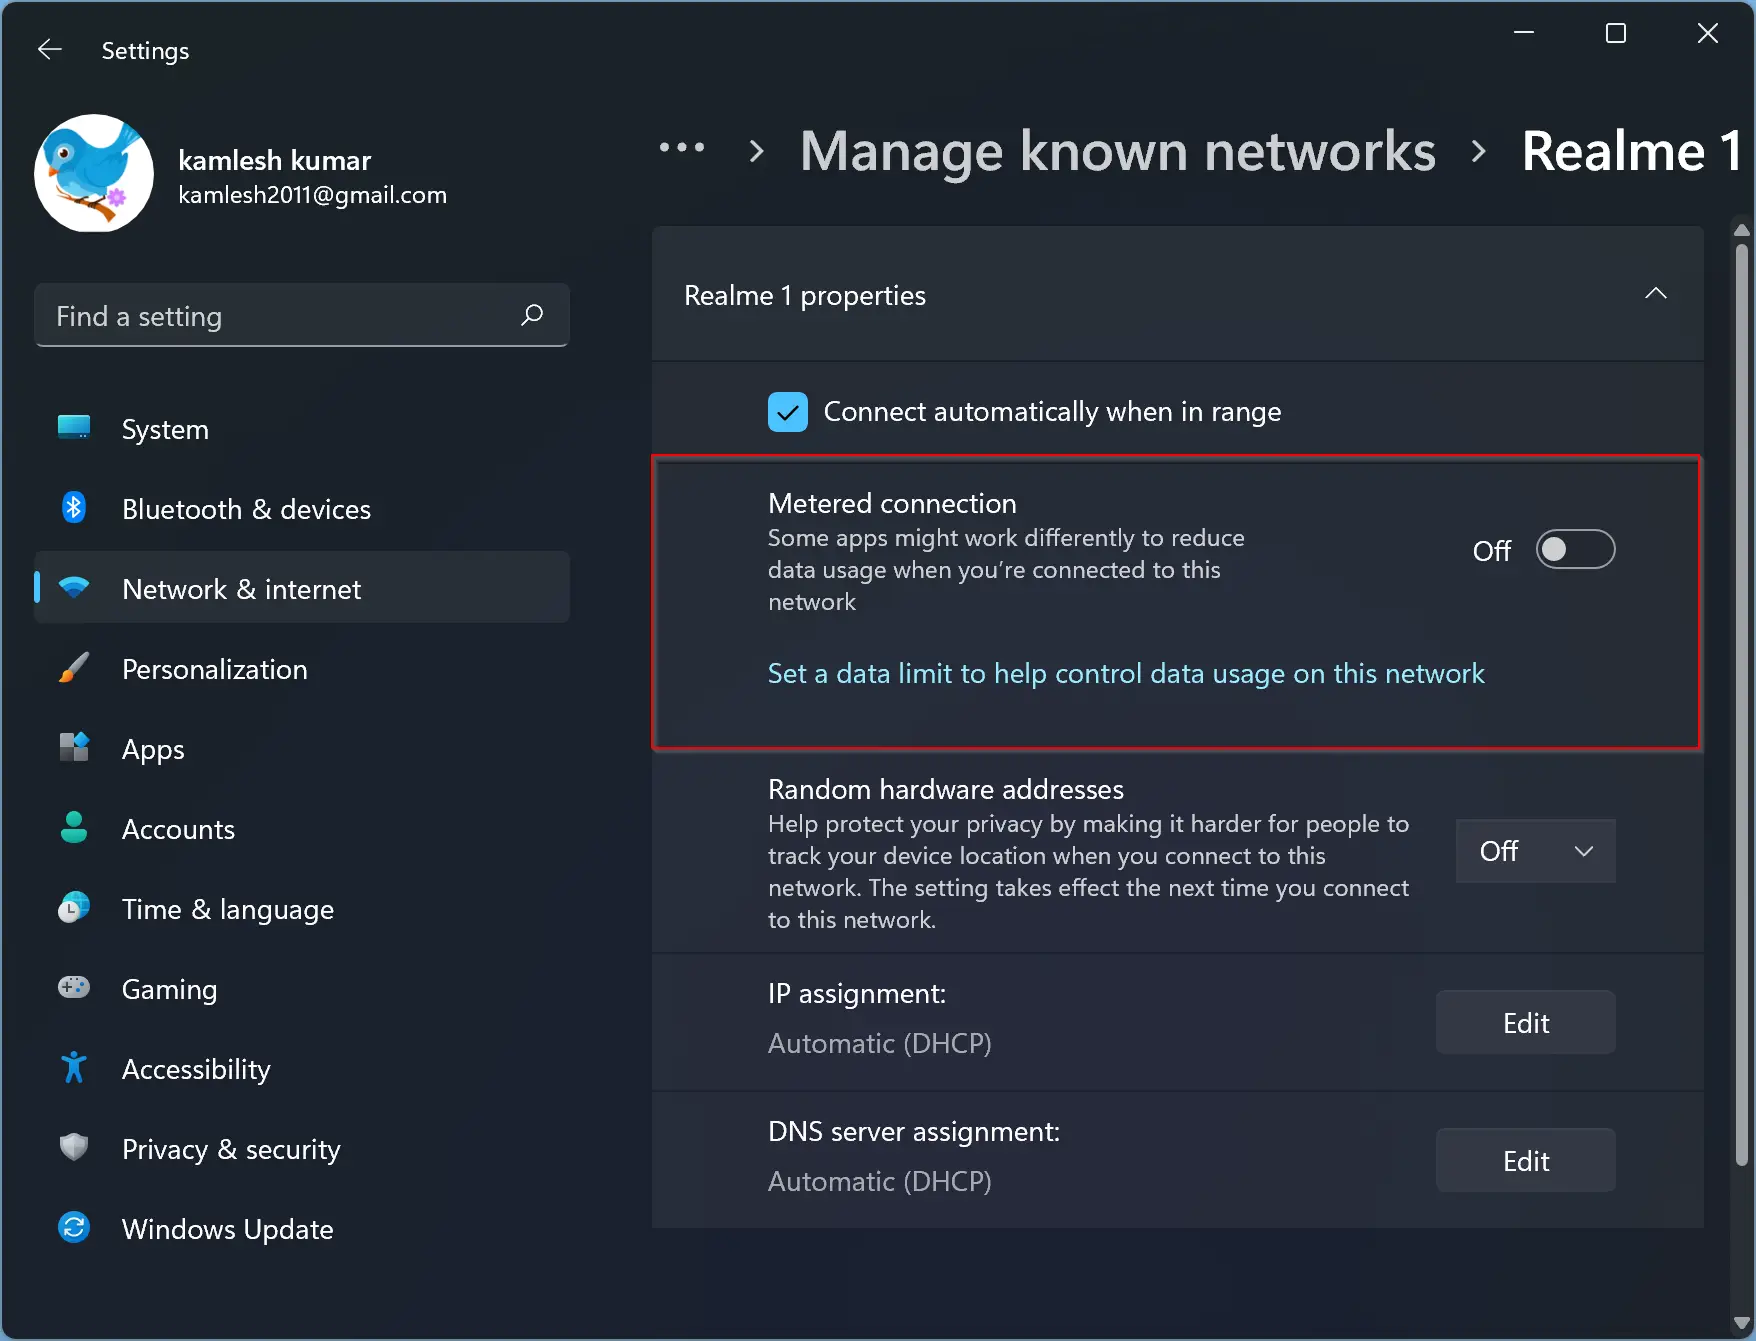
Step 5. In the next window, you will see all the Wi-Fi profiles are listed that you have ever used to connect to the internet. Select a network profile by clicking on it.
Step 6. Turn the toggle switch Off beside “Metered connection” to enable it.
That’s it. You need to repeat the above steps for each Wi-Fi profile if you want to turn off metered connection for all.
How to Enable or Disable a Metered Connection in Windows 10?
To enable or disable a Metered Connection in Windows 10, use the following steps:-
Step 1. First, open the Settings app by pressing Windows + I keys on the keyboard.
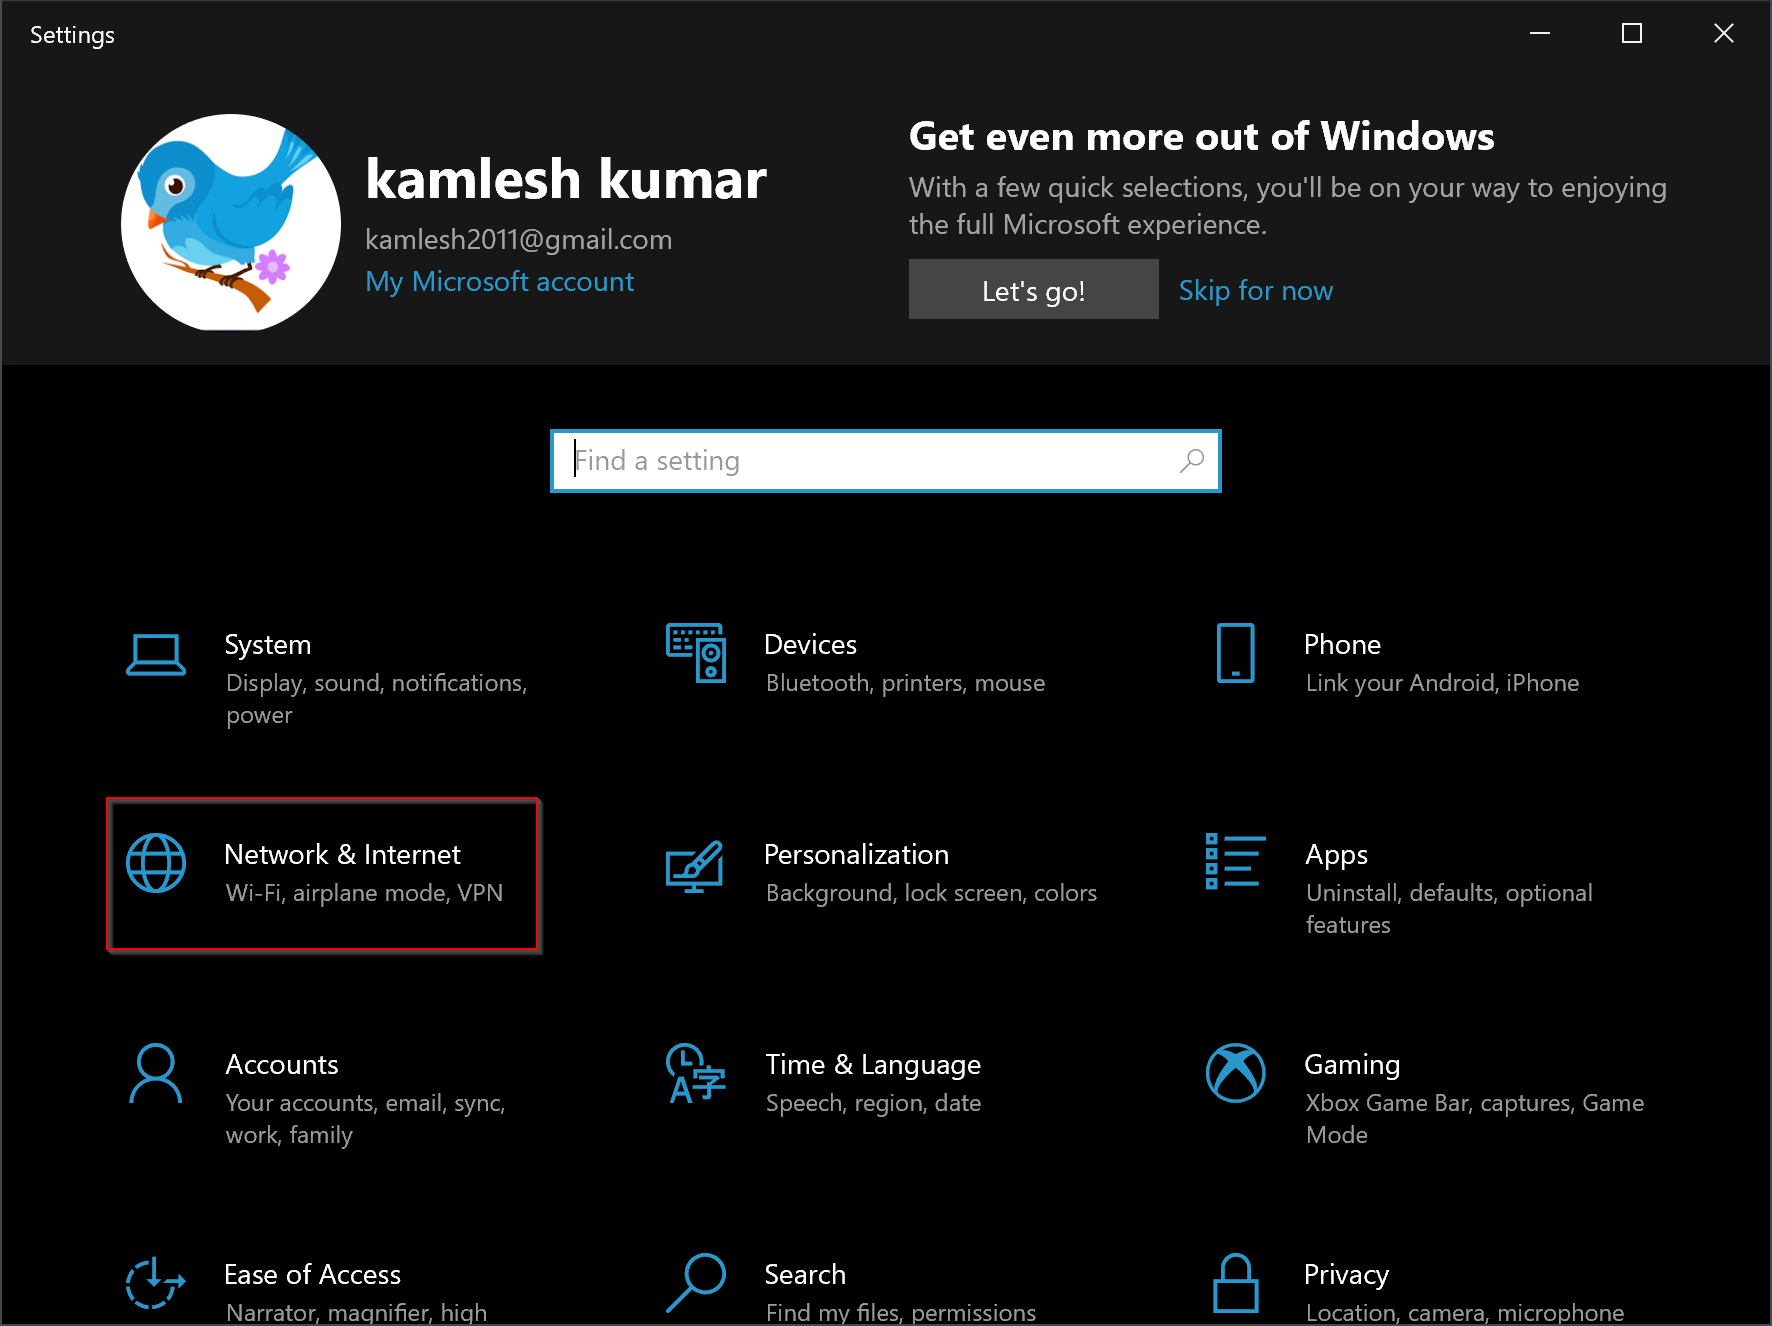
Step 2. When Windows Settings appears, click on the Network & Internet category.
Step 3. Then, select the Wi-Fi tab in the left sidebar.
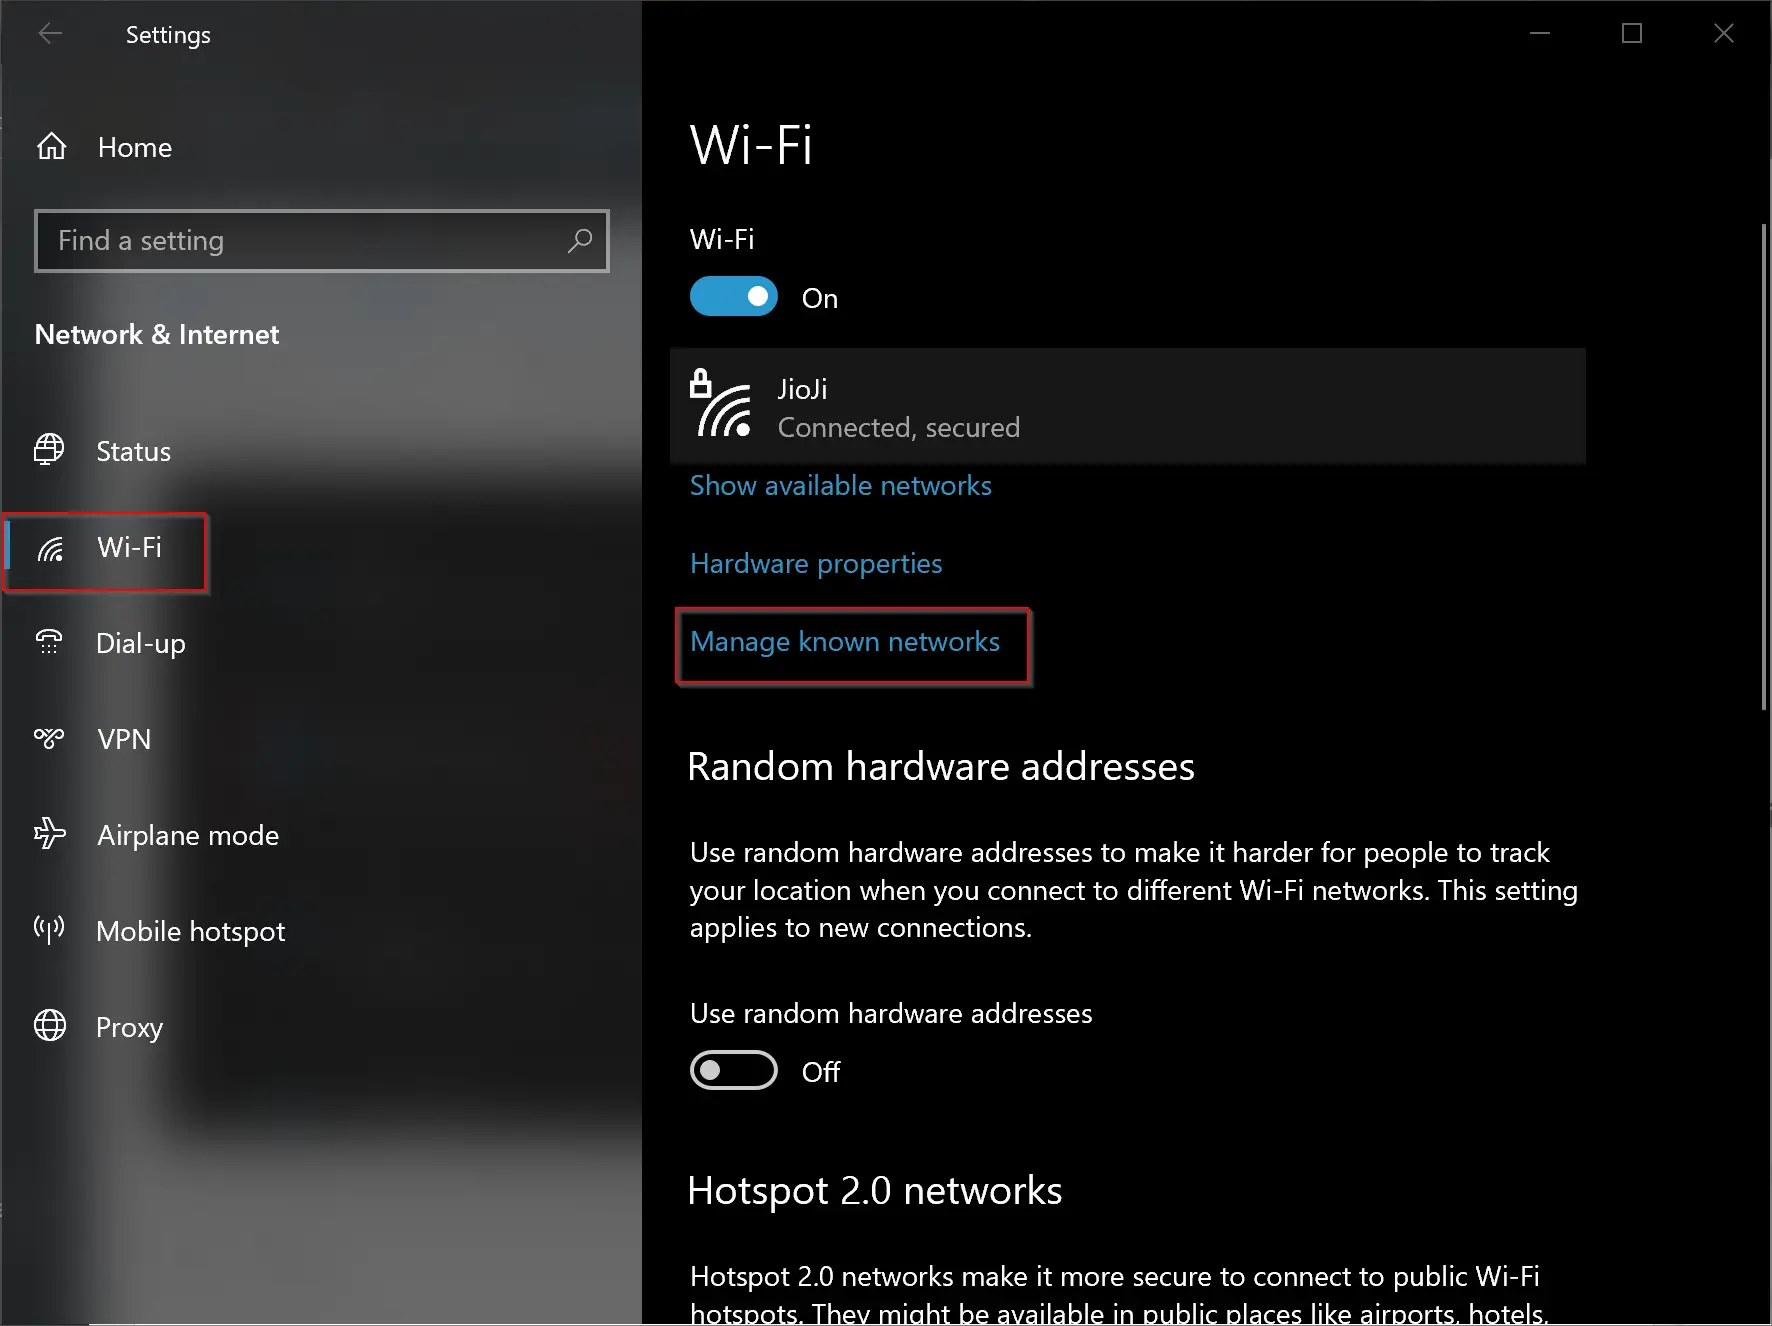
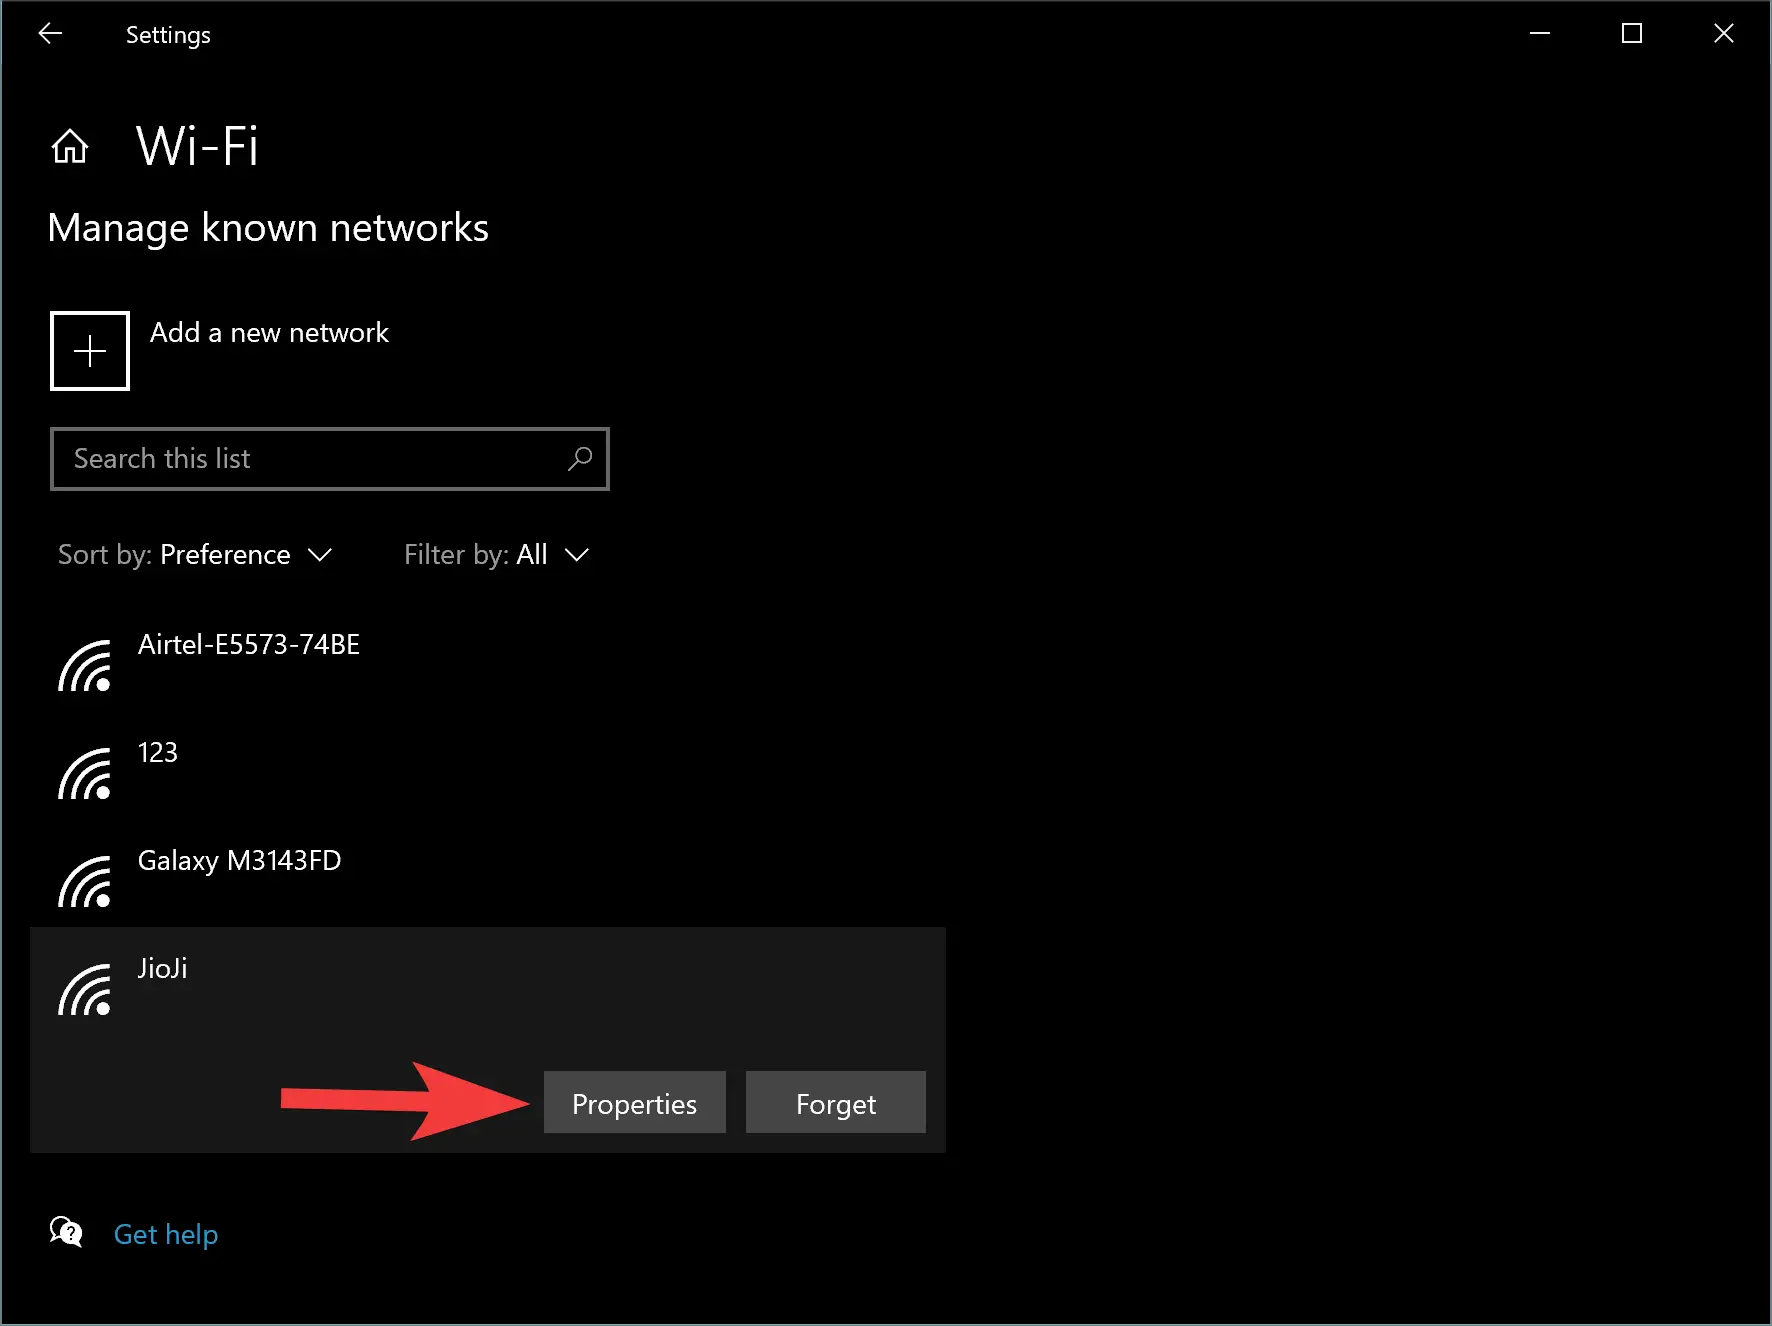
Step 4. After that, click the link Manage known networks.
Step 5. Next, select the Wi-Fi network you’d like to set Metered Connection. Then, click on the Properties button under it.
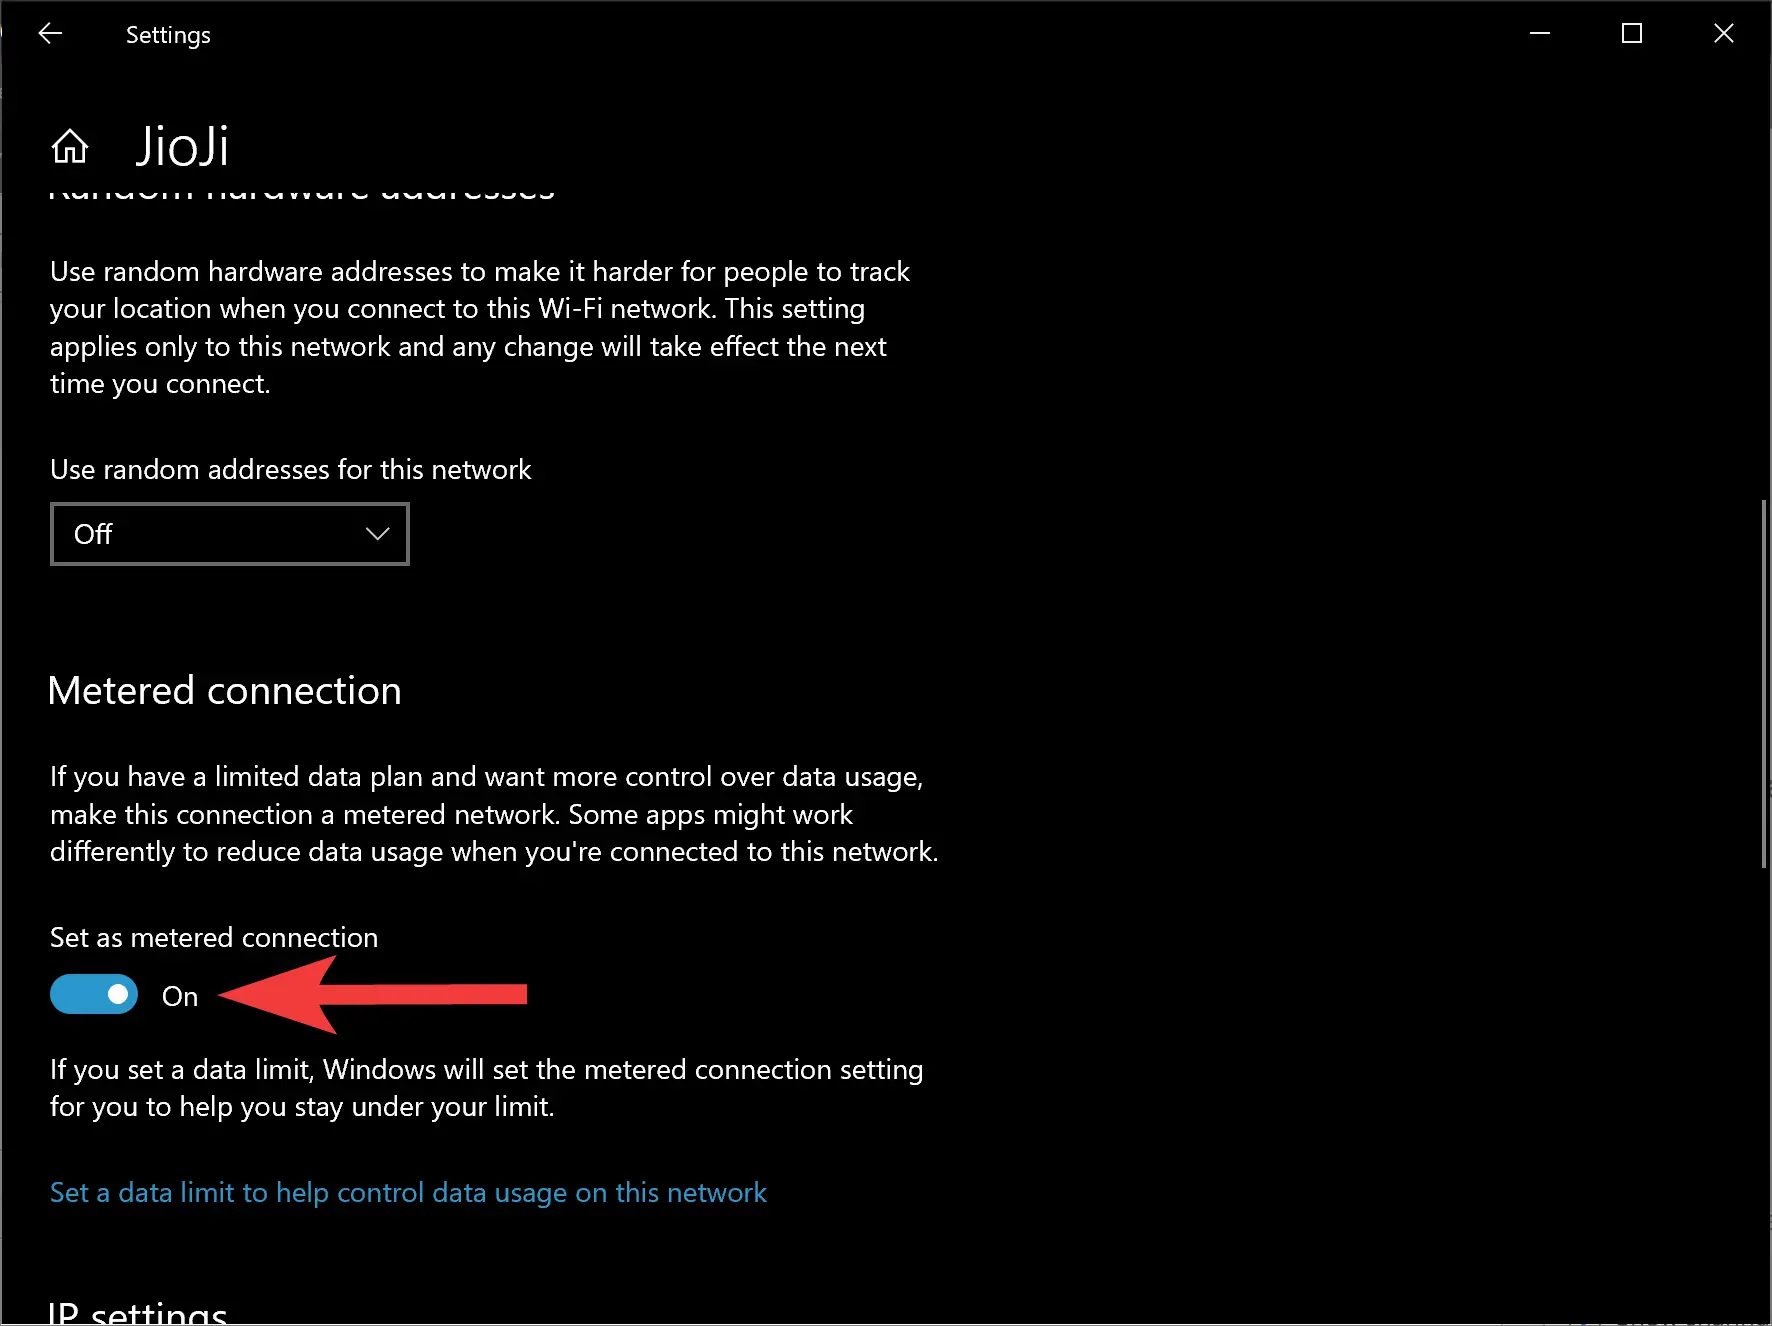
Step 6. In the following window, scroll down to the Metered connection section. Then, toggle the Set as metered connection to On/Off to enable or disable this feature, respectively.
Conclusion
In conclusion, the metered connection feature in Windows 11 and Windows 10 allows users to control their internet usage by limiting data usage on certain networks. This feature is particularly useful when using a mobile network or when there is a limited amount of data available. By enabling metered connection, Windows will stop downloading updates, and some apps may also work differently to reduce data usage. To enable or disable the metered connection feature in Windows 11, users can follow a few simple steps in the Settings app. Similarly, in Windows 10, users can access the feature through the Wi-Fi settings and manage known networks. Overall, the metered connection feature is a convenient tool for users who want to manage their internet data usage effectively.