Microsoft had introduced Desktop Stickers in Windows 11 Insider build 25162. The Desktop Stickers feature allows you to choose and edit stickers for your wallpaper using Windows Spotlight or a picture with Fill as your desktop background image. You can add stickers to your desktop through Settings or the desktop context menu.
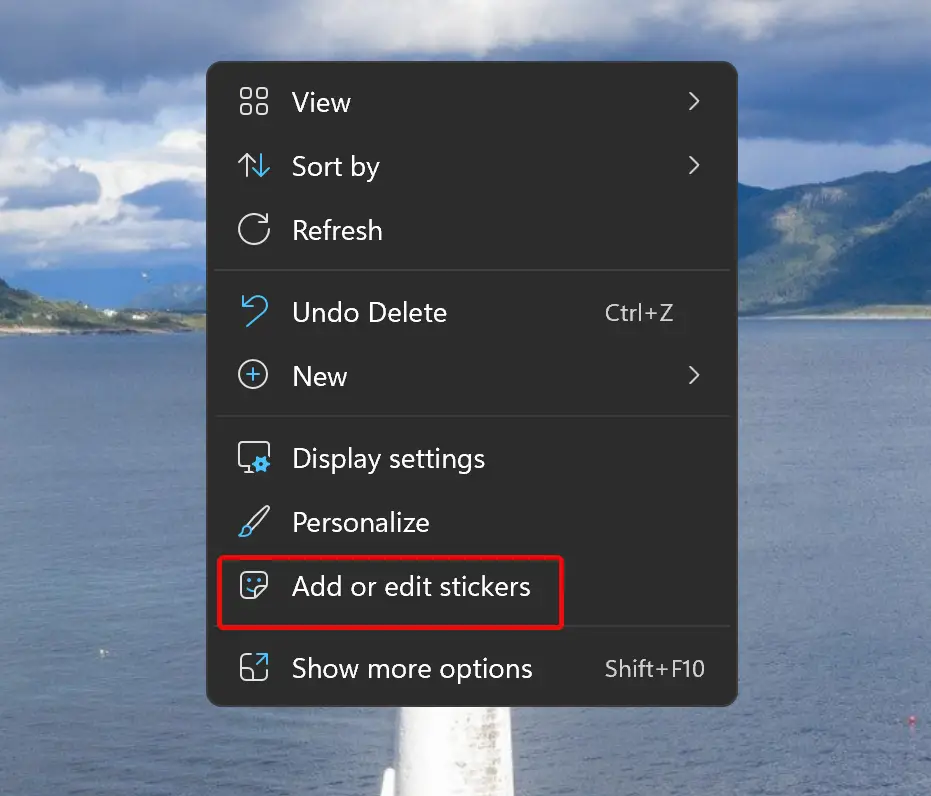
When the Desktop Stickers are enabled, it also places “Add or edit stickers” on the desktop context menu. However, it is possible to remove this context menu by tweaking the Registry if you don’t need it.
In this gearupwindows article, you will learn how to add or remove the “Add or edit stickers” Desktop context menu in Windows 11.
How to Remove the “Add or edit stickers” Desktop context menu in Windows 11?
To hide the “Add or edit stickers” in the Windows 11 desktop context menu, use these steps:-
Step 1. Open Registry Editor.
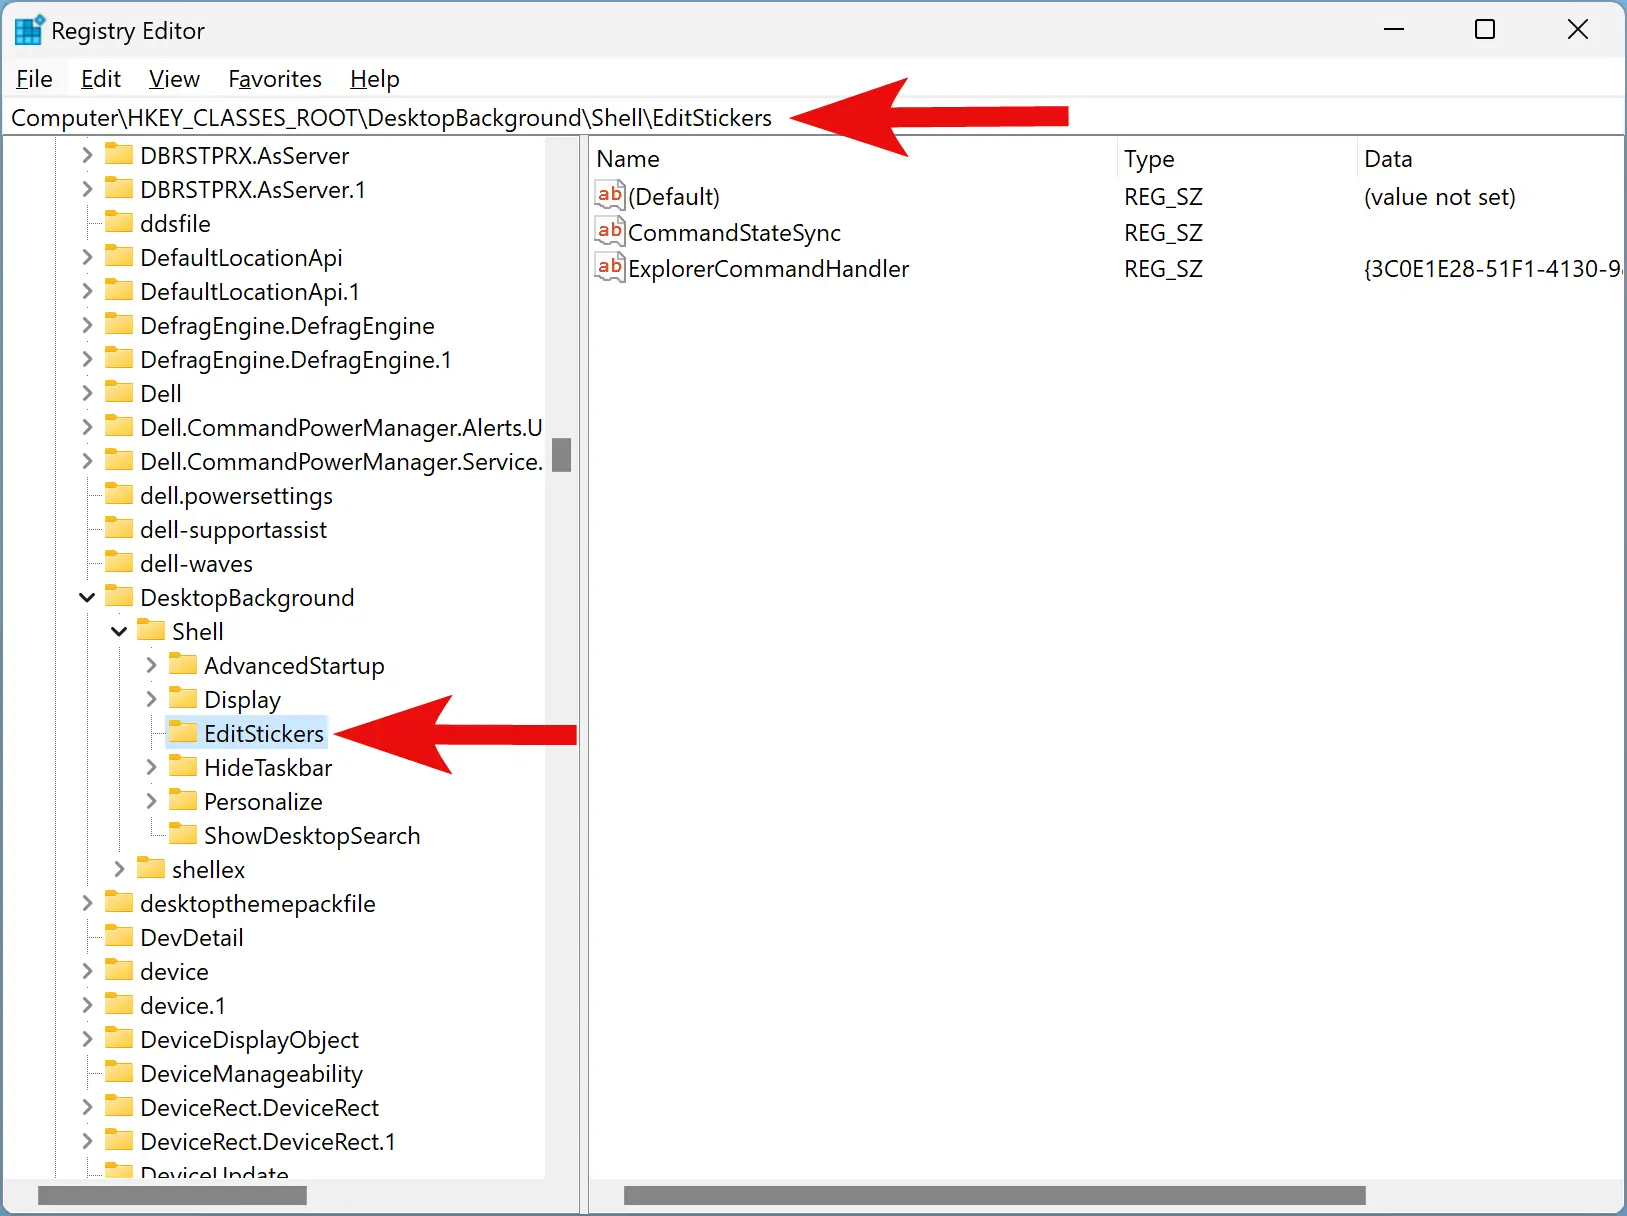
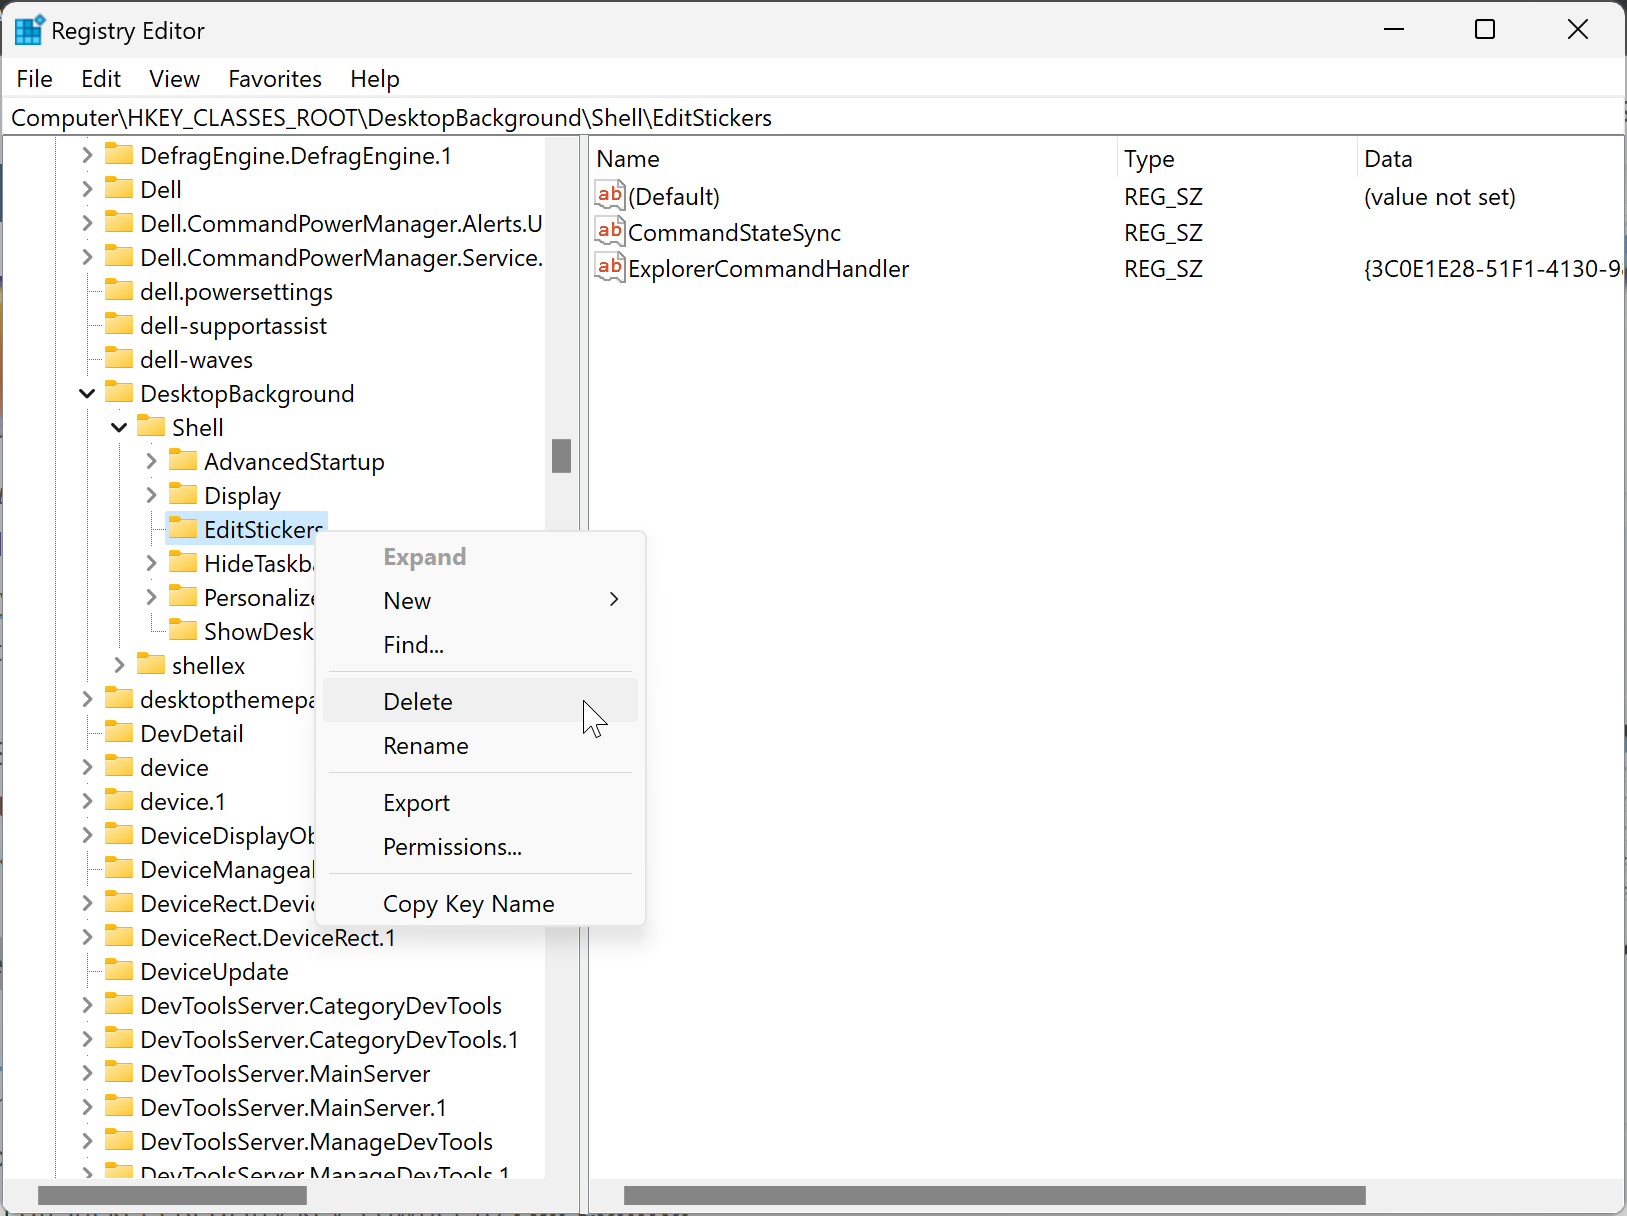
Step 2. Navigate to the following key in the left sidebar of the Registry Editor window:-
HKEY_CLASSES_ROOT\DesktopBackground\Shell\EditStickers
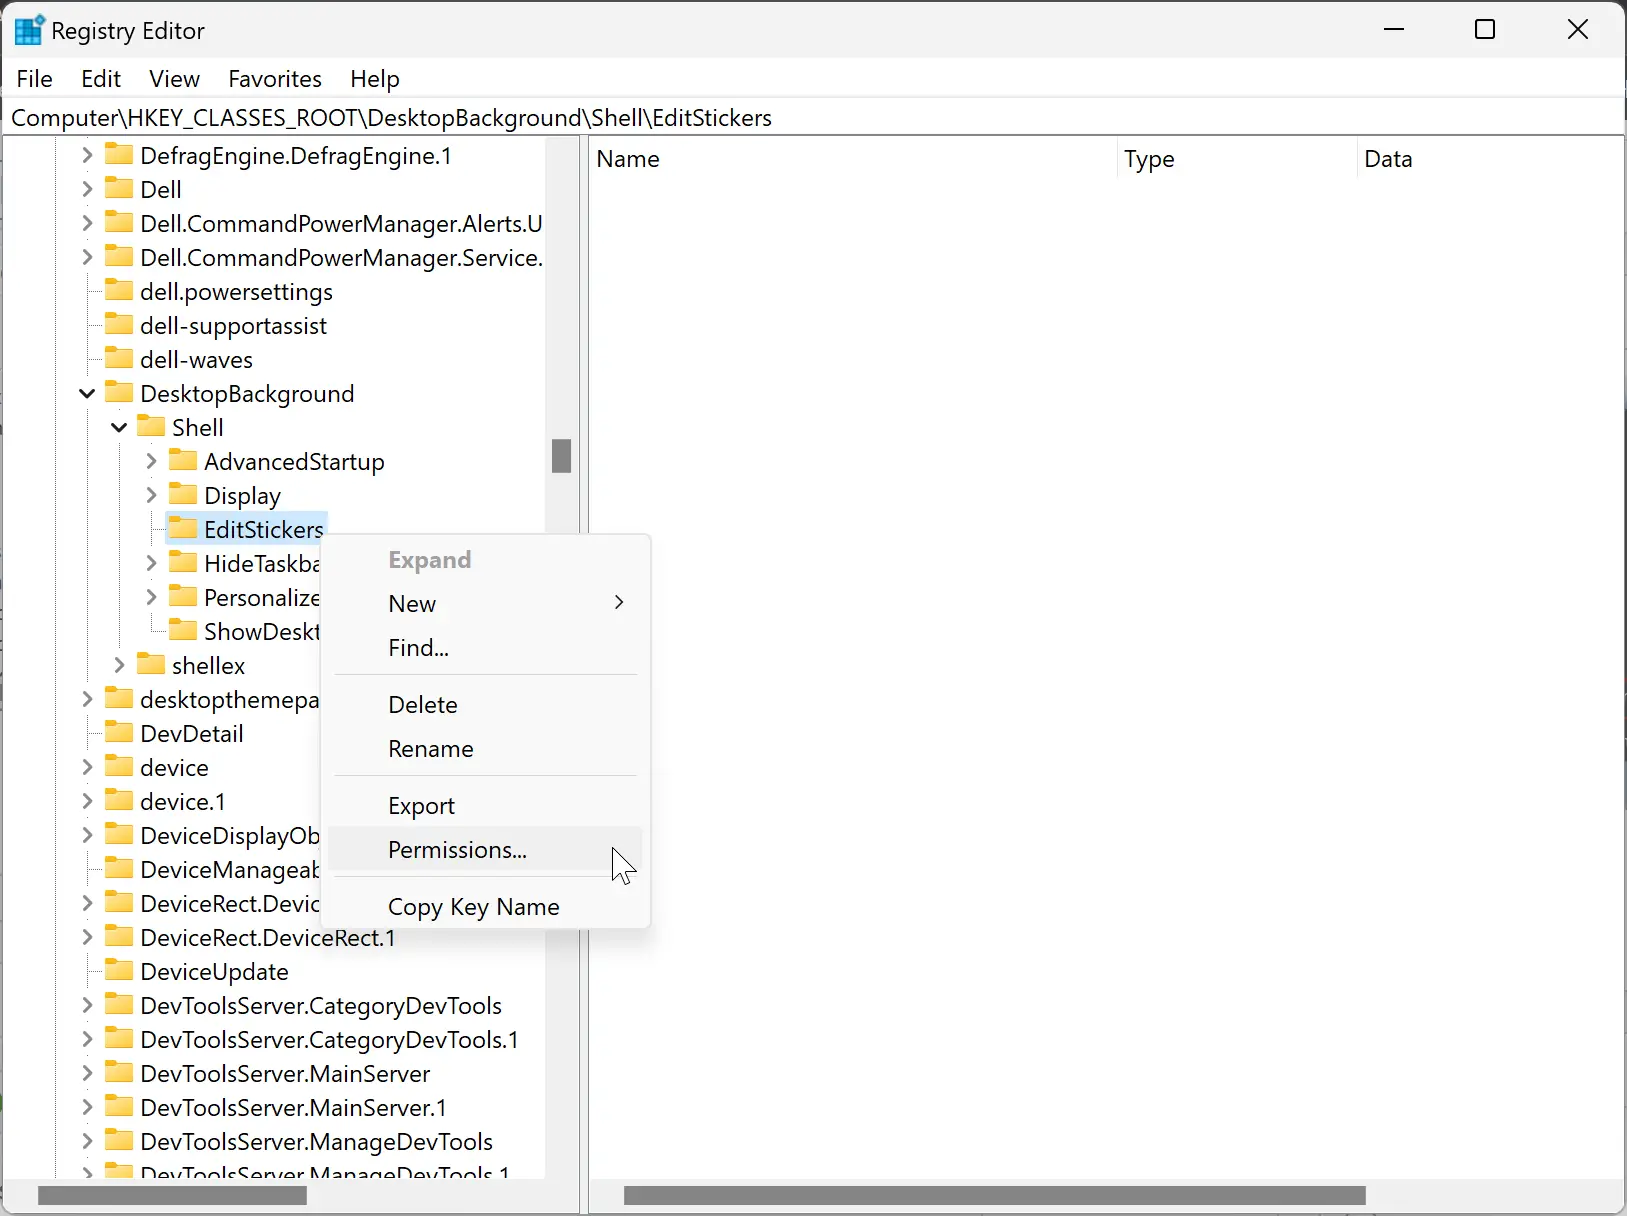
Step 3. Right-click on the EditStickers key and select Permissions option.
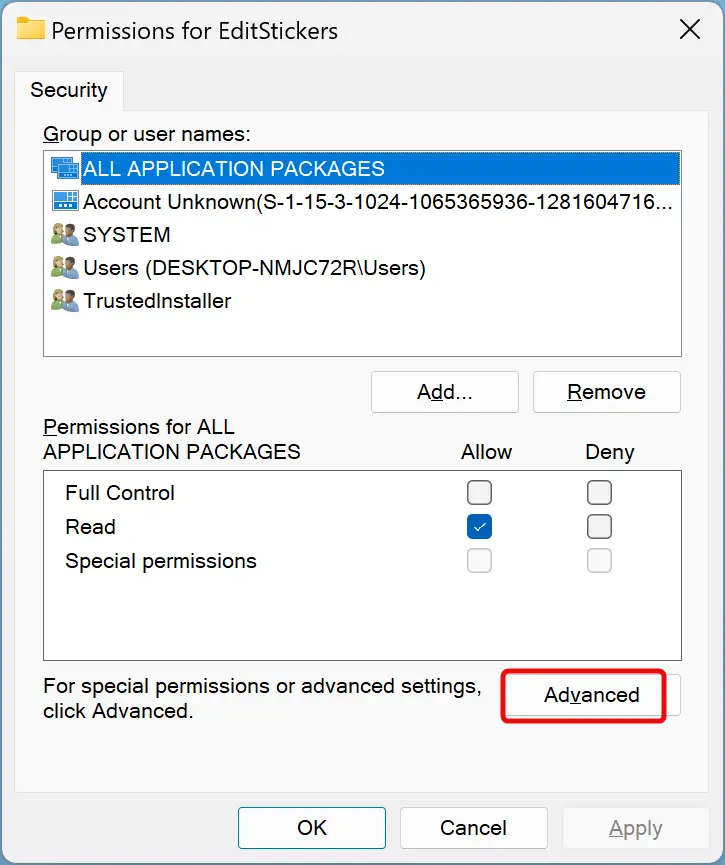
Step 4. Once done, the “Permissions for EditStickers” window will open. Here, click on the Advanced button.
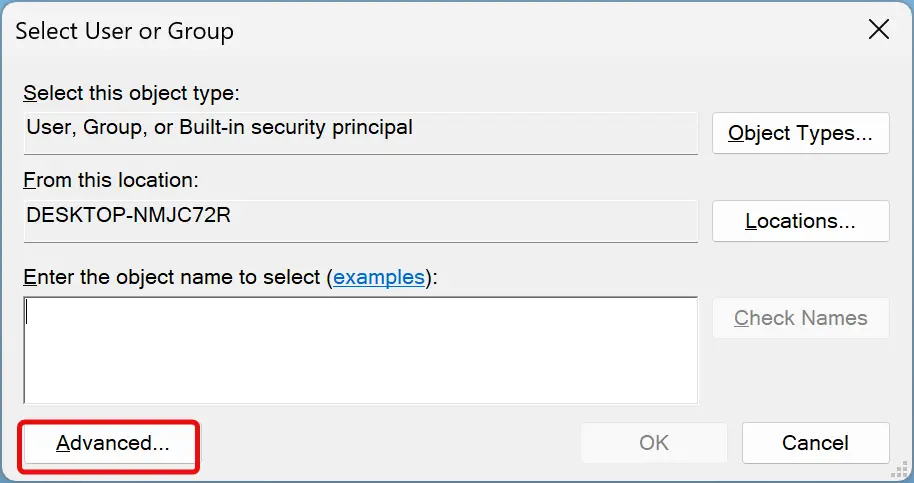
Step 5. In the following screen, click the Change link.

Step 6. Click the Advanced button.
Step 7. Click the Find Now button.

Step 8. Under the “Search results” section, click Administrators.
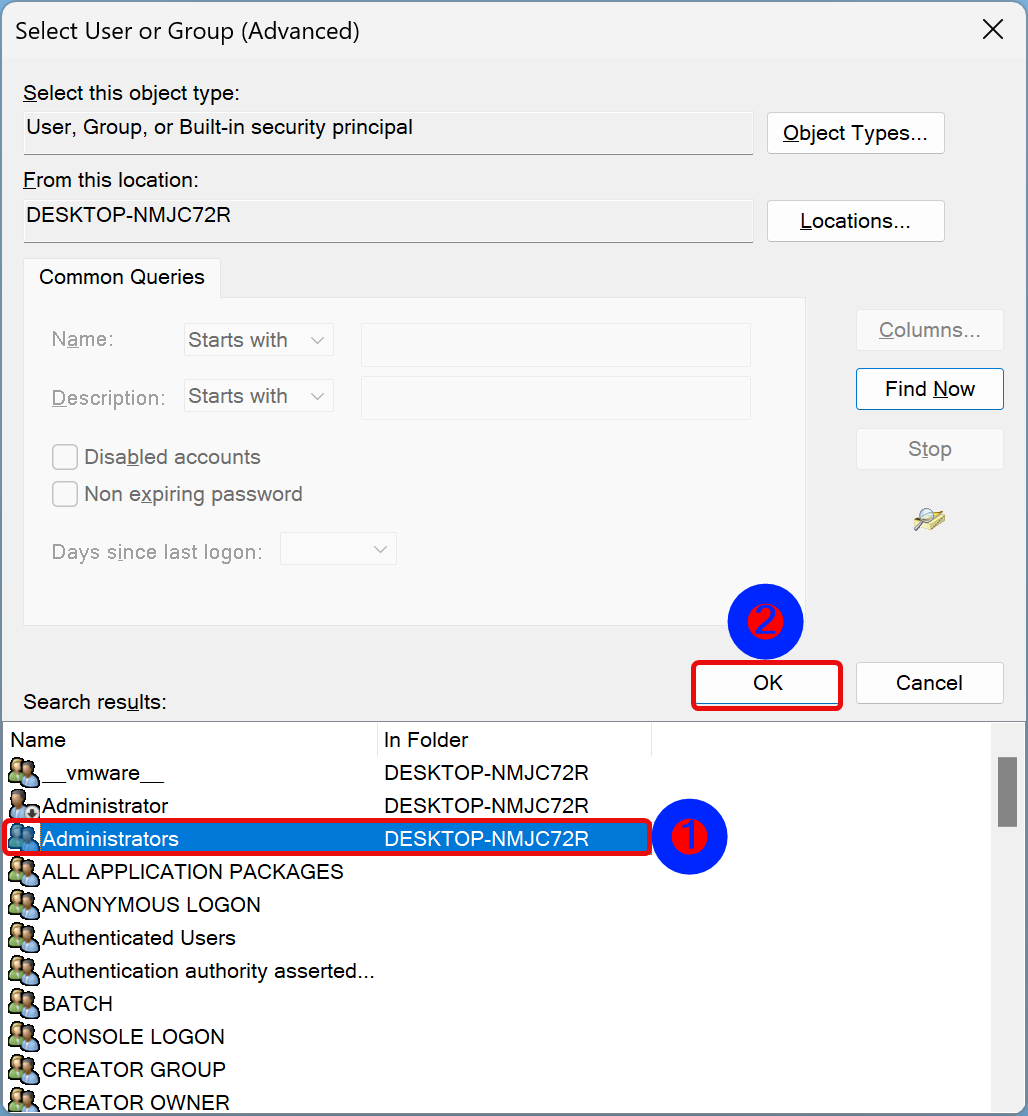
Step 9. Click OK.
Step 10. Click OK.
Step 11. Click Apply.
Step 12. Click OK.
Step 13. Select Administrators and check to Allow for “Full Control.”
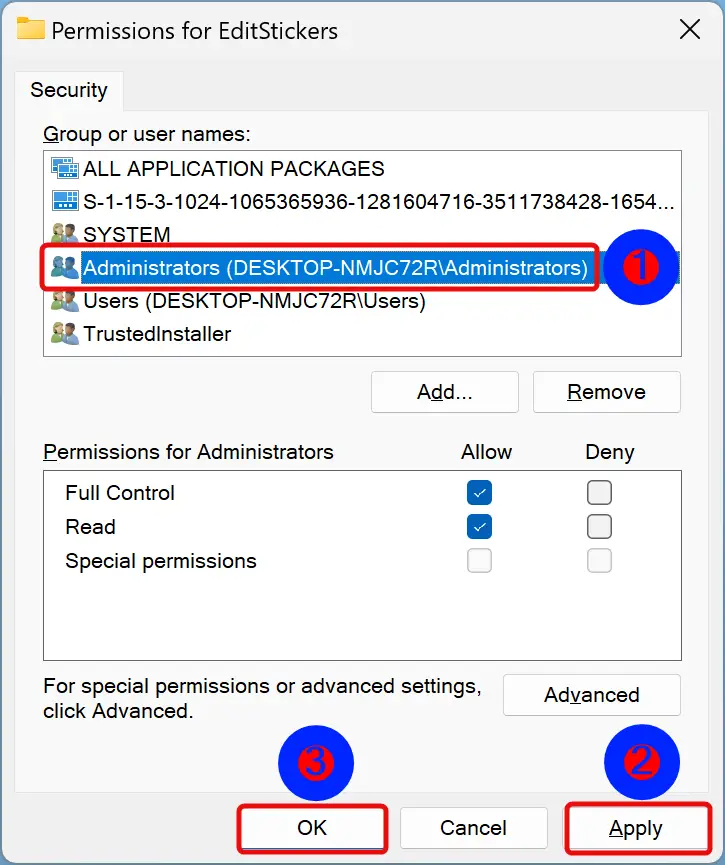
Step 14. Click Apply.
Step 15. Click OK.
Step 16. Again, right-click on the EditStickers key and select the Delete option.
Step 17. Click Yes when prompted.
Step 18. Restart your computer to apply the changes.
Once you complete the above steps, the “Add or edit stickers” desktop context menu will no longer appear in Windows 11.
How to Add the “Add or edit stickers” Desktop context menu in Windows 11?
If you wish to add the “Add or edit stickers” Desktop context menu in Windows 11, use these steps:-
Step 1. Open Registry Editor.
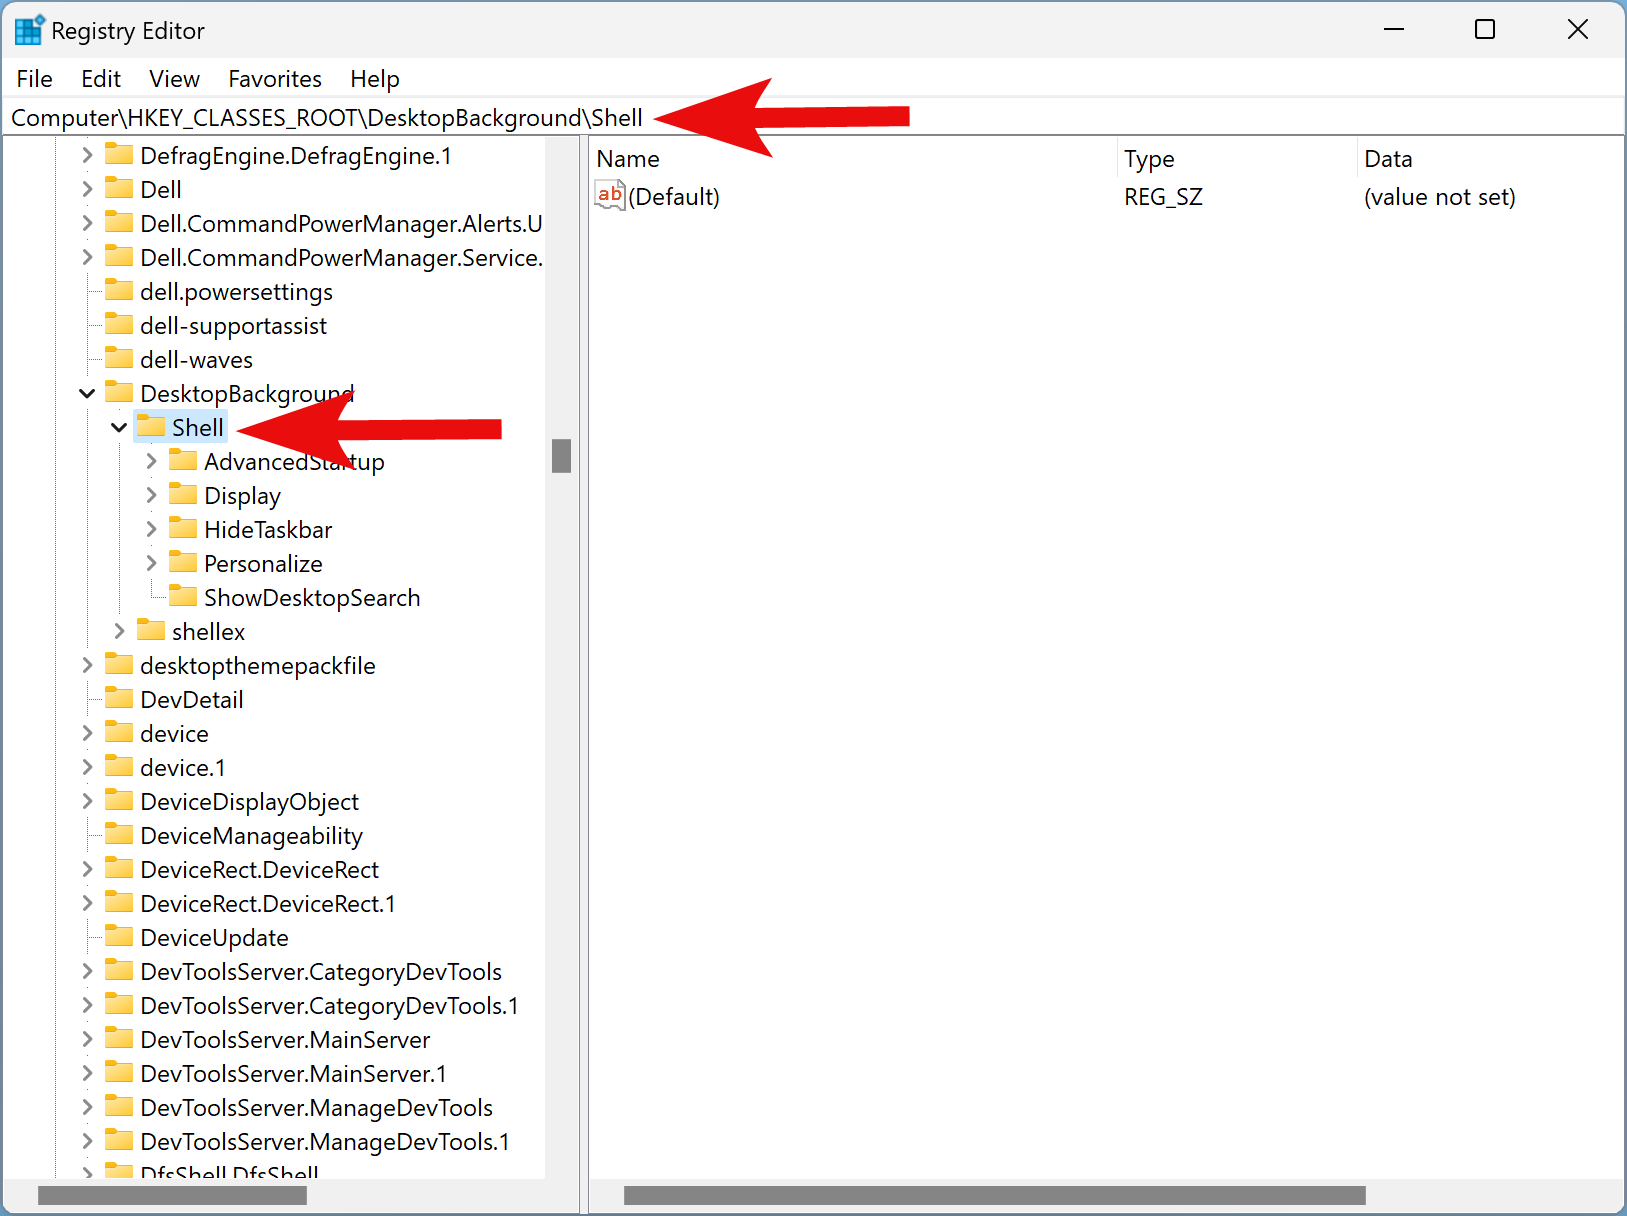
Step 2. Browse or navigate to the following key in the left sidebar of the Registry Editor window:-
HKEY_CLASSES_ROOT\DesktopBackground\Shell
Step 3. Right-click on the Shell folder in the left sidebar and select New > Key.
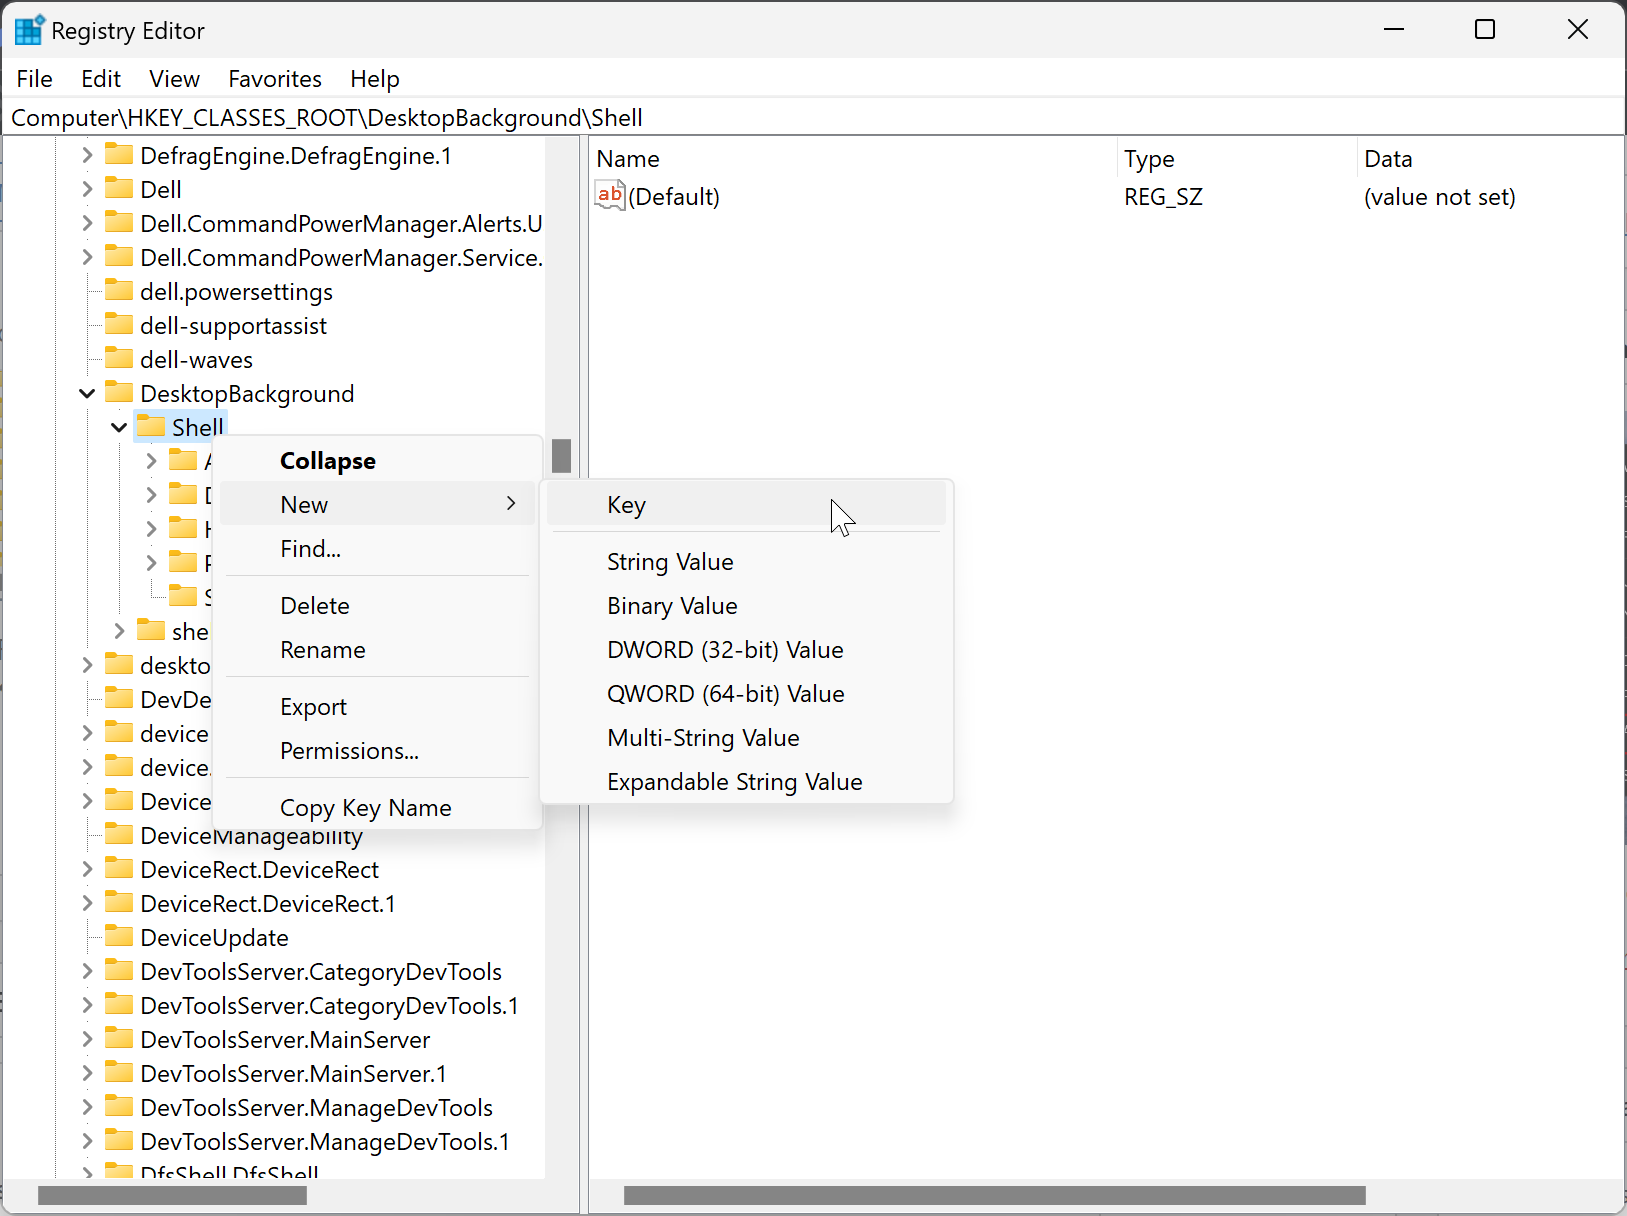
Step 4. Name the newly created key to EditStickers.
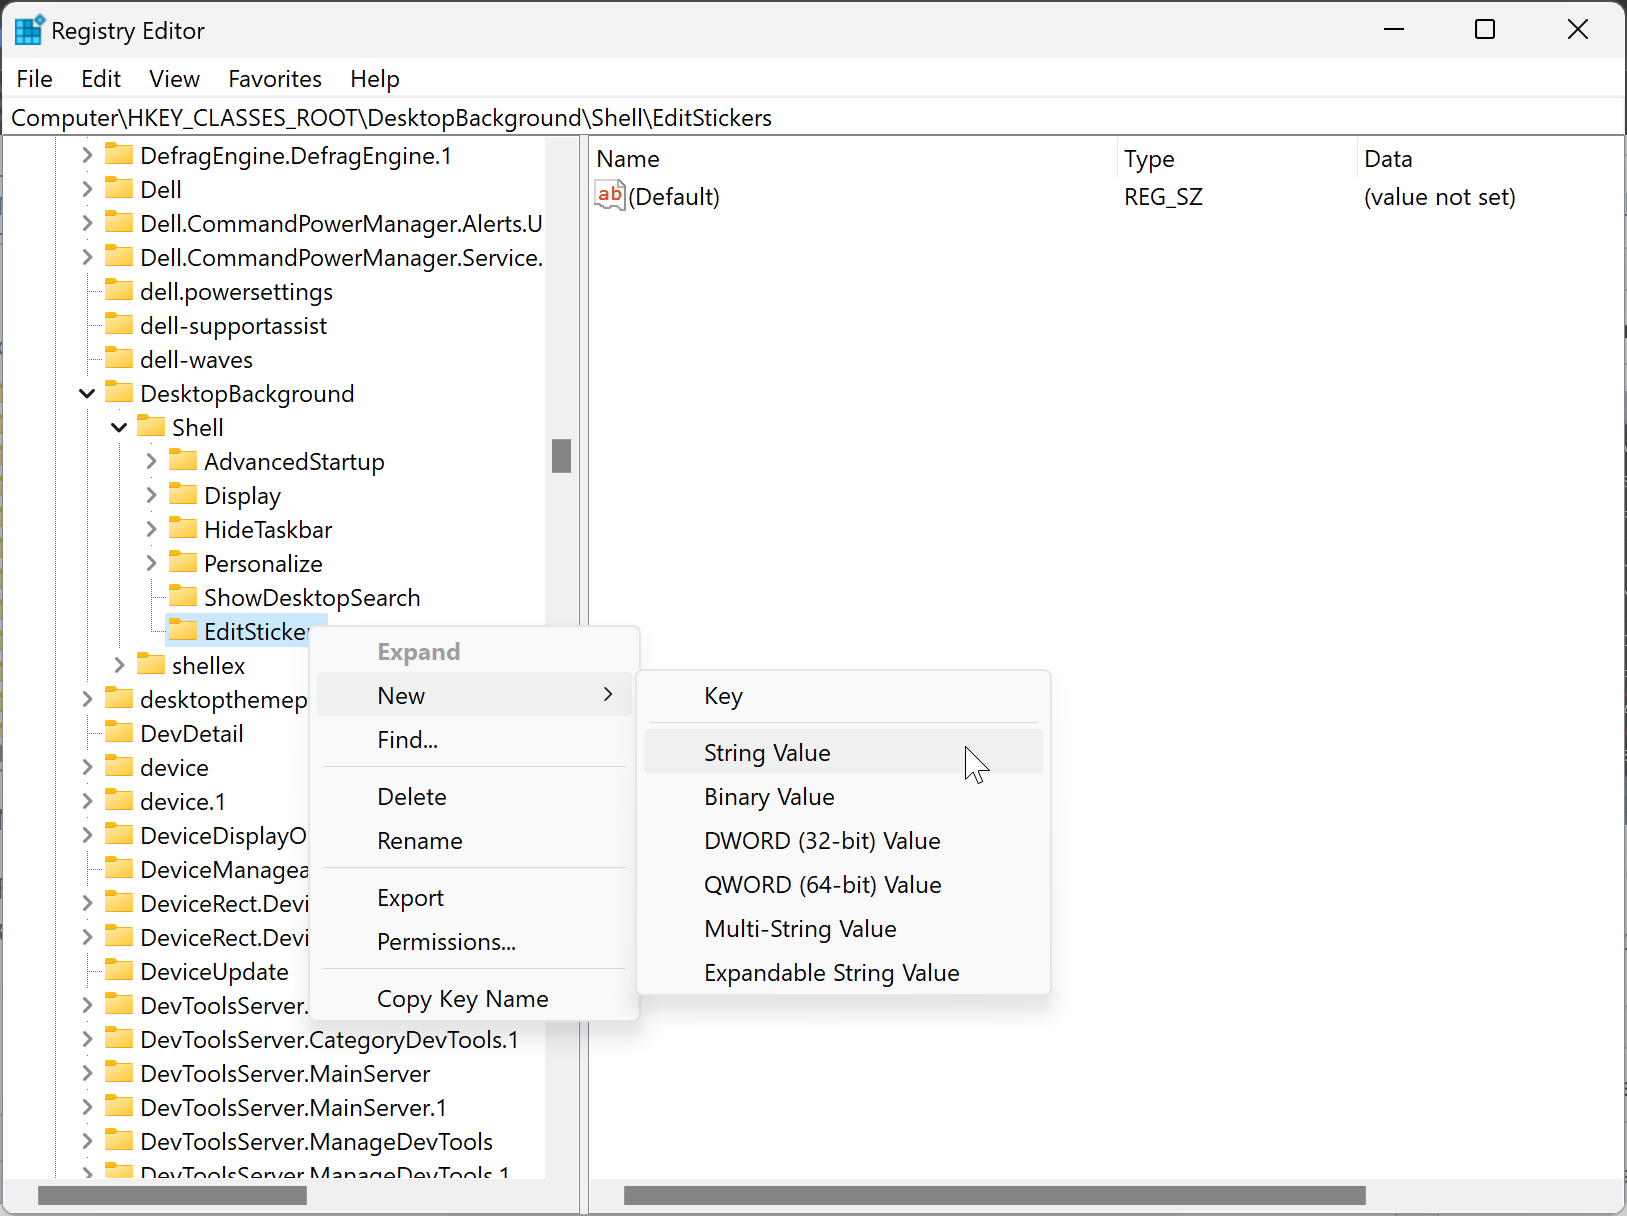
Step 5. Right-click on the EditStickers key and select New > String Value.
Step 6. Name the newly created REG_SZ to CommandStateSync.
Step 7. Again, right-click on the EditStickers key and select New > String Value.
Step 8. Name this new REG_SZ to ExplorerCommandHandler.
Step 9. Double-click on the ExplorerCommandHandler REG_SZ and copy and paste the following in the “Value data” field:-
{3C0E1E28-51F1-4130-98AC-0FBFB5FE4638}
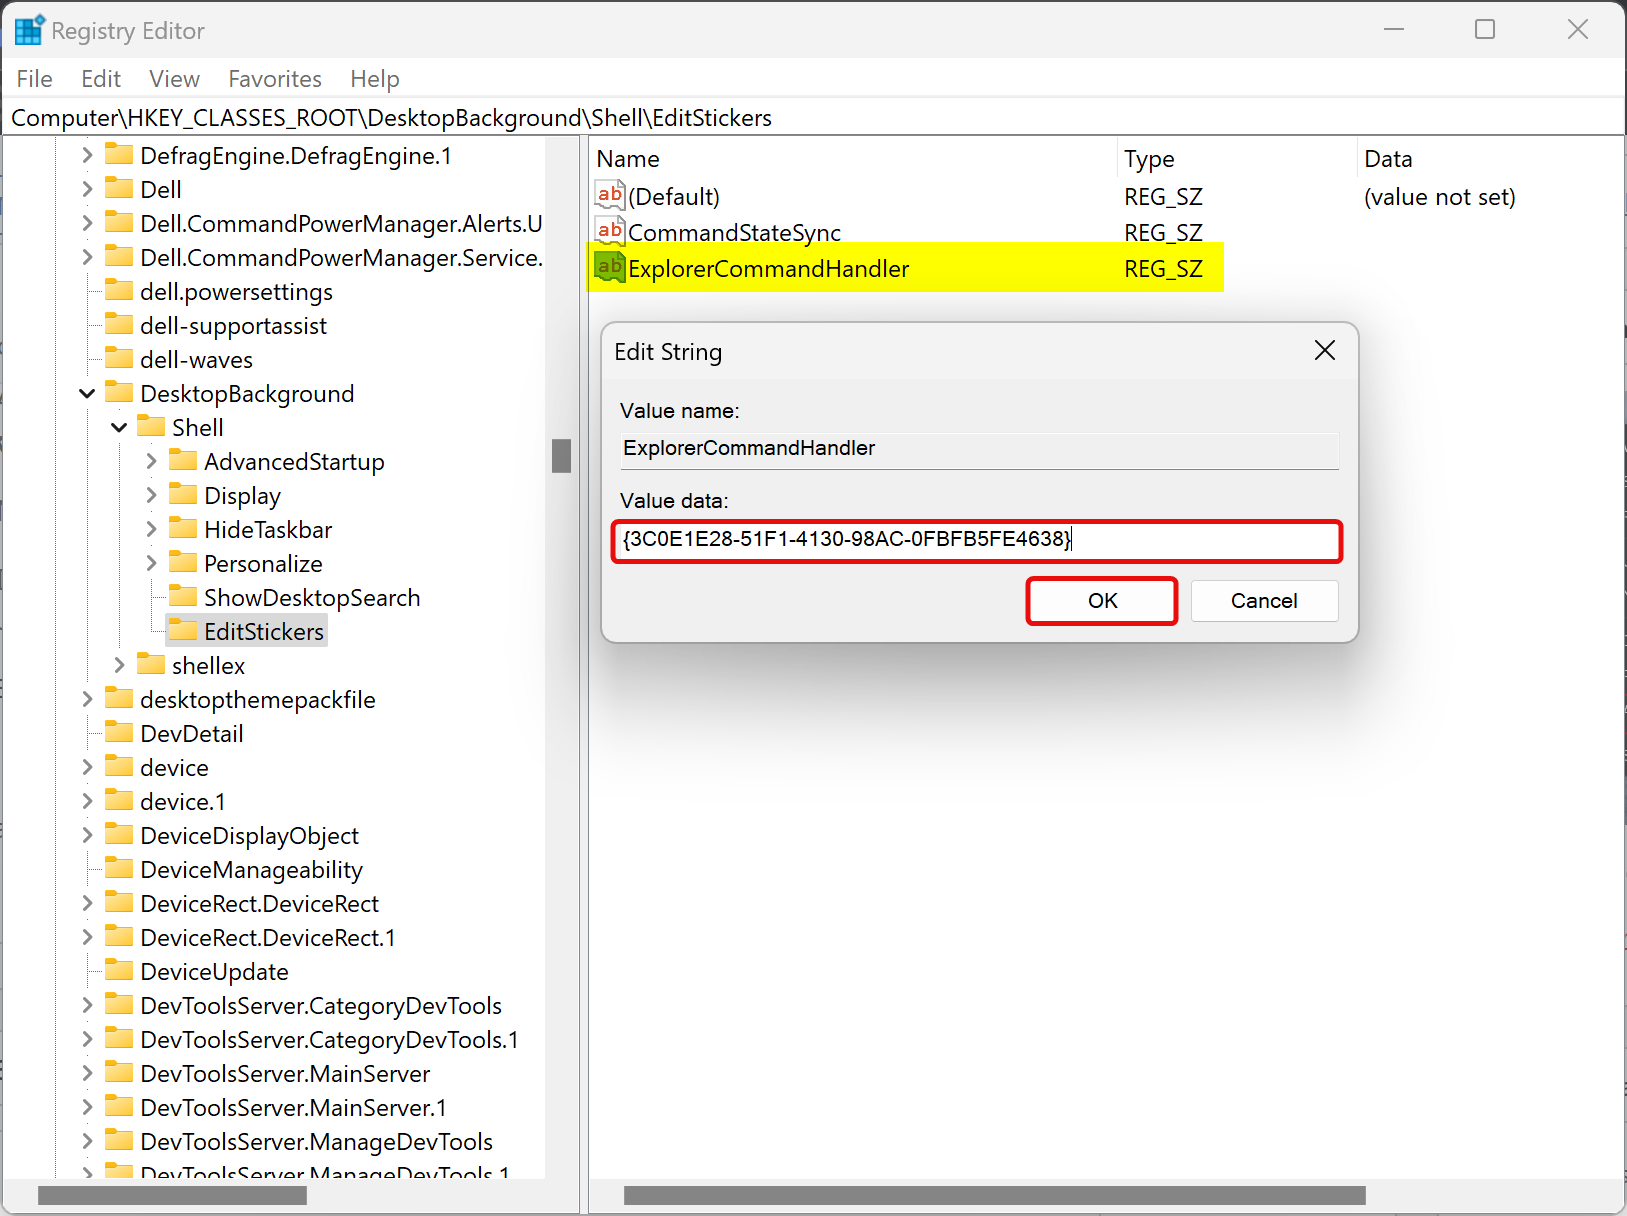
Step 10. Click OK.
Step 11. Restart your computer.
Once you complete the above steps, the “Add or edit stickers” desktop context menu will appear again in your Windows 11 machine.
Conclusion
In conclusion, Desktop Stickers is a new feature in Windows 11 Insider build 25162 that allows you to choose and edit stickers for your wallpaper. When enabled, the “Add or edit stickers” option appears in the desktop context menu, but it can be removed by tweaking the Registry. This article provided step-by-step instructions on how to remove or add the “Add or edit stickers” option in Windows 11. These procedures can help users customize their Windows 11 desktop to their liking.