Do you want to sign in automatically to Windows 11 without a password quickly? This gearupwindows article will guide you with simple steps to log in to your Windows PC automatically. If you independently handle your PC, there is no need to put in a password to sign in to your account every time you start or restart your machine. In my case, I use my computer at home, and I don’t carry it with me. For me, it is useless to secure my laptop with a password. It remains in the house as my other belongings. Still, if you have treasures on your computer, you should put in a strong password so that it will stay safe.
Reasons may be several, and requirements may vary from person to person. To sign in automatically without a password in Windows 11, you can create a local account and don’t set a password. It will serve your purpose. While that method works out of the box, it will work if you have created more than one account on your PC or want to use their Microsoft Accounts in Windows 11 for additional services, sync, apps, etc.
Also Read: How to enable “Automatically sign in” in Windows 10?
When you sign in to Windows 11 with a Microsoft Account, it forces you to use your password or a PIN code. That means to enable automatic login, you need some extra steps to perform. It is also worth mentioning that you need to disable Windows Hello to use automatic sign-in Windows. After that, you can set up automatic login using a classic Control Panel applet or with a Registry tweak.
How to “Automatically sign in” in Windows 11 using Microsoft AutoLogon?
AutoLogon is a small tool developed by Microsoft that enables automatic sign-in without a password in Windows 11. It stores your encrypted username and password in the Windows registry and allows you login into your account. If you are new to Windows and don’t want to go through a lengthy procedure to enable automatic sign-in to Windows 11, it may be your first choice. It is pretty easy to use, and you can instantly enable or disable the automatic sign-in feature on Windows computers.
To automatically sign in to Windows 11 using the AutoLogon app, perform the following steps:-
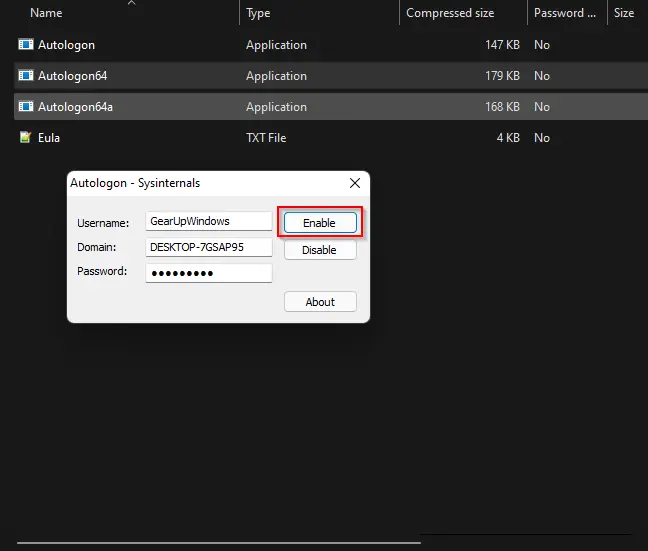
Step 1. Download the portable AutoLogon tool from the Microsoft website.
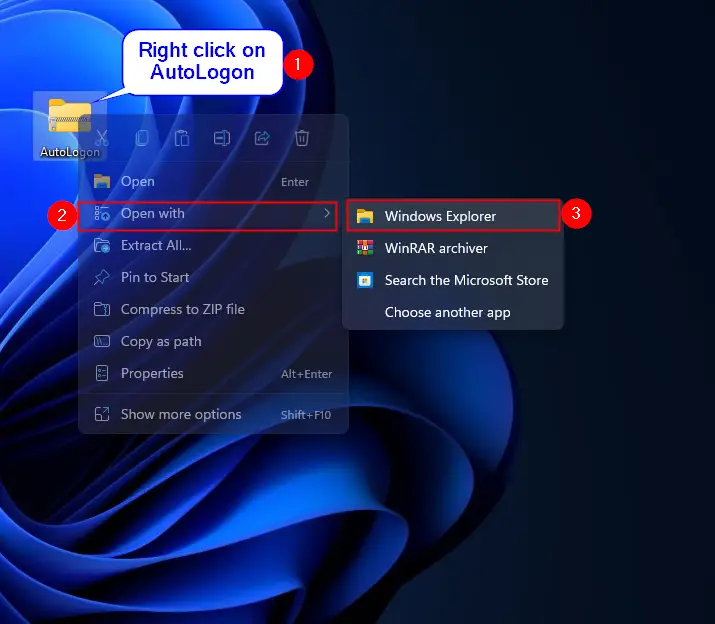
Step 2. Right-click on the downloaded zip file and select Open with > Windows Explorer.
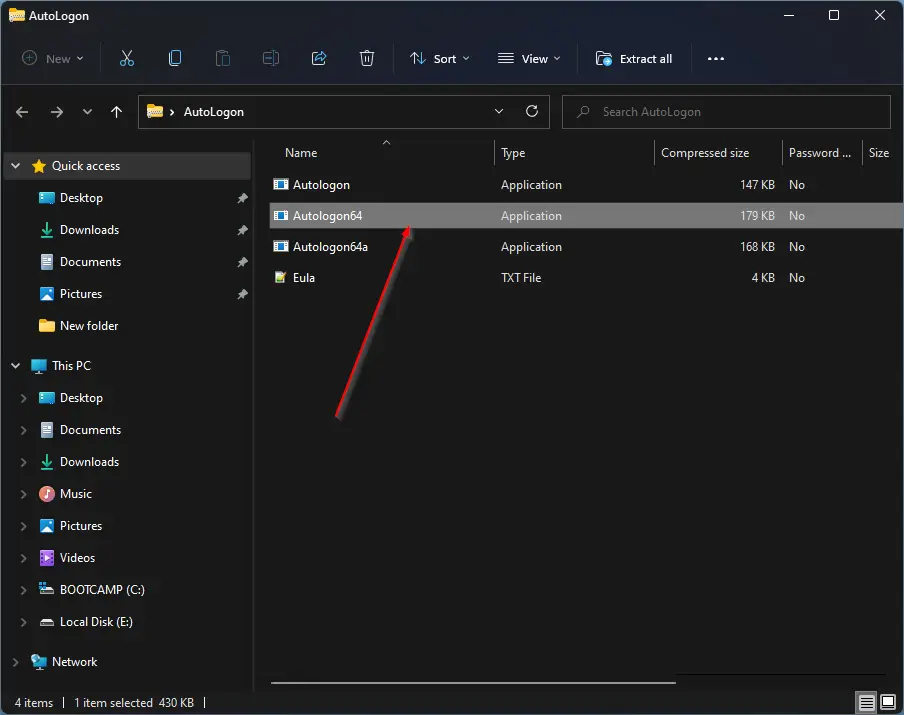
Step 3. Double-click on the Autologon64 executable file.
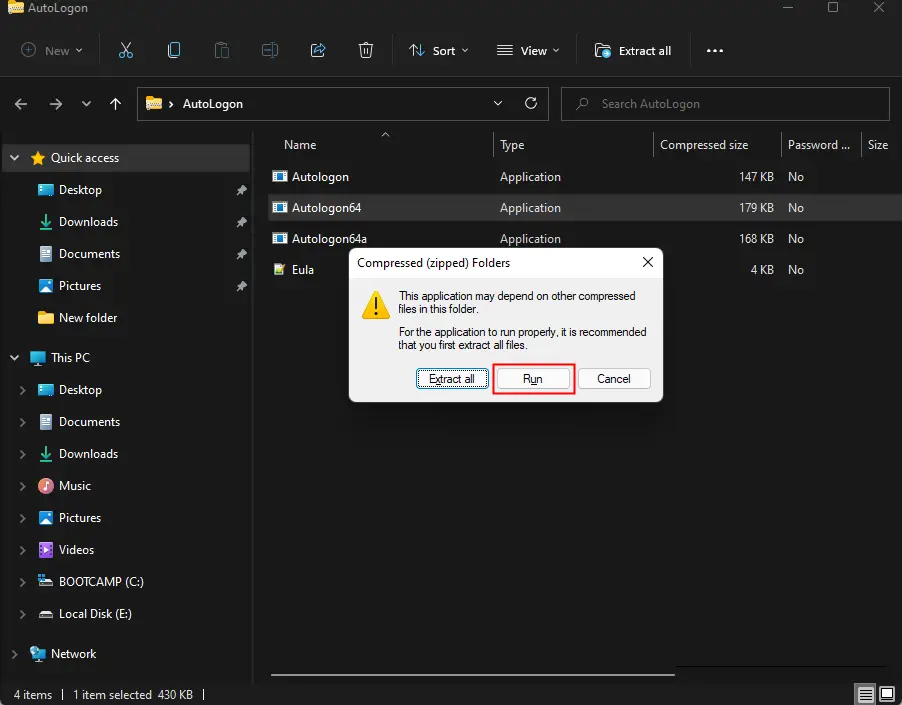
Step 4. Click Run.
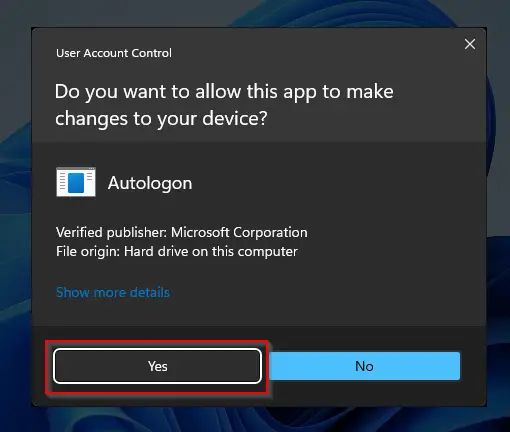
Step 5. When the User Account Control dialog prompts, click the Yes button.
Step 6. Accept the agreement then you will get a prompt to enter the password. Enter the password of your username.

Step 7. Click Enable button on the Autologon window.
That’s it. Please restart your computer, and it automatically logon on to your PC with prompting for a password. That means no need to enter the password when you start your PC.
Suppose you change your mind and want to disable automatic login or see a prompt to sign in to your computer; repeat the above steps, and in step 7, select Disable option. Restart your computer to see a prompt for a password.
If you don’t prefer to use a third-party app, that means you want to use the inbuilt options to enable automatic login on your computer or laptop; proceed with the following method.
As said above, you need to disable Windows Hello on your PC, then, using inbuilt options; you can enable the automatic sign-in feature of Windows 11.
How to Disable Windows Hello on Windows 11?
Follow these steps to turn off or disable Windows Hello on Windows 11:-
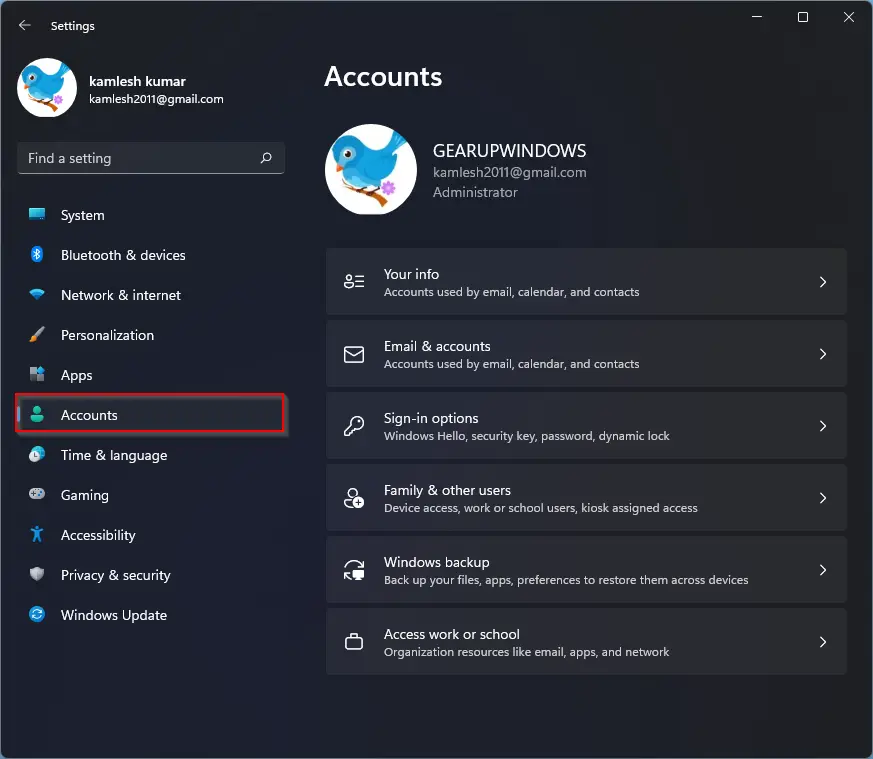
Step 1. Open the Settings app by pressing Windows + I hotkey.
Step 2. Click on the Accounts category from the left side pane in the Settings window.
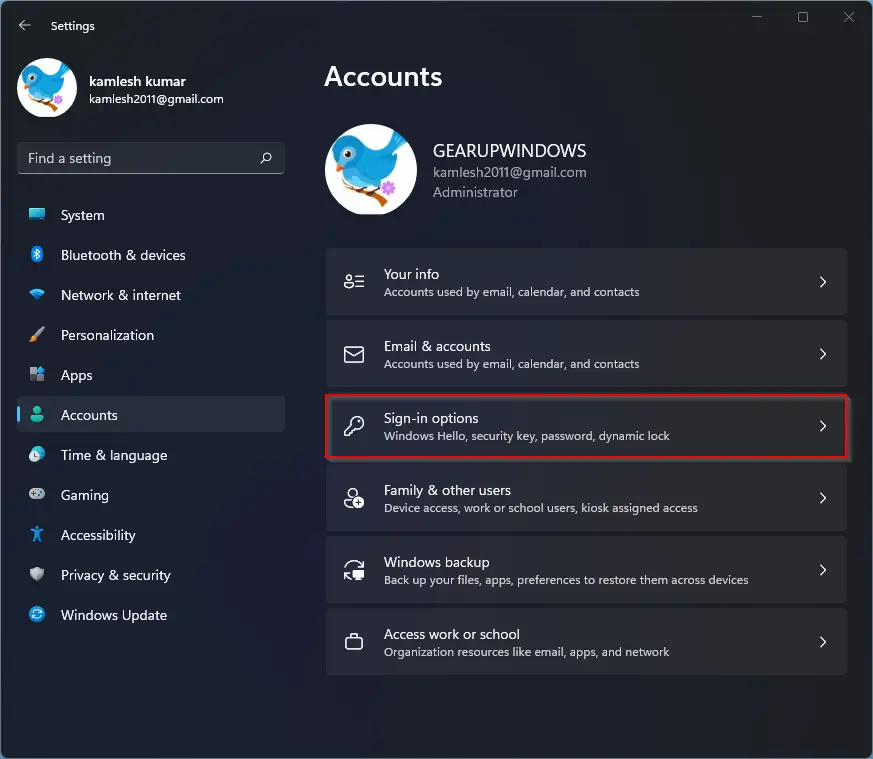
Step 3. On the right side pane of Accounts, click on the Sign-in options tab.
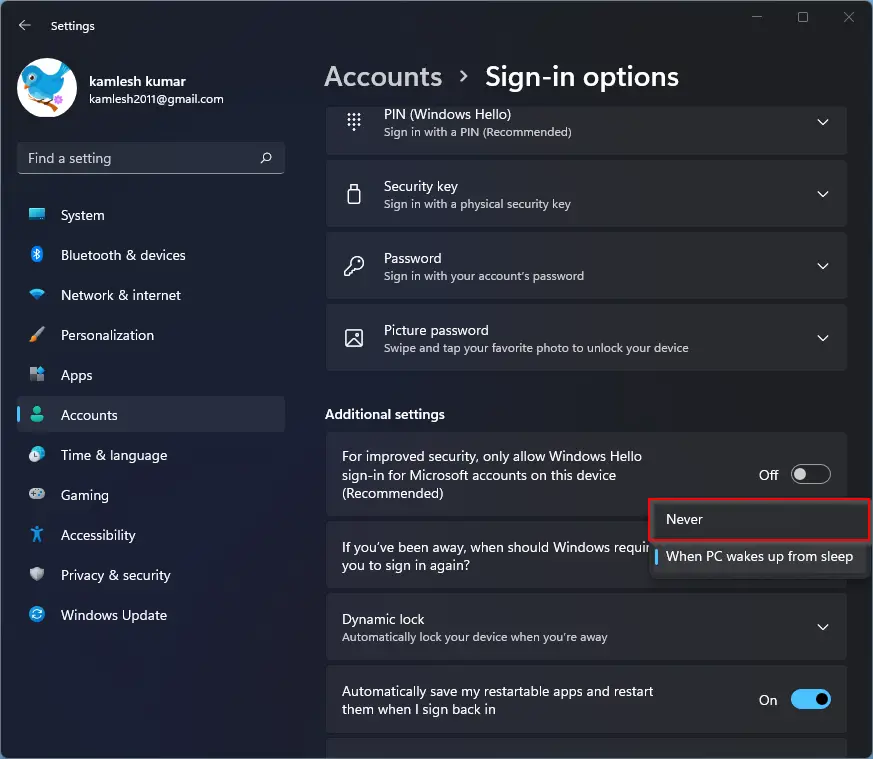
Step 4. Now, under the Additional settings section, turn off the toggle switch next to For improved security, only allow Windows Hello sign-in for Microsoft Accounts on this device (Recommended) option.

Step 5. Next, select the Never option from the drop-down menu If you’ve been away, when should Windows require you to sign in again?
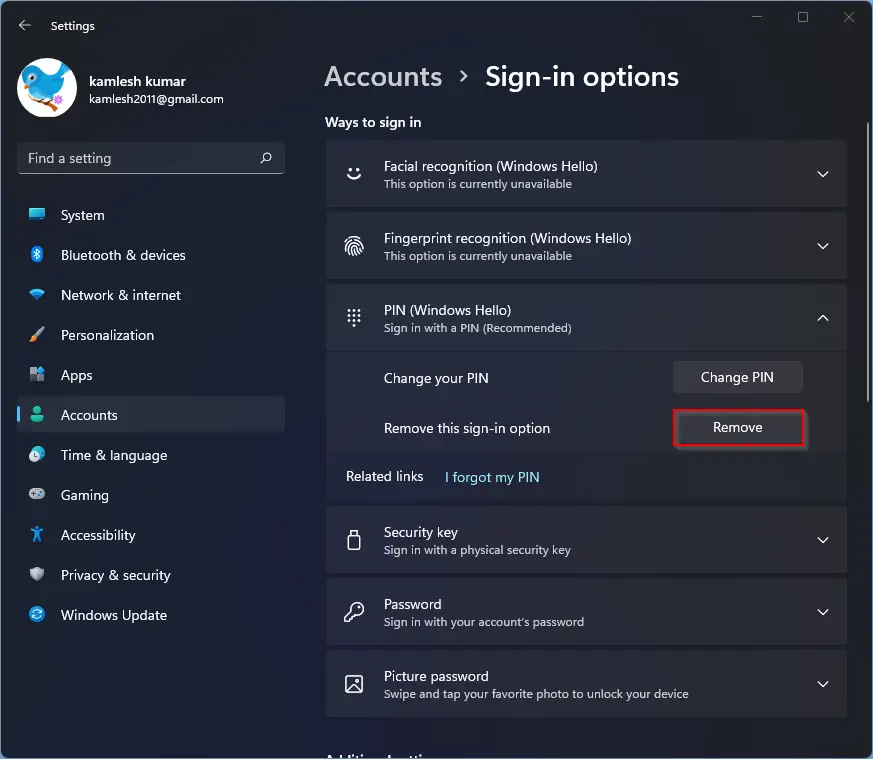
Step 6. Once done, click the PIN (Windows Hello) option.
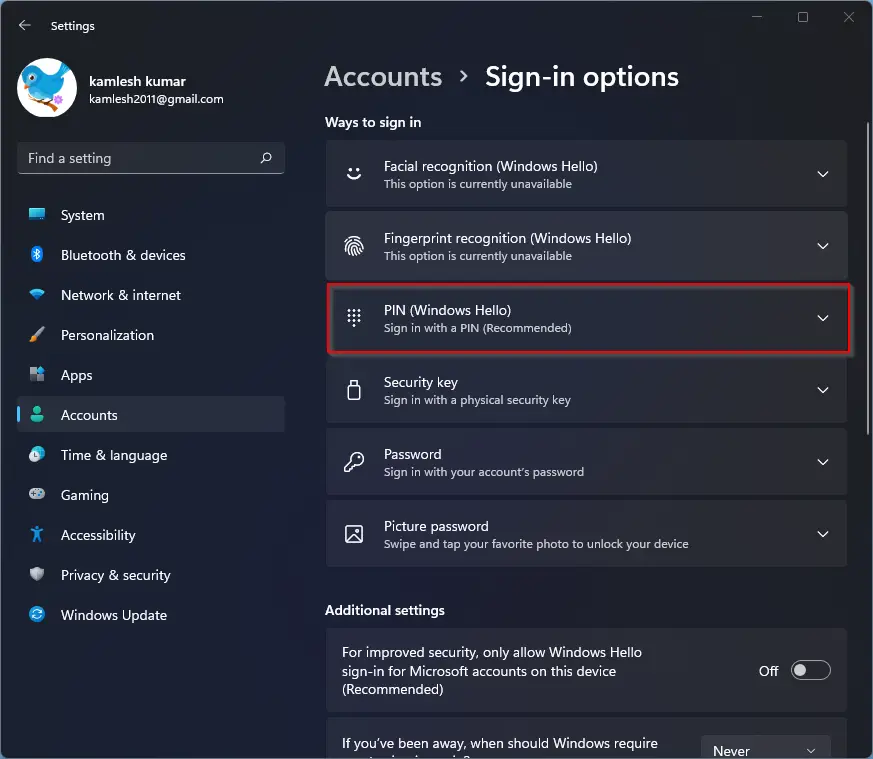
Step 7. Click on the Remove button next to “Remove this sign-in option.”
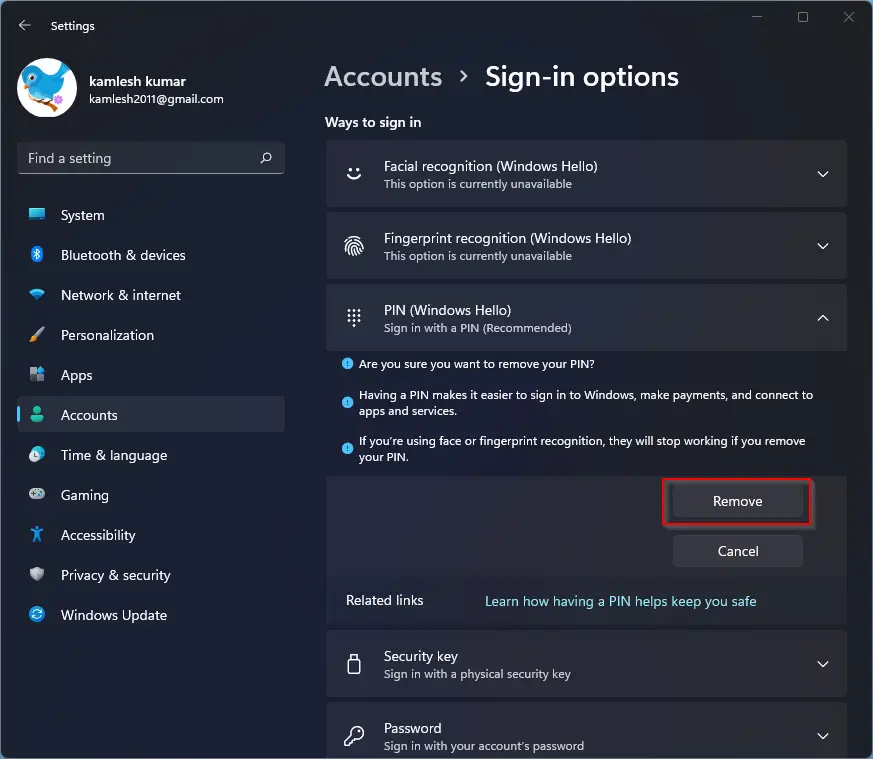
Step 8. Again click on the Remove button if you are prompted.
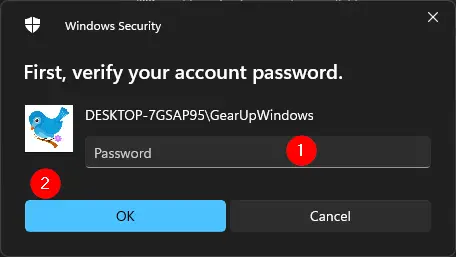
Step 9. When prompted with the Windows Security dialog, verify your account with the user account password and then click on the OK button.
After perming the above steps, Windows Hello is disabled on your computer. Now, you are ready to sign in automatically to Windows 11 without a password after perming the next steps.
How to Sign in automatically in Windows 11?
Once you have disabled Windows Hello using the above steps, perform the following steps to Sign in automatically in Windows 11:-
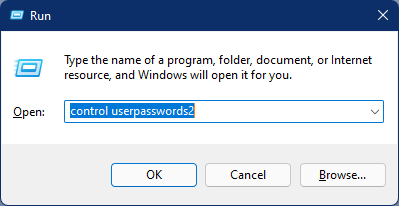
Step 1. Bring up the Run dialog box by pressing Windows + R shortcut keys from the keyboard.
Step 2. In the Run box, type the following and then hit Enter from the keyboard:-
control userpasswords2
or,
netplwiz
Step 3. Click on the user account to select it and then uncheck the option Users must enter a user name and password to use this PC.
Also Refer: Windows11: Missing Checkbox “Users must enter a user name and password to use this computer”
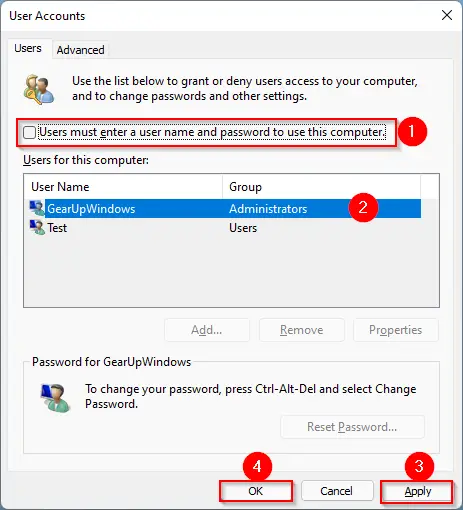
Step 4. Click Apply.
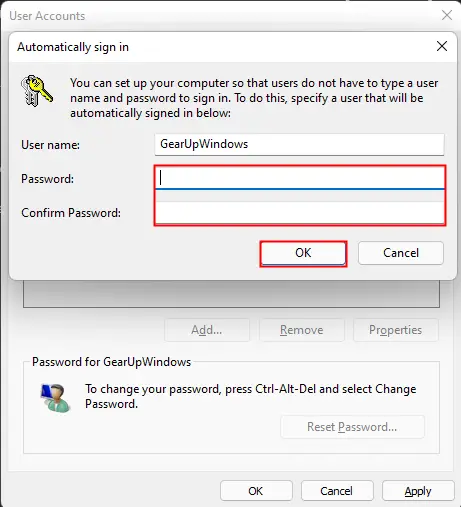
Step 5. If you are prompted, enter and then confirm the password in the provided box. Finally, click on the OK button.
Step 6. Finally, restart your computer or laptop. Windows will not prompt you for any password and will sign in automatically on your user account.
How to Disable “Sign-in automatically” or Enable Sign-in with a Password in Windows 11?
If, for some reason, you want to disable automatic sign-in and want to sign-in on your Windows 11 with a password, perform the following steps:-
Step 1. Summon the Run dialog box by pressing Windows + R shortcut keys from the keyboard.
Step 2. In the Run box, type the following and then hit Enter from the keyboard:-
control userpasswords2
or,
netplwiz
Step 3. Click on the user account to select it and then check the option Users must enter a user name and password to use this PC.
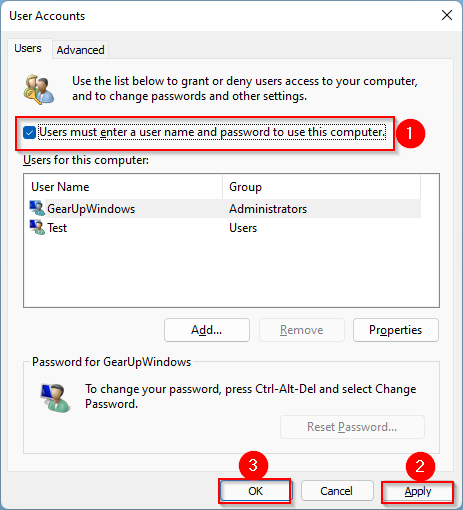
Step 4. Click Apply/OK.
Conclusion
In conclusion, Windows 11 offers users the option to sign in automatically without a password, which can be useful for those who don’t carry their computer with them or don’t have sensitive data on their PC. Users can create a local account and avoid setting a password, but this method may not work if they have more than one account or want to use additional services provided by Microsoft Accounts. To enable automatic login using a Microsoft Account, users need to disable Windows Hello and use a third-party app like AutoLogon or follow some steps using the built-in options. It is essential to have a strong password if the user has important data on their computers.