Windows 10, 8.1, and 7 can automatically detect and install new hardware drivers you connect to your computer. However, in some cases, you might not want the system setting up specific devices automatically. It could be because your Windows installs a version of the incompatible driver or a version that contains bugs, which will result in more issues.
Whatever the reason, Windows allows you to stop trying to use Windows Update to download driver updates.
In this gearupwindows article, we will explain several methods to change the settings and stop Windows 10, 8.1, and 7 from automatically installing drivers on your computer.
How to Prevent Automatic Driver Installation on Windows 10, 8.1, or 7?
Here are the steps to stop automatic driver installation on Windows 10:-
Method 1: Using System Properties
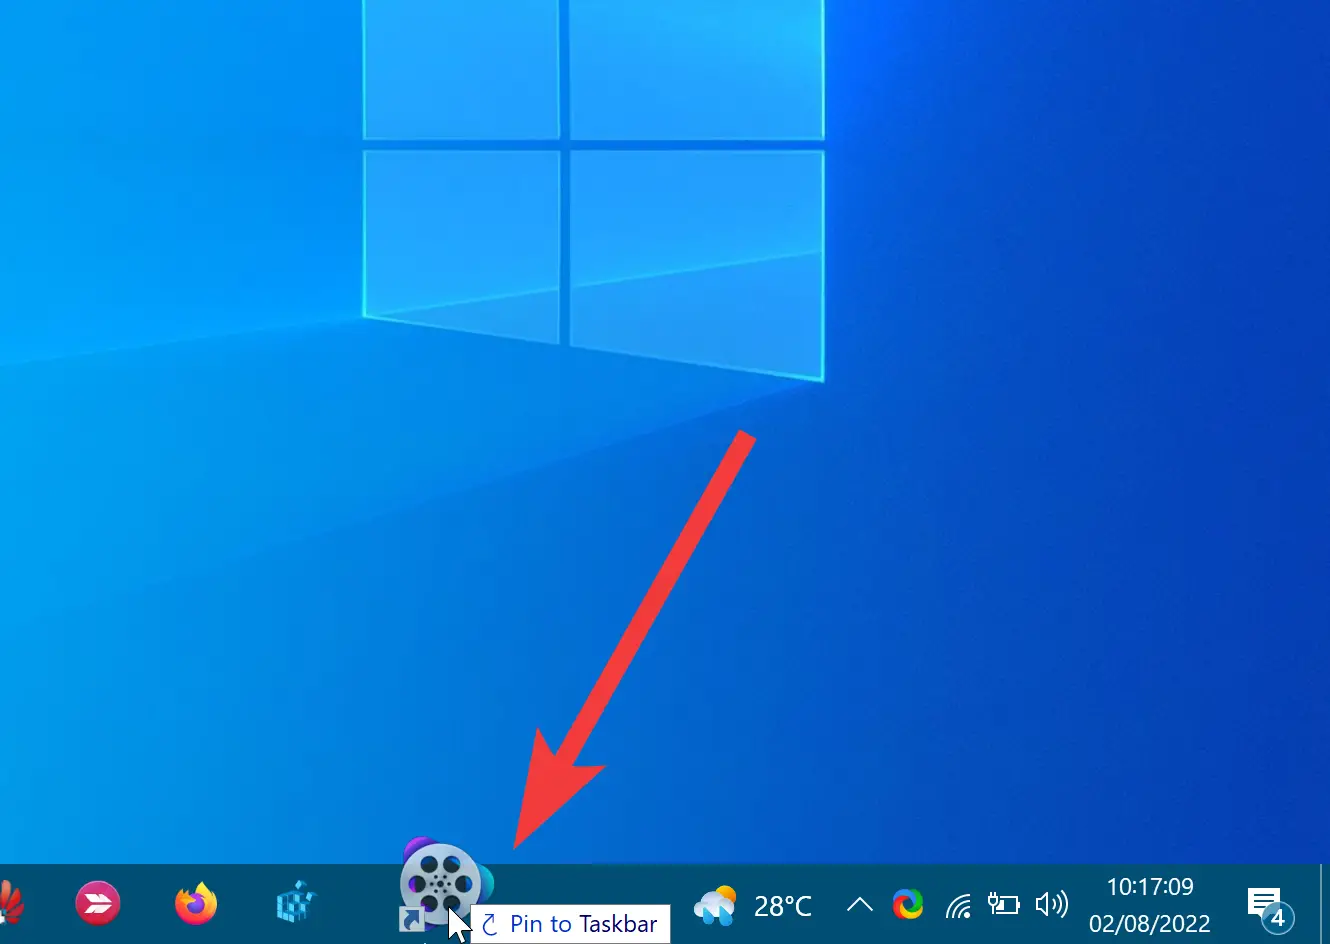
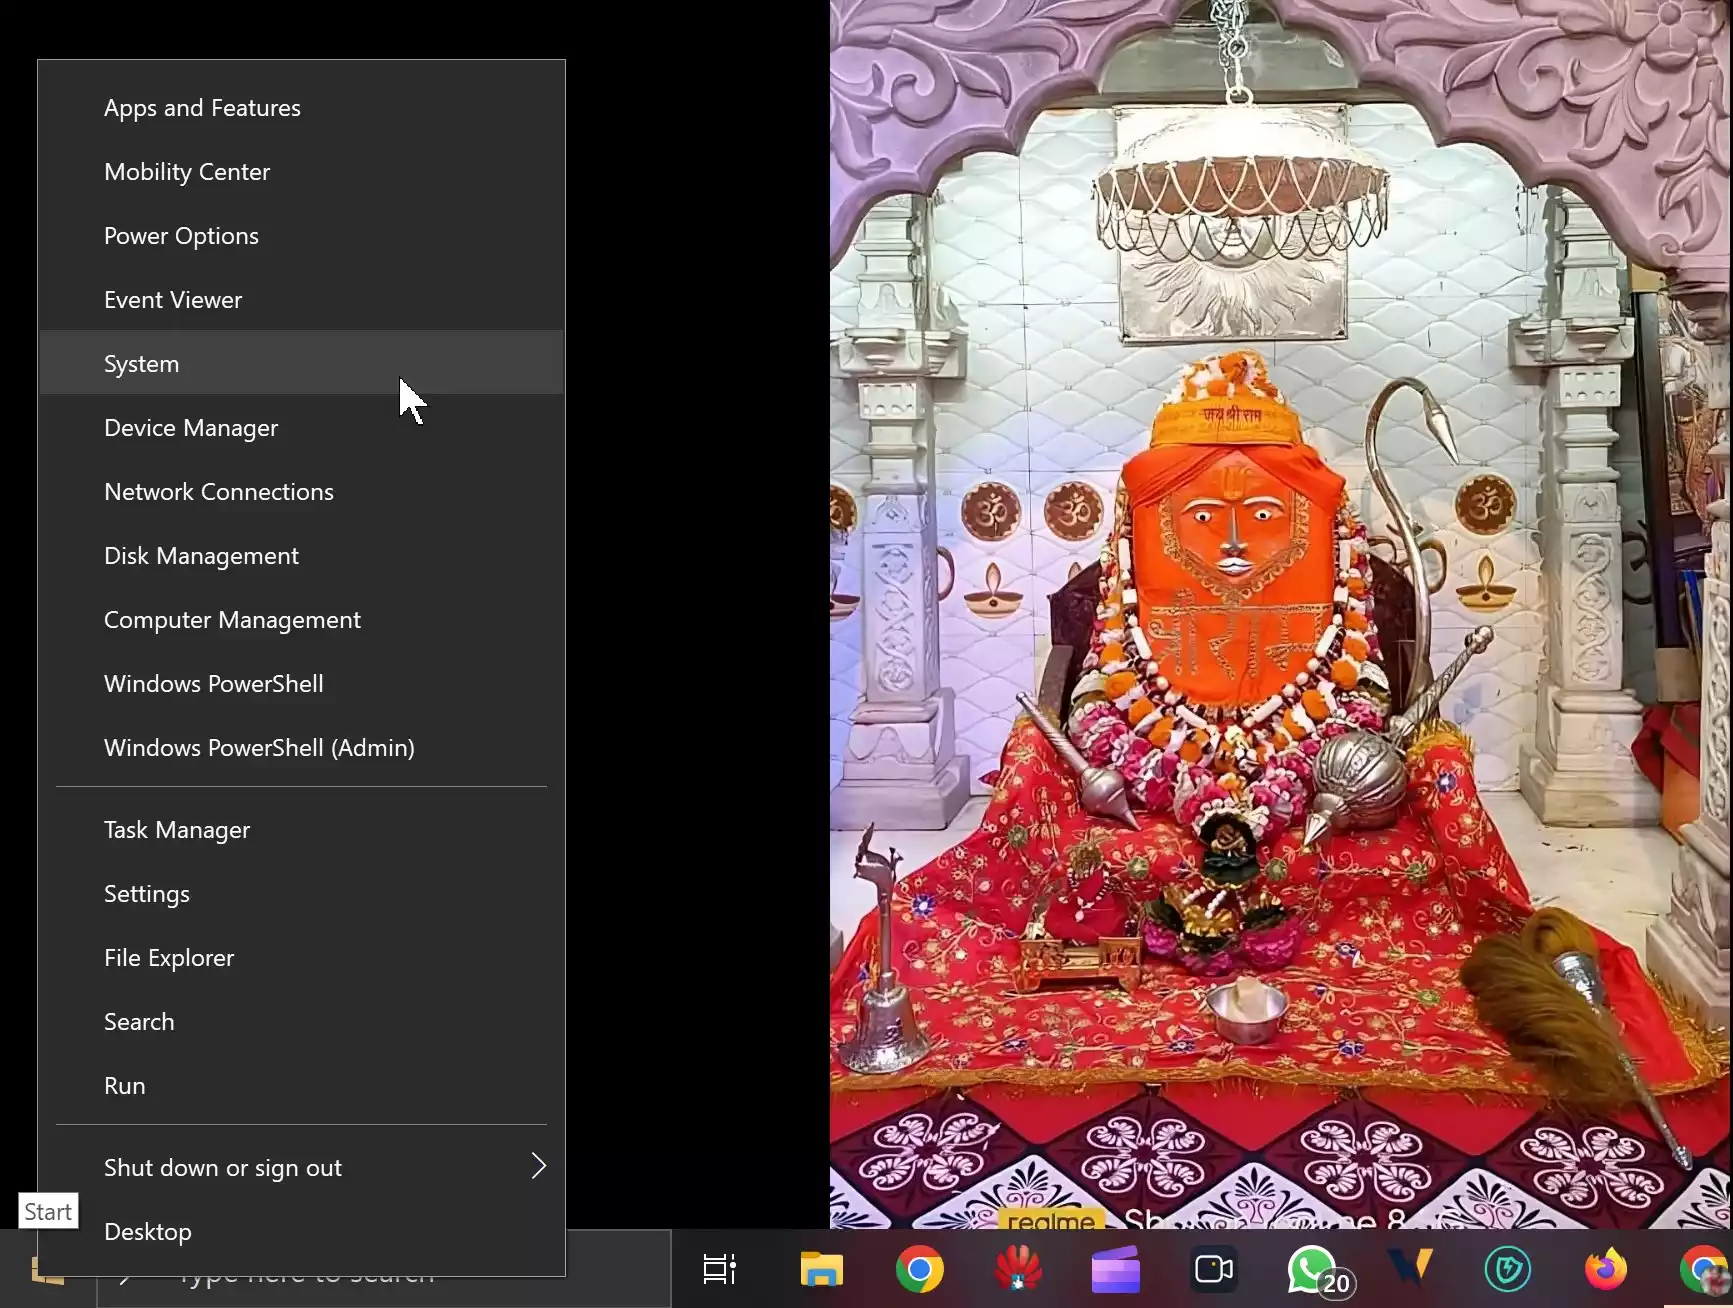
Step 1. First, right-click the “Start” button and select “System” from the pop-up menu.
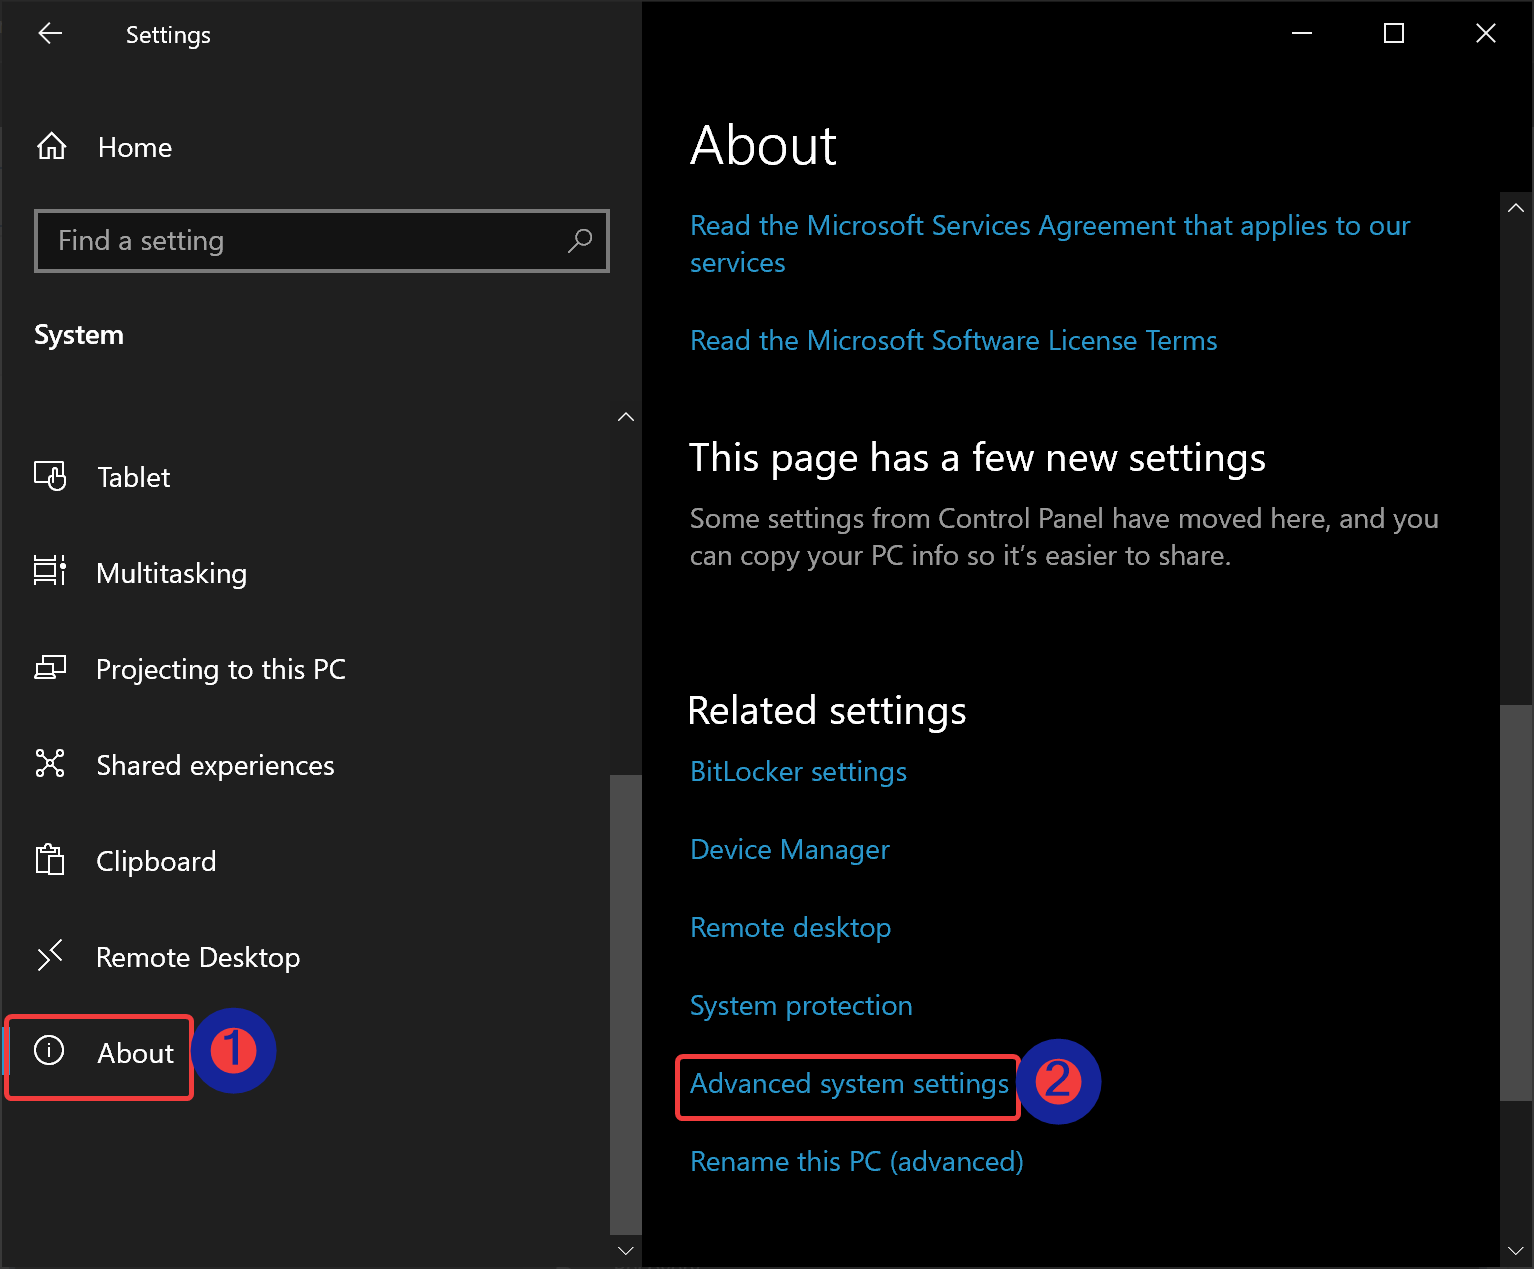
Step 2. Then, click “Advanced system settings” on the right-hand side of the About settings page.
Step 3. After that, click on the “Hardware” tab in the System Properties window.
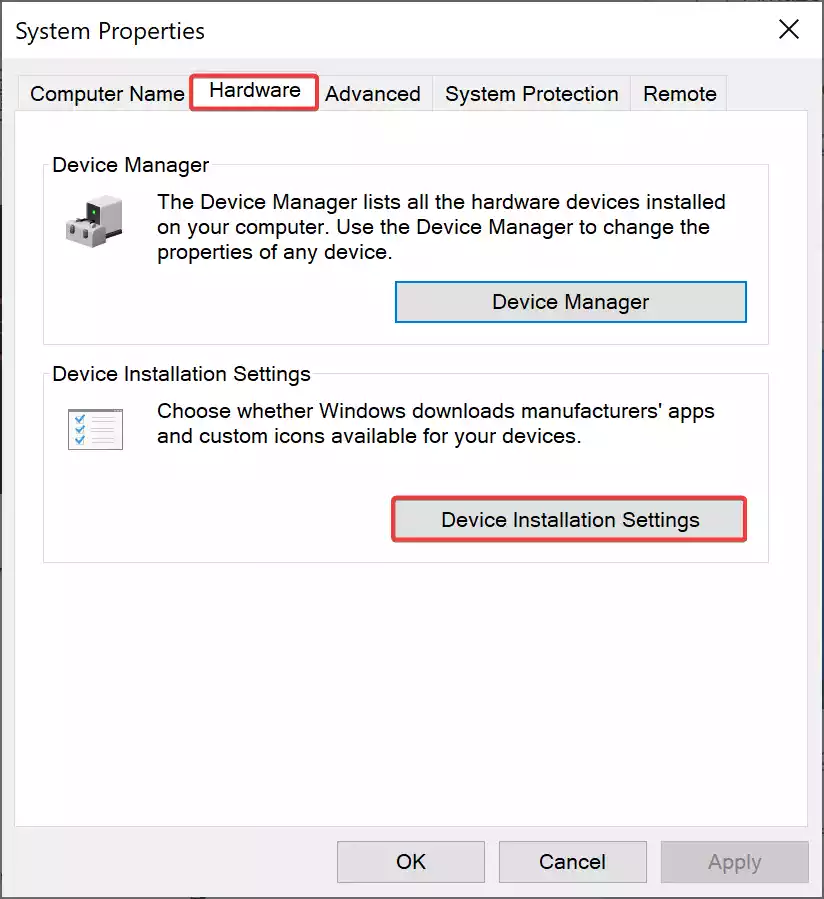
Step 4. Next, under the “Device Installation Settings” section, click on the “Device Installation Settings” button.
Step 5. In the Device Installation Settings window, choose the “No (your device might not work as expected)” option and click on the “Save Changes” button.
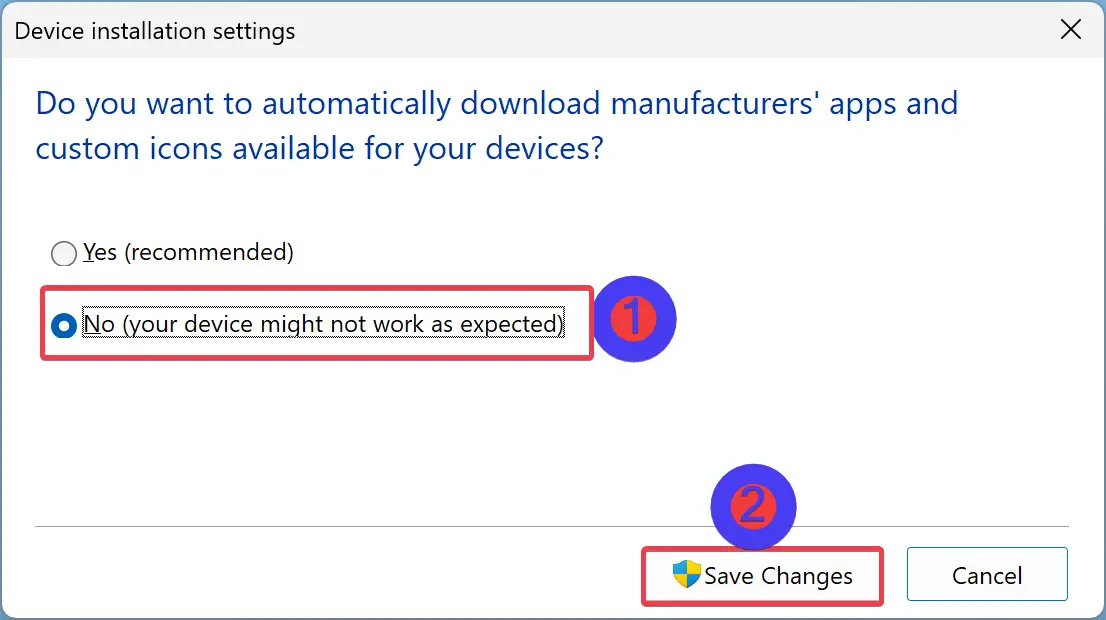
Step 6. If a User Account Control (UAC) prompt appears, click “Yes” to confirm the change.
Step 7. Finally, restart your computer to apply the changes.
Once you have completed these steps, Windows will no longer automatically installs drivers for hardware devices. If you need to install a specific driver version, you must download and install it manually.
Method 2: From the Group Policy Editor (Windows Pro, Enterprise, or Education)
Step 1. Open Local Group Policy Editor.
Step 2. Then, navigate to the following path in the left sidebar:-
Computer Configuration > Administrative Templates > Windows Components > Windows Update > Manage updates offered from Windows Update
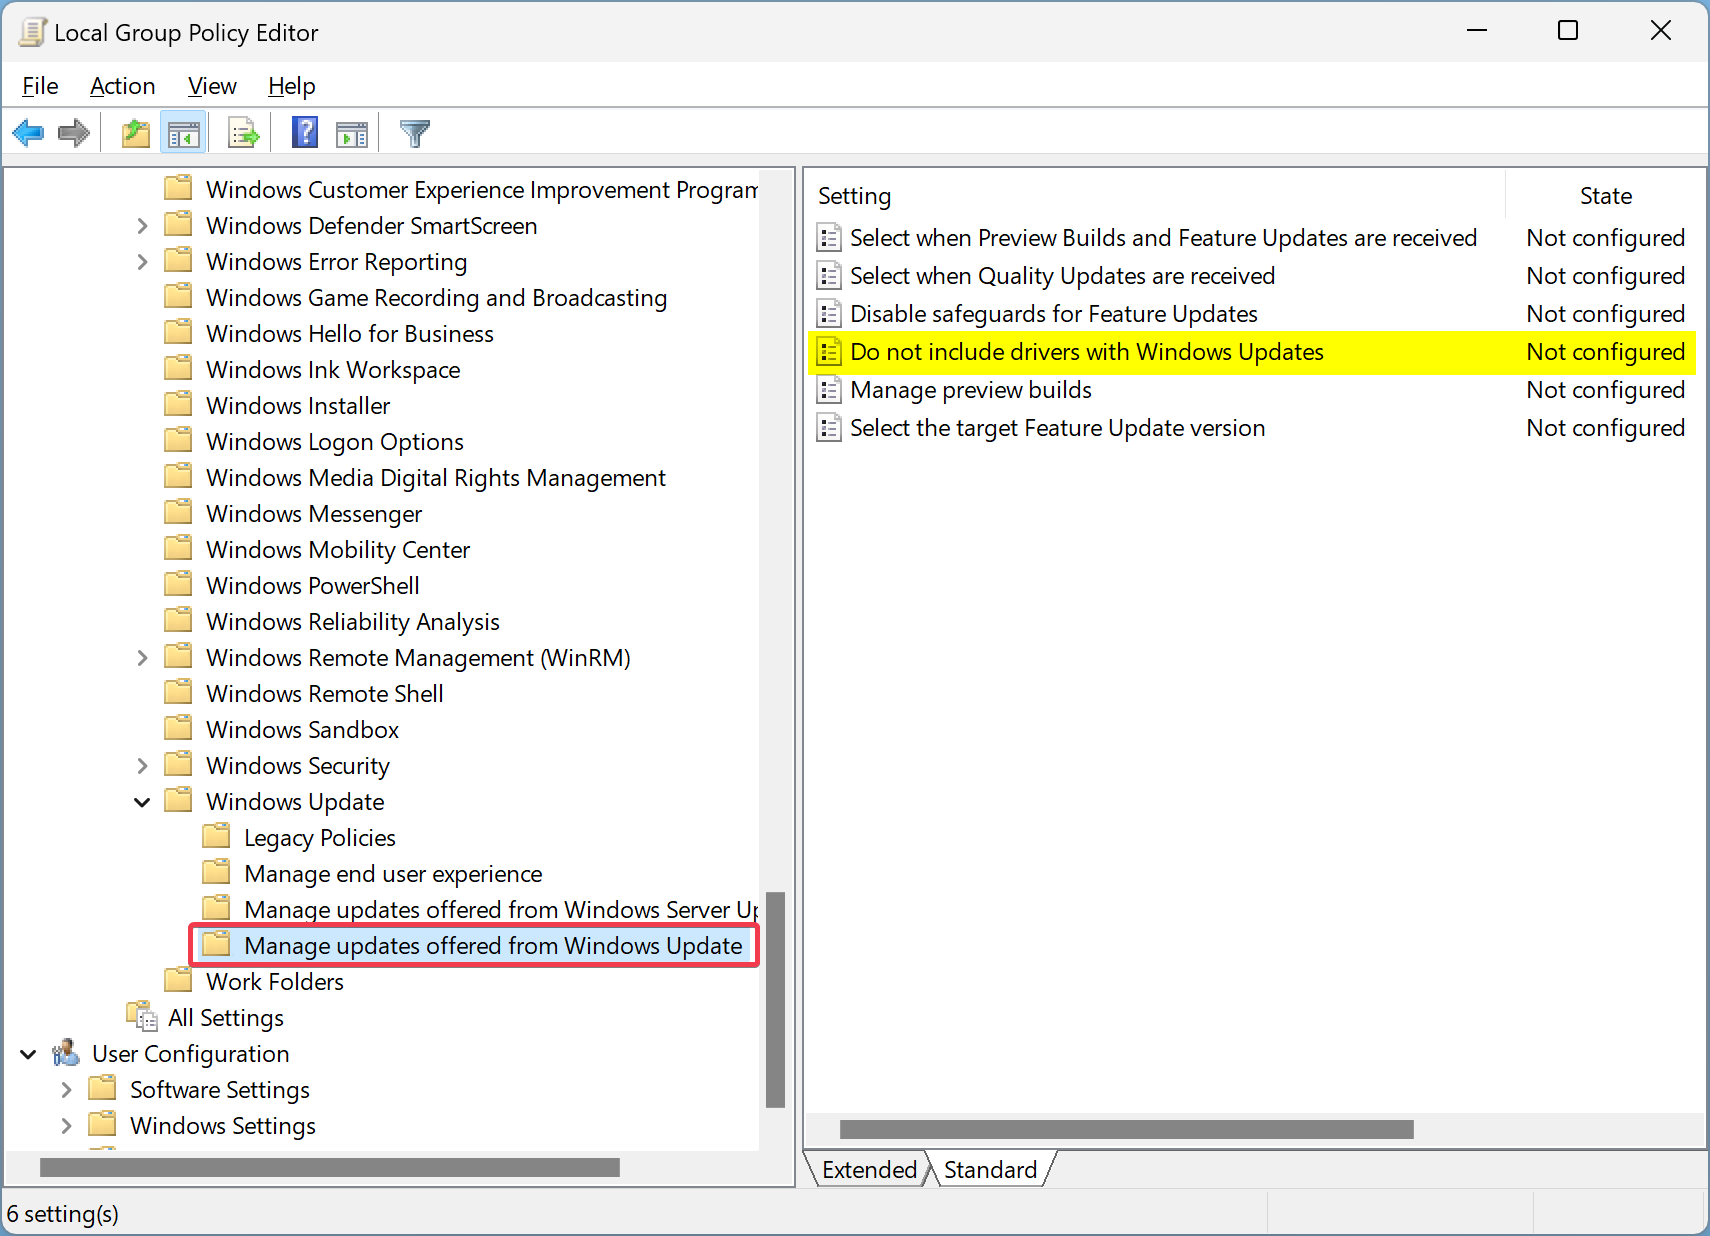
Step 3. Double-click the “Do not include drivers with Windows Updates” policy on the right sidebar.
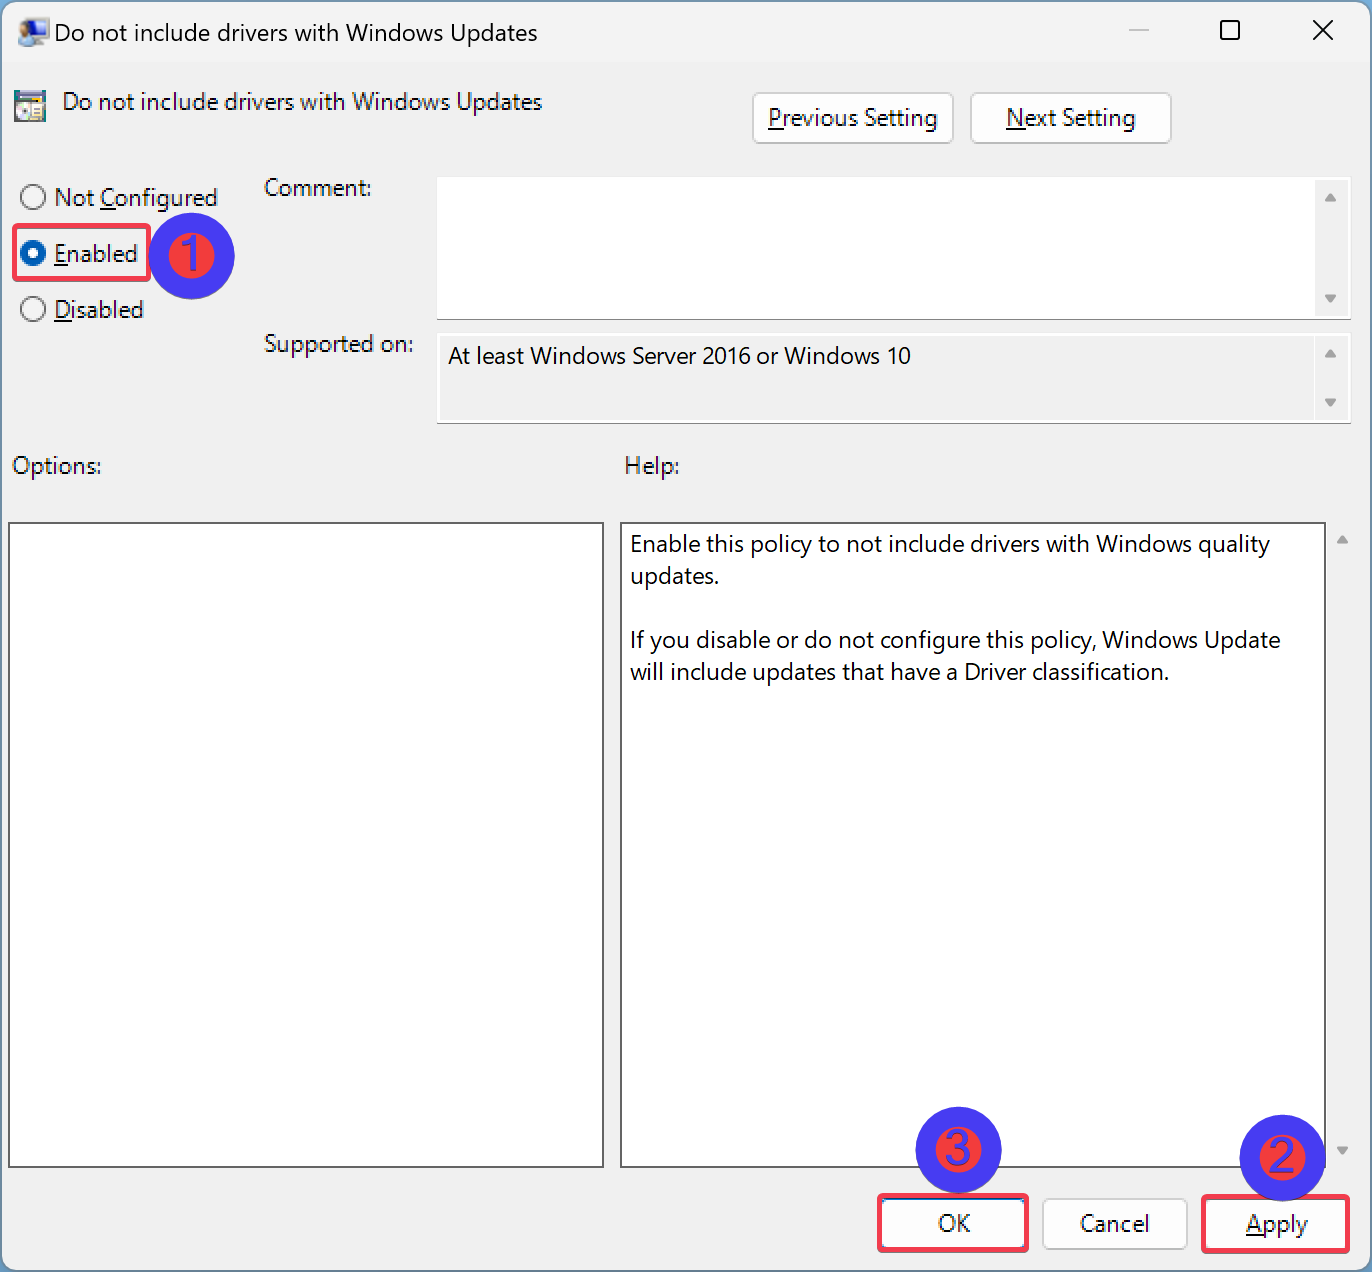
Step 4. Select the ‘Enabled‘ option.
Step 5. Click ‘Apply‘ and then ‘OK.’
Method 3: From the Registry Editor (Windows Home)
Step 1. Open Registry Editor.
Step 2. Next, navigate to the following path in the left sidebar:-
HKEY_LOCAL_MACHINE\SOFTWARE\Microsoft\Windows\CurrentVersion\DriverSearching
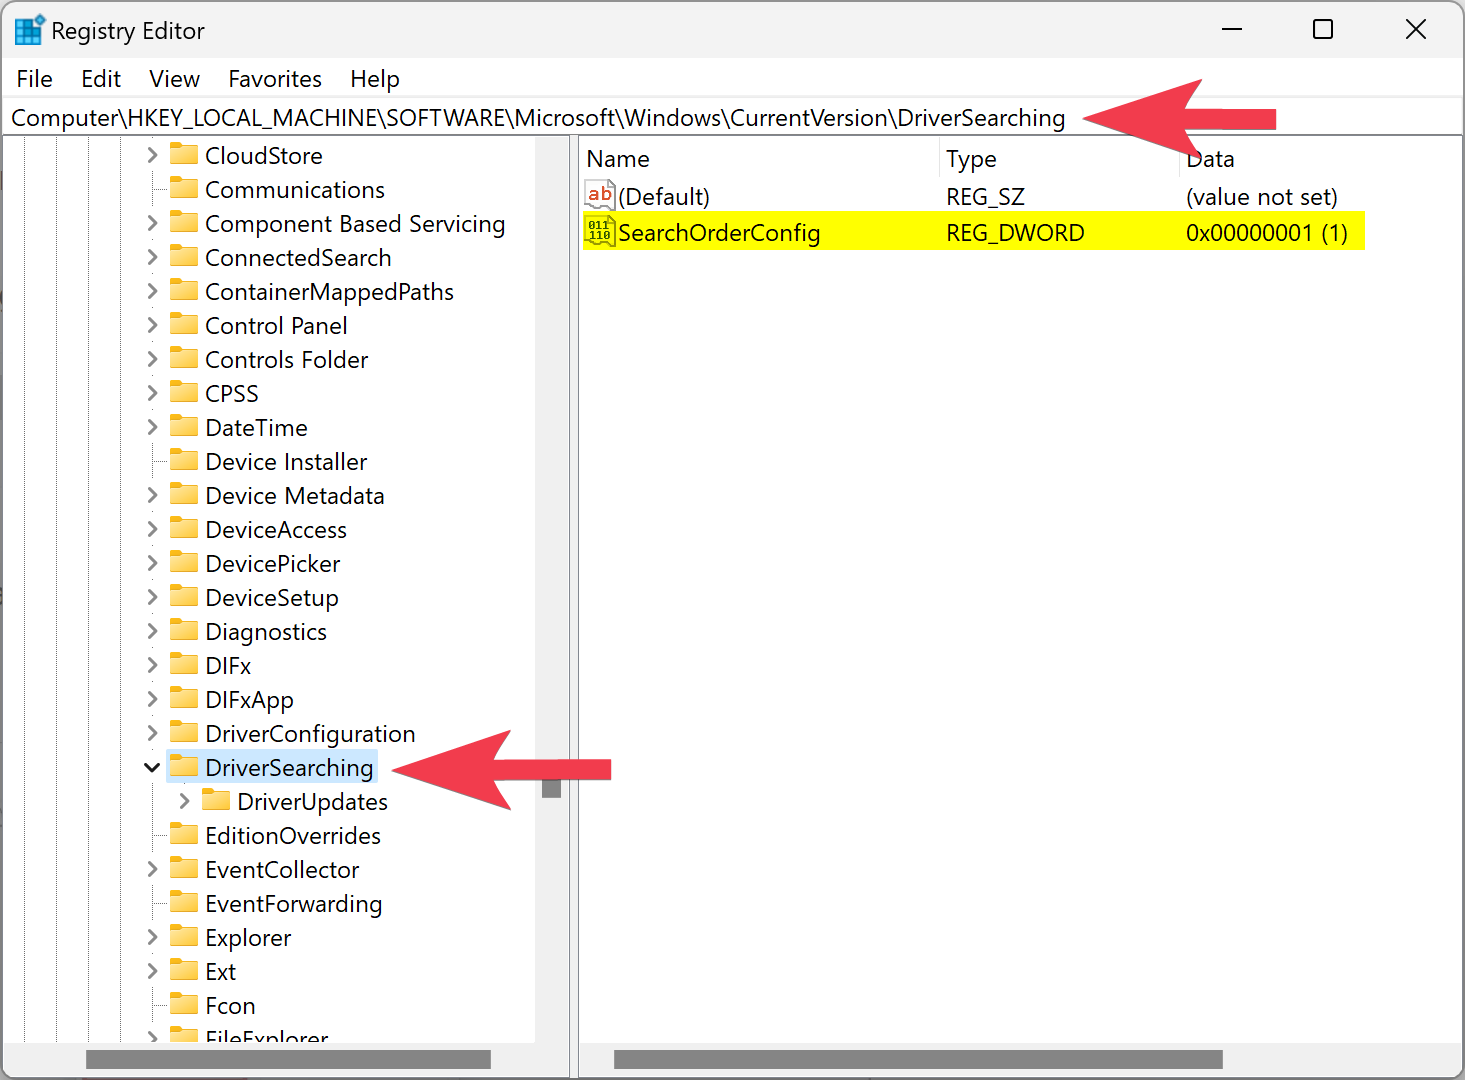
Step 3. Double-click the ‘SearchOrderConfig‘ REG_DWORD on the right sidebar.
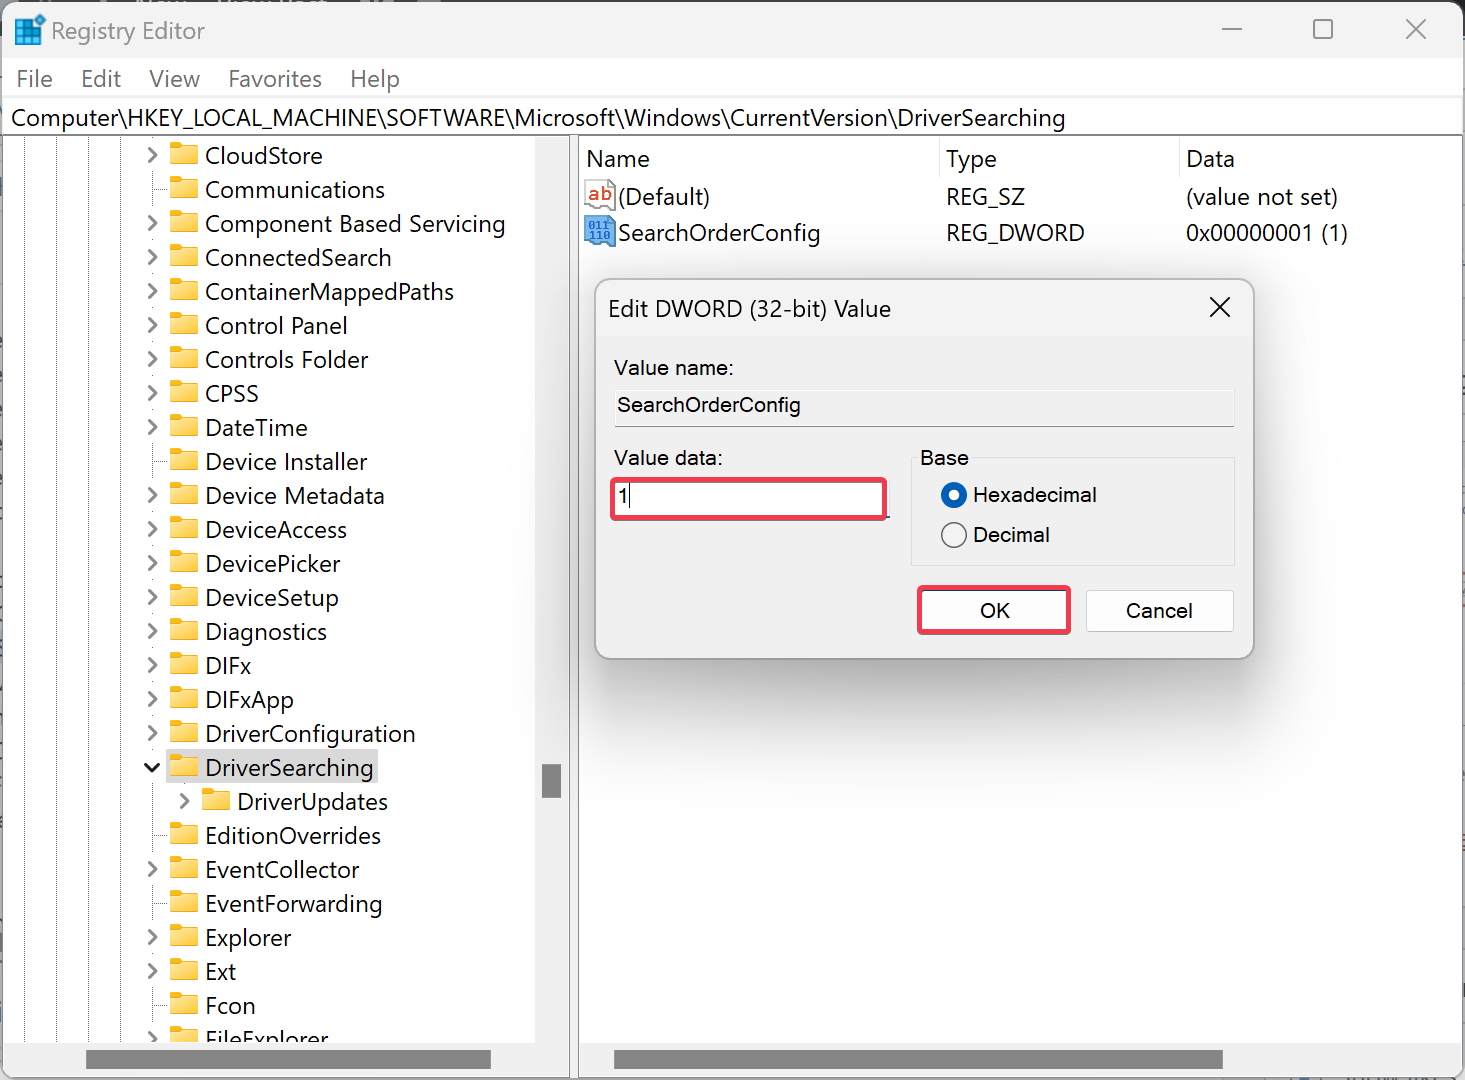
Step 4. Change its “Value data” from 1 to 0. This will stop automatic driver installation on your Windows PCs.
Step 5. Click ‘OK‘ and then restart your computer.
Conclusion
Taking control of driver updates is essential, especially when you want to avoid compatibility issues or need to stick with a specific driver version. Whether you’re using Windows 10, 8.1, or 7, you now have the knowledge to stop automatic driver installation using the methods described in this guide. By following these steps, you can ensure that your system’s drivers remain under your supervision, allowing for a smoother and more predictable computing experience.