AutoPlay in Windows 11 plays a handy role. It detects when you connect a removable storage device to your PC and performs preset actions such as opening a folder to view files in File Explorer or playing media files.
When the AutoPlay feature is enabled, the system automatically runs media files without user intervention when a USB external device is attached to your PC. If your USB drive is infected with malware, it can quickly exploit the AutoPlay feature to spread viruses.
Because of security, if you prefer your PC to take no action after connecting a USB drive, you can safely disable AutoPlay in the Windows Settings. You can also use the classic Control Panel or Group Policy to turn off AutoPlay in Windows 11.
In this gearupwindows article, we will guide you on disabling the AutoRun or AutoPlay for USB Drive in Windows 11.
How to Disable AutoPlay via Windows 11 Settings?
To turn off AutoPlay using Windows 11 Settings, do the following:-
Step 1. First, open the Settings app.
To do that, you can use Windows + I hotkey.
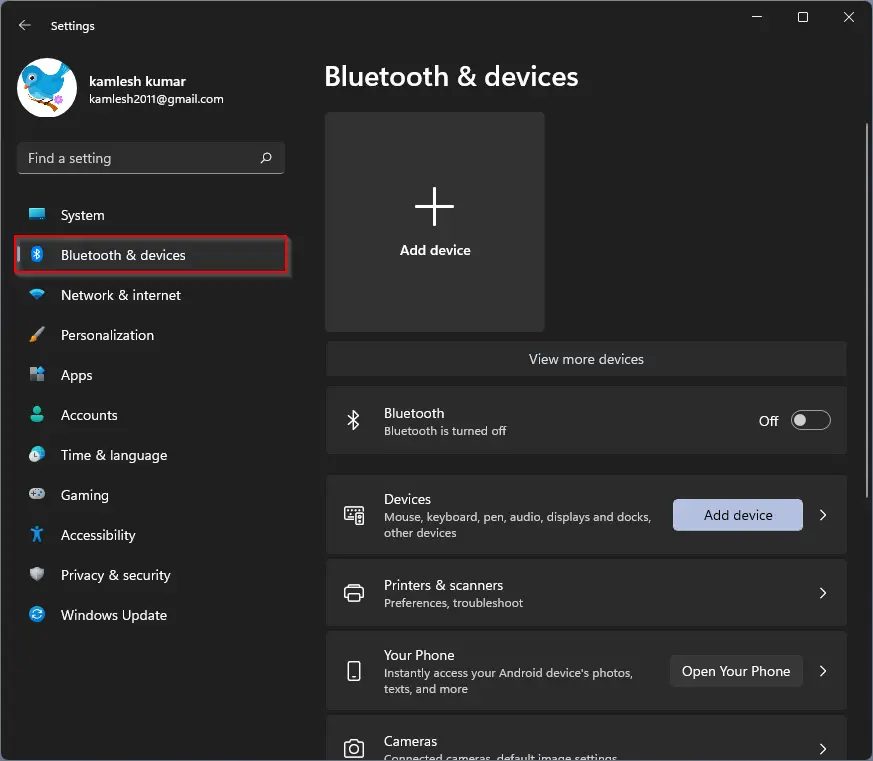
Step 2. When the Settings window appears, select the Bluetooth & devices in the left side area.
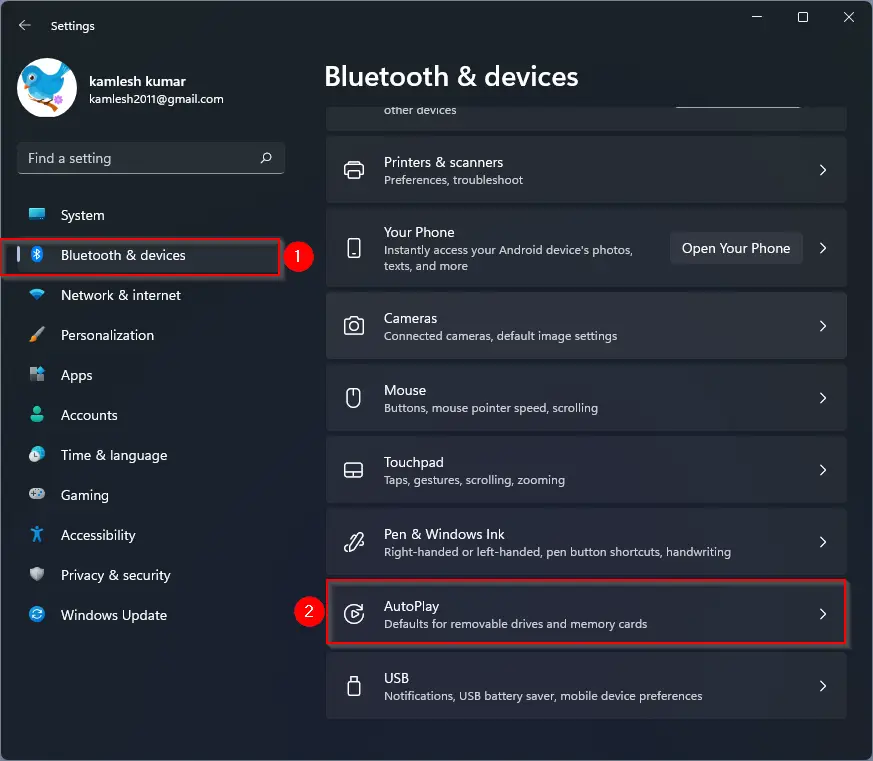
Step 3. Then, click the AutoPlay tile on the right sidebar.
Step 4. After that, turn Off the toggle switch “Use AutoPlay for all media and devices.”
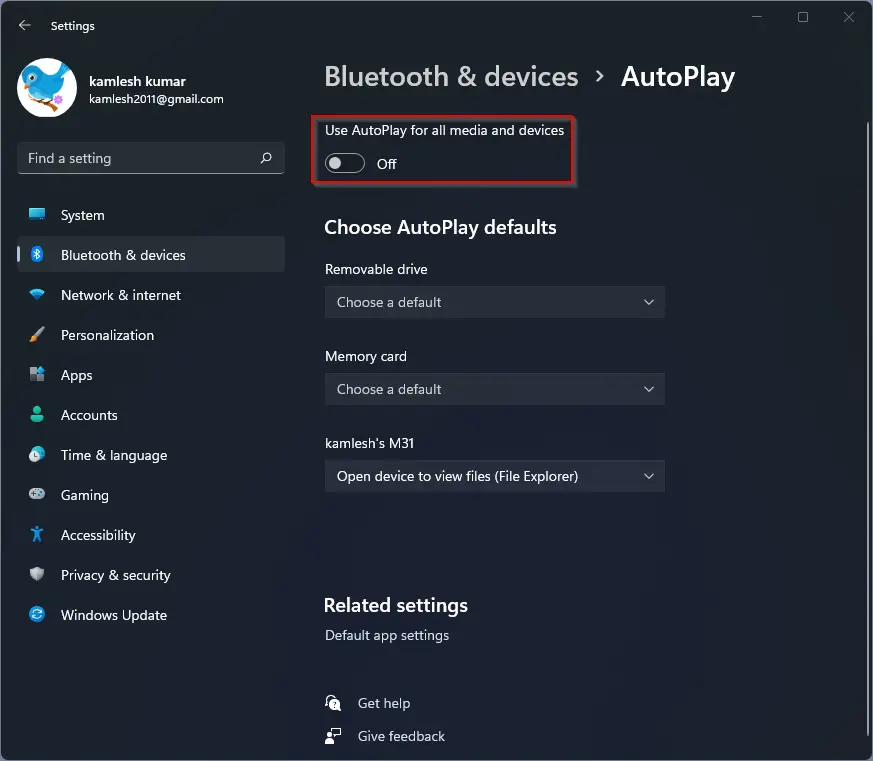
While you are on the AutoPlay settings page, you can also choose AutoPlay default actions for different removable devices. This is helpful if you don’t want to turn off AutoPlay but restrict its use to a removable drive or memory card.
Under Choose AutoPlay default section, click the drop-down for Removable drive for USB flash drive and select Take no action. If you connect a USB drive, AutoPlay will not take any action.
How to Turn Off AutoPlay in Windows 11 using Control Panel?
The Settings app only allows you to control AutoPlay for removable devices and memory cards. However, you can use the Control Panel if you want to control AutoPlay action for DVD, CD, and Blu-ray discs. To disable AutoPlay from Control Panel, use the following steps:-
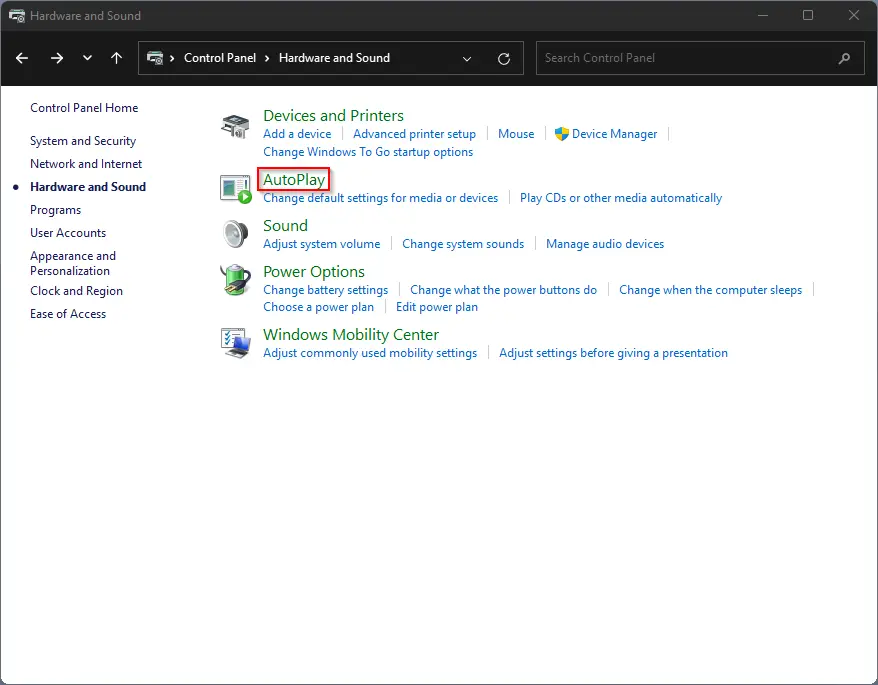
Step 1. First, open the Control Panel.
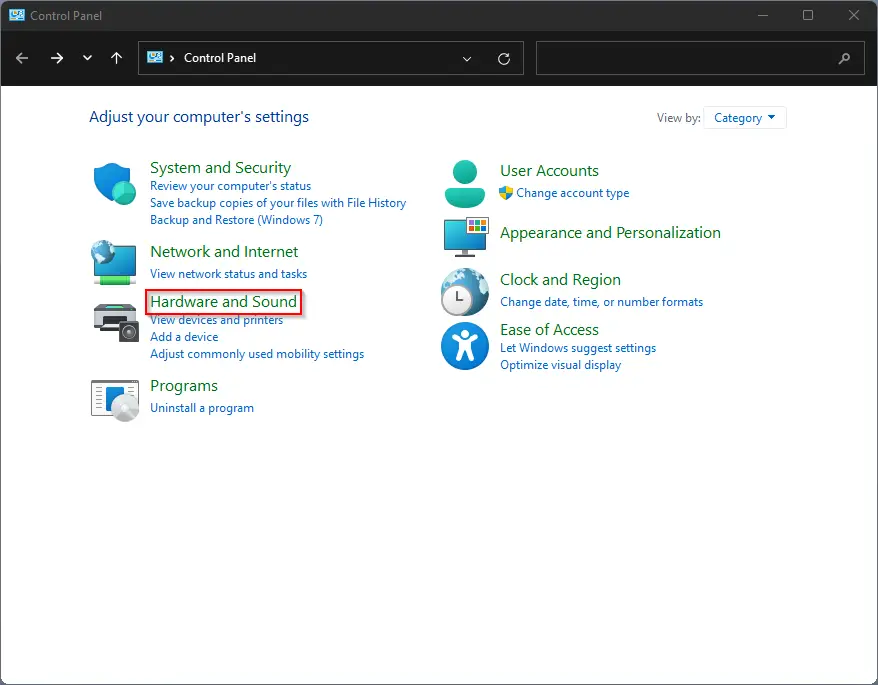
Step 2. In the Control Panel, click Hardware and Sound.
Step 3. Next, click the AutoPlay option.
Step 4. Uncheck the option Use AutoPlay for all media and devices to turn off or disable AutoPlay.
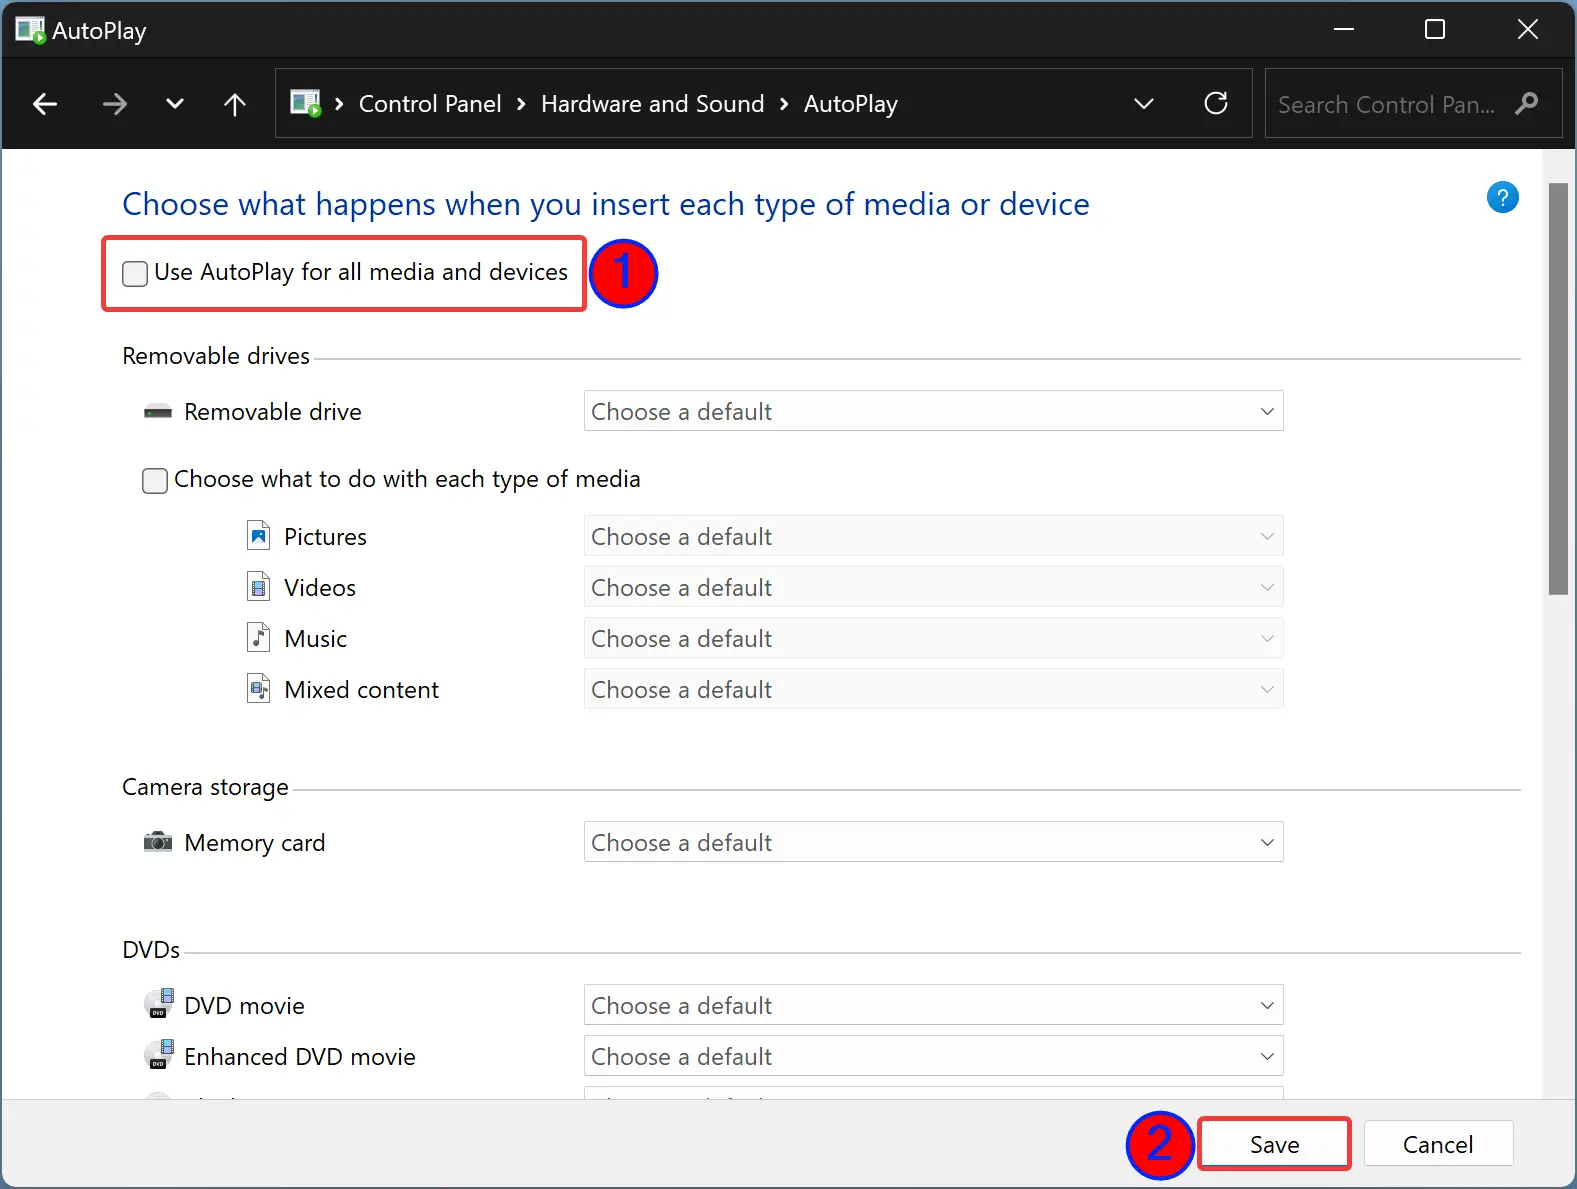
If you only want to disable AutoPlay for a USB flash drive, click the drop-down of Removable drive and select Take no action. Similarly, you can configure the other media and storage devices.
Step 5. When you’re done, click the Save button.
How to Disable AutoPlay in Windows 11 via Group Policy Editor?
To turn off or disable AutoPlay in Windows 11 using Group Policy, do the following steps:-
Step 1. At first, open the Local Group Policy Editor.
Step 2. Next, navigate to the following path in the left sidebar of the Local Group Policy Editor window:-
Computer Configuration > Administrative Templates > Windows Components > AutoPlay Policies
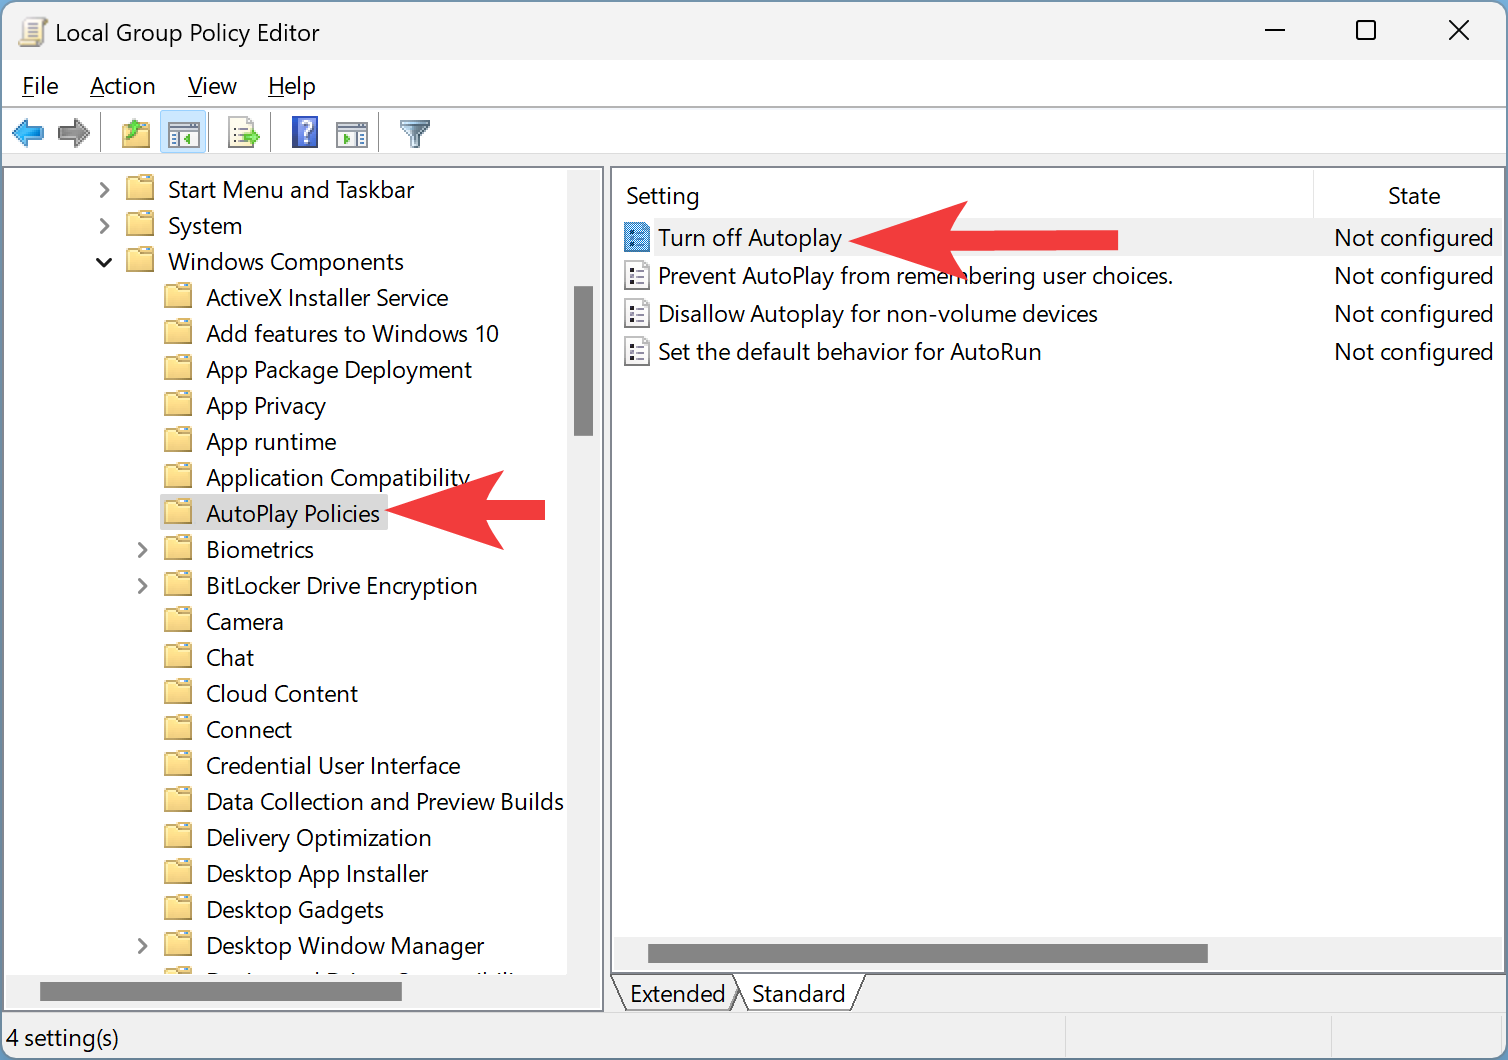
Step 3. On the right side of the AutoPlay Policies folder, double-click on the policy name Turn off AutoPlay.
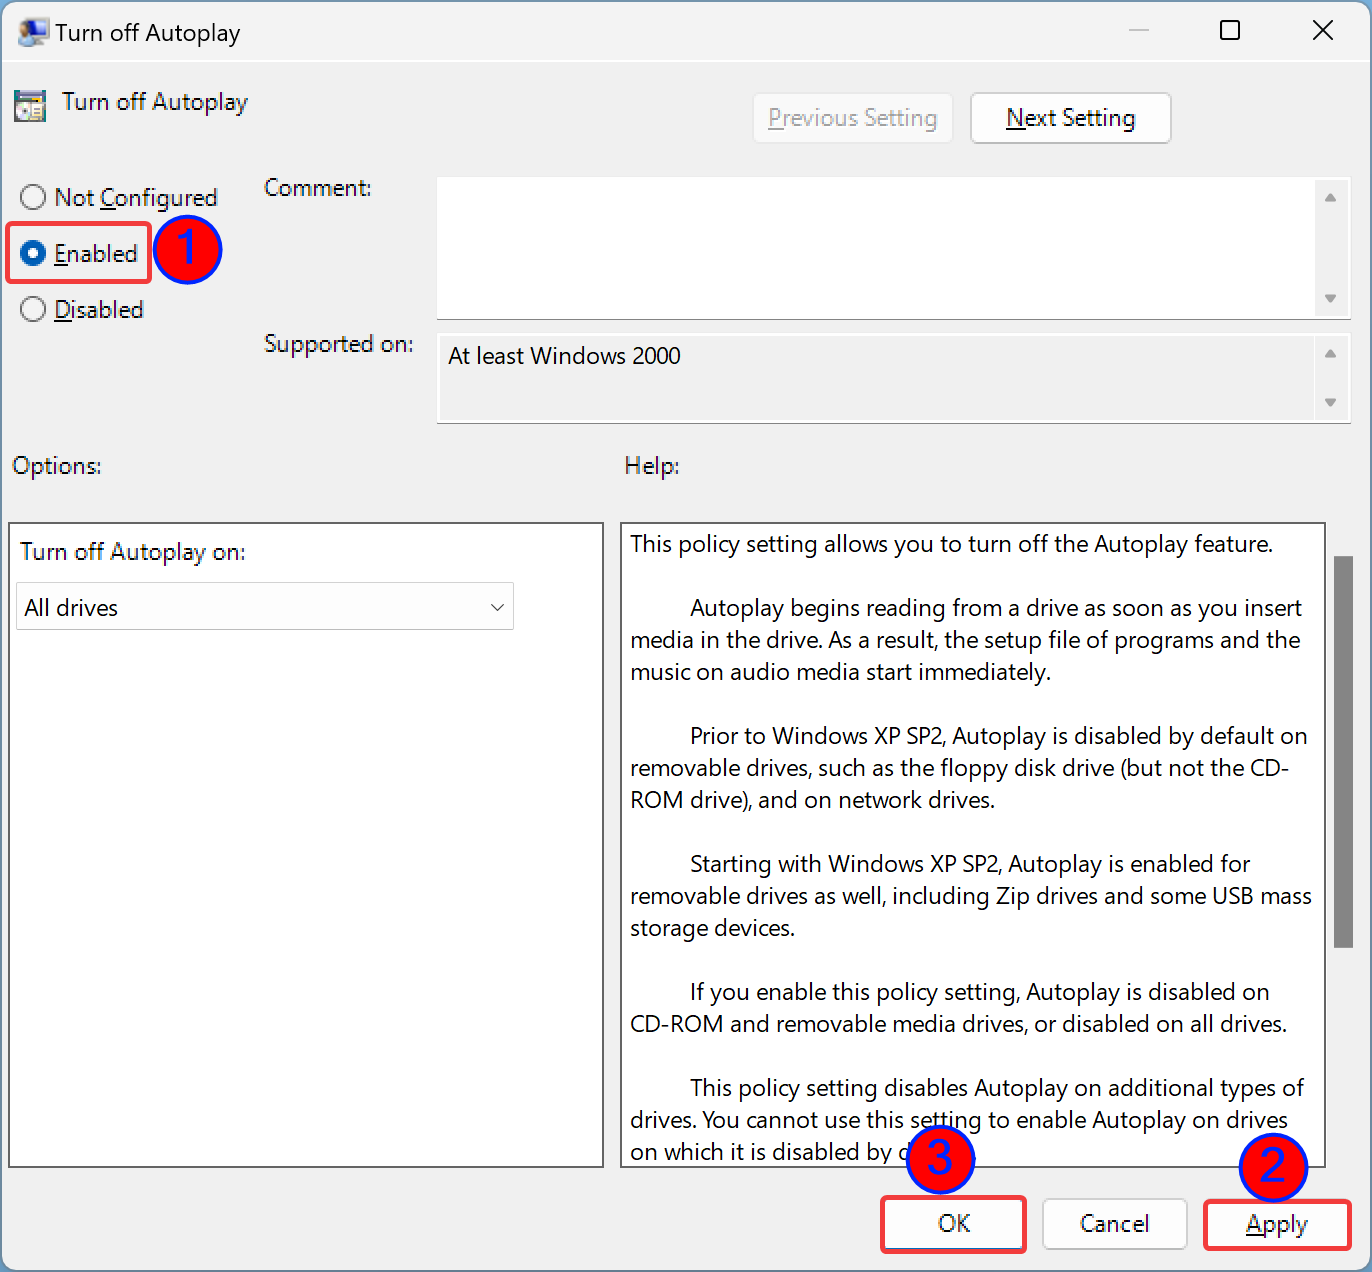
Step 4. Select Enabled.
Step 5. Click Apply.
Step 6. Click OK.
That’s it.
Conclusion
In conclusion, the AutoPlay feature in Windows 11 can be useful, but it can also pose a security risk if a USB drive with malware is attached to the computer. Disabling AutoPlay is a good practice for keeping your computer safe from potential threats. You can turn off AutoPlay using the Settings app, Control Panel, or Group Policy Editor in Windows 11. By following the steps provided in this guide, you can easily disable AutoPlay and customize default actions for different removable devices. It is essential to stay vigilant about security measures to protect your computer and sensitive data.