The Narrator feature of Windows reads on-screen text to help you navigate your PC. It is especially useful for those with limited vision to “see” what’s on their computer screen. If you don’t use this feature on your PC, you can turn off the Narrator on your Windows 10 and 11.
Several methods are available on Windows that allow you to turn off the Narrator. You can either use the keyboard shortcut, the Windows Settings, or Registry Editor to disable this feature on your computer.
How to Deactivate Narrator in Windows 11 using Settings?
To disable Narrator in Windows 11 using the Settings app, do the following:-
Step 1. First, open the Settings app.
To do that, you can use the Windows + I hotkey or right-click on the Start button and select Settings in the menu.
Step 2. When the Settings window appears on your computer or notebook, select the Accessibility option from the left sidebar.
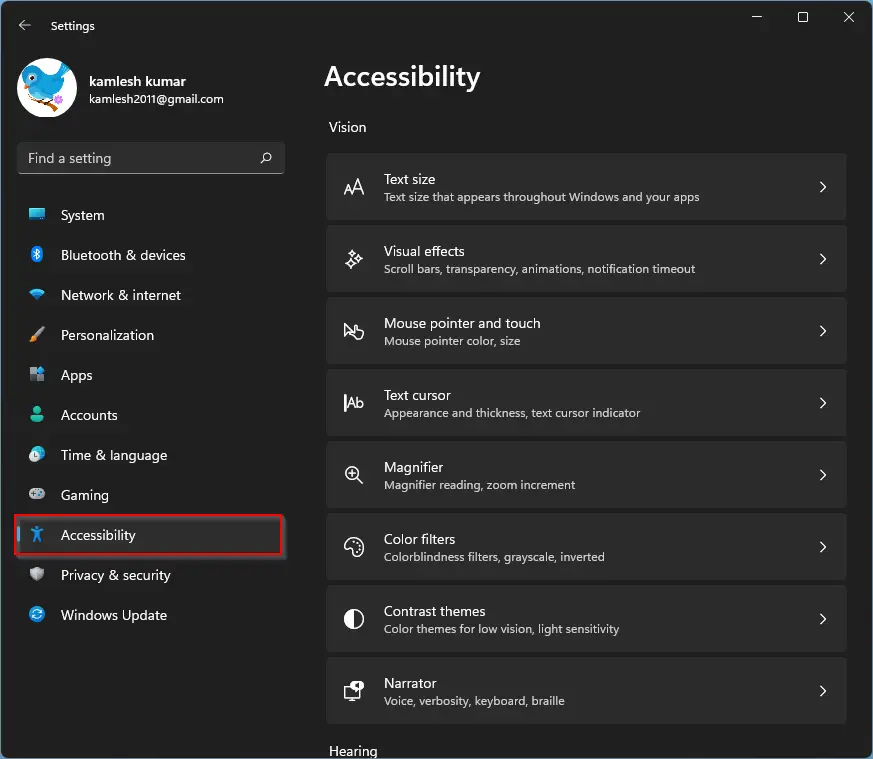
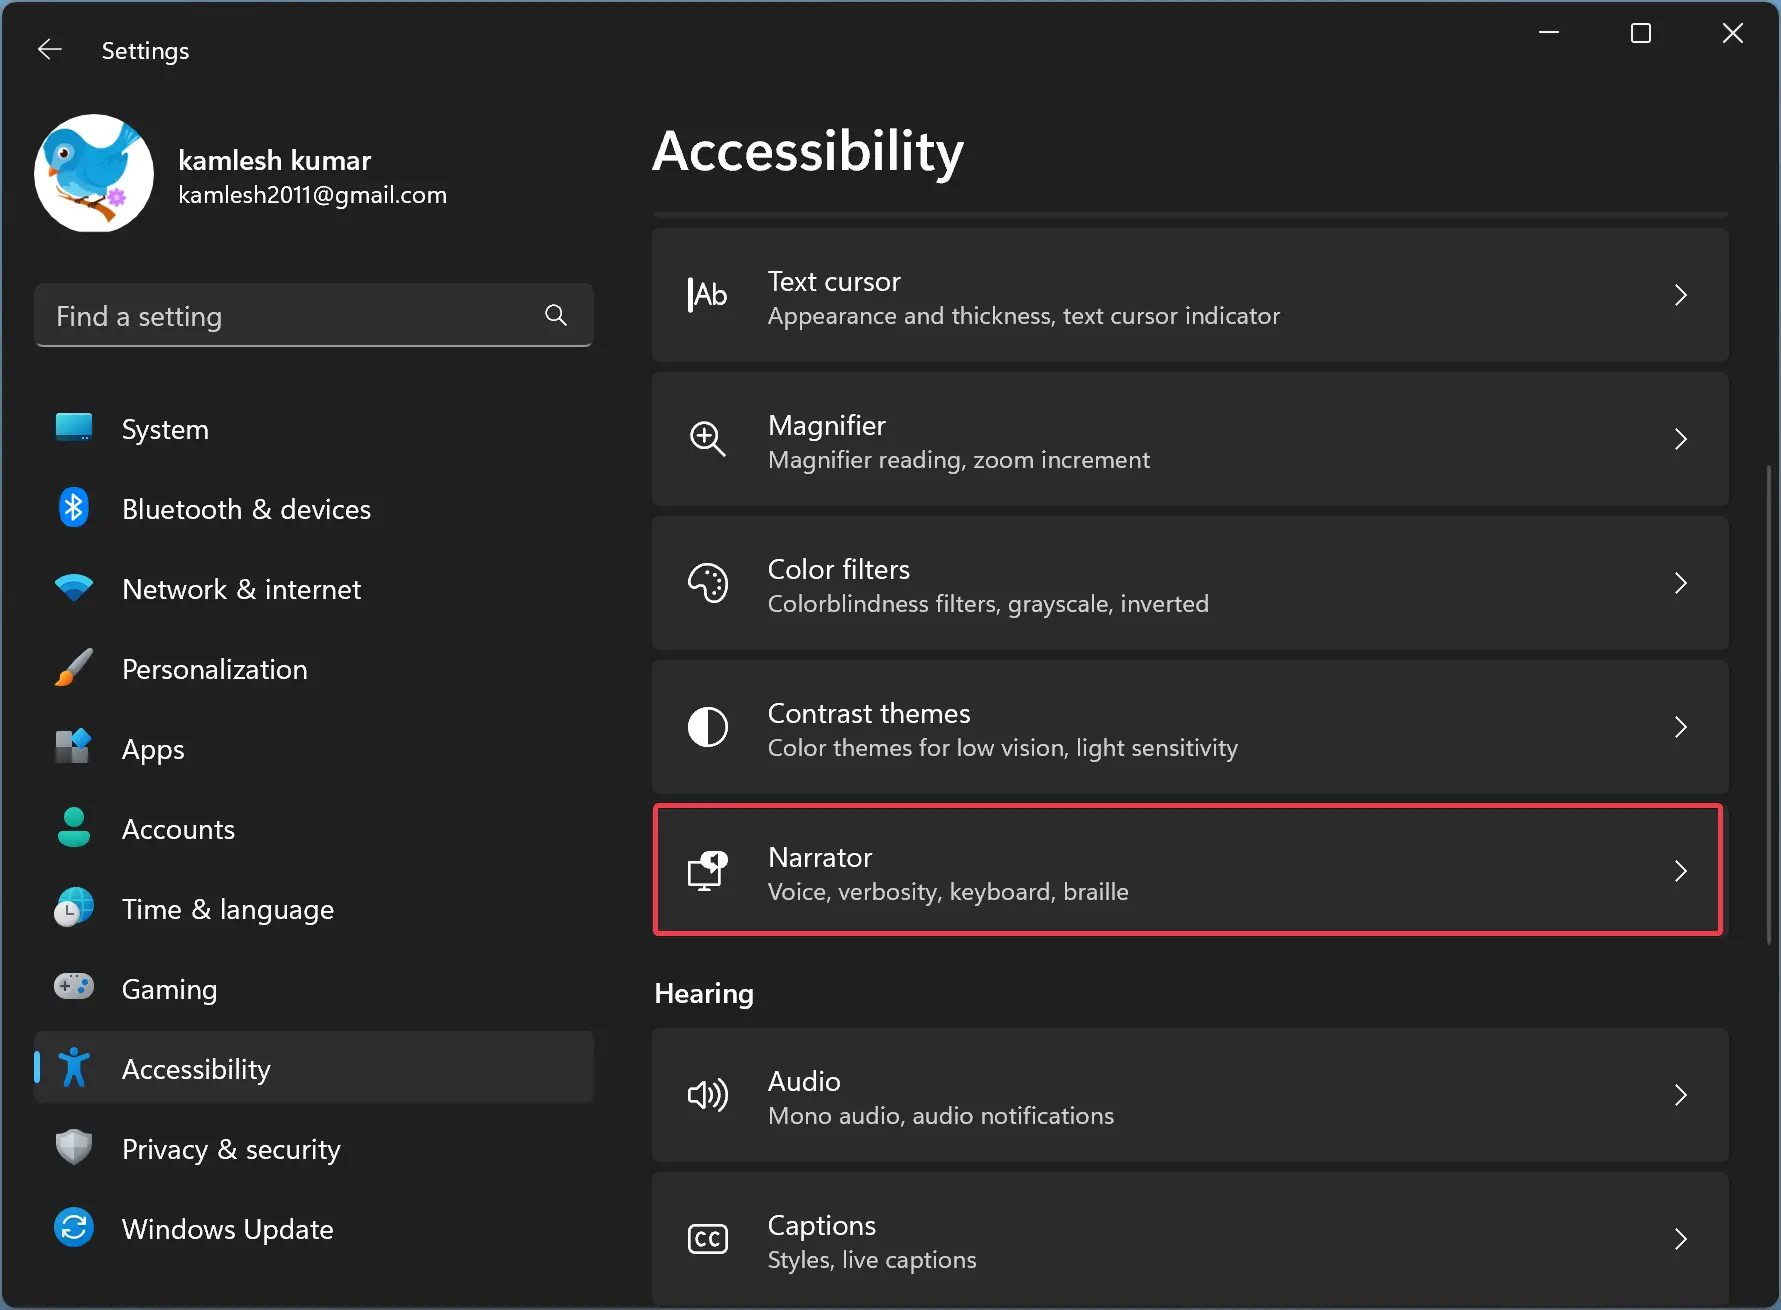
Step 3. On the opposite side of “Accessibility,” click the Narrator tile.
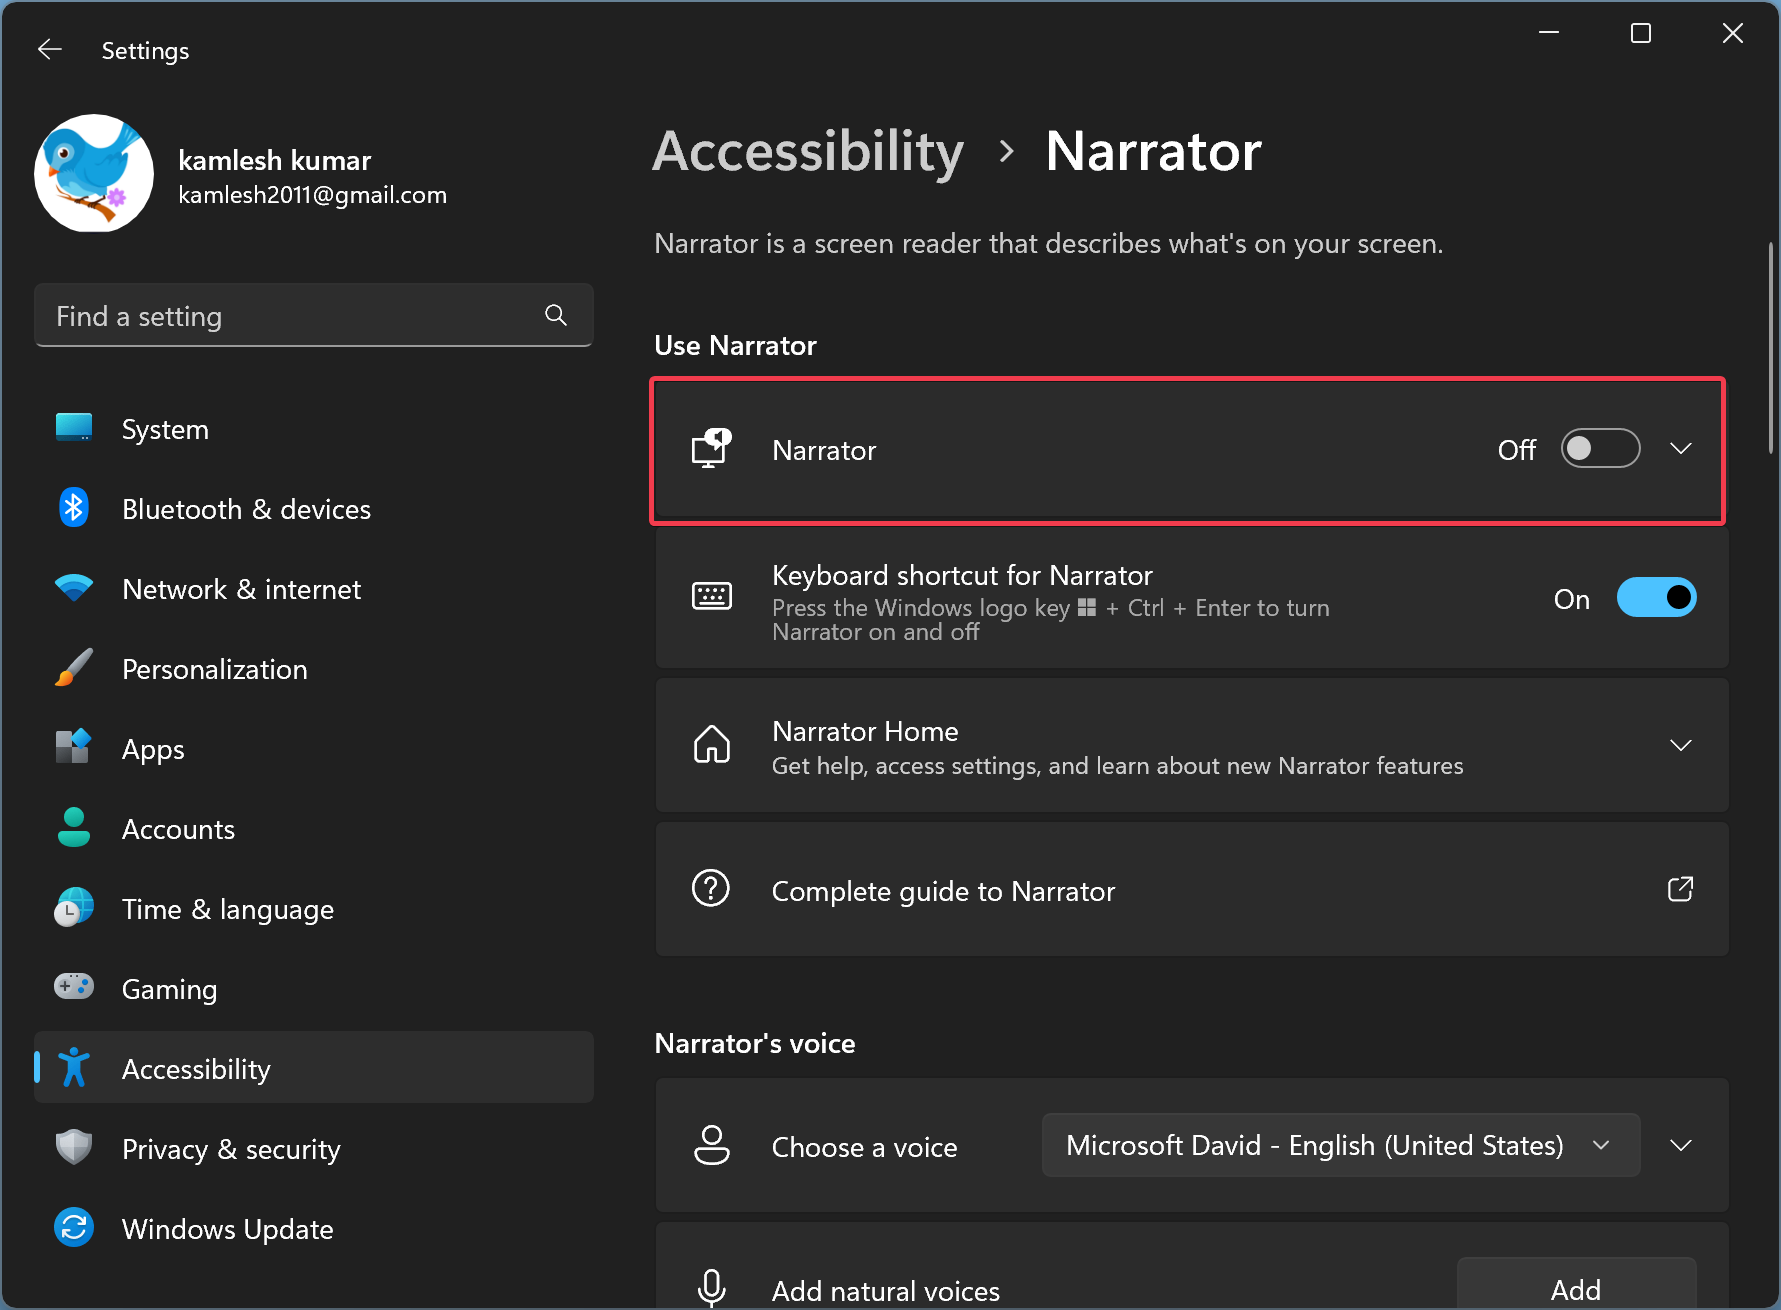
Step 4. At last, turn off the Narrator toggle switch.
If you want to enable the Narrator feature on your Windows 11 PC in the future, repeat the above steps, and in step 4 above, turn on the Narrator toggle switch.
How to Disable Narrator in Windows 10 through Settings?
If you want to disable or turn off narrator in Windows 10 using Settings, do the following:-
Step 1. Very first, launch Windows Settings using the Windows + I hotkey.
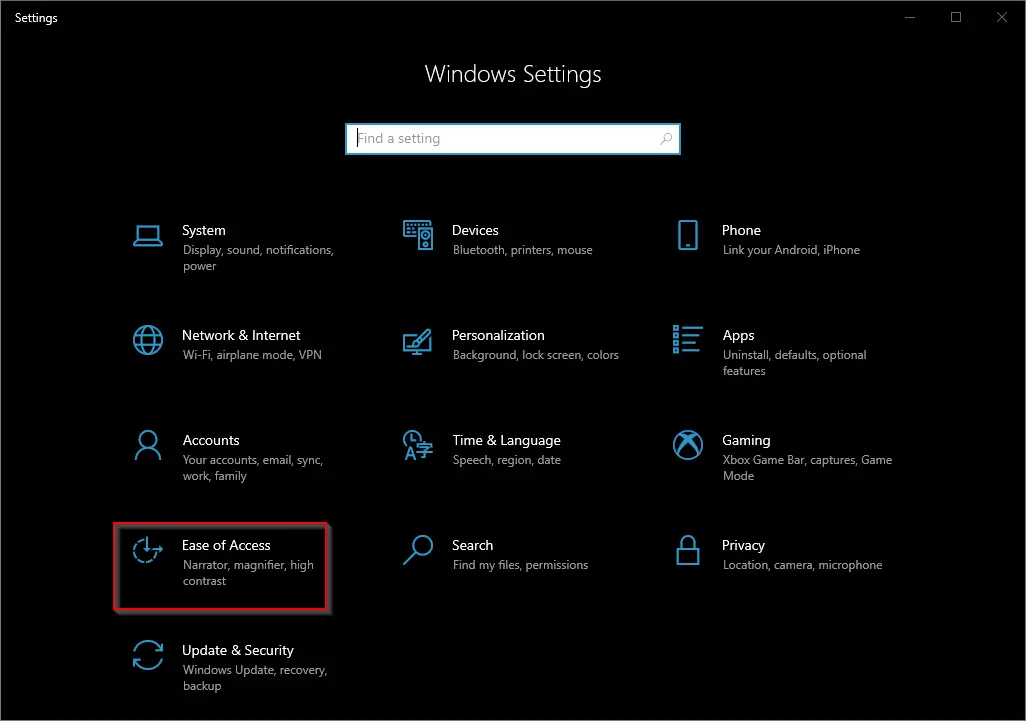
Step 2. After that, click the Ease of Access.
Step 3. Next, select the Narrator option from the left sidebar.
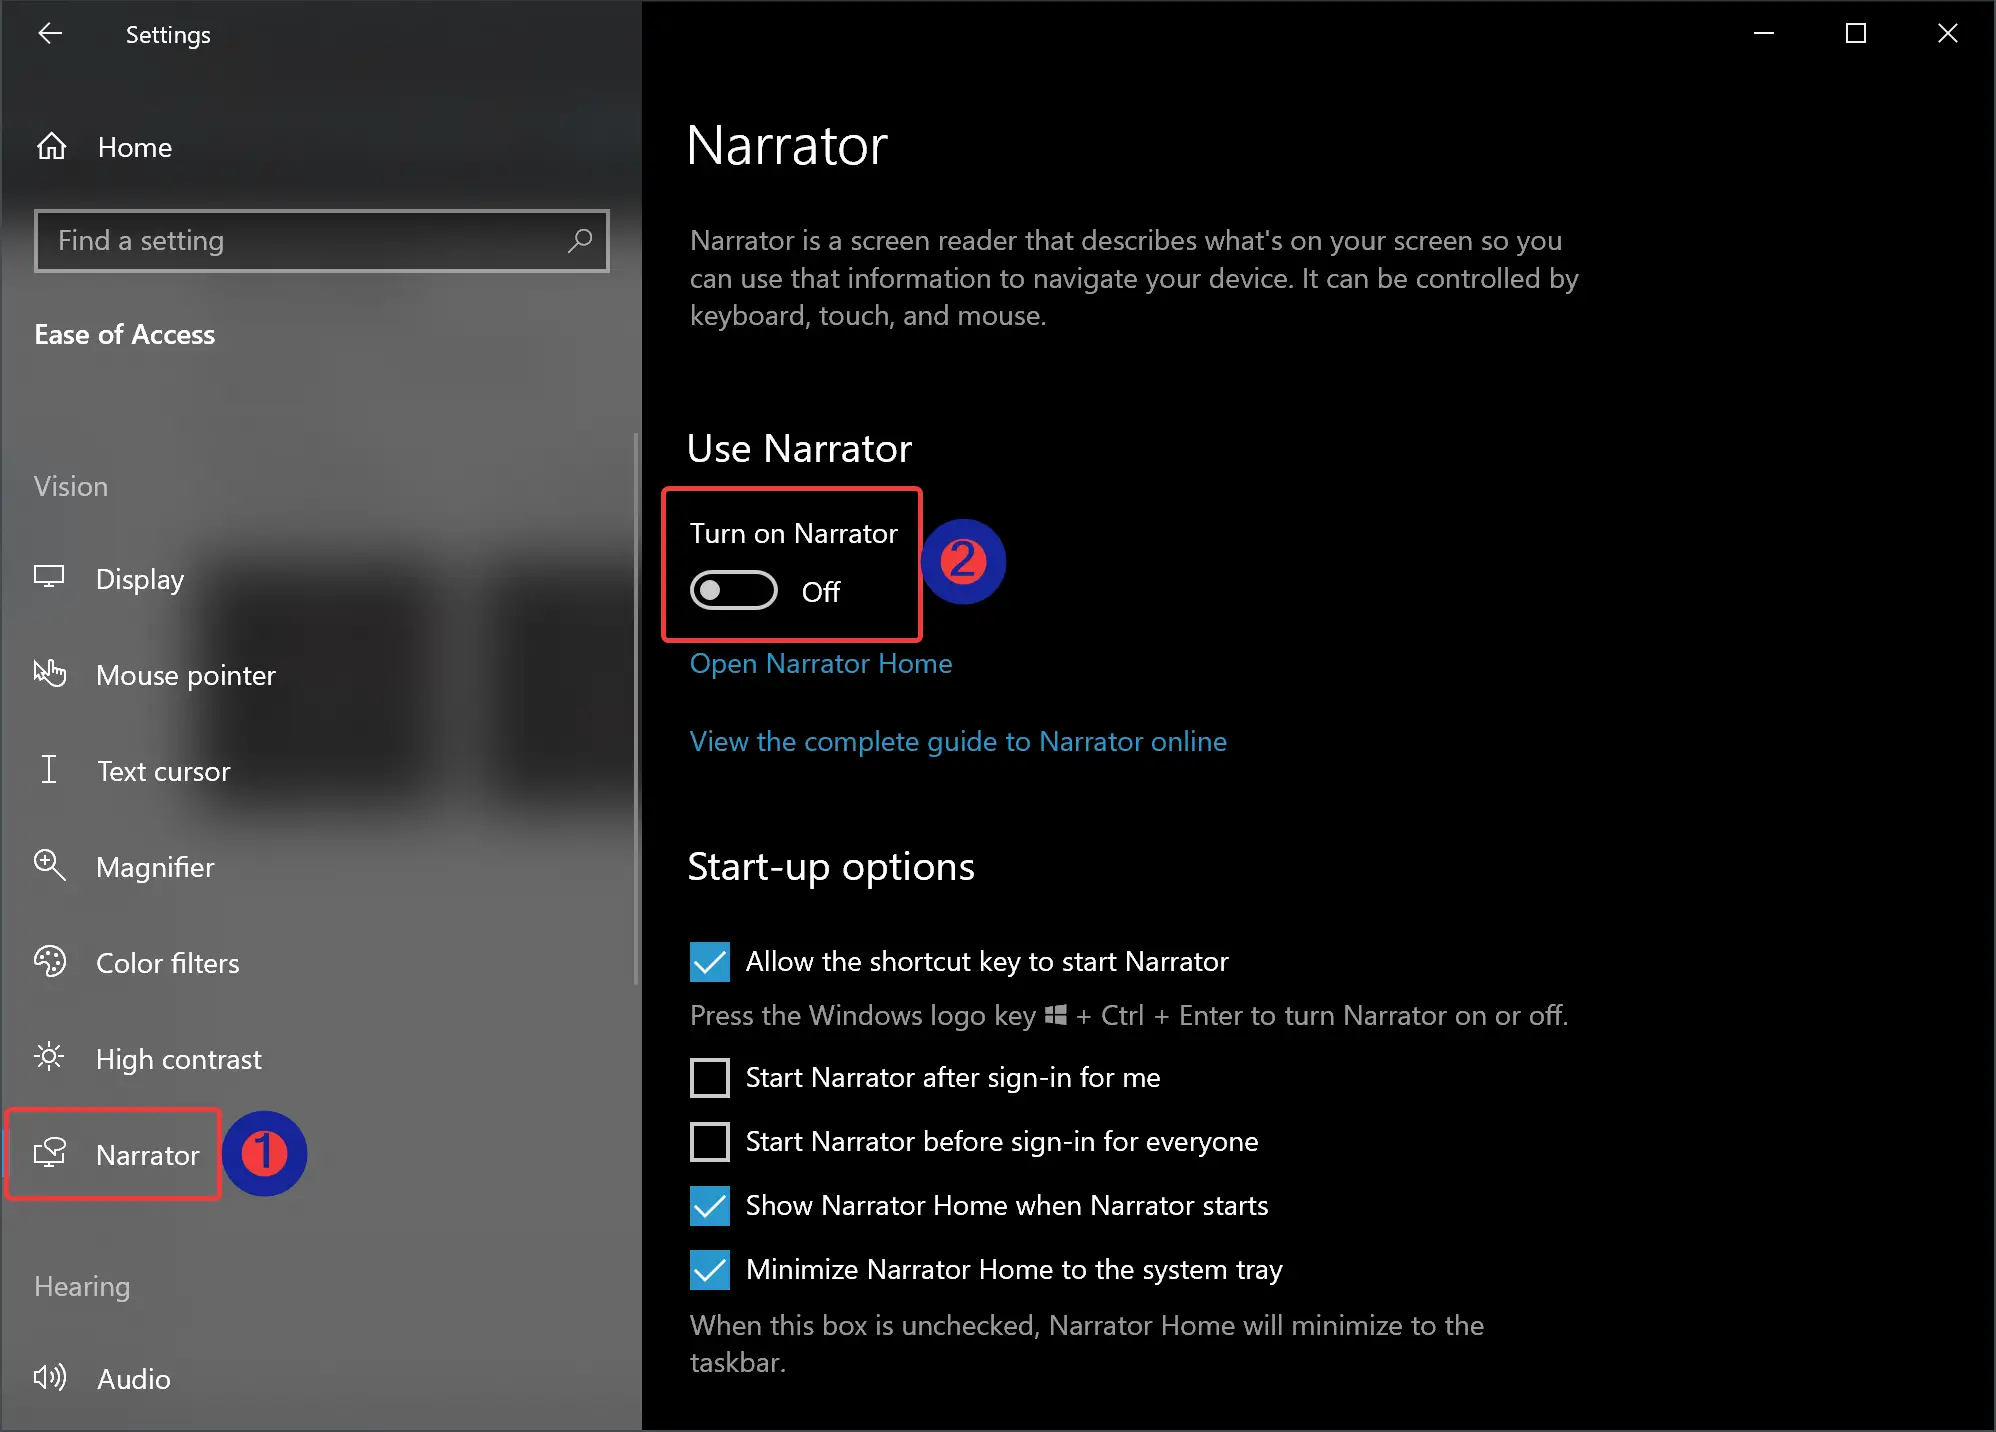
Step 4. On the right side of “Narrator,” turn off the toggle switch Turn on Narrator under the “Use Narrator” section.
To enable the Narrator, you need to turn On the toggle switch Turn on Narrator in step 4 above.
How to Quickly Activate or Deactivate Narrator on Windows 11 or 10?
If you want to quickly turn off or on the Narrator on Windows 11 or 10, you can use the keyboard shortcut Windows + Ctrl + Enter. Using this hotkey, you can enable or disable Narrator on your Windows machine according to your needs.
How to Enable or Disable Narrator in Windows 11 or 10 using Registry Editor?
To turn on or off Narrator in Windows 11 or 10 by tweaking the registry, use these steps:-
Step 1. Open Registry Editor.
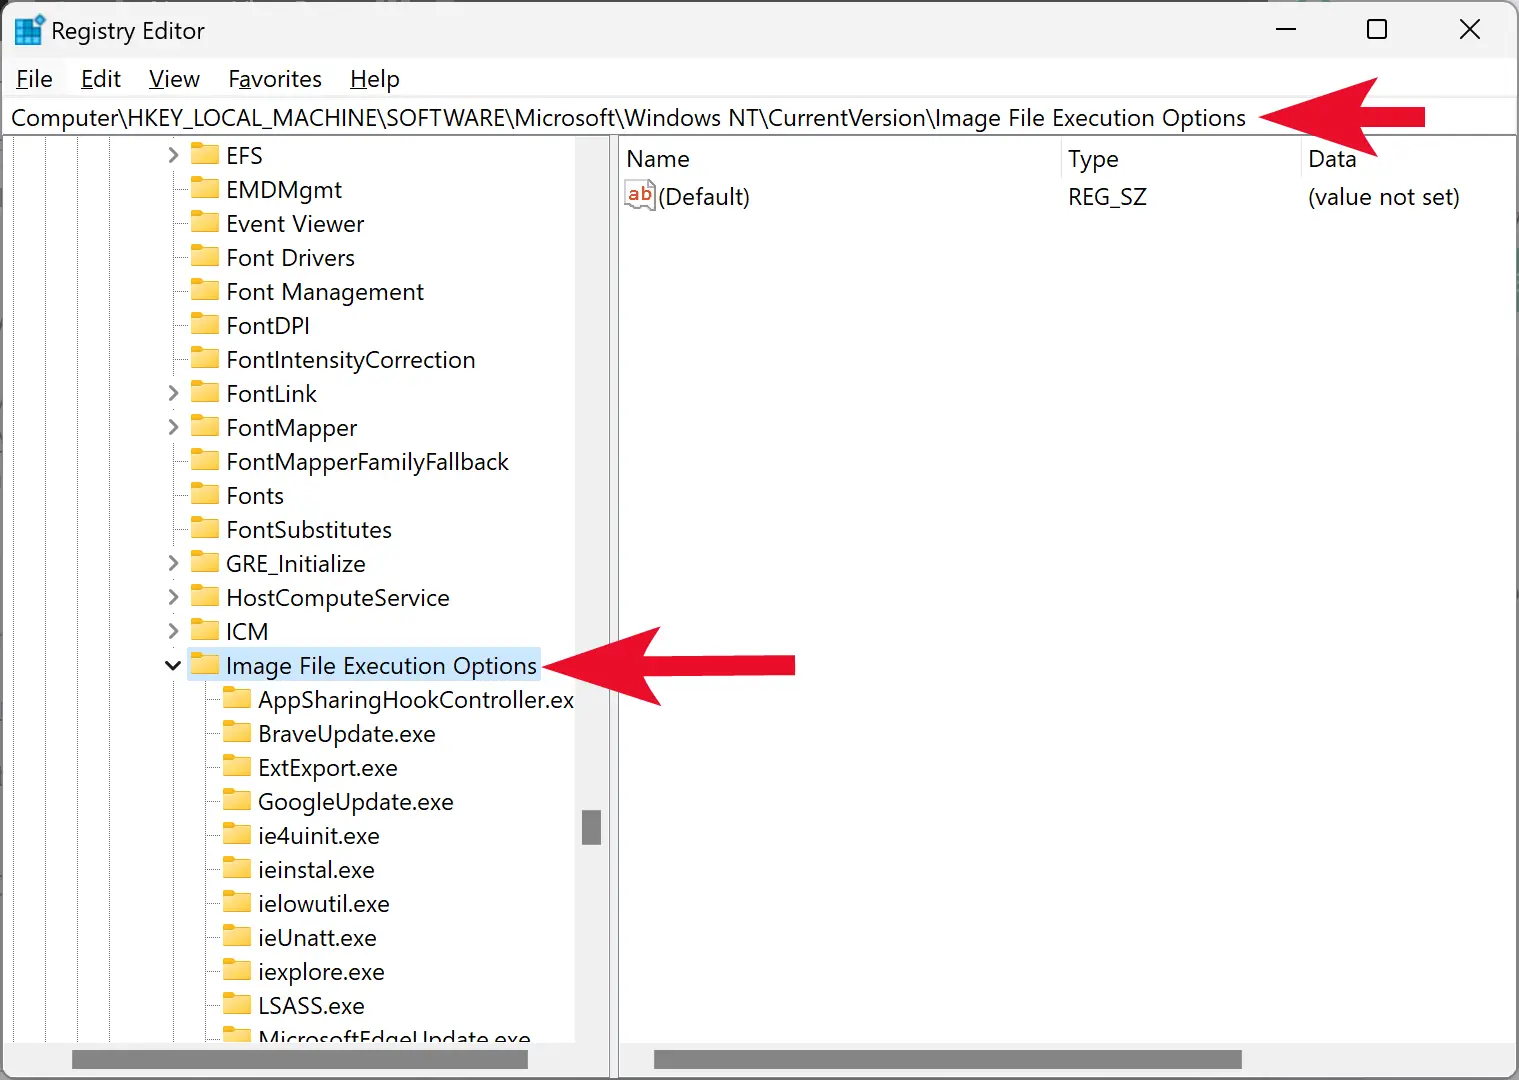
Step 2. When Registry Editor appears on your computer, browse to the following key in the left side navigation pane:-
HKEY_LOCAL_MACHINE\SOFTWARE\Microsoft\Windows NT\CurrentVersion\Image File Execution Options
Step 4. Then, right-click on the “Image File Execution Options” folder and select New > Key.
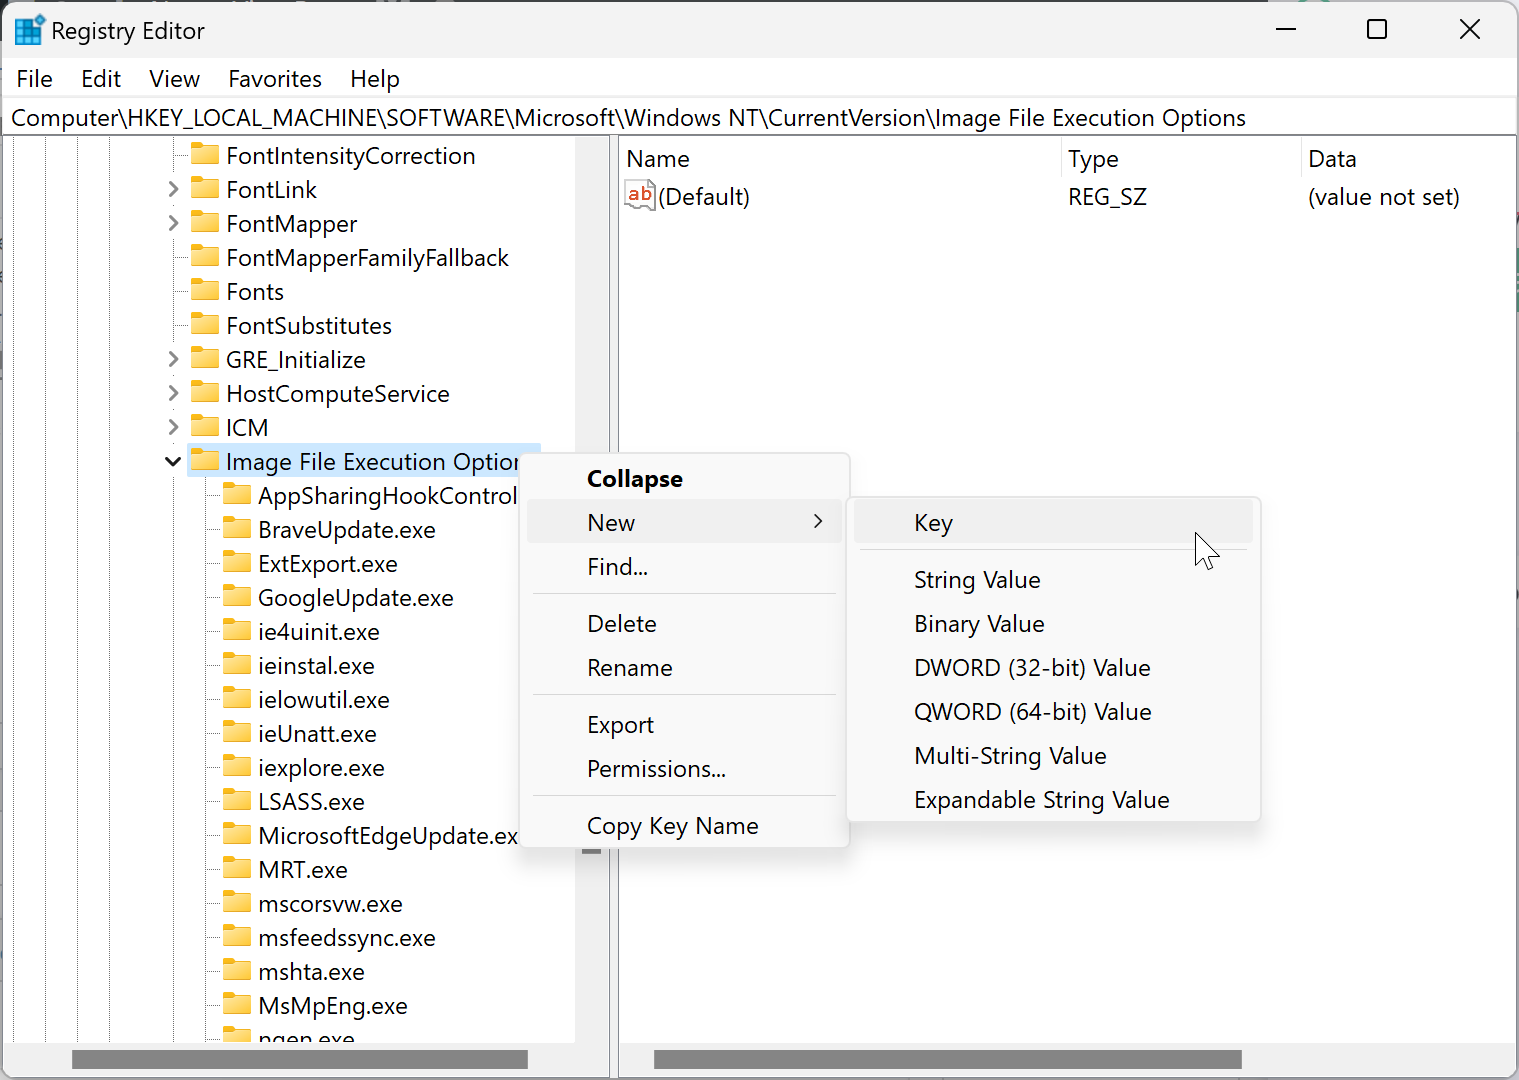
Step 5. Name the newly created key as narrator.exe.
Step 6. Now, right-click on the newly created folder narrator.exe and select New > String Value.
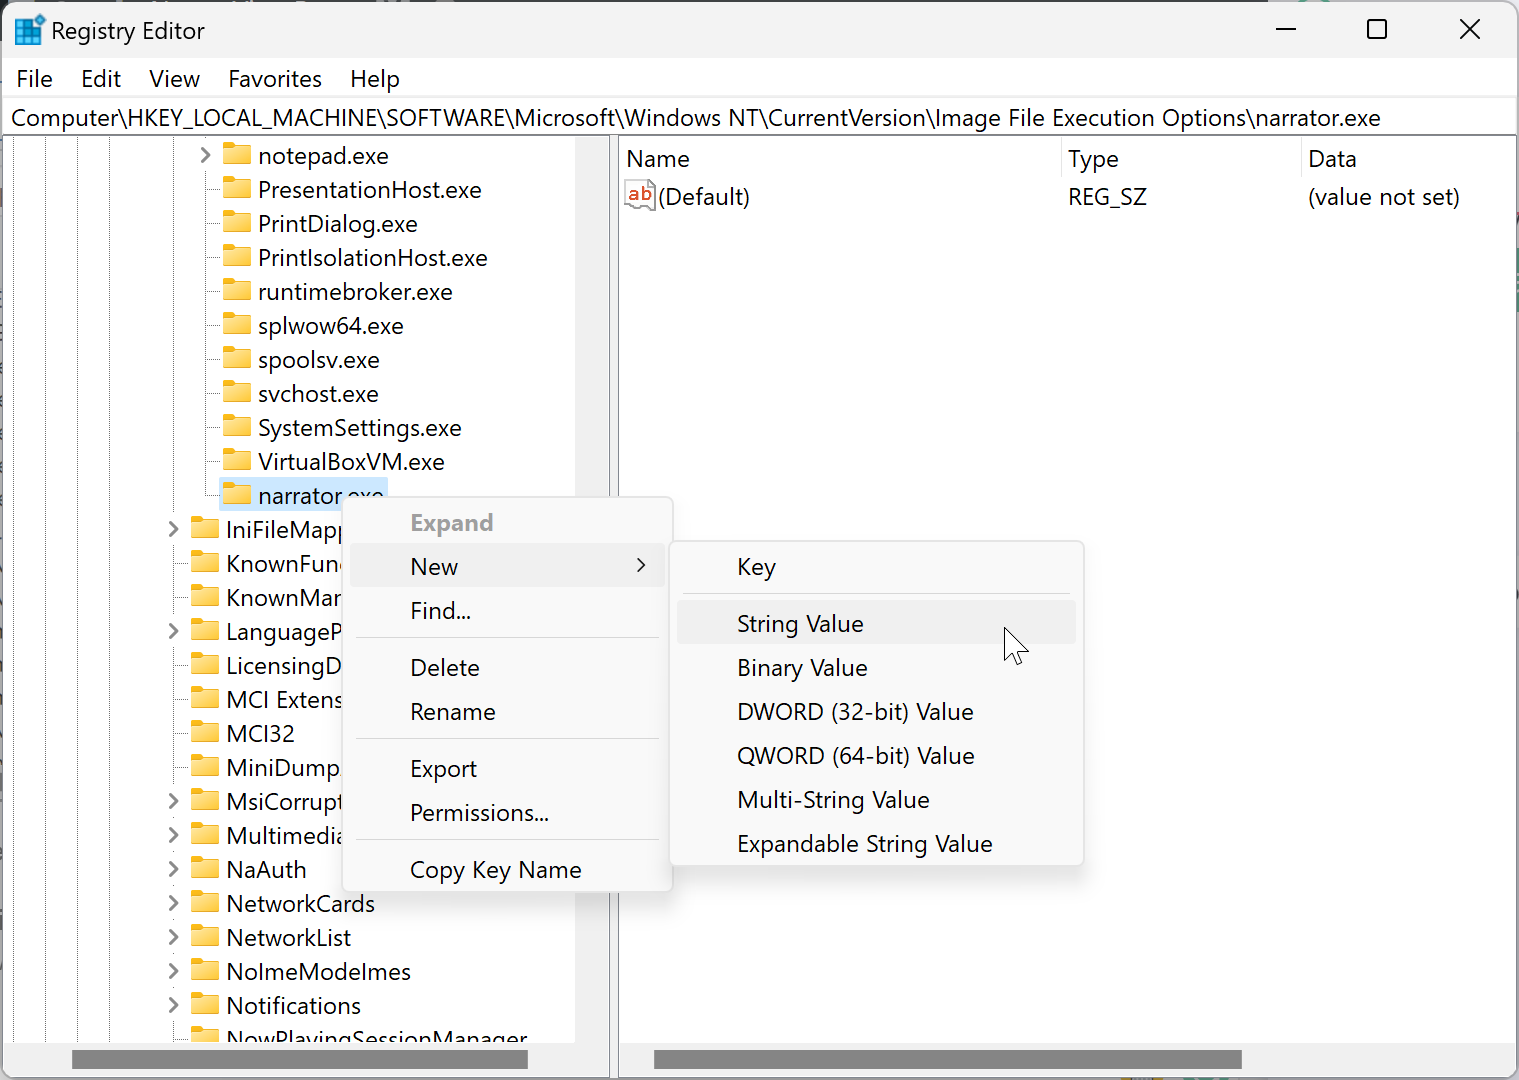
Step 7. Name the newly created REG_SZ as Debugger.

Step 8. Now, double-click on the Debugger REG_SZ and set its “Value data” to 1 to disable Narrator on your PC.
Step 9. At last, reboot your computer to apply the changes.
To enable the Narrator on your Windows 11 or 10 machine, navigate to the following Registry key in the Registry Editor window:-
Computer\HKEY_LOCAL_MACHINE\SOFTWARE\Microsoft\Windows NT\CurrentVersion\Image File Execution Options\narrator.exe
Then, right-click on narrator.exe key in the left sidebar and select Delete in the menu. When prompted, click the Yes button.
That’s it.
Conclusion
In conclusion, Narrator is a useful accessibility feature in Windows 10 and 11 that reads on-screen text to assist visually impaired users. However, if you don’t use this feature, you can turn it off using different methods. You can disable Narrator through Windows Settings, keyboard shortcuts, or the Registry Editor. Using the Settings app, you can turn off Narrator in just a few clicks. If you prefer using a keyboard shortcut, pressing Windows + Ctrl + Enter can quickly activate or deactivate Narrator on your Windows PC. Lastly, if you are comfortable using the Registry Editor, you can enable or disable Narrator by tweaking the registry values.