If your Windows 11 or 10 computer supports Hardware Accelerated GPU Scheduling, turning on this feature enables more efficient GPU scheduling between applications, improving overall system performance. When this feature is enabled, your PC offloads most of the GPU scheduling to a dedicated GPU-based scheduling processor.
How to Enable Hardware Accelerated GPU Scheduling in Windows 11?
If your Windows machine supports “Hardware Accelerated GPU Scheduling,” this can improve your system performance. By default, this feature is disabled, and to use it, you need to turn it on.
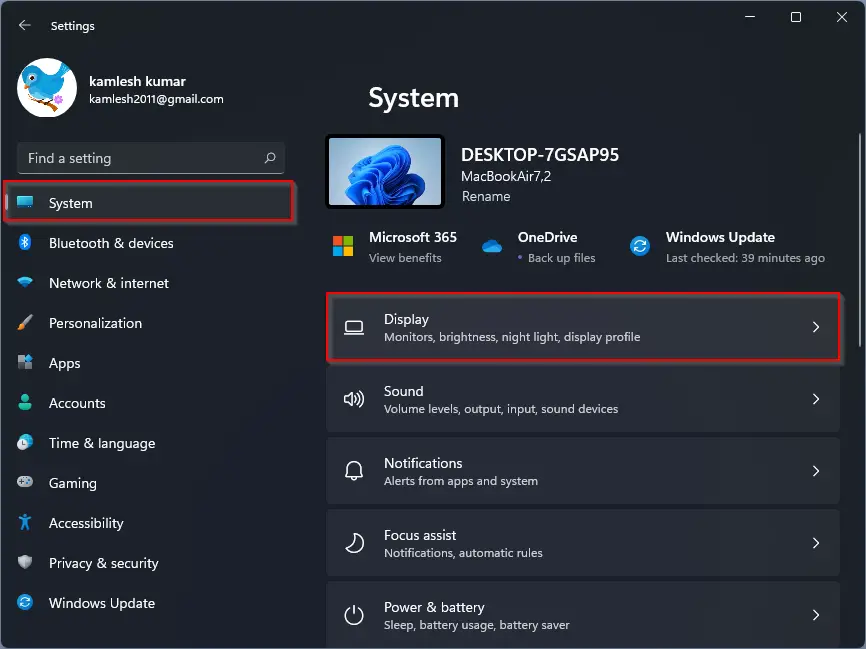
Step 1. Open the Settings app by pressing Windows + I keys from the keyboard.

Step 2. When Windows Settings opens, select the System category from the left sidebar.
Step 3. In the right-side pane, click the Display tab.
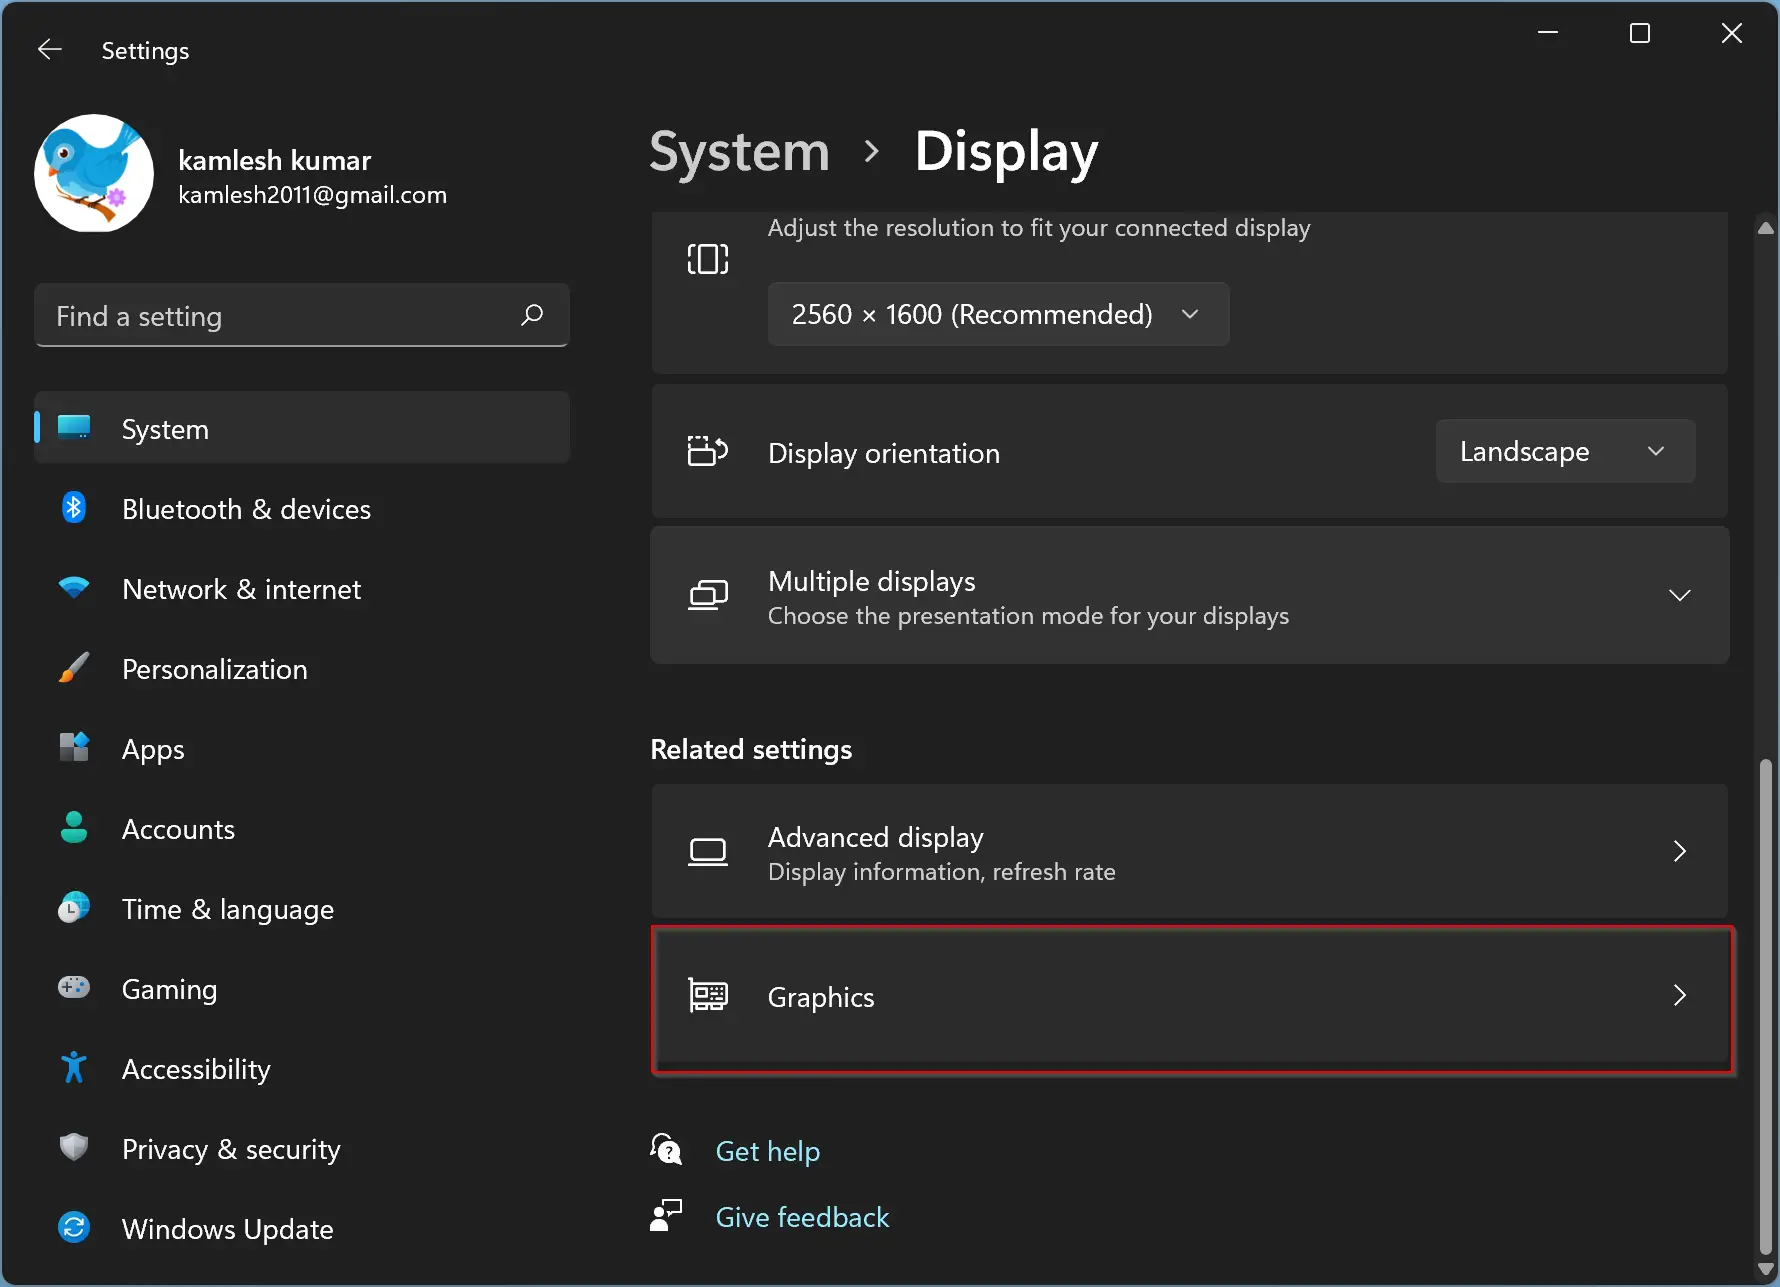
Step 4. On the Display settings, scroll down to the bottom of the screen to see Related settings. Then click the Graphics option.
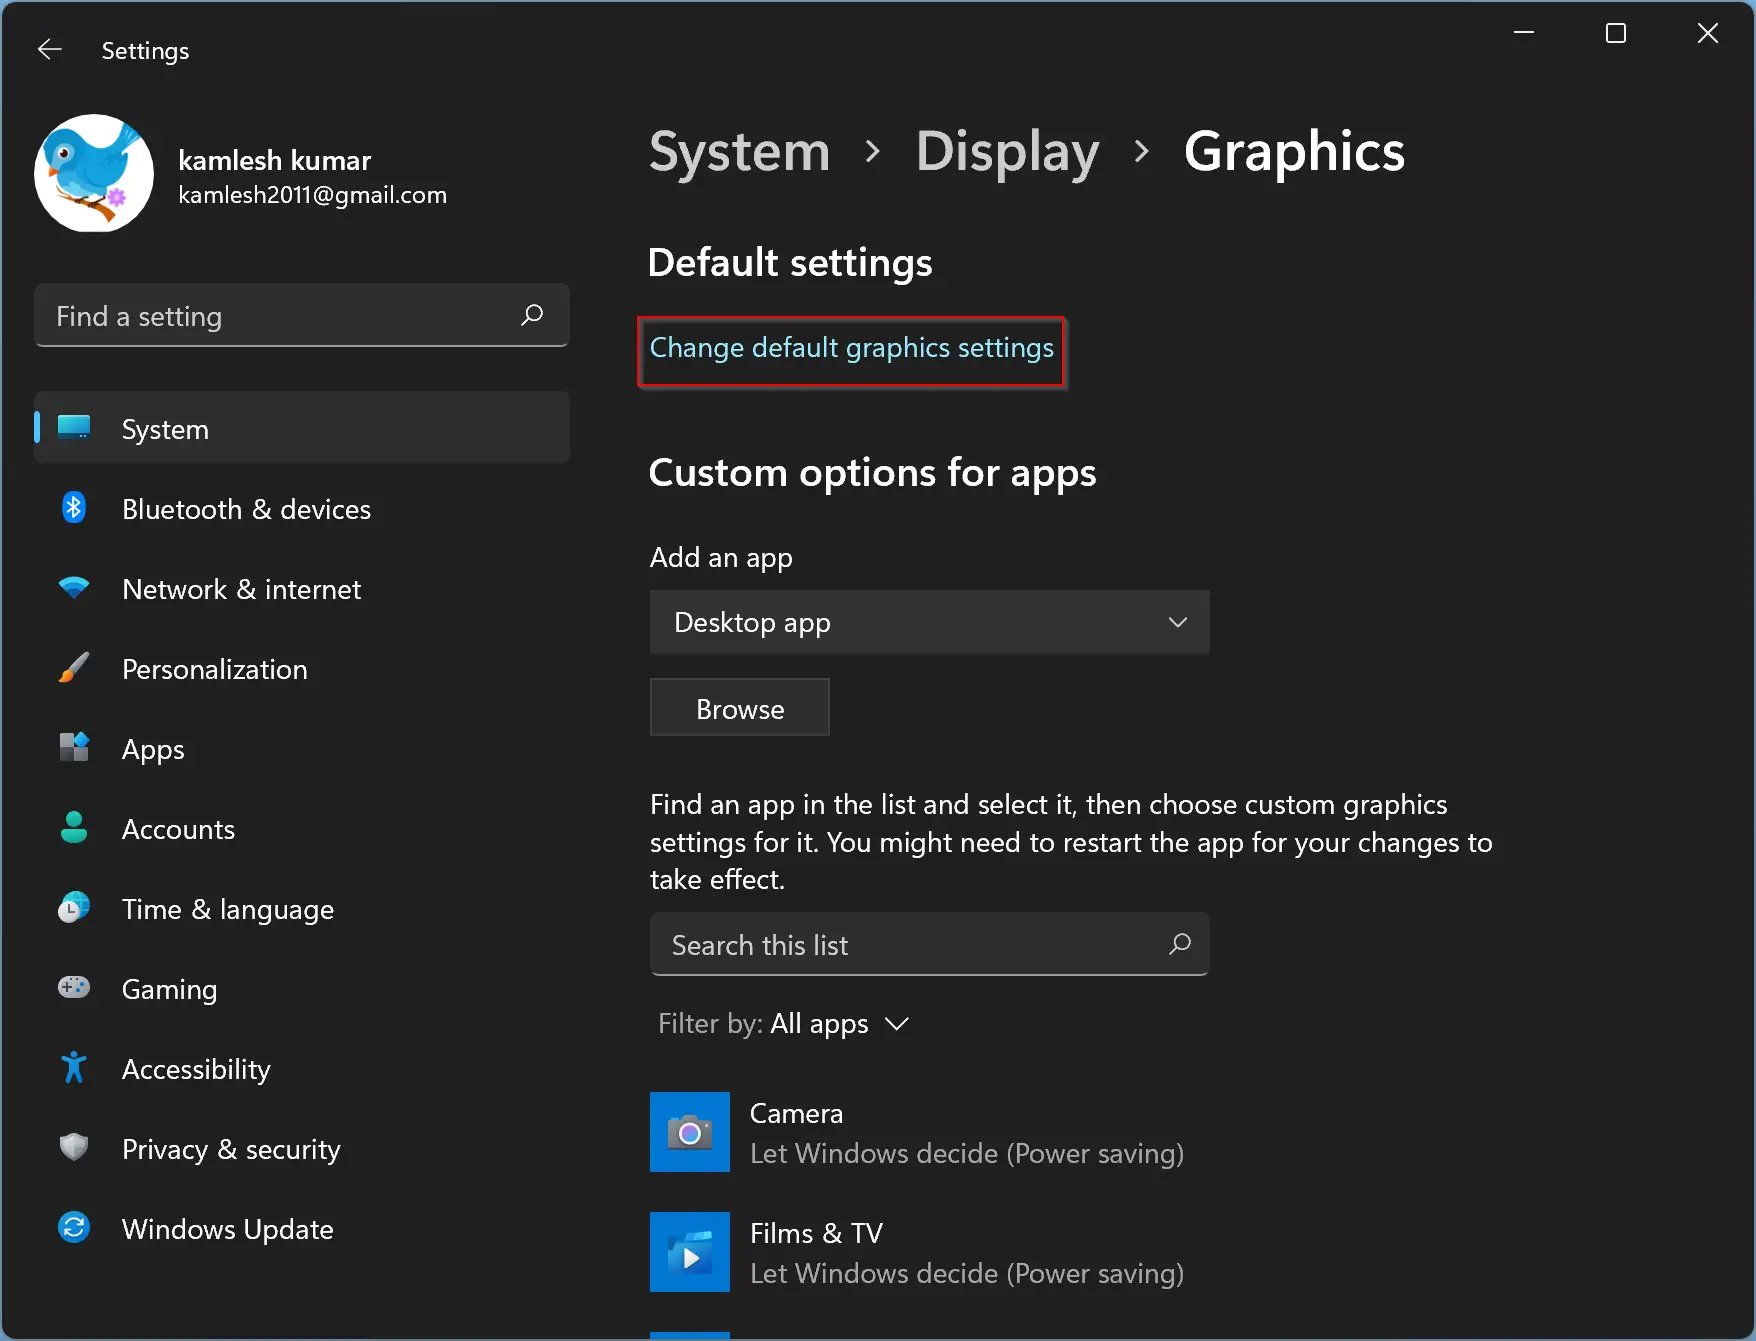
Step 5. In the next window, on the top of the screen, click the link Change default graphic settings.
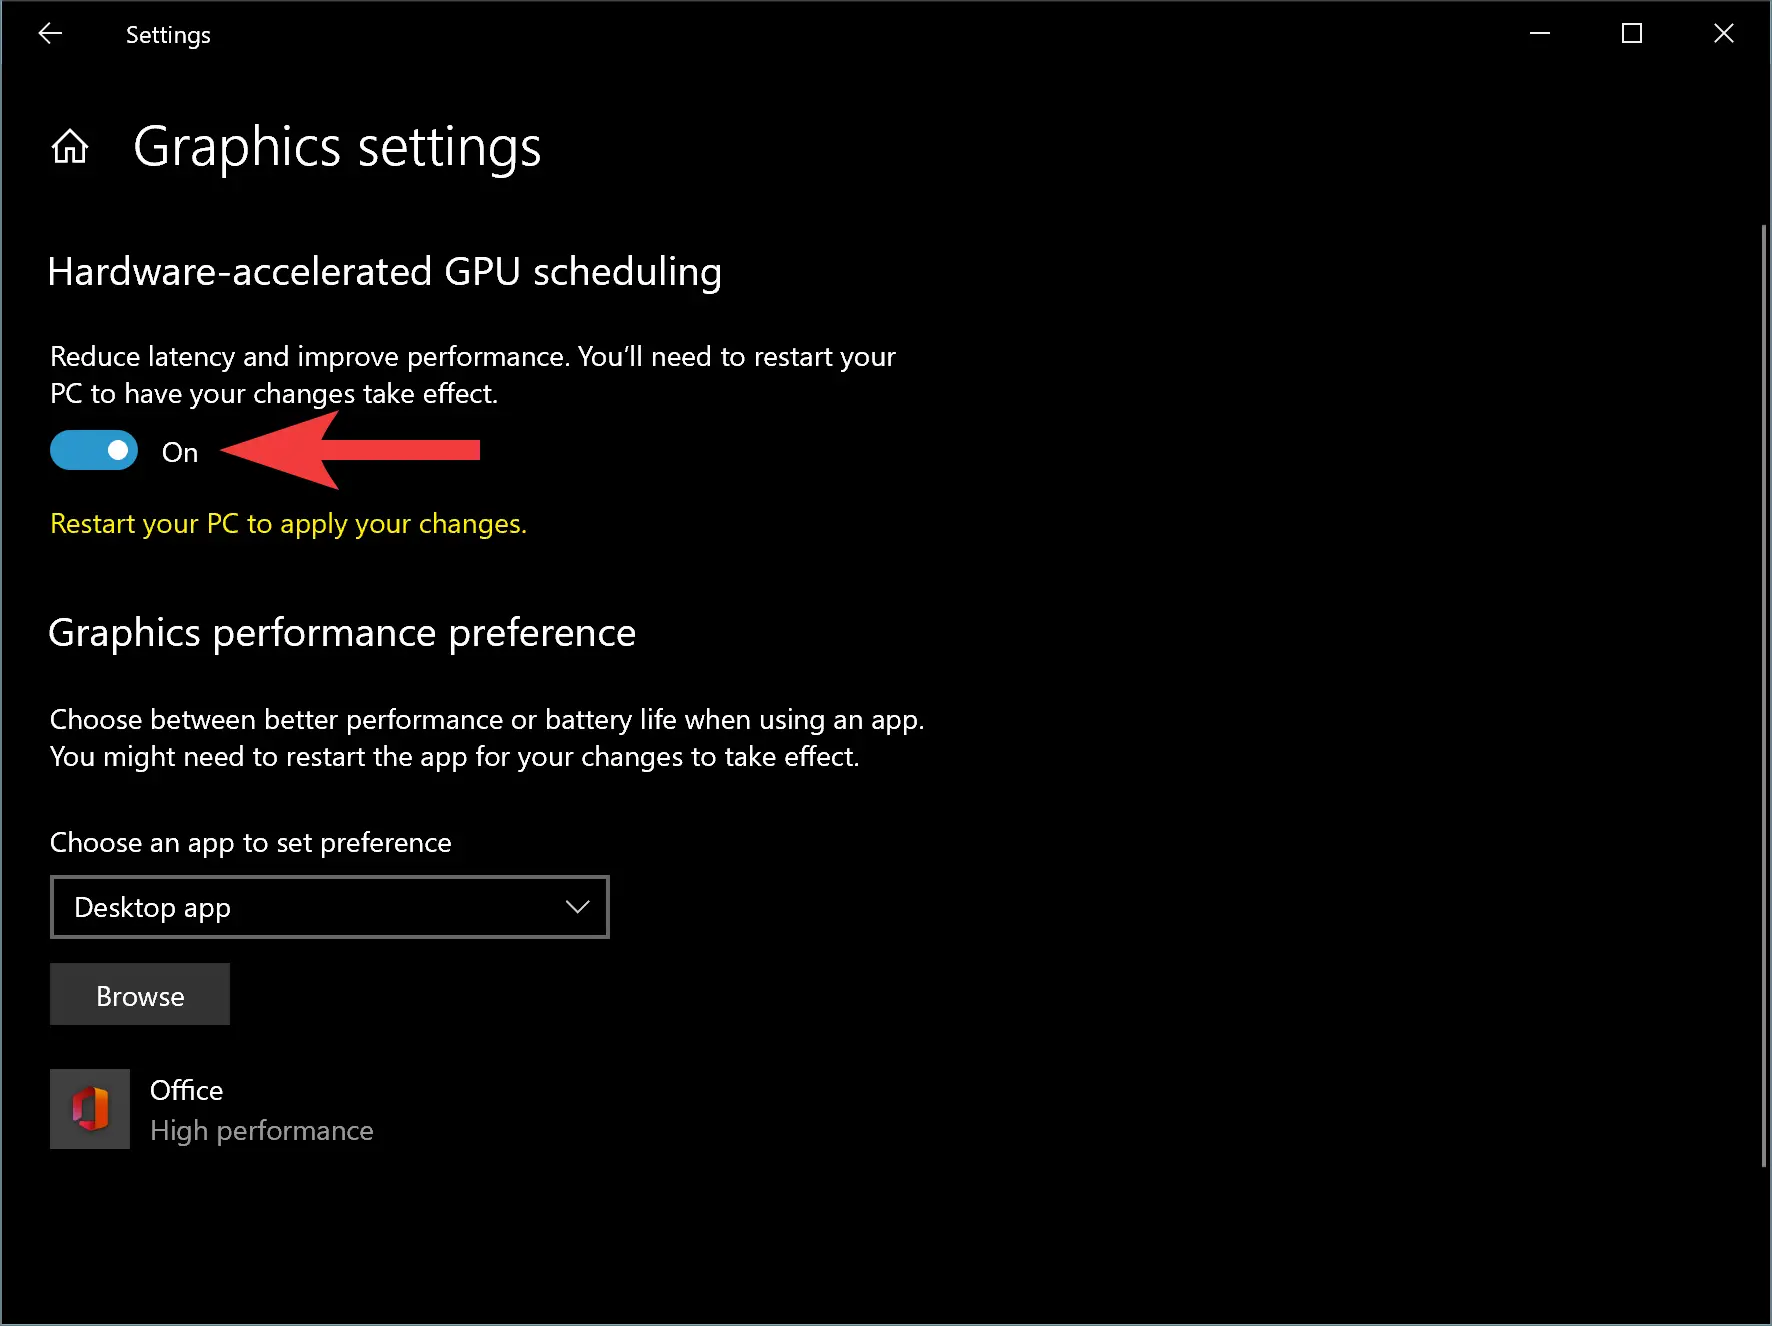
Step 6. Finally, turn the toggle switch beside “Reduce latency and improve performance. You’ll need to restart your PC to have your changes take effect” under the “Hardware-accelerated GPU scheduling” section.

Although Microsoft says turning on this feature reduces latency and improves performance, if you’re experiencing any issues on your Windows 11 computer, you can turn off this feature by repeating the above step and switching the toggle to the Off position in step 6 above.
How to Enable Hardware Accelerated GPU Scheduling in Windows 10?
To turn on Hardware Accelerated GPU Scheduling in Windows 10 PC, use the following steps:-
Step 1. First, open the Settings app on your PC by pressing Windows + I keys on the keyboard.
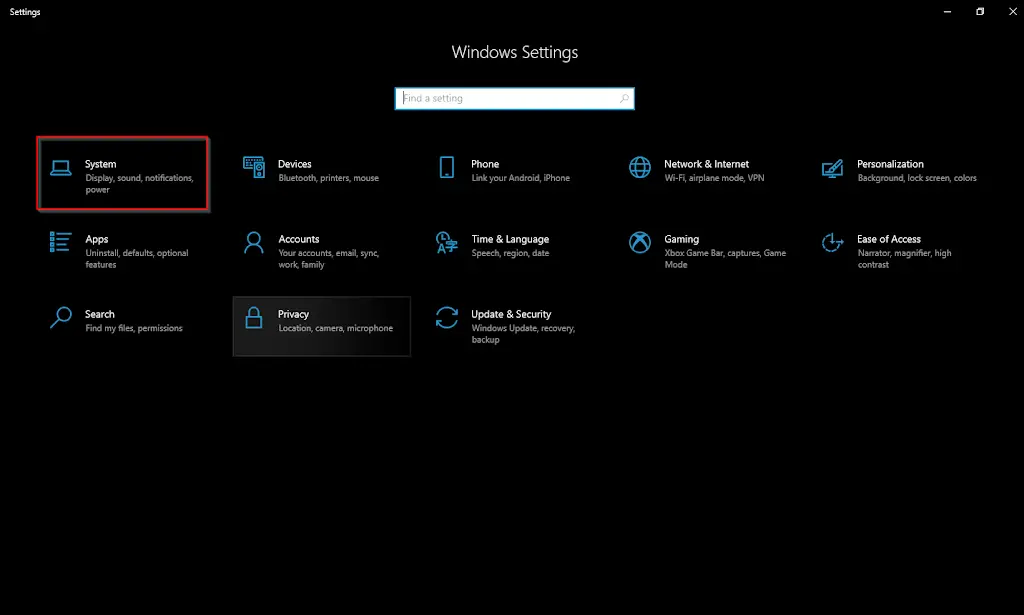
Step 2. Then, hit the System category.
Step 3. Under the System, select the Display tab.

Step 4. When you’re done, scroll down a bit on the right-side pane. Click on the Graphics settings option under the “Multiple displays” section.
Step 5. Then, on the “Graphics settings” page, turn the toggle switch to the On position for the “Reduce latency and improve performance. You’ll need to restart your PC to have your changes take effect” option.
Note: To disable this feature, you’ll need to turn off the toggle switch beside the “Reduce latency and improve performance. You’ll need to restart your PC to have your changes take effect” option.
Step 6. Finally, reboot your computer to apply the changes.
Good luck.
Conclusion
In conclusion, enabling Hardware Accelerated GPU Scheduling in Windows 11 or 10 can significantly improve system performance by offloading most of the GPU scheduling to a dedicated GPU-based scheduling processor. The process of enabling this feature is relatively easy, and it can be turned on or off according to your preference. With this feature enabled, your computer can handle more demanding applications and processes more efficiently. If you want to improve your Windows 11 or 10 PC’s overall performance, you may want to consider enabling Hardware Accelerated GPU Scheduling.