By default, Microsoft Edge comes preinstalled as the default web browser in Windows 11 and Windows 10. Although the Edge browser comes with several features and meets most user needs, most Windows users do not love using it and want to get rid of it.
Unluckily when you try to uninstall Microsoft Edge using either Control Panel or the Settings app, you will find the Uninstall option is missing or greyed out. Luckily, there is a workaround to uninstall the Edge browser from Windows 11/10. To remove Edge from your computer, you need to take the help of the built-in Command Prompt or Windows PowerShell. Here is how to do it.
How to Uninstall Microsoft Edge in Windows 11 or 10 using Command Prompt?
To remove or uninstall Microsoft Edge from your Windows 11/10 through Command Prompt, do the following:-
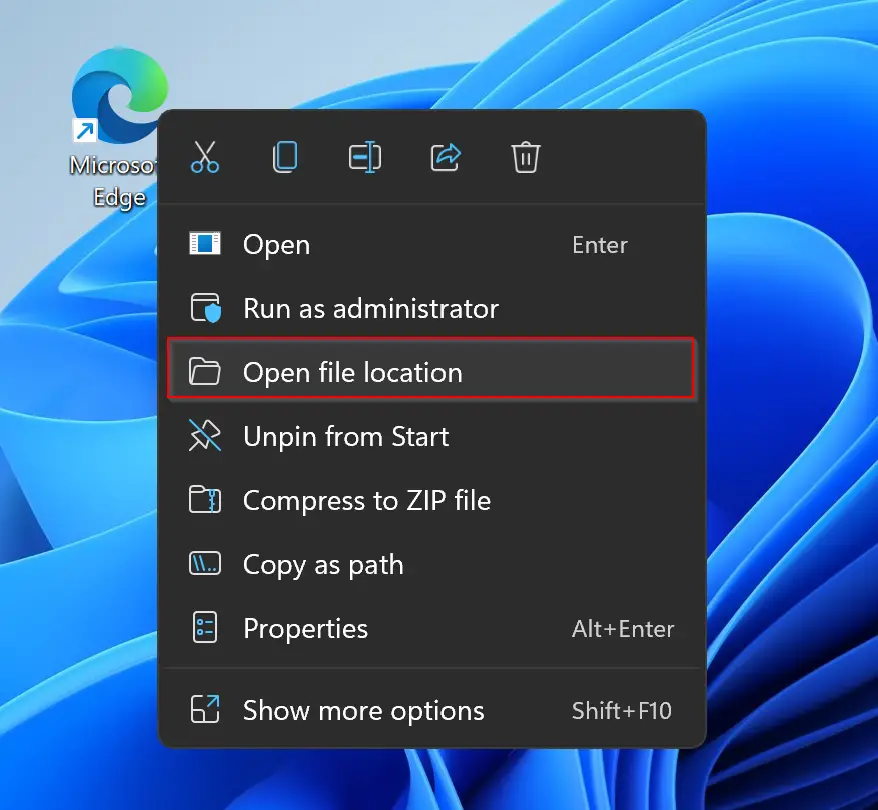
Step 1. First, locate the Microsoft Edge installation folder. To do that, right-click on the Microsoft Edge desktop shortcut and select Open file location.
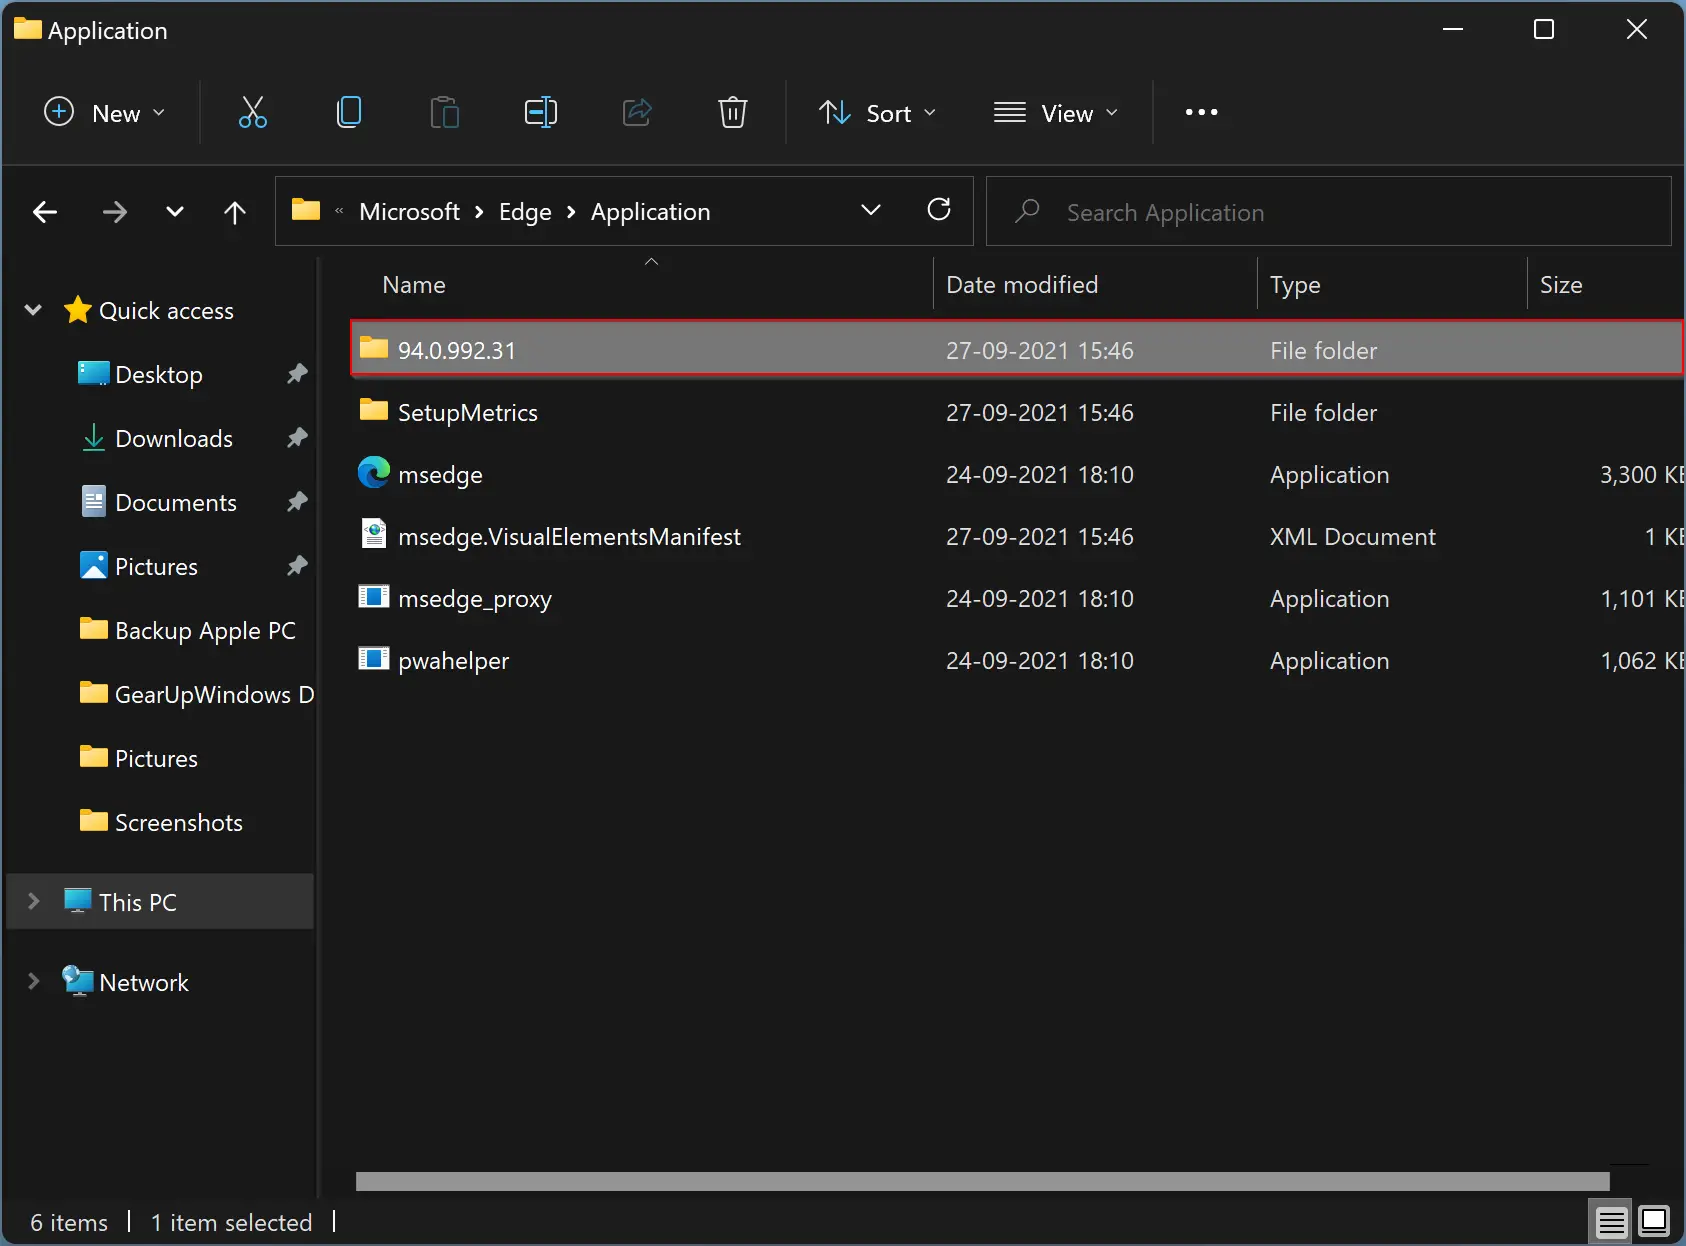
Step 2. Now, double-click the folder name with the Edge browser version.
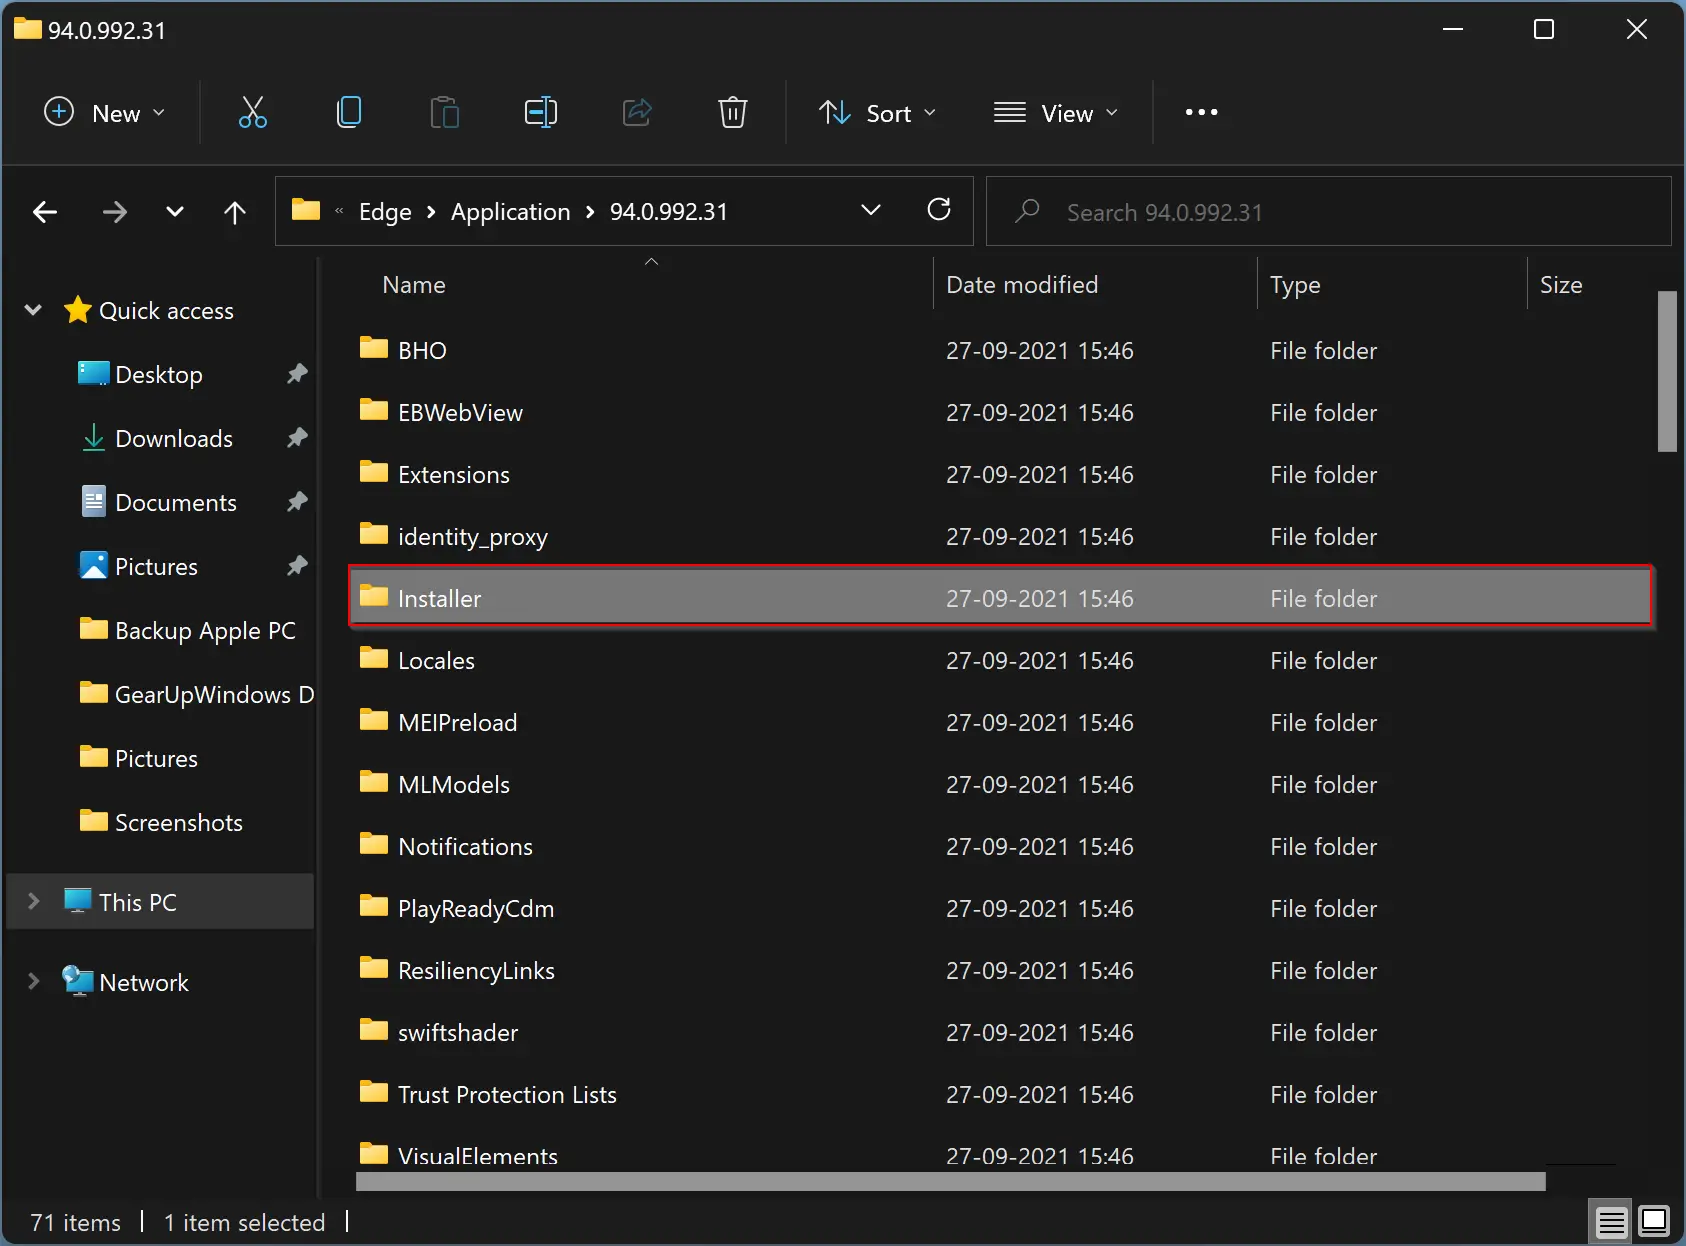
Step 3. Then double-click the Installer folder to see the executable file.
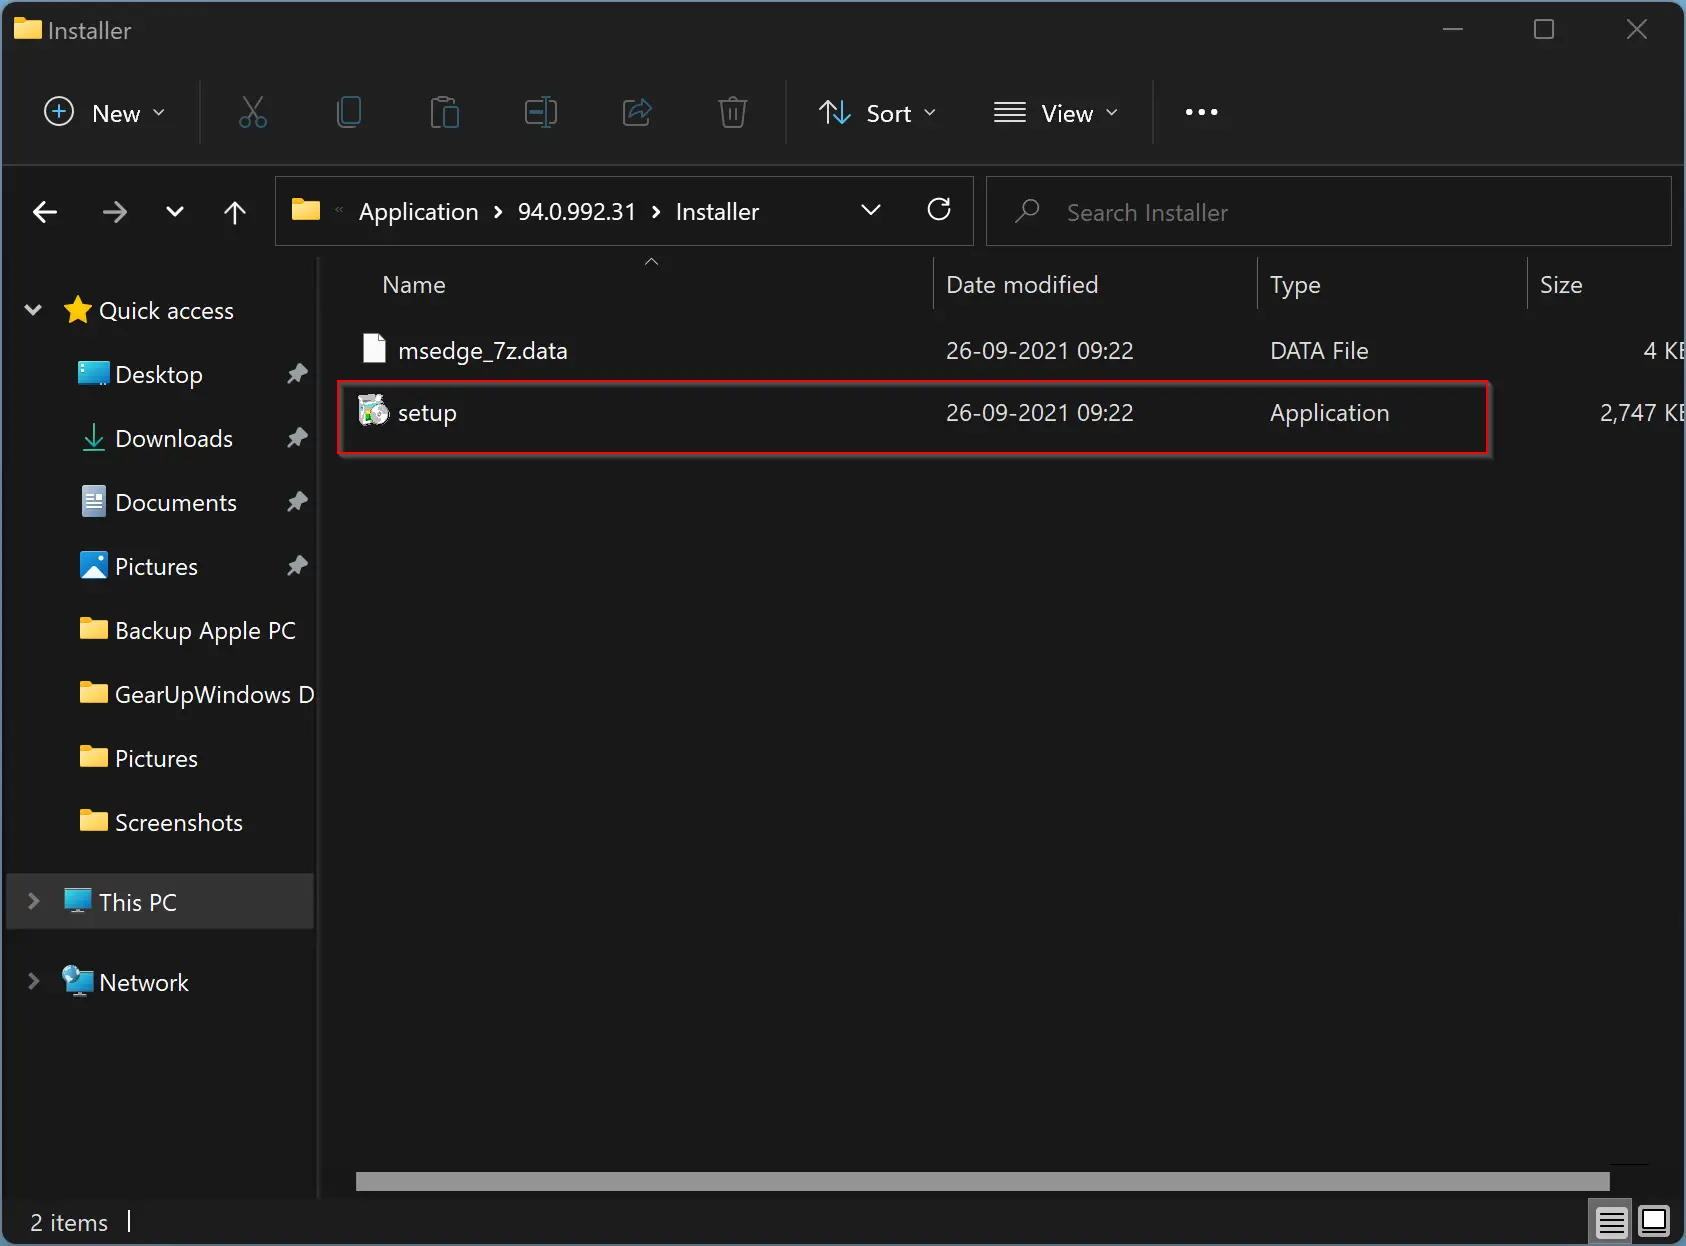
Step 4. From here, note down the executable file name—for instance, setup.exe.
Step 5. Now, right-click on the Installer and select Copy address to copy the path of the Installer folder.
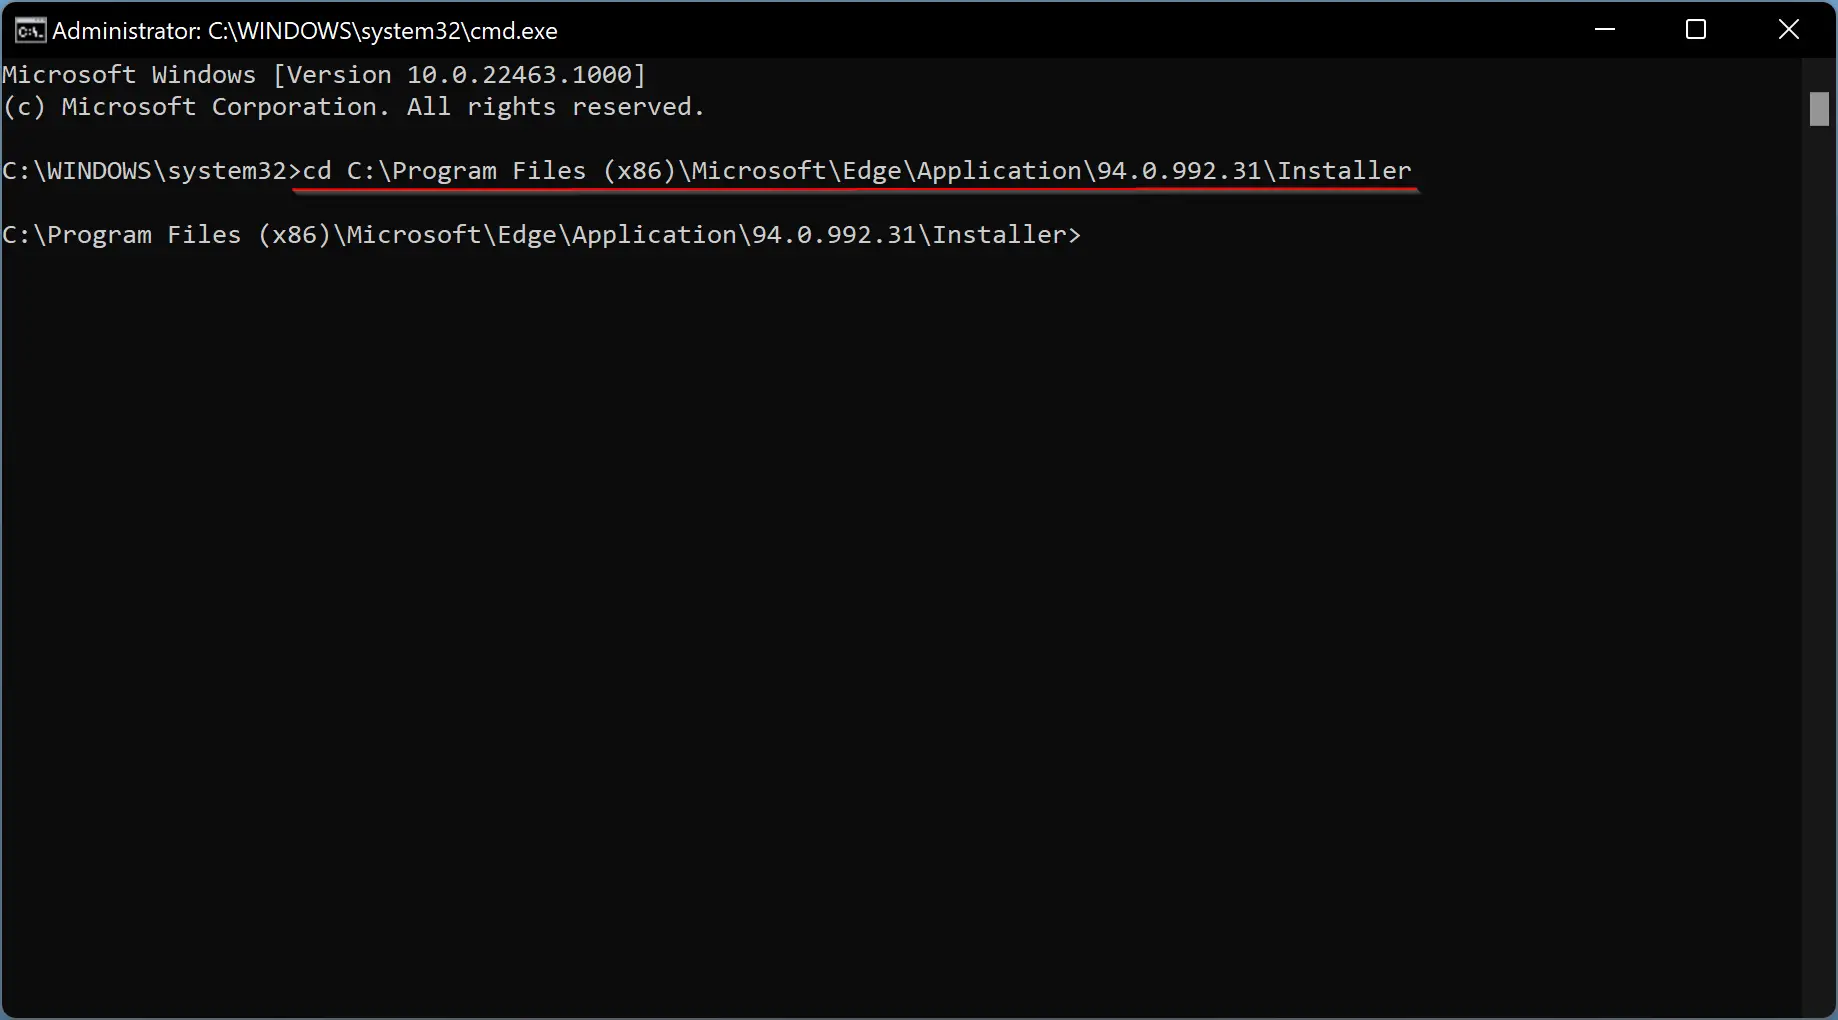
Step 6. Then, open an elevated Command Prompt.
Step 7. Now that you have copied the path of the Installer folder of Edge, on the command prompt, type cd and then give a space using the spacebar. Then, right-click from the mouse to paste the copied path on the command prompt. Not hit Enter from the keyboard to execute it.
Step 8. Again provide a space and then paste the following:-
.\setup.exe -uninstall -system-level -verbose-logging -force-uninstall
Note: Replace setup.exe with the executable if it is different in your case.
After entering the entire command, press Enter from the keyboard to execute it.
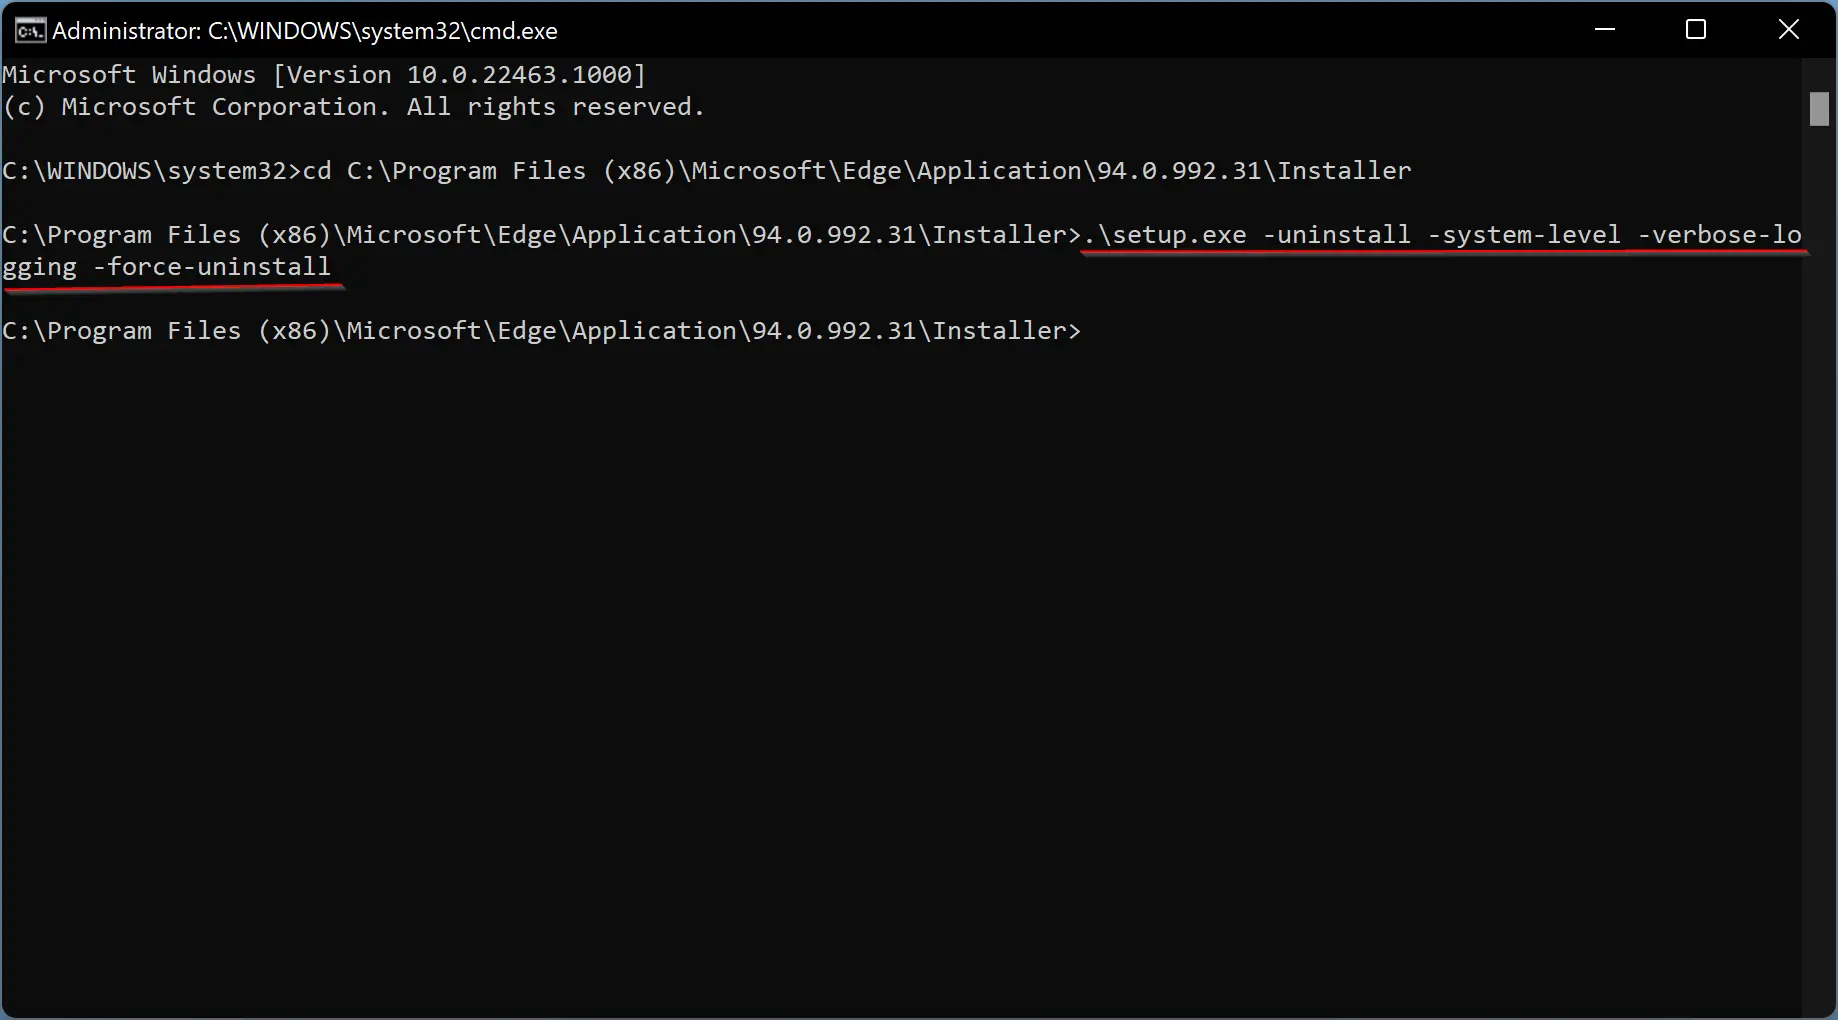
That’s it! Microsoft Edge is wholly removed from your computer.
How to Remove Microsoft Edge in Windows 11 or 10 through Windows PowerShell?
To remove or uninstall Microsoft Edge from your Windows 11/10 using Windows PowerShell, do these steps:-
Step 1. First, open an elevated Windows PowerShell.
Step 2. Next, copy and paste the following command and press Enter key on the keyboard:-
get-appxpackage *edge*
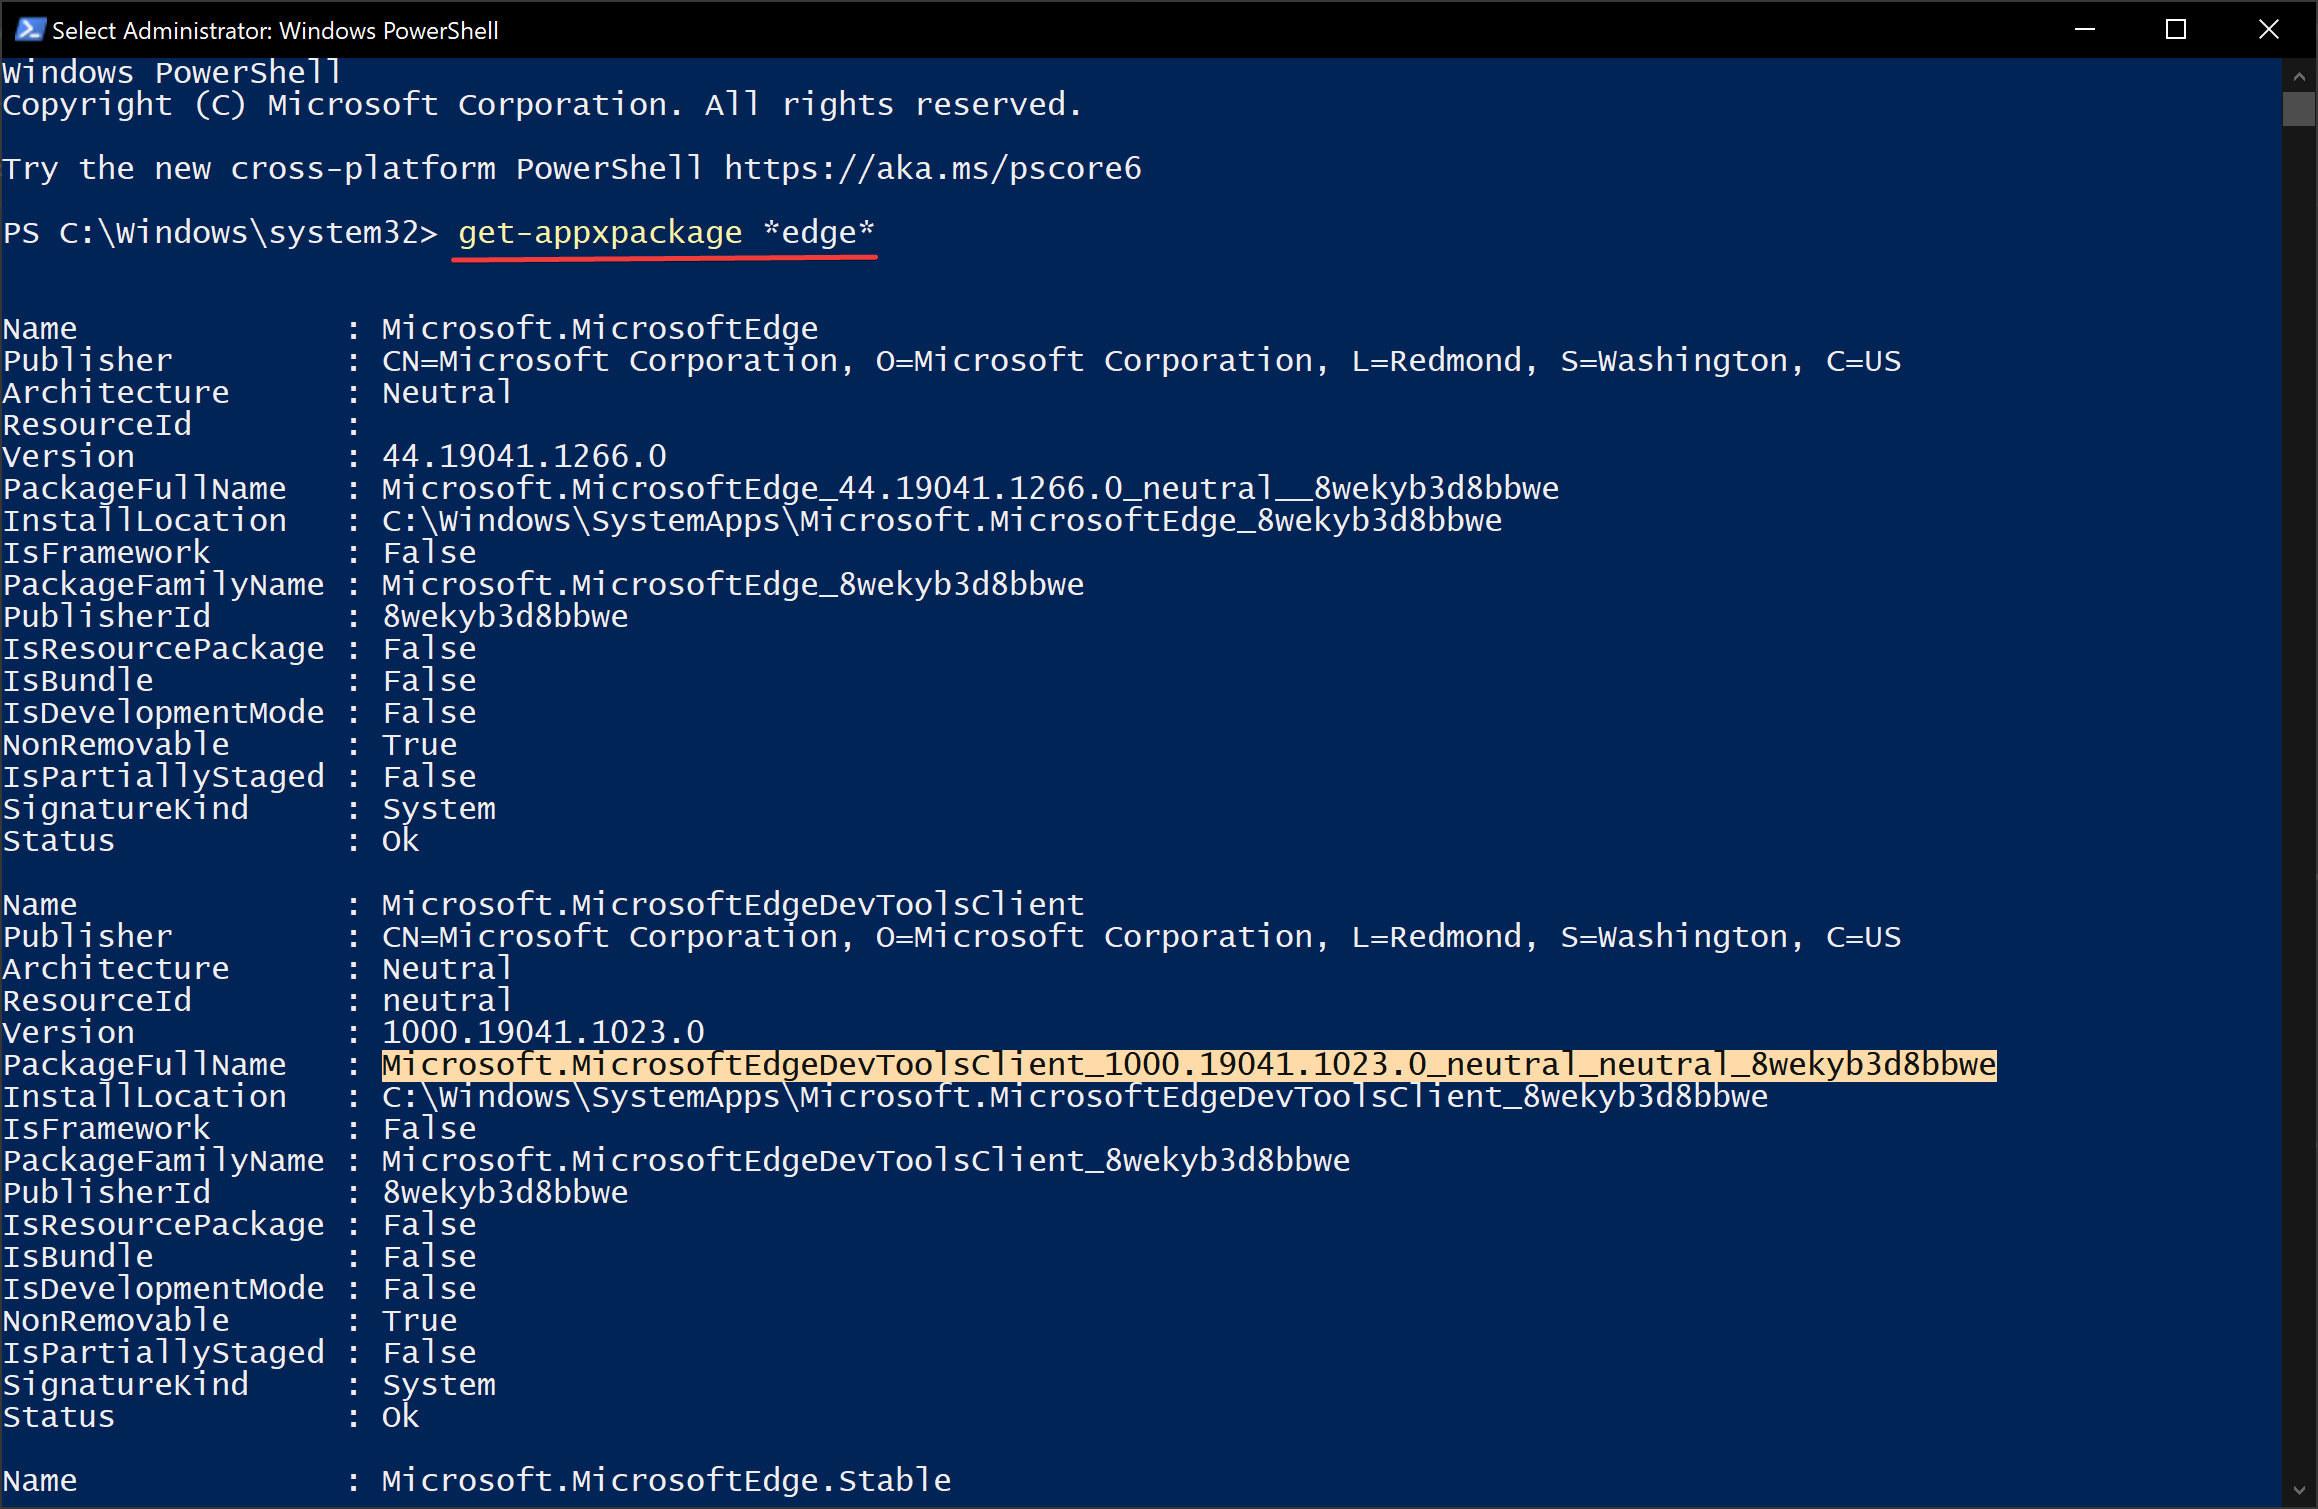
Step 3. Now, select the text beside PackageFullName and use Ctrl + C keyboard shortcut to copy it.
Step 4. Then, copy and paste the following command and hit the Enter key on the keyboard to uninstall Microsoft Edge from your computer:-
Remove-appxpackage <PackageFullName>
Note: In the above command, replace <PackageFullName> with the package name you copied earlier.
Whenever you need to install Microsoft Edge later, you can download it from the Microsoft website.
Conclusion
In conclusion, Microsoft Edge is a default web browser that comes preinstalled with Windows 11 and Windows 10. Although it comes with several features and meets most user needs, some users may not prefer it and want to uninstall it from their systems. Unfortunately, the Uninstall option is missing or greyed out in the Control Panel or the Settings app, making it difficult to remove Edge. However, there are workarounds to uninstall Microsoft Edge from Windows 11/10 using either Command Prompt or Windows PowerShell. By following the steps outlined in this article, users can successfully remove Microsoft Edge from their computers. If needed, Microsoft Edge can be reinstalled from the Microsoft website.