Reserved storage is a feature of the Windows 11/10 operating system that stores a part of the internal hard disk as a reserve to use by Windows temporary files, caches, and other files. This reserves storage facilitates your machine to run with proper performance and successful device updates. Windows 11/10 automatically clears the reserve storage when the primary disk runs out of free space and needs more storage for Windows updates or other processes.
The default size of reserved storage is around 7 GB. However, it may vary based on several things, such as disk space, processes, number of apps installed, etc. In most cases, you will not want to delete the reserved storage space, as it’s crucial for Windows.
Due to some reason, if you decide to remove the reserved storage space, this gearupwindows article will help you. However, it’s not recommended as it is needed by Windows 11/10 to run it smoothly. When troubleshooting Windows or for some reason, if you delete this reserved storage, we recommend you recreate it again.
How to Enable or Disable Reserved Storage Space in Windows 11?
Before disabling the reserved storage space in Windows 11, you should know how much space your system uses. To see that, do the following:-
Step 1. Open the Settings app by pressing the Windows + I keys from the keyboard.

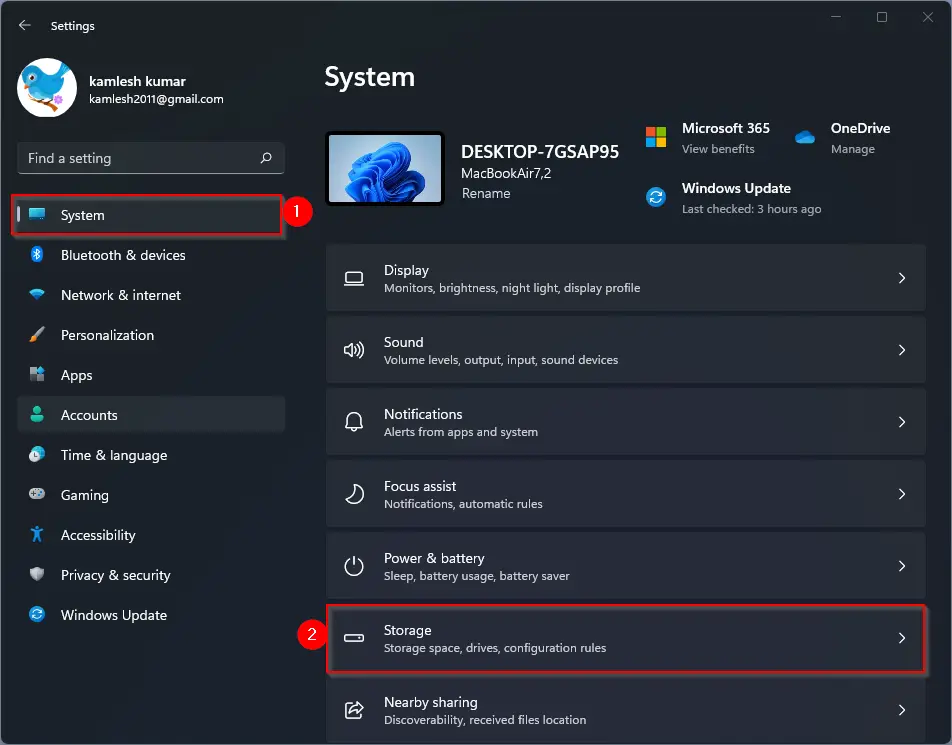
Step 2. When Windows Settings opens, select the System category from the left sidebar.
Step 3. In the right sidebar, click the Storage tab.
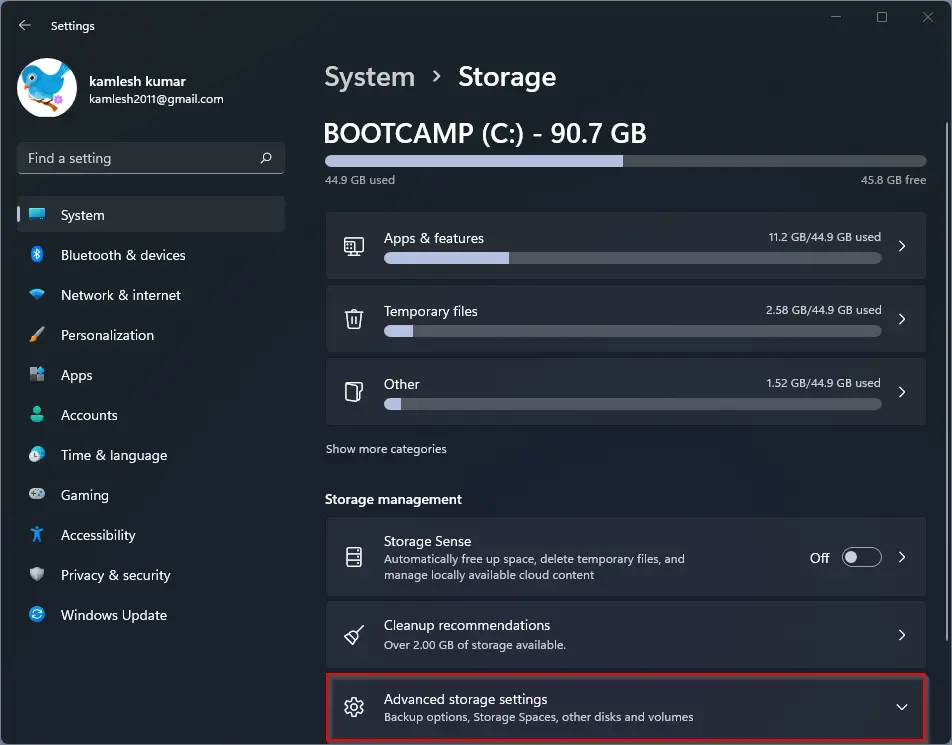
Step 4. Then click the option Advanced storage settings.
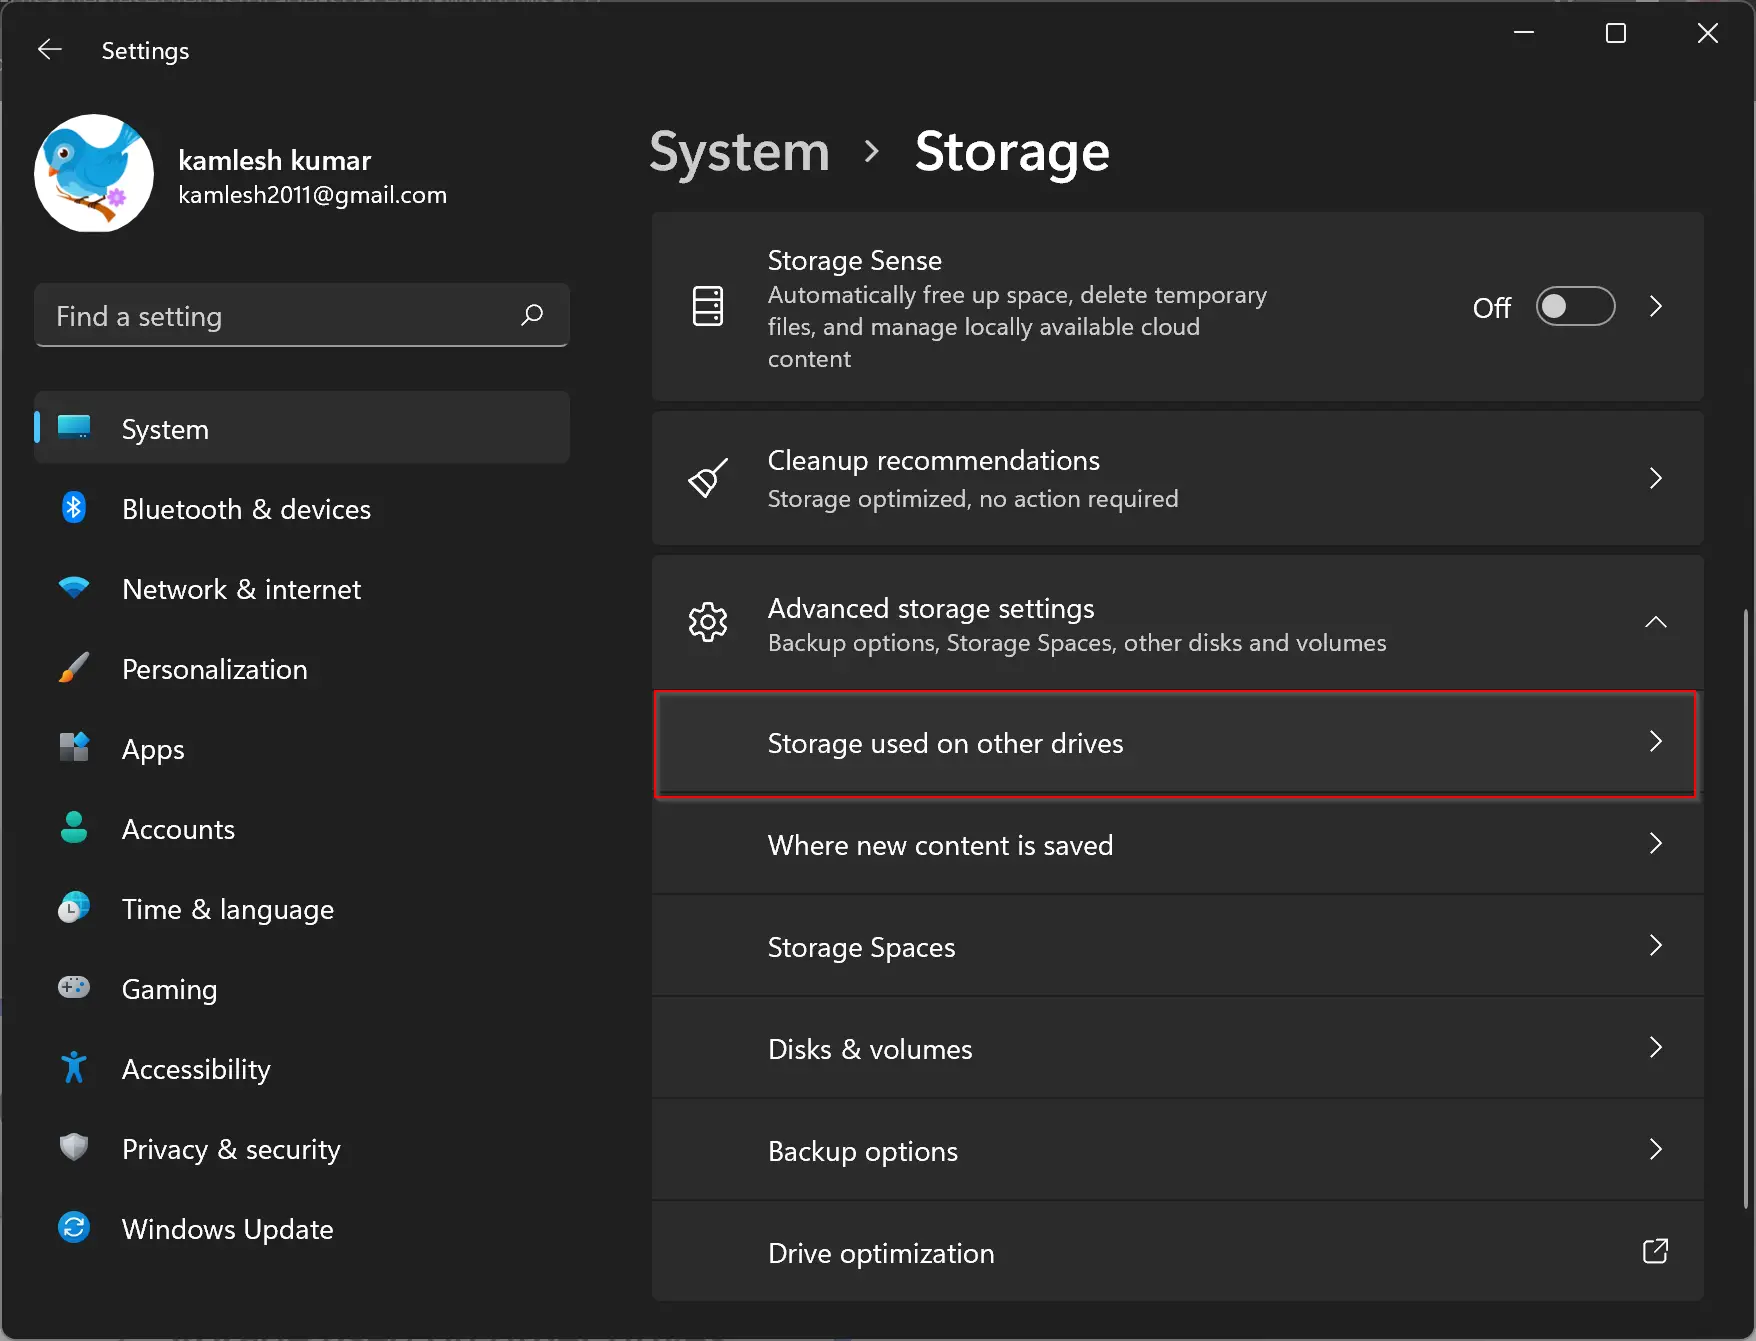
Step 5. Next, select the option Storage used on other drives.
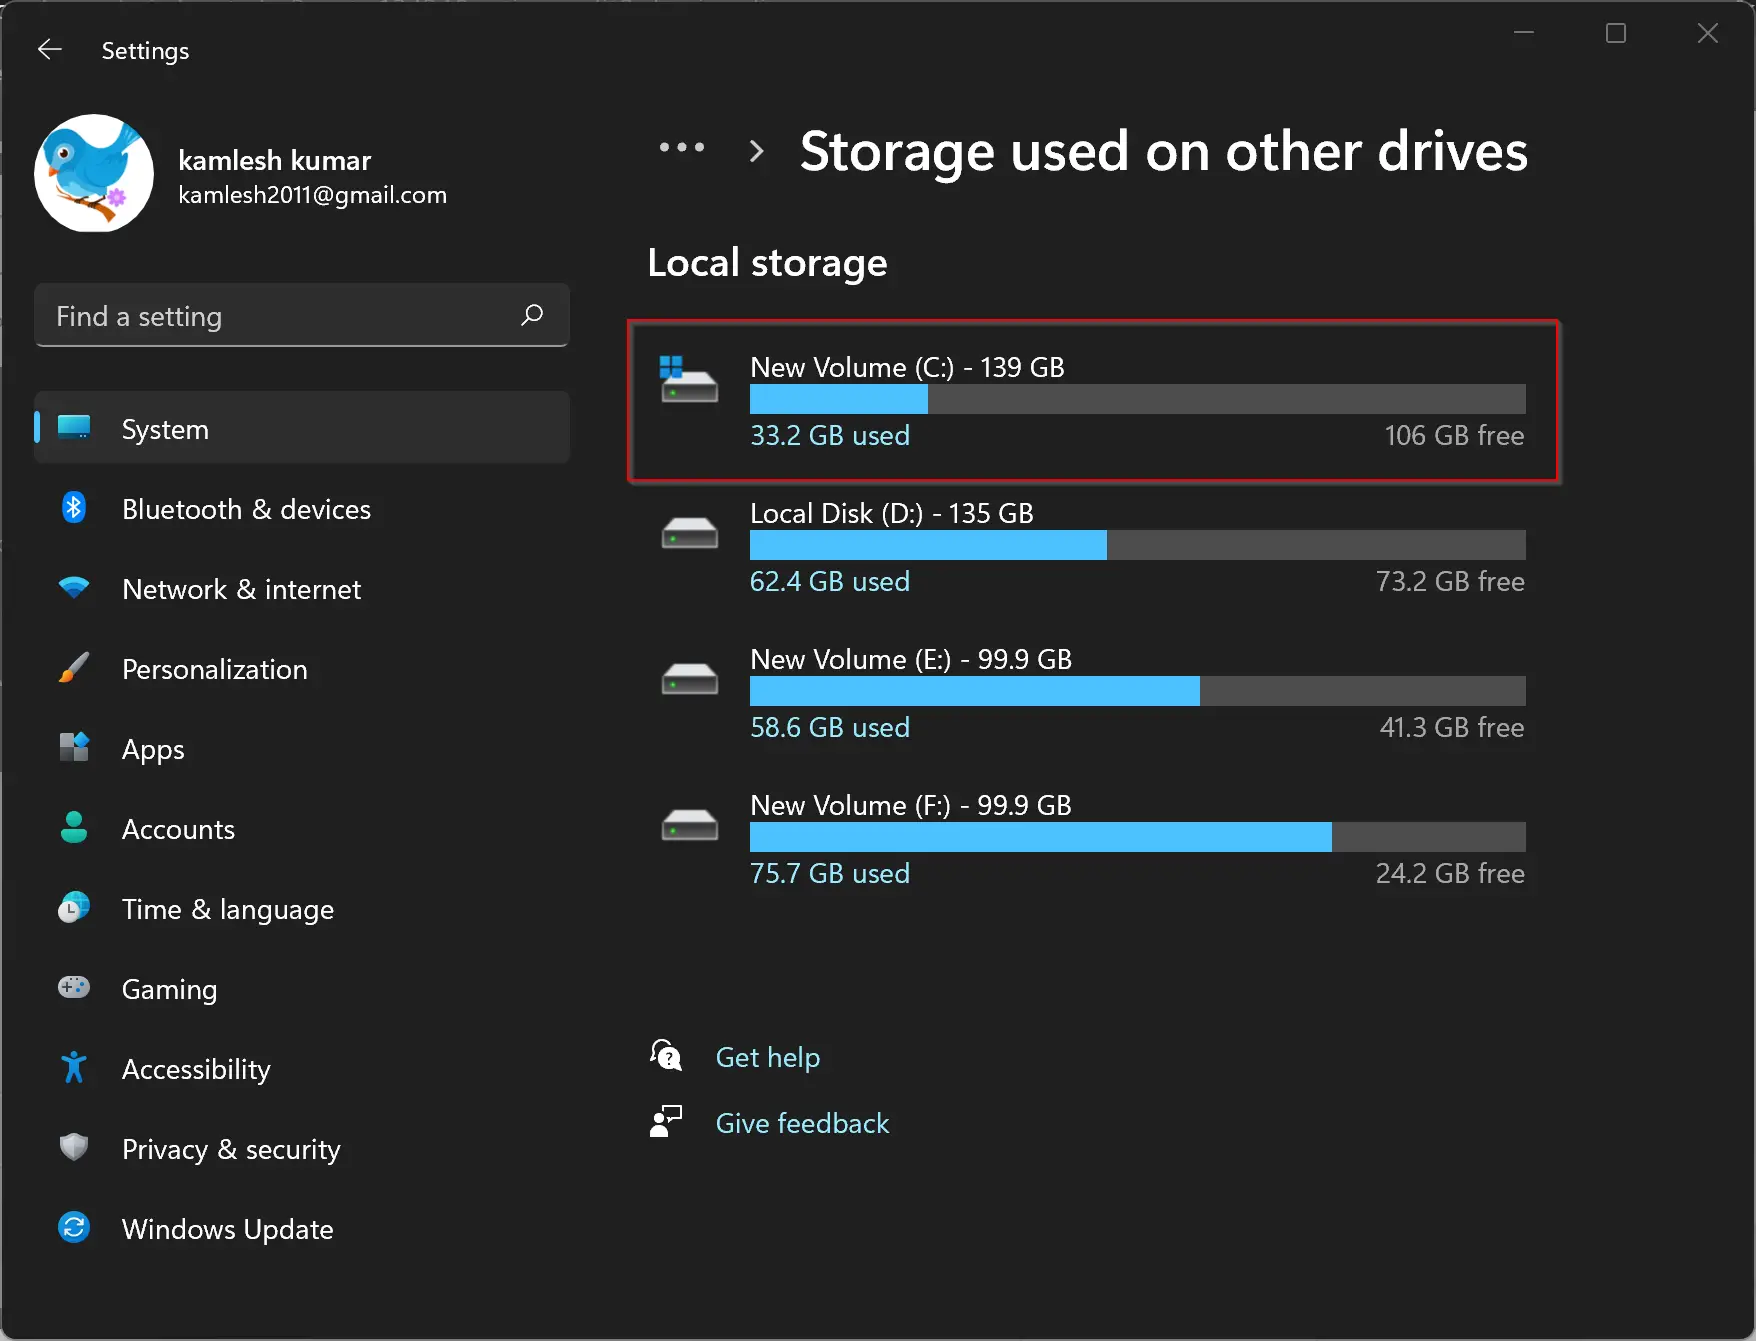
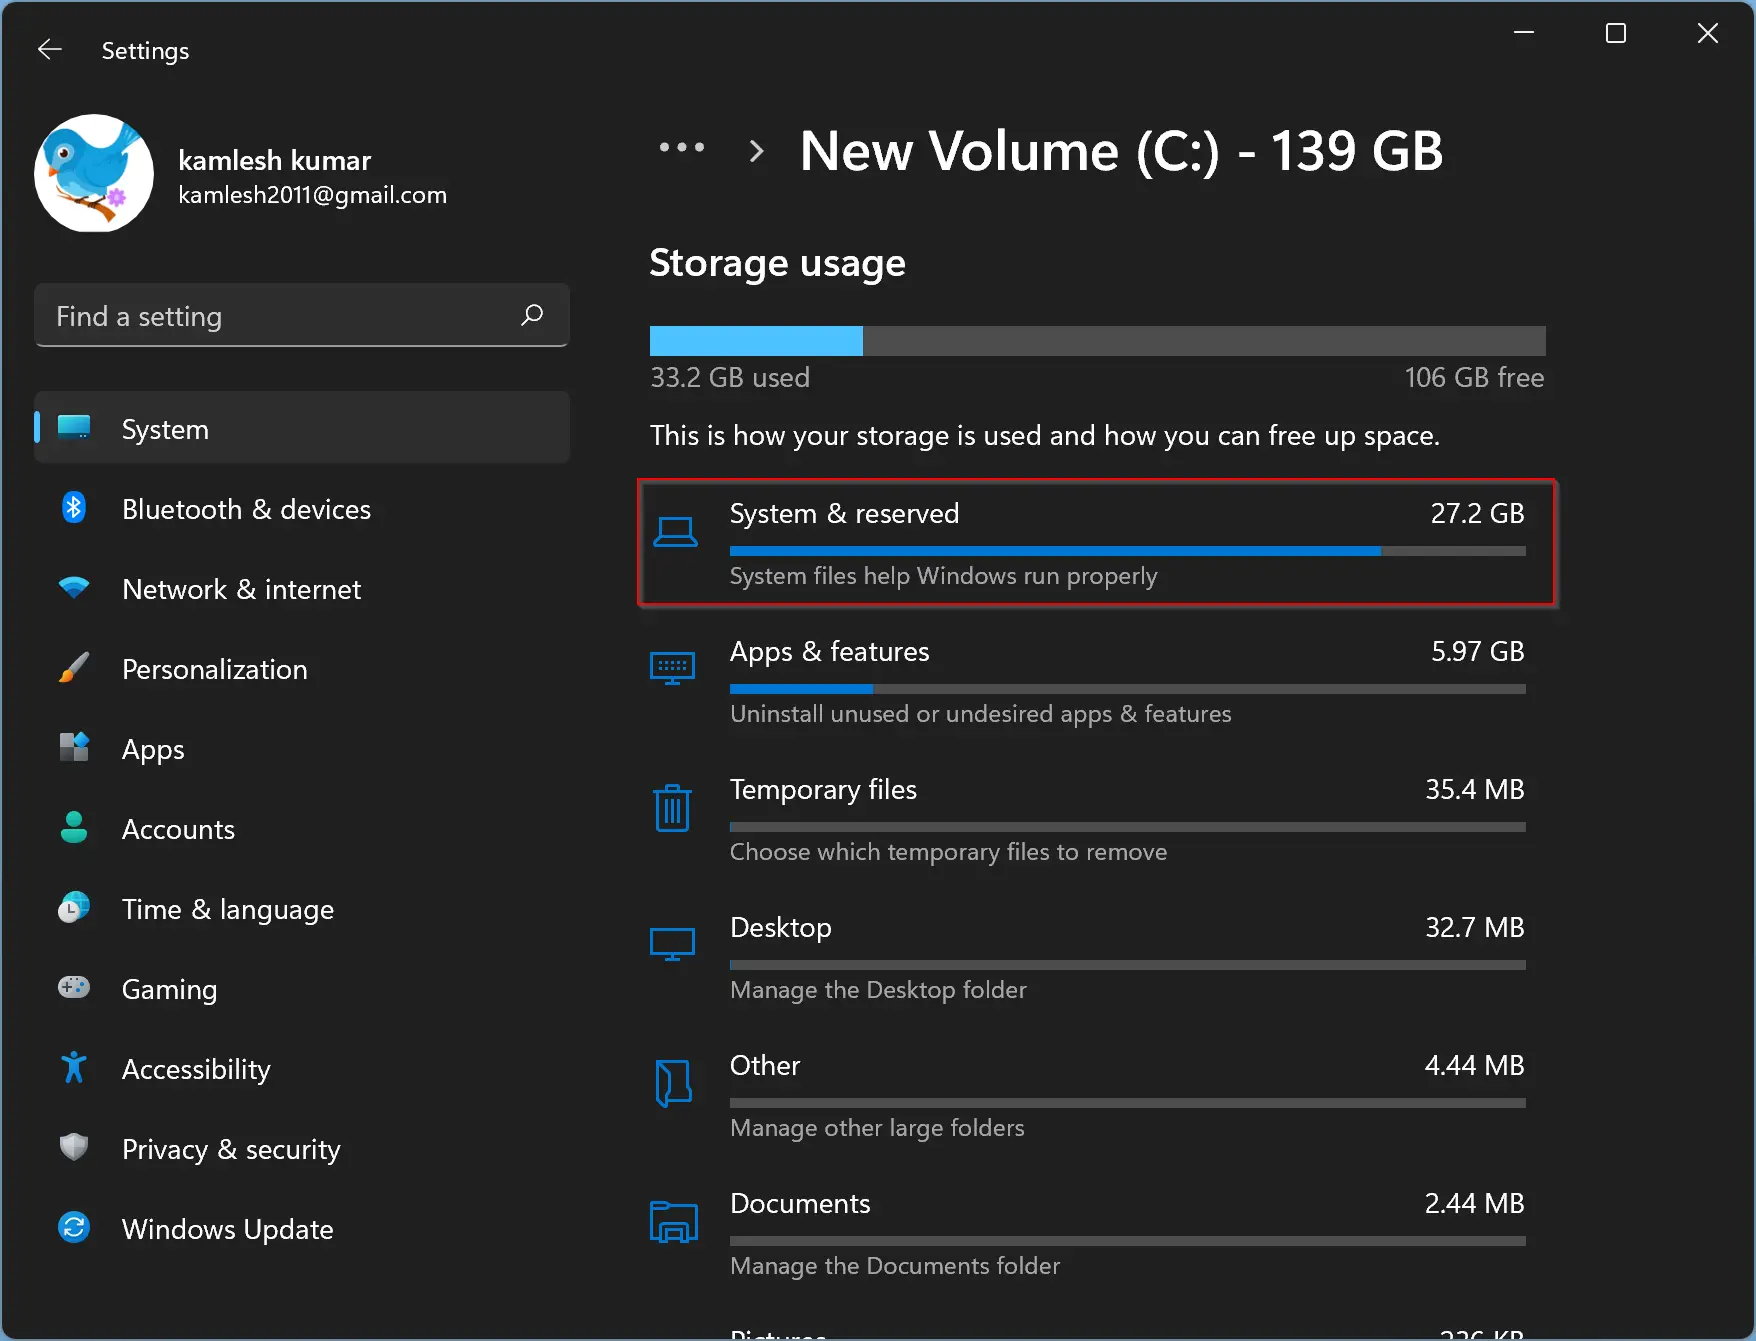
Step 6. Select “C” drive from the list of available volumes.
Step 7. Then, select System & reserved to see your computer’s Reserved storage.
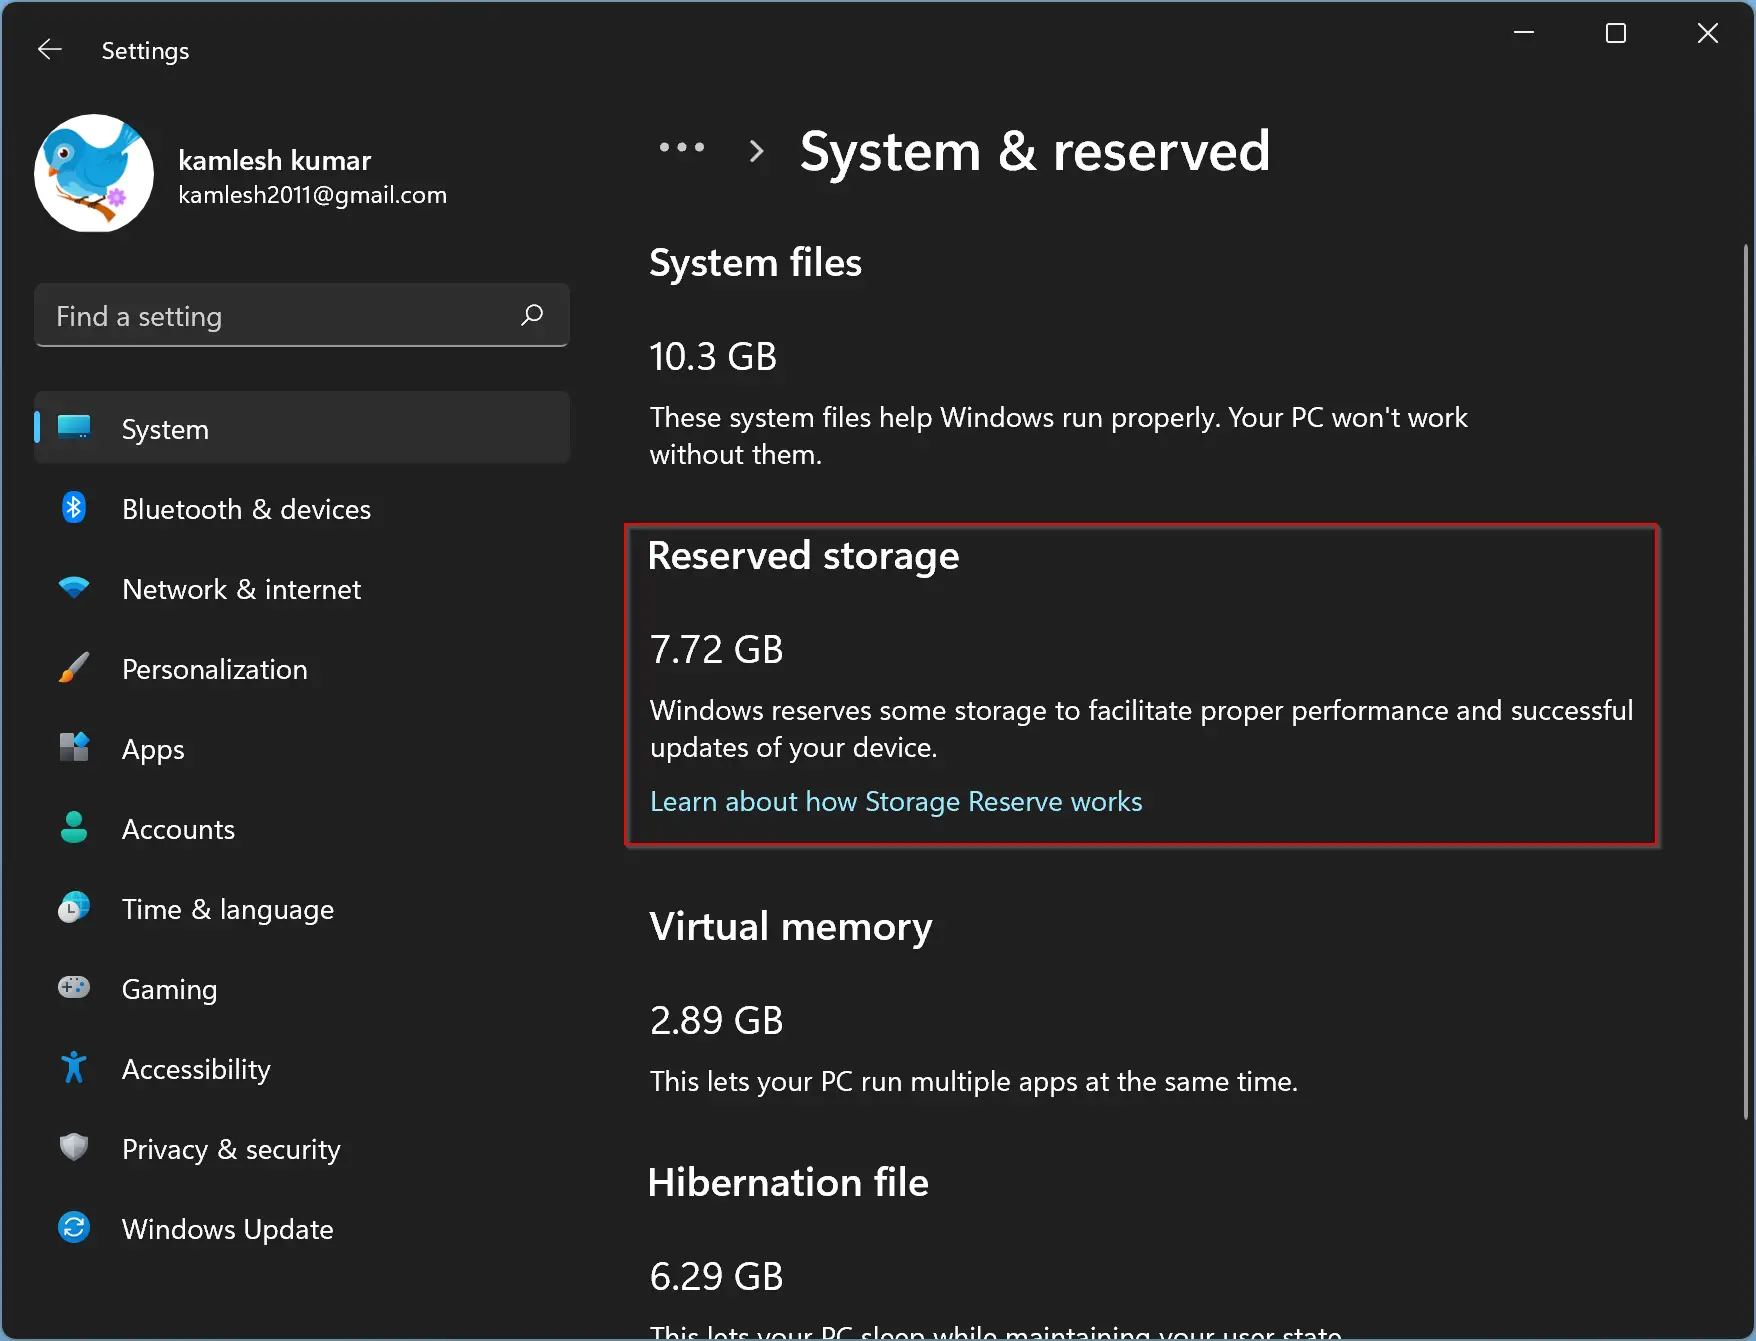
Step 8. When you’re done, you can view the Reserved storage. On my computer, Windows reserved storage is 7.72GB.
Step 9. Now that you are familiar with reserved storage on Windows 11, open an elevated command prompt to proceed further with disabling the reserved storage.
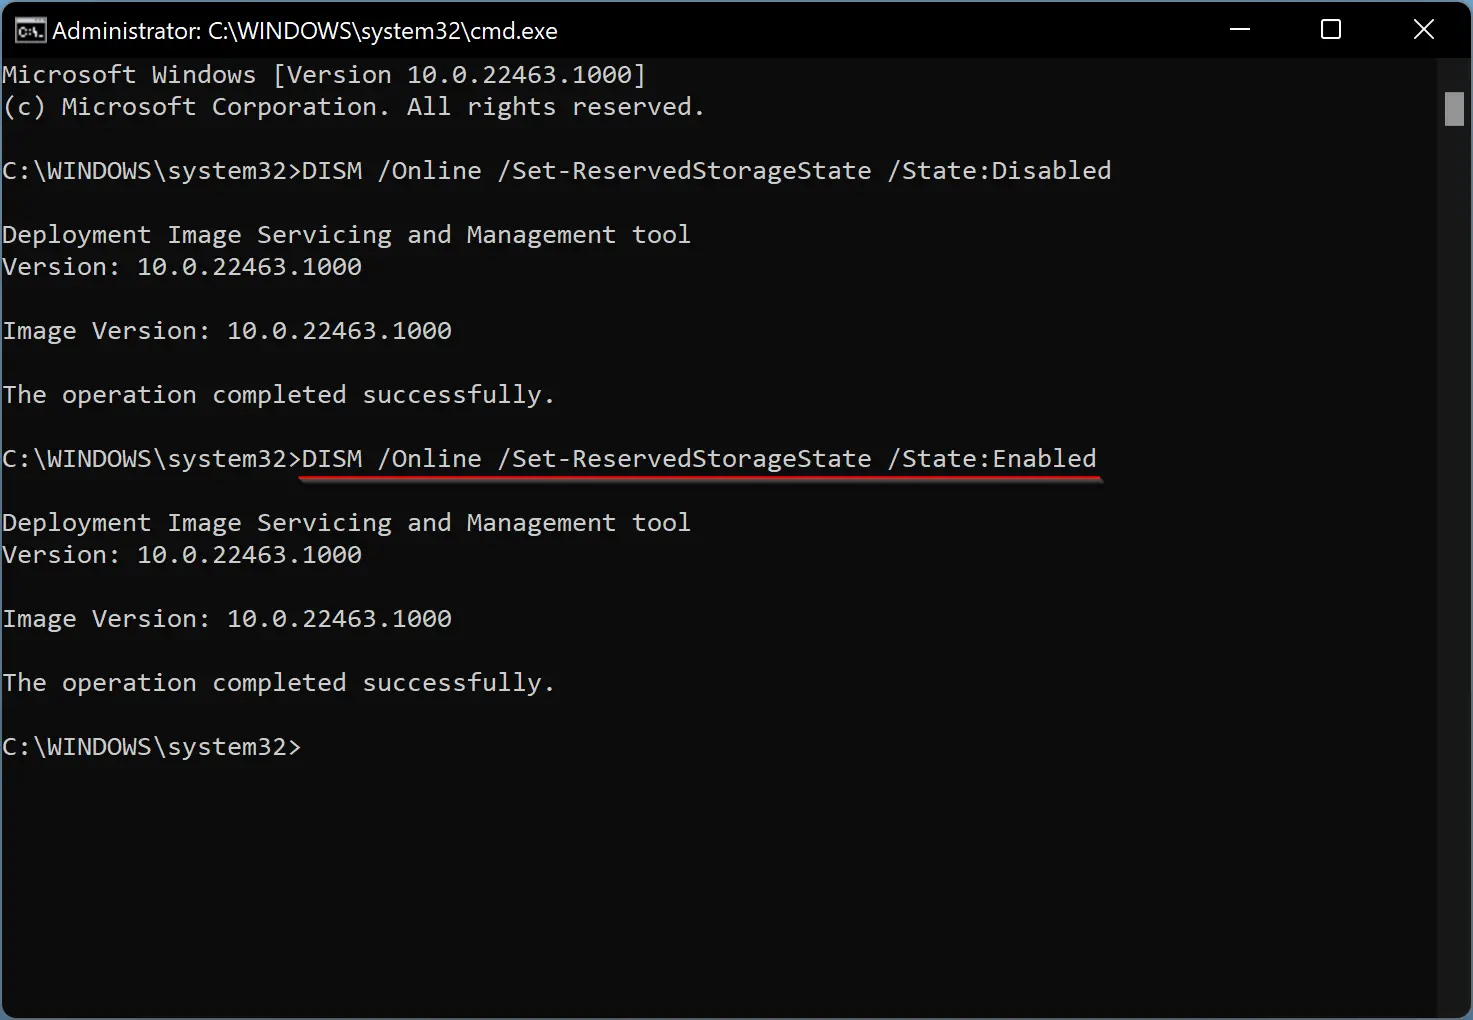
Step 10. When Command Prompt with administrator rights opens, copy and paste the following line and then hit Enter from the keyboard to execute it:-
DISM /Online /Set-ReservedStorageState /State:Disabled

Now reserved storage will disappear from the Windows Settings.
Step 11. To re-create the reserved storage on your Windows 11 computer, use the following command:-
DISM /Online /Set-ReservedStorageState /State:Enabled
After executing the above command, Windows 11 will reoccupy storage and keep for reserved for Windows updates, temporary files, etc.
How to Turn On or Off Reserved Storage Space in Windows 10?
Before proceeding with further steps, we want to mention that there is no option available in the Settings app to disable the Reserved Storage Space in Windows 10. However, there is a workaround that lets you disable it. First, we will show you how to view the Reserved Storage Space and then how to disable it.
Step 1. Open the Settings app.
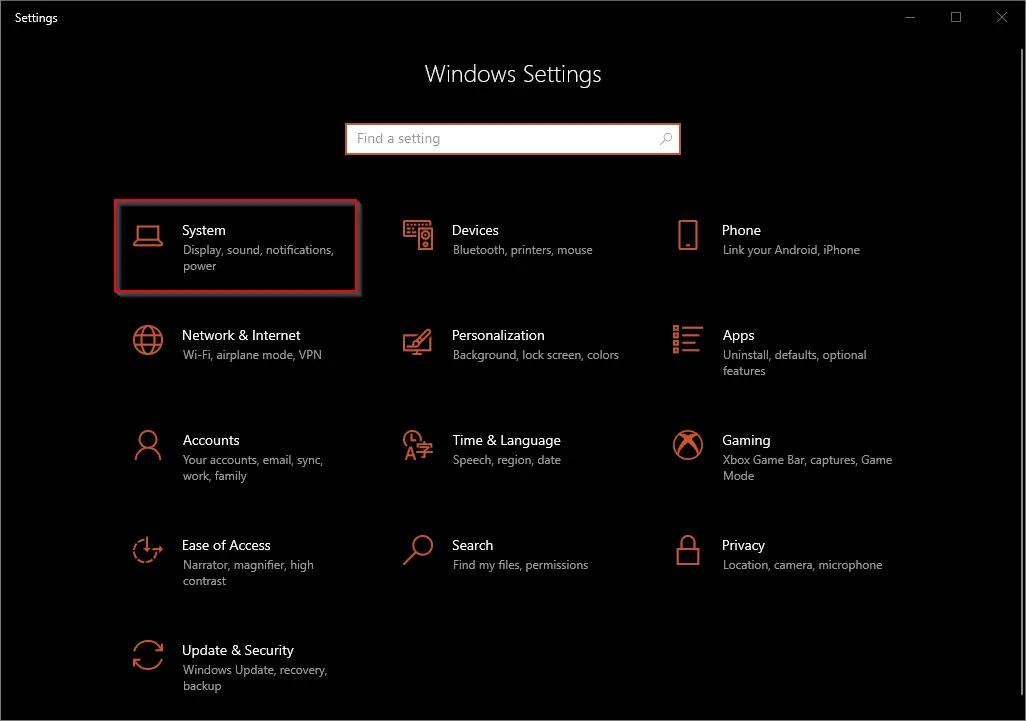
Step 2. Then, click on the System.
Step 3. Select the Storage option in the left sidebar.
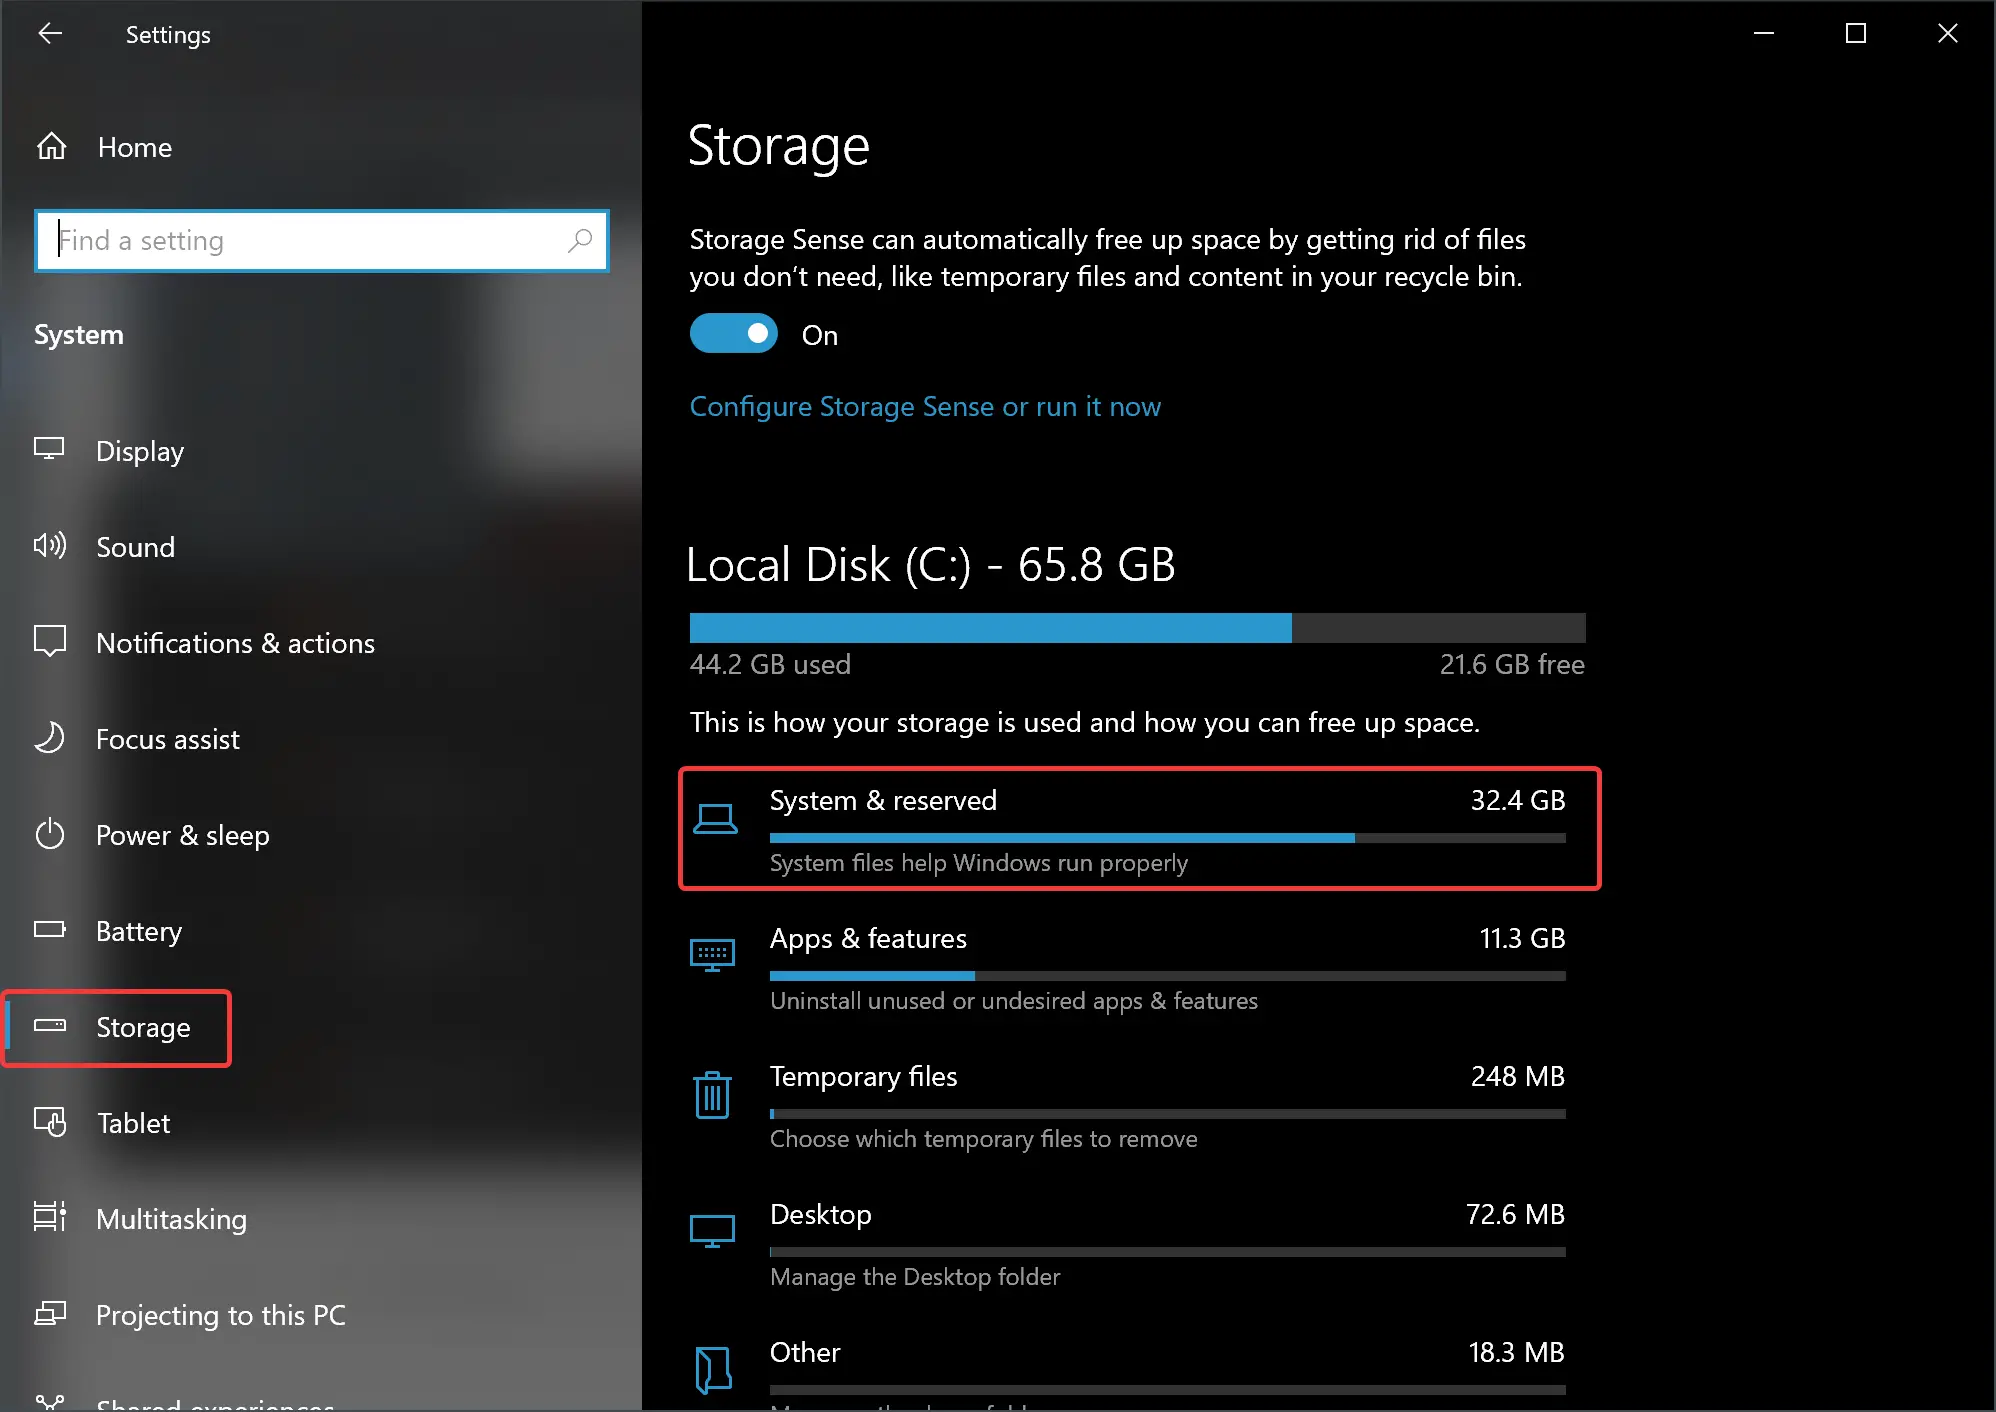
Step 4. On the right-sidebar, click the System & reserved option.
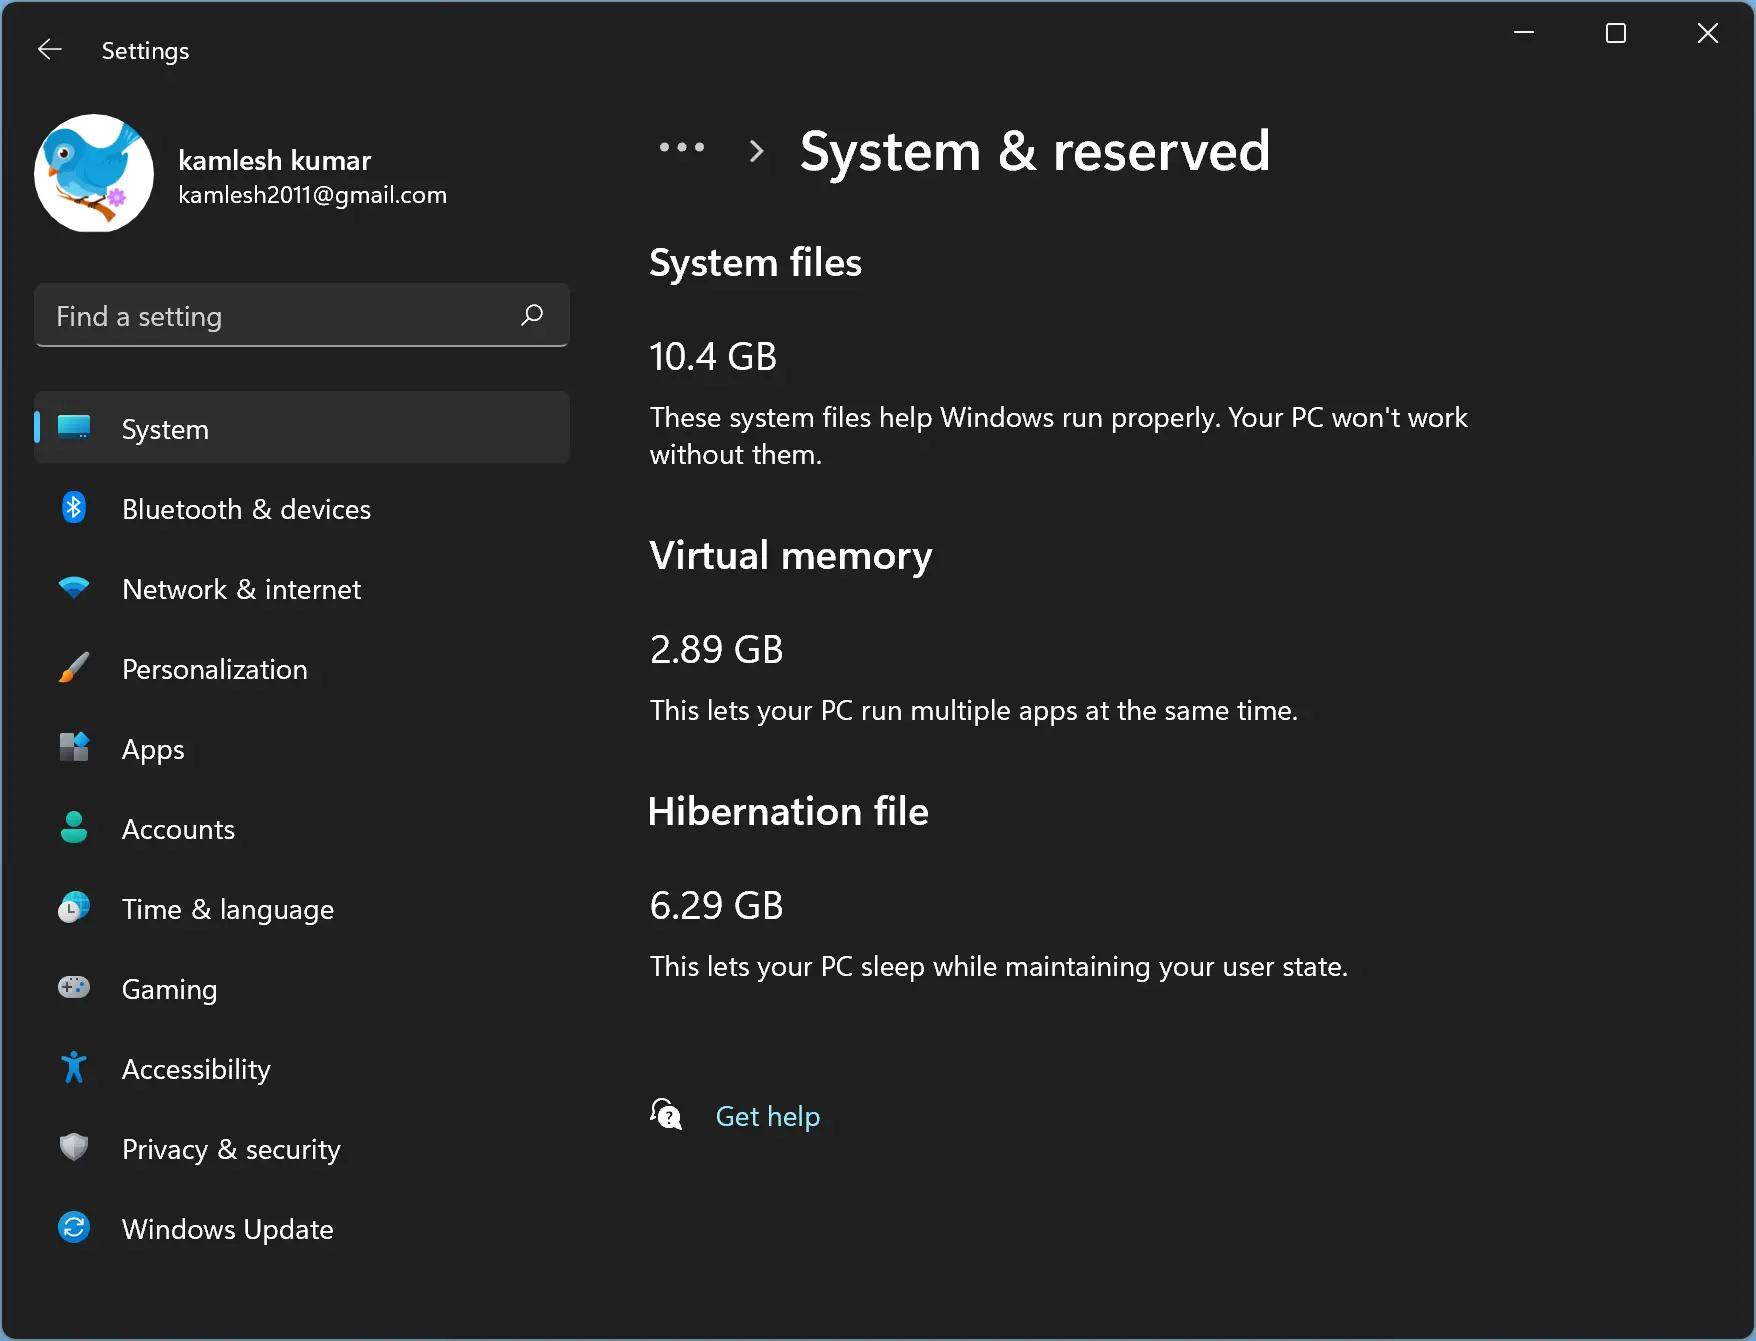
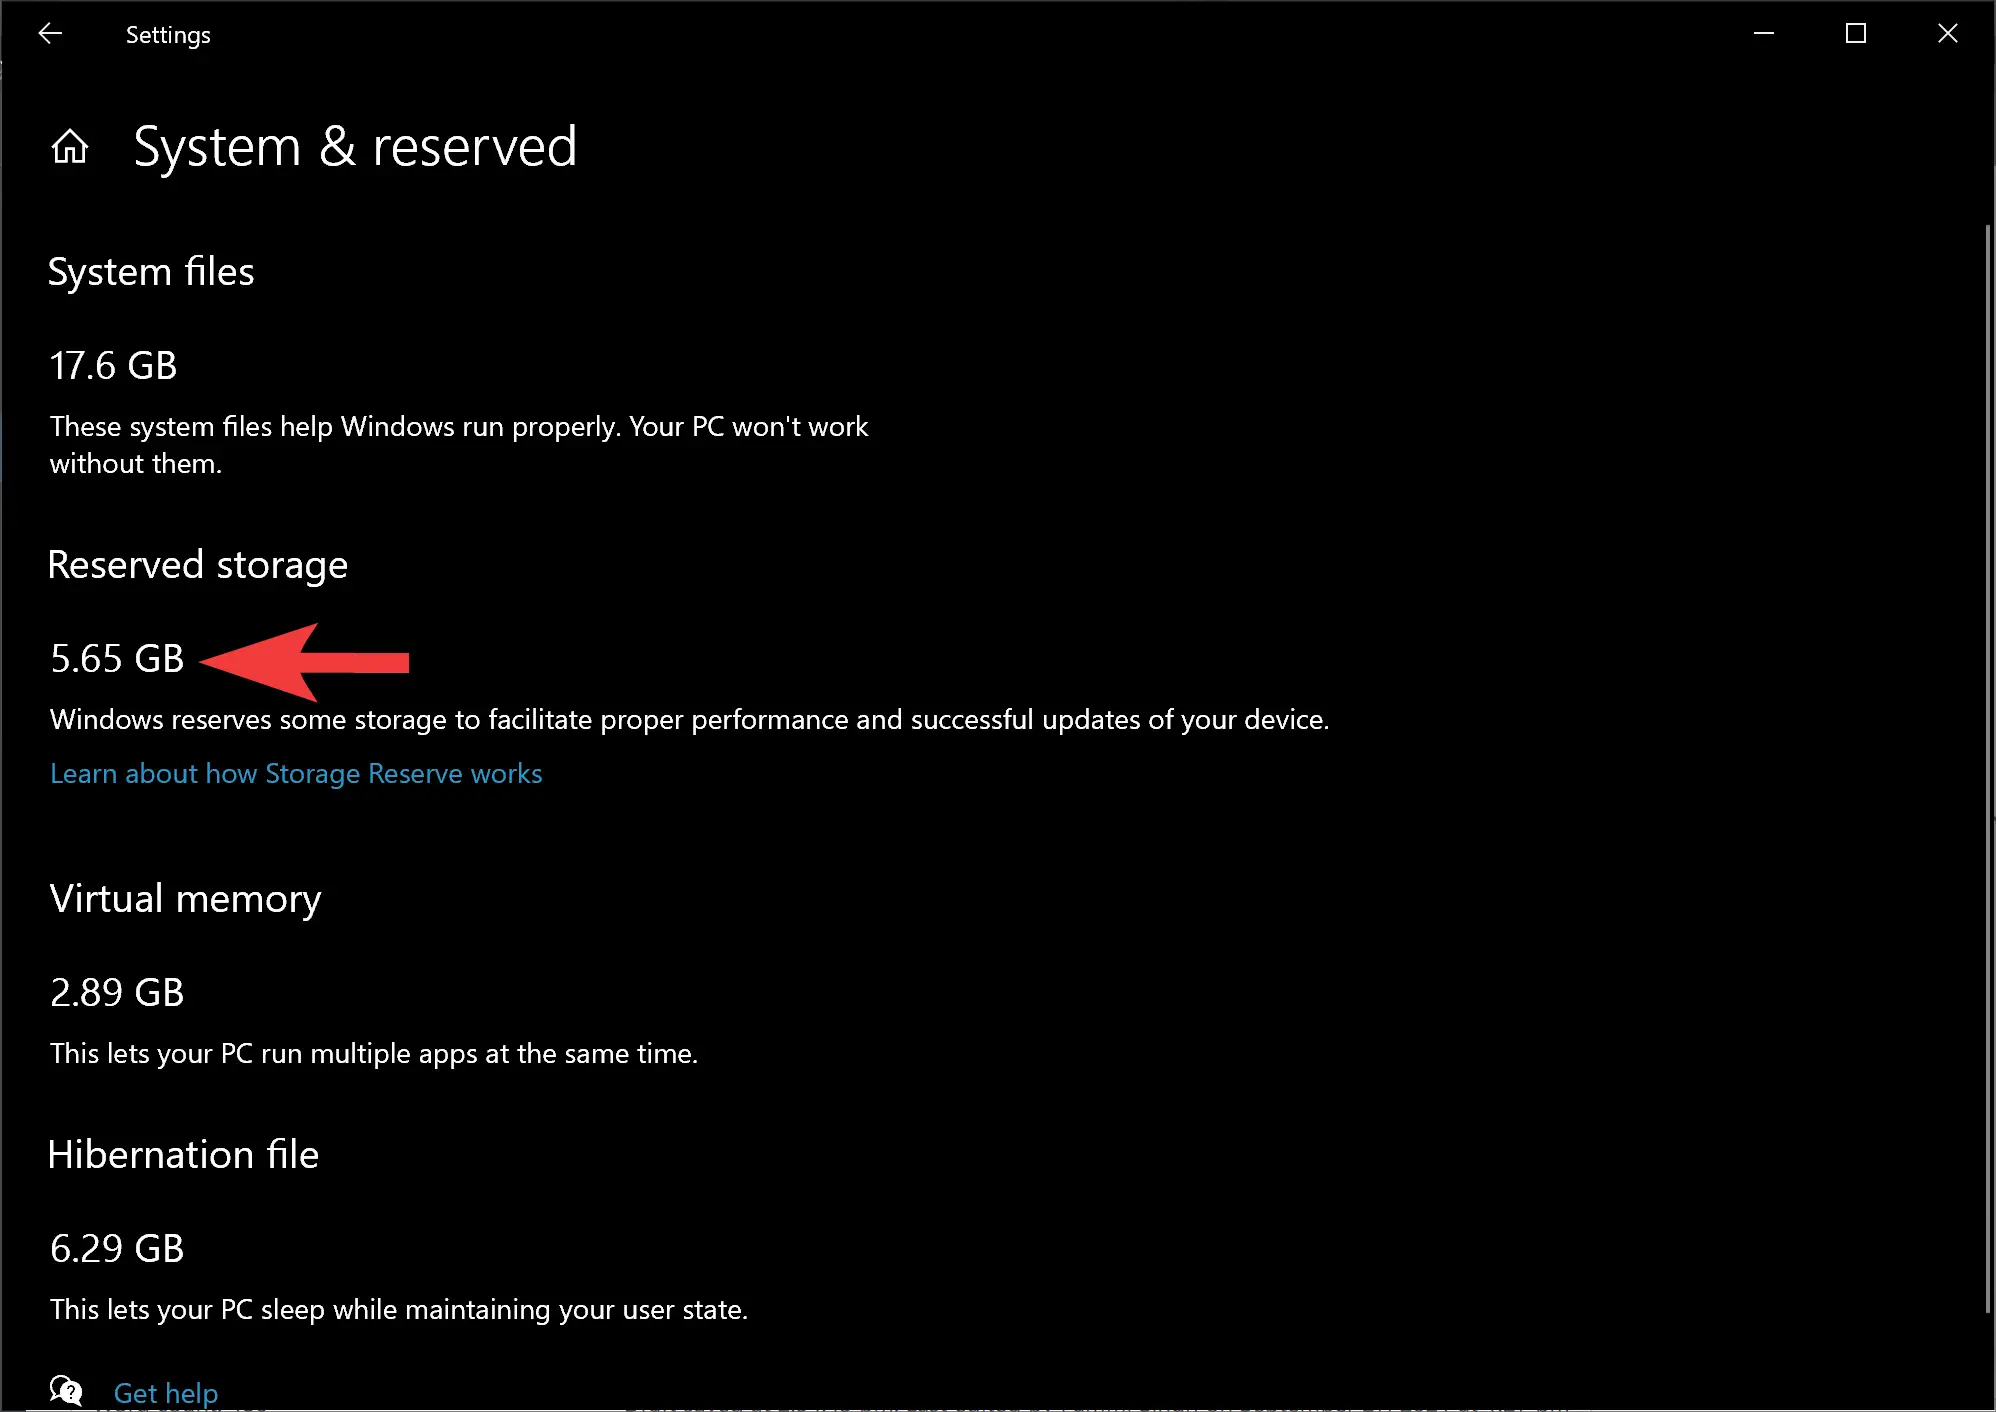
Step 5. In the “System & reserved” setting page, you can view the reserved storage under the “Reserved storage” section.
Step 6. Now that you have seen the reserved storage on your Windows 10, open an elevated command prompt to proceed further with disabling the reserved storage.
Step 10. In the administrative Command Prompt, copy and paste the following line and then hit Enter key on the keyboard to execute it:-
DISM /Online /Set-ReservedStorageState /State:Disabled
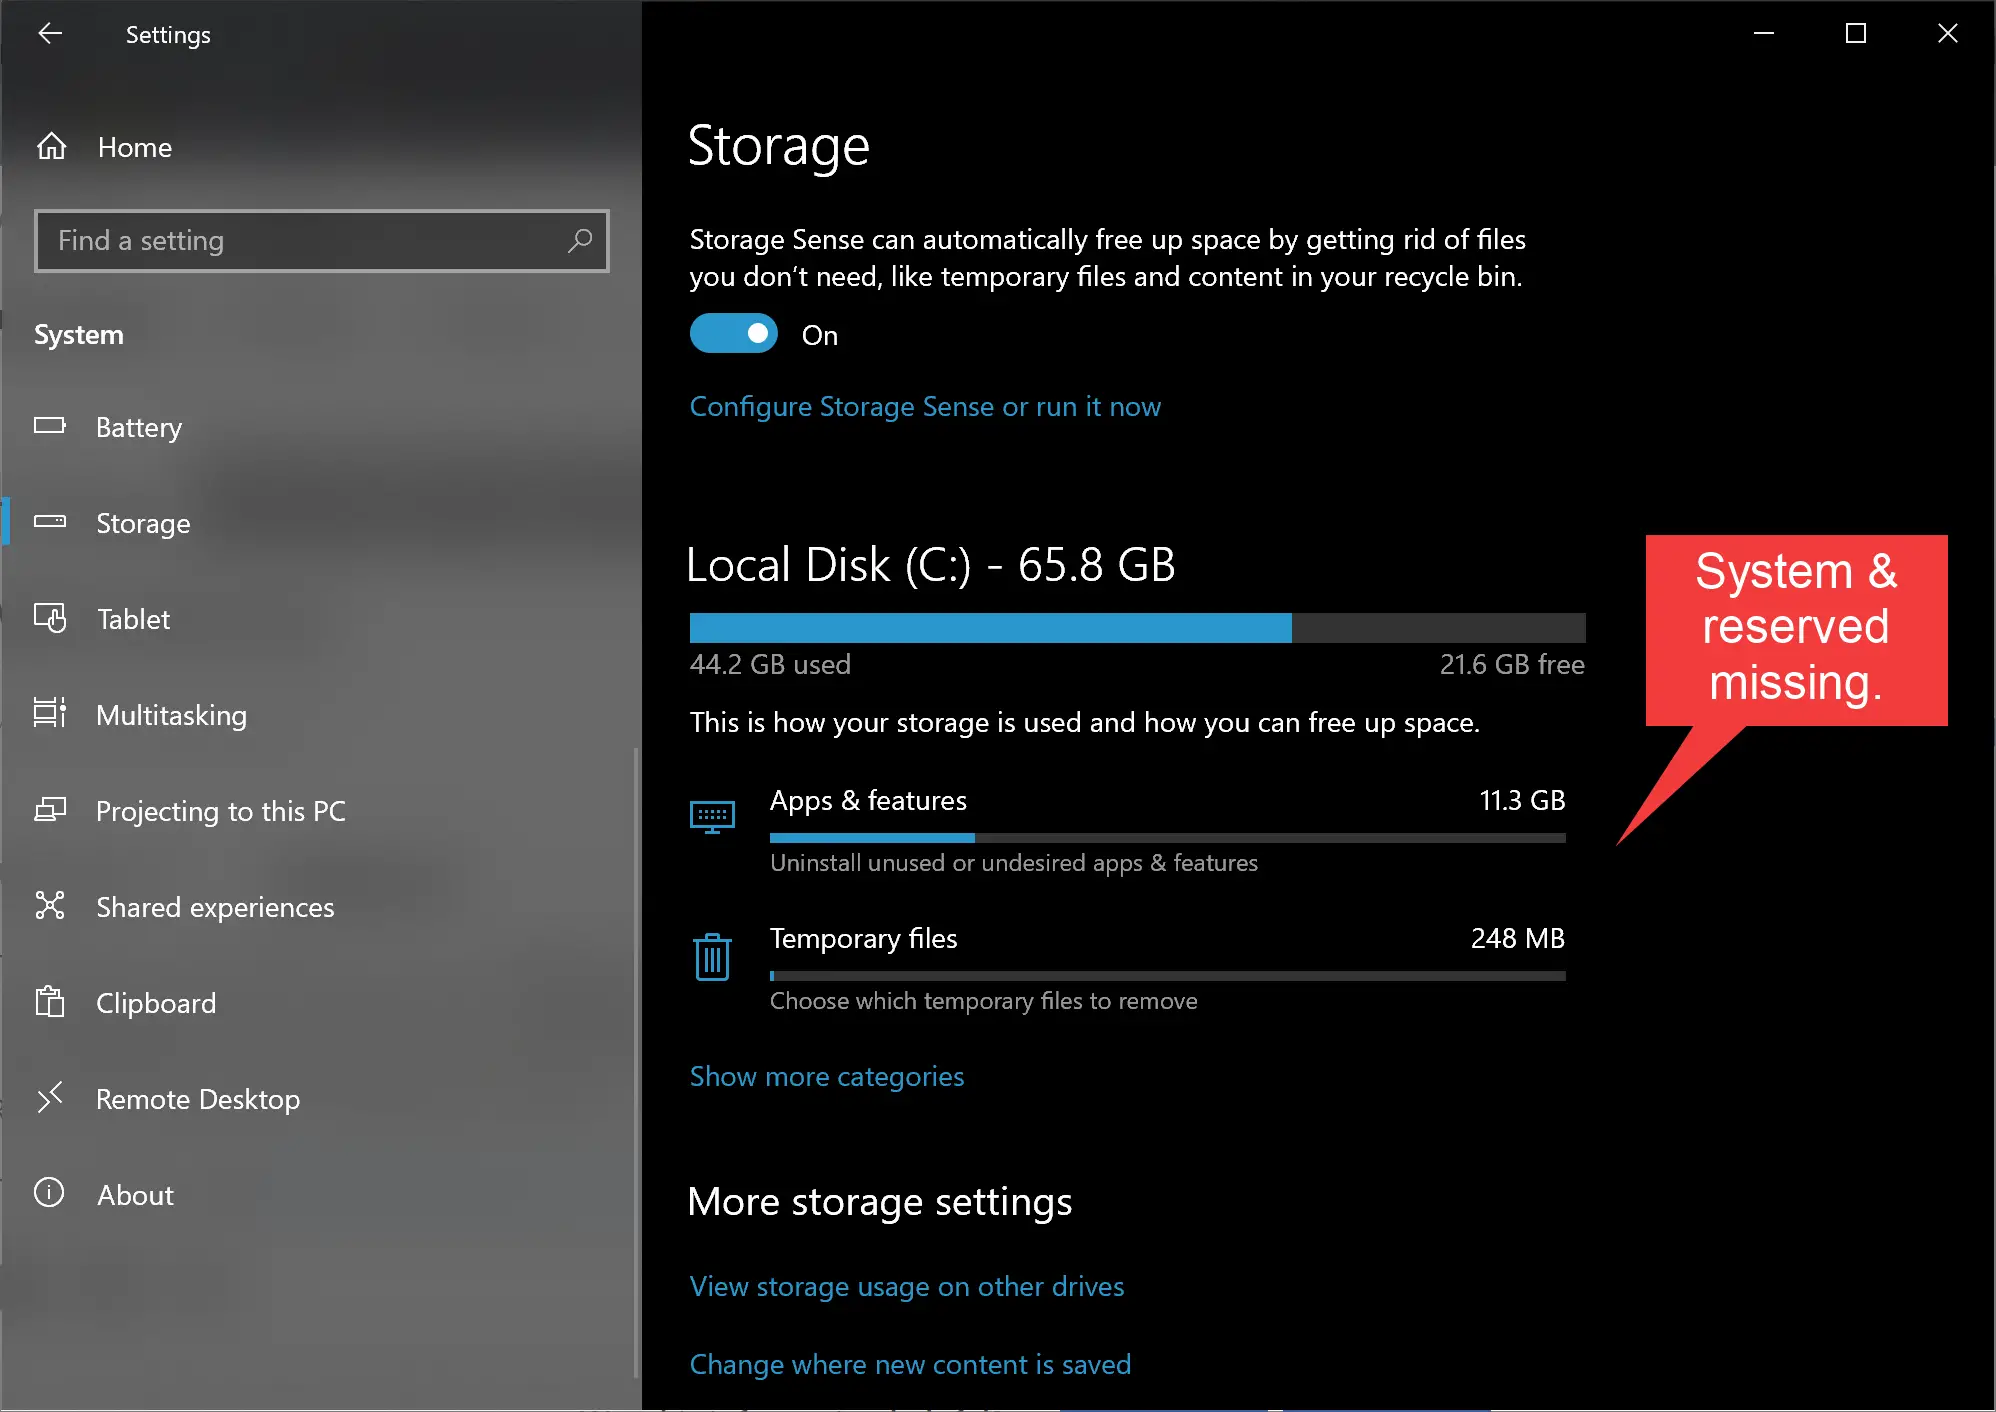
Step 11. Once you complete the above command, reserved storage will disappear from the Windows Settings. You can view the same by navigating to Settings > System > Storage.
Step 12. To enable the reserved storage again on your PC, in the administrative Command Prompt, copy and paste the following line and then hit the Enter key on the keyboard to execute it:-
DISM /Online /Set-ReservedStorageState /State:Enabled
To view the Reserved Storage, you can use the following command:-
DISM /Online /Get-ReservedStorageState
Good luck.
How to Turn On or Off Reserved Storage Using Registry Editor?
Follow these steps to enable or disable Reserved Storage through Windows 11 or 10 Registry Editor:-
Step 1. Open Registry Editor.
Step 2. Navigate to the following path in the left sidebar of Registry Editor:-
HKEY_LOCAL_MACHINE\SOFTWARE\Microsoft\Windows\CurrentVersion\ReserveManager
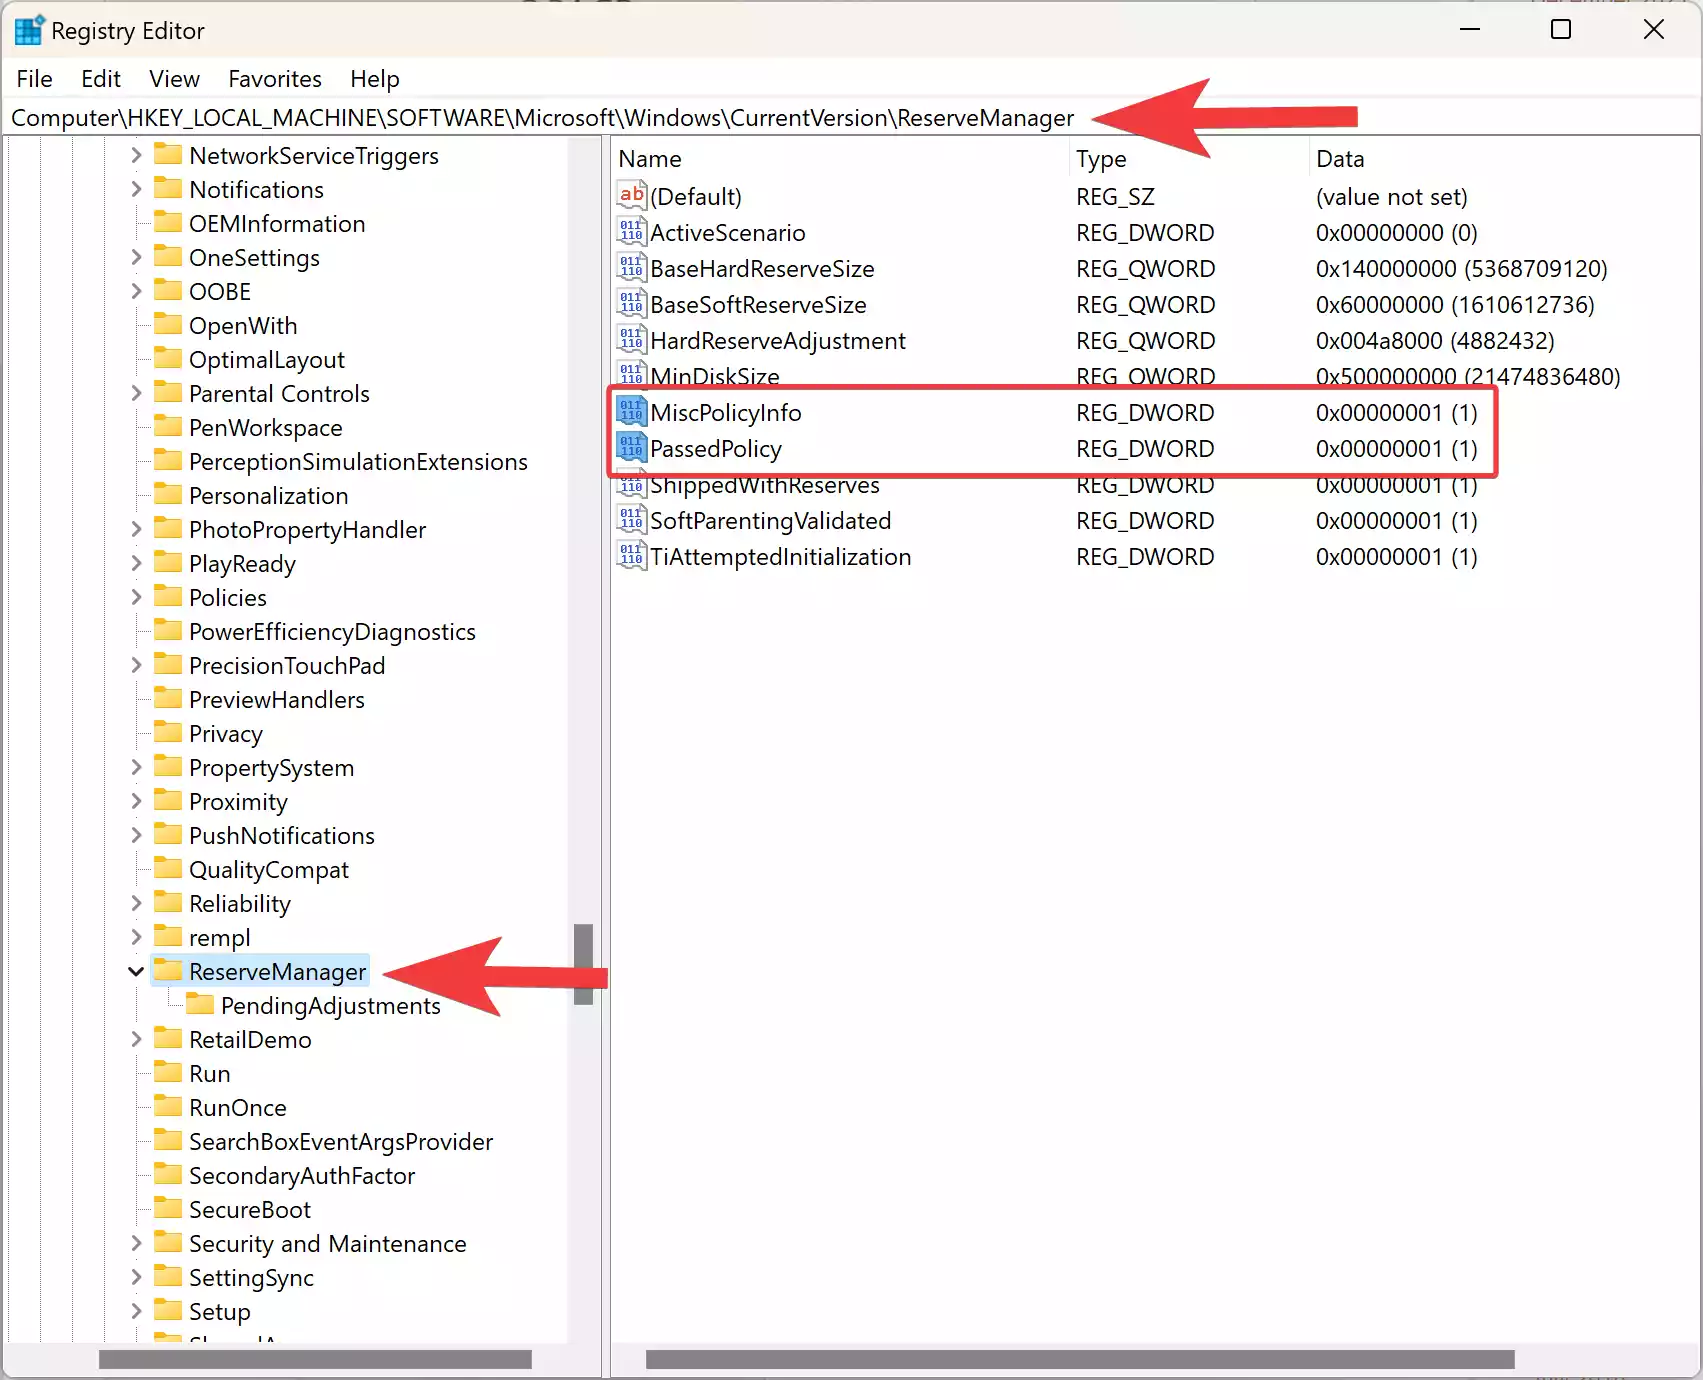
Step 3. On the right sidebar of the ReserveManager folder, you will find two REG_DWORDs namely MiscPolicyInfo and PassedPolicy. Double-click on each to set its “Value data.”
Note: If any REG_DWORD is missing on your PC, right-click on free space on the right sidebar and select “New” > “DWORD (32-bit) Value.”
Step 4. To disable or turn off reserved storage, just set MiscPolicyInfo “Value data” to 2 and set PassedPolicy “Value data” to 0. To enable or turn on reserved storage, set the values of both MiscPolicyInfo and PassedPolicy to 1.
Step 5. Click OK to save the changes.
Conclusion
In conclusion, reserved storage is an important feature of Windows 11/10 that reserves a portion of the internal hard disk to use for temporary files, caches, and other files. This feature helps maintain system performance and facilitates successful device updates. Although the default size of reserved storage is around 7 GB, it may vary based on several factors. While it is not recommended to delete the reserved storage space, there are ways to disable it temporarily. However, it is recommended to re-enable the reserved storage to maintain optimal system performance. Overall, understanding reserved storage and its functions can help users troubleshoot system issues and maintain their Windows 11/10 operating system effectively.
Also Read: Two methods to find Reserved Storage Size in Windows 11.