To list out items in Microsoft Word and PowerPoint, we use bullets. Both, Word and PowerPoint apps include some basic bullets such as numbers, symbols, and more. However, suppose you are preparing a project document or presenting any seminar. In that case, you can customize or change how you use bullets in Word or PowerPoint to make it look attractive and impressive. The good news is that you can use an image as bullets in Word and PowerPoint. You can upload selective pictures from your computer and use them as bullets according to your needs.
In this gearupwindows article, you will learn how to use pictures as bullets in Microsoft Word and PowerPoint.
How to Use Pictures as Bullets in Microsoft Word?
To use pictures as bullets in Microsoft Word on Windows 11 or 10, use these steps:-
Step 1. Open a Microsoft Word document on your PC.
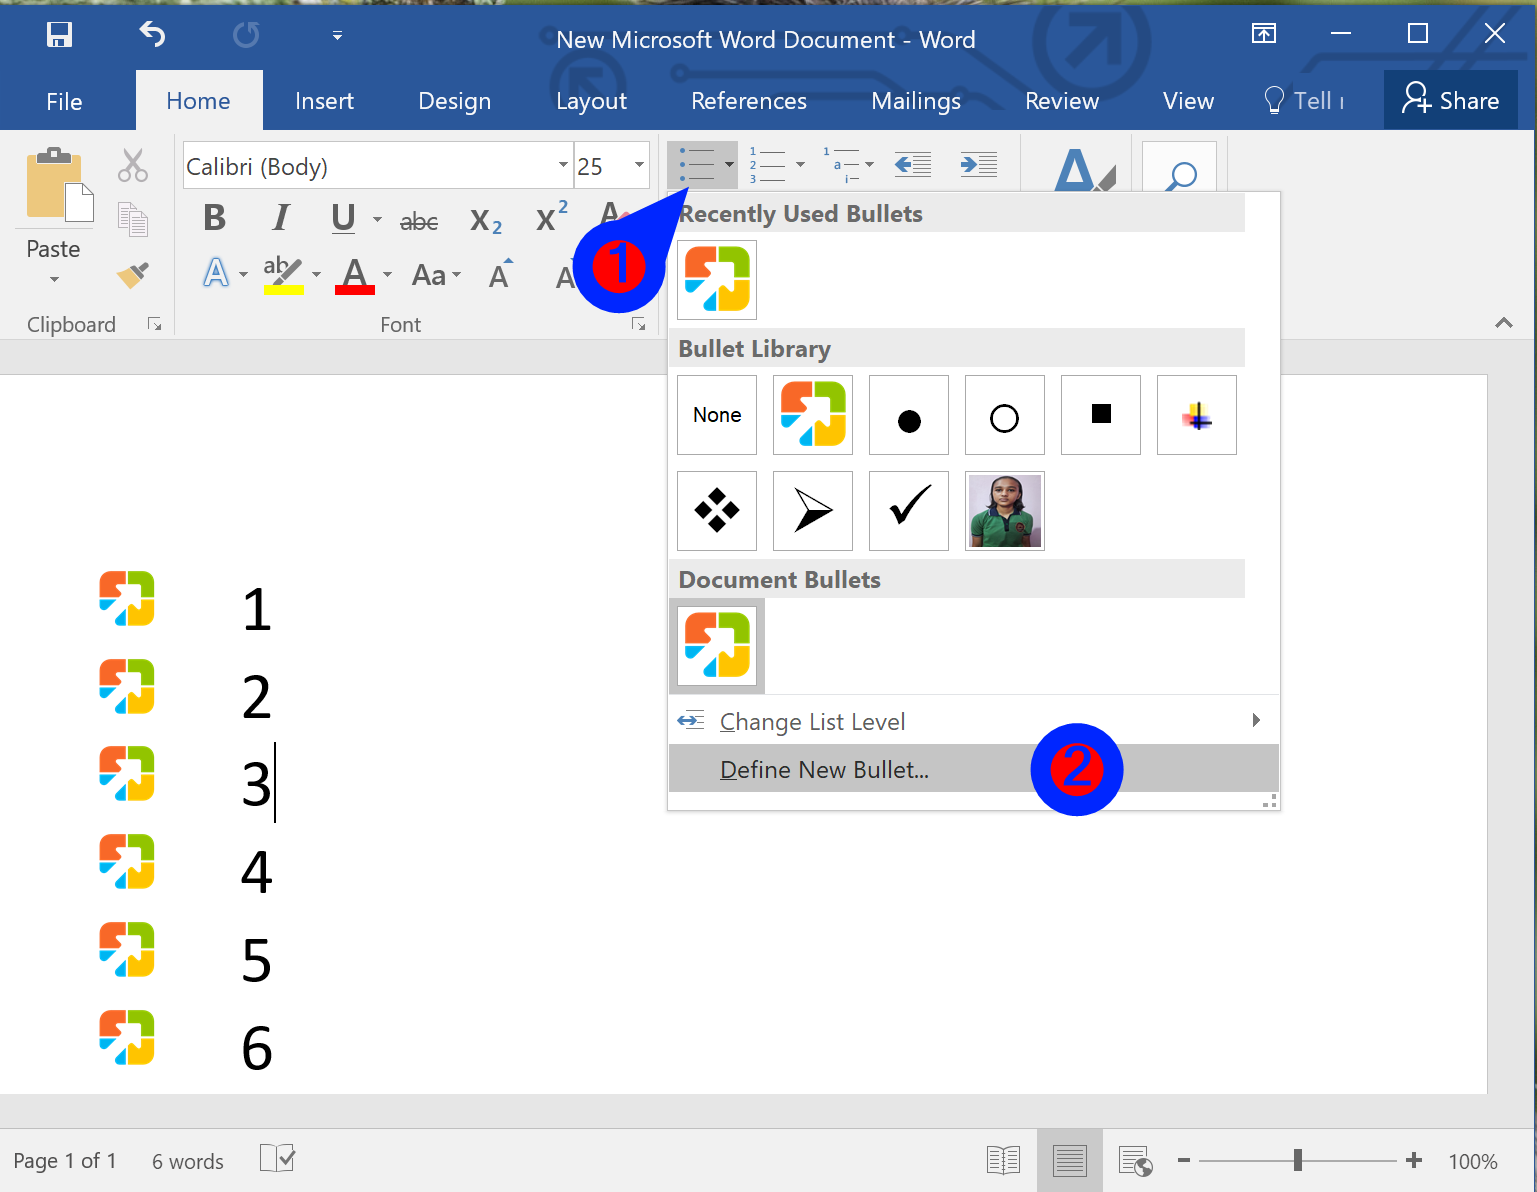
Step 2. Click on the Buttets down-arrow button under the “Home” tab and select the Define New Bullet option.
Step 3. Once done, the “Define New Bullet” window will appear. Click on the Picture button under the “Bullet character” section.

Step 4. When you’re done, the “Insert Pictures” dialog will appear. Here, select an option from where you want to upload the image, such as “From a file,” “Bing Image Search,” or “OneDrive – Personal.” For example, we select “From a file.”

Step 5. Pick an image and click the Insert button.

Step 6. Click OK.
Once you complete the above steps, the selected picture is added to the Word bullets list.
Please note that not all pictures will look glorious as bullets. Images should be transparent with an excellent background to look beautiful in your document.
How to Use Pictures as Bullets in Microsoft PowerPoint?
To use pictures as bullets in Microsoft PowerPoint, use these steps:-
Step 1. Open a Microsoft PowerPoint presentation.
Step 2. Click on the Buttets down-arrow button under the “Home” tab and select the Bullets and Numbering option.

Step 3. Once done, the “Bullets and Numbering” dialog will open. Here, click on the Picture button.

Step 4. When you’re done, the “Insert Pictures” dialog will appear. Here, select an option from where you want to upload the image, such as “From a file,” “Bing Image Search,” or “OneDrive – Personal.” For example, we select “From a file.”
Step 5. Pick a picture and click the Insert button.
Step 6. Click OK.
Once you complete the above steps, the selected picture is added to the PowerPoint bullet list.
Please note that not all pictures will look glorious as bullets. Images should be transparent with an excellent background to look beautiful in your presentation.
Conclusion
In conclusion, using pictures as bullets in Microsoft Word and PowerPoint can enhance the visual appeal of your documents and presentations. The process of adding images as bullets is simple and easy to follow. By using the steps mentioned above, you can customize your bullets in Microsoft Word and PowerPoint and give a personal touch to your documents and presentations. It is important to note that images with transparent backgrounds work best for this purpose, and not all images may look good as bullets.
