How to enable and use the Clipboard History feature on Windows 11? Copy (Ctrl+ C) and Paste (Ctrl+ V) are basic functions of Windows, and usually, we perform them daily on our PC. It does not matter if you are browsing on the web or coding or anything else, copy and paste functions are required daily.
On Windows 11, if you want to copy a file, you’ll have to right-click on the file and click on the copy icon and paste it somewhere else; again, right-click and click on the paste icon. If you again copy any item on your PC, Windows will forget the previously copied item. But Windows 11 takes the copy and paste function to a higher level. The latest operating system is lashed with the Clipboard History function. However, this function is disabled by default. That means to use it, you need first to enable this feature on your computer.
After enabling the clipboard history function, Windows 11 will remember Images, text, scripts, links, documents, and videos under 4 MB. However, the number of entries that will be stored by Windows 11 is only 25. Once it crosses the limit of number 25, the very last copied item will be removed from the clipboard. That means the oldest items disappear from the clipboard history as new ones appear. Furthermore, unless an item is pinned to the Clipboard, the Clipboard history list will reset every time you restart your computer or laptop.
In this post, we will guide you to turn on Clipboard history and view your clipboard history.
How to Enable Clipboard History in Windows 11?
To enable the Clipboard History on Windows 11 PC, perform the following steps:-
Step 1. Open the Settings app.
To open the Settings app, simultaneously press Windows + I keys from the keyboard.
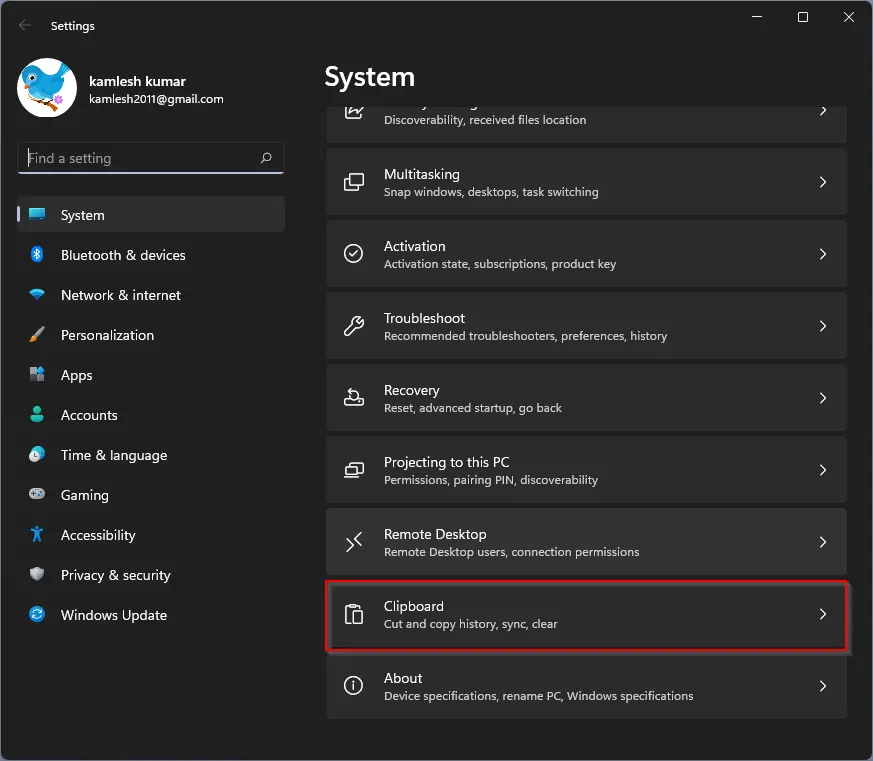
Step 2. In the Settings window, click on the System category.

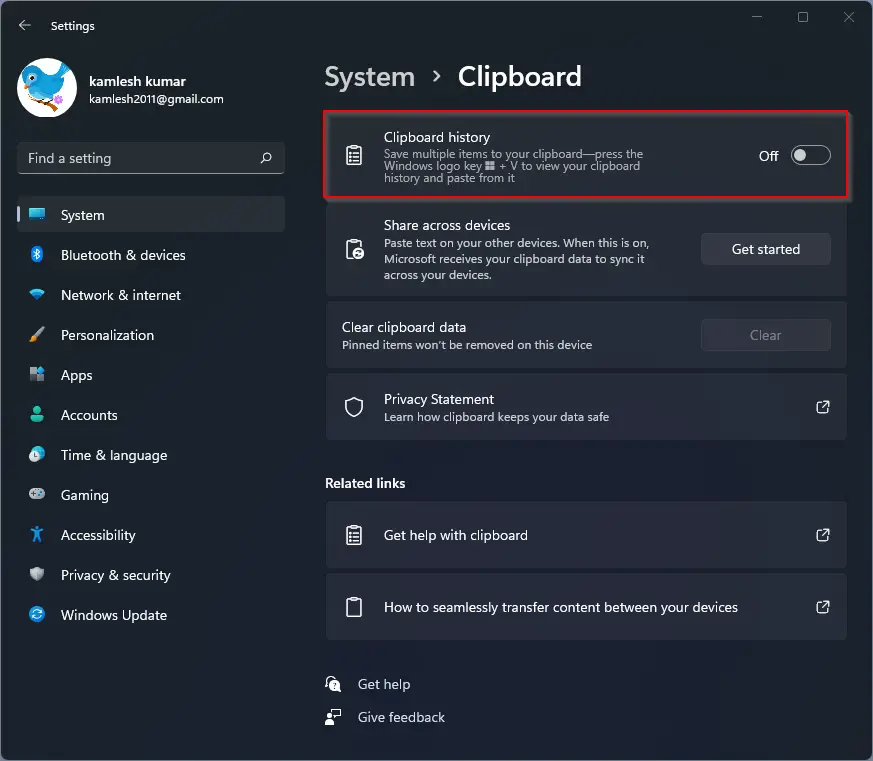
Step 3. On the right-hand side of the System, click on the Clipboard.
Step 4. On the right-side pane of the Clipboard, turn on the toggle switch to the On position next to the Clipboard history.
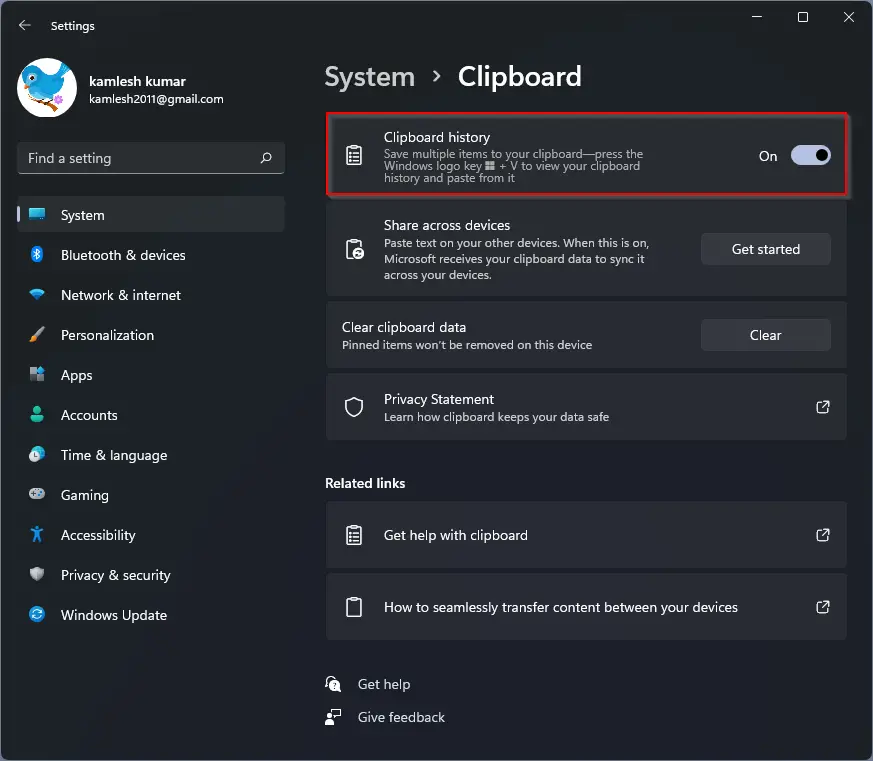
Step 5. Clipboard history is now enabled on your Windows 11 PC. You can now close the Settings app and use this feature in any application.
How to View Clipboard History in Windows 11?
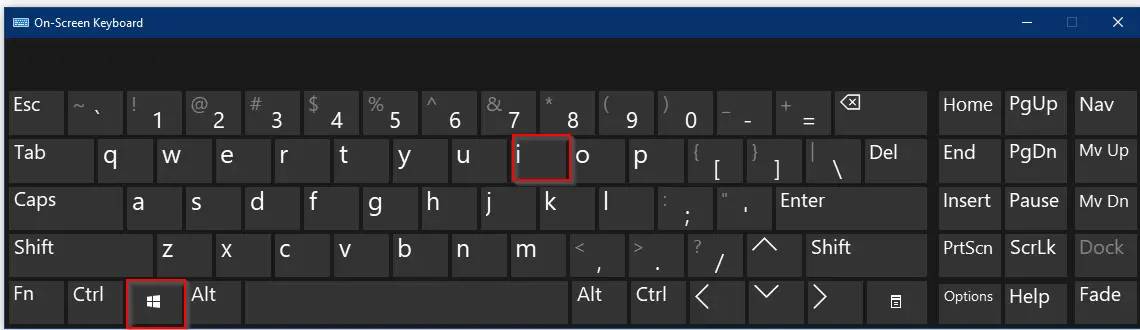
Once you have enabled Clipboard history, you can call up a list of items you have copied recently by pressing Windows + V. A small window will open up. The most recent copied items will be available at the top of the list.
To paste the item from the Clipboard history, open the application where you want to paste the text or URL that you have copied and then call up Clipboard history by pressing the Windows + V keyboard shortcut. Click on any item from the Clipboard. It will immediately paste the selected clipboard item to opened application.
How to Remove Items from Clipboard History in Windows 11?
Follow these steps to remove Items from Clipboard History in Windows 11:-
To open the Settings app, simultaneously press the Windows logo + I keys from the keyboard.
Step 2. In the Settings window that appears, click on the System category from the left side pane.
Step 3. Please scroll down to see the Clipboard tab and click on it on the right-side window of System.
Step 4. Now, click the Clear button next to Clear clipboard data to erase all clipboard history. It will silently erase all the clipboard history.
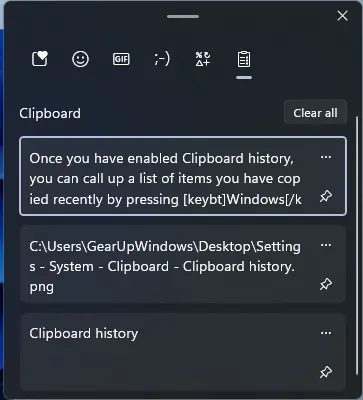
Suppose you don’t want to go through the Settings app to erase the Clipboard history. Open the Clipboard window by pressing the Windows + V shortcut keys. If you’d like to remove all the items at once from the Clipboard history, click the Clear all button.
![]()
To remove the selected item from the clipboard, click on three dots beside any item you’d like to delete. Select the Delete icon.
![]()
If you’d like to keep any item permanently in the Clipboard history, click Pin in the three-dots menu to pin the selected item. Even if you reboot your PC or use the Clear all option, pinned items will always remain in the Clipboard history. You can delete the pinned item later by selecting Delete from the three-dots menu.

How to disable Clipboard History in Windows 11?
To disable or turn off the Clipboard History on Windows 11 PC, perform the following steps:-
Step 1. Open the Settings app.
To open the Settings app, simultaneously press Windows + I keys from the keyboard.
Step 2. In the Settings window, click on the System category.
Step 3. On the right-hand side of the System, click on the Clipboard.
Step 4. On the right-side pane of the Clipboard, turn on the toggle switch to the Off position next to the Clipboard history.
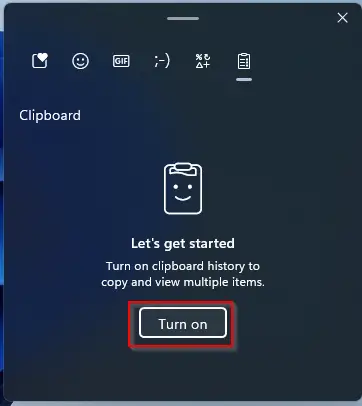
Note: If the Clipboard history feature is turned off and you want to turn it on quickly, you can use the hotkey Windows + V. Click on the Turn on button to enable it immediately.
That’s all!!!
Conclusion
In conclusion, the Clipboard History function on Windows 11 is a useful feature that can store up to 25 items of various formats, such as text, images, links, and videos, under 4 MB. To use this feature, it is necessary first to enable it in the System settings. Once enabled, users can access their Clipboard history by pressing the Windows + V hotkey and pasting the desired item into any application. The Clipboard history can be cleared entirely or individually for specific items, and items can also be pinned for permanent storage. Lastly, users can easily turn off the Clipboard history function by toggling the switch in the System settings. Overall, the Clipboard History function is a convenient feature that saves time and effort in copying and pasting tasks, making Windows 11 even more efficient.
Also learn: How to enable and use Clipboard History on Windows 10?