Mapping a network drive is basically creating a shortcut for that drive on another computer or in another location. In other words, mapping allows you to create a new drive letter for a folder, giving you access to it just like other computer drives. Generally, Windows users map the shared folder if they want permanent access to a folder on another computer, network, or server.
However, even after correct mapping of a network drive, if it doesn’t appear in File Explorer, this gearupwindows article will guide you.
What is the Root Cause of the Mapped Network Drive not Showing in File Explorer?
The main problem of disappearing the mapped network drive in Windows 11 or 10 is when you map a network drive using administrative Command Prompt or a logon script. By default, network drives created with standard rights appear in File Explorer. So either you delete the mapped drive and again create with regular rights or use below mentioned guideless to fix the issue of the mapped network drive not showing in Windows 11 or 10.
How to Fix: Mapped Network Drive Not Showing In Windows 11 or 10?
If you have mapped a network drive correctly and it still does not appear in File Explorer, use the following steps to fix it:-
Step 1. First, open Registry Editor.
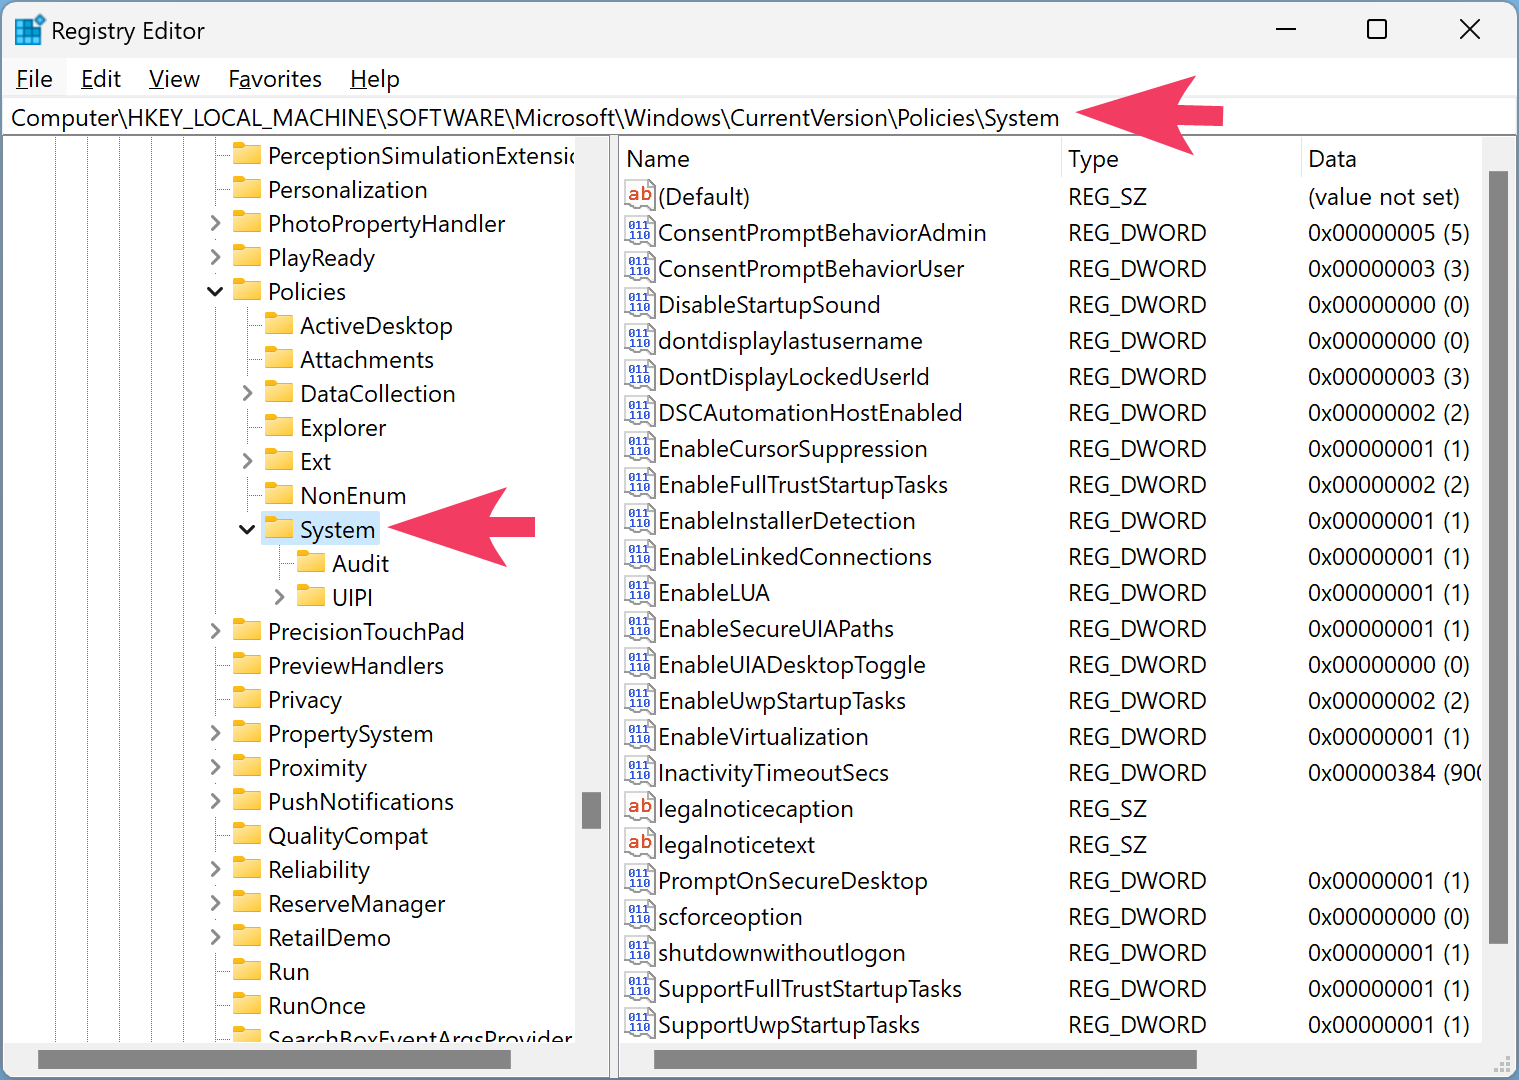
Step 2. When the Registry Editor window appears on your computer, navigate to the following path:-
HKEY_LOCAL_MACHINE\SOFTWARE\Microsoft\Windows\CurrentVersion\Policies\System
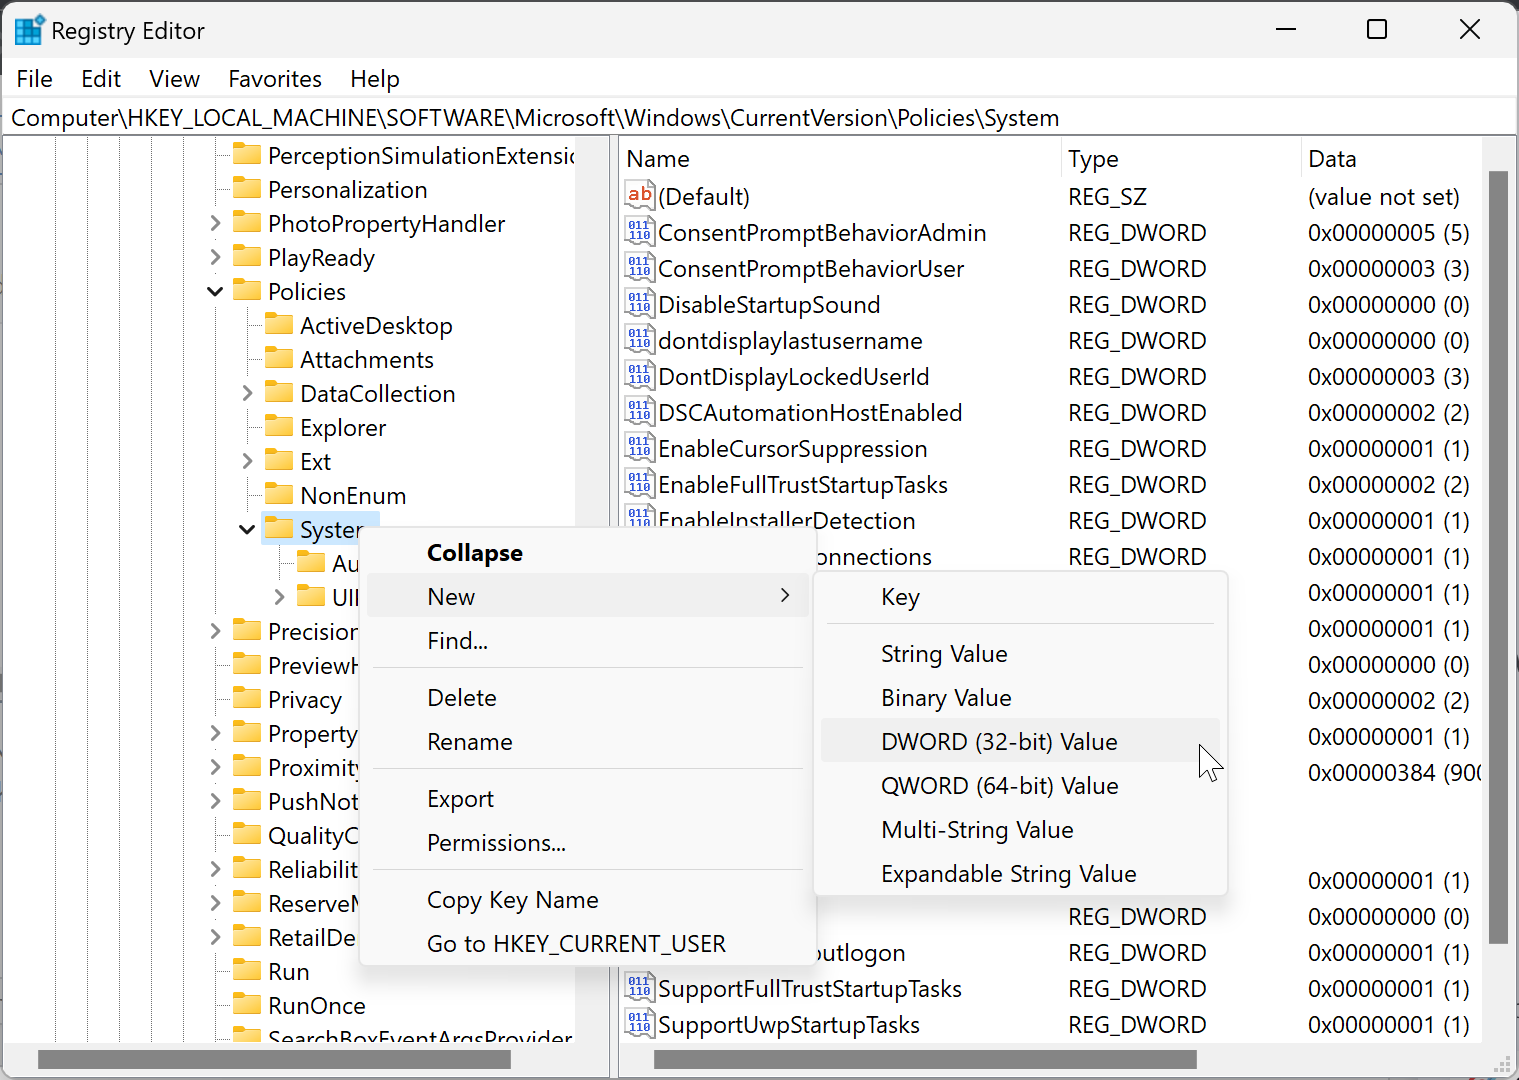
Step 3. Next, right-click the System key in the left navigation pane, choose New, and then click on DWORD (32-bit) Value.
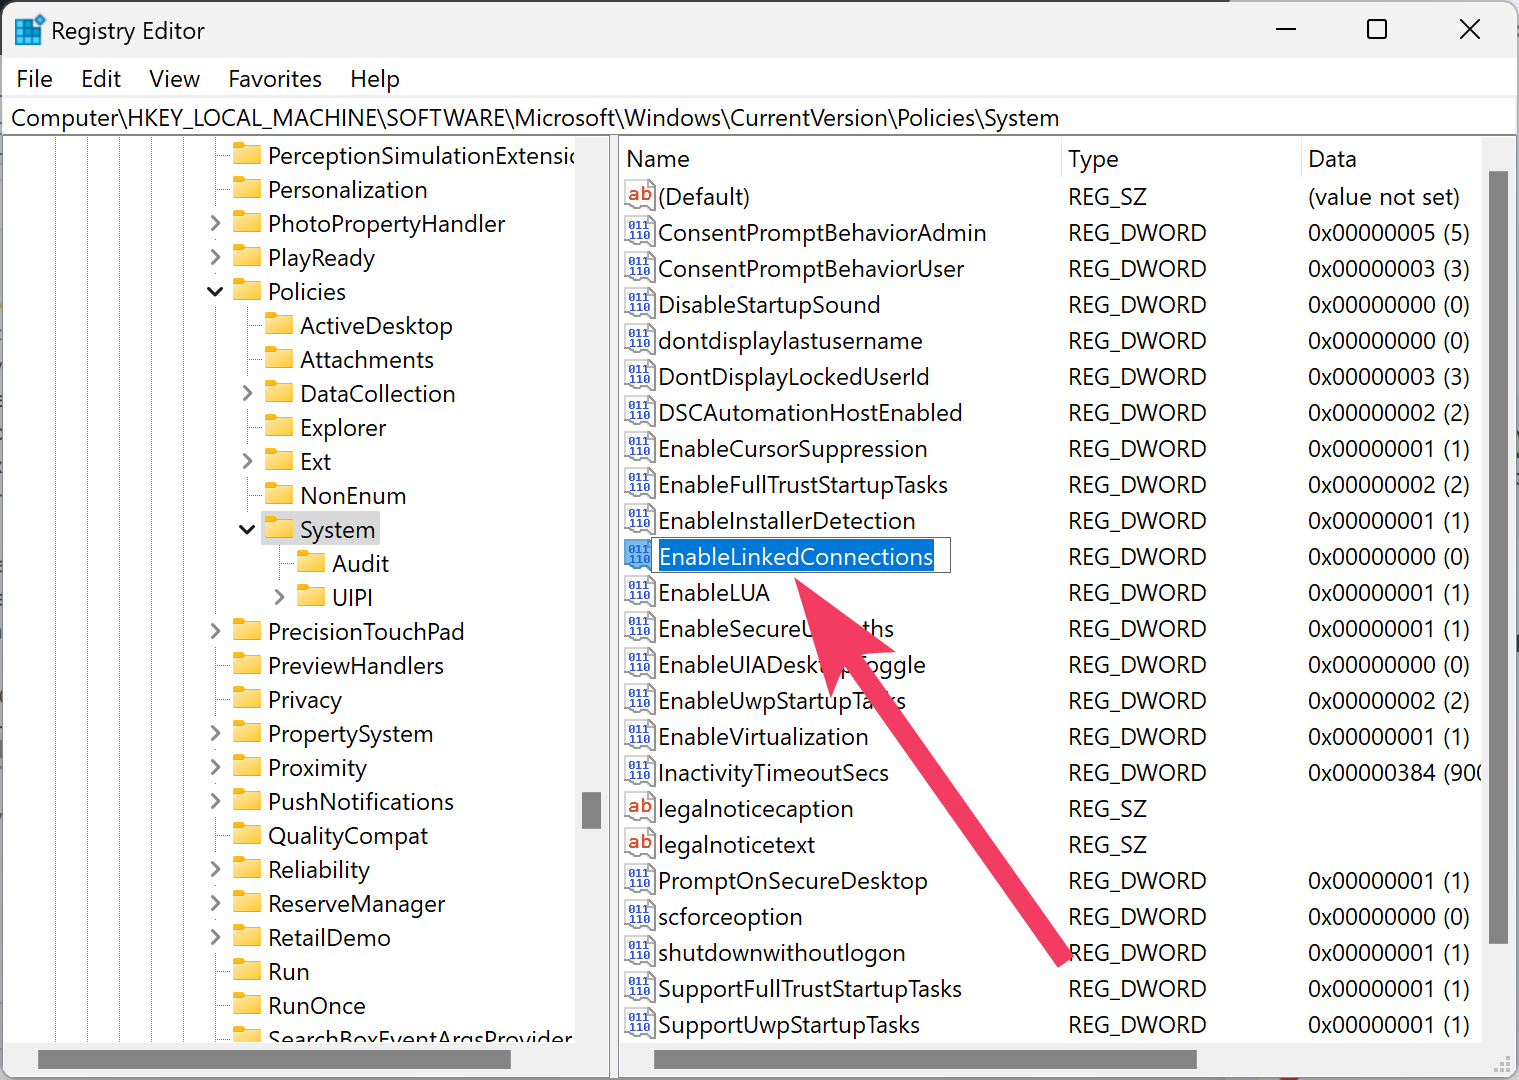
Step 4. Name the newly created REG_DWORD as EnableLinkedConnections.
Step 5. Now, double-click on the EnableLinkedConnections REG_DWORD to change its “Value data.”
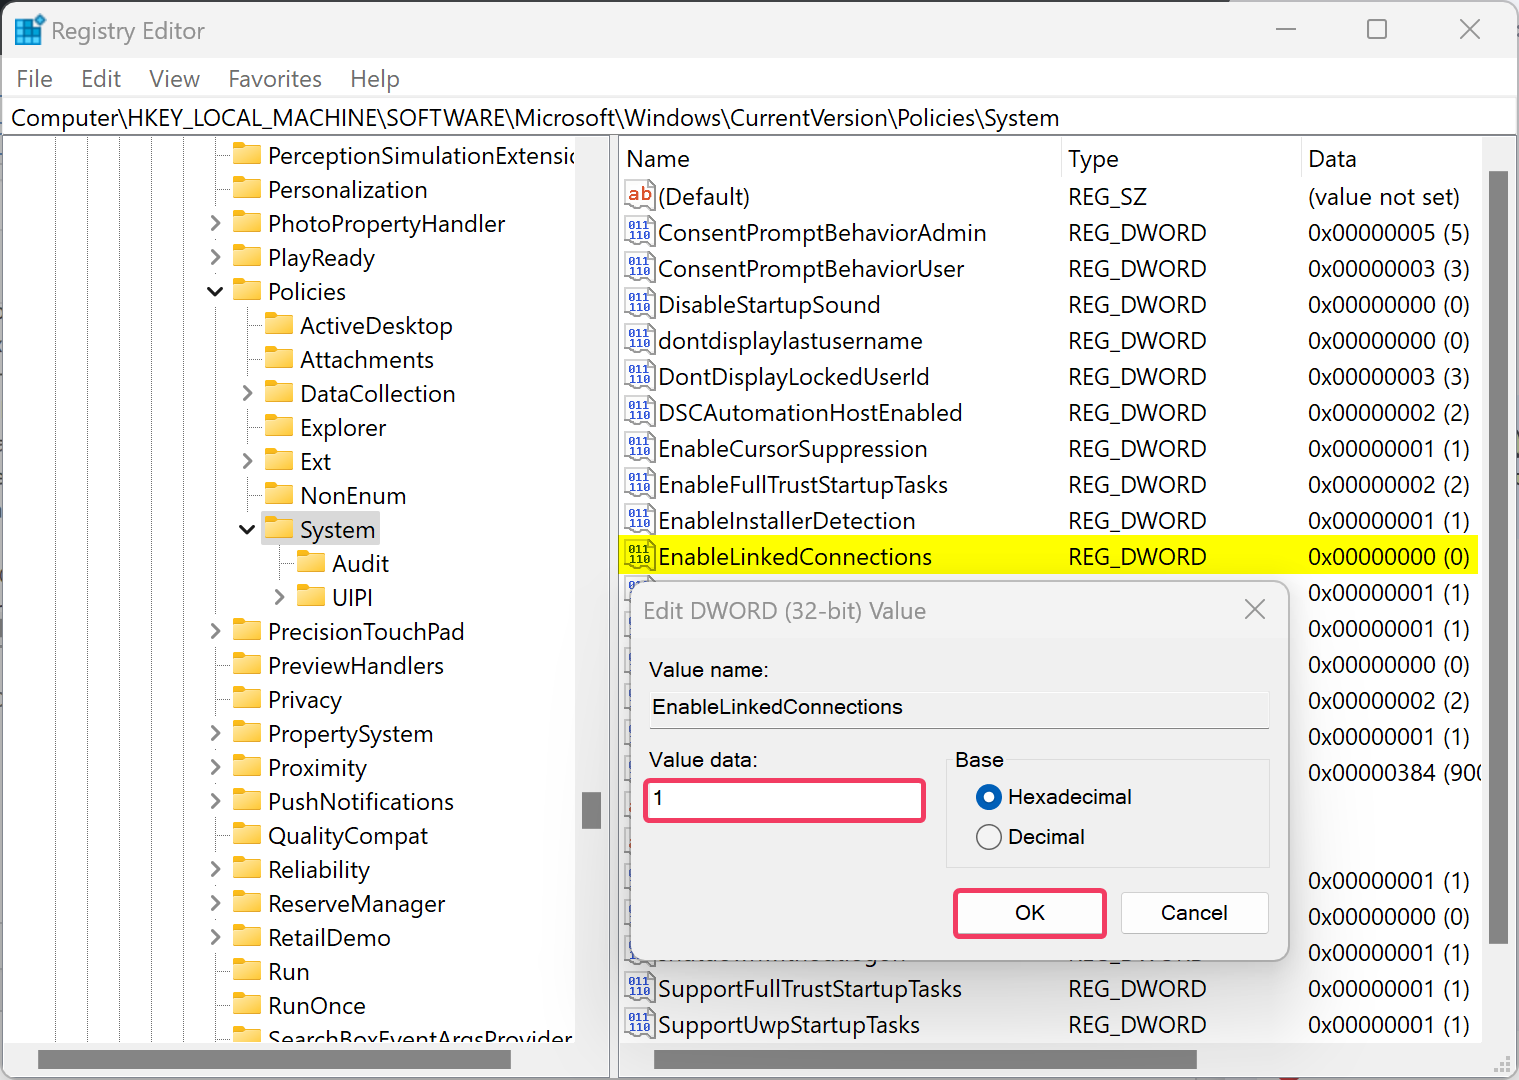
Step 6. Then, set the “Value data” to 1.
Step 7. Click OK.
Step 8. At last, reboot your computer to apply the changes.
Once you complete the above steps, network drives created by elevated apps will be visible in File Explorer, and elevated apps can also access the network drives created by programs running with standard rights.
The tutorial mentioned above you can also apply in Windows 8 and 7.
Conclusion
Mapping a network drive is a convenient way to access a folder on another computer or network. However, sometimes a mapped network drive may not appear in File Explorer, which can be frustrating. This gearupwindows article provided a solution to fix the issue of a mapped network drive not showing in Windows 11 or 10. The root cause of the problem is that network drives created with administrative Command Prompt or a logon script may not appear in File Explorer. The solution involves creating a new DWORD value in the Registry Editor and changing its value data. Once the steps are completed, network drives created by elevated apps will be visible in File Explorer. These steps can also be applied to Windows 8 and 7. By following this guide, users can easily fix the issue of a mapped network drive not showing in File Explorer and gain access to the shared folder.