Windows 10 allows you to add Wi-Fi Network Profile in two ways, using the Settings app and Control Panel. Using any method, you can easily add network details such as network name, security type, security key, etc. Once the network profile is added to your Windows 11/10 PC, you can easily connect with that network whenever you are available nearby. Even if you accidentally deleted the Wi-Fi network profile, you can add that network profile manually at anytime using any of these two methods.
How to add a new Wi-Fi Network Profile in Windows 10?
As said above, there are at least two ways to add a new Wi-Fi Network profile to Windows 10 PC. We will learn the following in this gearupwindows post:-
- How to add a new Wi-Fi Network Profile in Windows 10 using the Settings app?
- How to add a new WiFi Network Profile in Windows 10 via Control Panel?
How to add a new Wi-Fi Network Profile in Windows 10 using the Settings app?
Follow these steps to add a new Wi-Fi Network Profile in Windows 10 using the Settings app:-
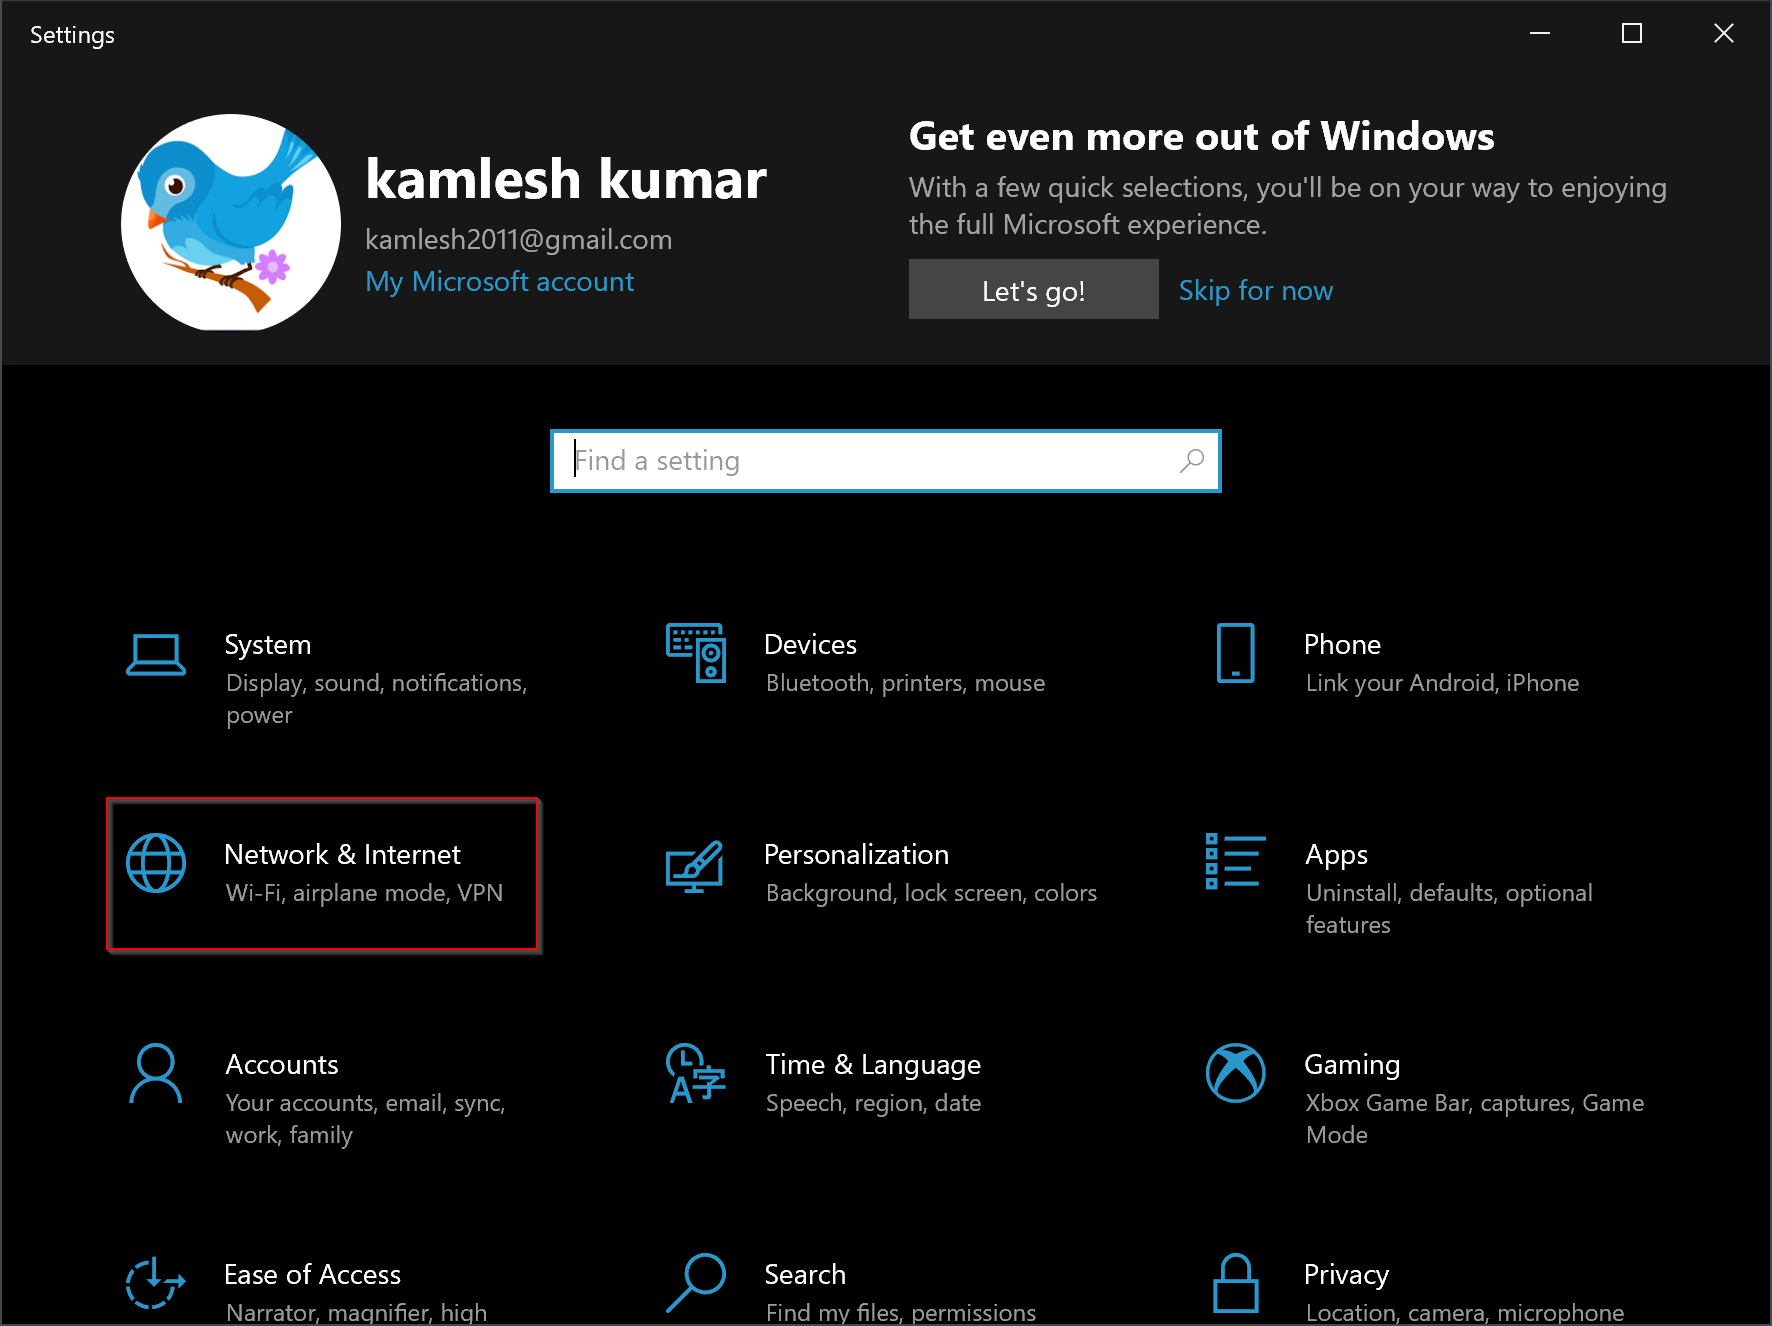
Step 1. Access the Settings app on your PC by pressing the Windows logo + I hotkey.
Step 2. In the Settings window that opens, click the Network & Internet category.
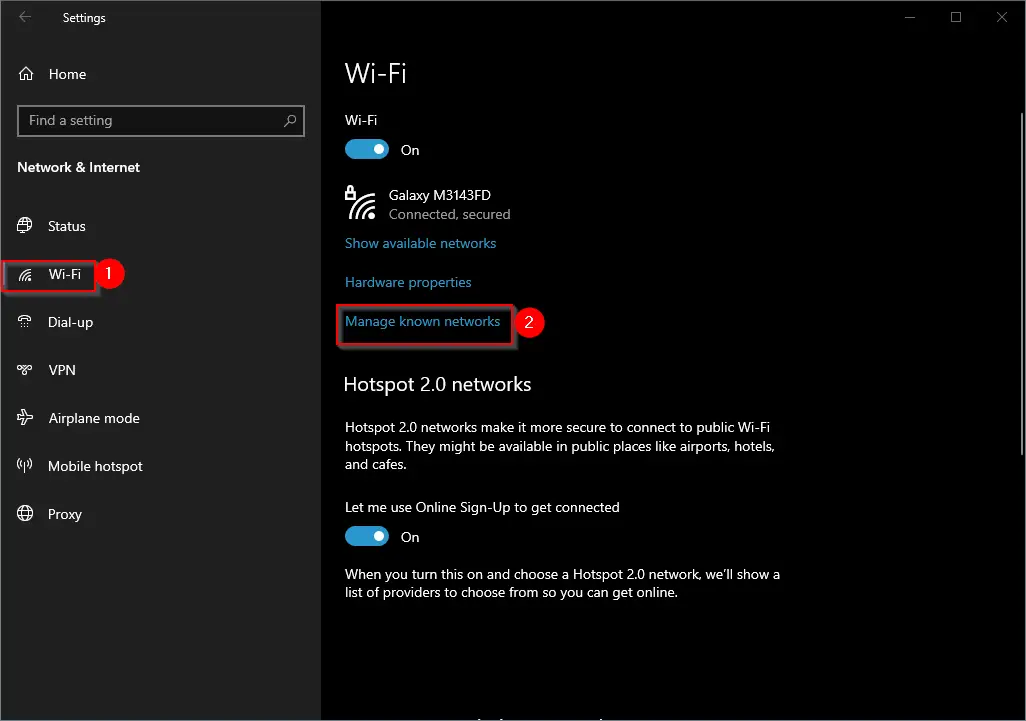
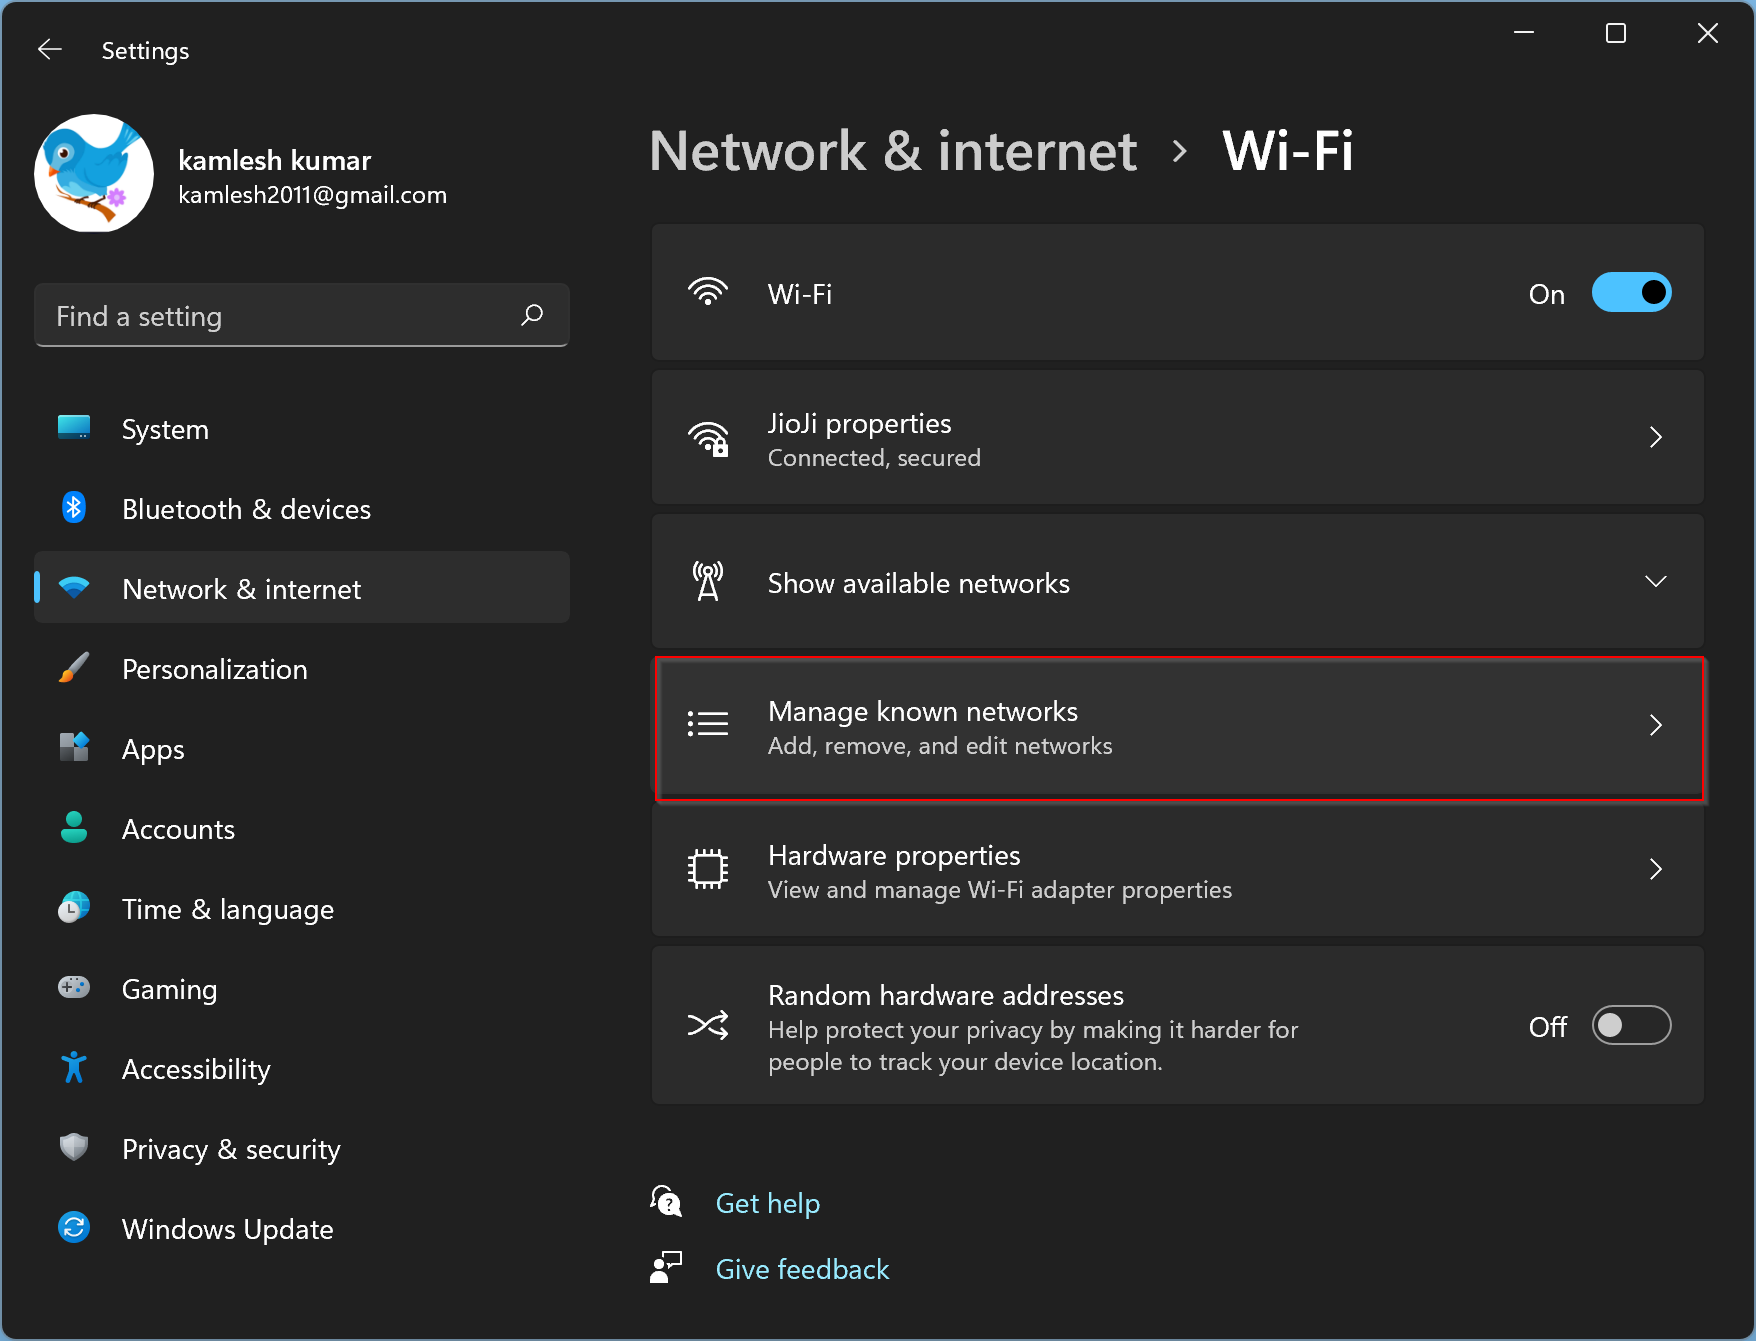
Step 3. Under the Network & Internet category, click on the Wi-Fi tab from the left side pane. On the right-side pane of the Wi-Fi tab, click on the “Manage known networks” link.
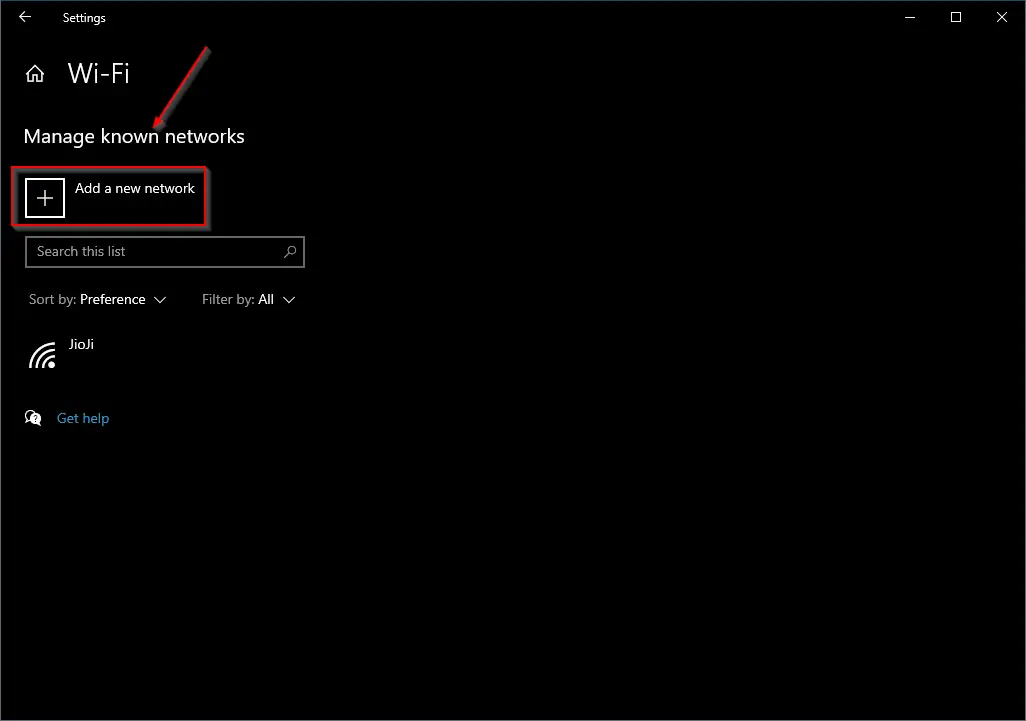
Step 4. In the “Manage known networks” section, click the “Add a new network” option.
Step 5. A pop-up window opens. Fill in network profile details (network name, security type, and security key).
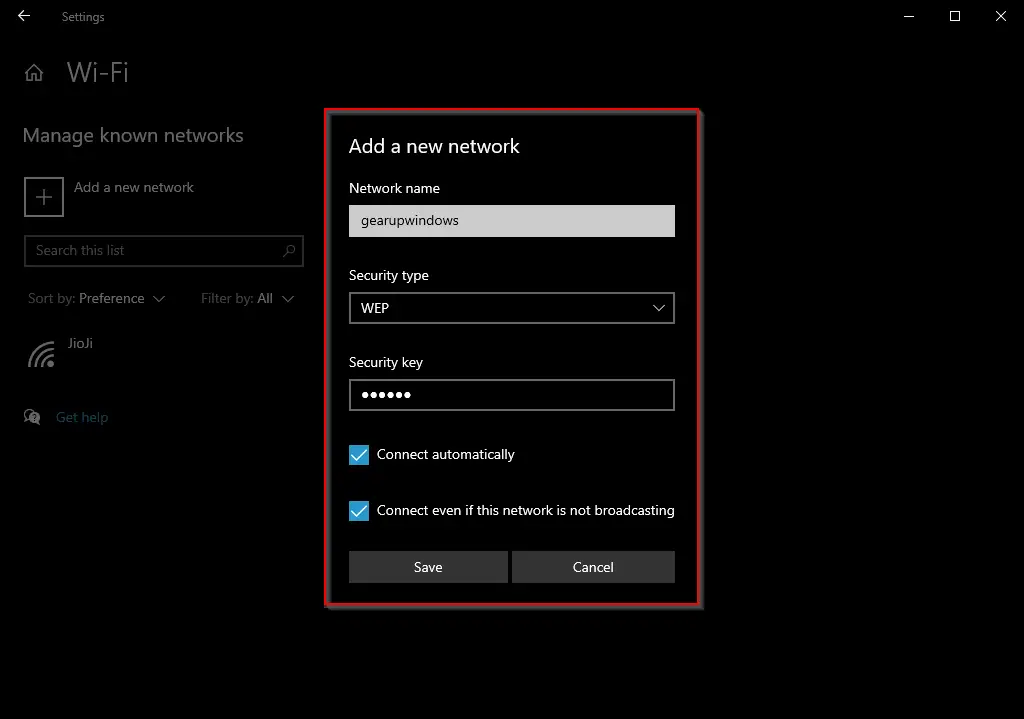
Optionally, you can check the checkbox “Connect automatically” and “Connect even if this network is not broadcasting.”
Step 6. Click the Save button to add a WiFi network profile on your computer or notebook.
How to add a new WiFi Network Profile in Windows 11/10 via Control Panel?
If you prefer to use Control Panel rather than the Settings app, perform the following steps to add a new WiFi Network Profile in Windows 10:-
Step 1. Click on the Start button/menu and type Control Panel.
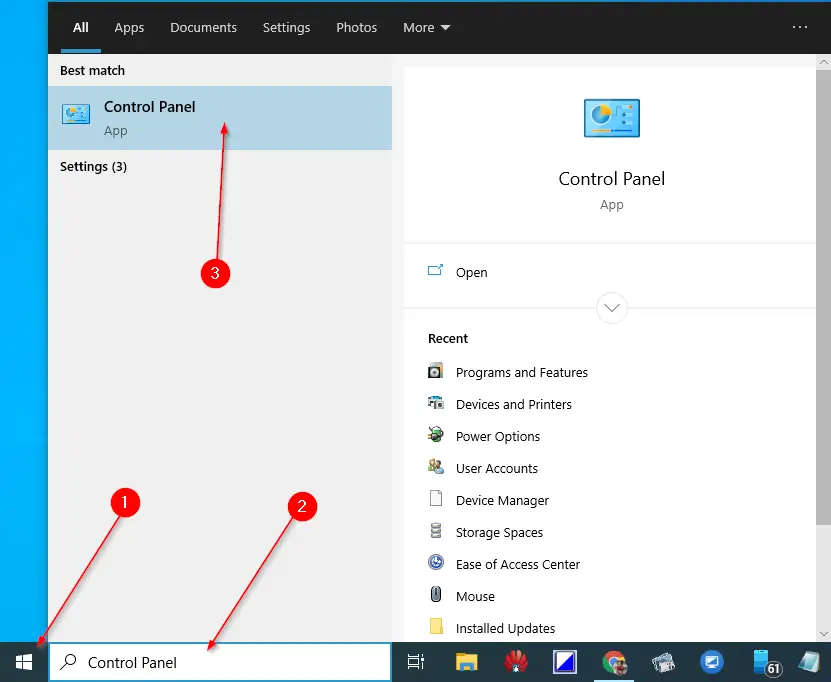
Step 2. Click on the Control Panel to open it on the top search results.
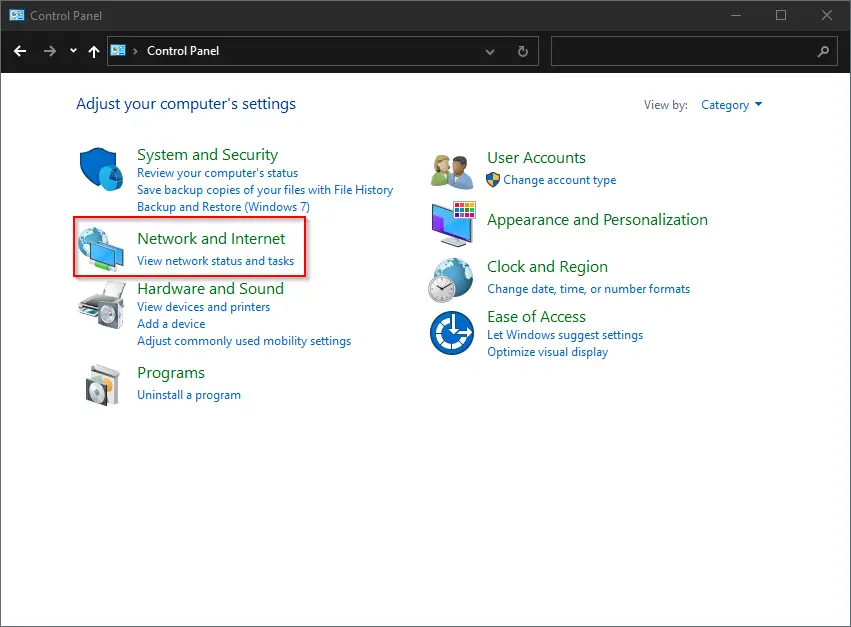
Step 3. In the Control Panel window, click on the Network and Internet category.
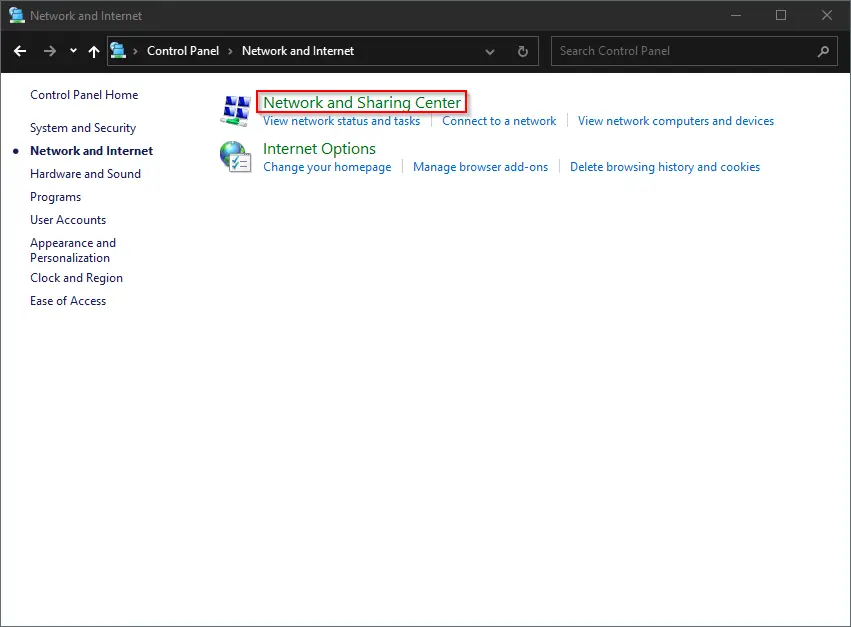
Step 4. Click on the Network and Sharing Center option on the following screen.
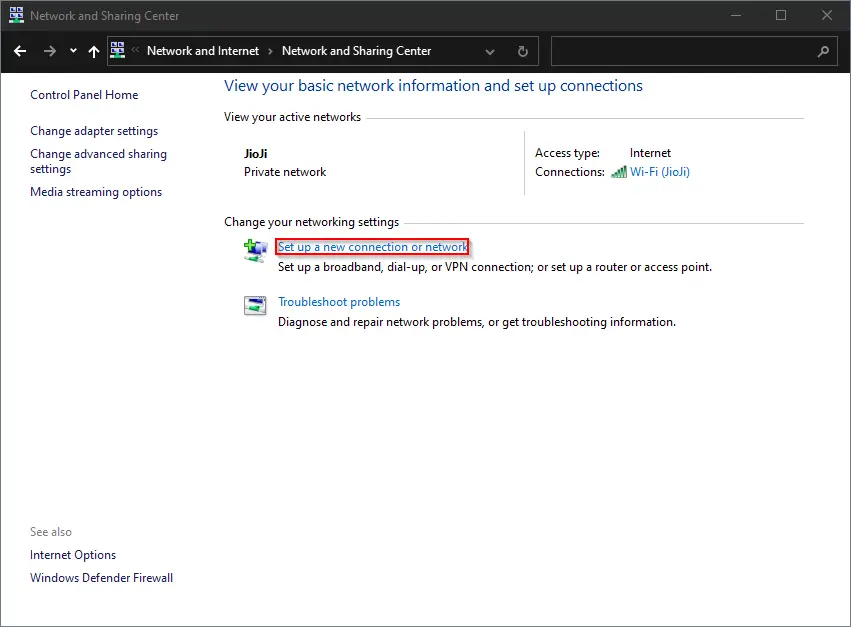
Step 5. Click on the “Set up a new connection or network” link in the Network and Sharing Centre window.

Step 7. Click the Next button.
Step 8. In the “Manually connect to a wireless network” windows, fill in network type, security type, and security key details.
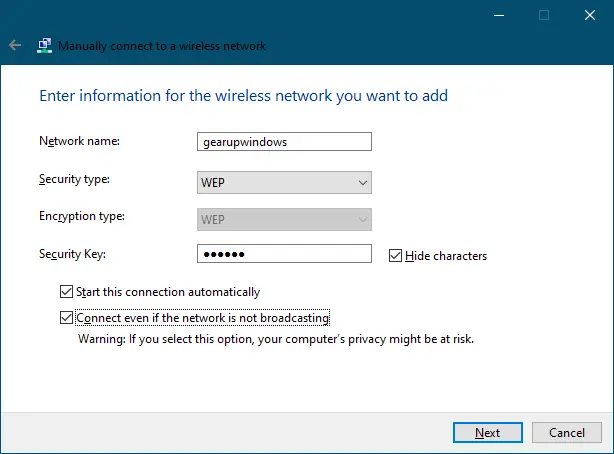
Optionally, you can check the checkbox “Start this connection automatically” and “Connect even if the network is not broadcasting” options.
Step 9. Click the Next button.
You can easily add a new WiFi network profile on your Windows 11/10 computer or laptop by performing the above steps.
How to add a new Wi-Fi Network Profile in Windows 11 through the Settings app?
To add a new Wi-Fi network profile in Windows 11 through Settings, do the following:-
Step 1. Hit Windows + I keys to open the Settings app.
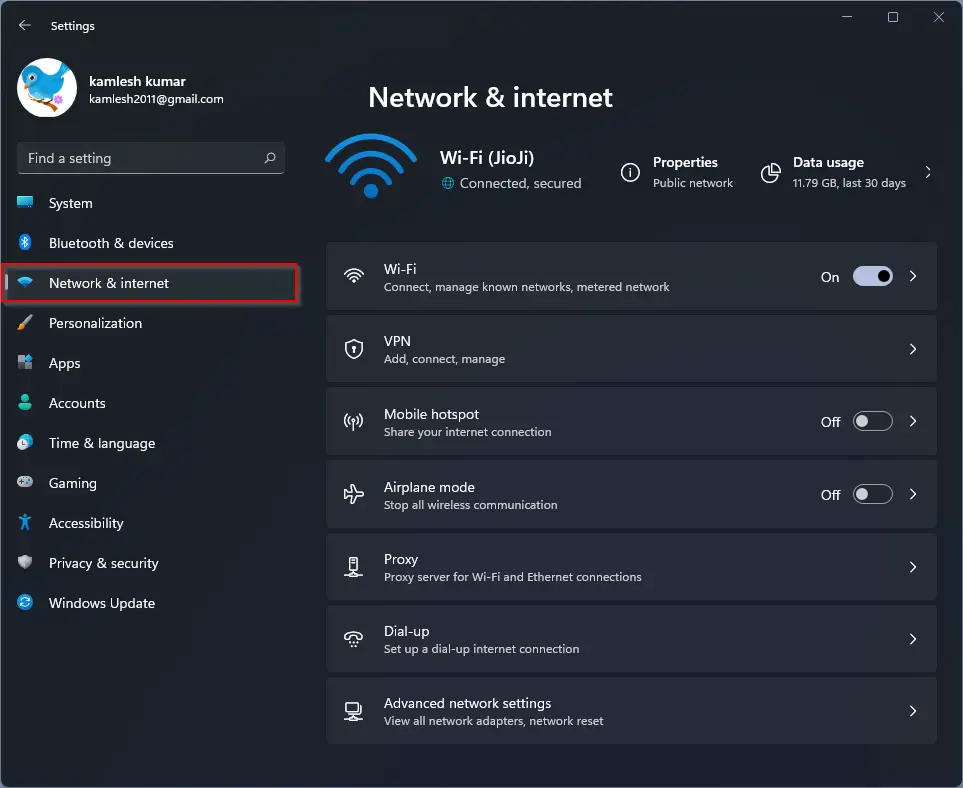
Step 2. Then, select Network & internet in the left sidebar.
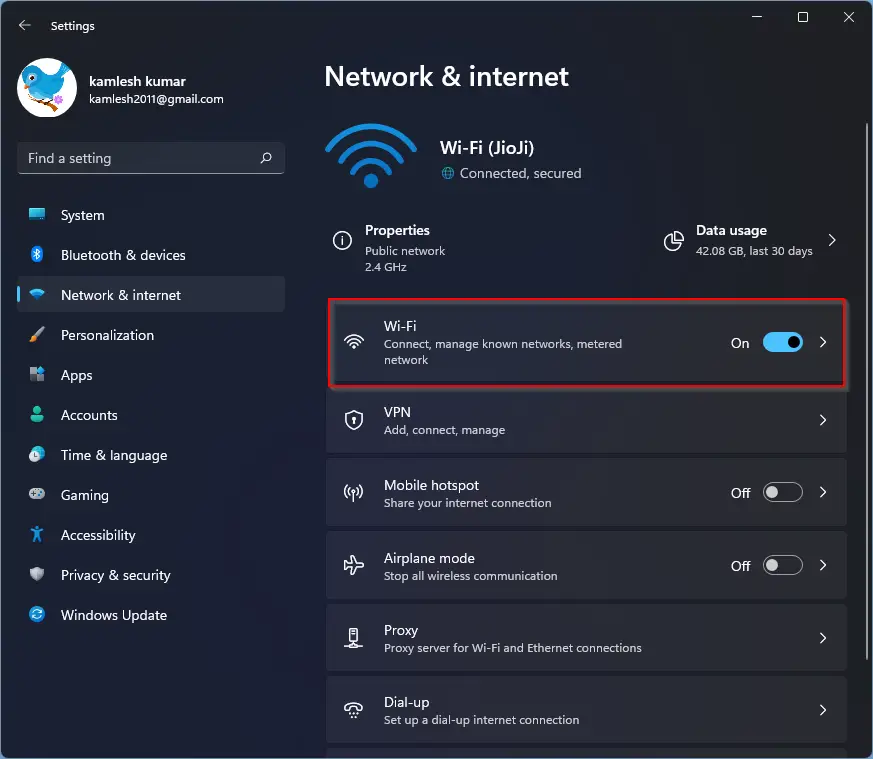
Step 3. After that, click Wi-Fi on the right sidebar.
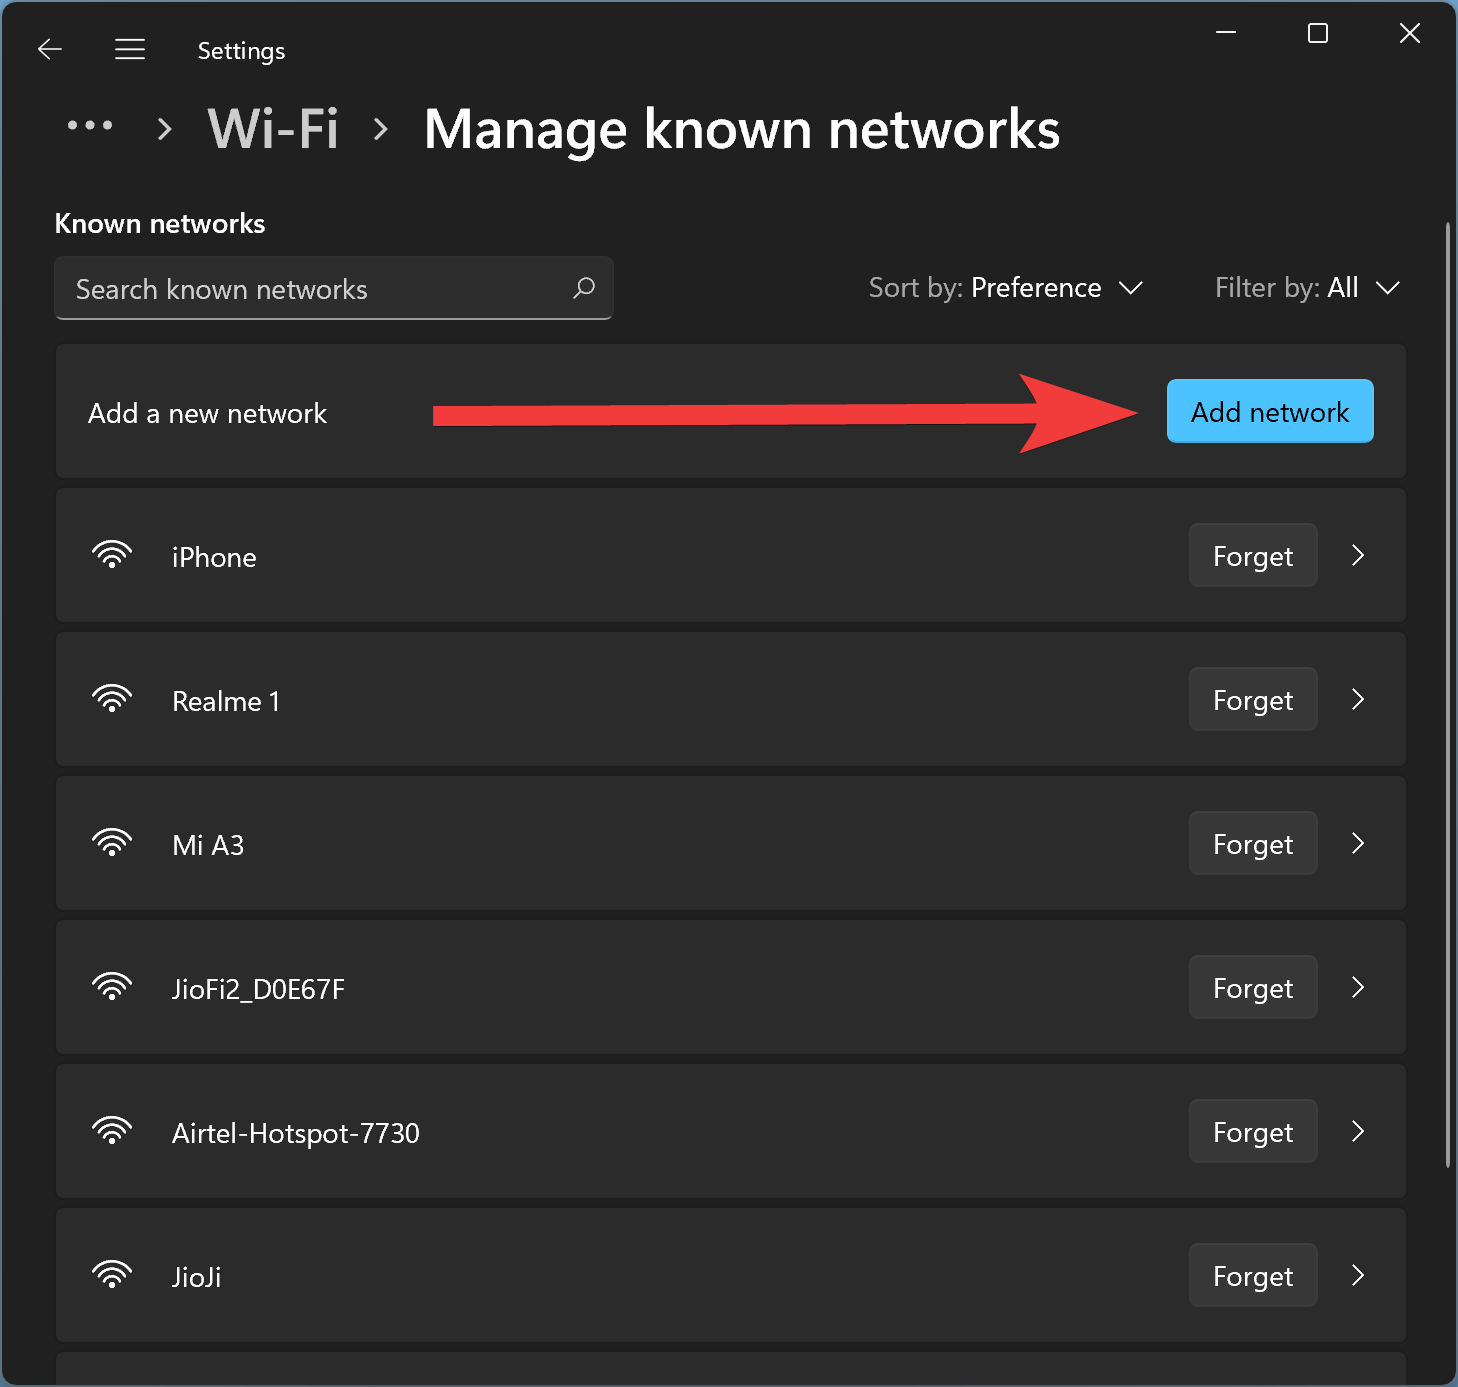
Step 4. Next, click on the Manage known networks tile on the right sidebar of Wi-Fi settings.
Step 5. Besides the “Add a new network,” click the Add network button.
Step 6. On the pop-up “Add a new network” window, type the “Network name,” select “Security type,” and enter “Security key.”
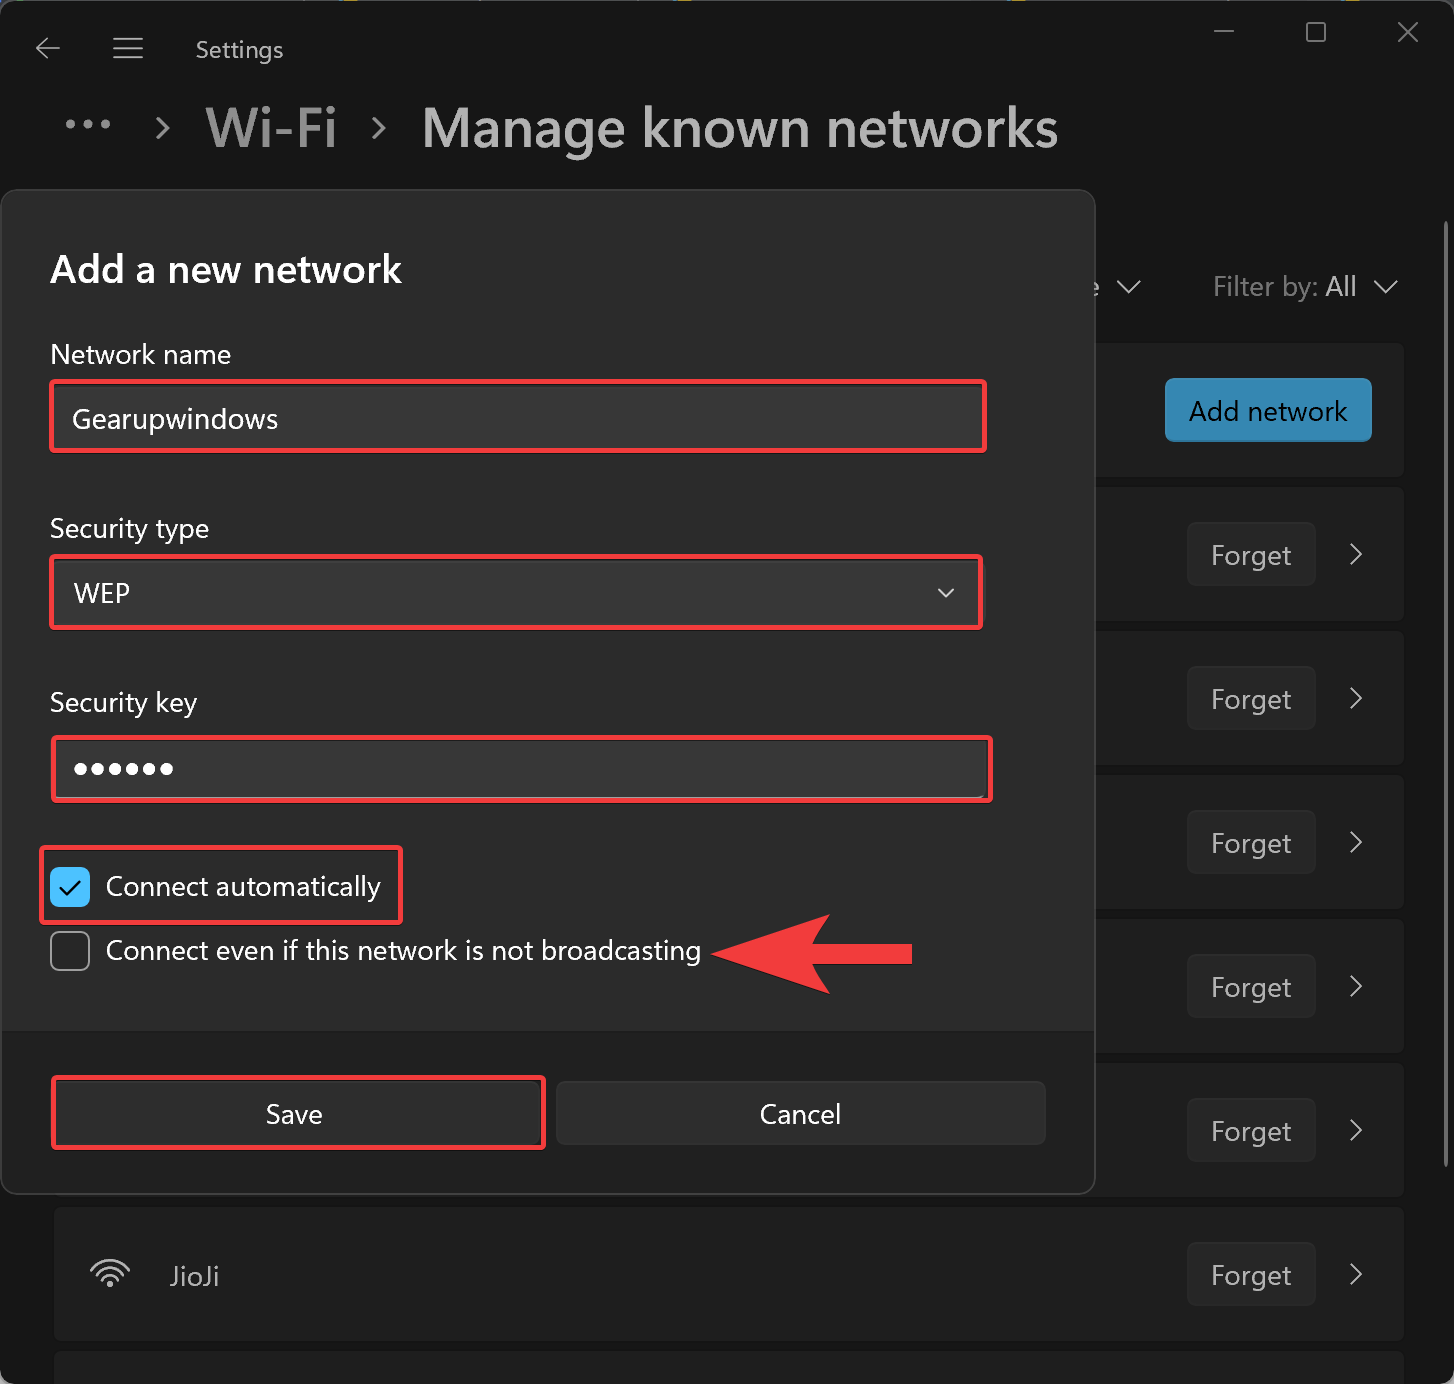
Step 7. If you want to allow this connection to connect to your computer automatically, check the checkbox Connect automatically.
Step 8. Check or uncheck the optional checkbox, “Connect even if this network is not broadcasting.”
Step 9. Finally, hit the Save button.
That’s all!!!
Conclusion
In conclusion, adding a new Wi-Fi network profile in Windows 10/11 is a simple process that can be done through either the Settings app or Control Panel. By following the steps outlined in this post, users can easily add network details such as network name, security type, security key, etc. Once added, the network can be easily accessed and connected when in range. Additionally, if a network profile is accidentally deleted, it can be manually added back using either method. Overall, Windows 10/11 provides users with flexible and convenient options for managing their Wi-Fi network connections.
You might also be interested in blocking or hiding a neighbor’s Wi-Fi Network from Appearing on Windows 11 or 10.
