A page file (also known as a “paging file”) is a hidden system file on a hard disk. It enables the system to remove rarely accessed modified pages from physical memory to virtual memory (page file) so that your Windows system uses physical memory more efficiently for more frequently accessed pages.
The paging file is a unique area on your hard disk that Windows uses, like physical memory. When this paging file is allowed on your system, it automatically improves system performance.
Due to some reason, you have previously turned on manual page file size or turned off paging files entirely and are experiencing slow performance from your computer. You can try changing to an automatic page file size to help improve performance.
How to Enable Automatic Page File Size in Windows 11?
By default, Windows automatically manages the system page file size based on several factors, including disk size, speed, etc. Due to some reason, if you have changed it to manual or turned off this feature and want to turn it on, use the following steps:-
Step 1. As usual, press Windows + I keys on the keyboard to open the Settings app on your computer.

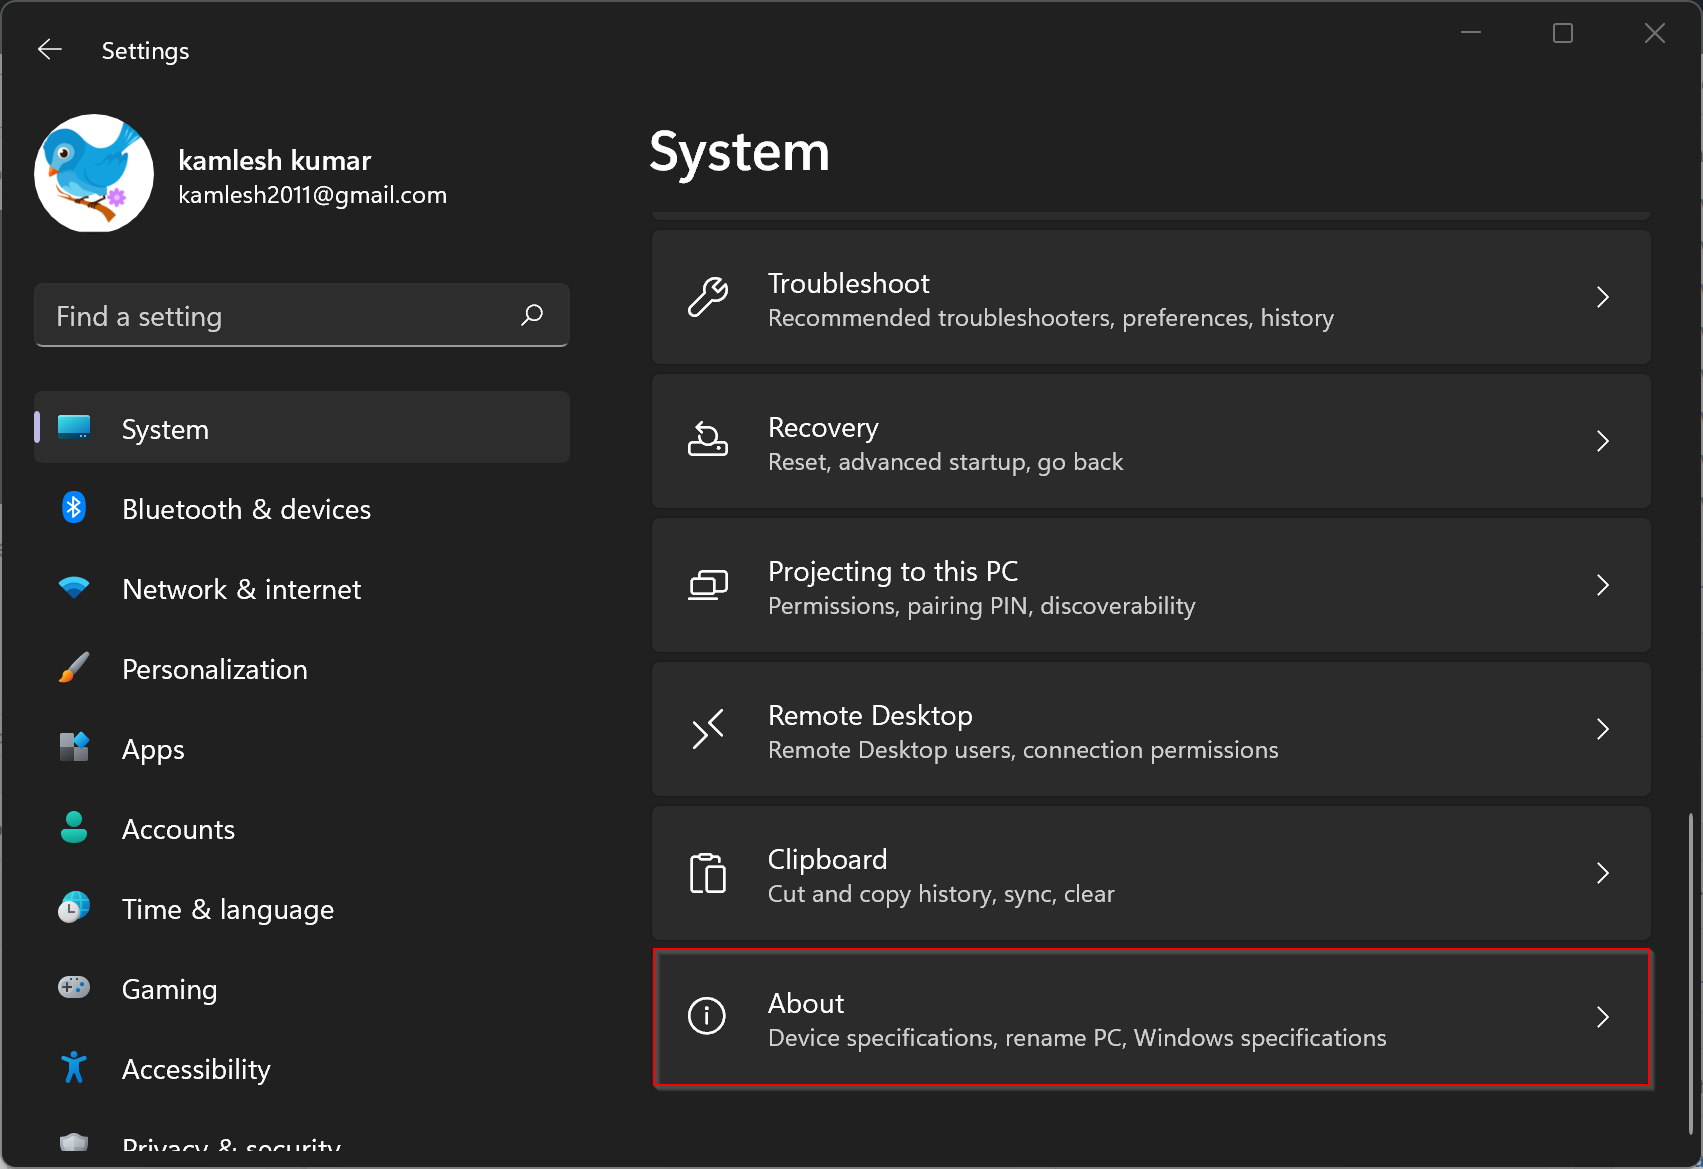
Step 2. Then, select the System category in the left side pane.
Step 3. Select the About tile on the right side of “System” to expand.
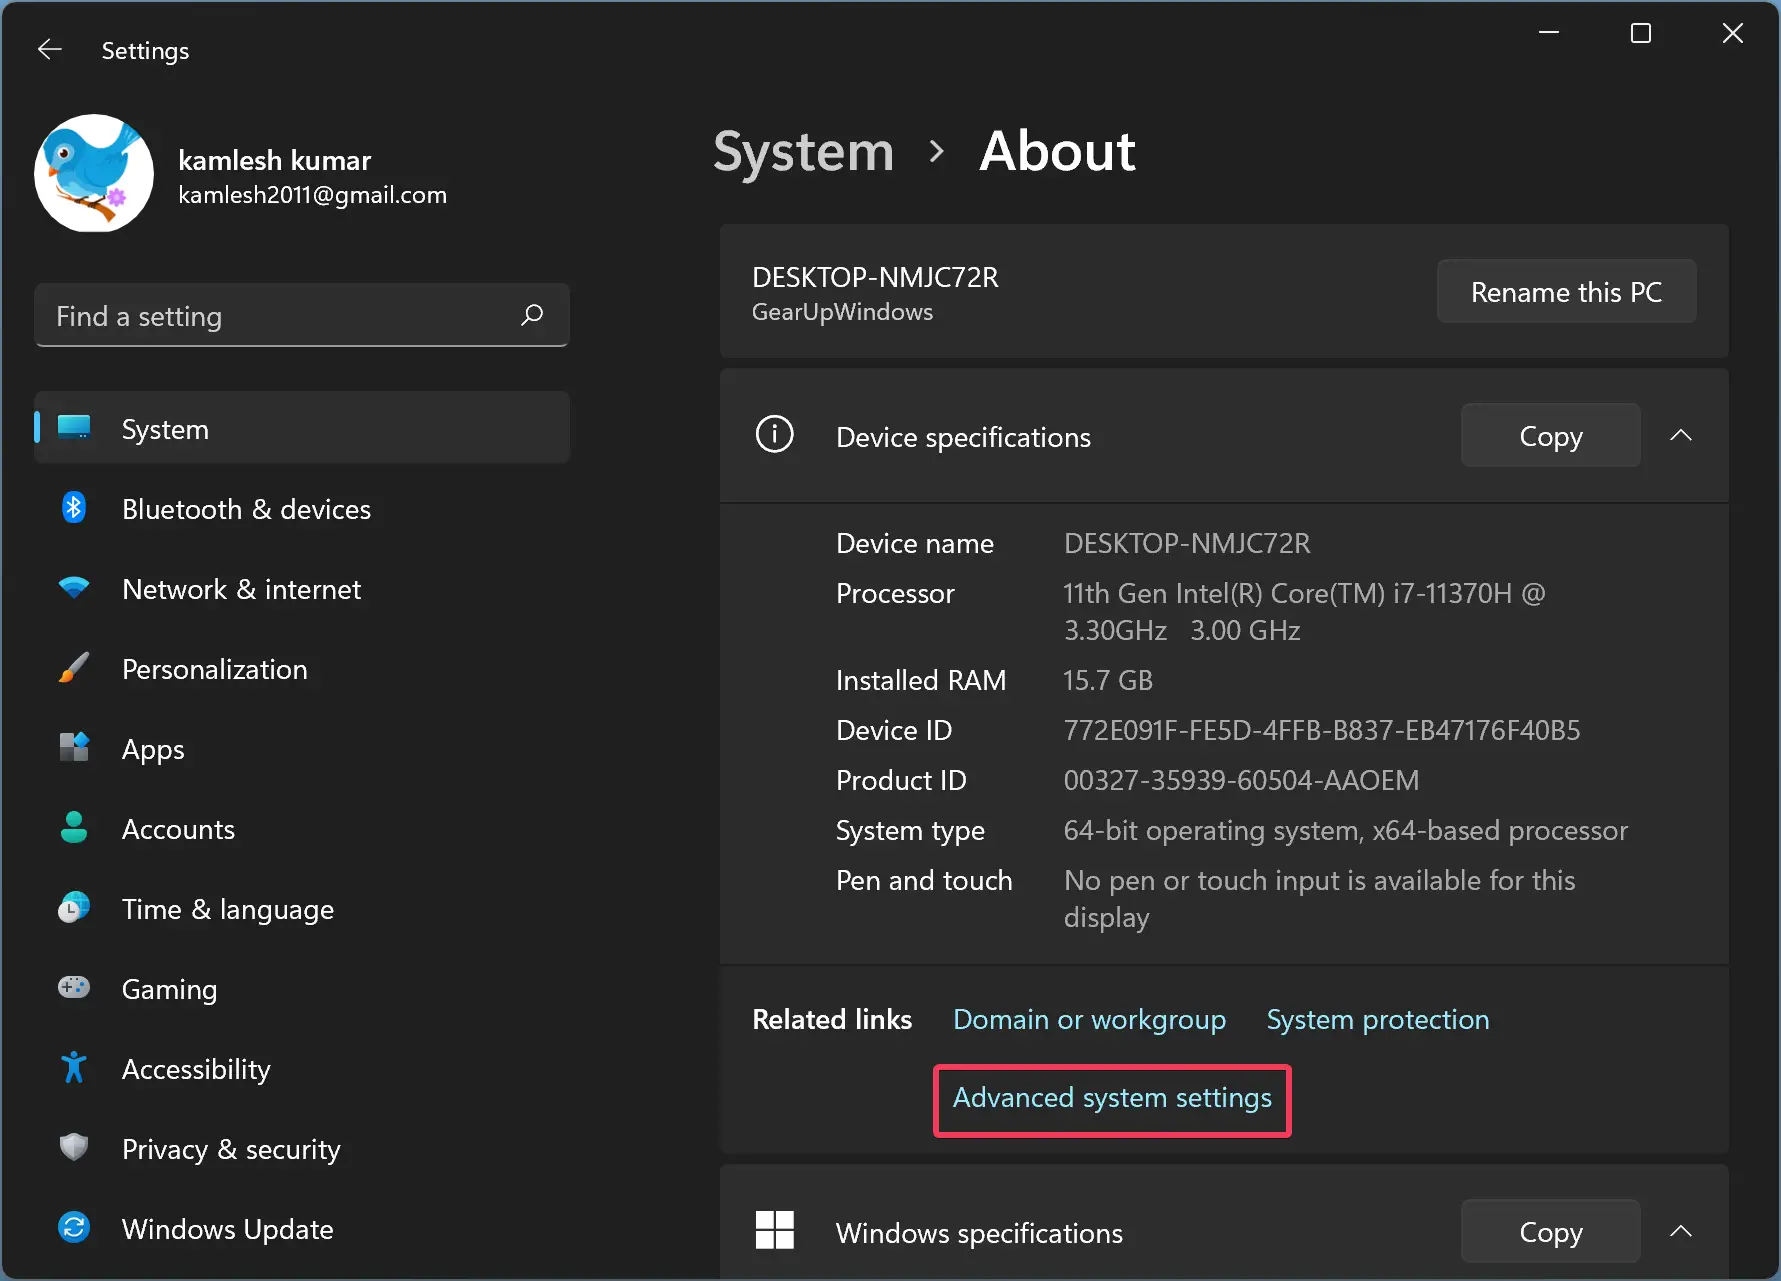
Step 4. On the About settings page, click the Advanced system settings link.
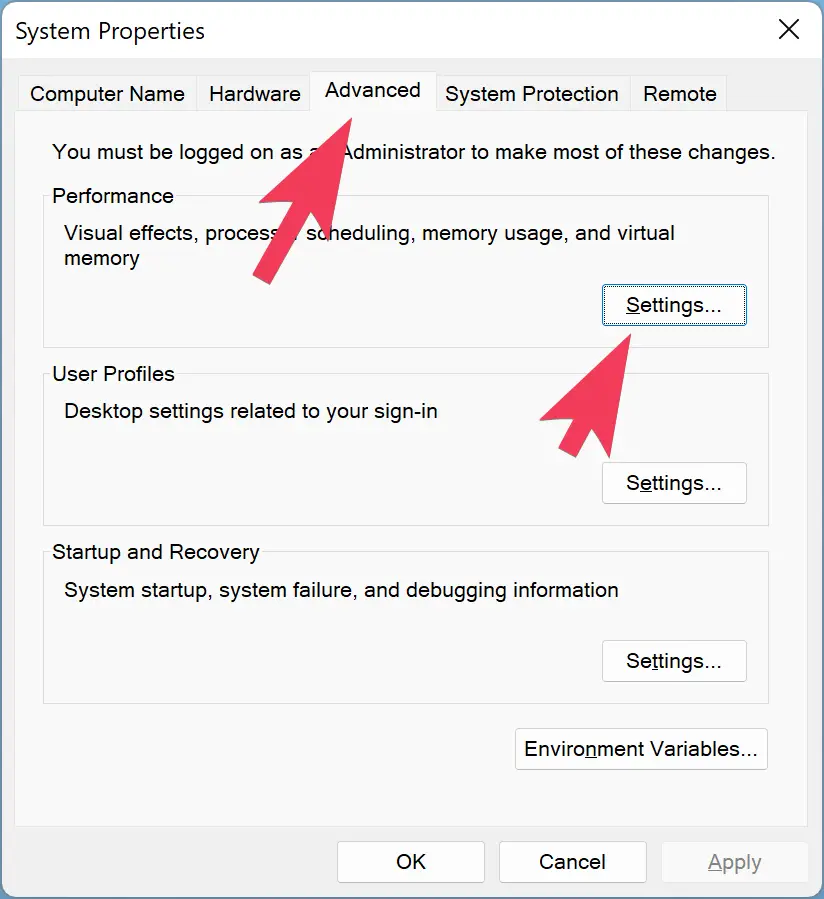
Step 5. When you’re done with the above steps, the “System Properties” window will appear. Select the Advanced tab and click the Settings button in the Performance area.
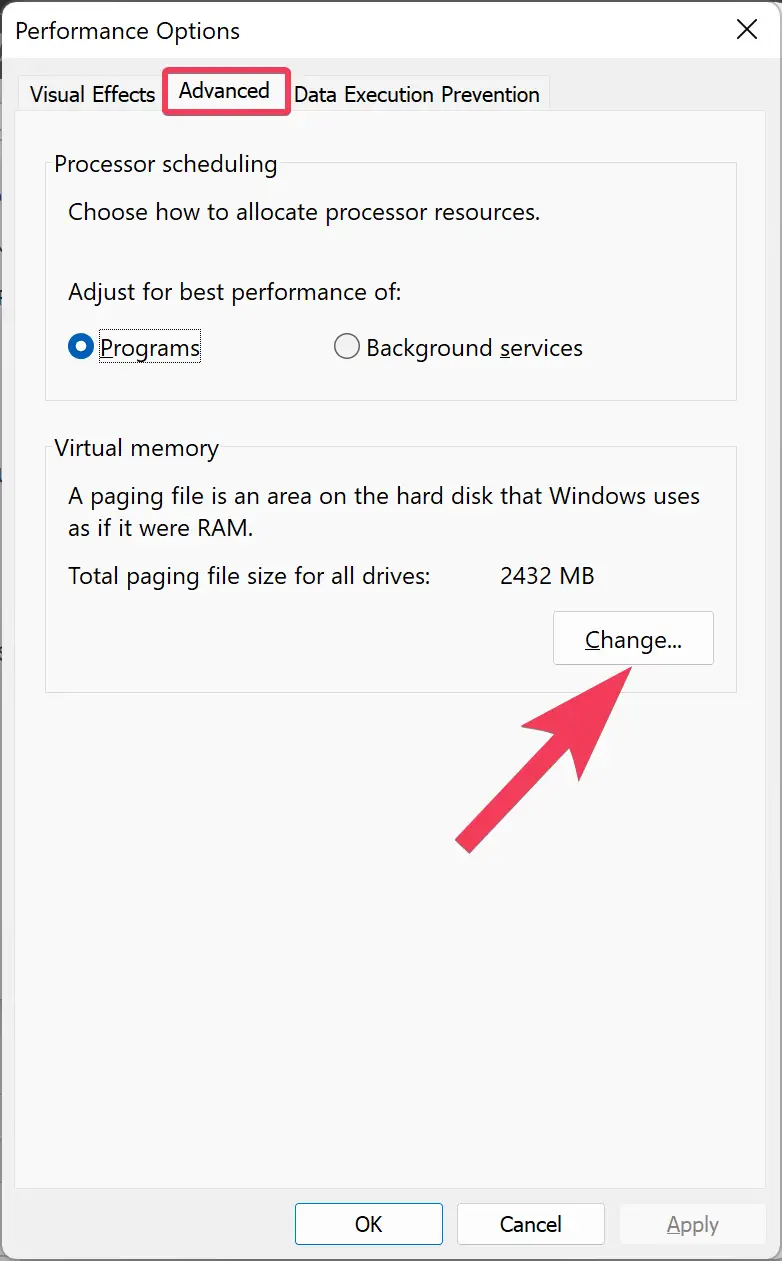
Step 6. A new window, “Performance Options,” will appear on the screen. Select the Advanced tab and click the Change button in the Virtual memory area.
Step 7. Check the checkbox “Automatically manage paging file size for all drives” in the “Virtual Memory” pop-up window.
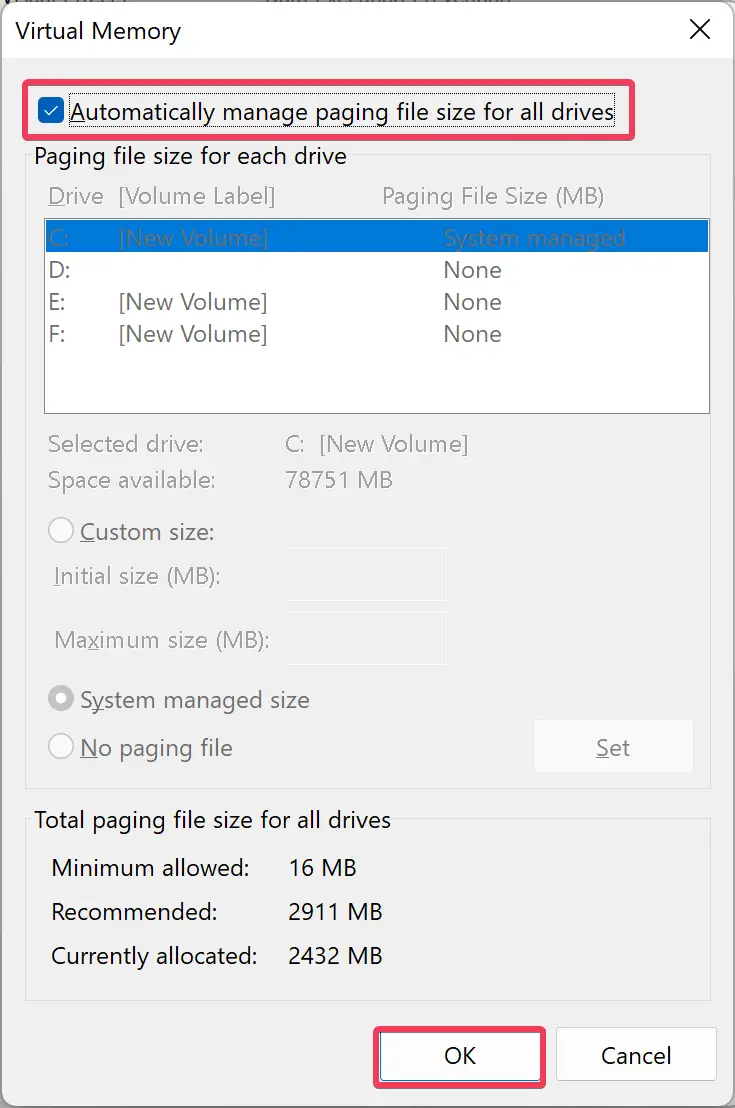
Step 8. Click OK.
Step 9. Click OK.
Step 10. Click OK.
Step 11. Click OK.
Step 12. Click OK.
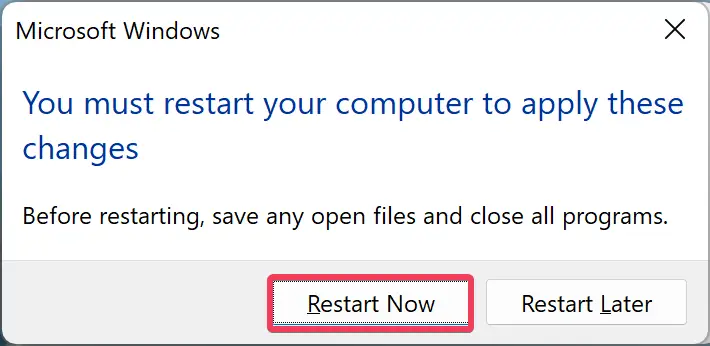
Step 13. Microsoft Windows will prompt you to reboot your computer. Click the Restart Now button to apply the changes.
That’s it. You have successfully allowed your Windows 11 machine to manage Page file size automatically.
How to Turn On Automatic Page File Size in Windows 10?
To enable or turn on automatic page file size in Windows, here are the steps:-
Step 1. First, open the Settings app.
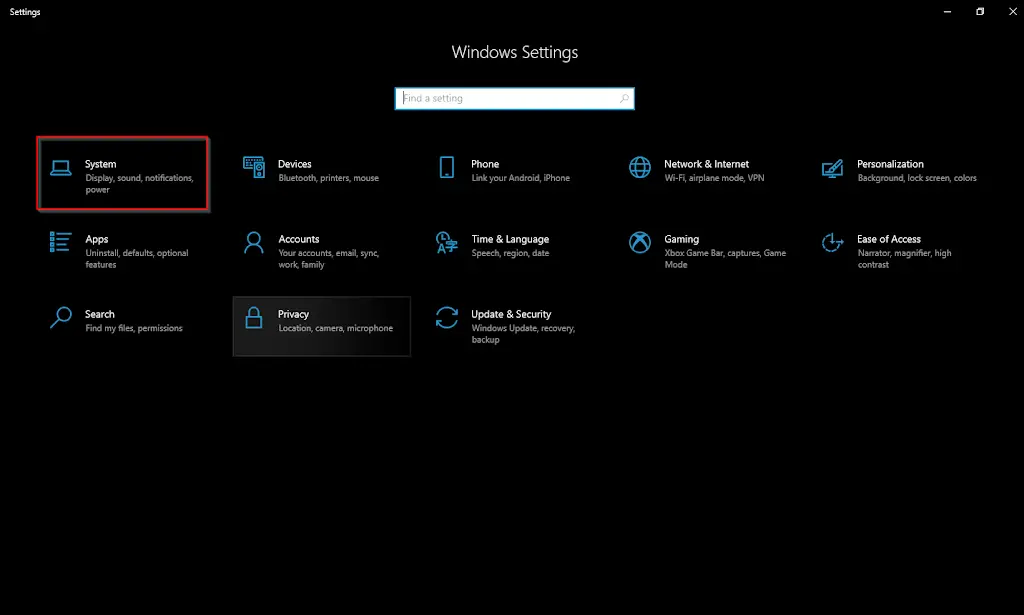
Step 2. Then, click the System.
Step 3. After that, select About on the left sidebar.

Step 4. On the About settings page, scroll down to see the “Related settings” area. Then, click the link System protection.
Step 5. When the “System Properties” window appears, navigate to the Advanced tab.

Step 6. Click on the Settings button inside the “Performance” area.
Step 7. Again select the Advanced tab in the “Performance Options” window.

Step 8. Then, click the Change button under “Virtual Memory.”
Step 9. Ensure “Automatically manage paging file size for all drives” is checked.
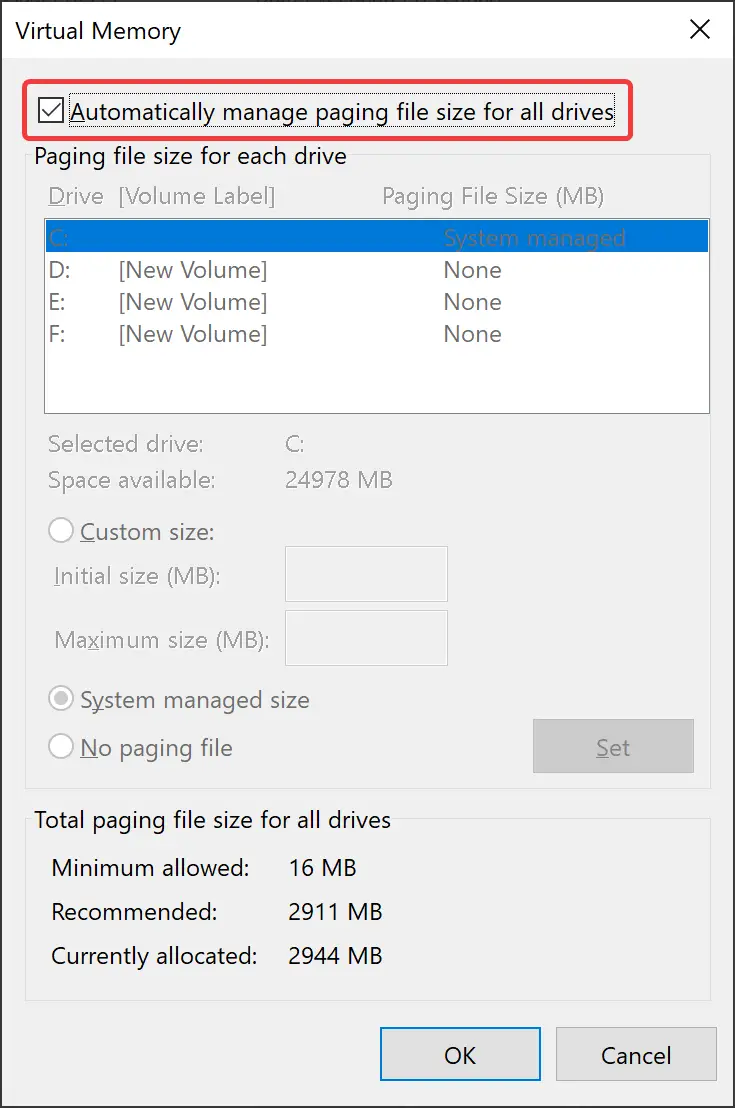
Step 10. Click OK.
Step 11. Click OK.
Step 12. Click OK.
Step 13. Click OK.
Step 14. Click OK.
Step 15. When Microsoft Windows prompts you to reboot your computer, click the Restart Now button to apply the changes.
Good luck.
Conclusion
In conclusion, the page file, also known as the paging file, is a hidden system file on a hard disk that helps Windows manage physical memory more efficiently. By automatically removing rarely accessed modified pages from physical memory to virtual memory, the paging file allows frequently accessed pages to use physical memory, thereby improving system performance. If you have turned off or manually set your page file size in the past and are experiencing slow performance, turning on automatic page file size can help improve your computer’s performance. Windows 10 and Windows 11 both offer easy ways to enable automatic page file size through the Settings app, as outlined in the step-by-step instructions provided.