There are two types of updates in Windows 11 and 10 devices: feature updates and Quality Updates. By default, Windows automatically downloads and installs these updates on your PC. Windows also notify you to restart your computer immediately or schedule a restart when these updates are downloaded and installed. If you want, you can reschedule the restart of updates repeatedly.
However, Windows 11 and 10 have policies that let you specify deadlines for automatic updates and restarts. You can configure the policy in Group Policy or tweak the Registry to specify a new default deadline (up to 30 days) that Windows 11/10 will use to restart your device automatically.
How to Set Deadlines for Automatic Restart to Windows 11 after Windows Updates?
To specify deadlines for automatic restarts after updates in Windows 11, you need to access Local Group Policy Editor. However, this function is not available in Home Edition, and you need to enable gpedit.msc on your PC to avail of this facility. Once you have access to Local Group Policy Editor on your computer, do the following:-
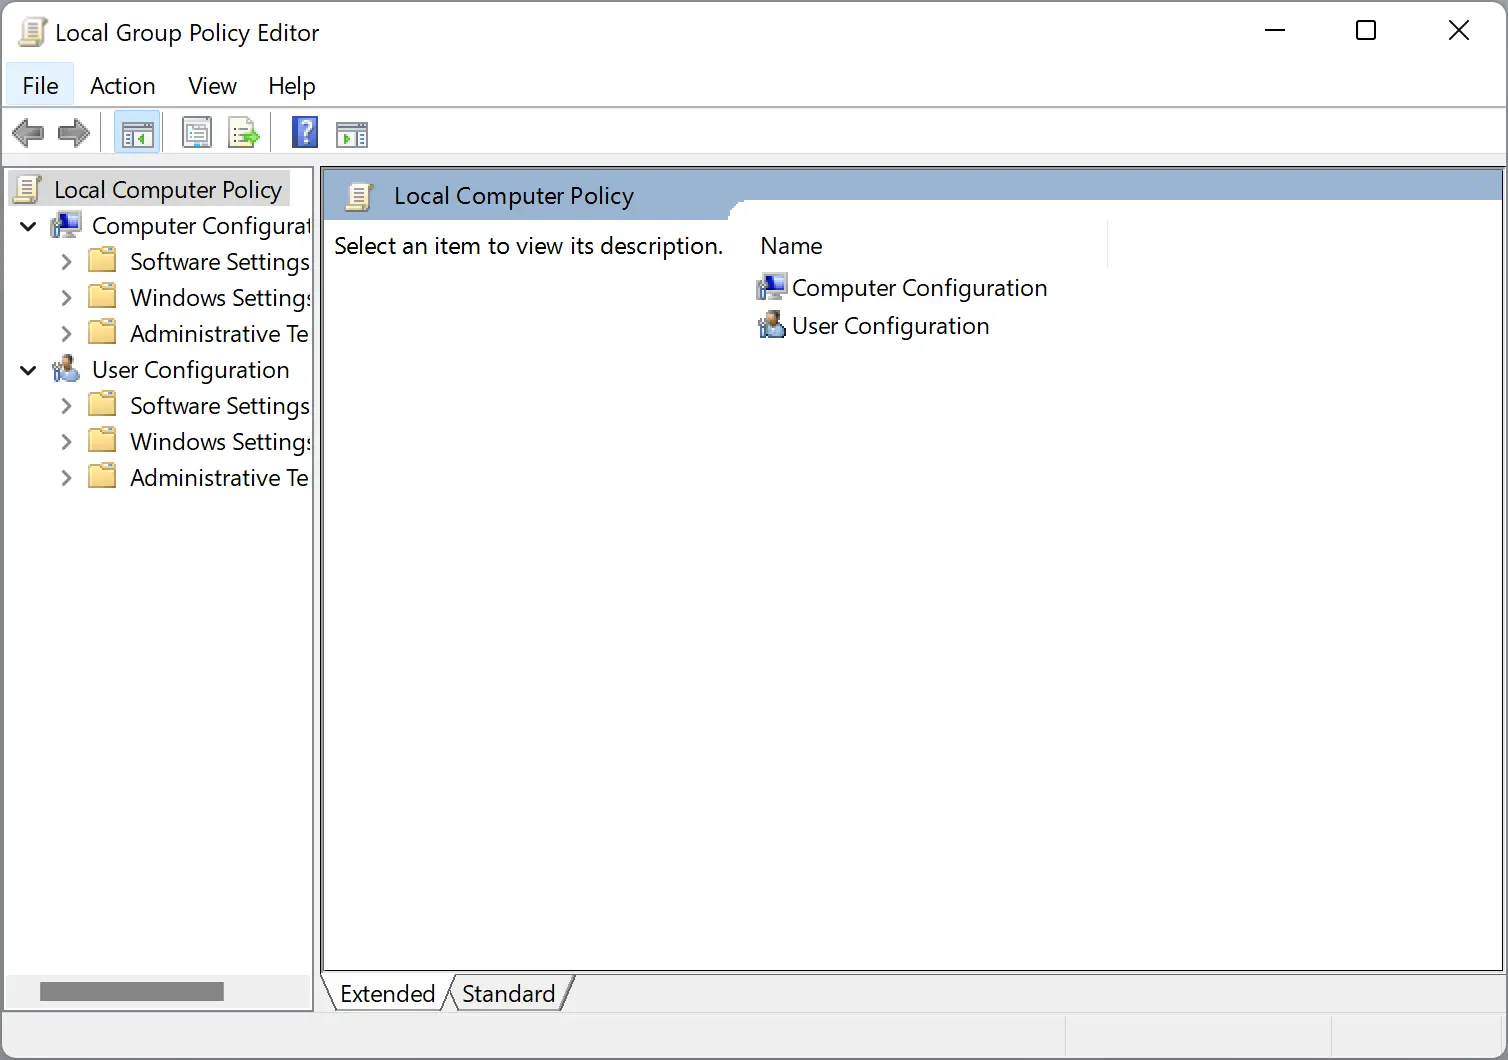
Step 1. First, open Local Group Policy Editor on your PC.
Step 2. Then, navigate to the following path in the left sidebar:-
Computer Configuration > Administrative Templates > Windows Components > Windows Update > Legacy Policies
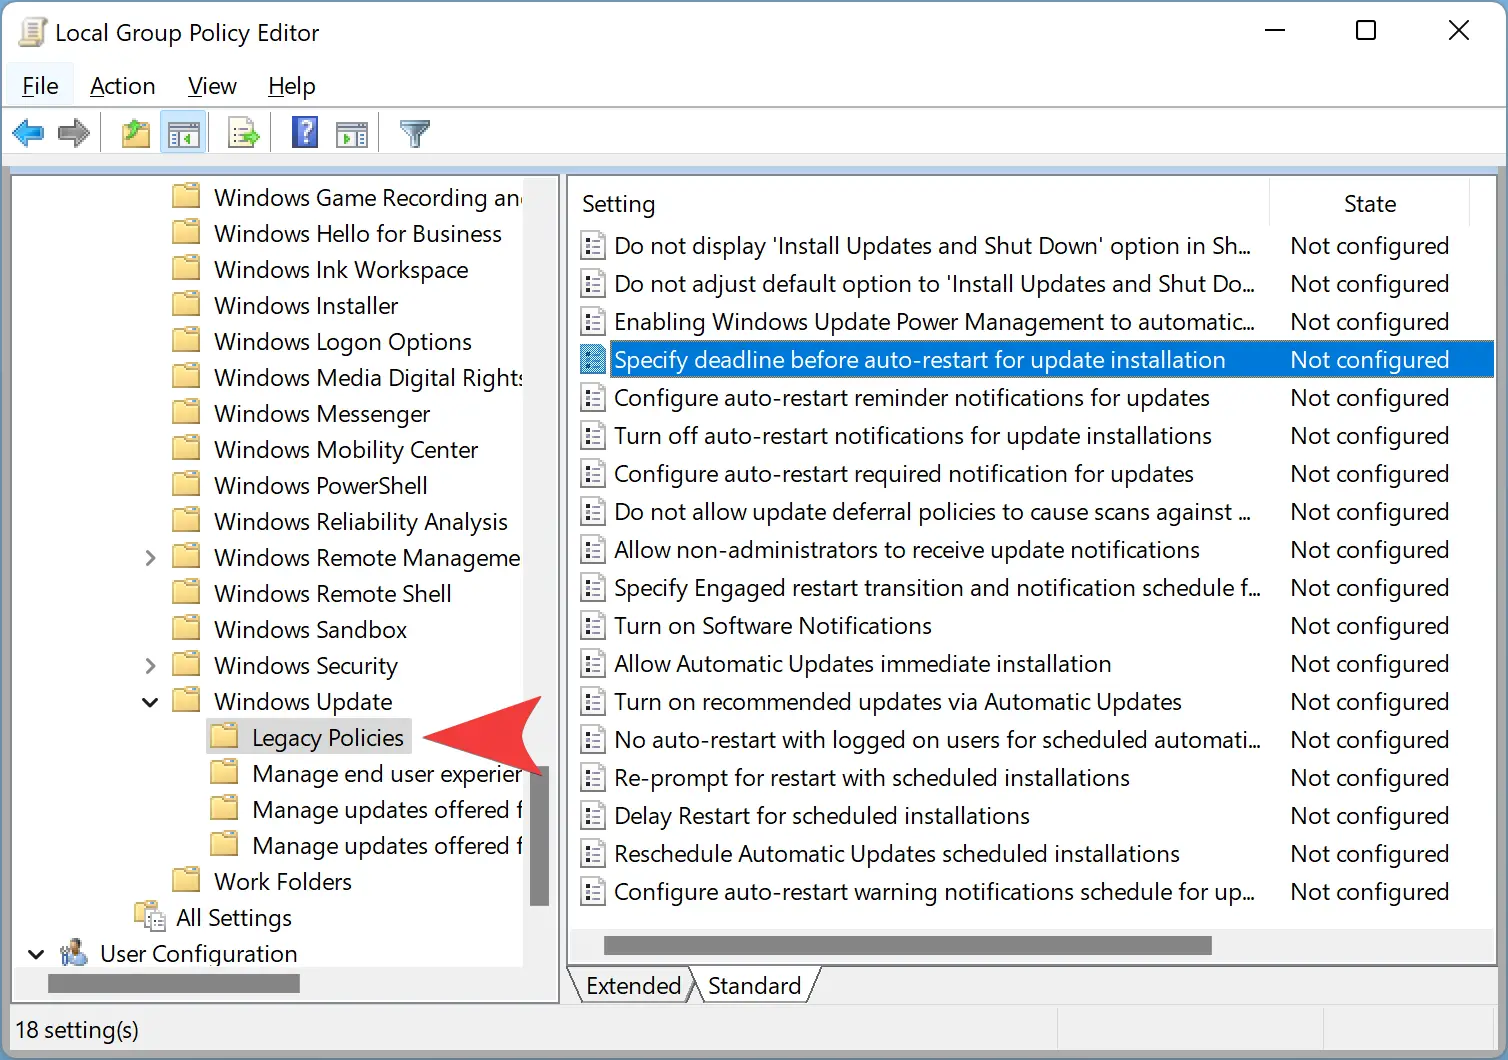
Step 3. On the right side pane, look for the policy name that says, “Specify deadline before auto-restart for update installation.” Then, double-click on this policy to change its settings.
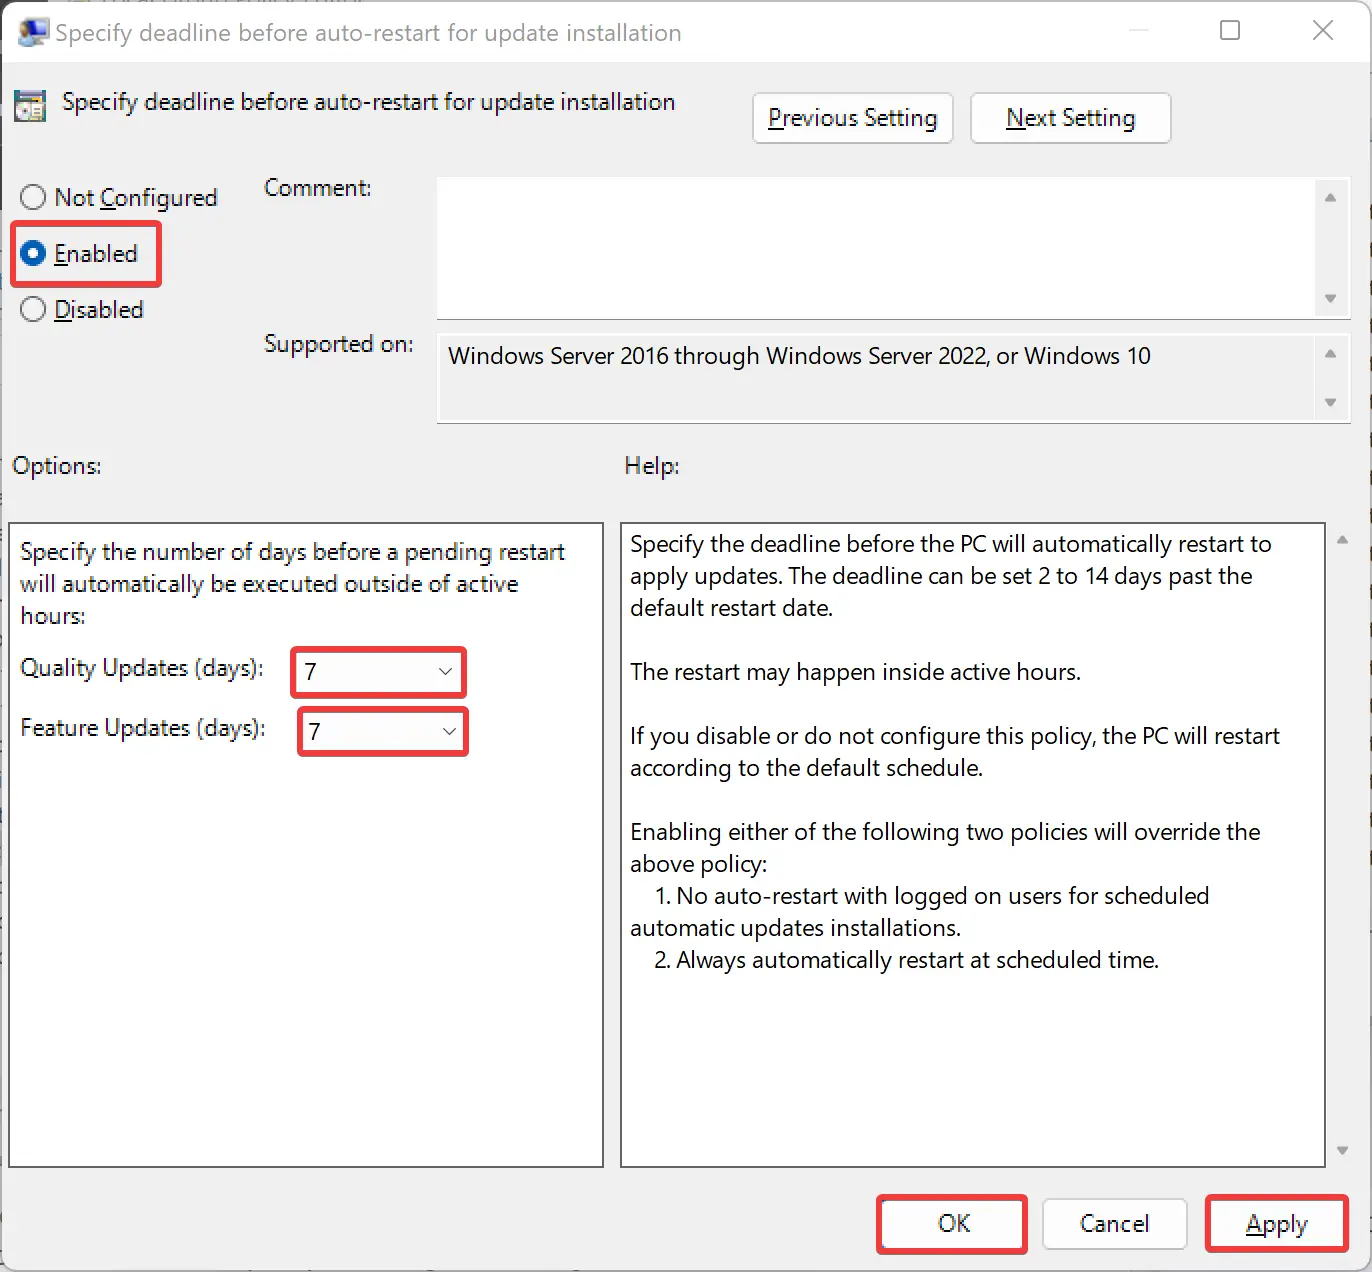
Step 4. Select the Enabled option.
Step 5. Specify the days (allows you to select a minimum of two and a maximum of 30 days) for “Quality Updates” and “Feature Updates.”
Step 6. Then click the Apply button.
Step 7. After that, hit the OK button.
Finally, restart your computer to apply the changes.
After doing the above steps, when Feature Updates or Quality Updates are installed on your PC and you don’t restart your computer, Windows 11 automatically restart your device outside of active hours when the specified days limit is exceeded.
How to Specify Deadlines for Automatic Restart to Windows 10 after Windows Updates?
You can also specify deadlines for automatic restart after updates on Windows 10. For that, you need to have access to the Local Group Policy Editor. If you are using Windows 10 Home Edition, you need to enable gpedit.msc first before proceeding with the steps.
Step 1. Open the Local Group Policy Editor.
Step 2. When Local Group Policy Editor opens on your computer, navigate to the following location in the left side pane:-
Computer Configuration > Administrative Templates > Windows Components > Windows Update
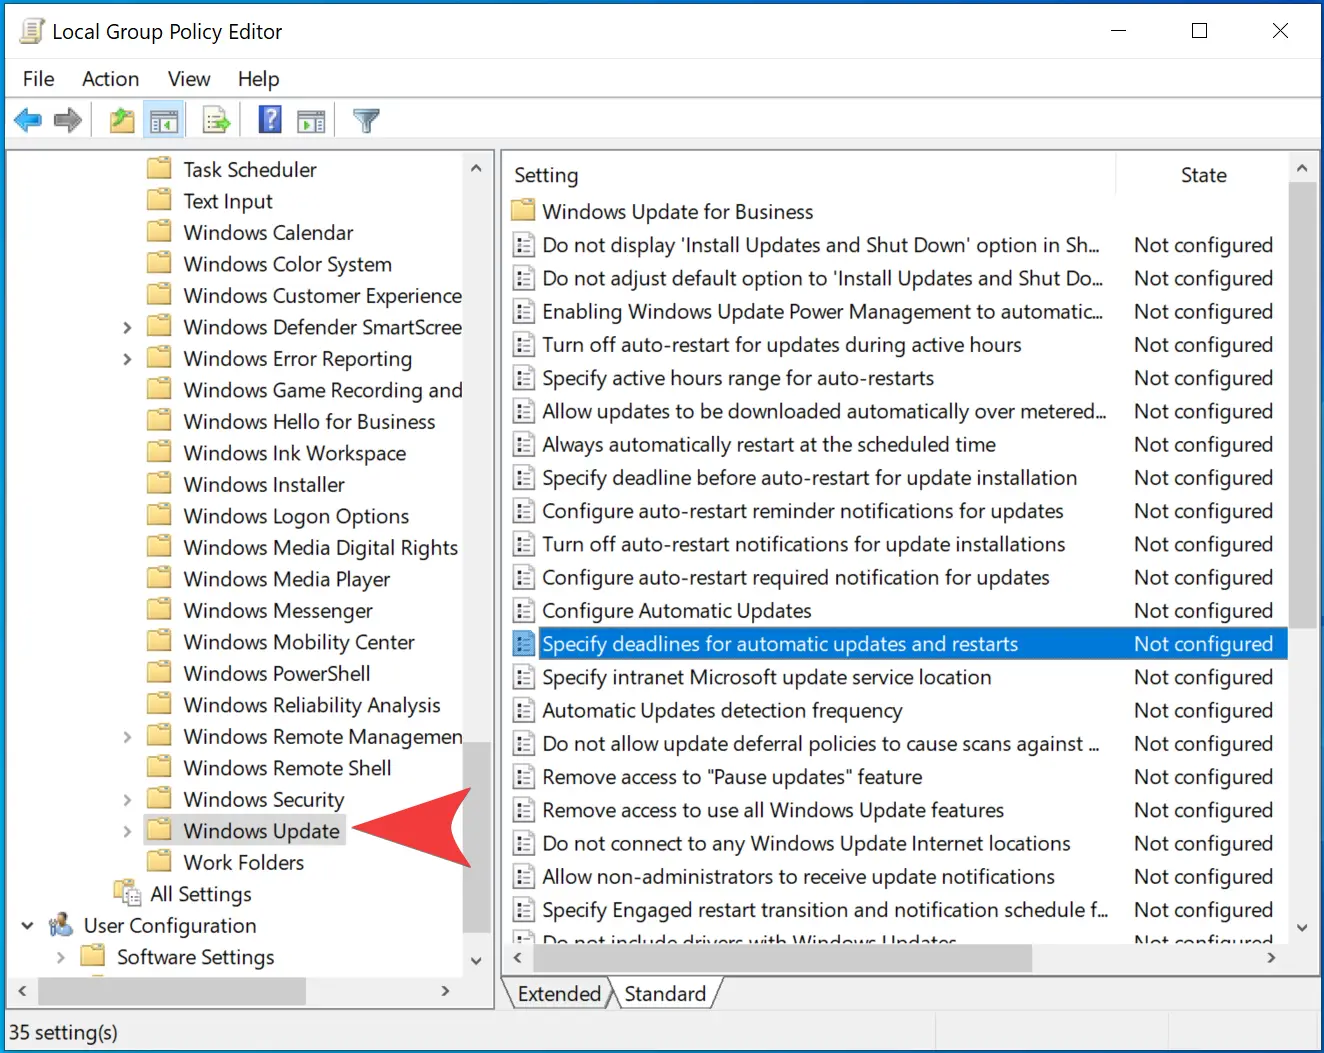
Step 3. Find out the “Specify deadlines for automatic updates and restarts” policy on the right-side panel and double-click on it to open.
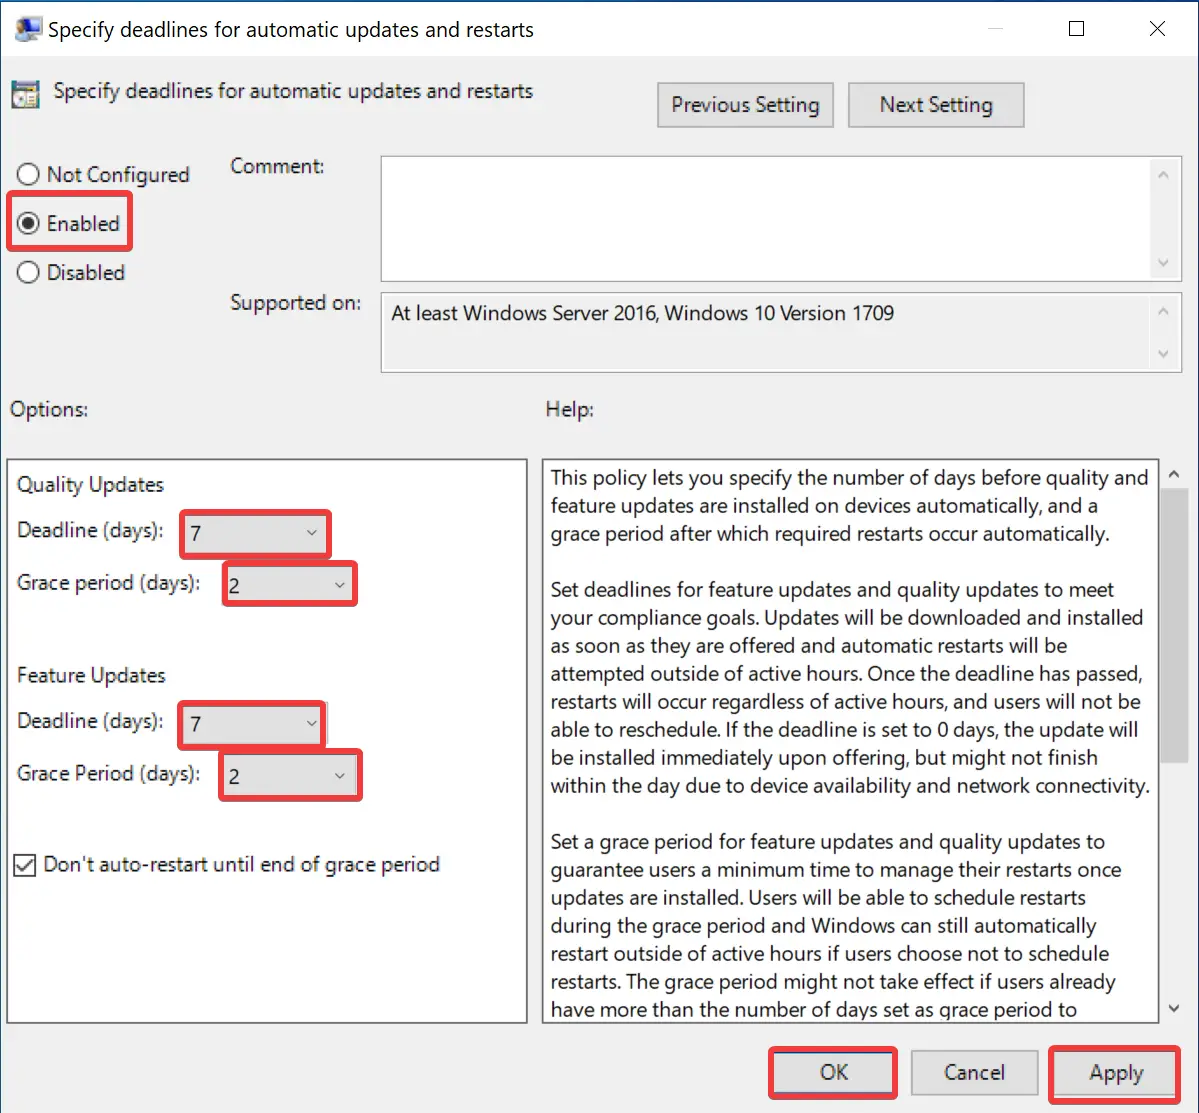
Step 4. Choose the Enabled option.
Step 5. Under the Options selection, you will see Quality Updates and Feature Updates. Quality updates (deadline) are used to specify the number of days before the Windows update launches automatically to install the monthly updates. At the same time, the Feature updates (deadline) are used to automatically determine the number of days before Windows updates launch to install a new version of Windows 10.
Here, you will find an additional option, Grace Period. You can select the number of days to wait before restarting the PC to apply the new changes from the Grace period drop-down menu. Finally, you can check or uncheck the option “Don’t auto-restart until end of grace period,” according to your requirements.
Step 6. When you’re done with the above options, click the Apply button.
Step 7. Then, hit the OK button.
Finally, reboot your computer to apply the changes.
How to Change Auto-Restart Deadline for Updates using Registry Editor?
If you’re running Windows 11/10 Home or due to some reason, you won’t have access to the Local Group Policy Editor; you can change the default restart schedule to restart your device to finish installing updates using the Registry Editor.
To change the auto-restart deadline for updates using Registry Editor, do the following:-
Step 1. First, open Registry Editor.
Step 2. Next, navigate to the following key on the left side of the Registry Editor window:-
HKEY_LOCAL_MACHINE\SOFTWARE\Policies\Microsoft\Windows
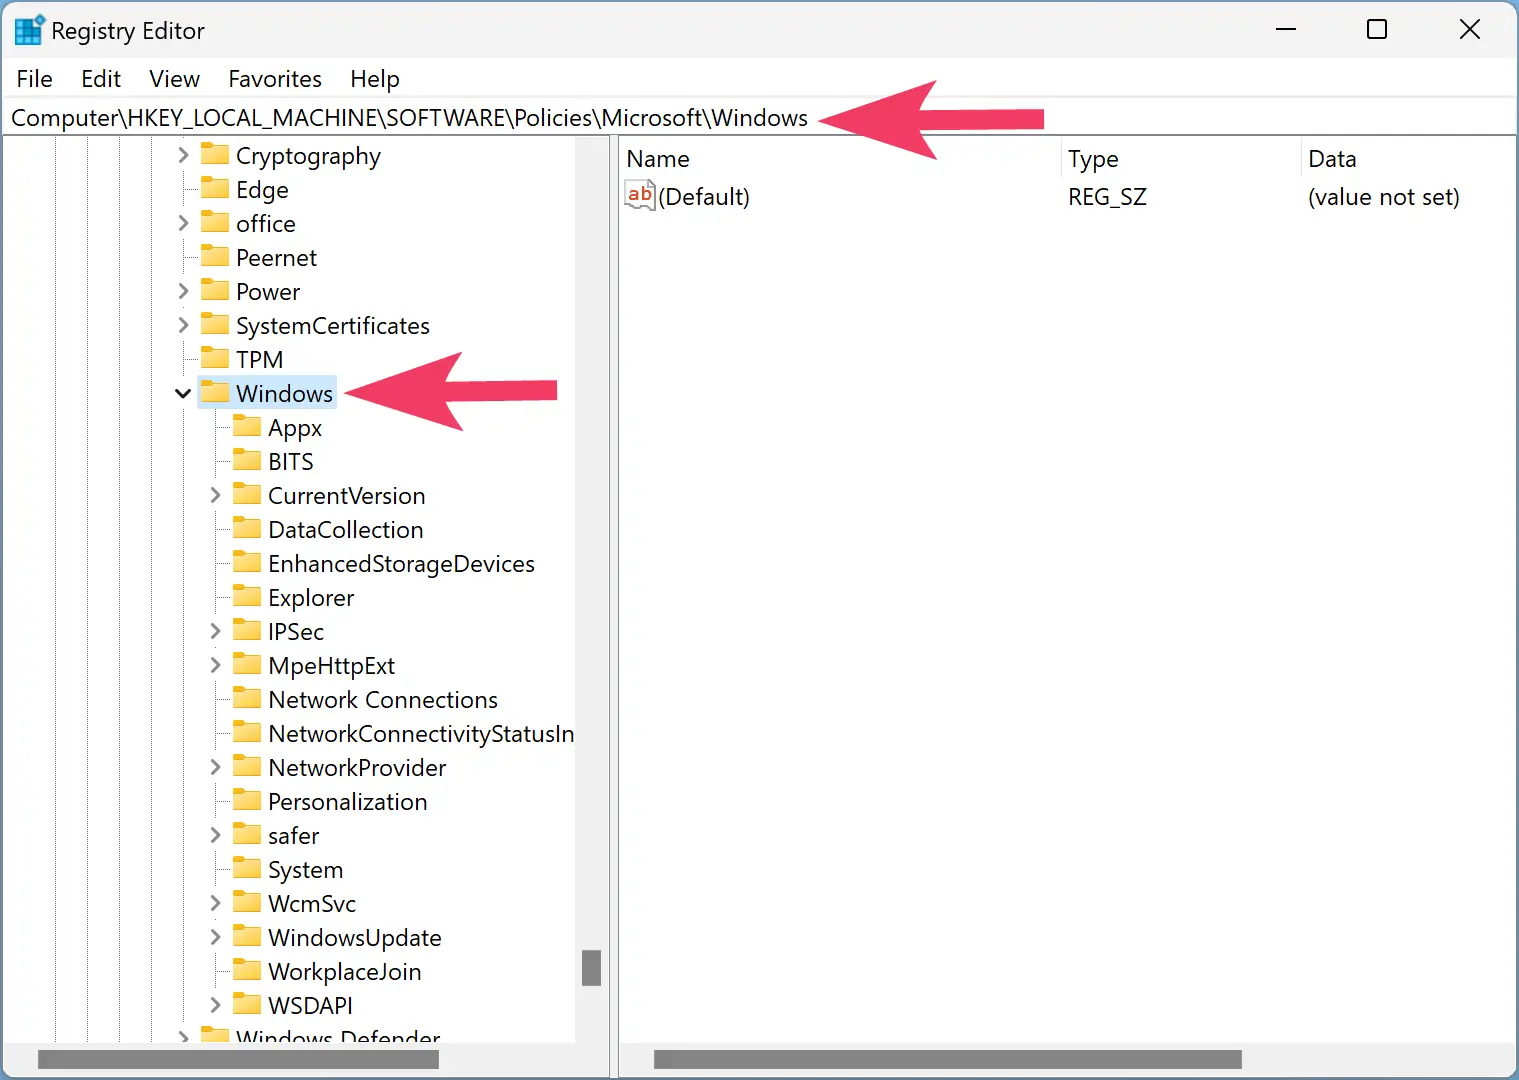
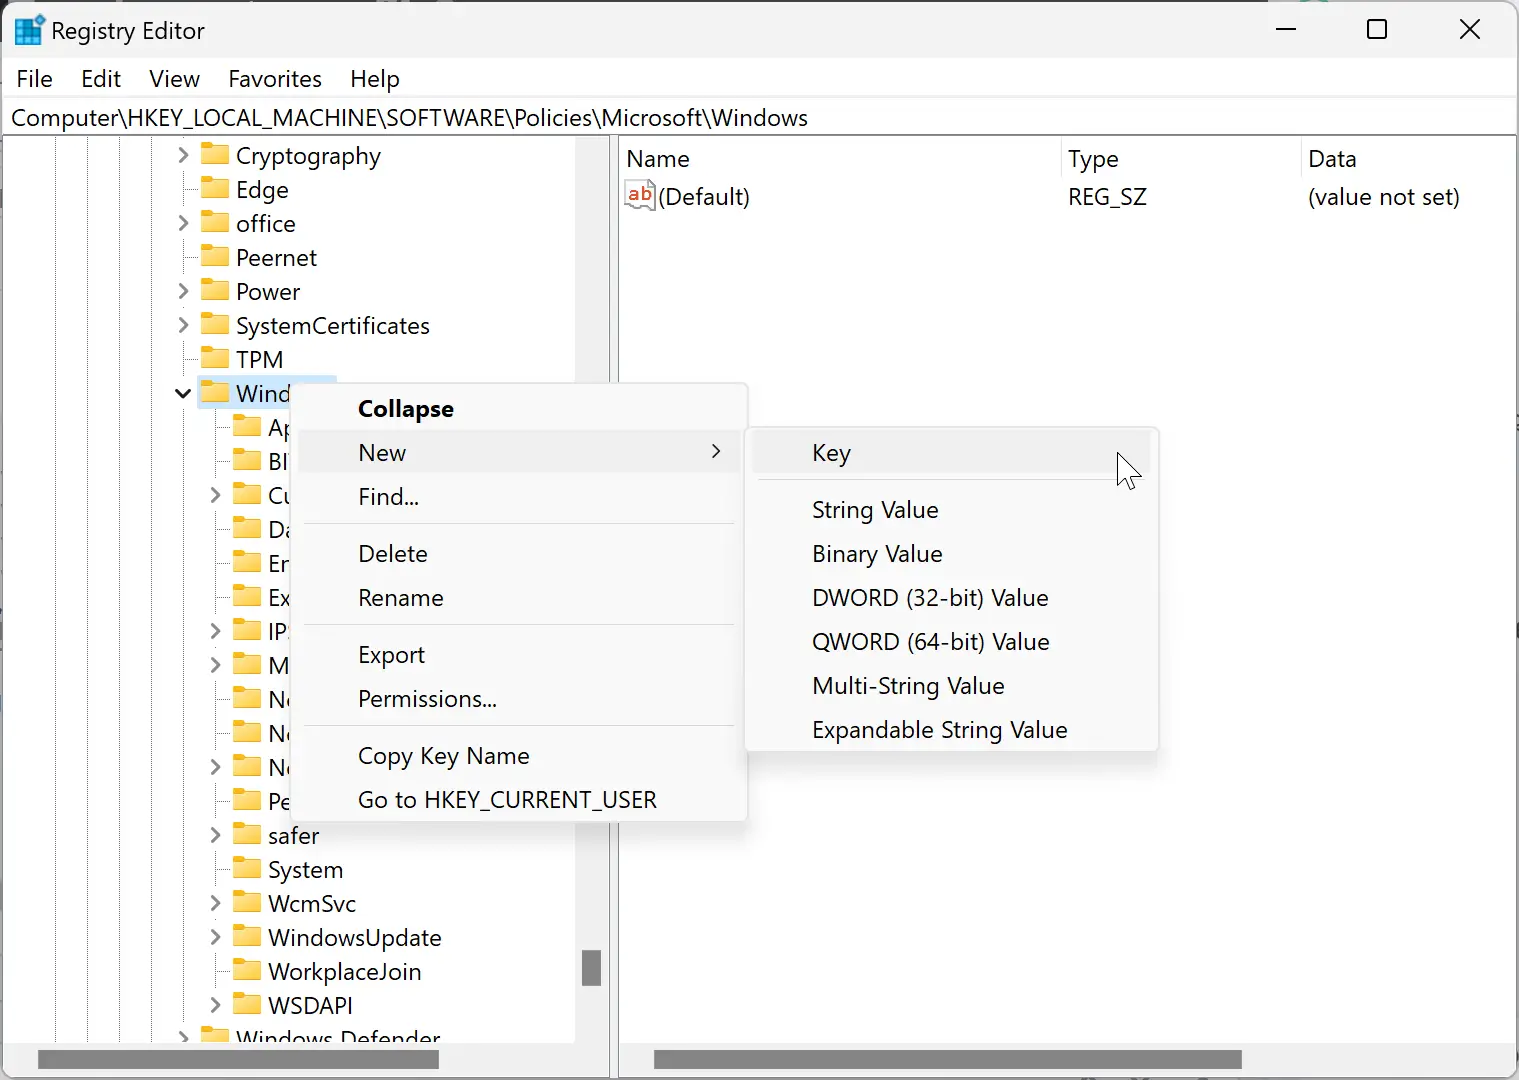
Step 3. After that, right-click the Windows folder and select New > Key.
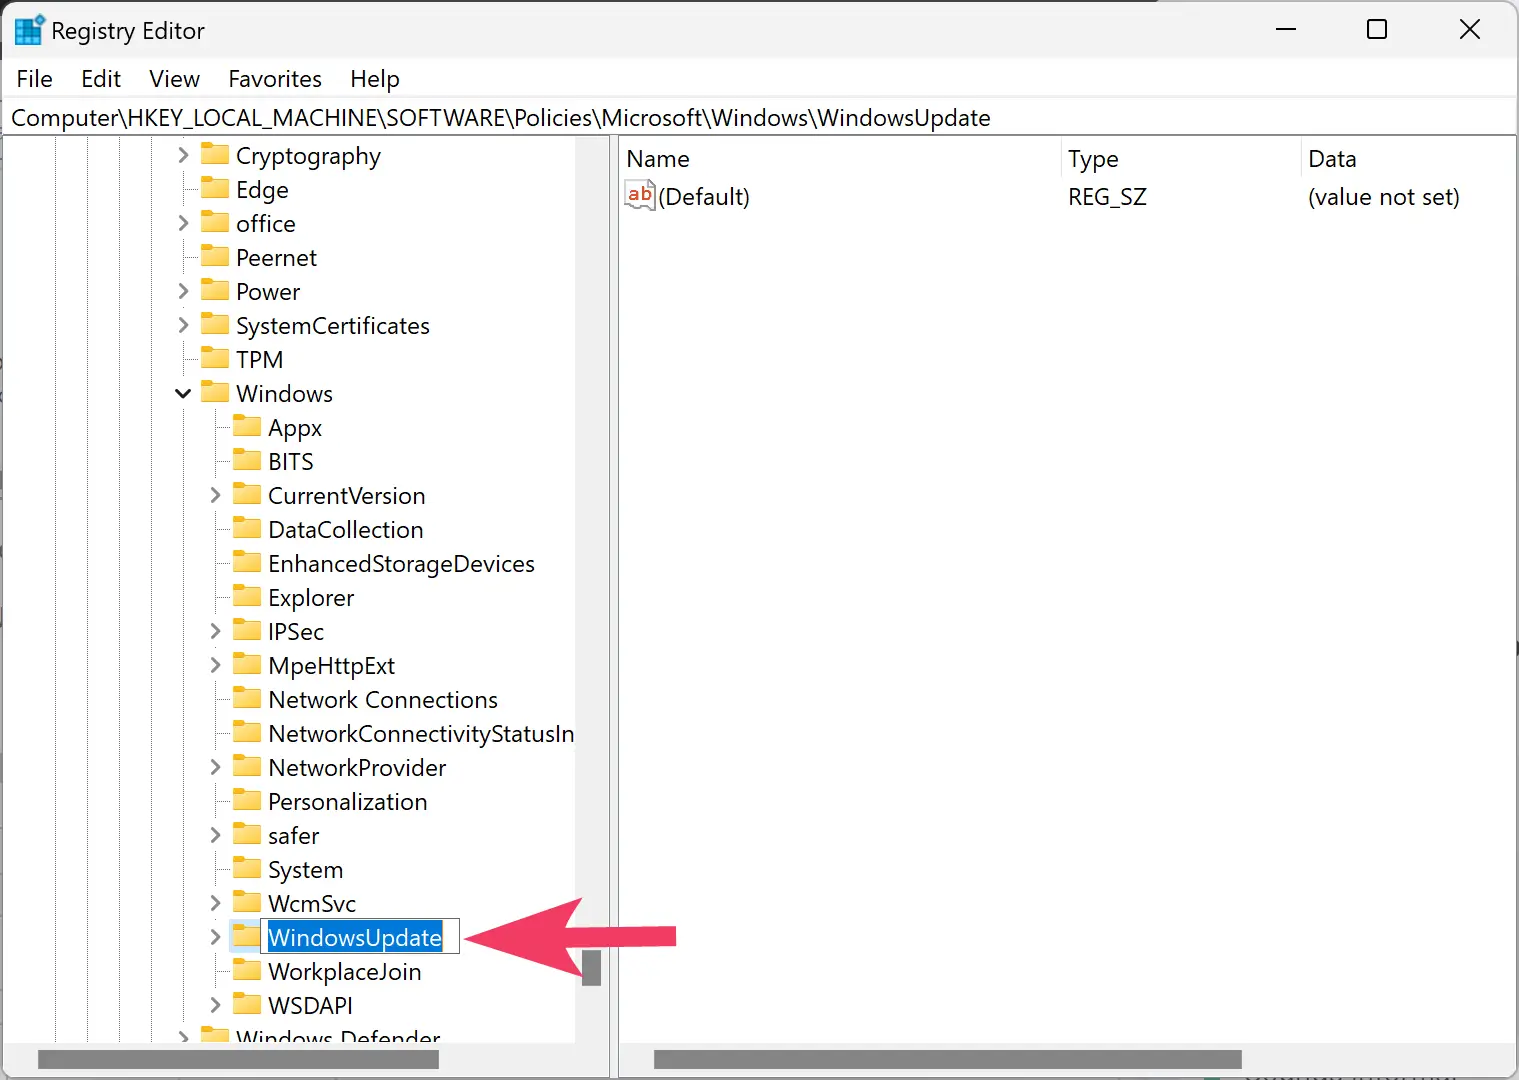
Step 4. Name the newly created key as WindowsUpdate.
Quick Note: If the WindowsUpdate key already exists, you can skip this step.
Step 5. Now, right-click on the WindowsUpdate folder and select New > DWORD (32-bit) Value.
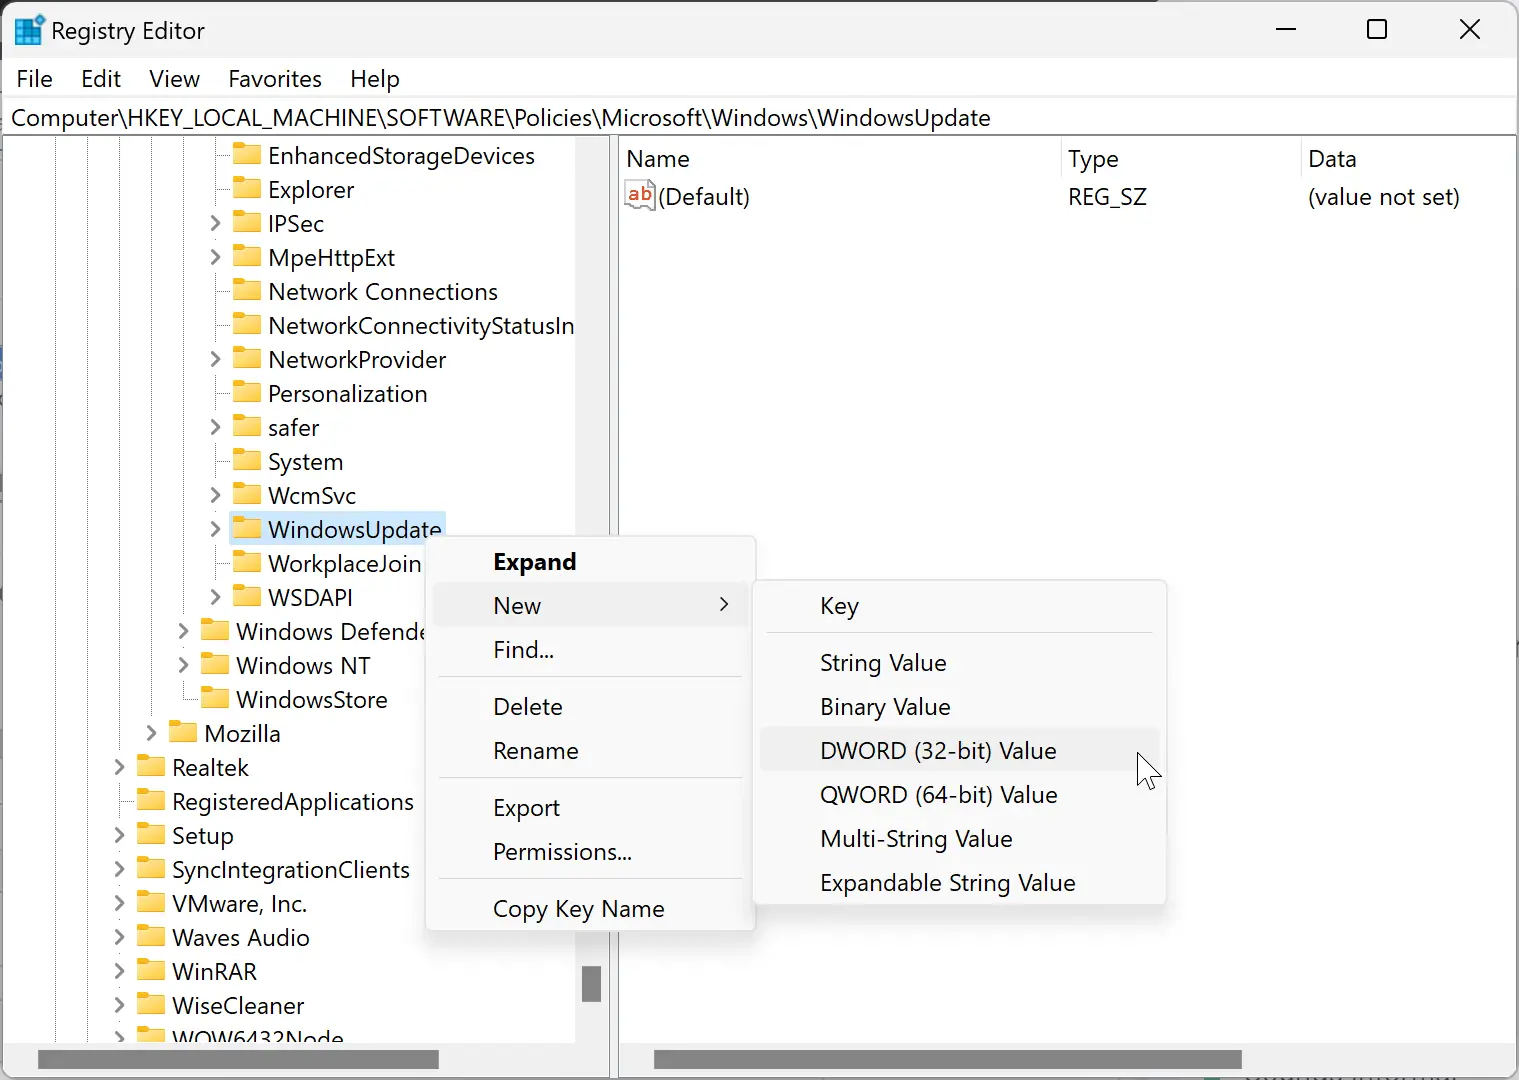
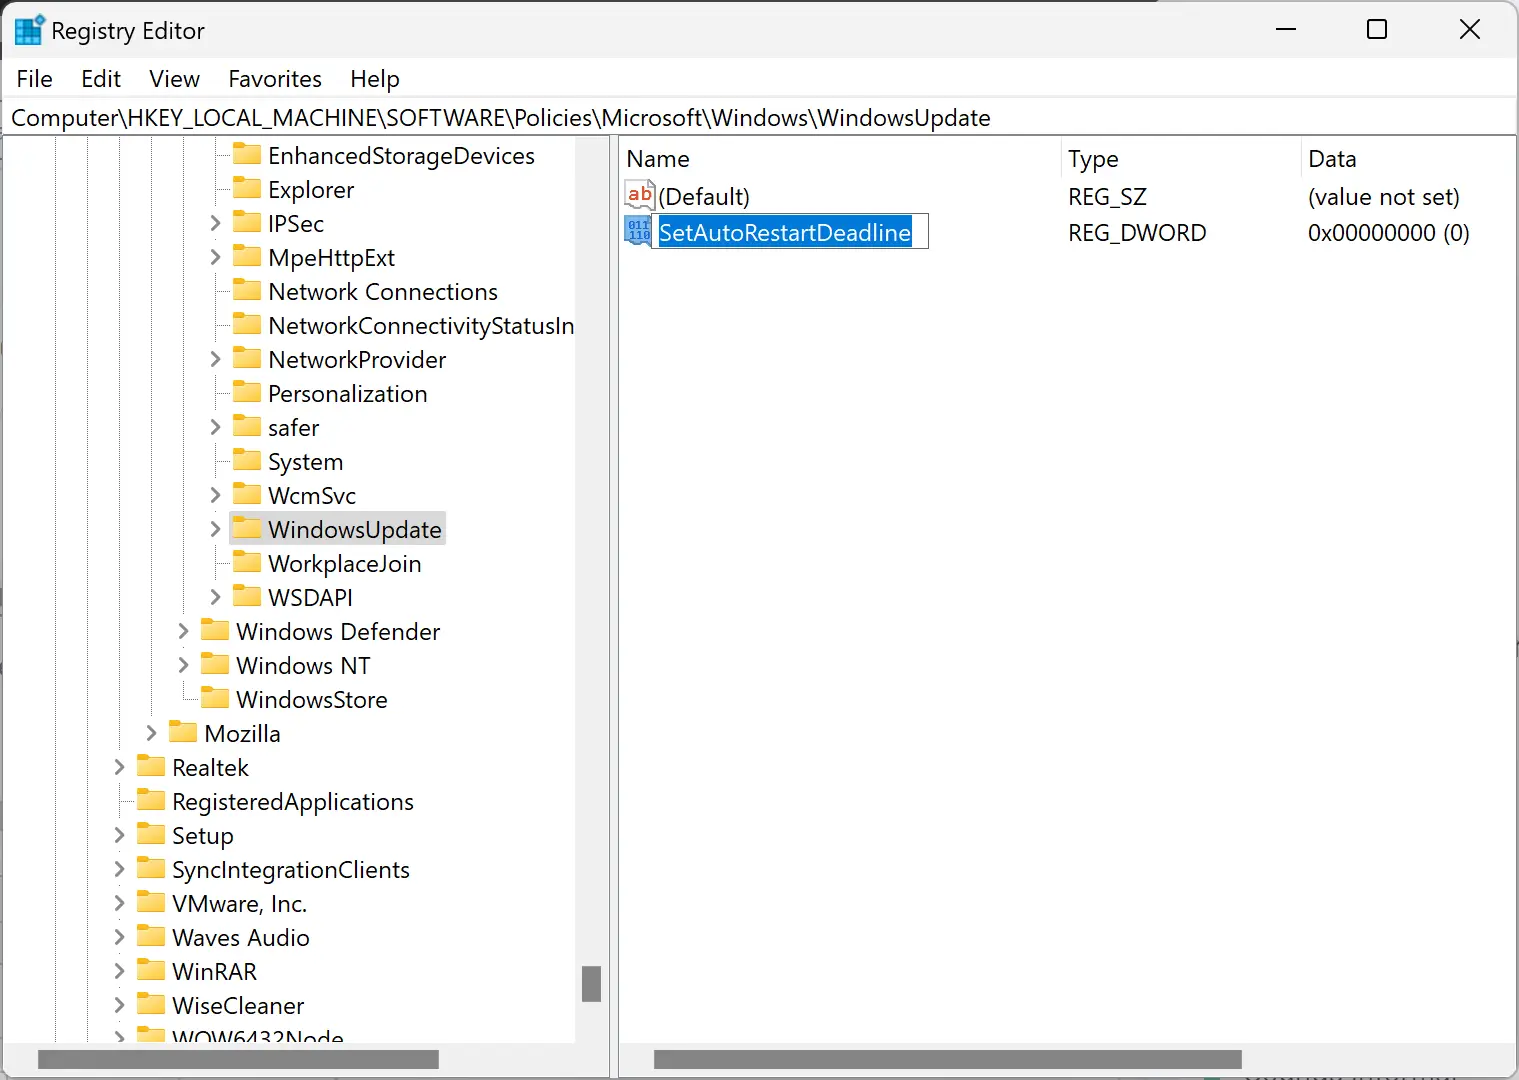
Step 6. Name the newly created REG_DWORD as SetAutoRestartDeadline.
Step 7. After that, double-click on the SetAutoRestartDeadline REG_DWORD on the right-side pane and change the “Value data” from 0 to 1.
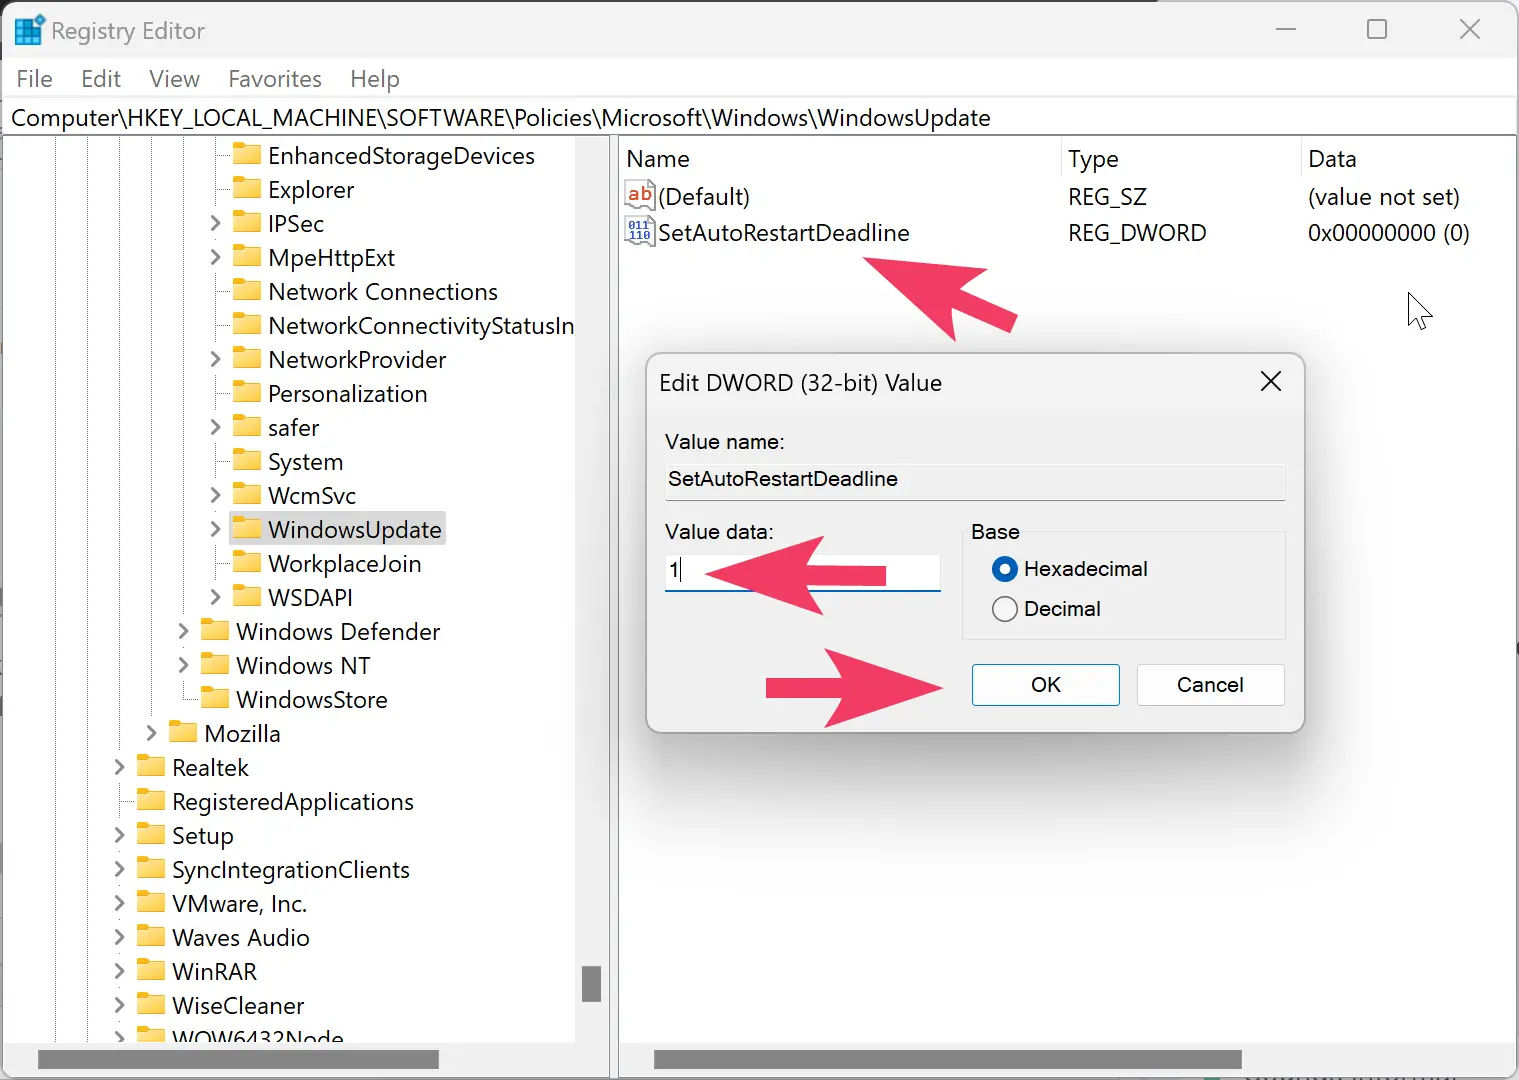
Step 8. Click the OK button.
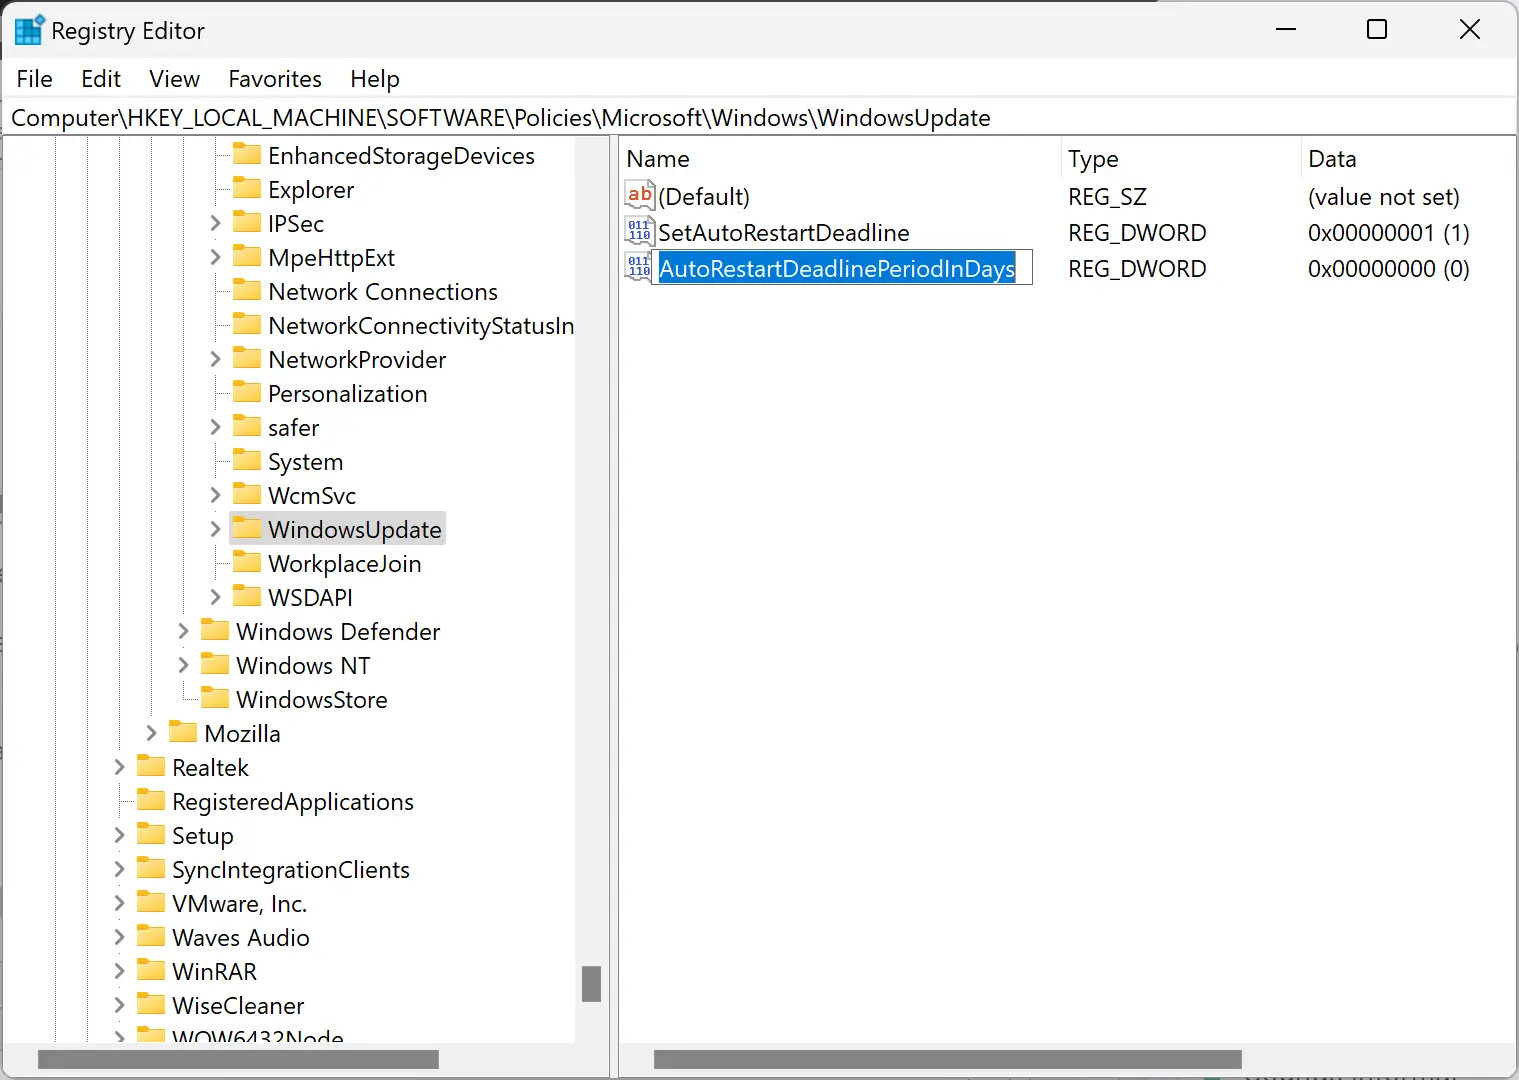
Step 9. Again right-click on the WindowsUpdate key and select New > DWORD (32-bit) Value.
Step 10. Name the newly created REG_DWORD as AutoRestartDeadlinePeriodInDays.
Step 11. Now, double-click on the newly created REG_DWORD AutoRestartDeadlinePeriodInDays and select Decimal under “Base.” Then, set “Value data” from 2 to 30 for the days you want to set for a Quality updates deadline.
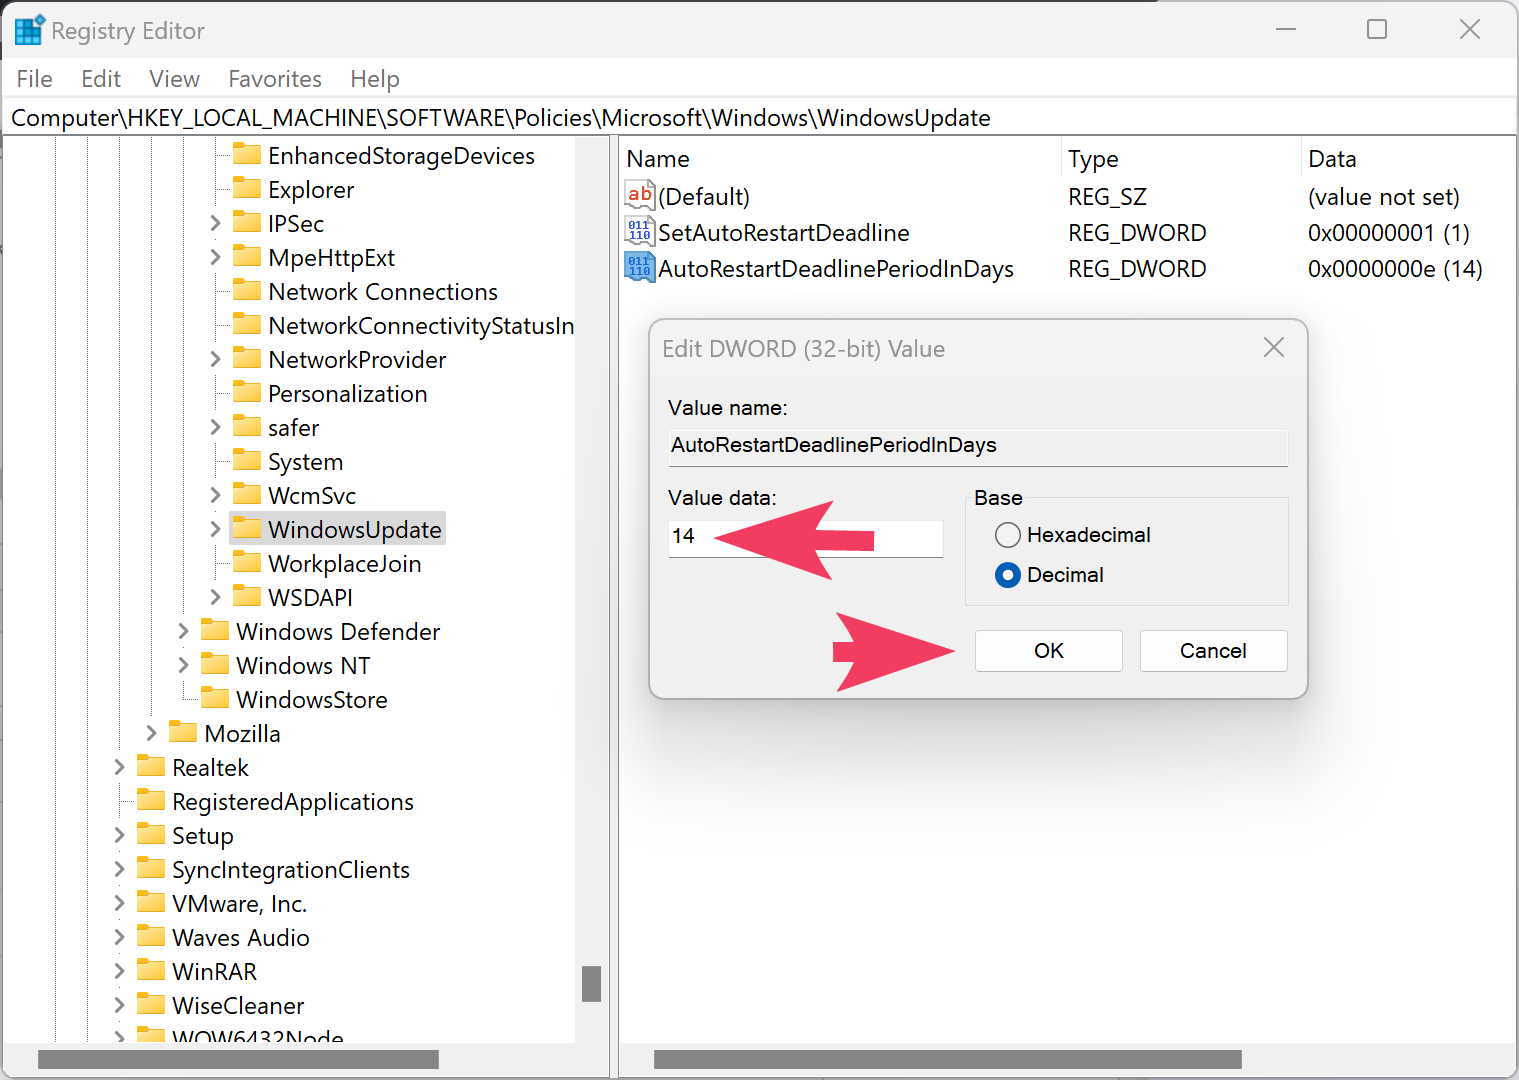
Step 12. Click the OK button.
Step 13. Again, right-click on the WindowsUpdate key and select New > DWORD (32-bit) Value.
Step 14. Name the newly created REG_DWORD as AutoRestartDeadlinePeriodInDaysForFeatureUpdates.
Step 15. Now, double-click on the newly created REG_DWORD AutoRestartDeadlinePeriodInDaysForFeatureUpdates and select Decimal under “Base.” Then, set “Value data” from 2 to 30 for the days you want to set for a Future updates deadline.
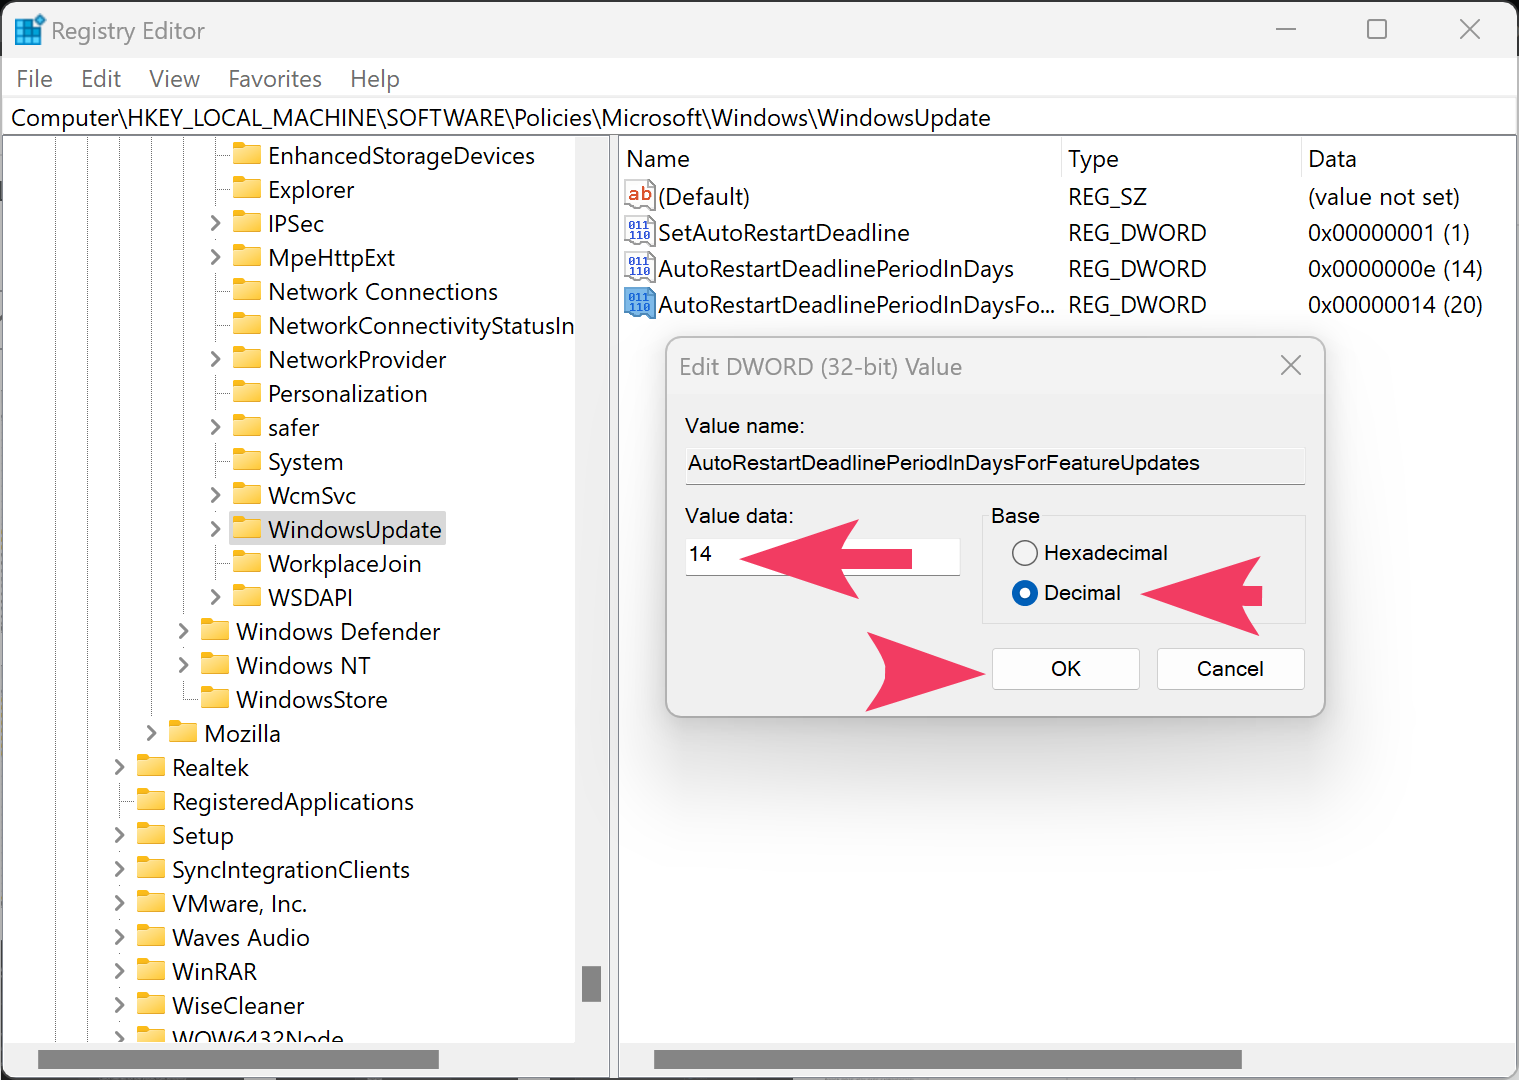
Step 16. Click OK.
Step 17. At last, restart your computer or notebook to apply the changes.
Once you complete the above steps, when a new update is downloaded and installed on your Windows 11 or 10 machines, your device will restart outside the active hours in the day you specified.
Conclusion
In conclusion, Windows 11 and 10 automatically download and install two types of updates: feature updates and quality updates. By default, Windows automatically restarts your computer after the installation of these updates. However, users can configure policies in the Group Policy Editor or Registry to specify deadlines for automatic updates and restarts. With these policies, users can set the minimum and maximum limit of days for the restart of the computer after the installation of updates. Access to the Local Group Policy Editor is necessary to configure these policies. However, if it’s not available, users can modify the registry to change the restart schedule. It is essential to note that Windows 11 Home Edition does not have access to the Local Group Policy Editor. Therefore, users have to enable it first to access it. Overall, the policies allow users to have more control over their devices and the installation of updates.