Are you wondering how to change AutoPlay settings in Windows 11? By default, Windows 11 displays a pop-up window when you insert media or attach a new device to your PC, prompting you to select your desired action. However, if you have changed the settings and Windows does not appear for any action when you plug any external device into your PC, don’t worry! You can easily reset these settings to restore the default behavior of AutoPlay.
AutoPlay is a useful feature that allows you to select the desired option when you plug in an external drive to your PC. Without your permission, your PC will not execute any file or media, preventing potential harm from malicious content.
Thankfully, Microsoft has provided an option on Windows 11 to configure the AutoPlay feature and decide which action to take when you insert an external drive into your PC. Once configured, Windows will automatically detect the disc or media inserted on the PC and take action based on your pre-defined settings.
How to reconfigure AutoPlay settings in Windows 11?
Follow these steps to reconfigure AutoPlay settings in Windows 11:-
Step 1. Simultaneously press Windows + I keys from your keyboard to open the Settings app.
Alternatively, press the Windows key from the keyboard to open the Start menu and click the Settings gear icon.
![]()
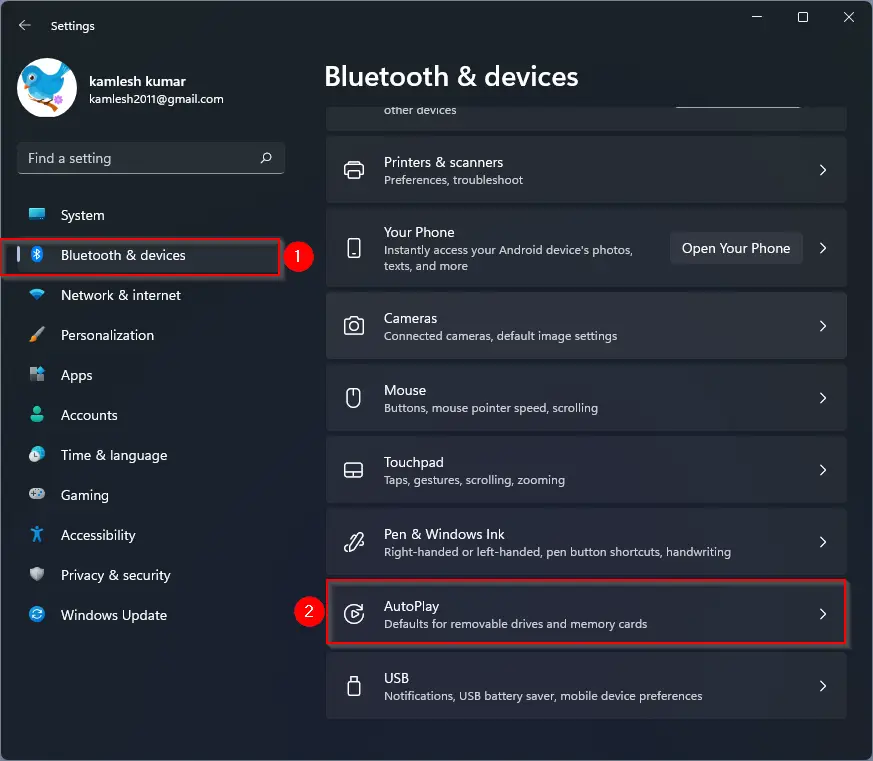
Step 2. In Settings, select Bluetooth & devices category from the left sidebar, and then click on the AutoPlay tab on the right-hand side of it.
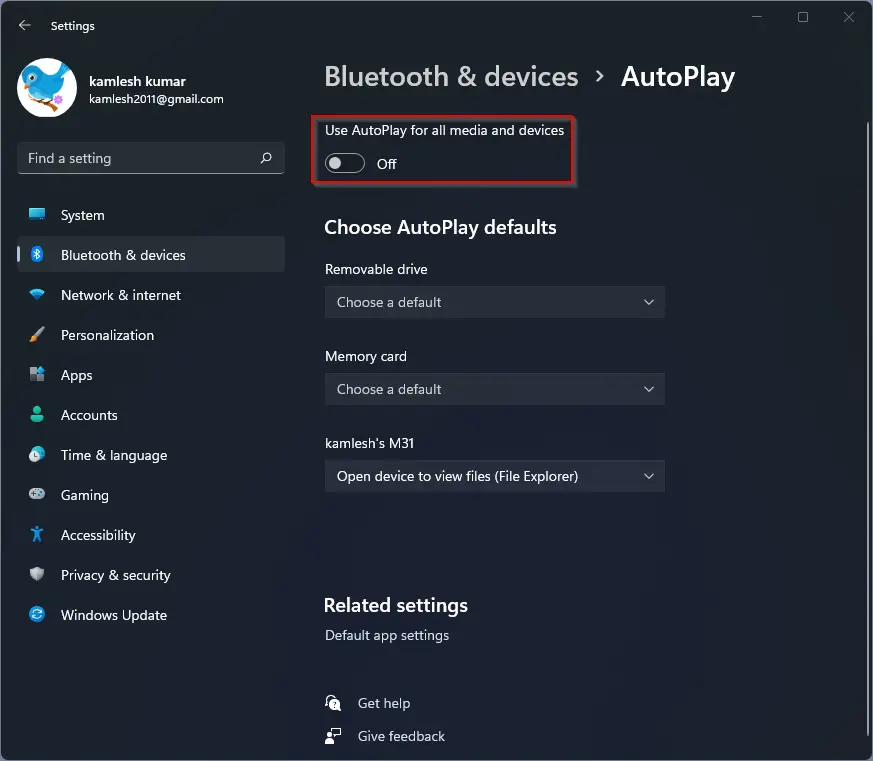
Step 3. If you don’t want to play any media or pop-up window when you insert your external drive to a PC, simply turn the toggle switch to the Off position next to Use AutoPlay for all media and devices.
Once you disable the AutoPlay feature, you need to manually open the contents of external devices when you insert or connect to your computer.
Step 4. However, if you want to customize individual settings, let’s Use AutoPlay for all media and devices turned on. Now, choose the media type that you would like to modify. Select the default action you want AutoPlay to perform when you connect every kind of media or device.
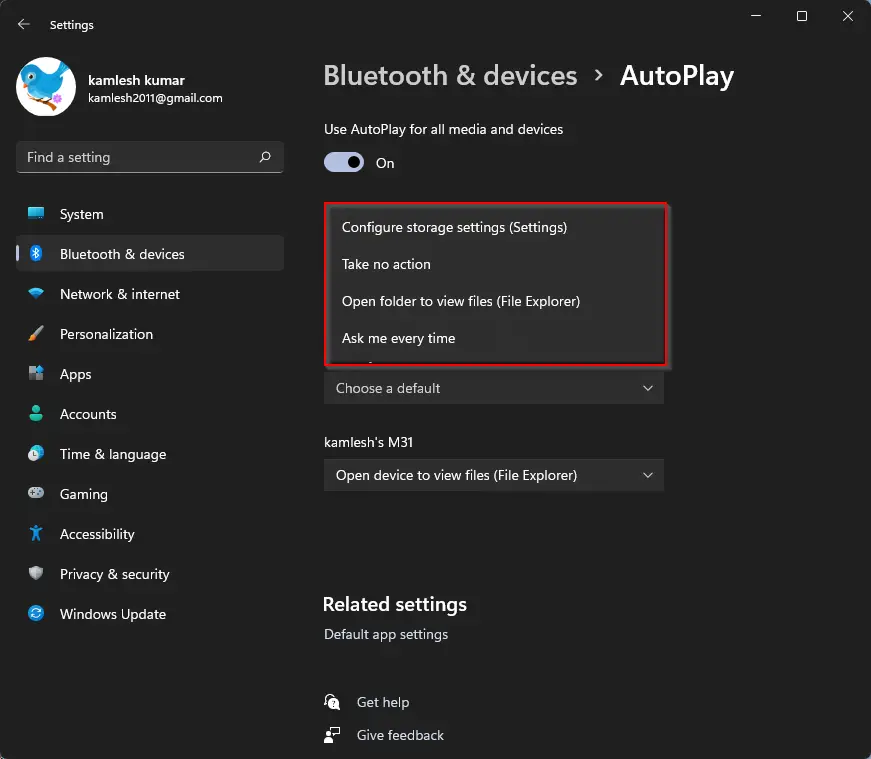
Clicking on the Removable drive drop-down, you can select from the following options:-
- Configure storage settings (Settings)
- Take no action
- Open folder to view files (File Explorer)
- Ask me every time.
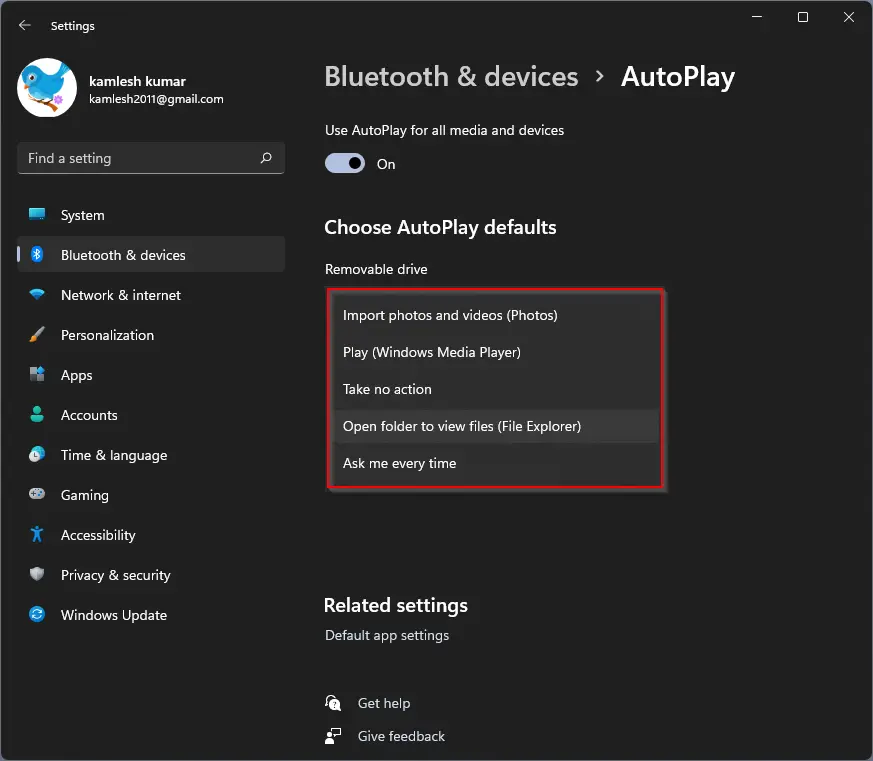
While clicking on the Memory card drop-down menu, you will have the following options to choose from:-
- Import photos and videos (Photos)
- Play (Windows Media Player)
- Take no action
- Open folder to view files (File Explorer)
- Ask me every time.
Select your desired options according to your needs. Next time, when you connect your external media to your PC, Windows 11 will perform your chosen option.
How to configure AutoPlay settings in Control Panel?
Control Panel is still alive on Windows 11, and AutoPlay settings are possible to configure. It would be best if you did the following:-
Step 1. Open Control Panel.
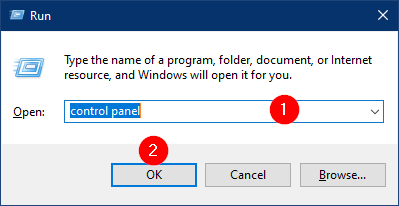
To launch Control Panel on Windows 11, first press Windows + R keys simultaneously from the keyboard to access the Run dialog box. In the Run box, type the control panel and then click on the OK button.
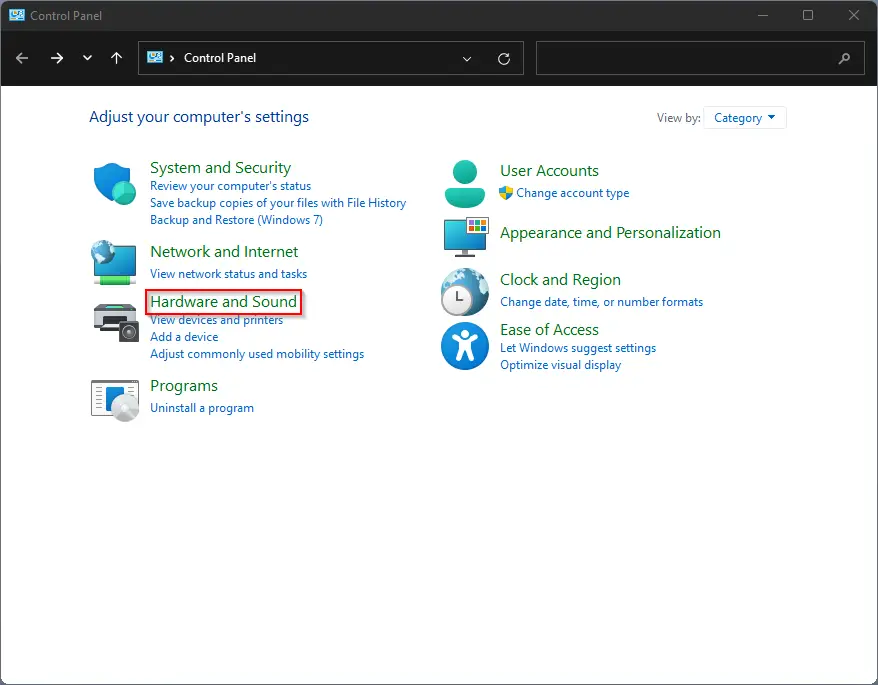
Step 2. On the Control Panel window, click on the Hardware and Sound category.
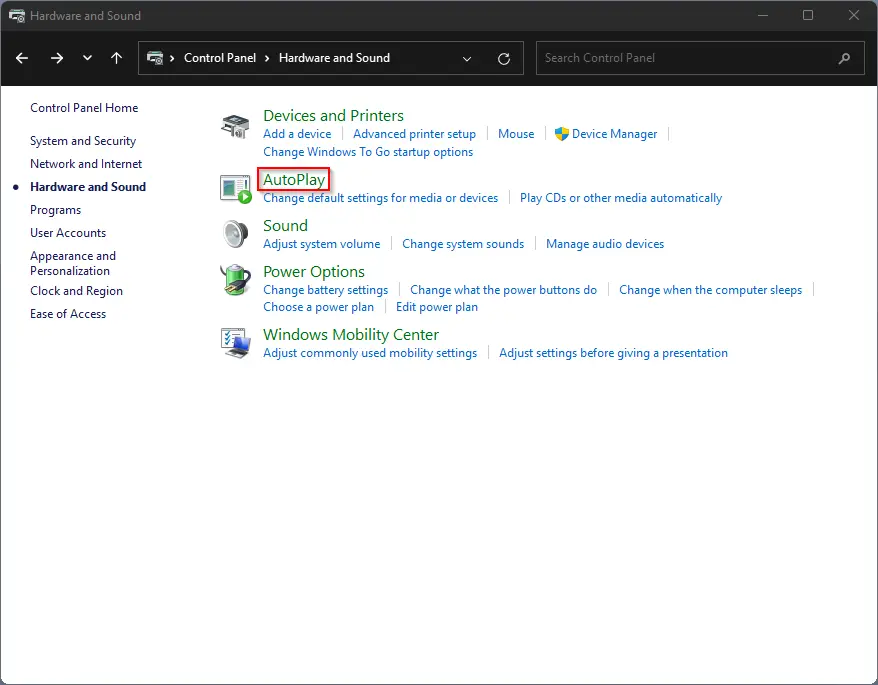
Step 3. Now, click on the AutoPlay link on the right-side pane.
Step 4. Once you perform the above steps, you can configure AutoPlay on the upcoming window. Unlike the Settings app, which allows you to configure Removable drives and Memory cards only, you can configure many types of devices here. From here, you can configure the following types of external devices:-
- Removable drive
- Memory card
- DVDs
- Blu-ray discs
- CDs
- Software
- Phones (if you have connected to your PC)
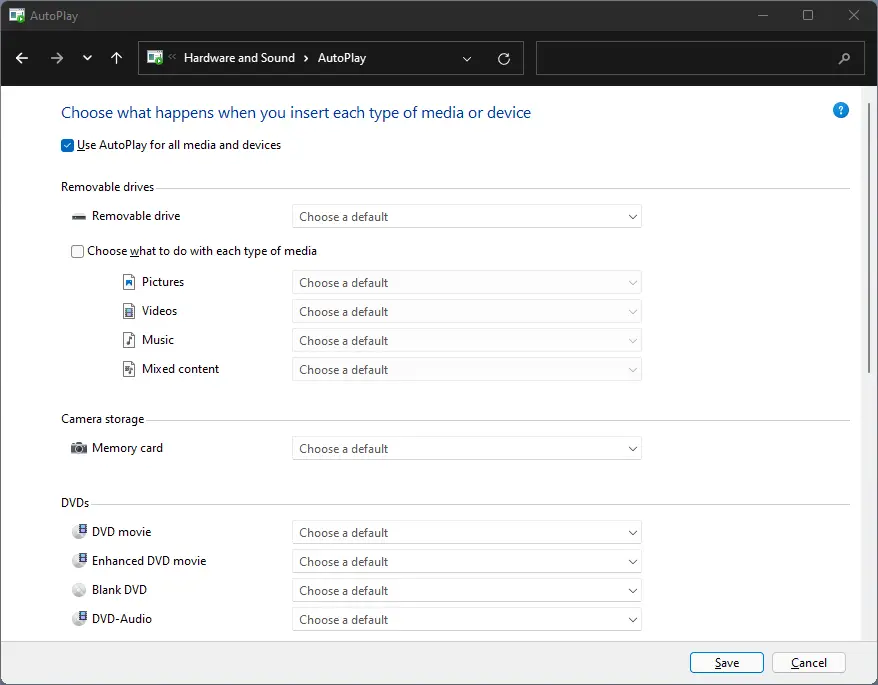
Step 5. Once you set the default behavior for the specific types of devices, click on the Save button in the bottom right corner.
How to Enable or Disable AutoPlay via Registry Editor?
AutoPlay is a helpful feature that automatically opens a pop-up window when you insert media or attach a new device to your PC. However, if you need to enable or disable AutoPlay for some reason, you can do so via the Registry Editor in Windows 11. The Registry Editor is a powerful tool that allows you to edit the Windows registry and make changes to your system’s settings. Here’s how you can enable or disable AutoPlay via Registry Editor:-
Step 1. Press the Windows + R to open the Run dialog box.
Step 2. Type “regedit” and press Enter to open the Registry Editor.
Step 3. In the Registry Editor, navigate to the following path:-
HKEY_CURRENT_USER\Software\Microsoft\Windows\CurrentVersion\Explorer\AutoplayHandlers
Step 4. Right-click on the free space on the right sidebar and select New > DWORD (32-bit) Value, and name it “DisableAutoplay.”
Step 5. Double-click on DisableAutoplay REG_DWORD and set its “Value data” to the following:-
- 0 = Enable the feature.
- 1 = Disable the feature.
Step 6. Click OK and close the Registry Editor.
After following these steps, AutoPlay will be enabled or disabled based on the value you set in the Registry Editor. It’s important to note that the Registry Editor is a powerful tool, and any changes you make can significantly impact your system’s functionality. Therefore, it’s recommended that you create a backup of your registry before making any changes.
Conclusion
In conclusion, AutoPlay is a useful feature in Windows 11 that allows you to select the desired action when you insert an external device or media into your PC. By default, Windows 11 prompts you to select your desired action when you insert media or attach a new device to your PC. However, if you have changed the settings and Windows does not appear for any action when you plug any external device into your PC, don’t worry! You can easily reset these settings to restore the default behavior of AutoPlay. In this article, we have discussed how to reconfigure AutoPlay settings in Windows 11 via the Settings app, Control Panel, and Registry Editor. By following these steps, you can customize your AutoPlay settings and make Windows 11 work the way you want it to. Remember, the Registry Editor is a powerful tool, and any changes you make can significantly impact your system’s functionality, so it’s essential to create a backup of your registry before making any changes.