Windows 11 has introduced many exciting features, including new visual elements that make it more user-friendly. One such feature is the cursor blink rate, which controls the speed at which the text cursor blinks in various applications. The default setting for the cursor blink rate in Windows 11 is set to 530 milliseconds, but you may find that this speed is either too slow or too fast for your liking. In this article, we’ll show you how to change the cursor blink rate in Windows 11 to suit your preferences better.
Changing the cursor blink rate in Windows 11 is a straightforward process that can be completed in a few simple steps. By adjusting this setting, you can personalize your Windows 11 experience and make your cursor blink at a speed that is comfortable and suitable for you. Whether you are a writer, programmer, or just an everyday user, changing the cursor blink rate can make a significant difference in your daily workflow. So, let’s dive into the steps required to change the cursor blink rate in Windows 11.
The text cursor is a vital part of any word processing application. However, if you find it hard to locate or see the text cursor in a text editor or field, you can adjust the cursor blink rate to make it more visible. In this article, we will show you how to change the text cursor blink rate in Windows 11 via the Control Panel app or the Windows Registry Editor.
How to Change Cursor Blink Rate in Windows 11 using Control Panel?
Changing the text cursor blink rate via the Control Panel is a straightforward process that can be completed in a few simple steps. Here’s how to do it:-
Step 1. First, launch Control Panel app.
Step 2. Once the Control Panel app opens, select View by to Large Icons to list individual icons for each setting.
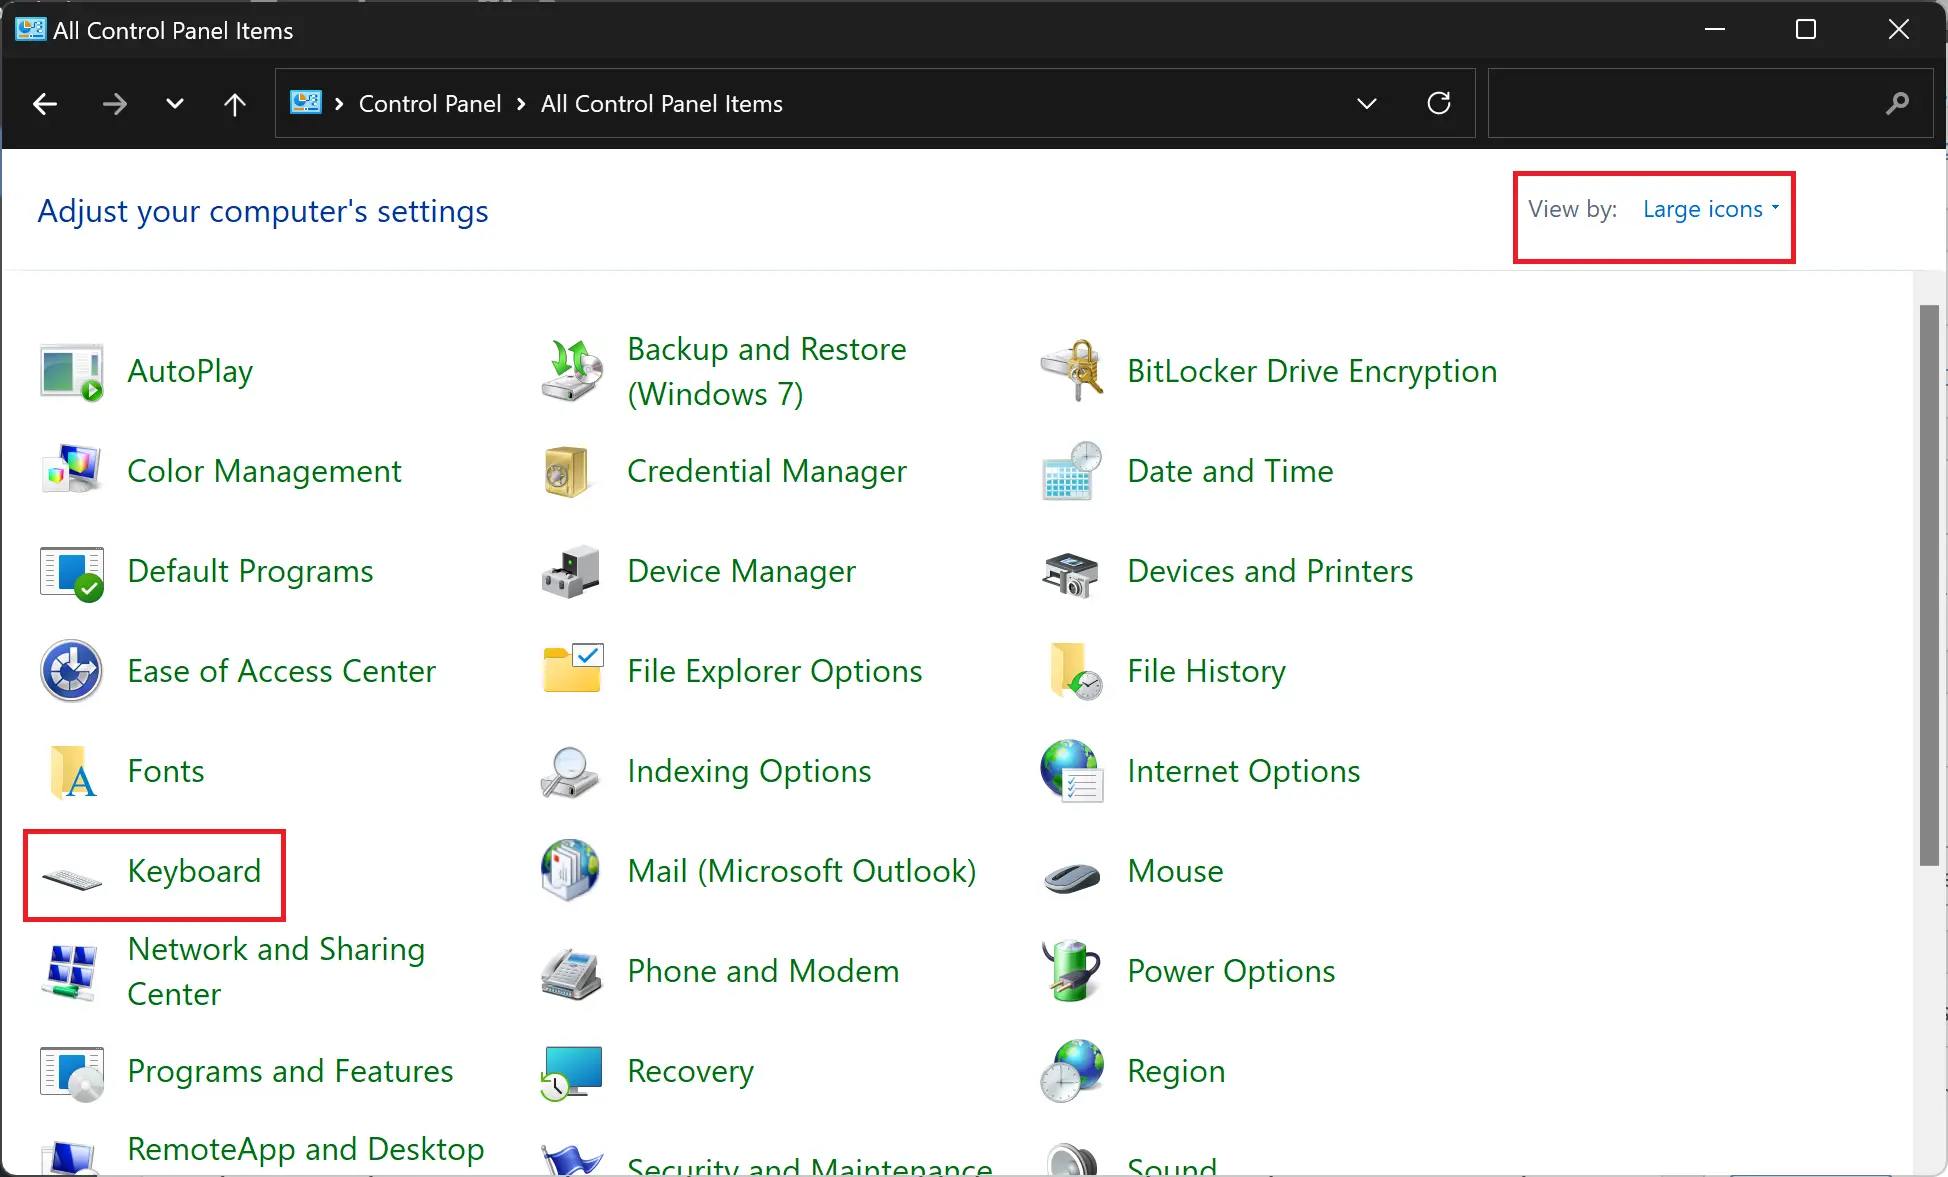
Step 3. Now, scroll down the list and click on Keyboard.
Step 4. In the Keyboard Properties dialog, switch to the Speed tab. Under the Cursor blink rate section, use the slider and move it to the left to decrease the speed or to the right to increase the speed.
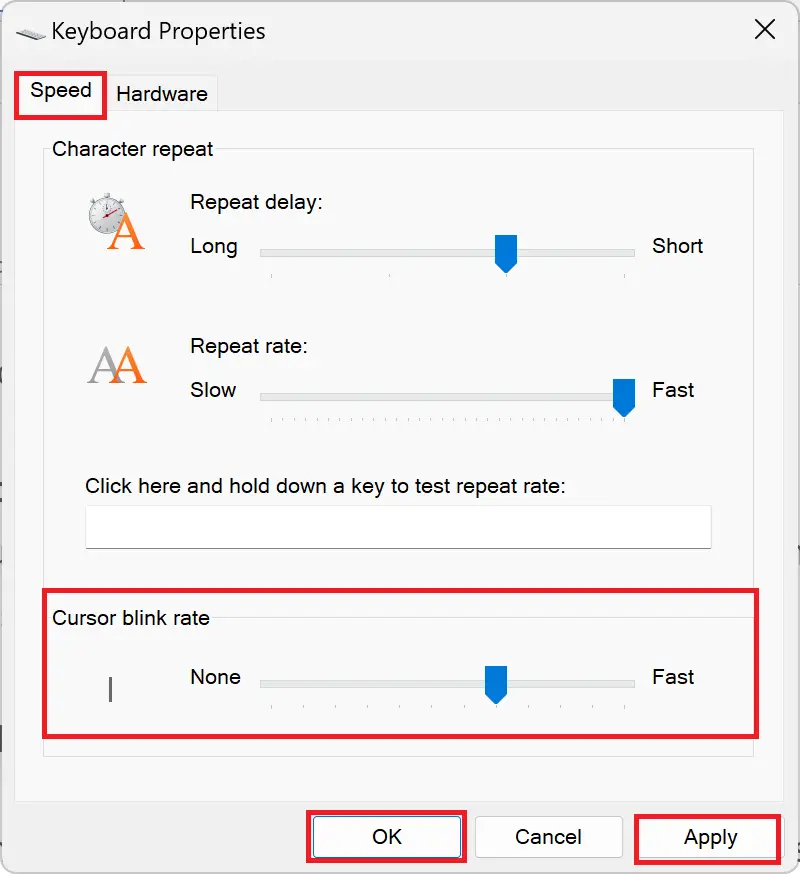
Step 5. Click Apply to save the changes.
Step 6. Click OK to exit.
How to Change Cursor Blink Rate in Windows 11 with Registry Editor?
Alternatively, you can change the text cursor blink rate via the Windows Registry Editor. Here’s how to do it:-
Step 1. Open Registry Editor by typing “regedit” in the search bar and selecting the app.
Step 2. Then, browse or navigate to the following key in the left sidebar of the registry editor:-
HKEY_CURRENT_USER\Control Panel\Desktop
Step 3. Now, right-click on the free space on the right pane of the Desktop folder and select New > String Value.
Step 4. Name the new String value as CursorBlinkRate.
Step 5. After that, double-click CursorBlinkRate and enter the Value data in a number between 200 (faster) and 1200 (slower) milliseconds. A Value data of -1 will disable the cursor blinking.
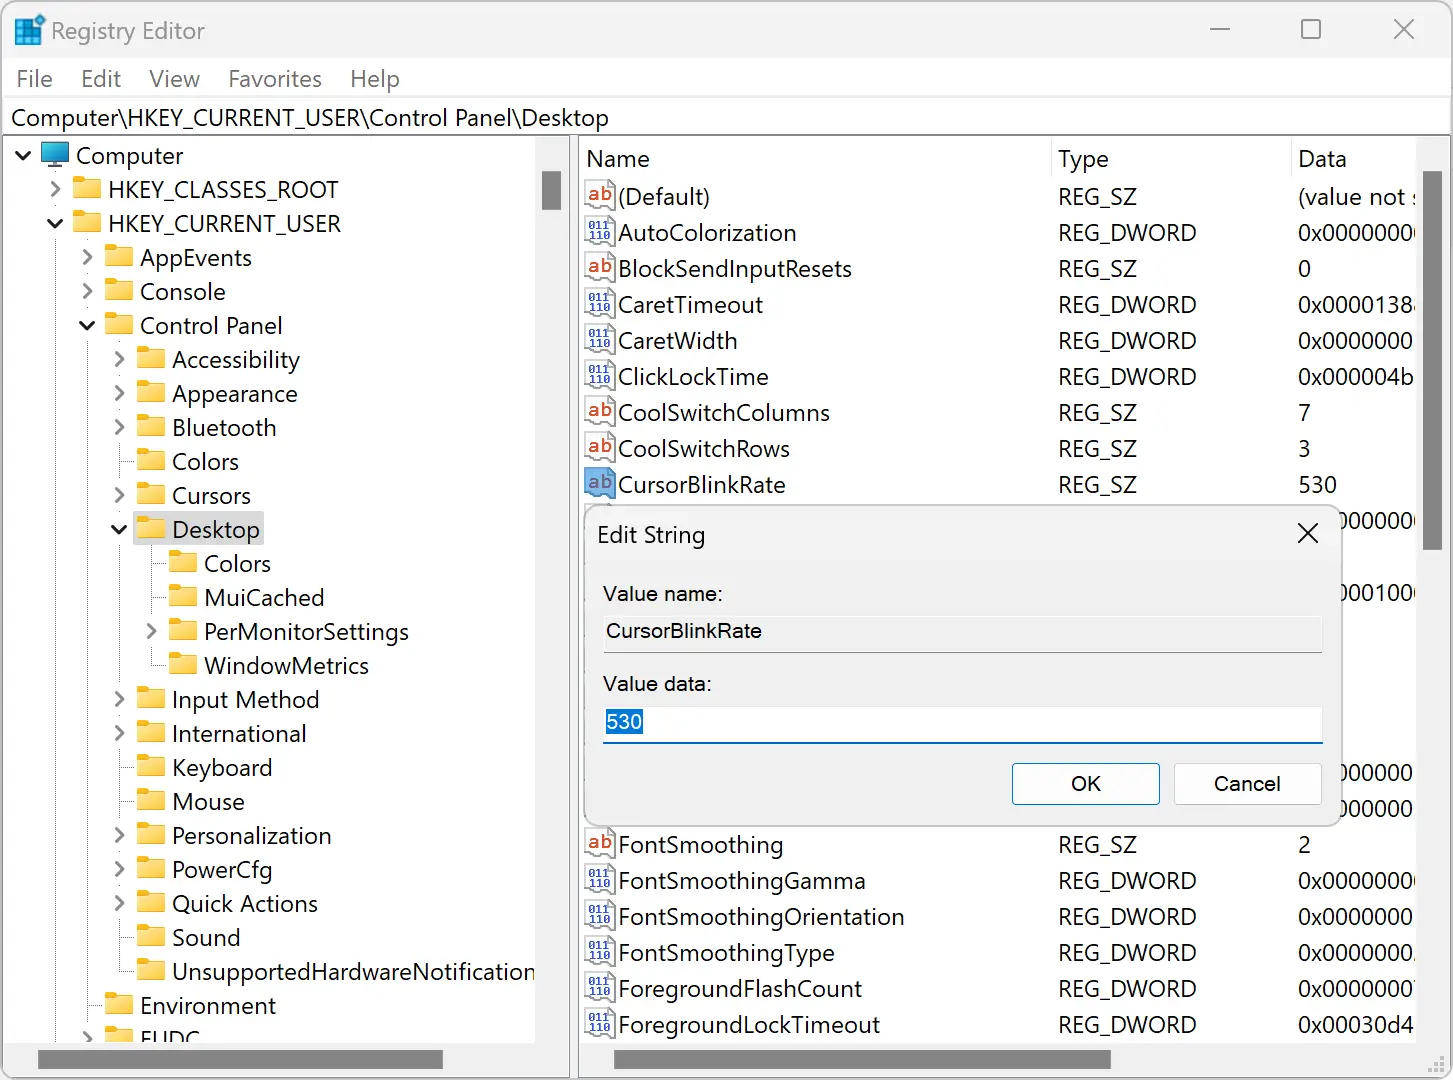
Step 6. Click OK.
Step 7. Finally, restart your computer for the changes to apply.
By following these easy-to-follow steps, you can change the text cursor blink rate in Windows 11 via the Control Panel app or the Windows Registry Editor. Whether you prefer a faster or slower cursor blink rate, these methods allow you to customize your cursor experience to your liking.
