On Windows 11/10, virtual memory (or paging file) plays a vital role. It is an essential component that remains hidden by default. It is designed to temporarily remove less frequently used modified files from RAM to the hard drive. Using this technology, the Windows operating system prioritizes faster physical memory for more frequent processes and applications, improving the overall performance and preventing the device from locking up if it runs out of system memory.
Although virtual memory is not always required to increase, increasing the virtual memory may sometimes be necessary to increase your system performance, especially when you see a message, “Your system is low on virtual memory.” Also, if you notice slow performance over time, you can try to increase virtual memory and see if it helps you.
If you’re experiencing issues with virtual memory or trying to improve the system’s performance, you should increase the virtual memory. Windows 11/10 allows you to increase the size of the virtual memory. There are at least two ways to change or increase virtual memory: Settings app and Command Prompt.
How to Increase Virtual Memory on Windows 11 using the Settings app?
To grow the virtual memory on Windows 11 using the Settings app, you need to do the following steps:-
Step 1. Open the Settings app by pressing Windows + I keys from the keyboard.
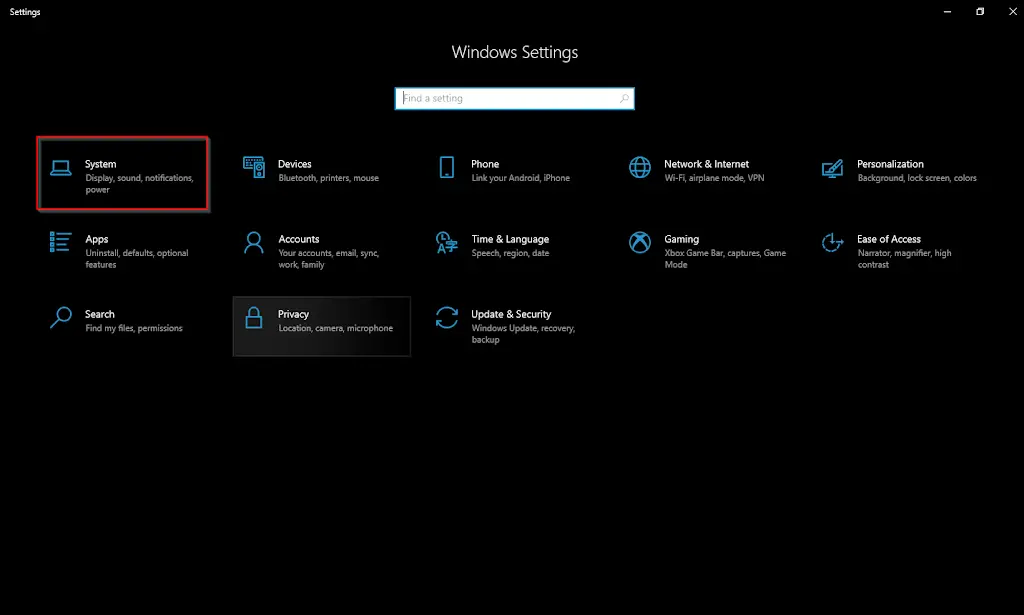
Step 2. Click the System category on the left sidebar of Windows Settings.

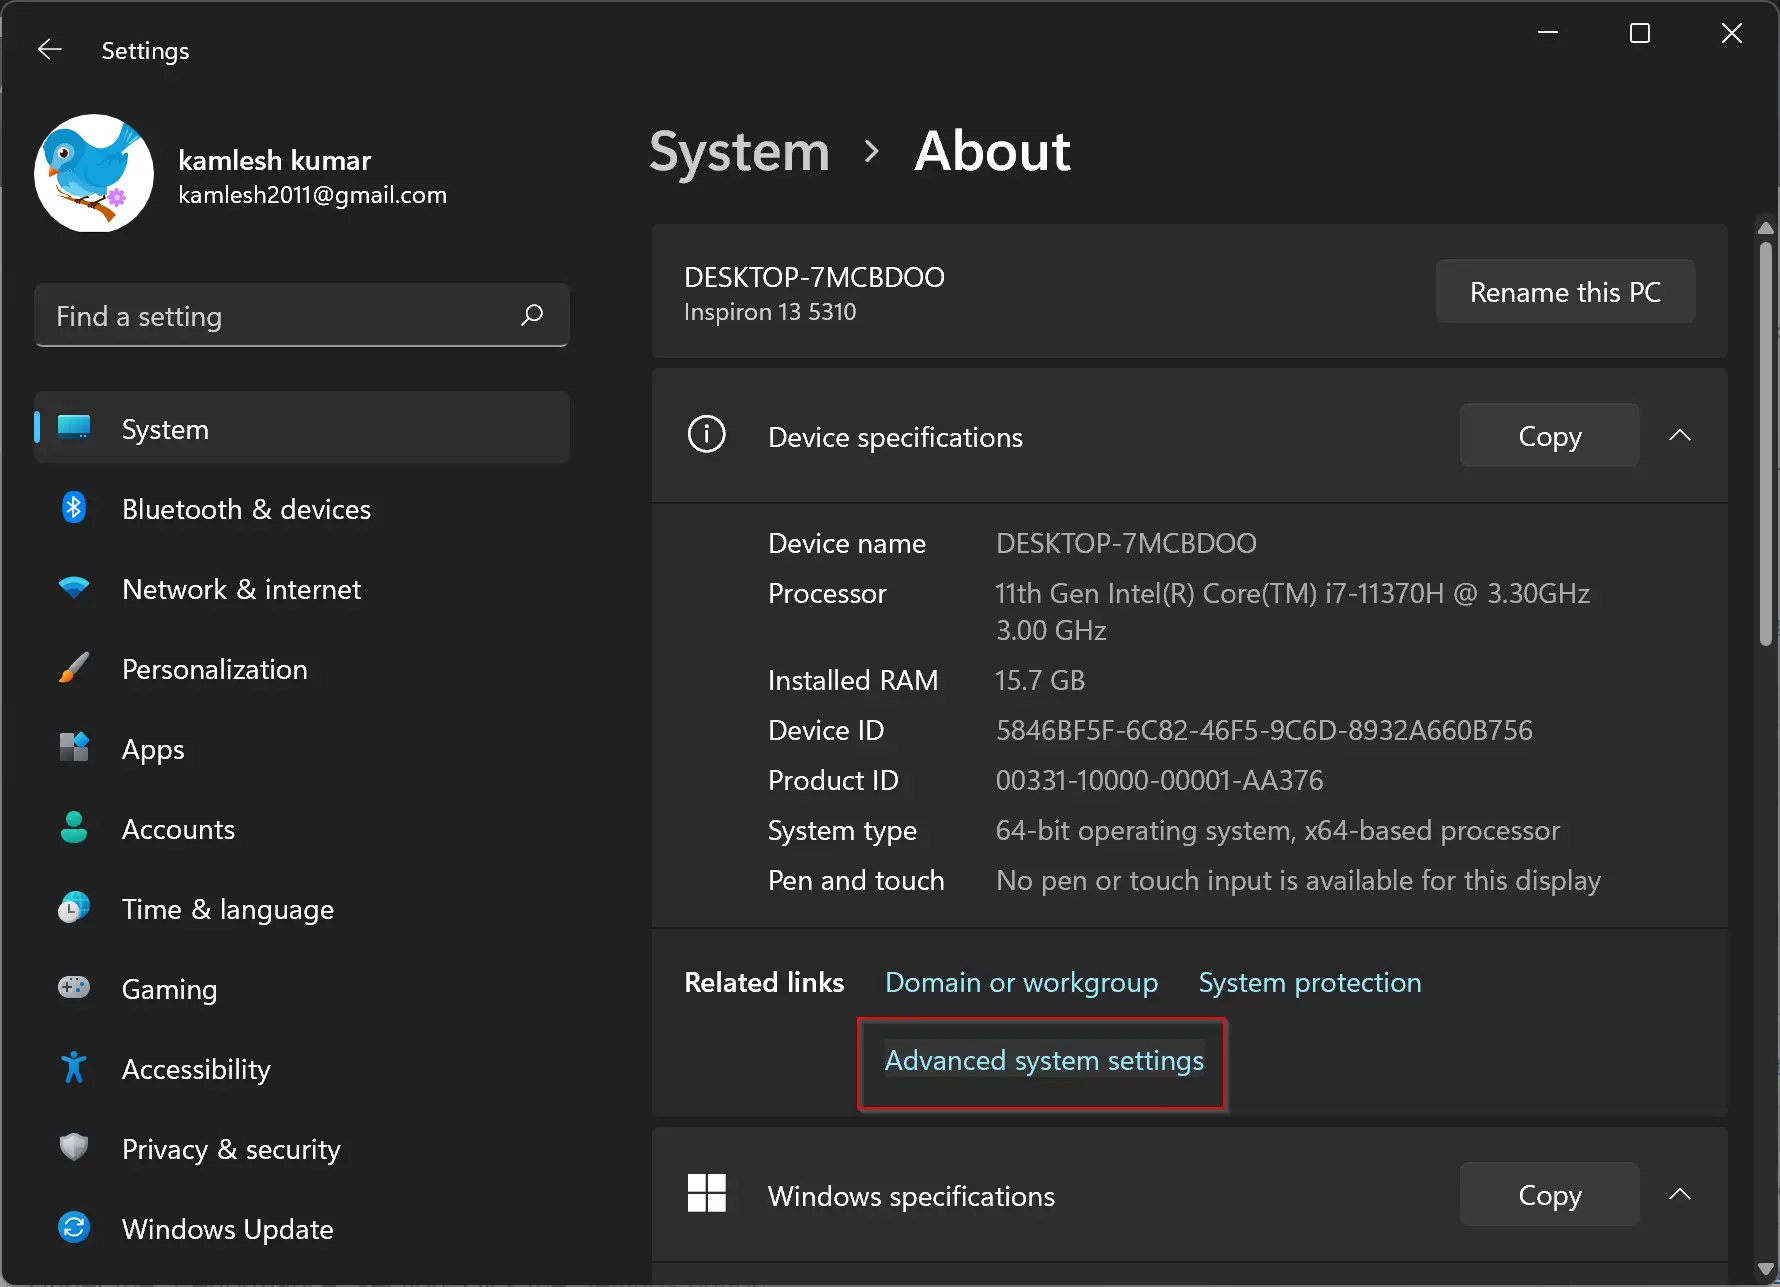
Step 3. Now, click About on the right-side pane of the System.
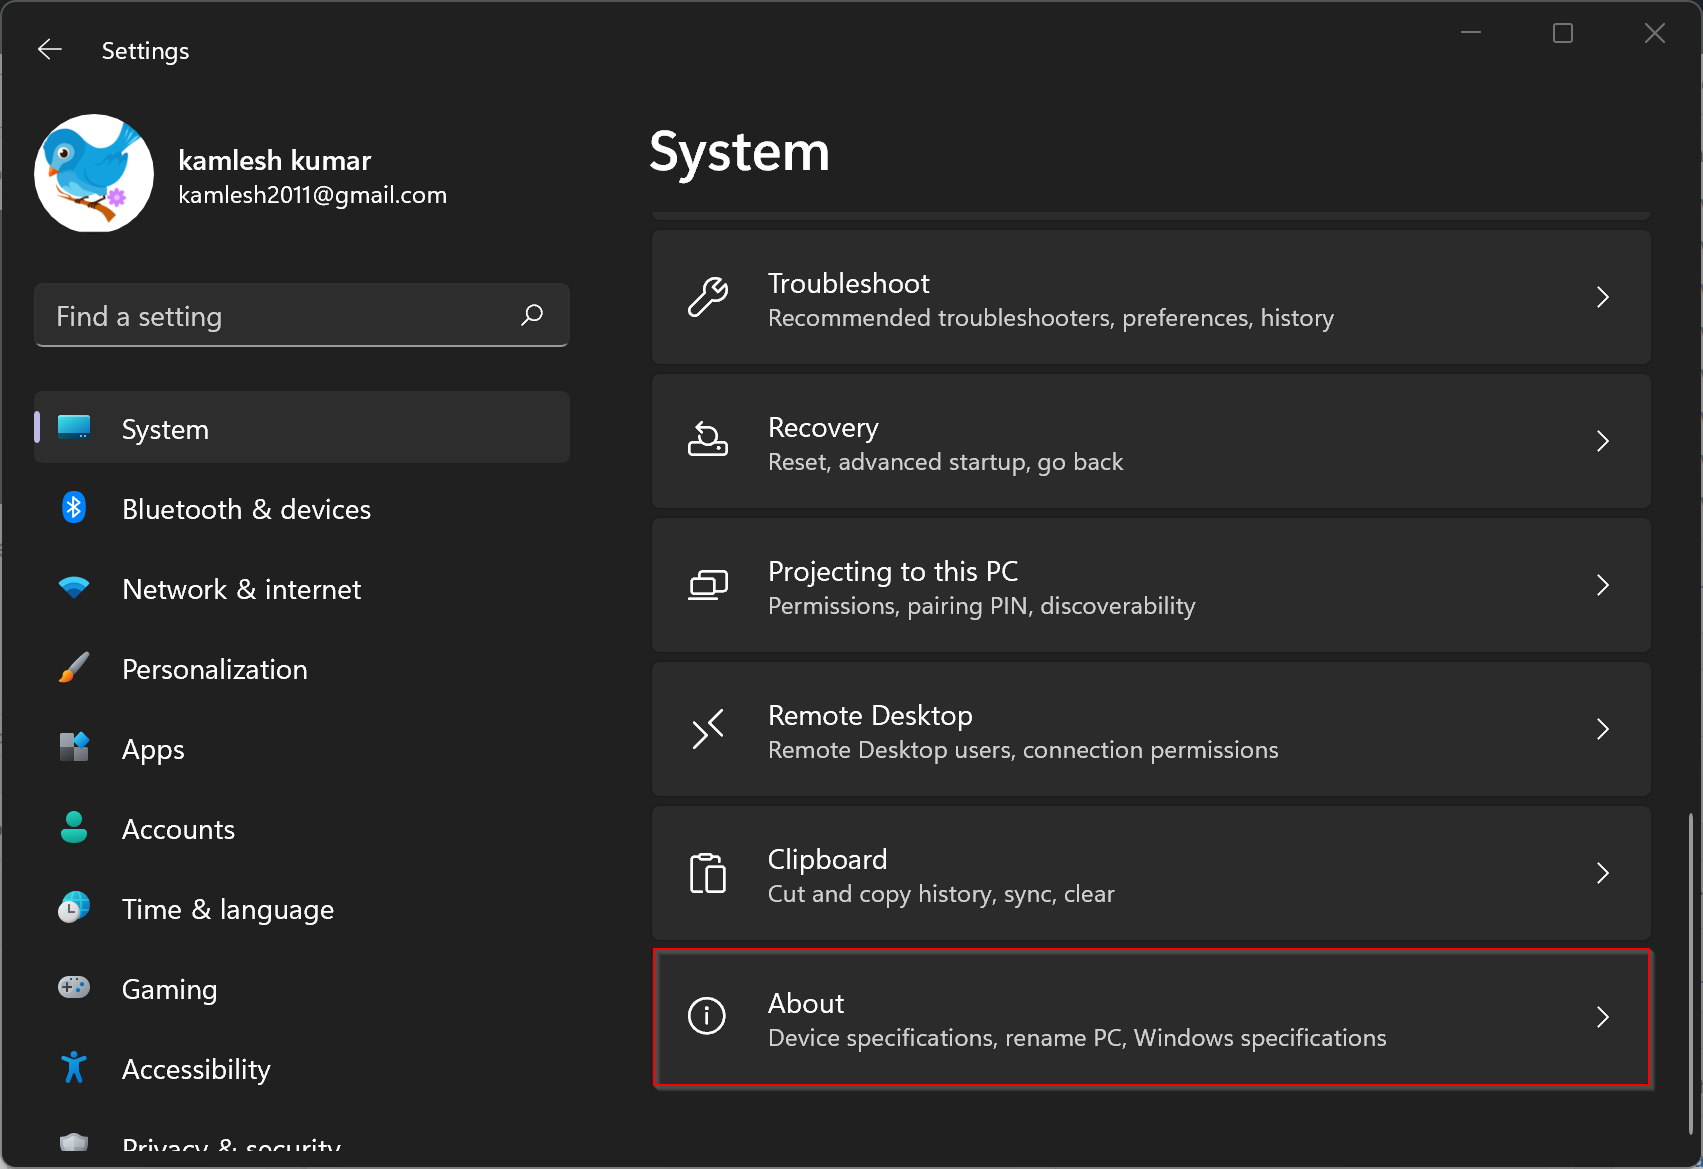
Step 4. Here, click the link labeled Advanced system settings.
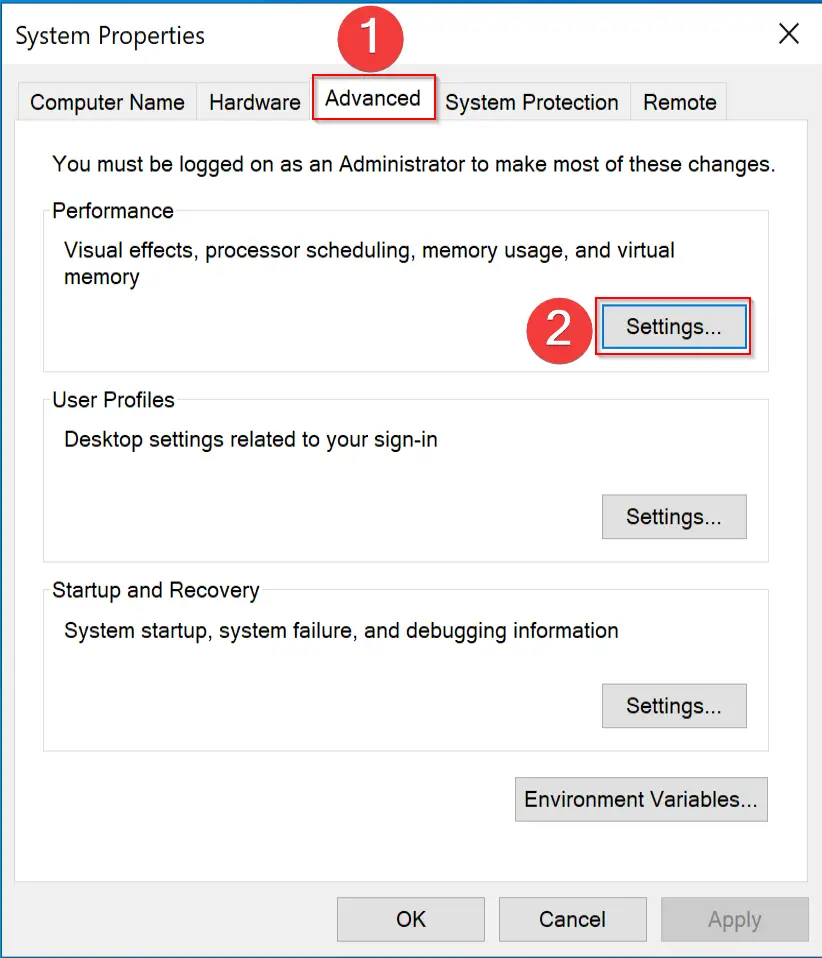
Step 5. Now, the System Properties pop-up window will appear. Navigate to the Advanced tab.
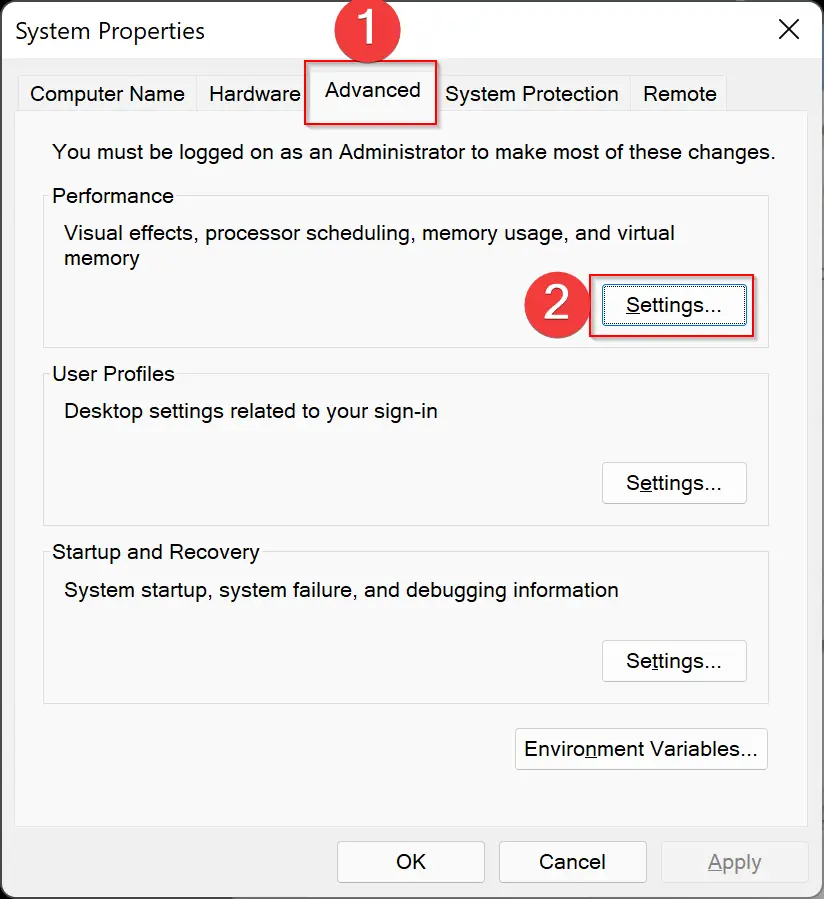
Step 6. Click the Settings button under the Performance section.
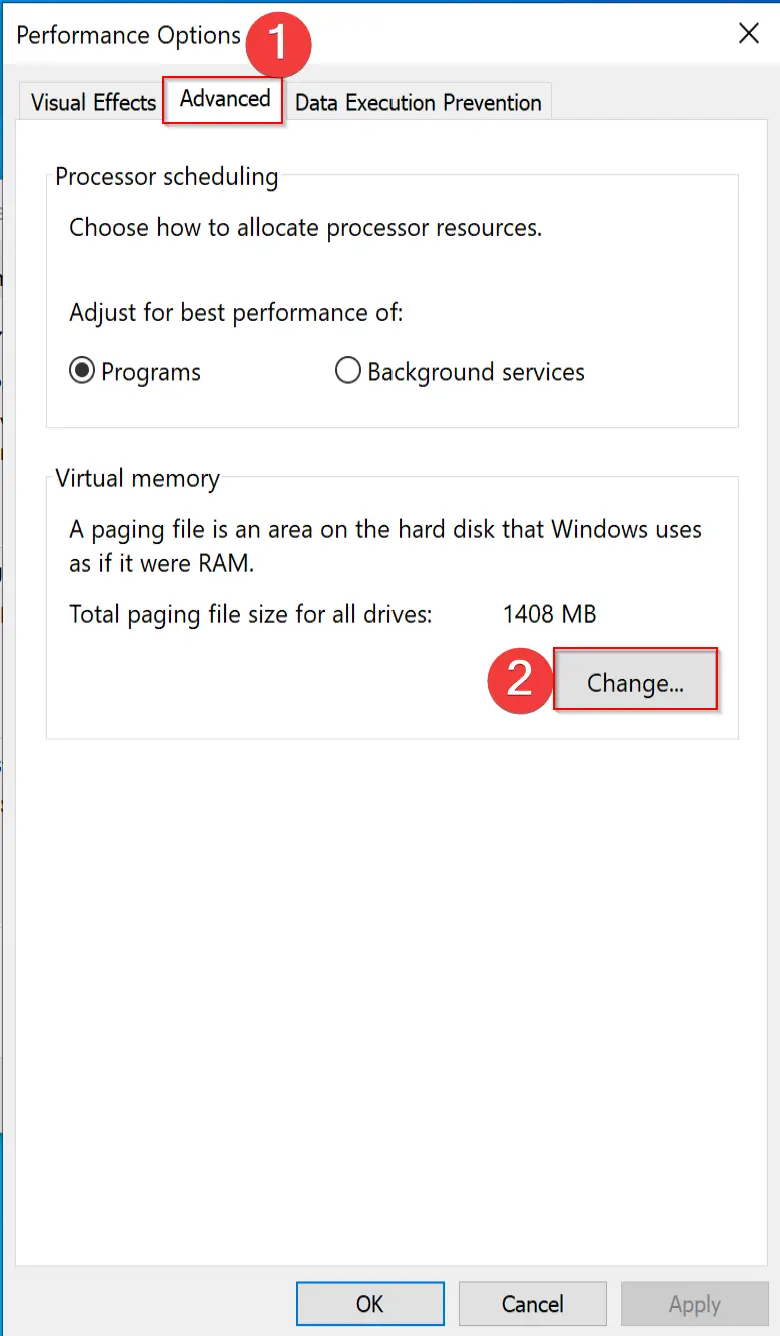
Step 7. Now, switch to the Advanced tab.
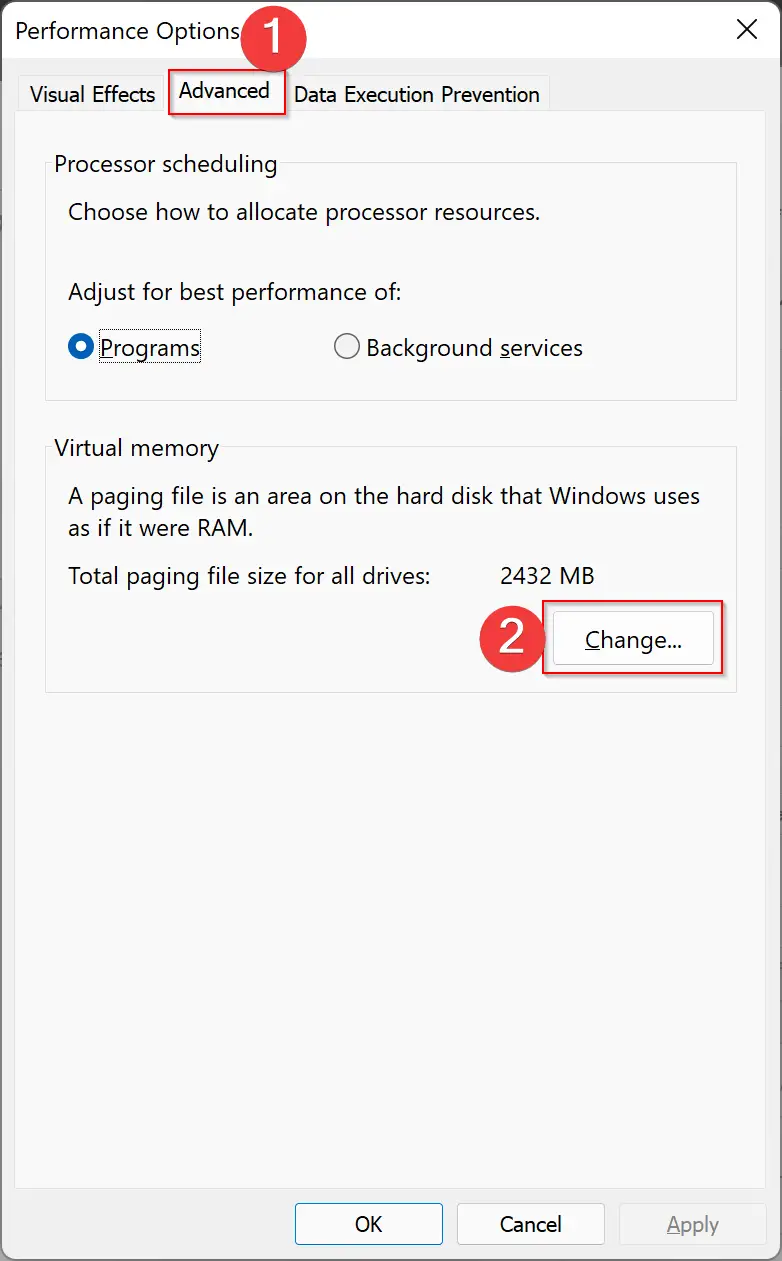
Step 8. Click the Change button under the “Virtual memory” section.
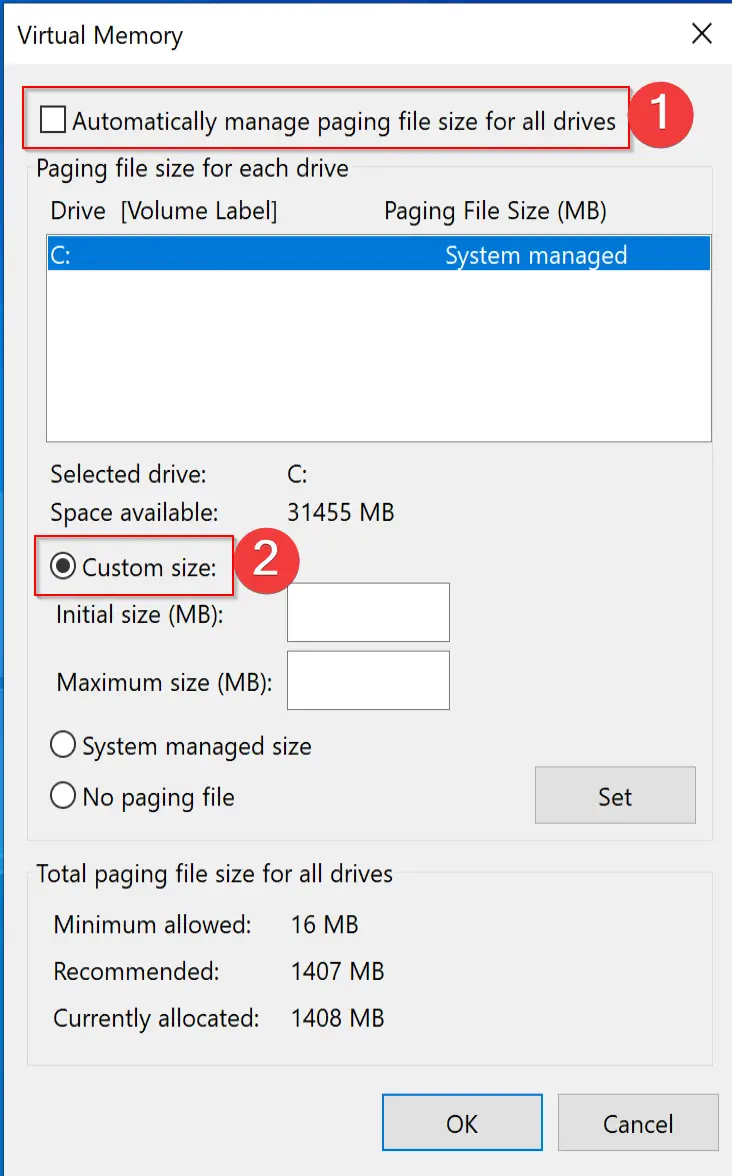
Step 9. Uncheck the checkbox Automatically manage paging file size for all drives.
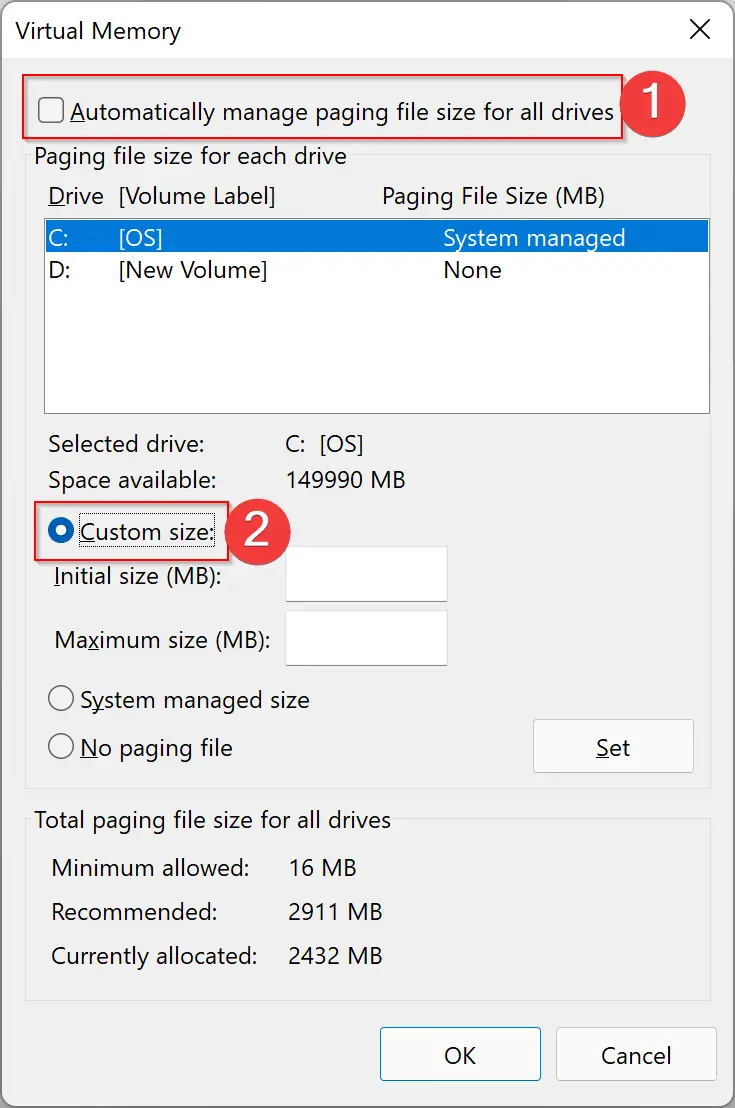
Step 10. Now, select the Custom size option.
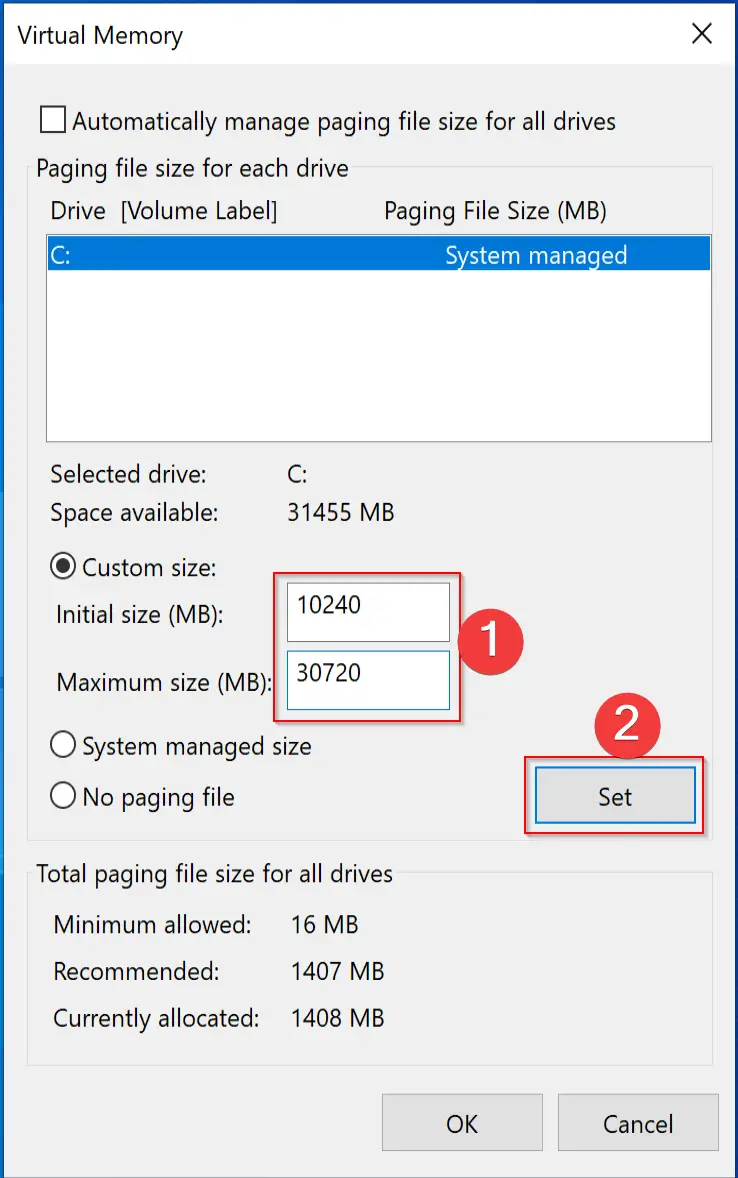
Step 11. Here, enter the initial and maximum size for the paging file in megabytes (MB).
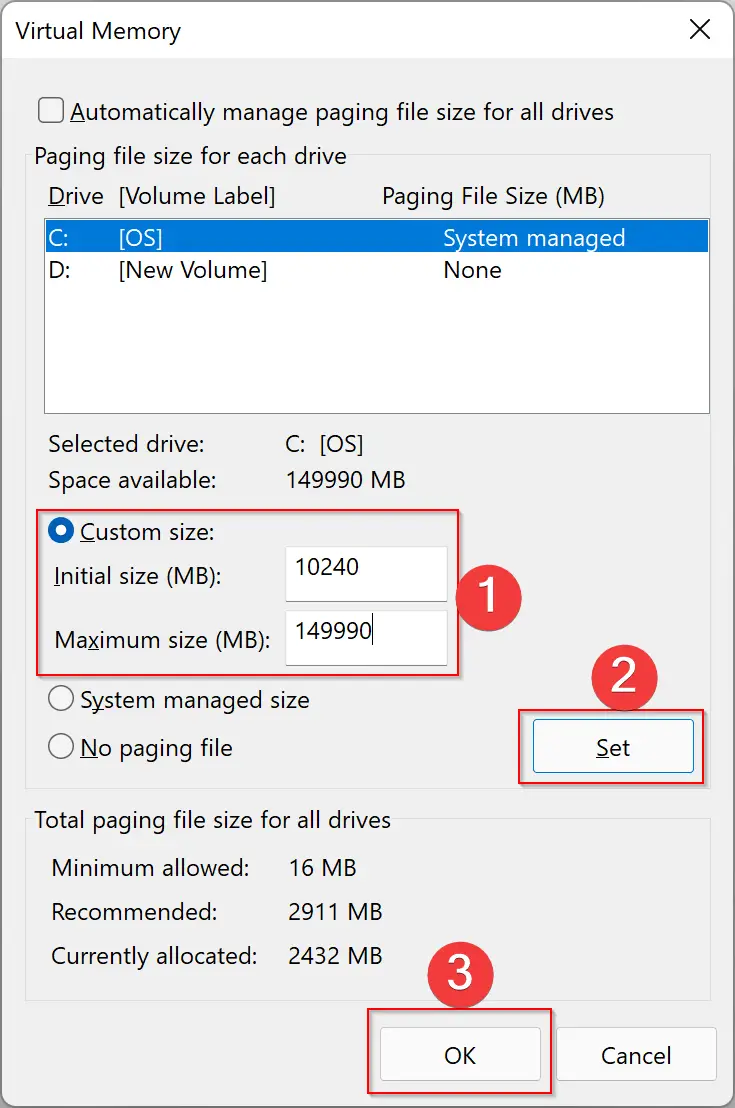
Step 12. Click the Set button.
Step 13. Click OK.
Step 14. Click OK again.
Step 15. Reboot your computer or laptop.
That’s it. Now, Windows OS will use the custom virtual memory (page file) that you have specified, which should increase the overall performance.
One should note that the size of the virtual memory is unique for each device. It is recommended to use one and a half times the total available memory (RAM) for the “Initial size” and three times of available memory for the “Maximum size,” if possible.
How to Increase Virtual Memory Using Settings on Windows 10?
To increase Virtual Memory using Settings on Windows 10, do these steps:-
Step 1. Open the Settings app.
Step 2. Click on the System under Windows Settings.
Step 3. Click About in the left sidebar.
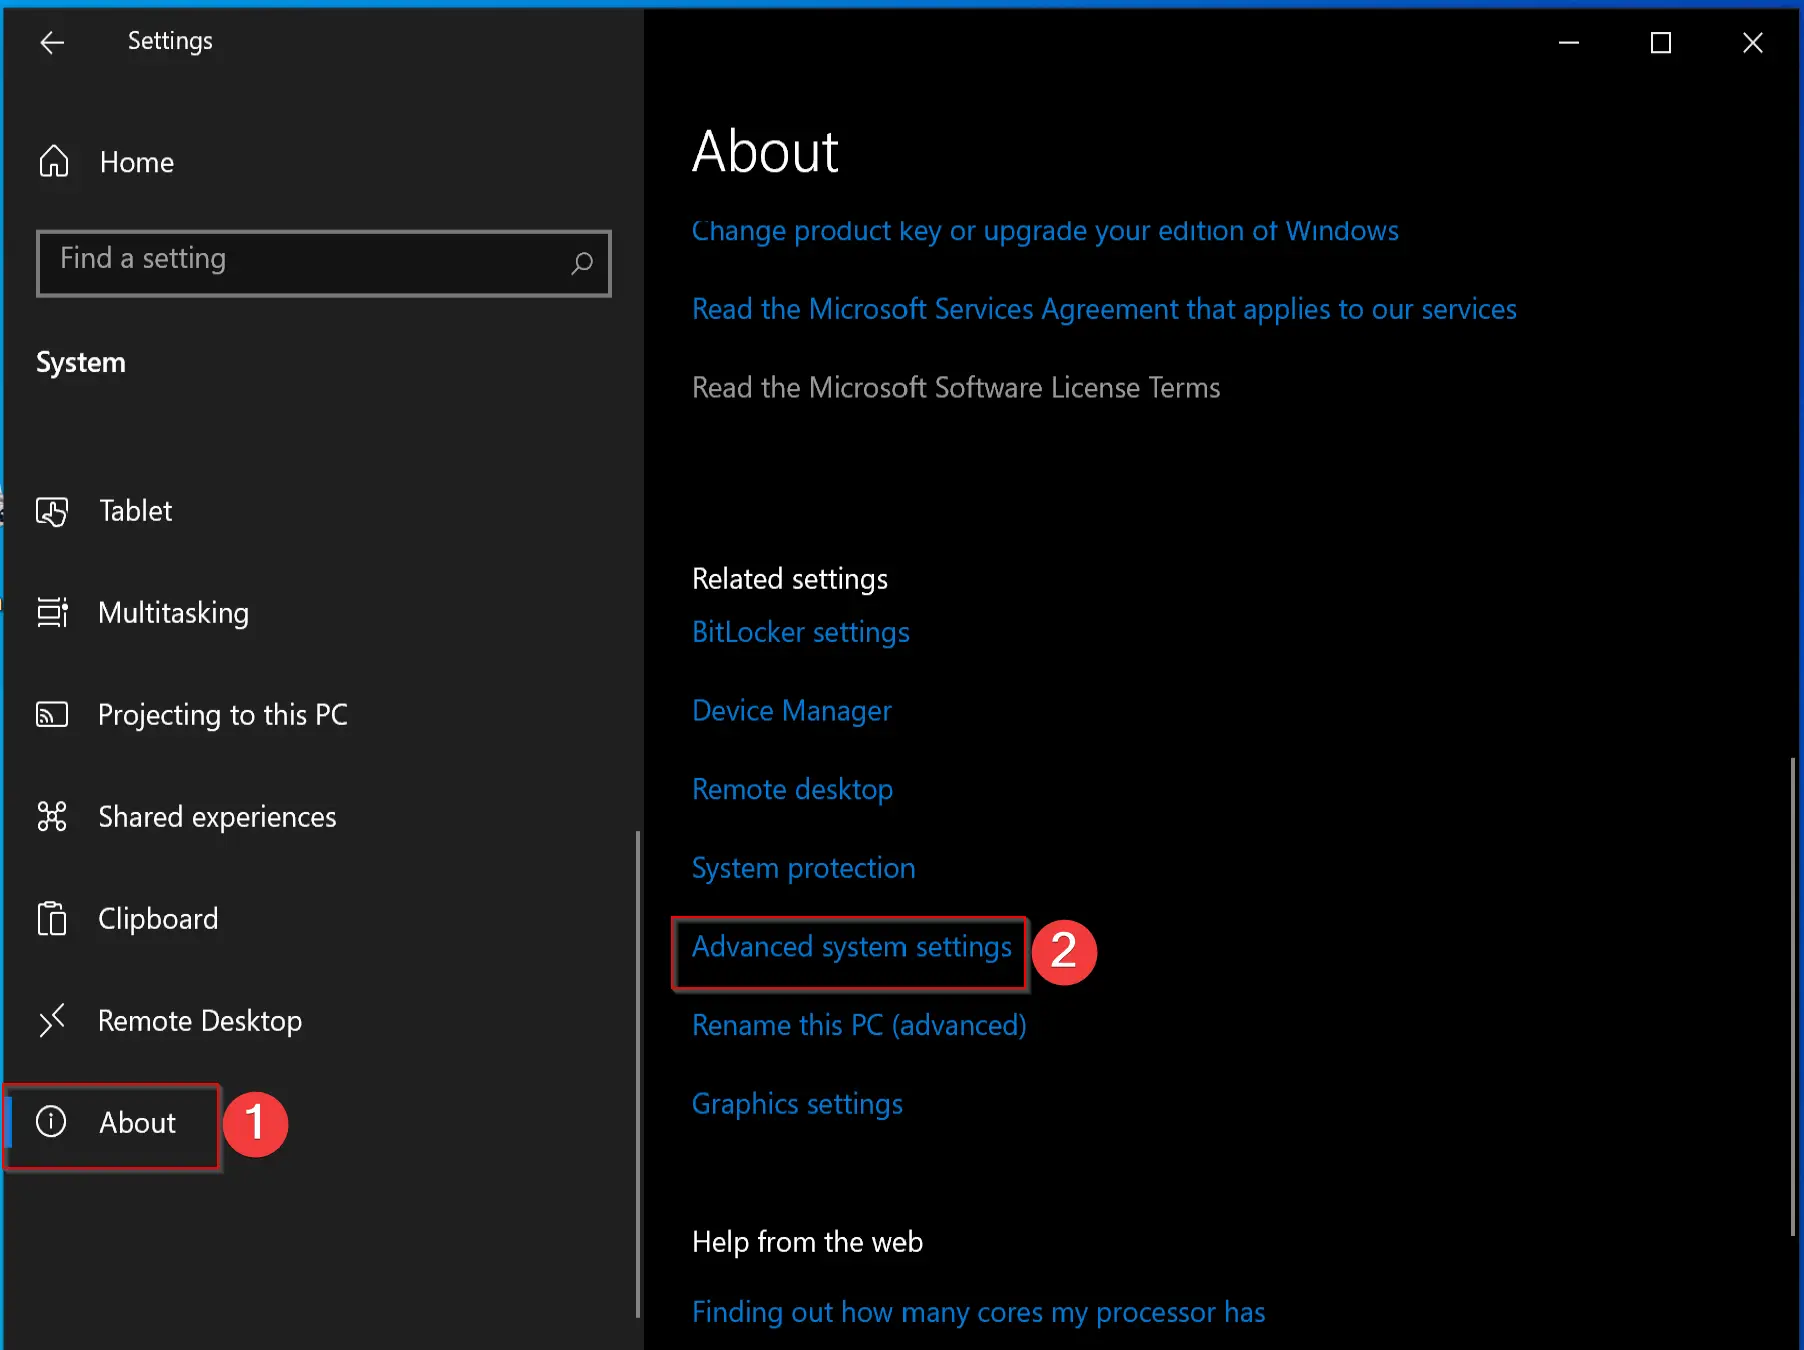
Step 4. On the right of About, click the link Advanced system settings.
Step 5. In the System Properties pop-up window that appears, click on the Advanced tab.
Step 6. Under the Performance section, check the Settings button.
Step 7. In the new pop-up window, navigate to the Advanced tab.
Step 8. Click the Change button under the Virtual memory section.
Step 9. On the new pop-up window, uncheck the option “Automatically manage paging file size for all drivers” and then click on the Custom size radio button.
Step 10. Enter the initial and maximum size in MB. Usually, it’s recommended to set one and a half times the total available memory for the “Initial size” and three times of available memory for the “Maximum size” when possible.
Step 11. Click the Set button.
Step 12. Click OK.
Step 13. Click OK again.
How to Increase Virtual Memory on Windows 11/10 using Command Prompt?
To increase virtual memory on Windows 11/10 using Command Prompt, do the following steps:-
Step 1. Open the Command Prompt with administrative rights.
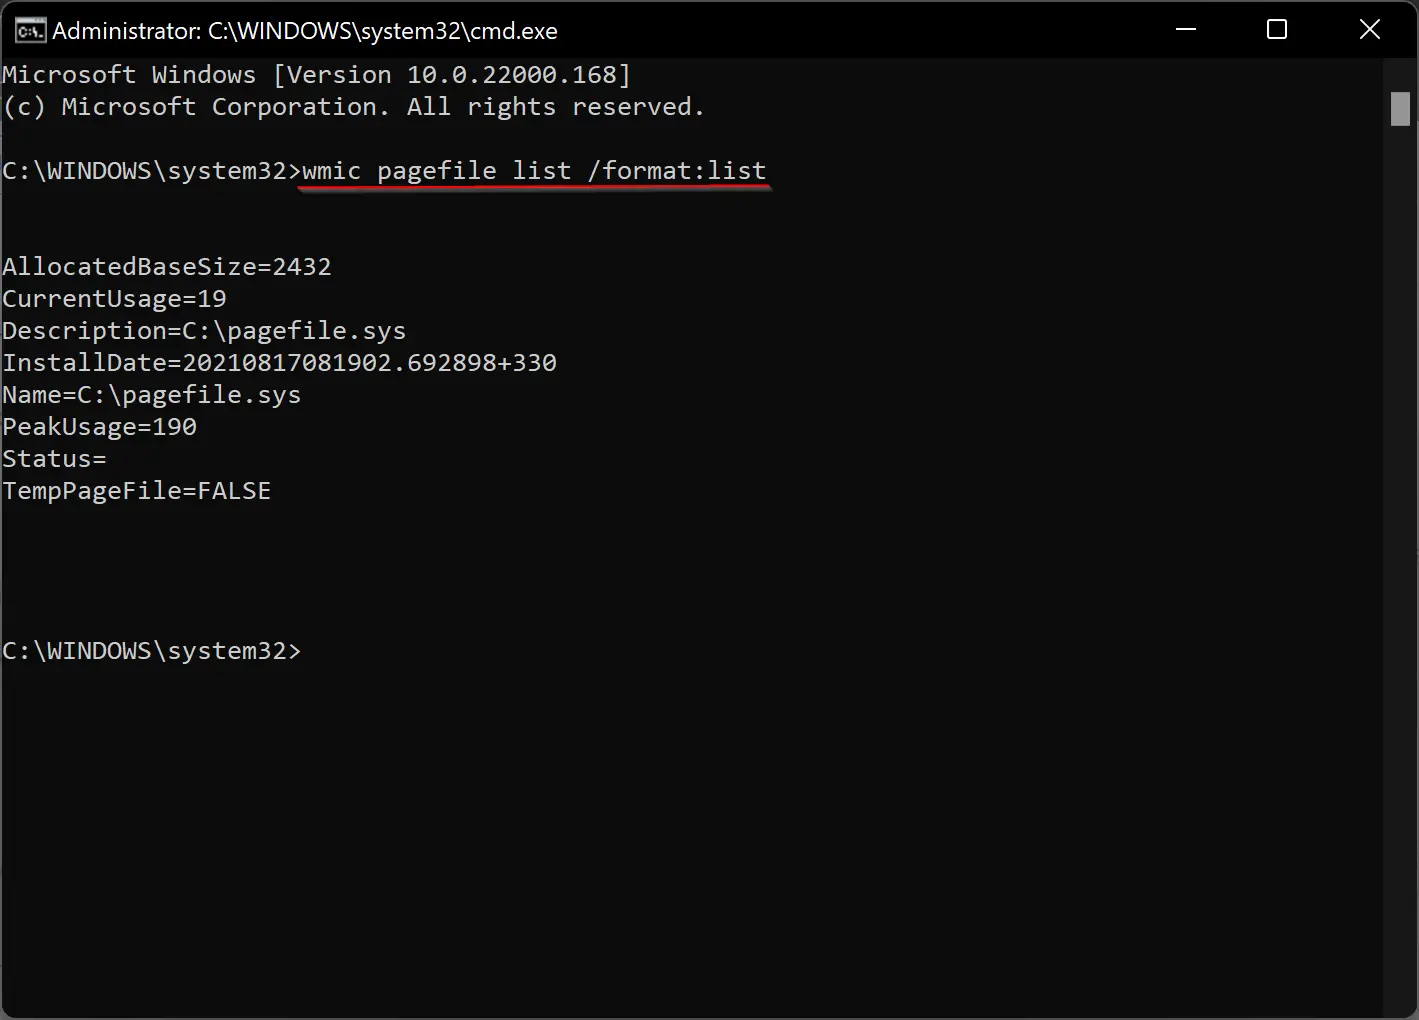
Step 2. In the elevated command prompt, type the following and hit Enter from the keyboard to view the current status of virtual memory:-
wmic pagefile list /format:list
Step 3. Now, type the following command to switch from manage to custom virtual memory, and press Enter from the keyboard:-
wmic computersystem where name="%computername%" set AutomaticManagedPagefile=false

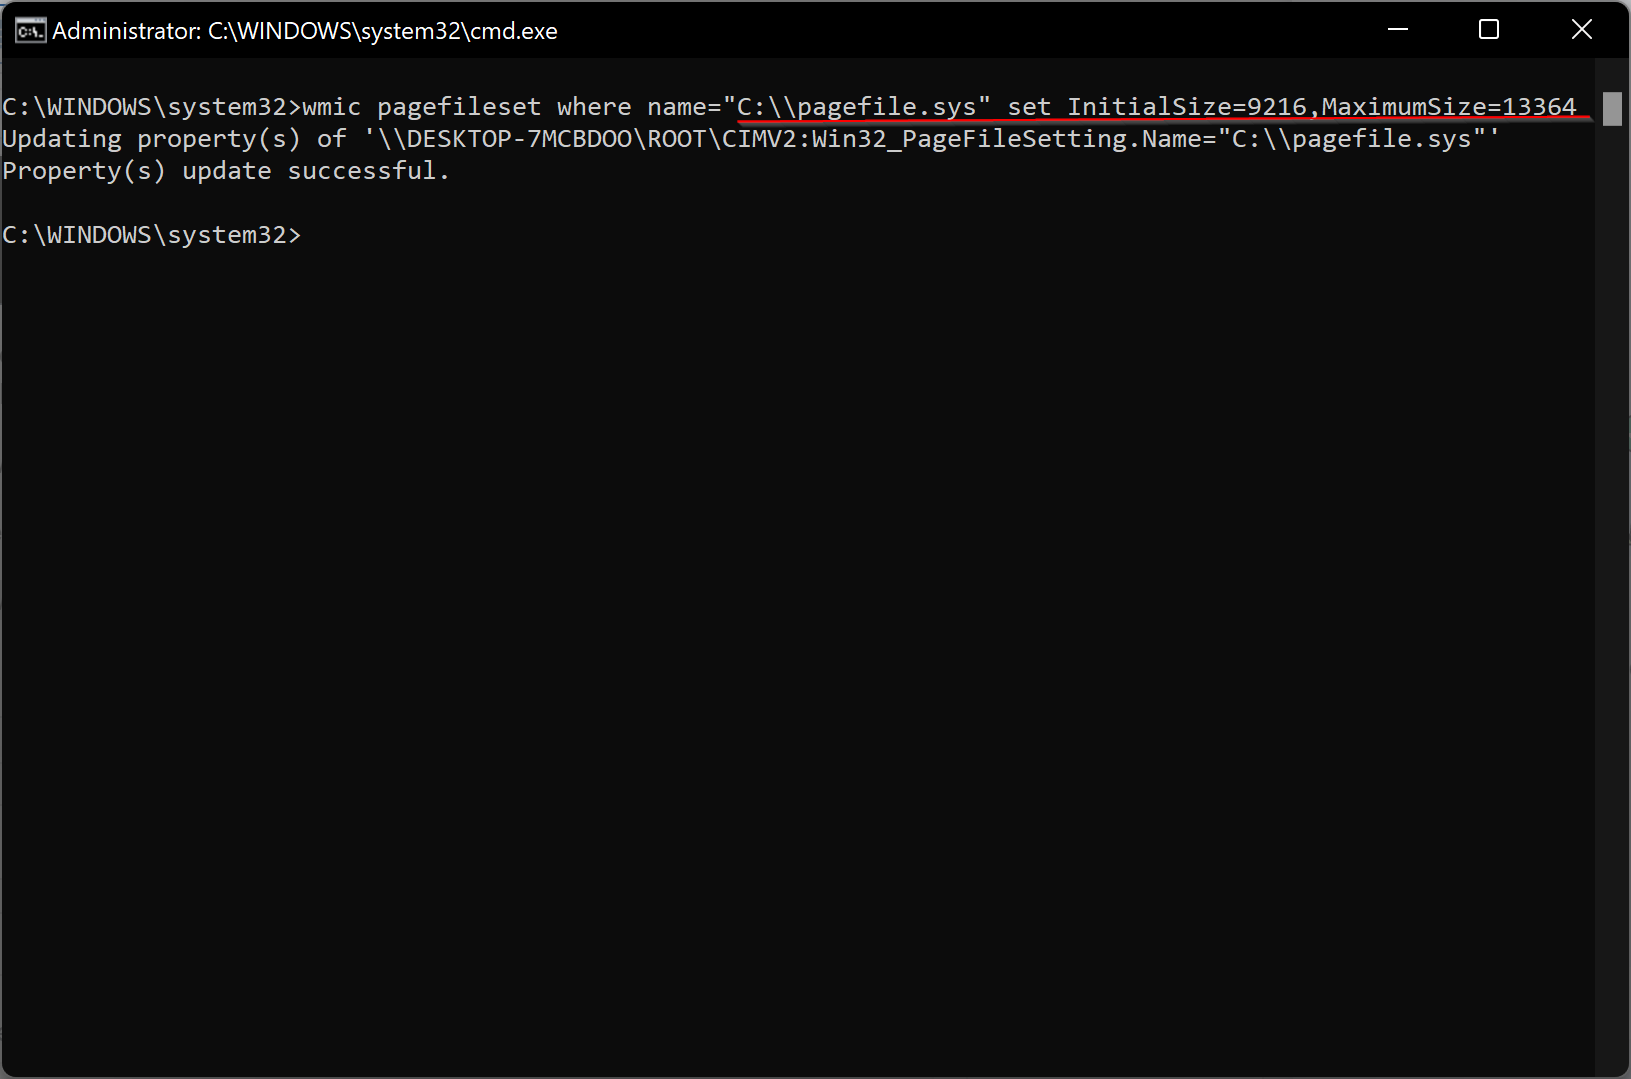
Step 4. Finally, type the following command to set the initial and maximum size of the virtual memory and press Enter from the keyboard:-
wmic pagefileset where name="C:\\pagefile.sys" set InitialSize=YOUR-INIT-SIZE,MaximumSize=YOUR-MAX-SIZE
For example, to set the paging file to initial to “9216” and maximum size to “13364,” issue the following command:-
wmic pagefileset where name="C:\\pagefile.sys" set InitialSize=9216,MaximumSize=13364
Step 5. Now, restart your computer.
Once you complete the above steps, your PC will start using the new values for virtual memory which should help to improve system performance.
If you no longer need to use the custom size for virtual memory, you can always revert the changes on Windows 11/10. For that, issue the following command:-
wmic computersystem where name="%computername%" set AutomaticManagedPagefile=true
After that, restart the device.
Conclusion
In conclusion, virtual memory plays a critical role in improving the performance of Windows 11/10 operating systems. By temporarily removing less frequently used modified files from RAM to the hard drive, the Windows operating system can prioritize faster physical memory for more frequent processes and applications. Increasing the size of virtual memory can sometimes be necessary to improve system performance, especially when experiencing slow performance or receiving a message that the system is low on virtual memory. Windows 11/10 offers two ways to change or increase virtual memory, using the Settings app or Command Prompt. It is recommended to set the initial and maximum size of virtual memory to one and a half times and three times the total available memory, respectively, if possible. Reverting changes to the virtual memory settings is also possible by using the Command Prompt. Overall, understanding how to adjust virtual memory settings can help users improve the performance of their Windows 11/10 devices.