In the fast-paced digital era, the health of your hard drive is a critical aspect of maintaining a reliable and efficient computing experience. Windows 11 has introduced a built-in feature that allows users to monitor the health of NVM SSDs, providing valuable insights into the remaining life and temperature of the drive. This guide will walk you through the step-by-step process of checking your hard drive health in Windows 11.
How to Check Hard Drive Health in Windows 11?
To know the hard drive health on your Windows 11 PC, follow these steps:-
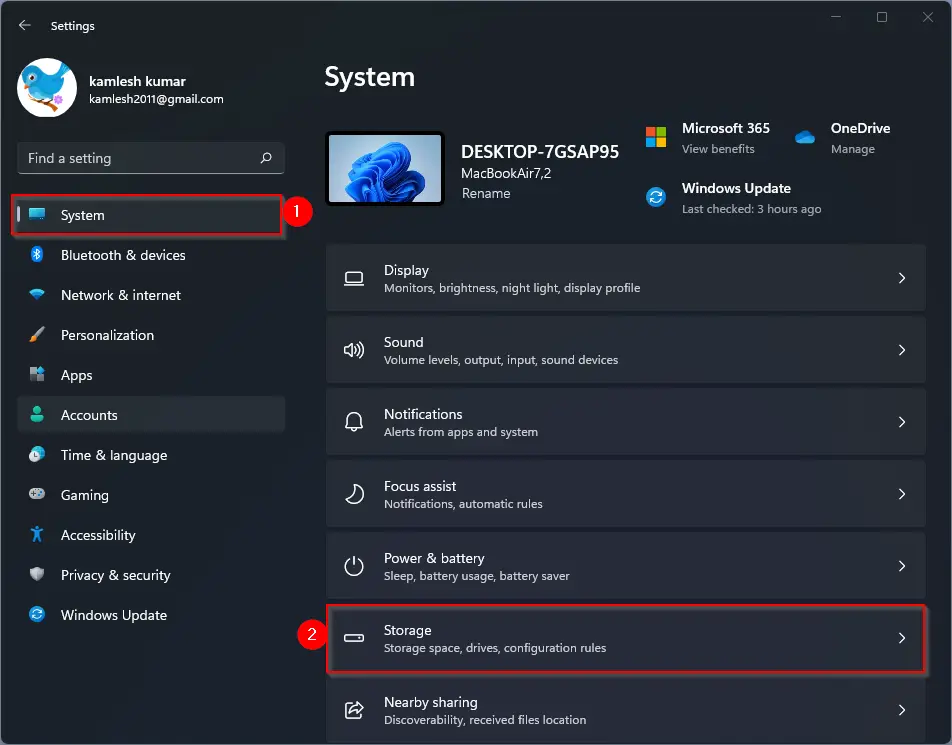
Step 1. Begin by launching the Settings app on your Windows 11 system. You can do this by clicking on the Start menu and selecting the gear-shaped icon or by pressing the Win + I keys simultaneously.
![]()
Step 2. Within the Settings app, navigate to the “System” category in the left-side pane. Once there, click on the “Storage” option on the right side pane.
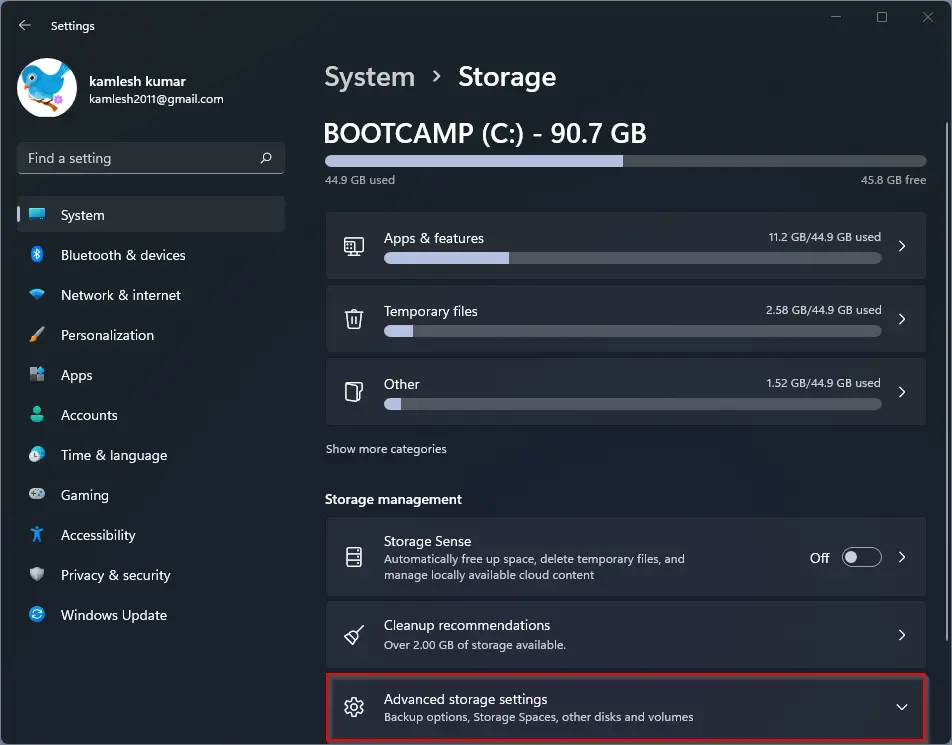
Step 3. Locate and click on the “Advanced storage settings” option. This will lead you to a set of advanced configurations for managing your storage devices.
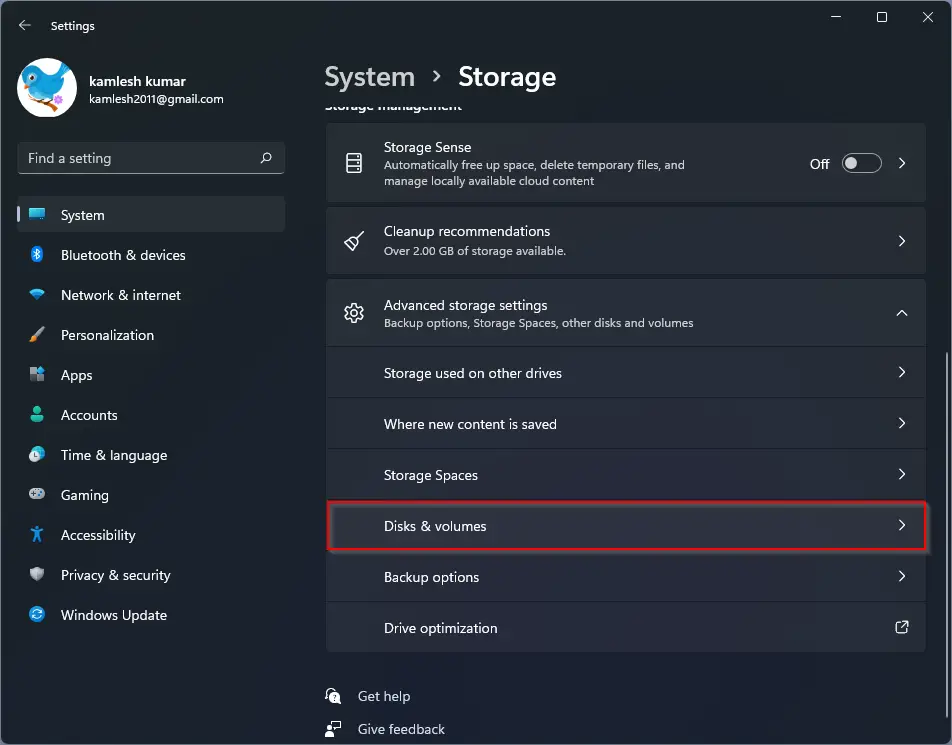
Step 4. Within the advanced storage settings, find and click on the “Disks & volumes” setting. This option will provide detailed information about your connected storage devices.
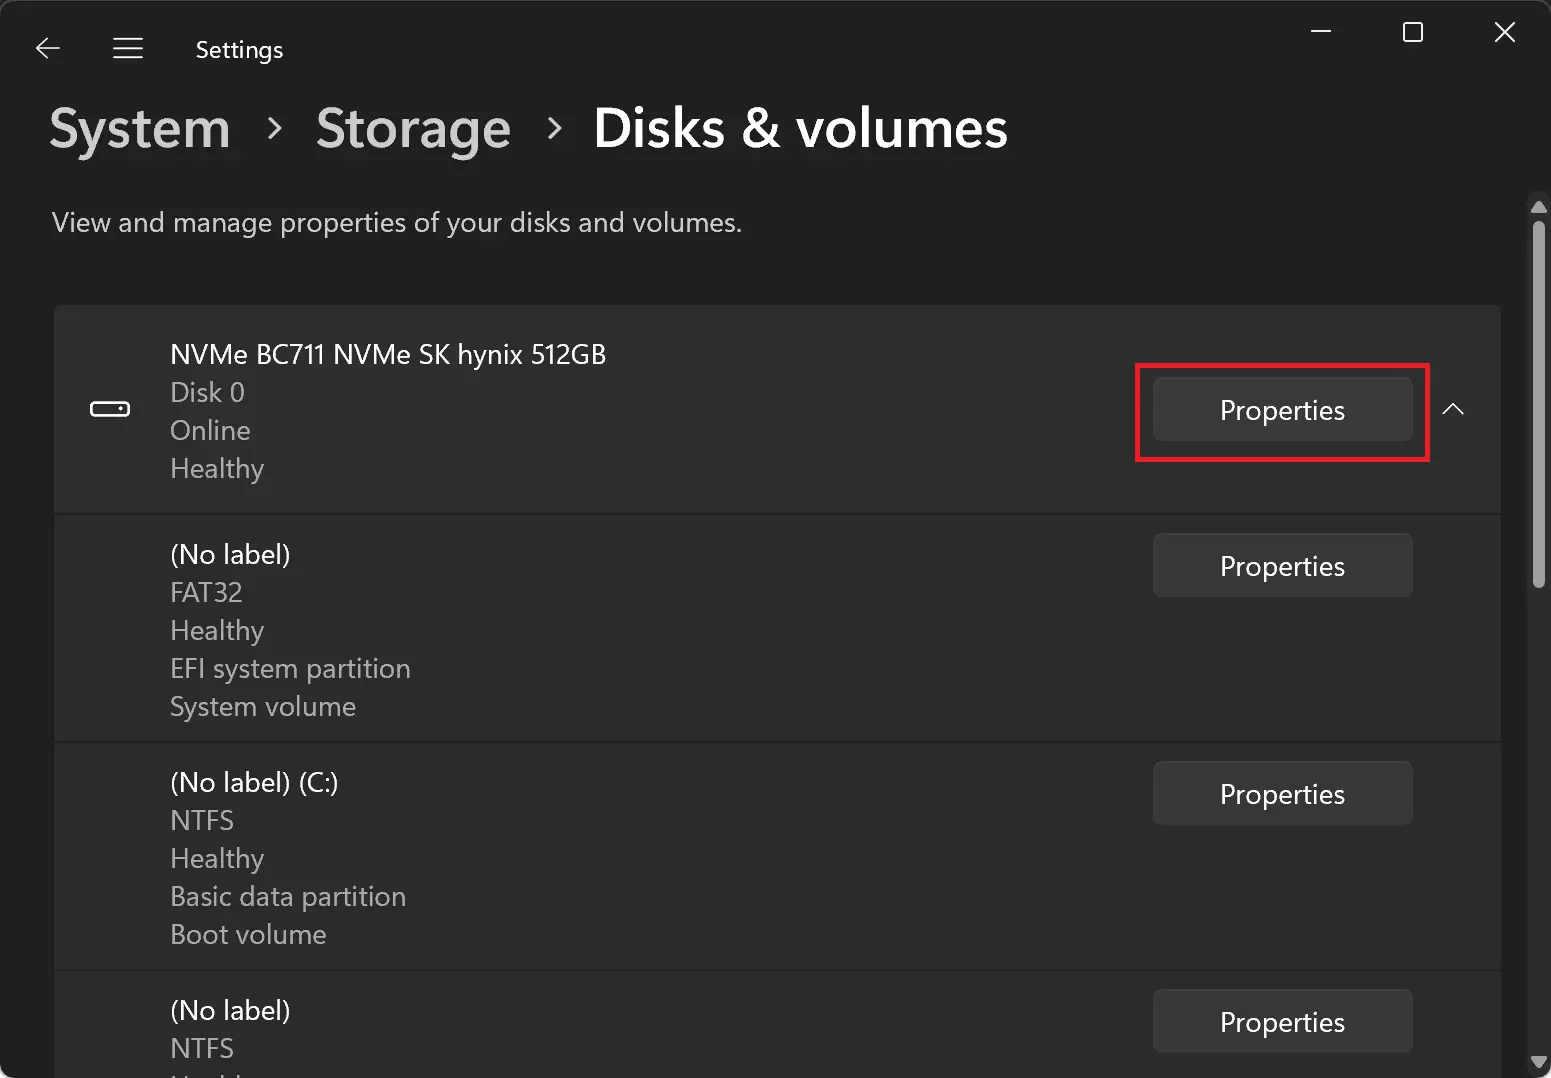
Step 5. Identify your hard drive (not volumes) from the list and click on the “Properties” button next to it. This action will open a new window containing specific details about your hard drive.
Step 6. Scroll down to the “Drive health” section within the properties window. Here, you’ll find crucial information such as the current temperature and the estimated remaining life of your NVM SSD. This data is invaluable for assessing the overall health and performance of your hard drive.
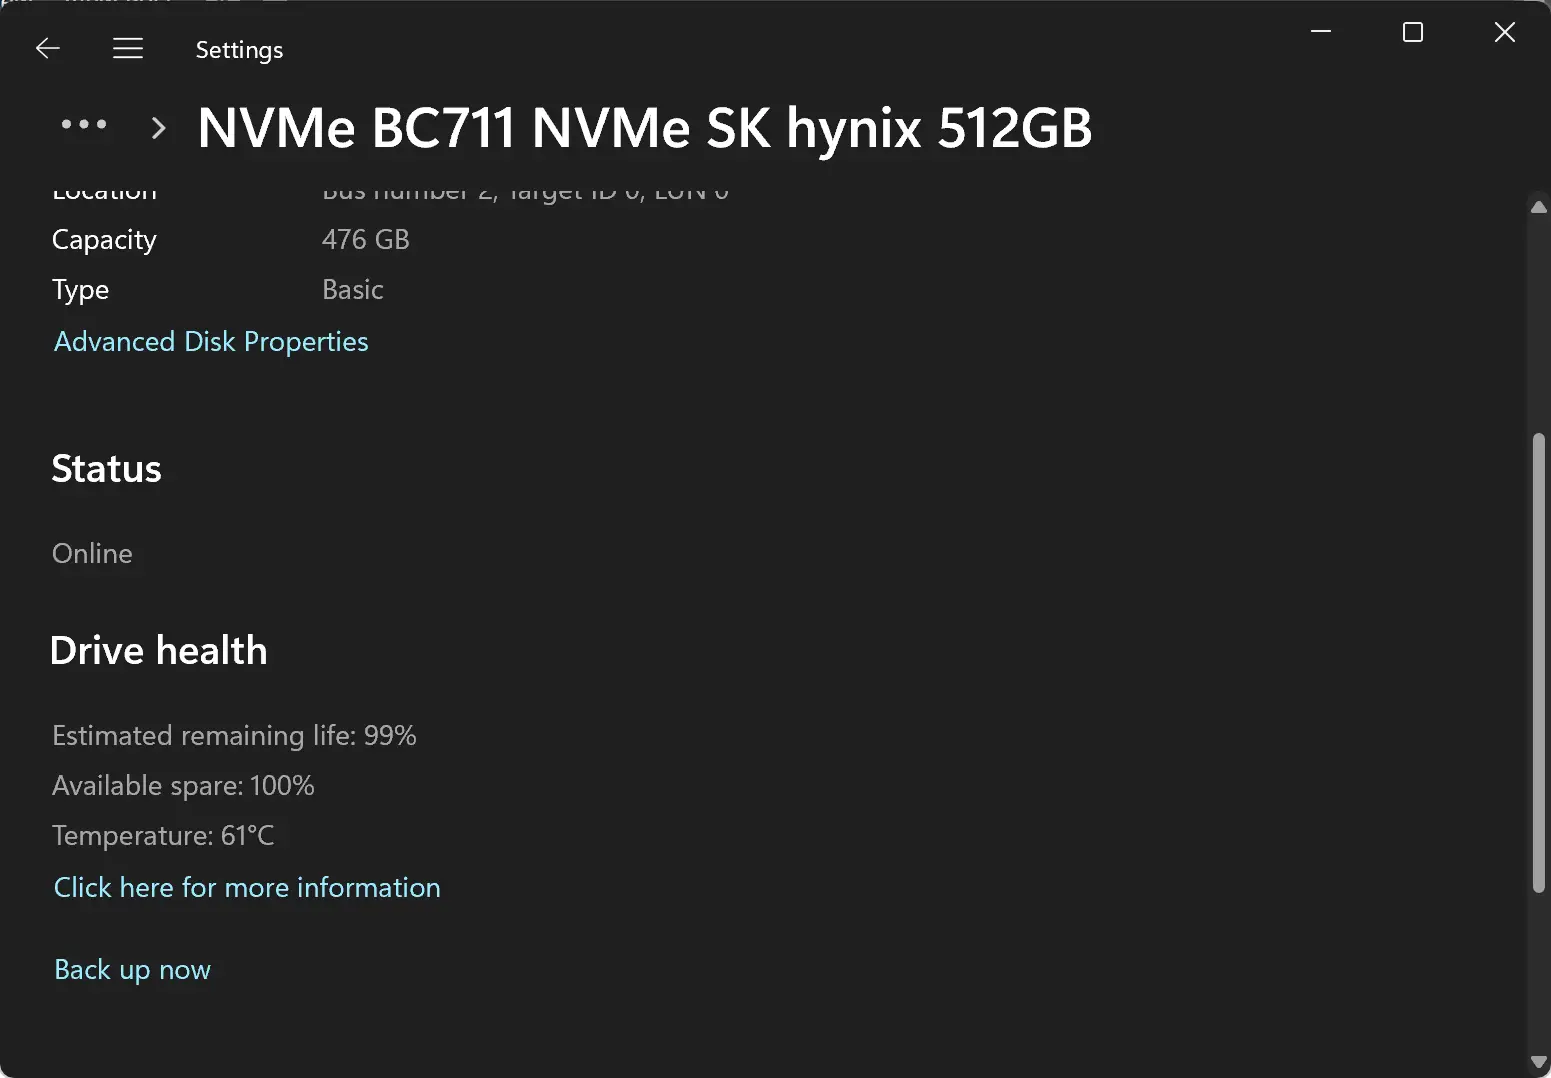
Step 7. Monitor for Warnings: The built-in feature in Windows 11 goes beyond providing basic statistics. It actively monitors for potential issues by issuing warnings in the event of significant media-related errors or internal errors to the NVM subsystem. These warnings serve as early indicators, allowing users to take preventive measures before a complete drive failure.
Conclusion
Regularly checking the health of your hard drive is a proactive approach to ensuring the longevity and reliability of your storage device. While Windows 11’s built-in feature specifically caters to NVM SSDs, it’s essential to note that it doesn’t support SATA SSDs or HDDs. For users requiring health checks for USB, Intel RAID, and NVMe, the tutorial suggests the use of CrystalDiskInfo, a freeware tool known for its efficiency in providing comprehensive drive information.
By following these steps and staying vigilant about your hard drive’s health, you empower yourself to address potential issues early on, safeguarding your data and maintaining a smooth computing experience on Windows 11.
