Connecting to a hidden WiFi network on Windows 10 may seem like a daunting task, but it’s actually quite straightforward once you know the steps. Hidden WiFi networks are those that don’t broadcast their network name (SSID), making them less visible to potential users. In this guide, we’ll walk you through the process of connecting to a hidden WiFi network on your Windows 10 computer.
How to Connect to Hidden WiFi Networks on Windows 10?
Method 1: Settings App
Windows 10 allows you to join a hidden WiFi network quickly using the Settings app. Here are the steps:-
Step 1. Click on the Start button in the lower-left corner of your desktop.
Step 2. Click on the “Settings” gear icon (resembling a gearwheel), which will open the Windows Settings menu.
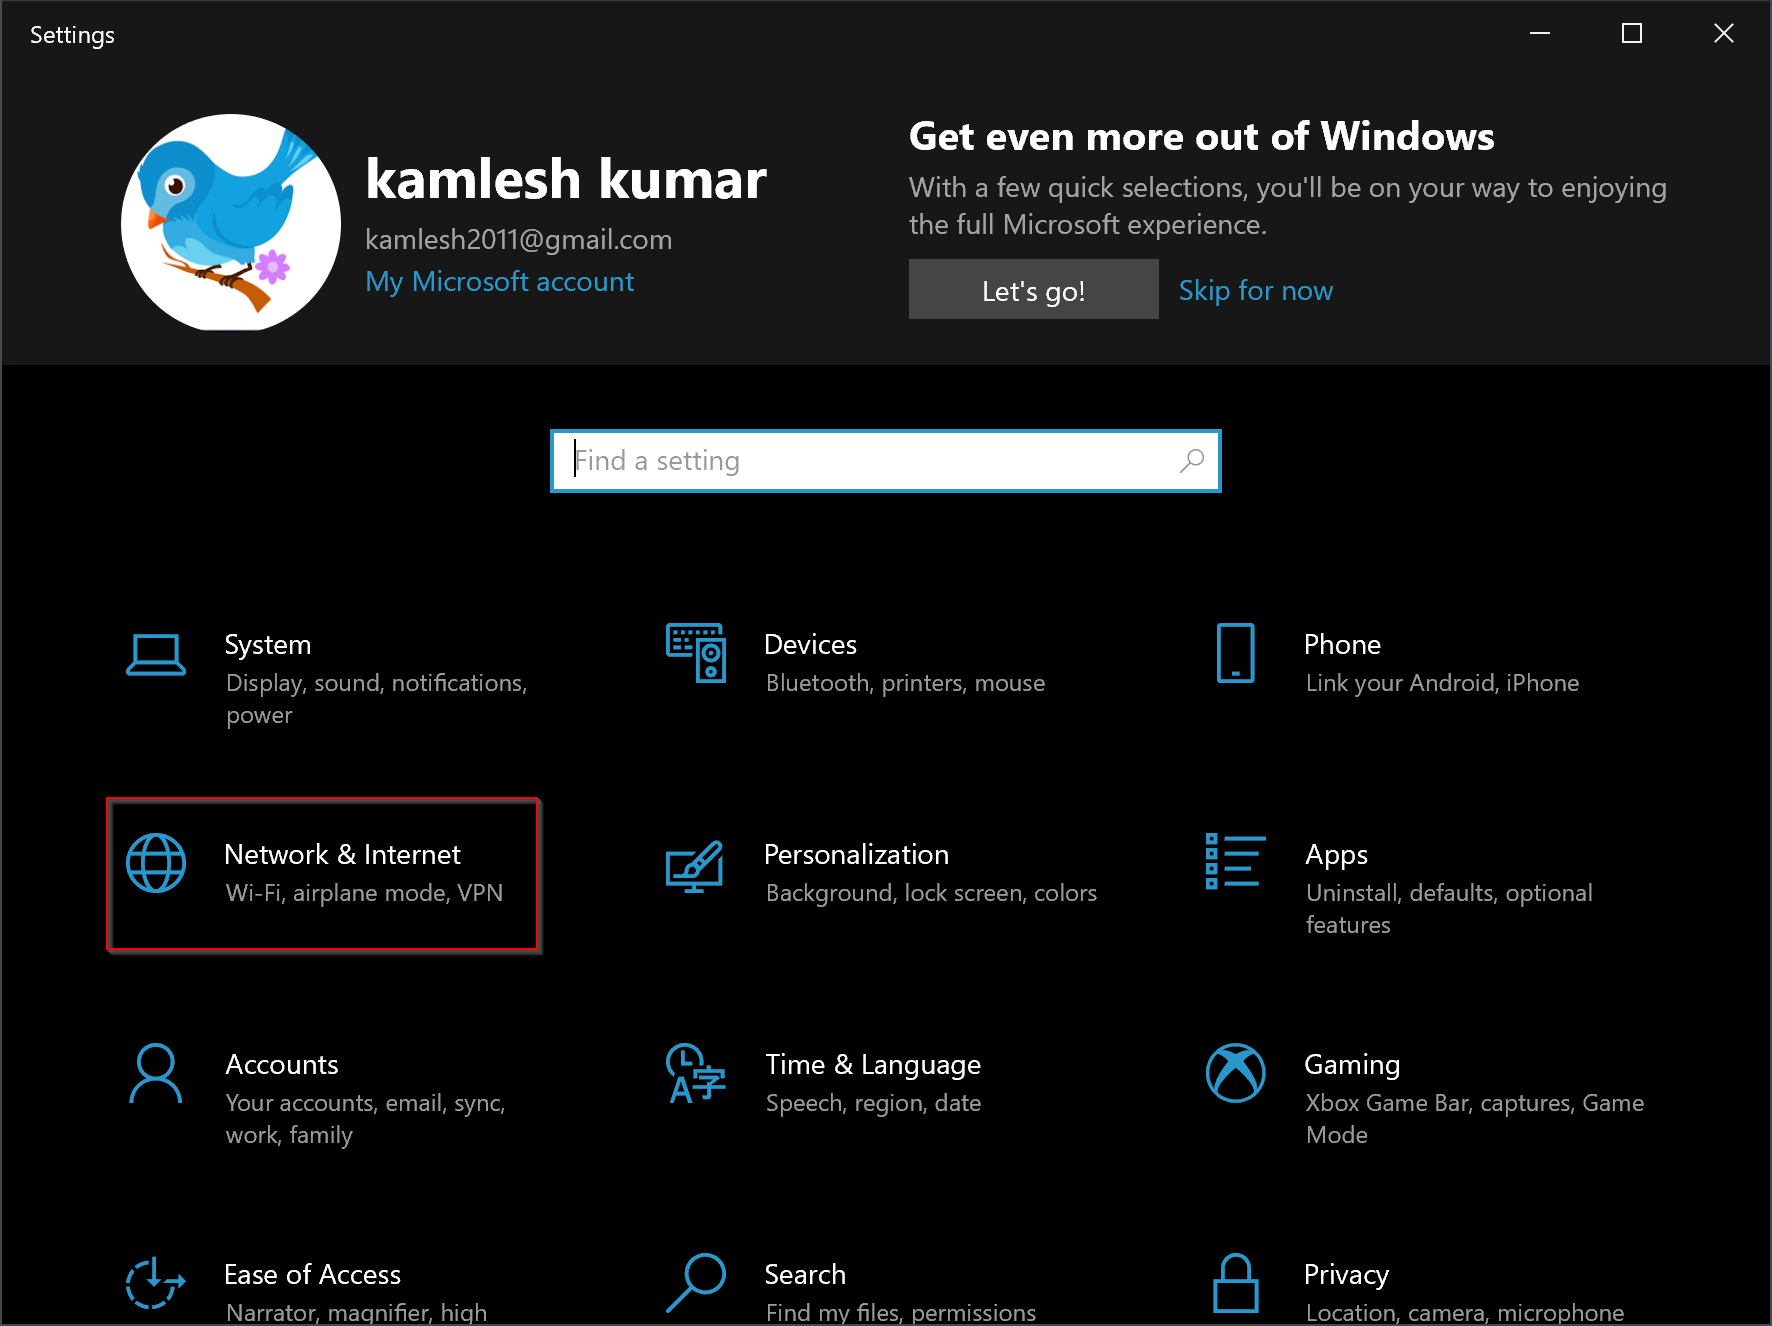
Step 3. In the Windows Settings menu, click on the “Network & Internet” option.
Step 4. In the Network & Internet settings, select the “Wi-Fi” tab from the left-hand menu.
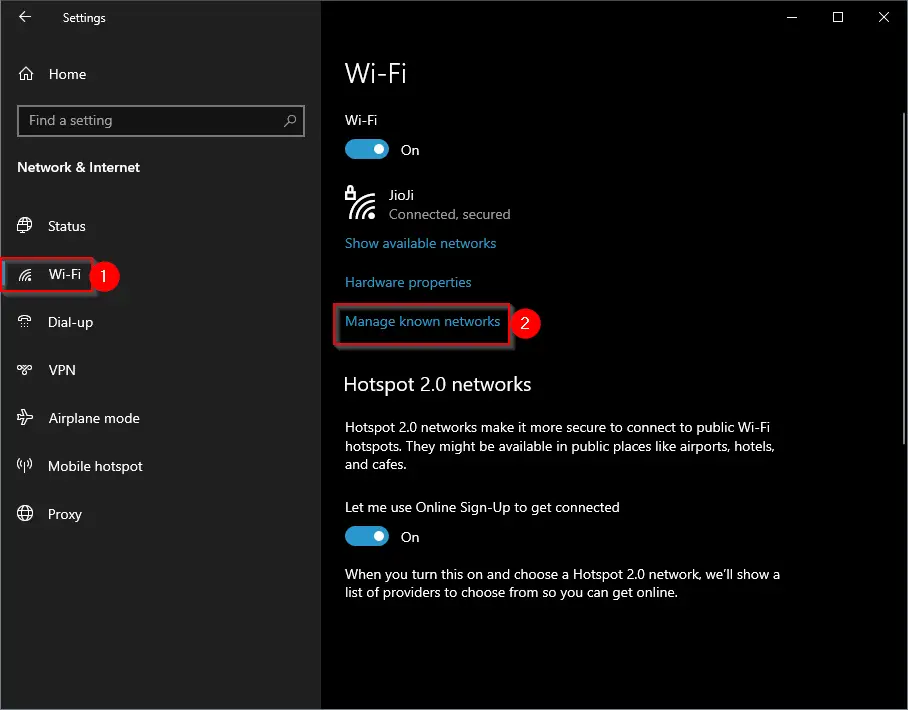
Step 5. On the right section, click on the “Manage known networks” option.
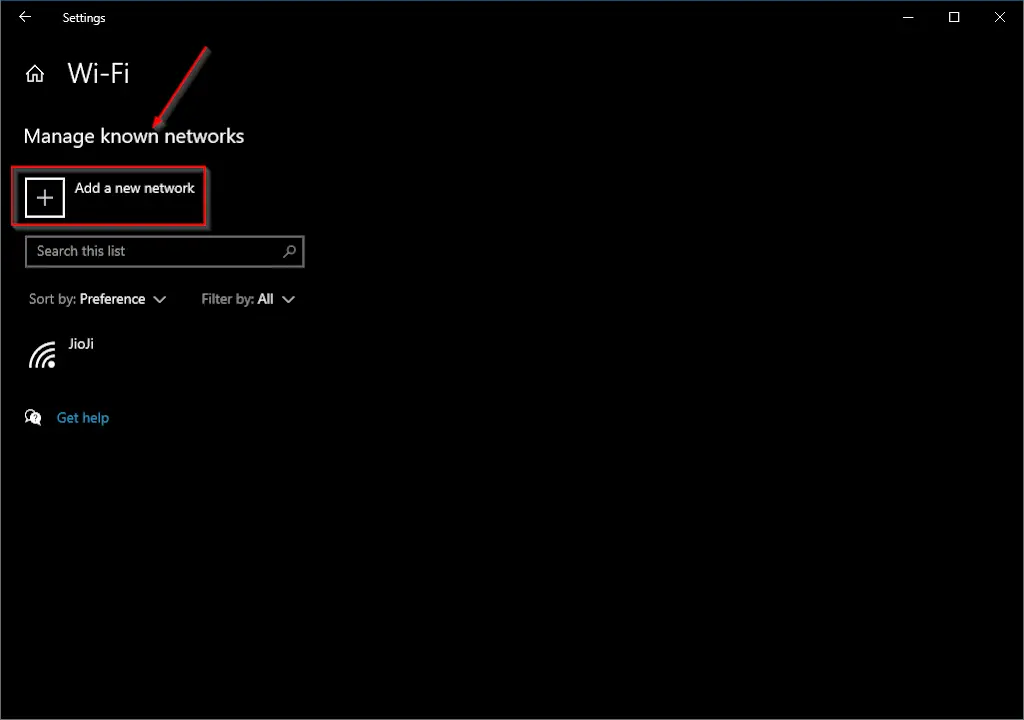
Step 6. In the list of known networks, you’ll see a variety of networks your computer has connected to in the past. To add a hidden network, click on the “Add a new network” option.
Step 7. A window will appear where you can enter the network name (SSID) of the hidden WiFi network you want to connect to. Type in the exact name of the network.
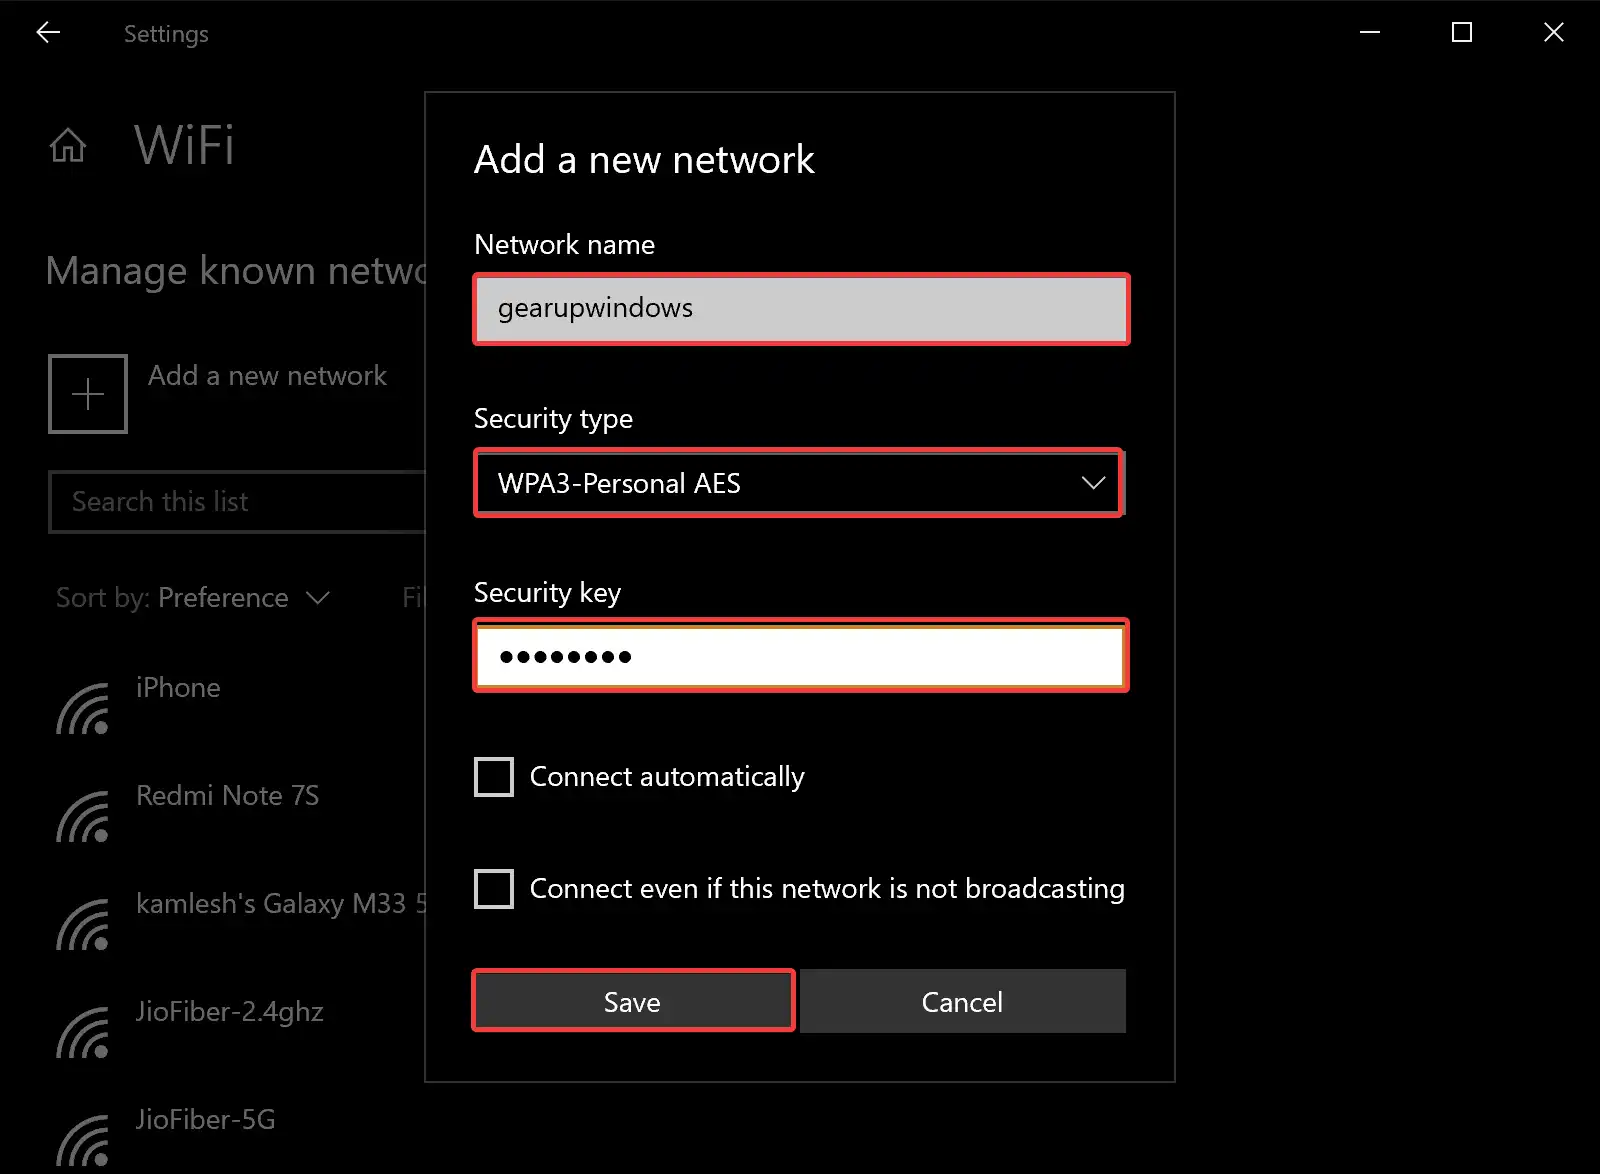
Step 8. Next, you’ll need to choose the security type of the hidden network. Most hidden networks use WPA2-Personal or WPA3-Personal. Select the appropriate option from the drop-down menu.
Step 9. Depending on the security type you selected, you’ll need to enter the network security key (password). Make sure to type it correctly, as it is case-sensitive.
Step 10. After entering the network name and security key, click the “Save” button.
Step 11. Windows 10 will save the network settings you entered. To connect to the hidden network, go back to the WiFi settings and click on the network name in the list of available networks. Windows will attempt to connect using the information you provided.
Step 12. If you entered the correct information, your Windows 10 computer should successfully connect to the hidden WiFi network. You’ll see a “Connected” status next to the network name in the WiFi settings.
Method 2: Control Panel
You can also connect to a hidden WiFi network on Windows 10 using the Control Panel. Here are the steps:-
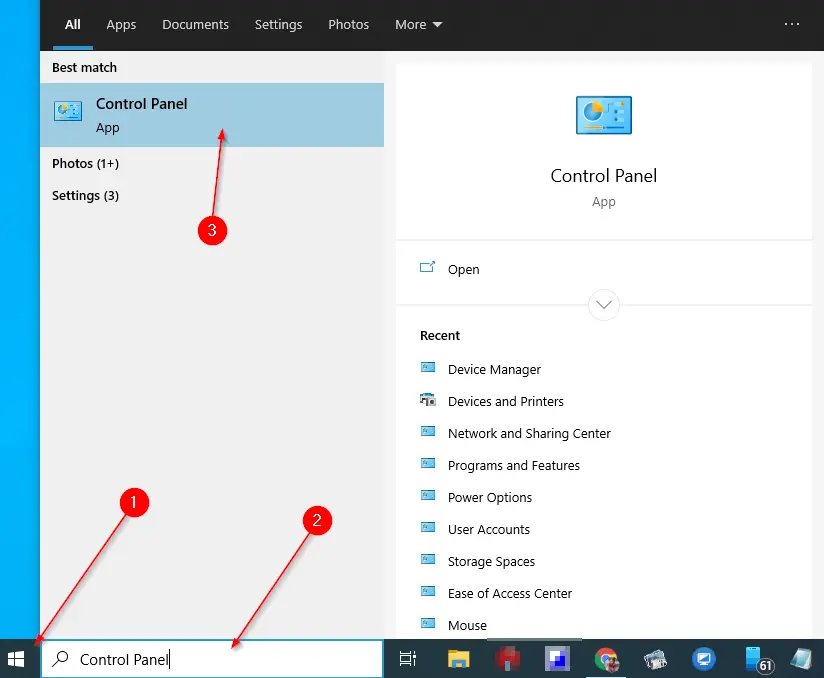
Step 1. Open Control Panel.
To do that, click on the Start button in the lower-left corner of your desktop. Type “Control Panel” into the search bar and press Enter. This will open the Control Panel window.
Step 2. In the Control Panel, set the “View by” option to “Category” (usually the default setting).
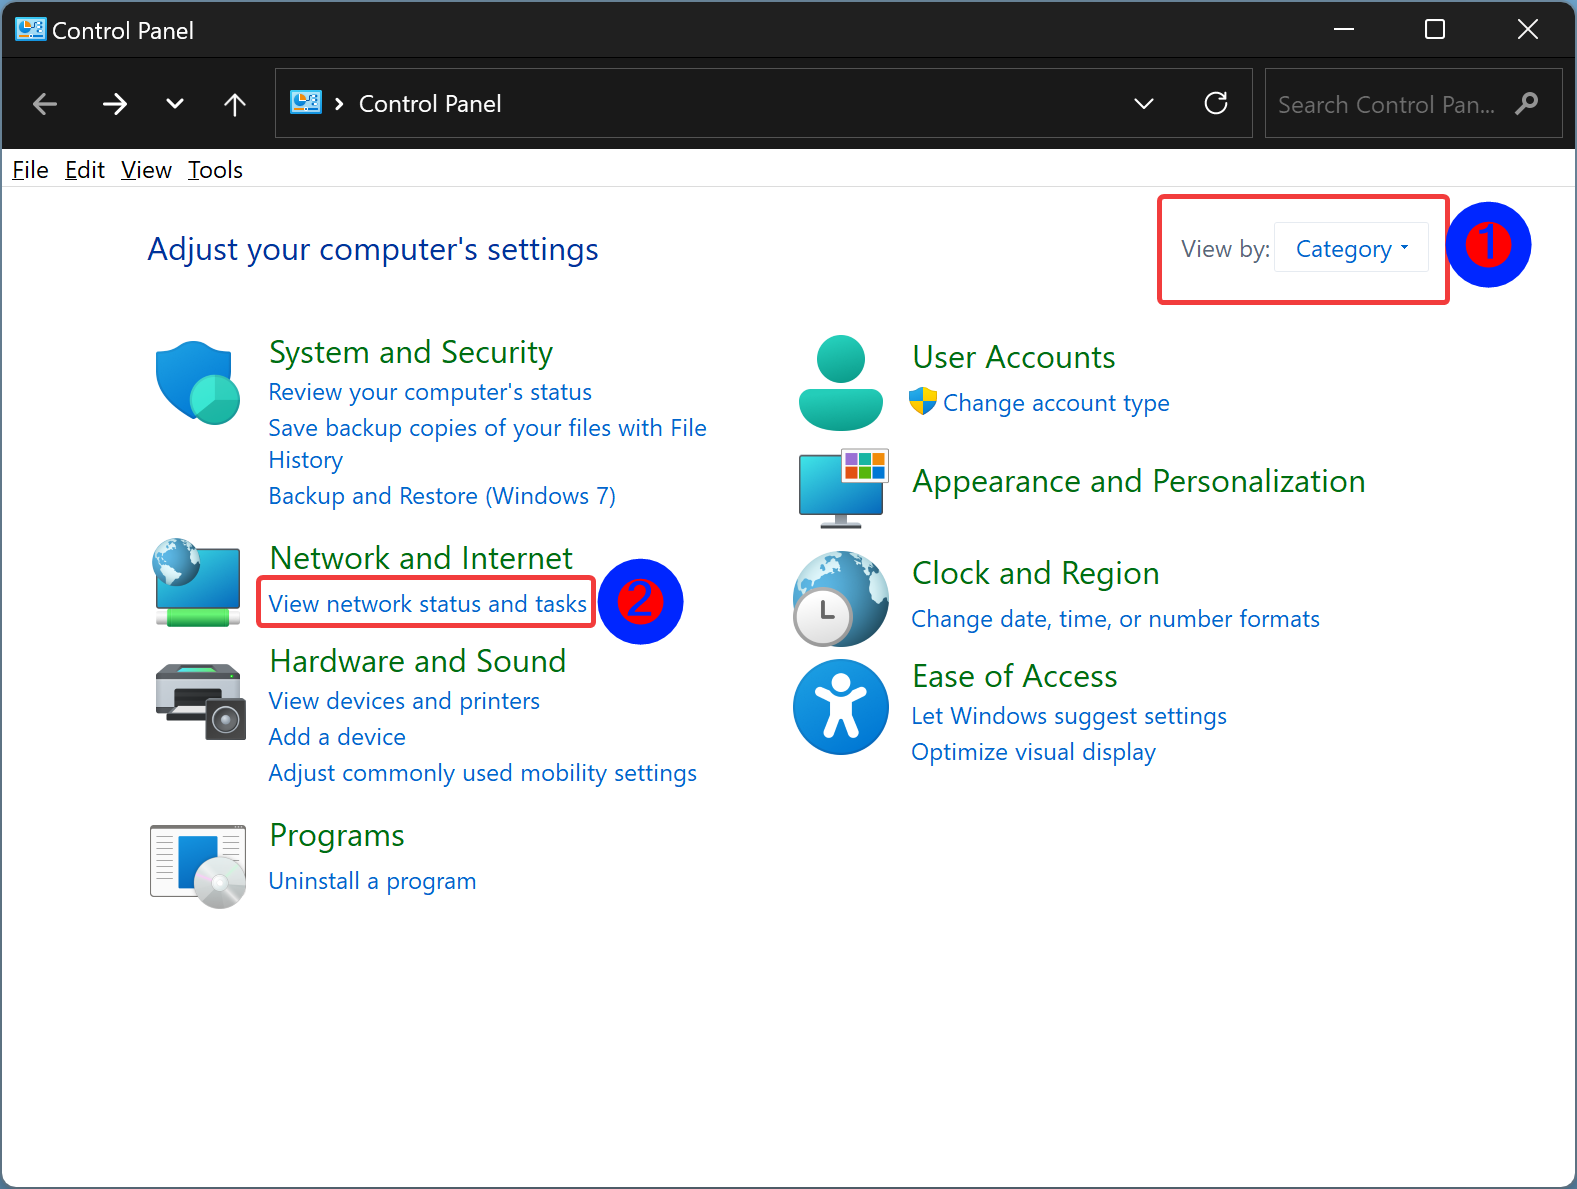
Step 3. Click on “View network status and tasks” under the “Network and Internet” category.
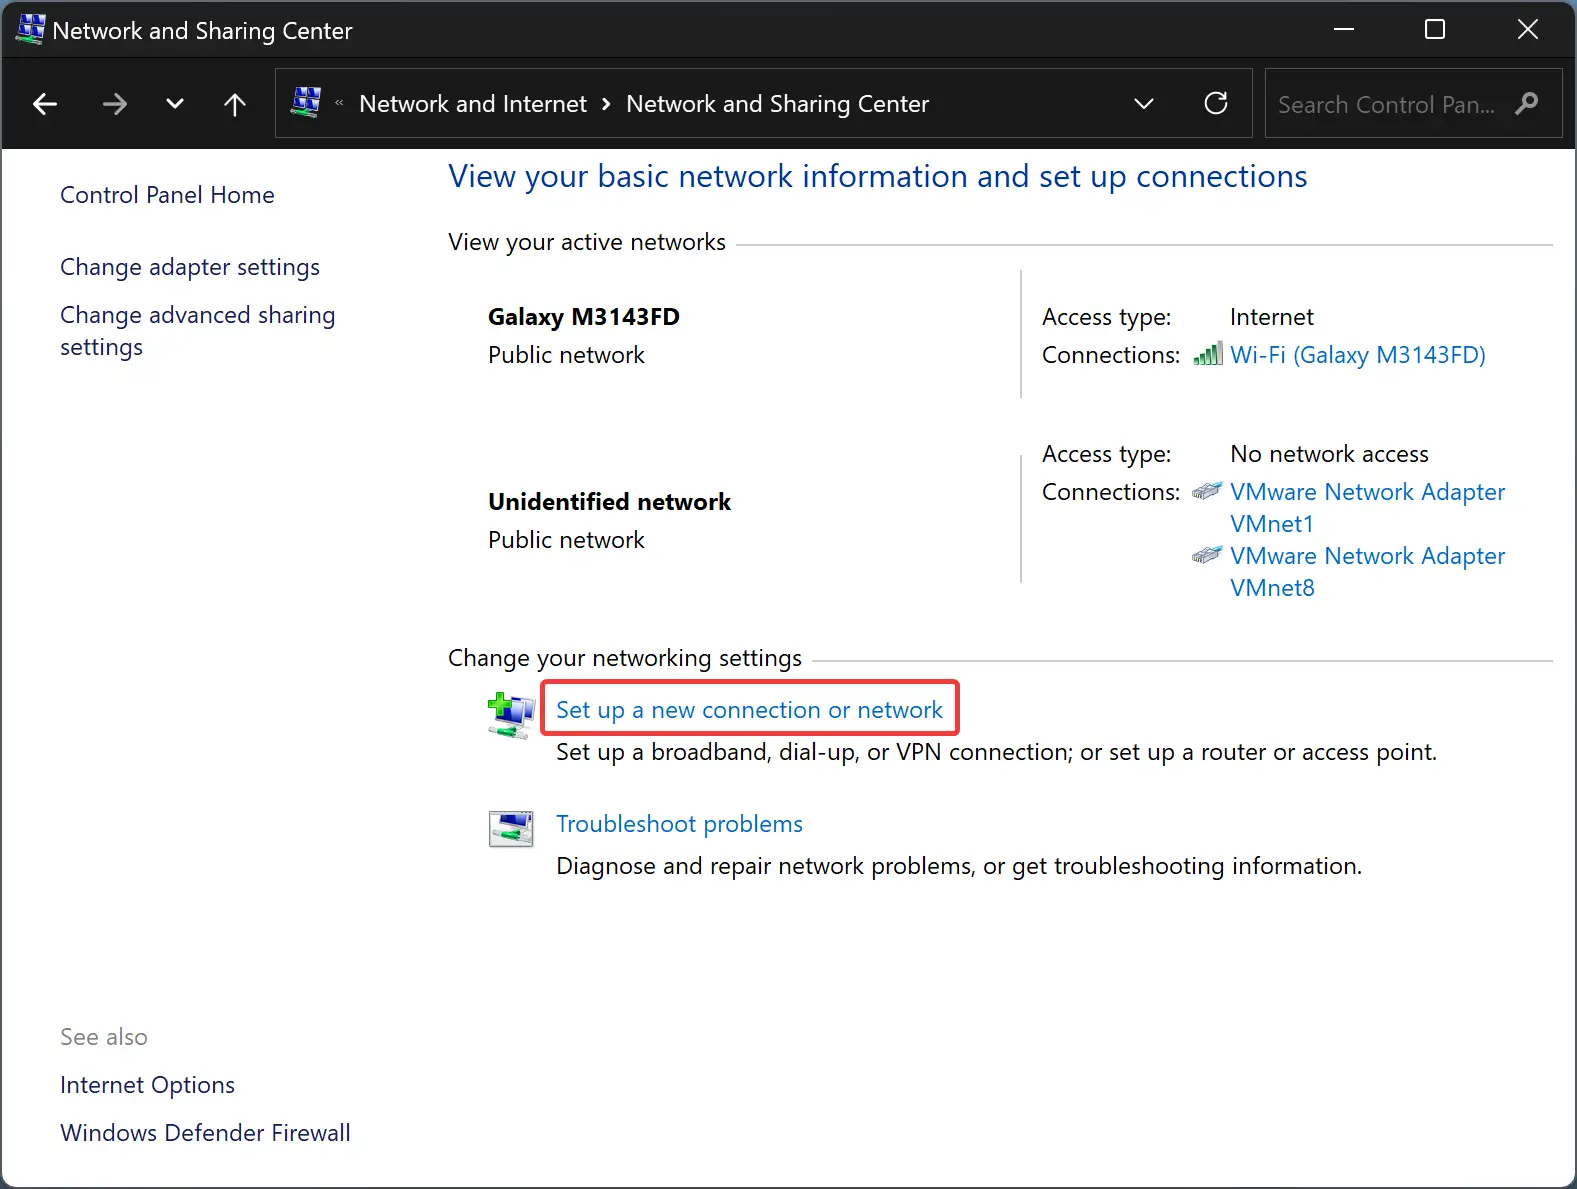
Step 4. In the Network and Sharing Center, you’ll see a list of your active network connections. On the left-hand side, click on “Set up a new connection or network.”
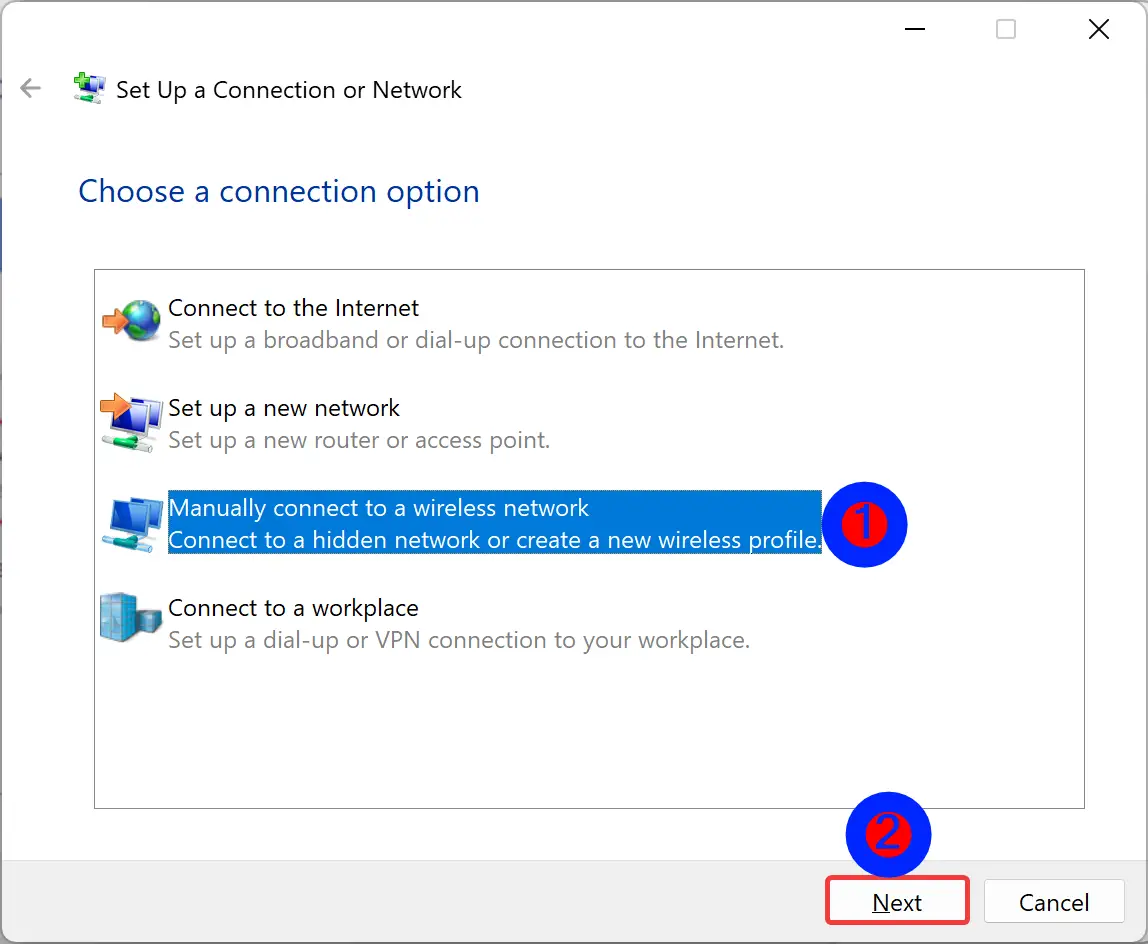
Step 5. In the “Set Up a Connection or Network” window, select “Manually connect to a wireless network” and click “Next.”
Step 6. You’ll be prompted to enter the network name (SSID) of the hidden WiFi network you want to connect to. Type in the exact name of the network.
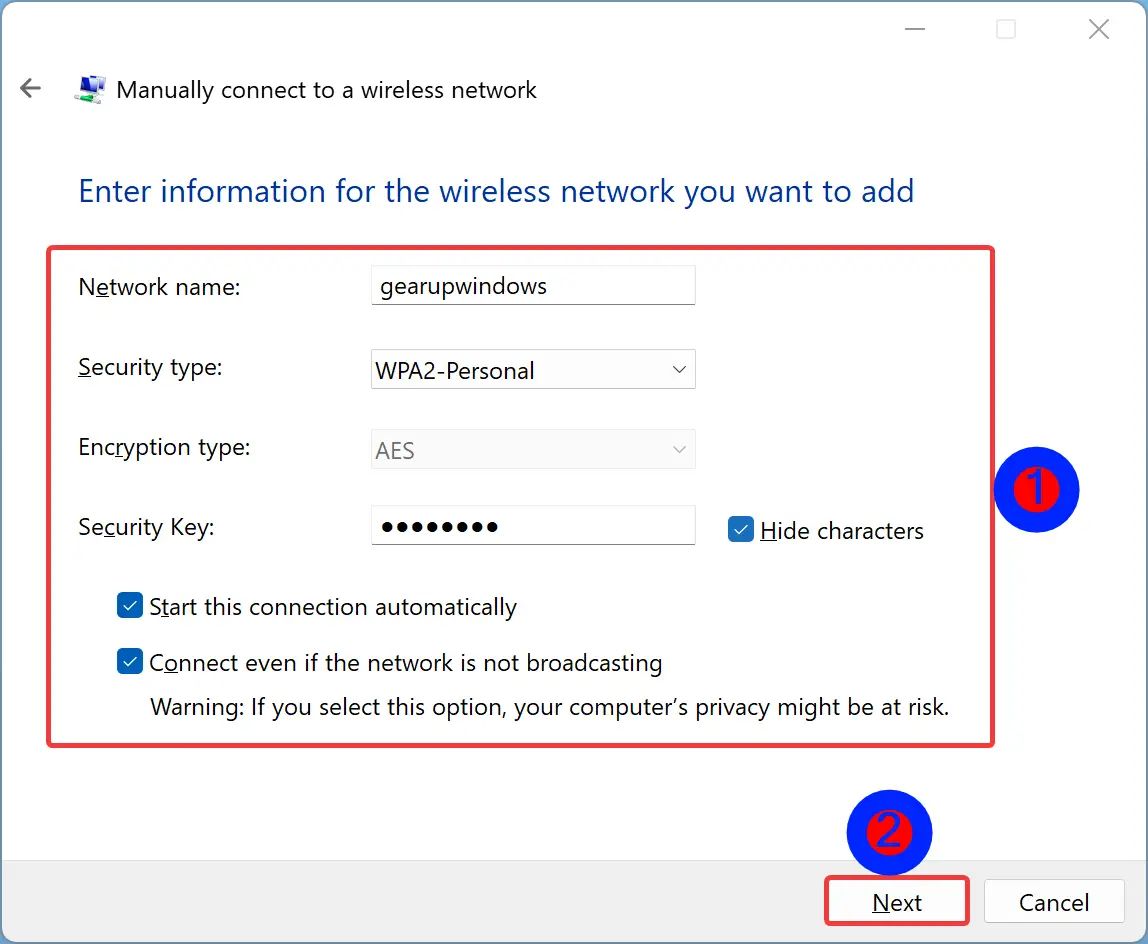
Step 7. Select the appropriate security type used by the hidden network. Most hidden networks use WPA2-Personal or WPA3-Personal.
Step 8. Enter the network security key (password) for the hidden network. Ensure it’s entered correctly, taking note of uppercase and lowercase characters, as it’s case-sensitive.
Step 9. After entering the network information and security key, click the “Next” button.
Step 10. Windows will save the network settings you entered. You can now close the Control Panel.
Step 11. To connect to the hidden network, click on the Wi-Fi icon in the system tray (taskbar) and select the hidden network from the list of available networks. Windows will attempt to connect using the information you provided.
Step 12. If you entered the correct information, your Windows 10 computer should successfully connect to the hidden WiFi network. You’ll see a “Connected” status next to the network name in the WiFi settings.
That’s it! You’ve successfully connected to a hidden WiFi network using the Control Panel in Windows 10.
Conclusion
Connecting to a hidden WiFi network on Windows 10 requires a few additional steps compared to connecting to a broadcasted network, but it’s a straightforward process once you know the procedure. By following the steps outlined in this guide, you can easily connect to hidden WiFi networks on your Windows 10 computer and enjoy wireless internet access.
