Although it is possible to make a bootable USB media to install Windows 10 using various tools, including the Media Creation Tool and Rufus, if you don’t want to use a third-party tool, then you can use the DiskPart command-line tool to create a flash drive to clean install Windows 10 from Command Prompt.
In this gearupwindows article, you will learn how to use Command Prompt to create a Windows 10 USB bootable media to install Win 10. Before proceeding with the steps, you will need to connect a USB flash drive with at least 8GB of space to your computer and the ISO file of Windows 10.
Creating a bootable Windows 10 USB disk using Command Prompt is quick and easy if you want to install or repair Windows 10 on your computer.
How to Create a Bootable Windows 10 USB Disk using Command Prompt?
Here’s how to create a bootable Windows 10 USB disk using Command Prompt:-
Step 1. First, insert a USB flash drive with at least 8 GB of storage into your computer.
Step 2. Next, open an elevated Command Prompt.
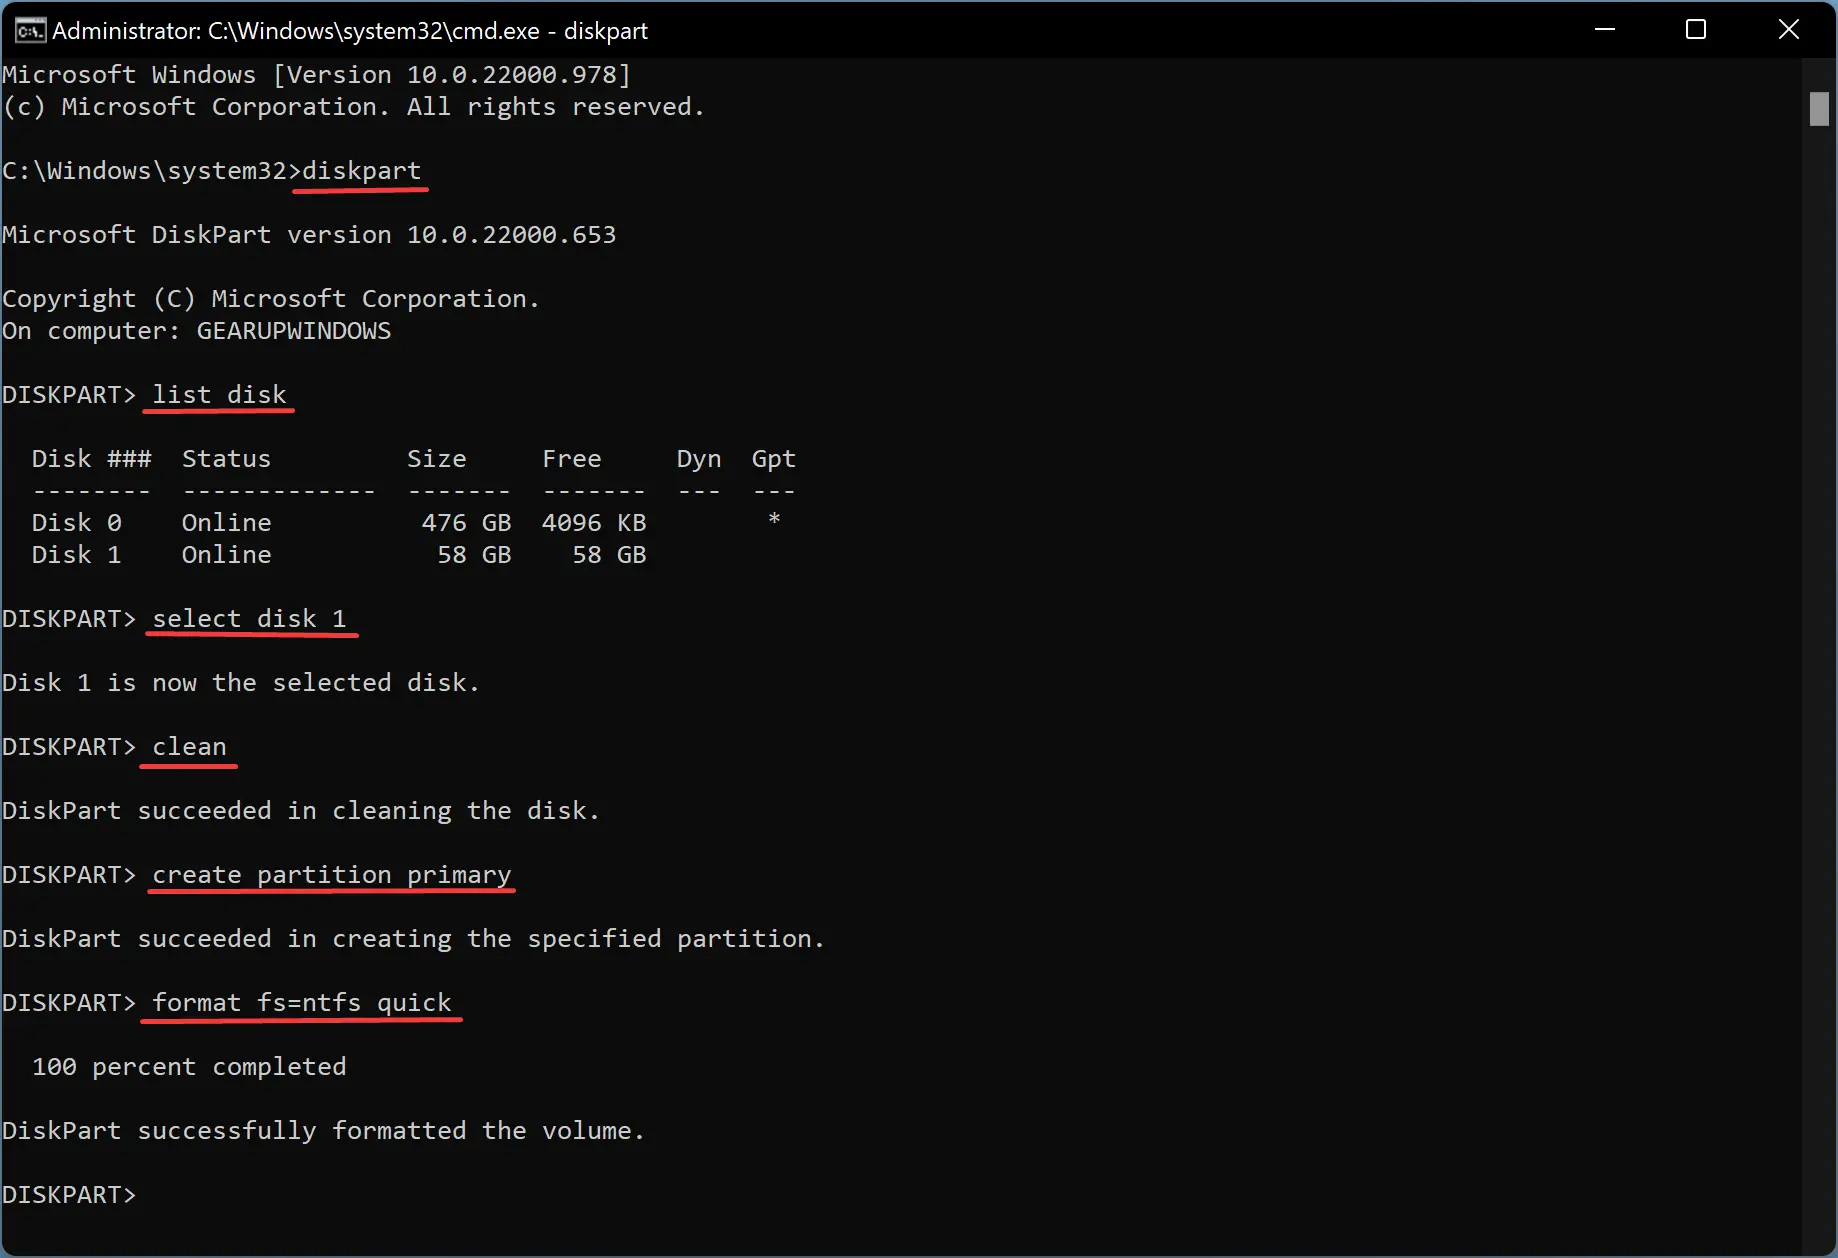
Step 3. In the Command Prompt window, type “diskpart” and press Enter.
Step 4. Then, type “list disk” and press Enter to display a list of disks connected to your computer.
Step 5. Note down the number of the USB drive from the list of disks.
Note:- Ensure to select the correct disk, as all data on the disk will be erased during this process.
Step 6. Now, type “select disk #” (Please replace “#” with the number of the USB drive) and press Enter.
Step 7. Then, type “clean” and press Enter to delete all data on the USB drive.
Step 8. After that, type “create partition primary” and press Enter to create a new primary partition on the USB drive.
Step 9. Next, type “select partition 1” and press Enter to select the newly created partition.
Step 10. Then, type “format fs=ntfs quick” and press Enter to format the partition as NTFS.
Step 11. Type “active” and press Enter to mark the partition as active.
Step 12. Then, type “exit” and press Enter to exit the diskpart utility.
Step 13. Now, insert the Windows 10 installation DVD or mount the Windows 10 ISO file on your computer.
Step 14. In the Command Prompt window, navigate to the directory where the Windows 10 files are located. For instance, if the files are located in the “E:\Win10” folder, type “E:” (without quotes) and press Enter, followed by “cd Win10” (without quotes) and press Enter.
Step 15. Then, type “xcopy . /s/e/f E:” (replace “E:” with the drive letter of the USB drive) and press Enter to copy the Windows 10 files to the USB drive.
Now, wait for the files to be copied to the USB drive.
That’s it! You have successfully created a bootable Windows 10 USB disk using Command Prompt. You can now install or repair Windows 10 on your computer using the USB disk.
Conclusion
In conclusion, creating a bootable Windows 10 USB disk using Command Prompt is a quick and easy process that can come in handy when you want to install or repair Windows 10 on your computer. By following the steps outlined in this gearupwindows article, you can create a bootable USB drive using the DiskPart command-line tool without the need for any third-party software. Just remember to select the correct disk and ensure that you have the Windows 10 ISO file and a USB flash drive with at least 8GB of space before proceeding with the steps. With this knowledge, you can now create a Windows 10 USB bootable media and enjoy a smooth installation or repair experience.