Microsoft has launched Windows 11 stable version. If you need, you can download the official ISO from the Microsoft server. Microsoft has also launched a new tool, “Windows 11 Installation Assistant,” that helps you upgrade from Windows 10 to 11. But what if you want to install a fresh or clean Windows 11 on several computers? On every PC downloading the whole ISO will waste bandwidth and time also. So, to install a clean Windows 11, we recommend you create bootable USB media. In this gearupwindows article, we will guide you on creating a bootable USB drive of Windows 11 using the “Windows 11 Media Creation Tool.”
Windows 11 Media Creation Tool
Although several third-party bootable USB flash drive creator software is available in the market, Rufus comes on top of the list. Since it is a third-party tool, not all Windows users will be happy with using this app. If you are one of those Windows users who don’t love to use a third-party tool, you can use the “Windows 11 Media Creation Tool,” officially released by Microsoft.
This is a handy tool and specially built to burn a bootable USB flash drive for Windows 11. To make a bootable USB drive for Windows 11, “Windows 11 Media Creation Tool,” you will need the following:-
- A USB flash drive with 8GB or more storage (Ensure backup of your important data before making it bootable. All the data will be erased during the process of creating a bootable USB drive.)
- Windows 11 ISO image file.
How to Use Windows 11 Media Creation Tool to Make Windows 11 Bootable USB Drive?
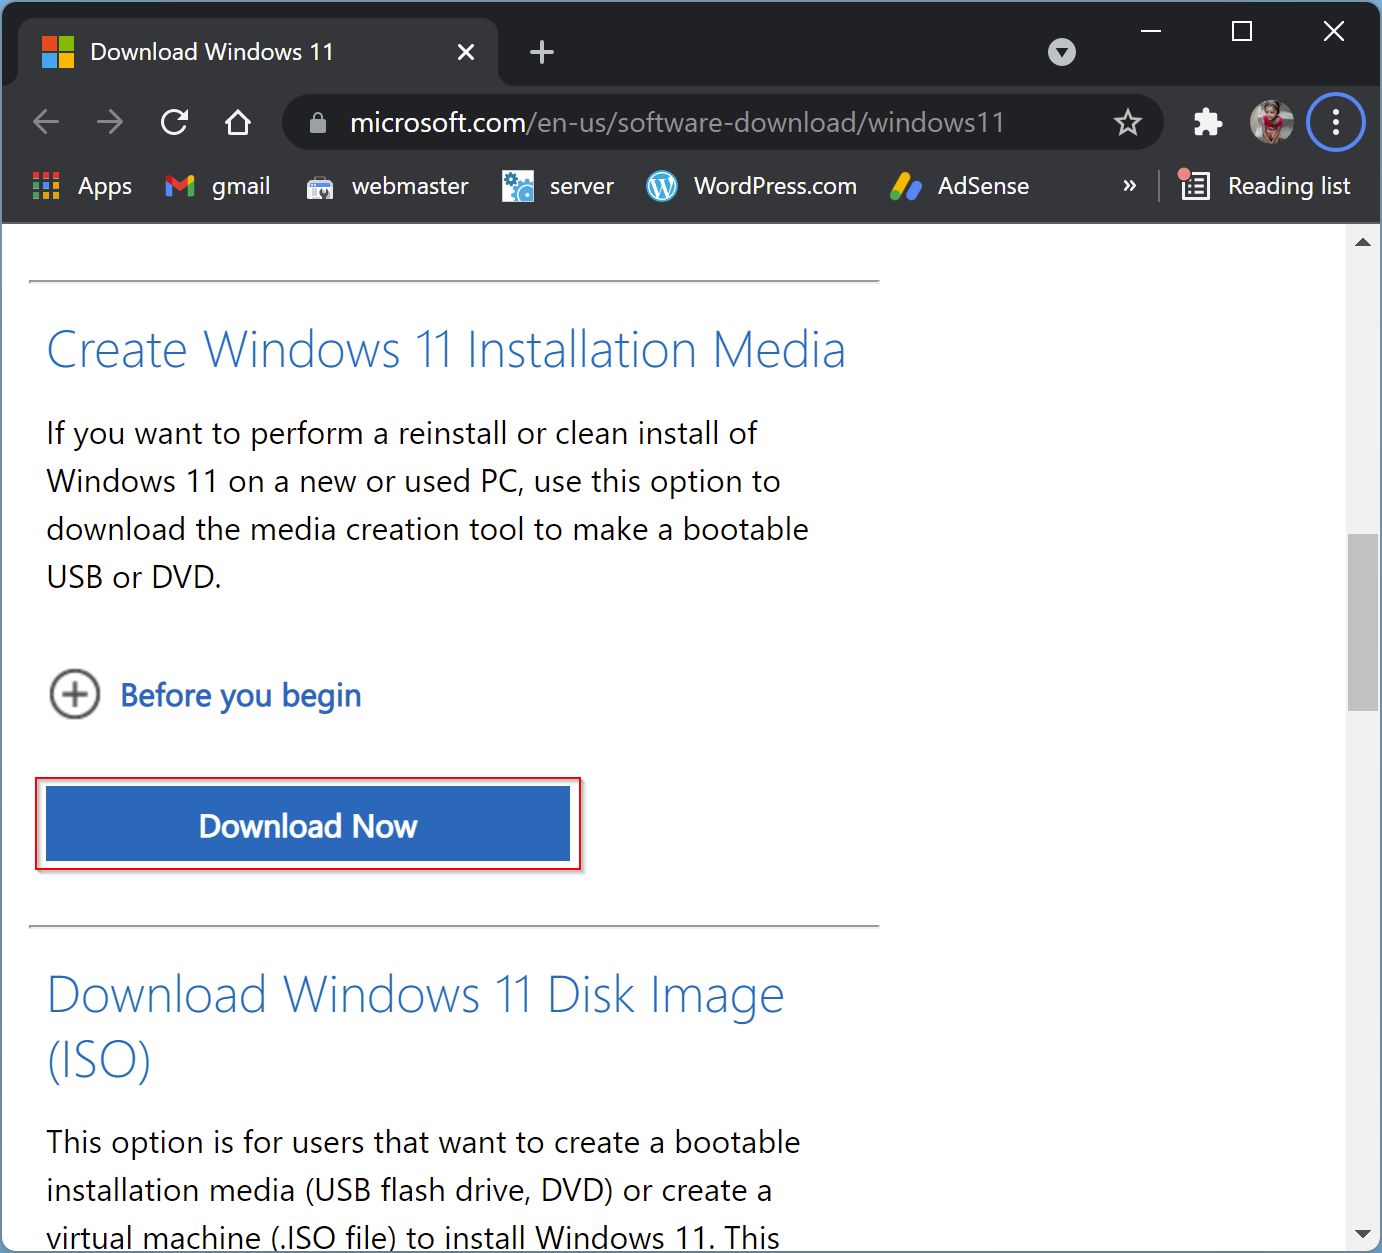
Step 1. First, download the “Windows 11 Media Creation Tool” by visiting the official download page at microsoft.com.
To do that, visit the above link and click the Download now button under the header “Create Windows 11 Installation Media.”
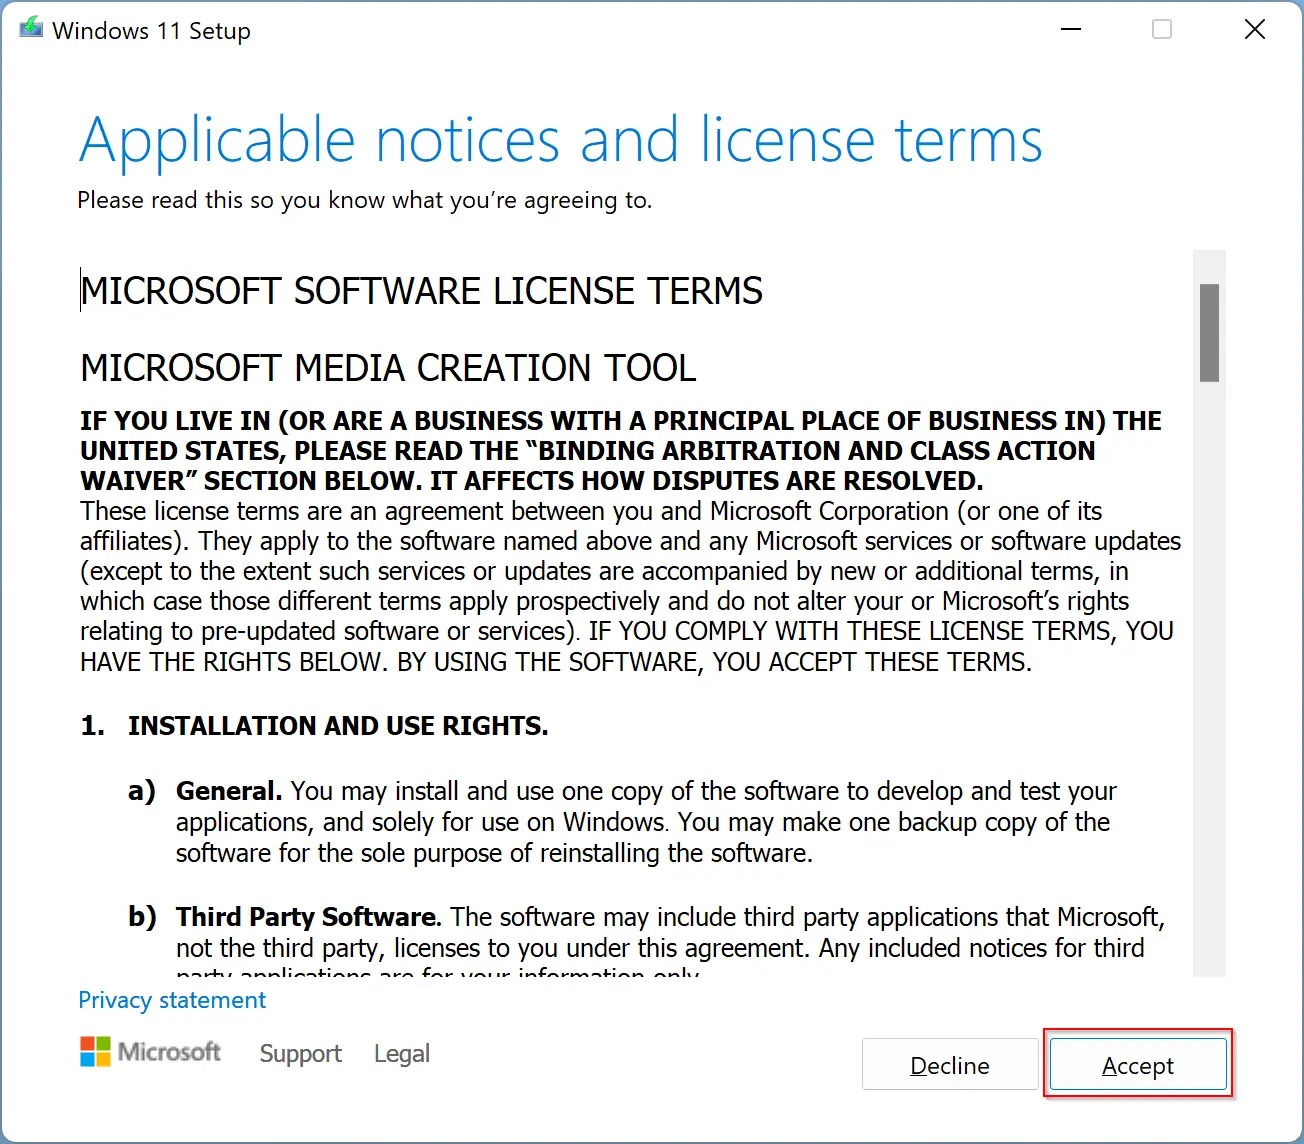
Step 2. After that, double-click the downloaded setup file to launch it. When it opens, click the Accept button.
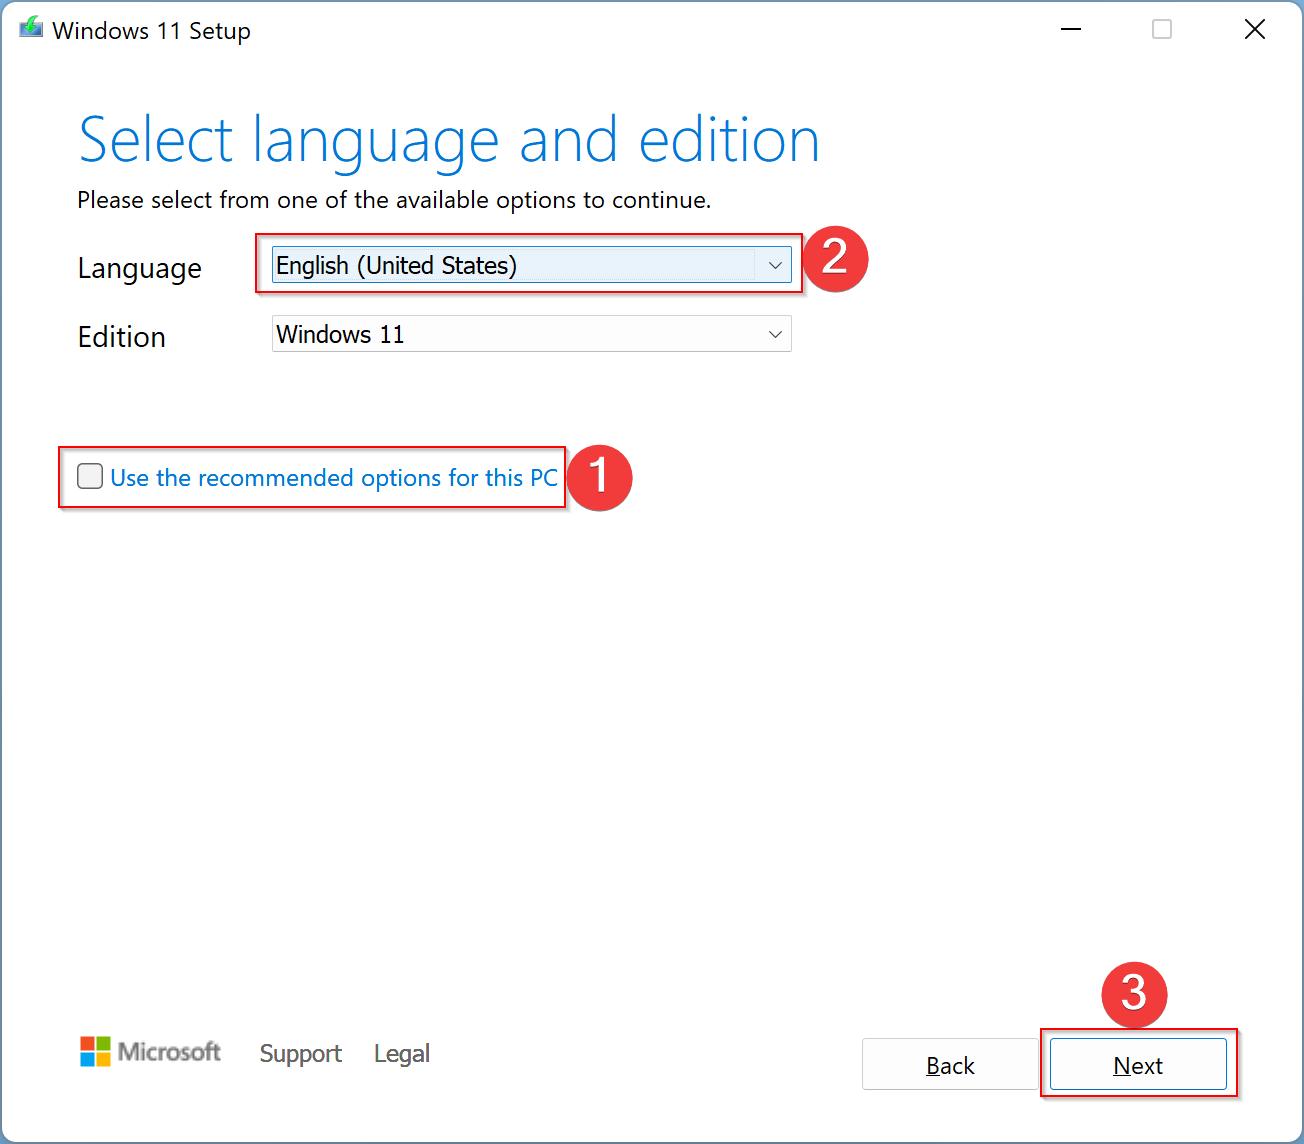
Step 3. Then uncheck the option “Use the recommended options for this PC.” Click the drop-down menu of “Langage” and select your preferred Windows 11 language. When you’re done, click the Next button.
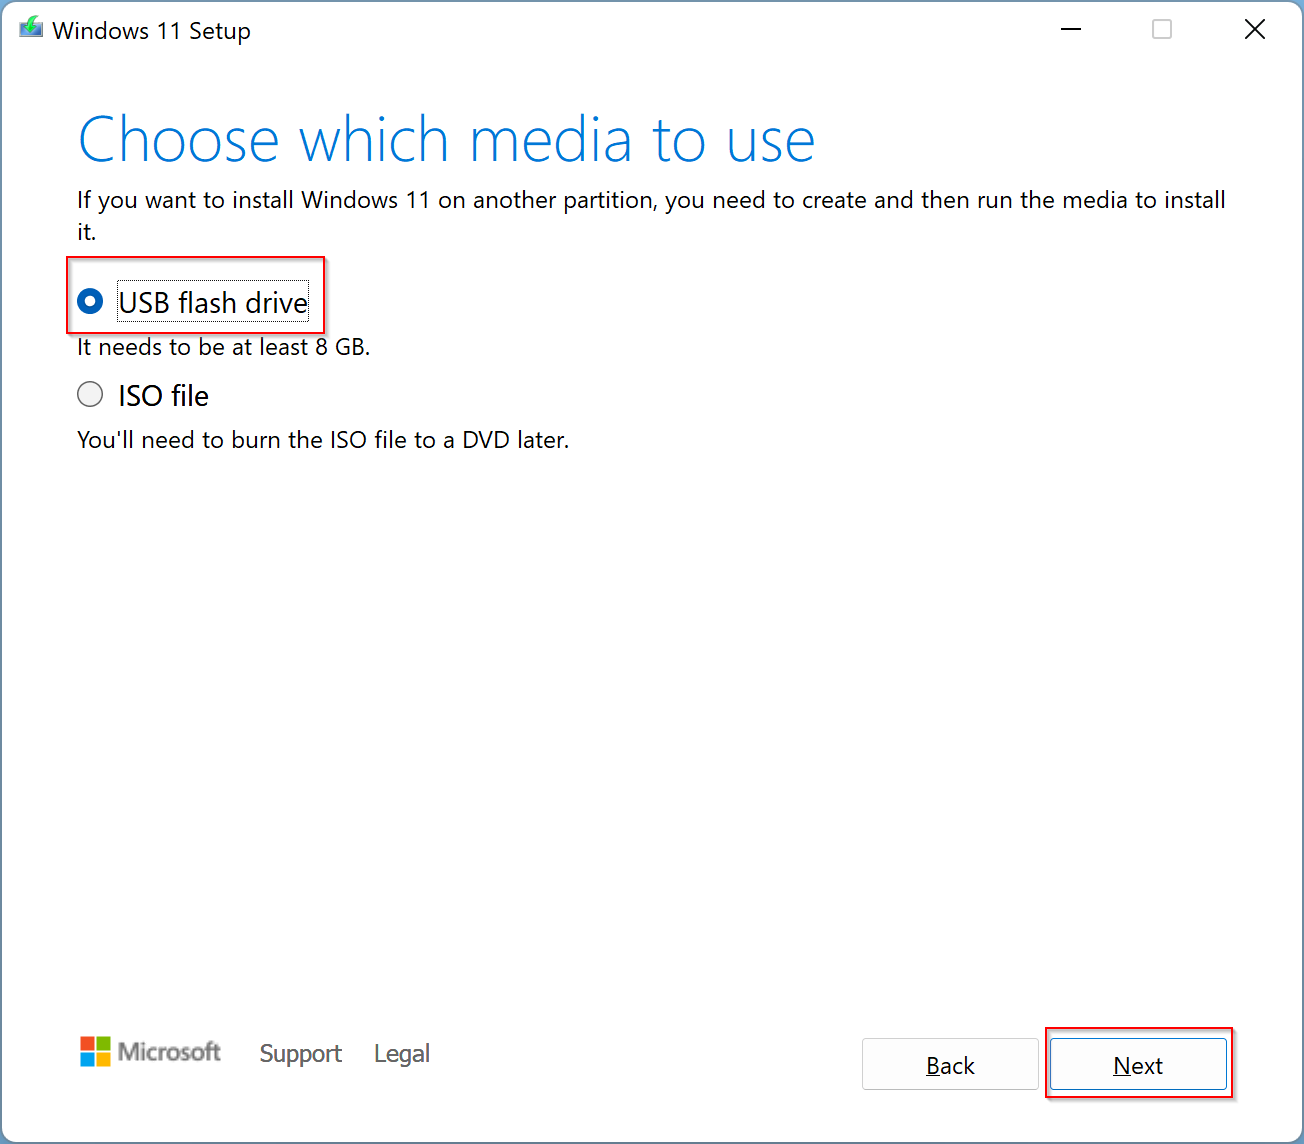
Step 4. Now, connect your USB disk to your PC if you have not already connected that.
Step 5. Then, select the USB flash drive option when you’re prompted to choose which media to use. After that, click the Next button.
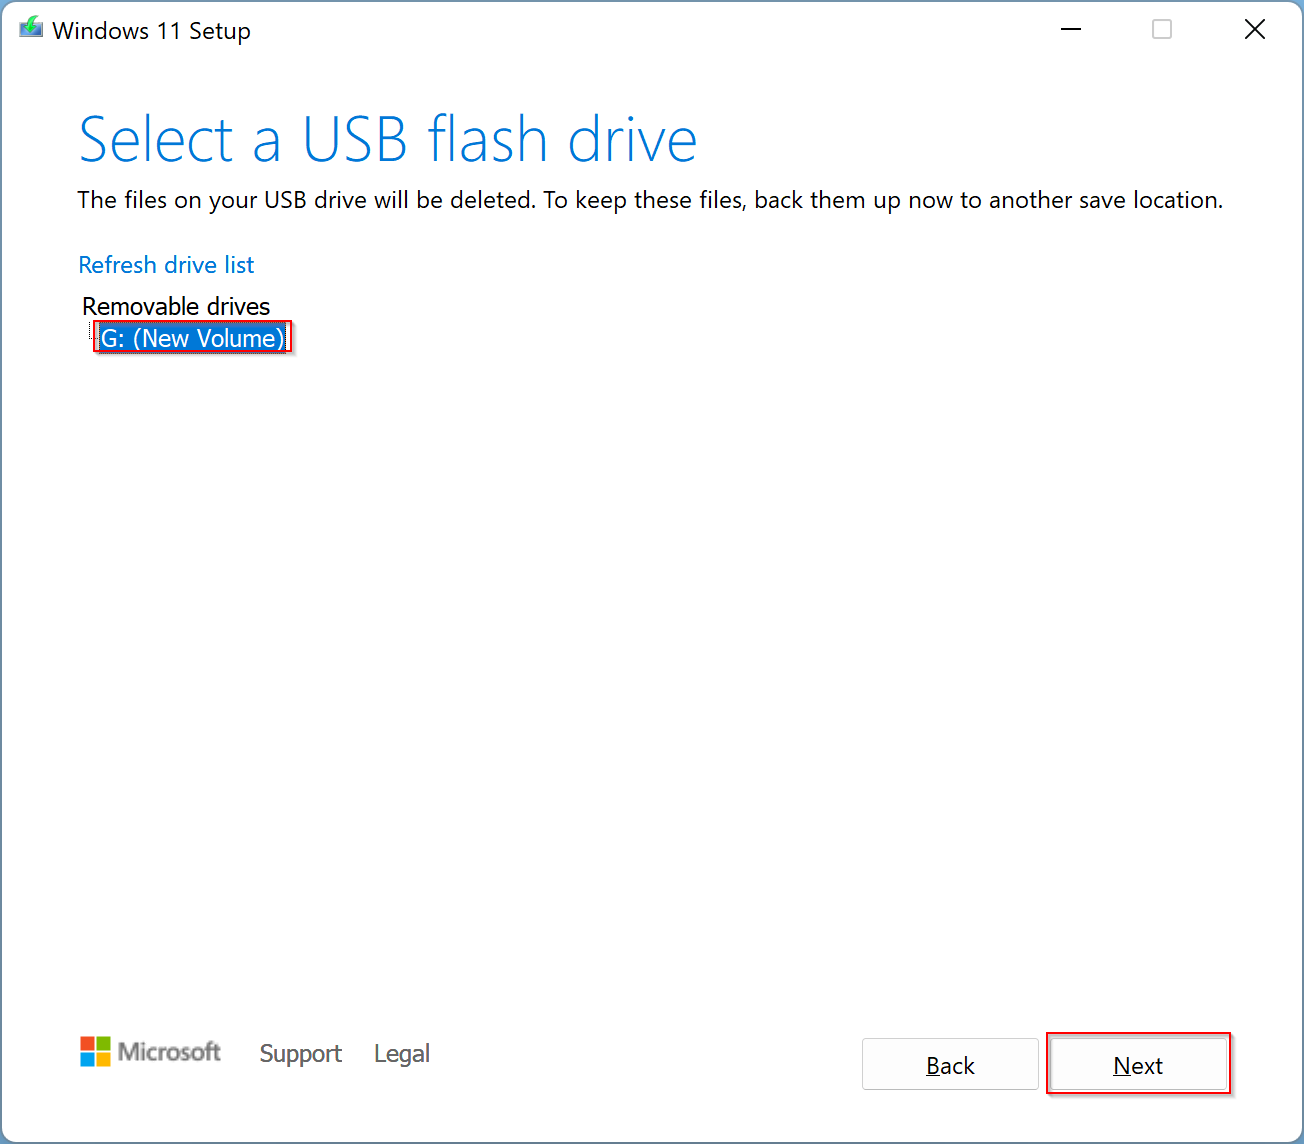
Step 6. In the following window, choose the USB drive letter just below “Removable drives.” Then click the Next button.
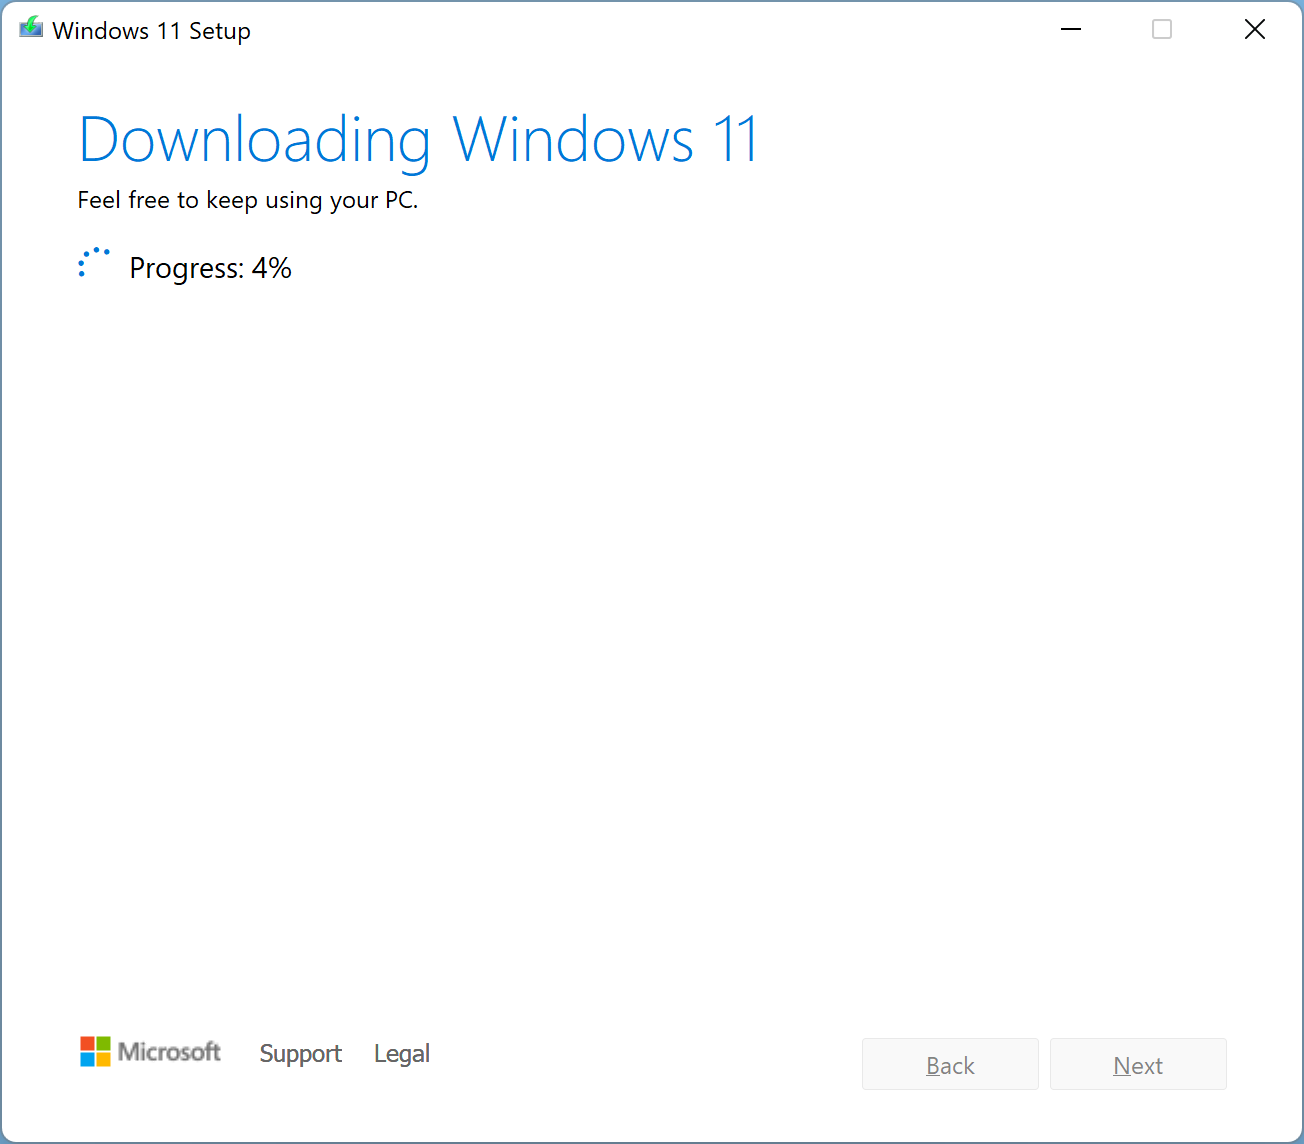
Step 7. After that, it will start downloading Windows 11 files on your computer.
When downloading is 100% completed, it will create a bootable USB drive for you. You will see a message on the screen, “Your USB flash drive is ready.” Click the Finish button and remove the USB drive from your PC. Now use this bootable media to install Windows 11 on a supported PC.
Suppose you have already downloaded a Windows 11 ISO image on your computer; no need to download it again. Simply use the Rufus tool to make your USB drive bootable.
Good luck!
Conclusion
In conclusion, Microsoft has released the stable version of Windows 11, and users can download it from the official Microsoft server. To upgrade from Windows 10 to 11, users can use the Windows 11 Installation Assistant tool. However, if someone wants to install a clean Windows 11 on multiple computers, it is recommended to create a bootable USB drive. Users can use the Windows 11 Media Creation Tool, officially released by Microsoft, to create a bootable USB flash drive for Windows 11. This tool is easy to use and can be downloaded from the Microsoft website. Users need to follow the simple steps outlined in this guide to create a bootable USB drive successfully. Whether users choose to use the Windows 11 Media Creation Tool or any other third-party tool, it is essential to back up their data before creating a bootable USB drive.