Windows 11 introduces several new features and improvements to enhance the user experience, and one of the standout additions is Copilot, a built-in chatbot designed to provide assistance and answer your queries. While you can easily access Copilot through the dedicated button in the Taskbar or by using the “Windows key + C” keyboard shortcut, creating a desktop shortcut can be a convenient way to access this feature quickly, especially if you’ve removed the Taskbar icon or are in a region where Copilot is not fully compliant with regulations. In this guide, we’ll walk you through the steps to create a desktop shortcut to access Copilot on Windows 11.
Prerequisites
Before you proceed, ensure that your Windows 11 system is up to date with the September 2023 update or version 23H2.
How to Create a Copilot Desktop Shortcut?
Follow these step-by-step instructions to create a desktop shortcut for Copilot:-
Step 1. Right-Click on the Desktop: Begin by right-clicking on your Windows 11 desktop. This action will bring up a context menu.
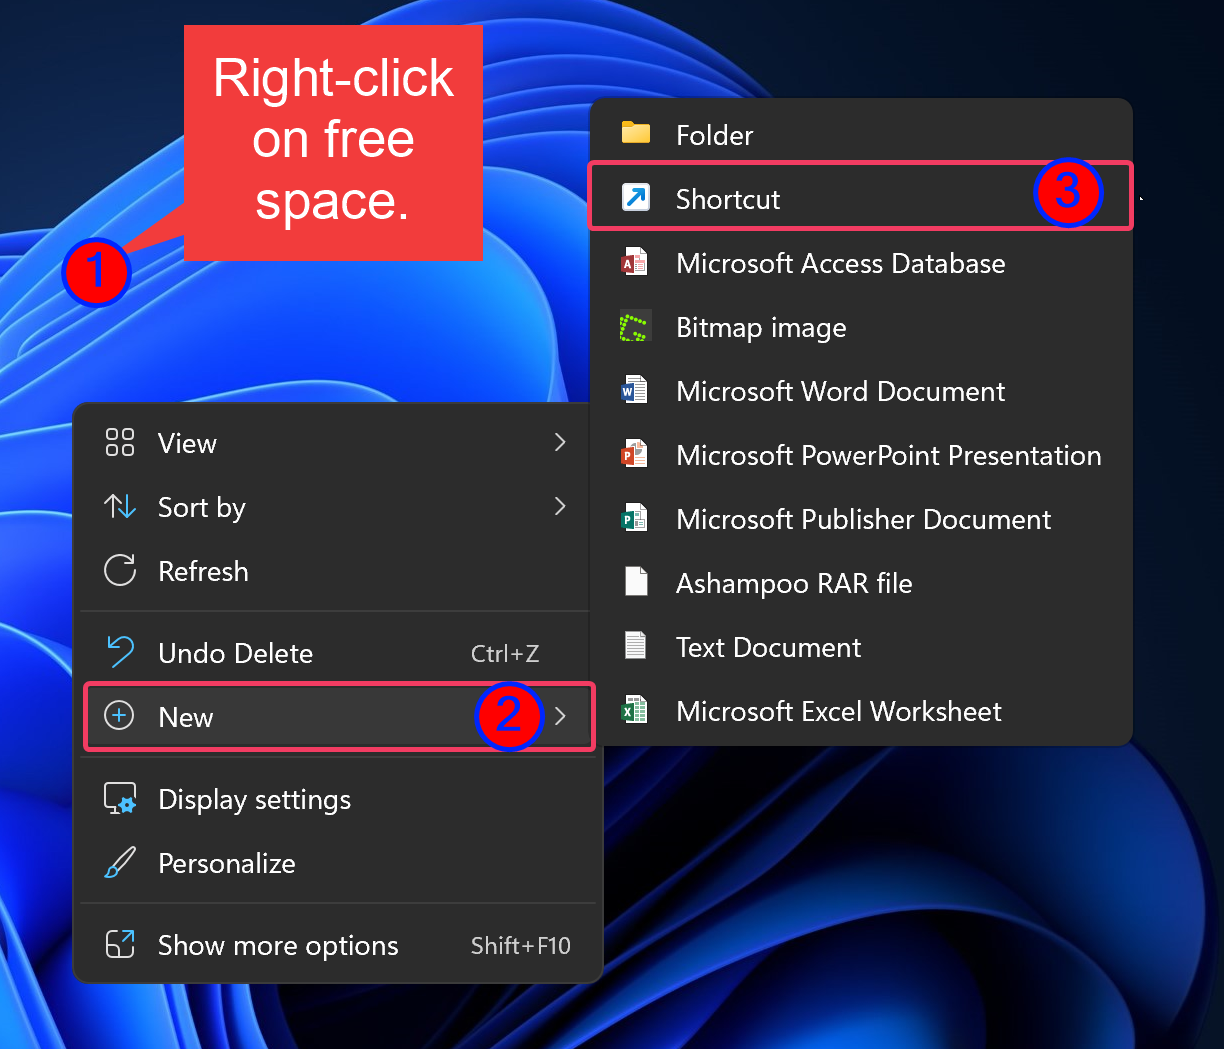
Step 2. Select “New” and Choose “Shortcut”: In the context menu, hover your cursor over “New” to reveal a submenu. From this submenu, select “Shortcut.”
Step 3. Create the Shortcut: A “Create Shortcut” wizard will appear on your screen. In the field labeled “Type the location of the item,” paste the following command:-
microsoft-edge://?ux=copilot&tcp=1&source=taskbar
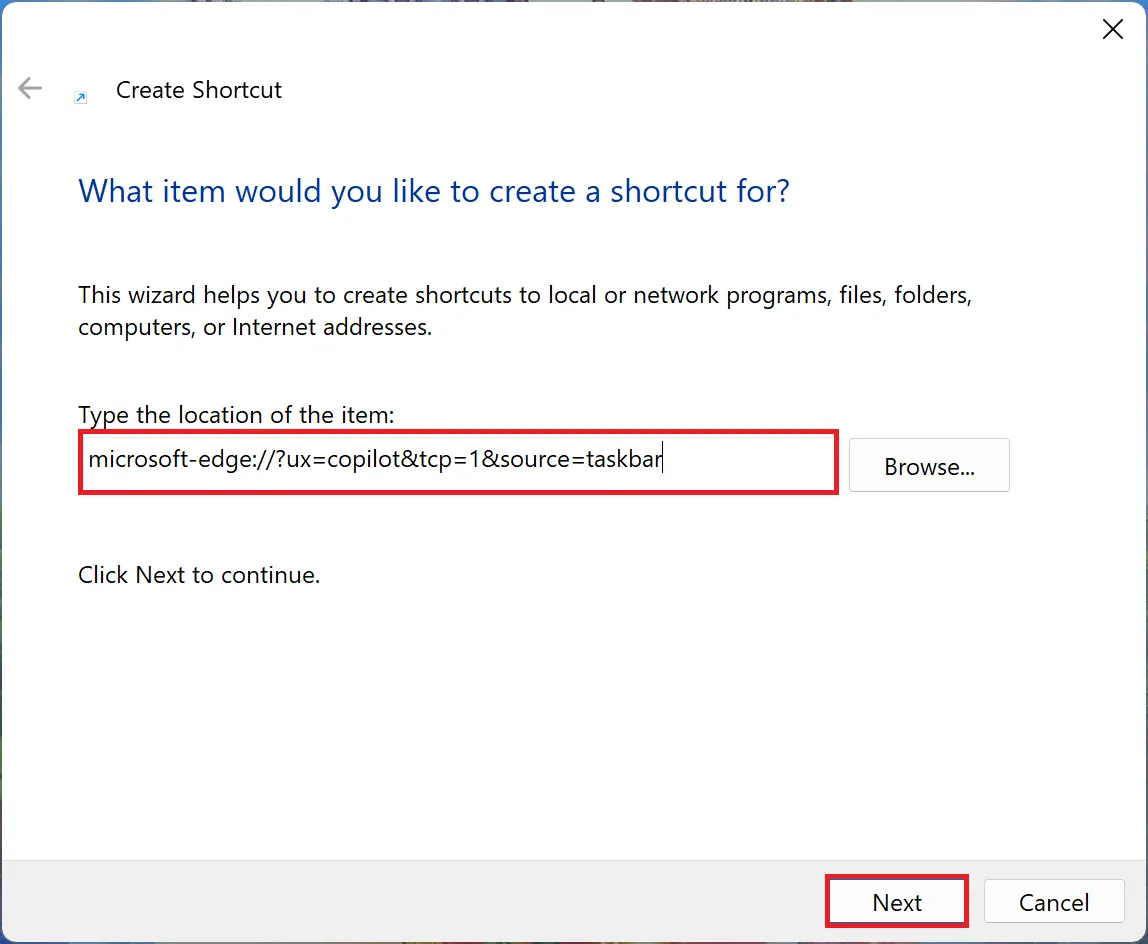
Step 4. Click “Next”: Once you’ve pasted the command, click the “Next” button to proceed.
Step 5. Name the Shortcut: Now, you’ll need to give your shortcut a name. For instance, you can simply name it “Copilot” to keep it straightforward and easy to identify.
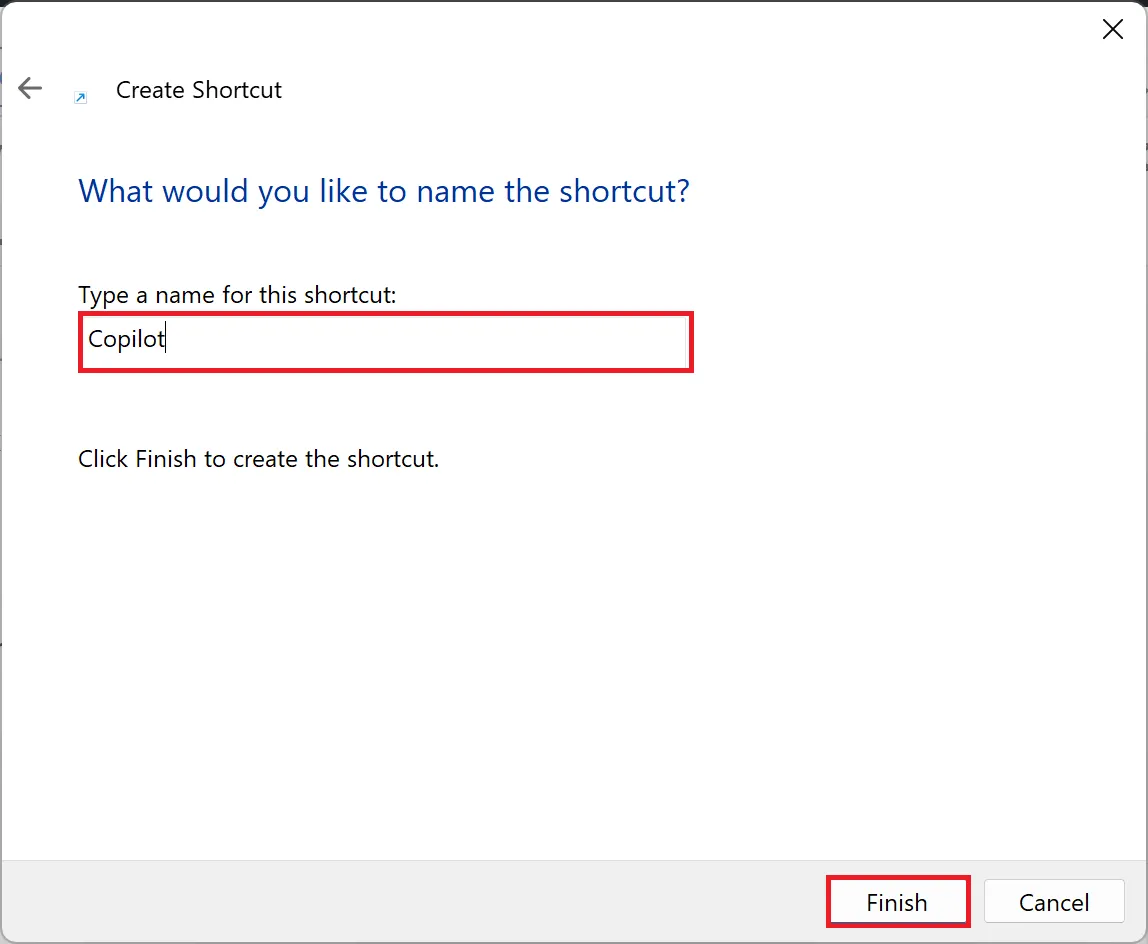
Step 6. Click “Finish”: After naming the shortcut, click the “Finish” button to create it.
Step 7. Customize the Shortcut Icon (Optional): If you’d like to change the icon for your Copilot shortcut, right-click on the newly created shortcut and choose “Properties” from the context menu.
Step 8. Change the Icon: In the shortcut’s properties window, click the “Change Icon” button. You can select an icon from the available options or specify a different path to an icon file.
Step 9. Apply the Changes: Once you’ve chosen an icon, click “OK” to apply the changes.
Conclusion
Creating a Copilot desktop shortcut on Windows 11 is a simple yet useful task that can help you access this feature quickly and efficiently. Whether you’ve removed the Taskbar icon or prefer a more direct way to engage with Copilot, these steps will allow you to set up a convenient shortcut on your desktop. With this shortcut in place, you can easily access Copilot and make the most of its features on your Windows 11 system.
