Have you ever noticed two blue arrows on your Windows 11 or 10 files or folders? The two blue arrows appear on files or folders when you or Windows automatically compress them to reduce their overall size on your hard drive.
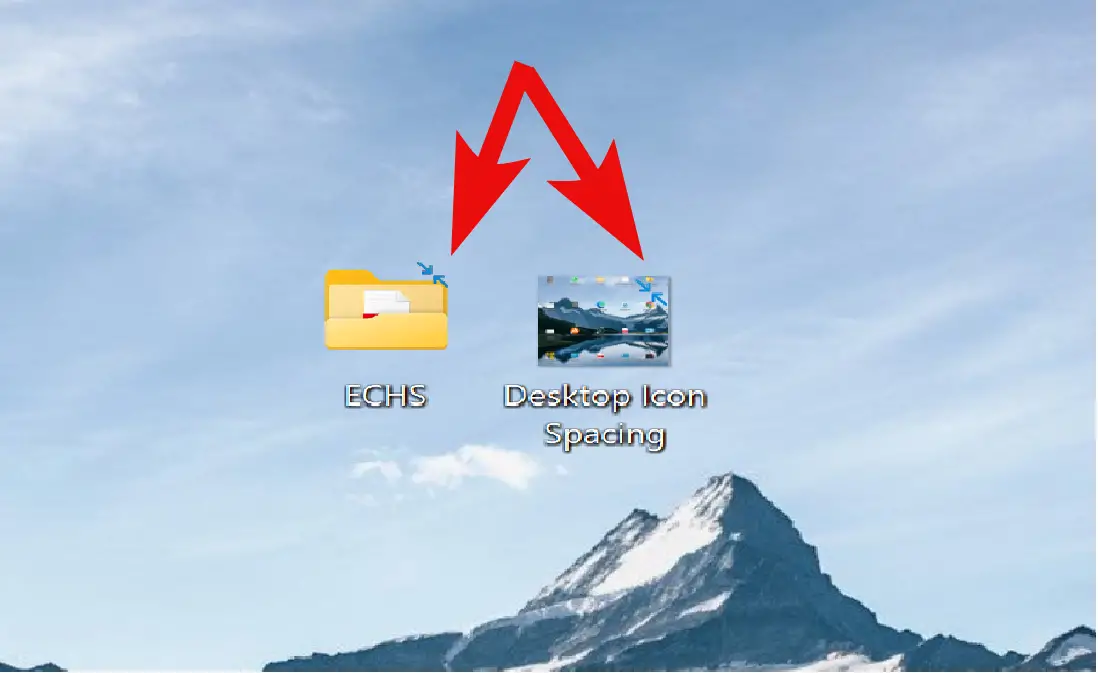
This problem usually happens when your PC is running out of disk space, and you’ll suddenly notice these two blue arrows appearing. However, if you want, you can stop the automatic compression of files or folders in Windows 11/10.
In this gearupwindows article, we will guide you through several ways to stop file compression on Windows 11 and 10.
What is File Compression on Windows 11 and 10?
Windows 11 and 10 use a file compression tool built into the filesystem itself. This process is also known as NTFS file compression, which Windows automatically uses to compress files and folders on an NTFS drive. Since Windows 11 and 10 are installed on the NTFS drive, you can also use this feature manually.
Using file compression, you or your Windows operating system can decrease the overall size of files and folders on your drive, but it has some drawbacks too. Whenever you or Windows try to access compressed files or folders, your operating system will first uncompress them. That means you will notice slower performance when using an old PC.
How to Disable File Compression Using Group Policy?
To turn off file compress using Group Policy, use these steps:-
Step 1. First, open Local Group Policy Editor.
Step 2. When the Local Group Policy Editor window appears on your computer, steer for the following path in the left side navigation pane:-
Computer Configuration > Administrative Templates > System > Filesystem > NTFS
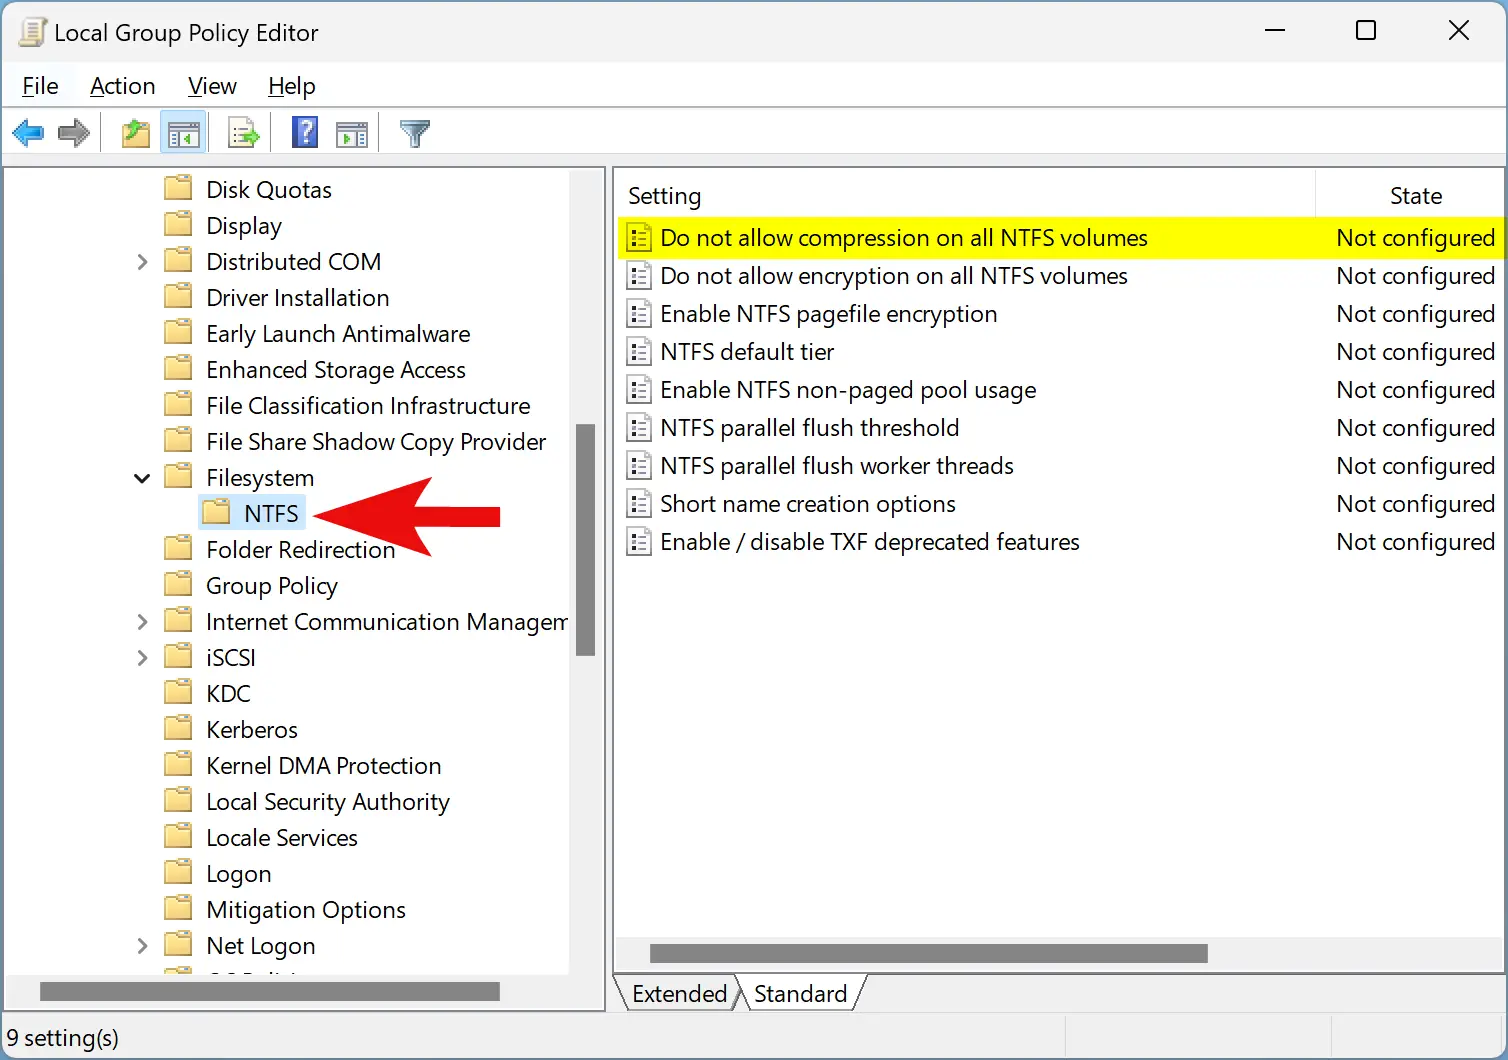
Step 3. On the right pane of the NTFS folder, double-click the policy “Do not allow compression on all NTFS volumes.”
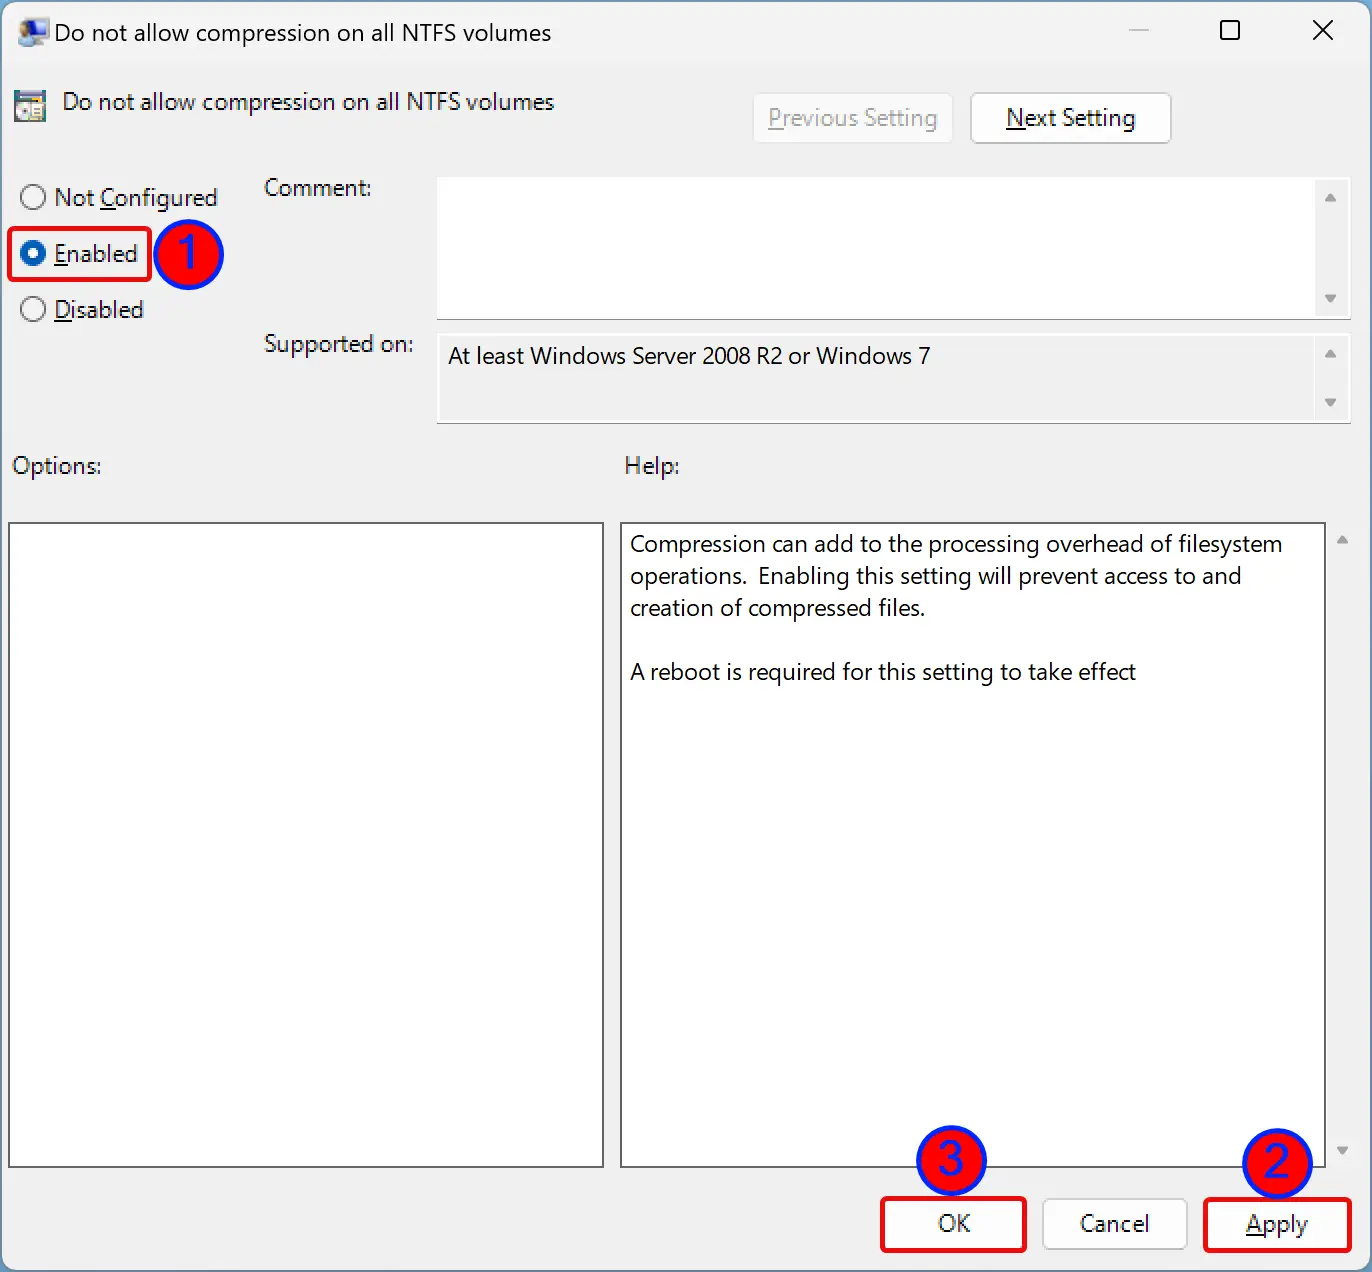
Step 4. Select Enabled.
Step 5. Click Apply.
Step 6. Click OK.
Step 7. At last, reboot your computer to apply the changes.
How to Turn Off File Compression through Registry Editor?
If you prefer to use Registry Editor to apply a policy, use these steps to disable file compression on Windows 11 or 10:-
Step 1. Open Registry Editor.
Step 2. Then, navigate to the following key in the left side navigation pane of Registry Editor:-
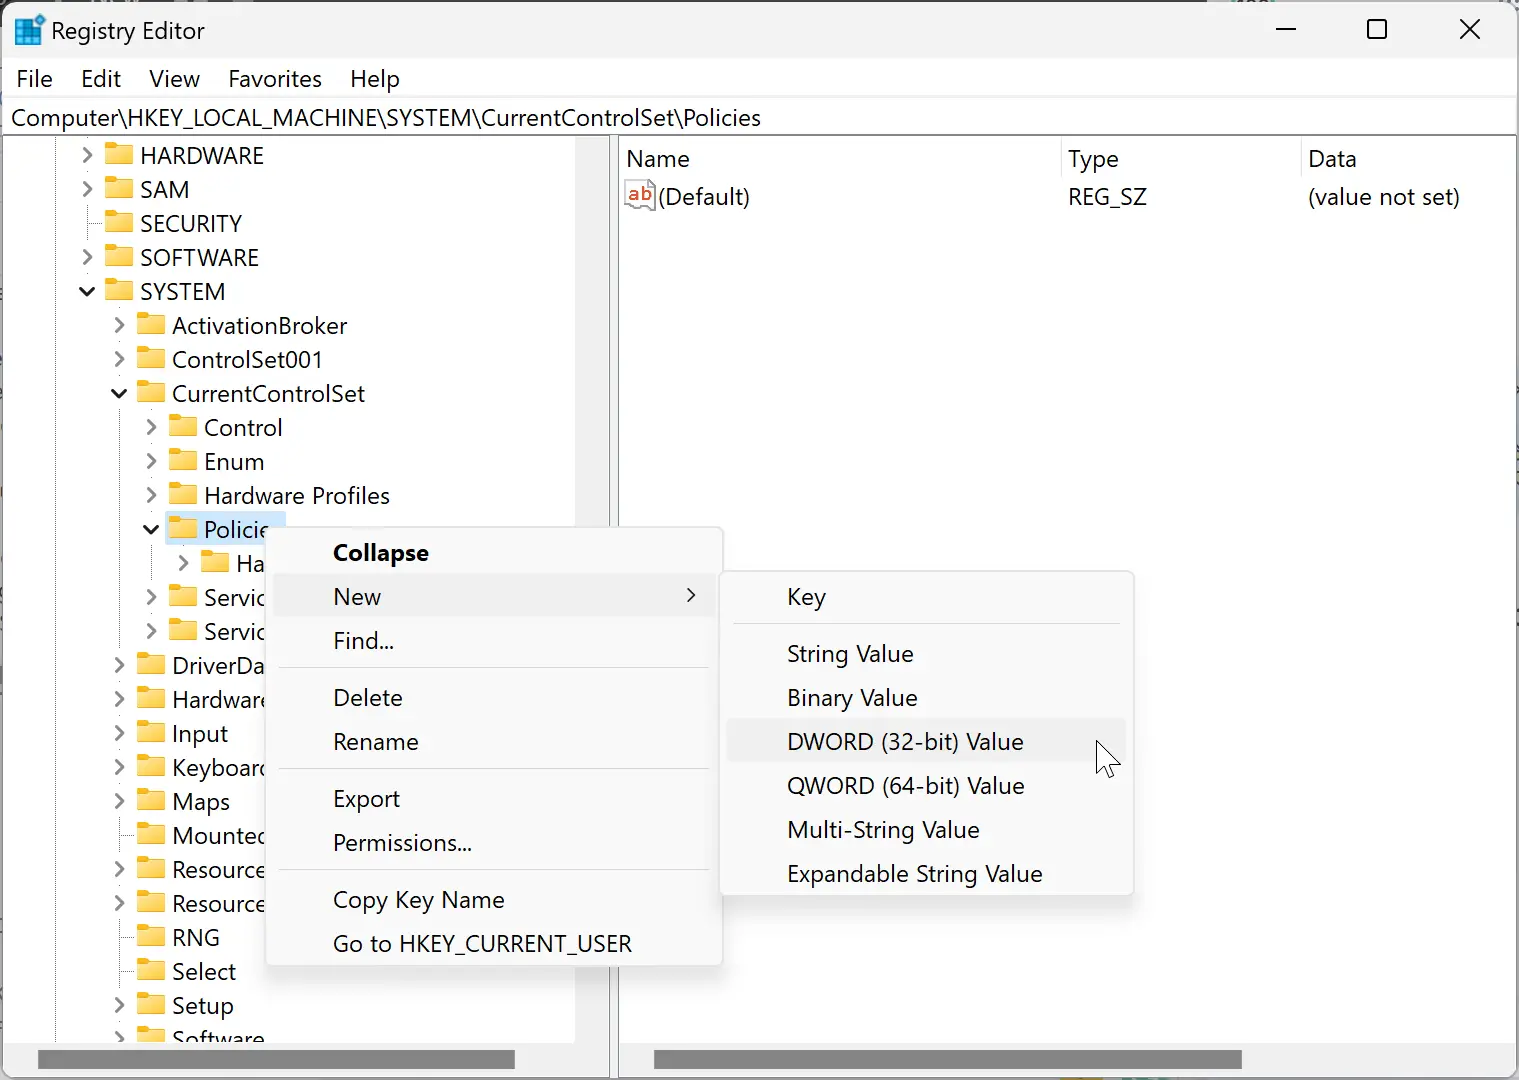
HKEY_LOCAL_MACHINE\SYSTEM\CurrentControlSet\Policies
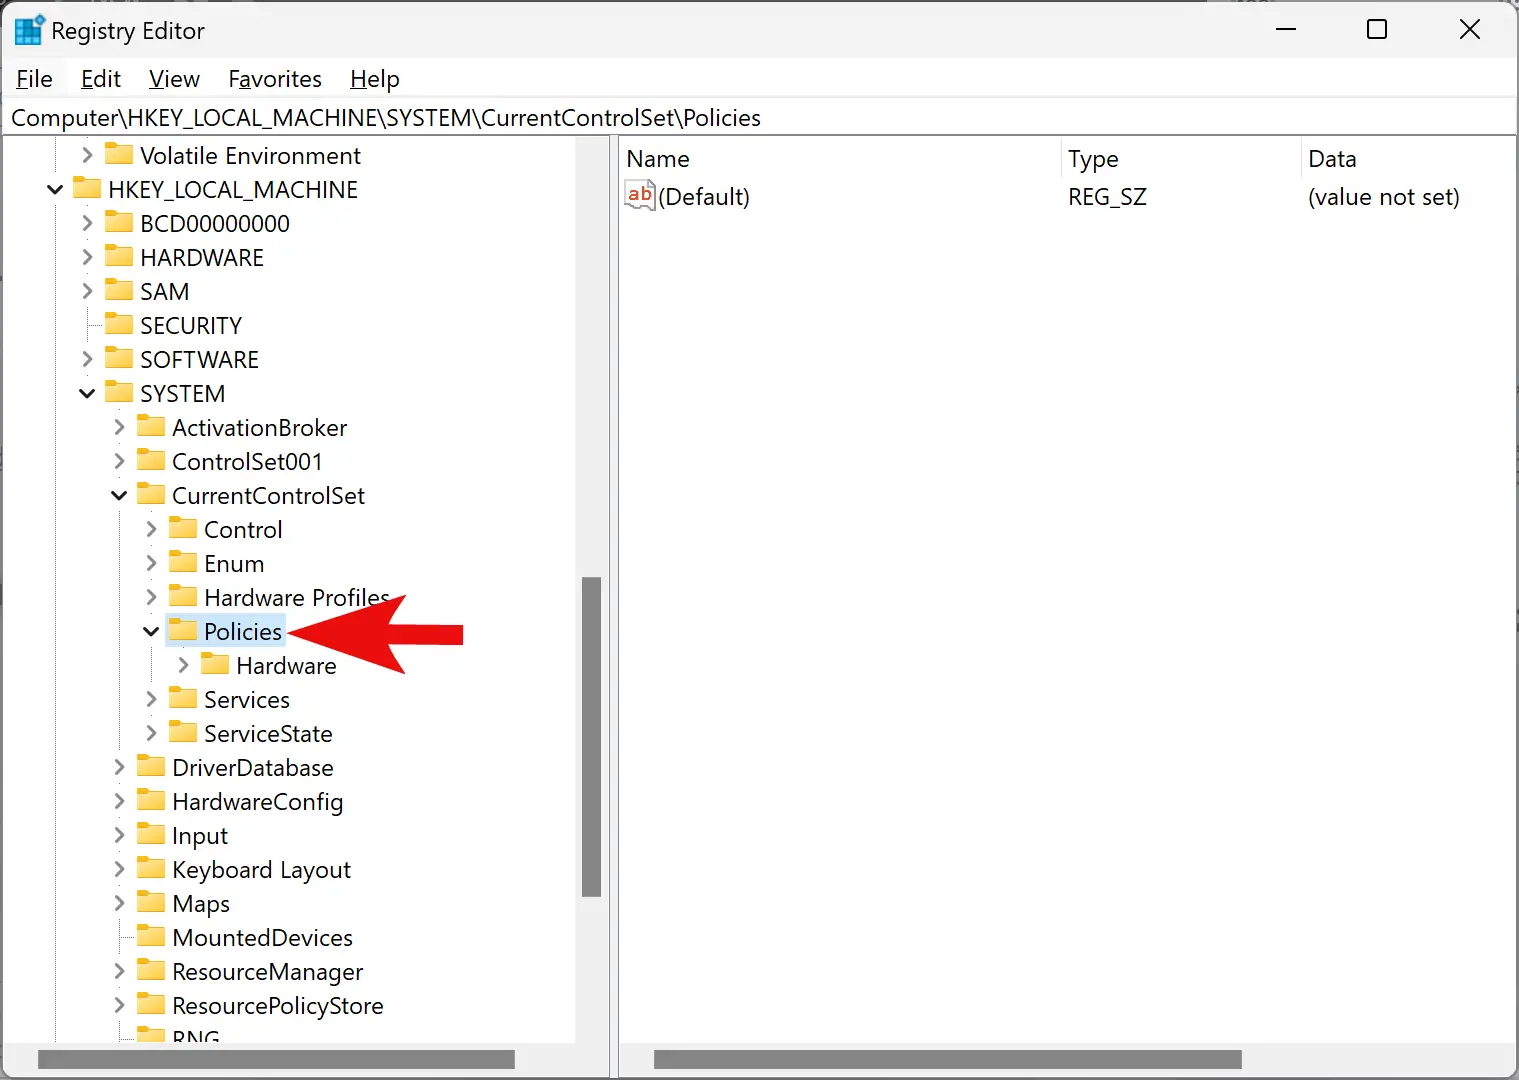
Step 3. Right-click on the Policies folder and select New > DWORD (32-bit) Value.
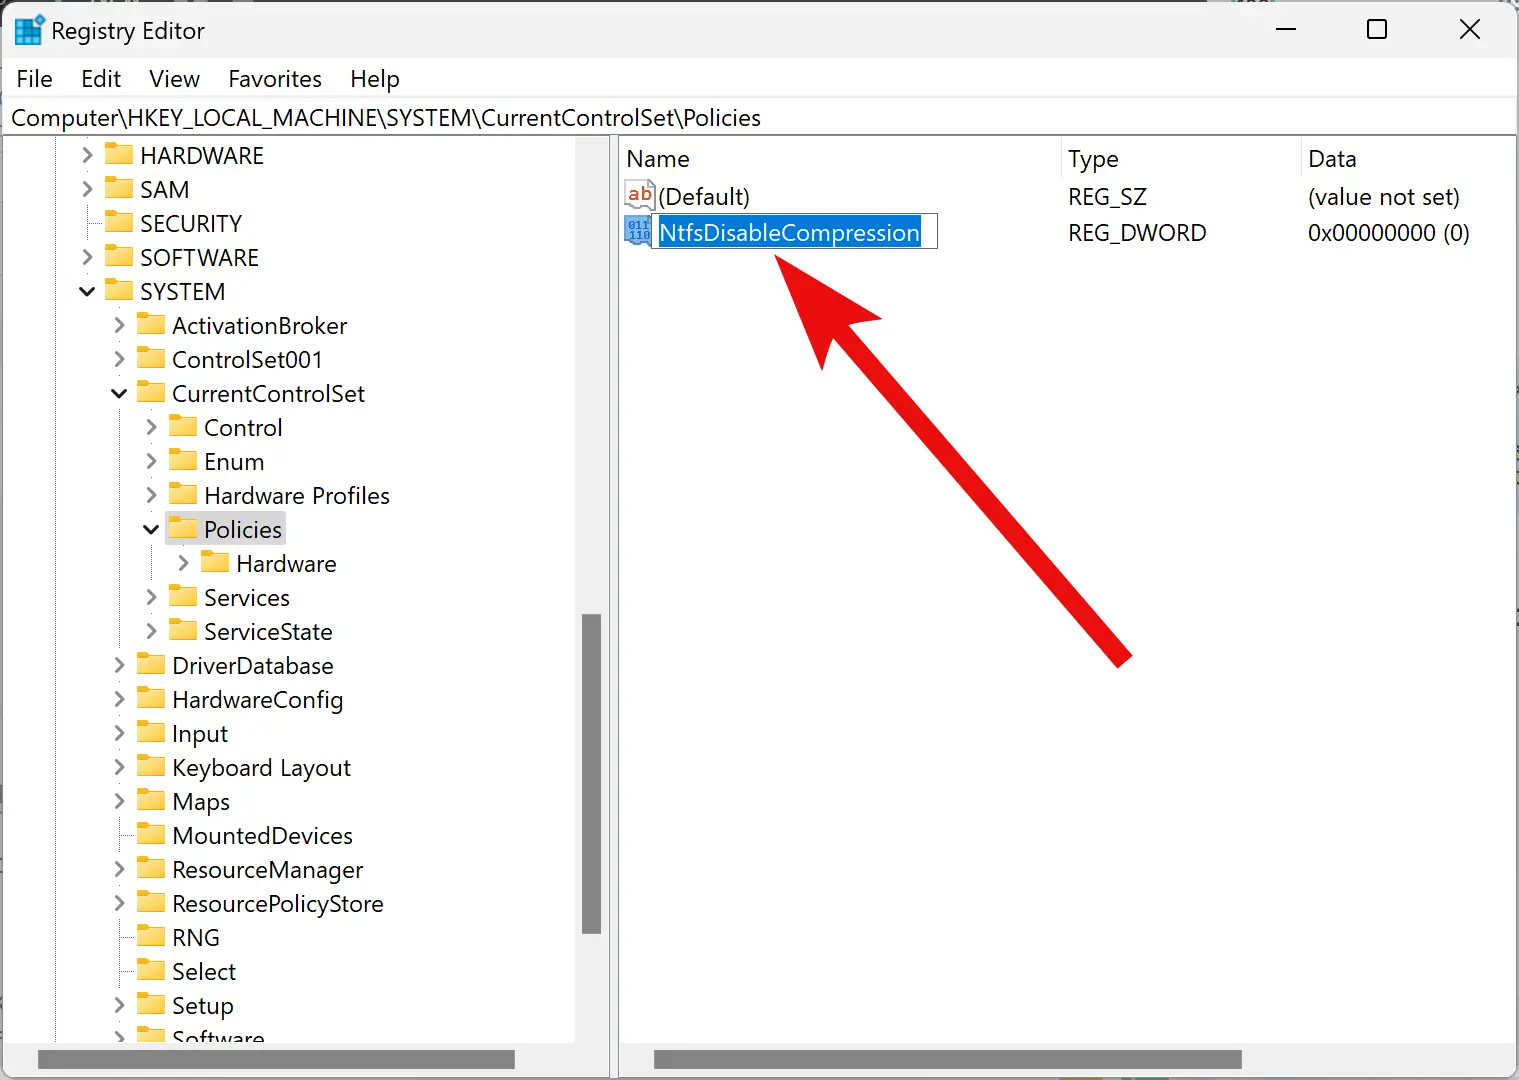
Step 4. Name the newly created REG_DWORD as NtfsDisableCompression.
Step 5. Next, double-click on NtfsDisableCompression REG_DWORD and set its “Value data” to 1 to turn off automatic file compression.
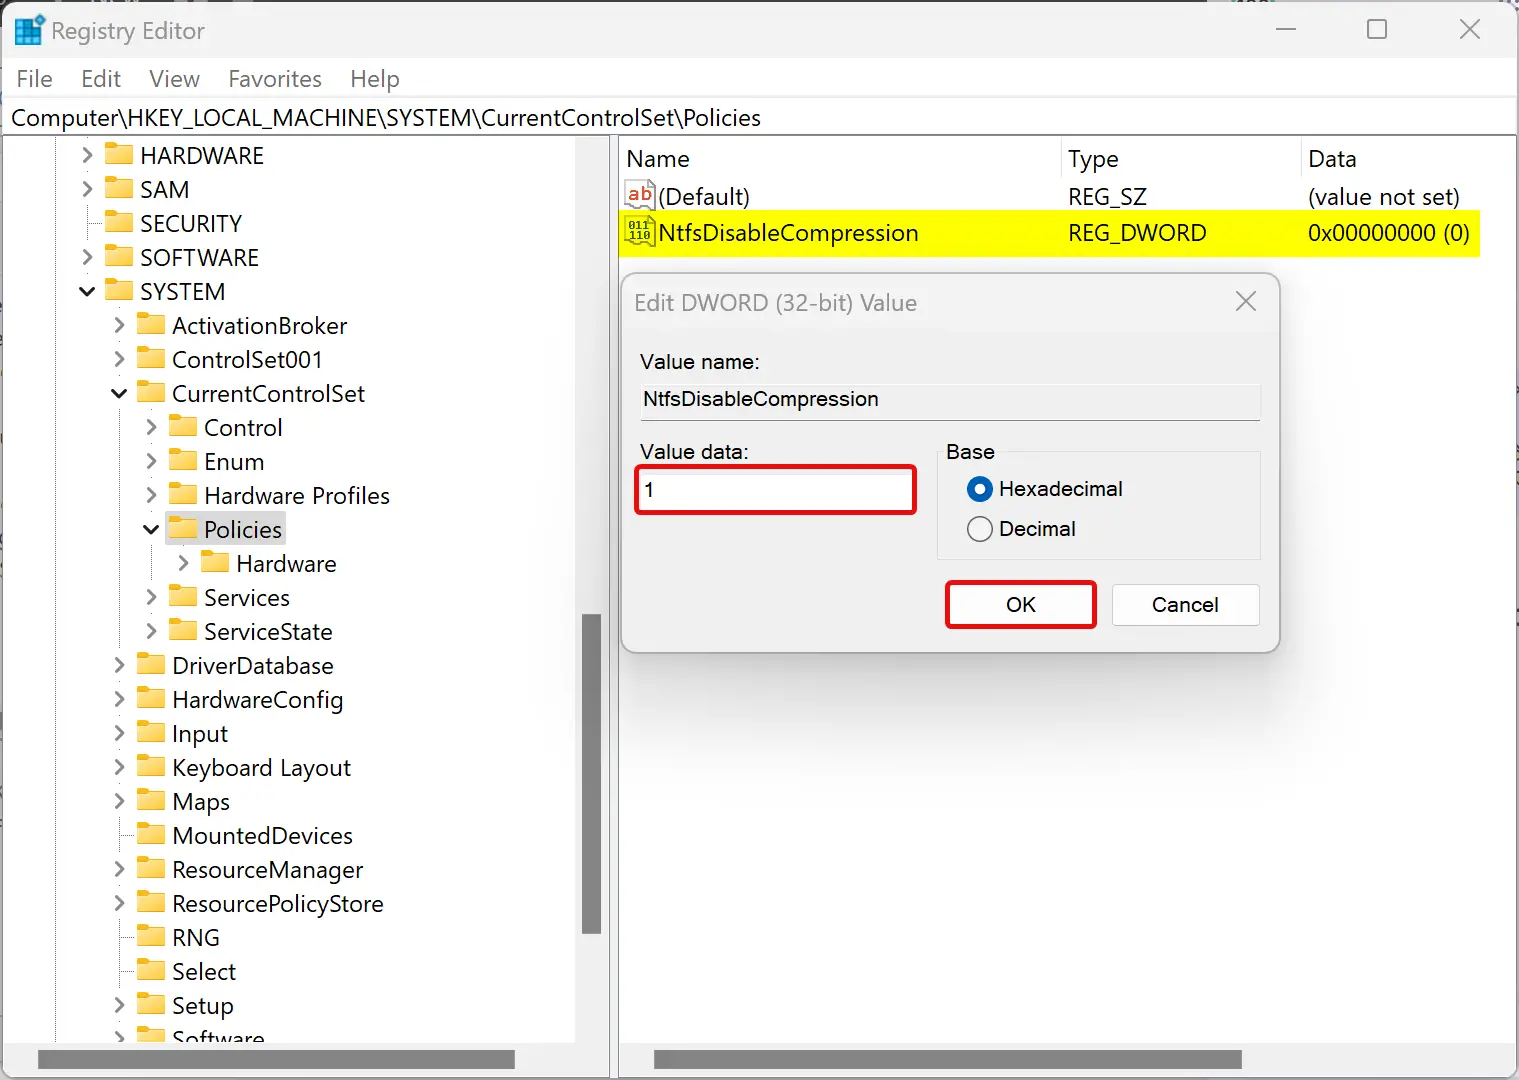
Step 6. Click OK.
Step 7. At last, restart your computer to apply the changes.
How to Disable File Compression Using Command Prompt?
To turn off file compression using Command Prompt, do these steps:-
Step 1. Open an elevated Command Prompt.
Step 2. Then, type the following and hit the Enter key on the keyboard to disable file compression:-
fsutil behavior set disablecompression 1
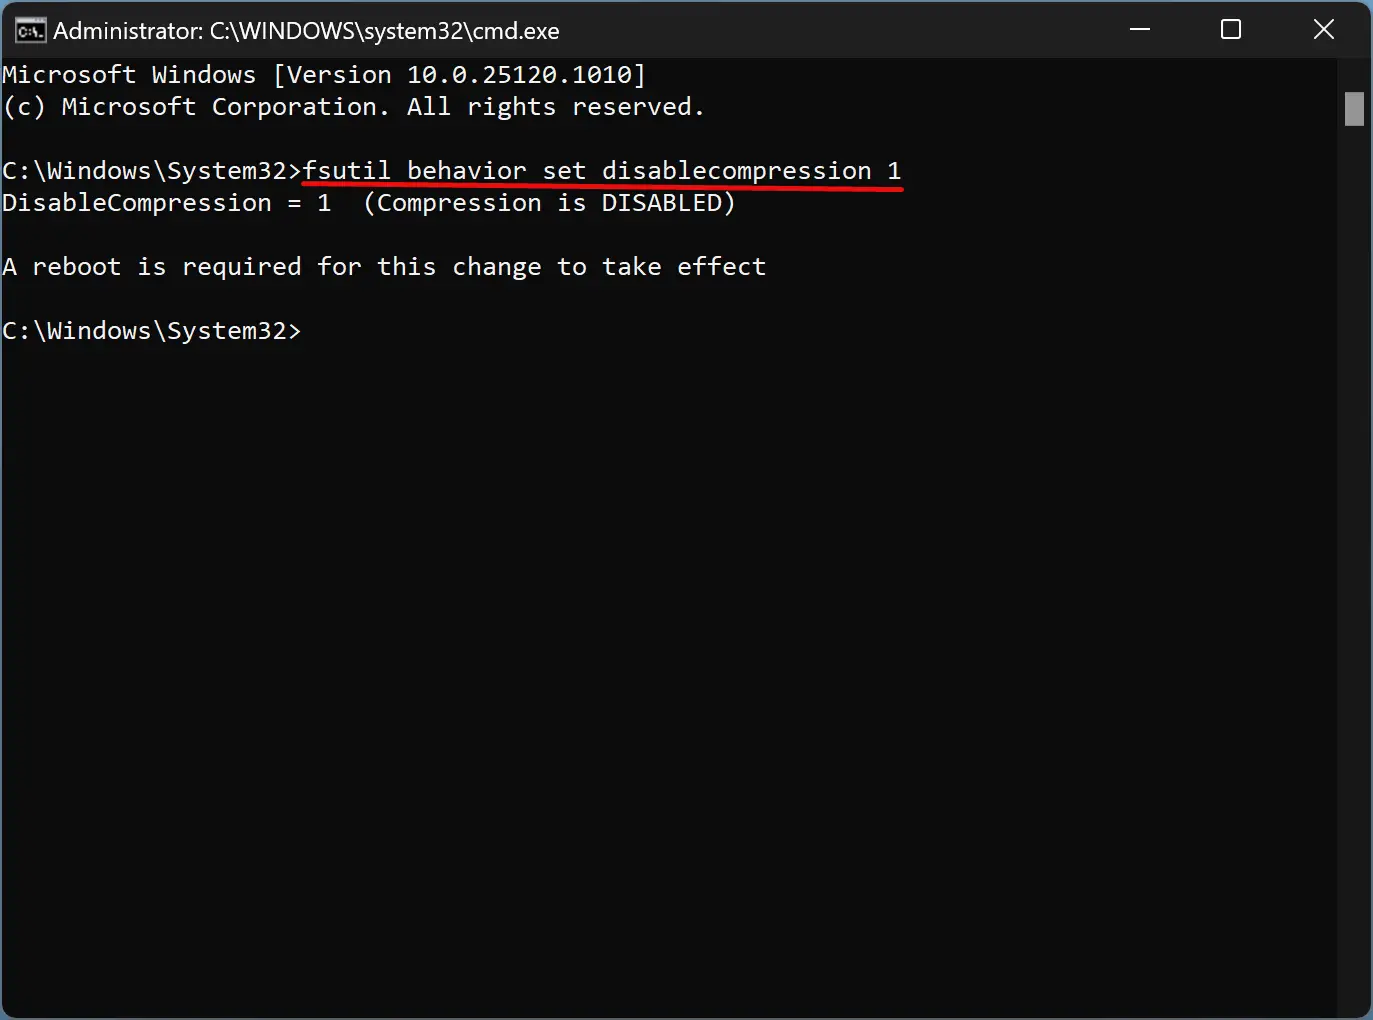
Step 3. Finally, reboot your computer to apply the changes.
To enable the file compression, open the elevated command prompt, type the following, and hit Enter key on the keyboard:-
fsutil behavior set disablecompression 0
How to Uncompress Files and Folders in File Explorer?
To uncompress individual files or folders in File Explorer, do the following:-
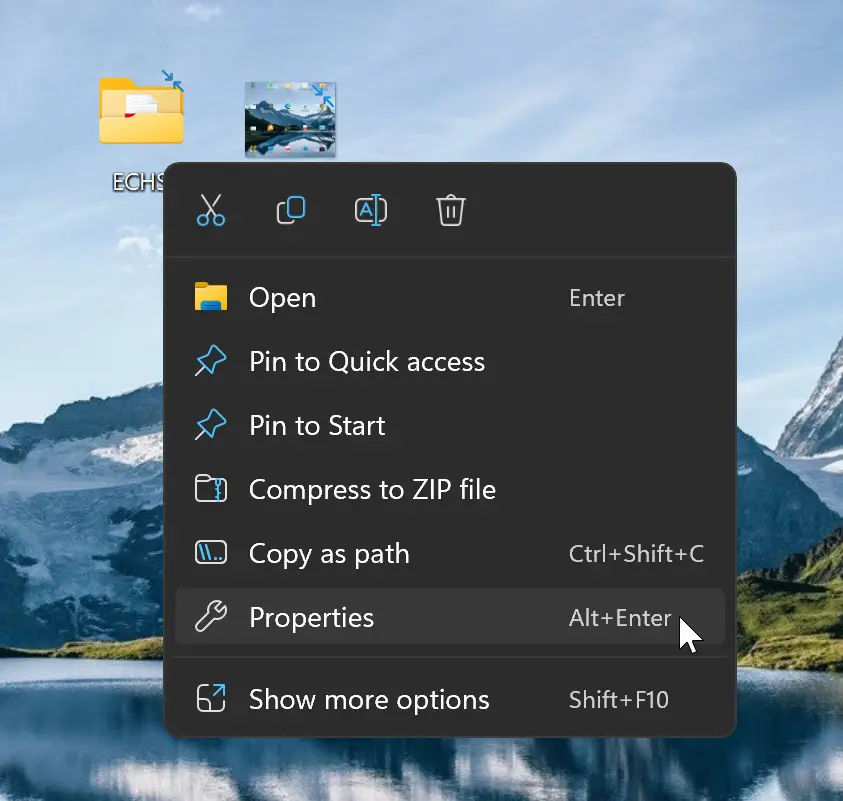
Step 1. Right-click on a compressed file or folder in File Explorer and select the Properties option in the context menu.
Step 2. In the Properties dialog, switch to the General tab.
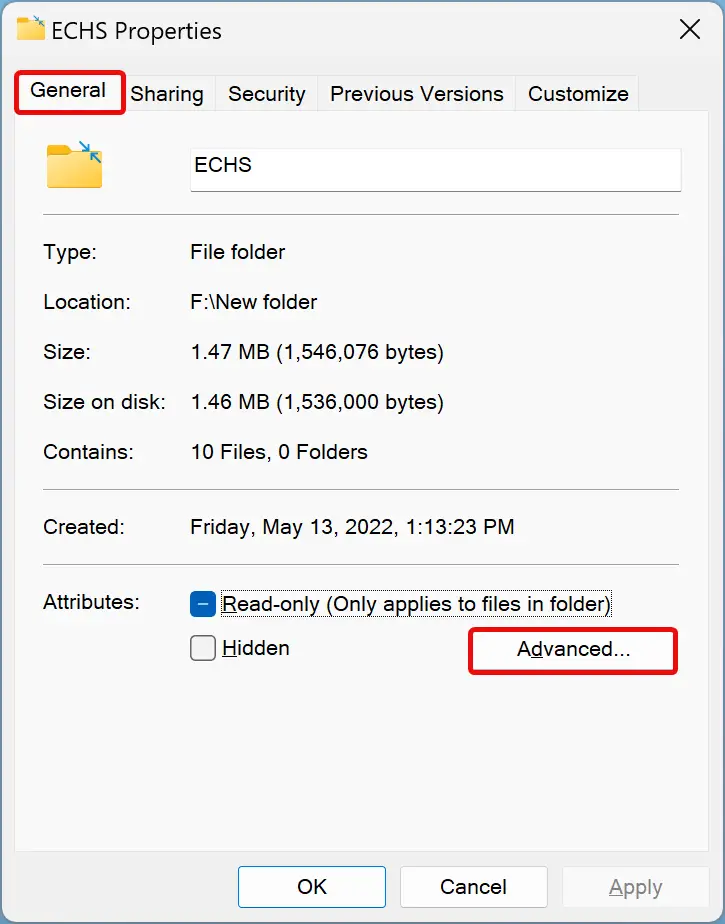
Step 3. Then, click the Advanced button.
Step 4. In the Advanced Attributes dialog, uncheck “Compress content to save disk space.”
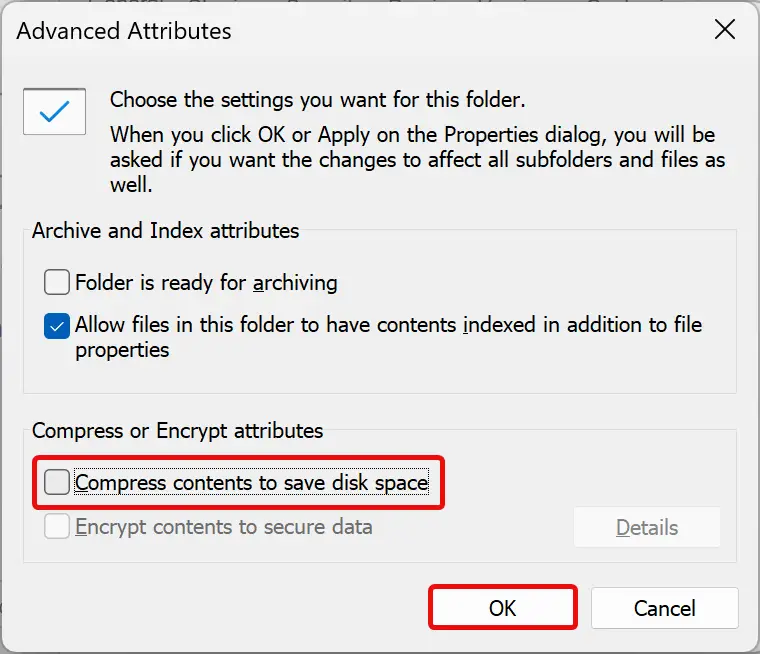
Step 5. Click OK.
Step 6. Click Apply in the Properties dialog.
Step 7. On the pop-up window, select “Apply changes to this folder, subfolders and files.”
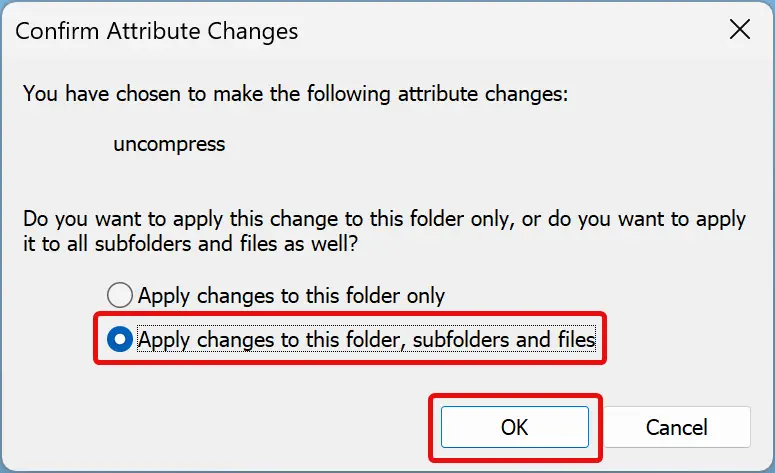
Step 8. Click OK.
Step 9. Click OK.
Now, Windows will start uncompressing the files/folders, and you will notice two blue arrows no longer show up in the icons of your folders or files.
Conclusion
In conclusion, file compression is a useful feature on Windows 11 and 10 that allows you to reduce the size of files and folders on your hard drive. However, it can also cause slower performance when accessing compressed files on an old PC. If you want to disable file compression on your Windows 11 or 10 PC, you can use the Group Policy, Registry Editor, or Command Prompt methods outlined in this article. Additionally, you can also uncompress individual files or folders in File Explorer by following the steps provided. By using these methods, you can free up disk space and improve the performance of your PC.