Integrated graphics are a valuable component of most modern computers, providing basic graphics capabilities for everyday tasks and ensuring your computer functions even when a dedicated graphics card isn’t available. However, there are situations where you might want to disable your integrated graphics on a Windows 10 system. This could be to troubleshoot graphics-related issues, make way for a more powerful dedicated graphics card, or simply conserve power. In this article, we will guide you through the process of disabling integrated graphics on Windows 10.
Also Read: How to Disable Your Integrated Graphics on Windows 11?
Before You Begin
- Check for a Dedicated Graphics Card: Ensure you have a dedicated graphics card installed in your computer before proceeding. Disabling integrated graphics without an alternative graphics solution may render your computer unusable.
- Backup Important Data: Before making any significant changes to your computer’s hardware configuration, it’s always wise to back up your important data.
- Create a System Restore Point: In case something goes wrong during the process, having a system restore point can help you revert your system to a previous state.
Now, let’s delve into the step-by-step process.
How to Disable Your Integrated Graphics on Windows 10?
To turn off or disable Integrated Graphics on Windows 10, follow these steps:-
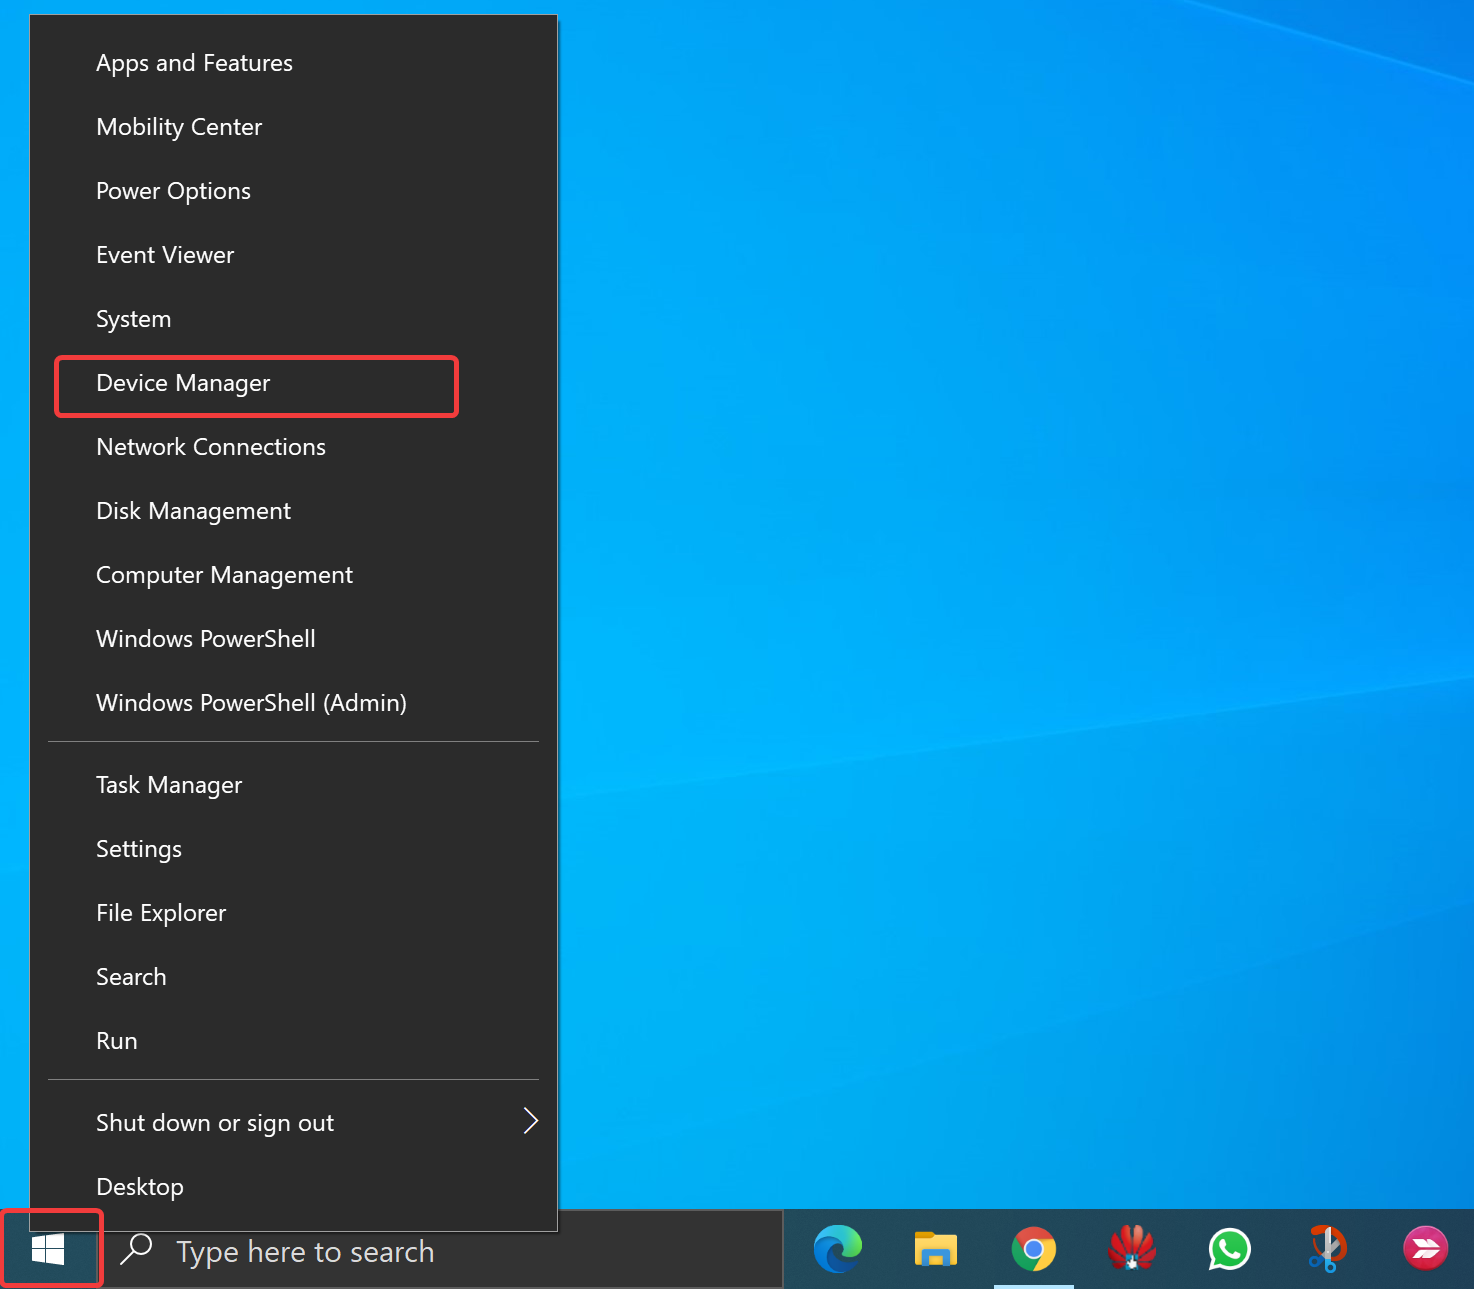
Step 1. Access Device Manager.
To do that, press “Windows + X” or right-click on the Start button and select “Device Manager” from the menu that appears. Alternatively, you can press “Windows + S,” type “Device Manager,” and click on the search result.
Step 2. In the Device Manager window, expand the “Display adapters” category. Here, you should see both your integrated graphics adapter (e.g., Intel HD Graphics) and your dedicated graphics card (e.g., NVIDIA or AMD).
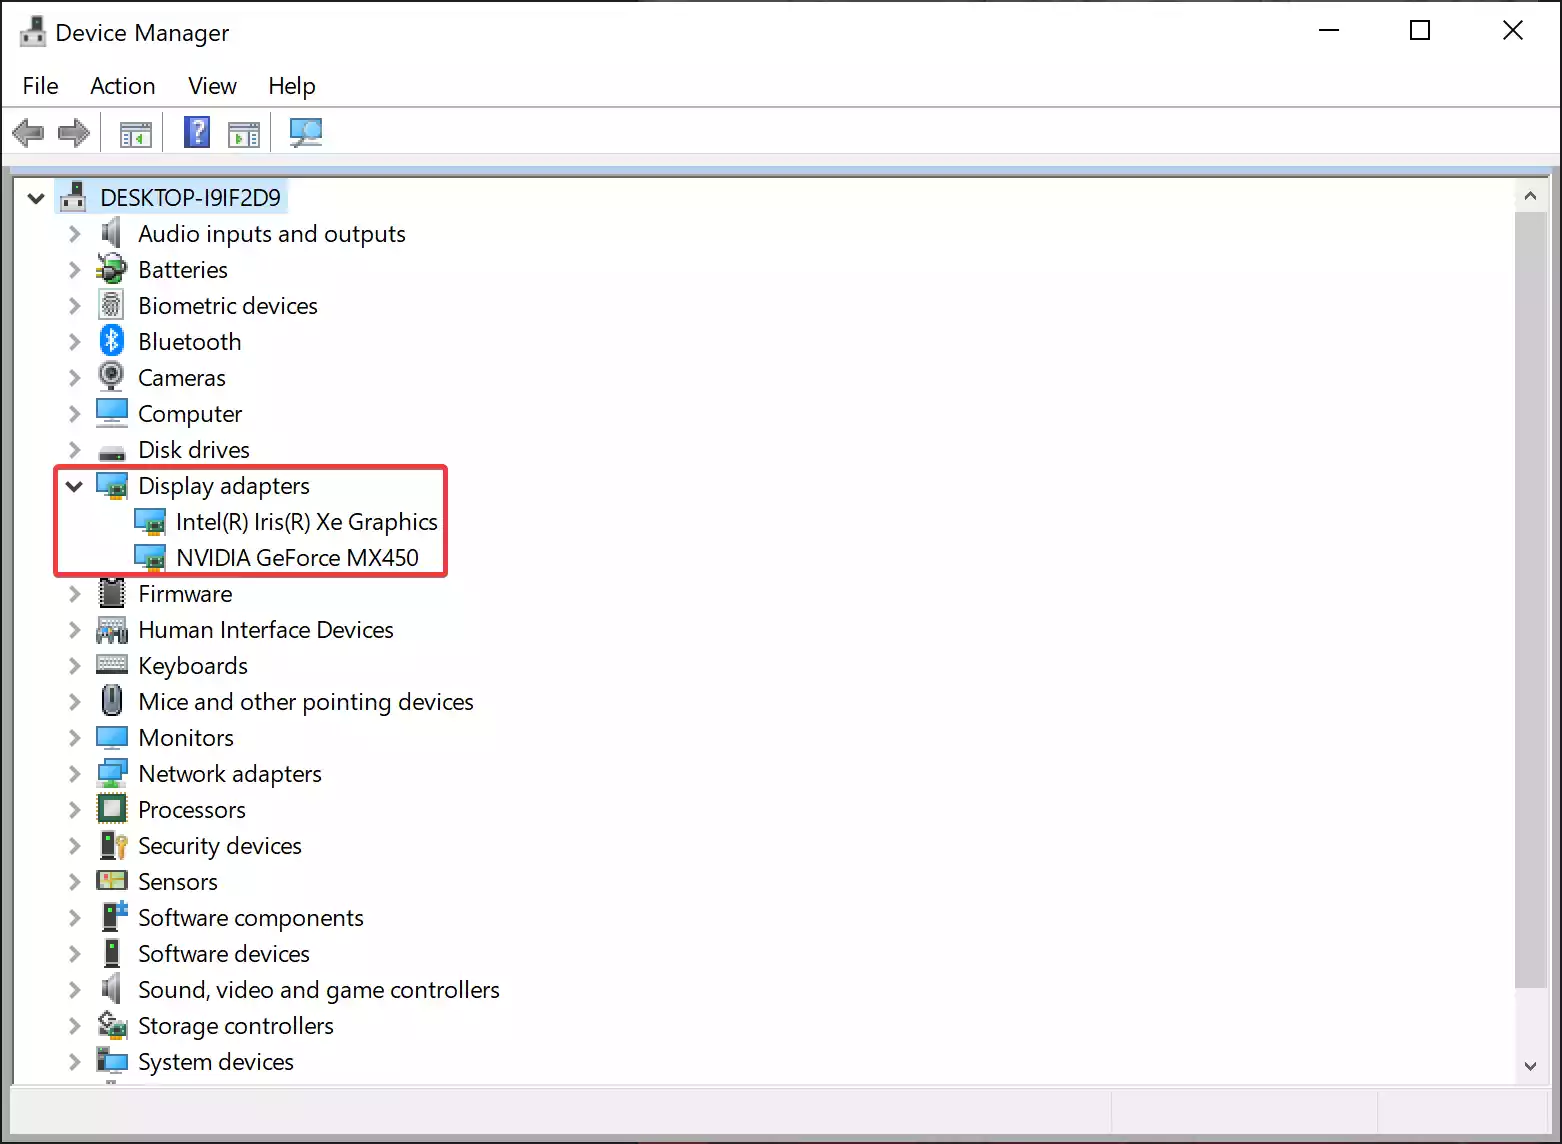
Step 3. Right-click on your integrated graphics adapter (e.g., Intel HD Graphics) and select “Disable device” from the context menu. Windows will ask for confirmation; click “Yes” to proceed.

Step 4. After confirming, your integrated graphics adapter will be disabled. Your screen may briefly flicker or go black as Windows switches to using your dedicated graphics card.
Step 5. It’s essential to restart your computer for the changes to take effect fully. After the reboot, your system will solely rely on your dedicated graphics card for graphics processing.
Step 6. Once your computer reboots, you can double-check if the integrated graphics are indeed disabled. Open Device Manager again and make sure that the integrated graphics adapter is listed with a disabled status.
Step 7. To ensure optimal performance from your dedicated graphics card, make sure you have the latest drivers installed. Visit the website of your graphics card manufacturer (e.g., NVIDIA or AMD) to download and install the latest drivers for your specific card.
Conclusion
Disabling integrated graphics on Windows 10 can be a useful step in optimizing your system’s performance, especially if you have a dedicated graphics card. However, it’s important to exercise caution and ensure you have a dedicated graphics solution in place before proceeding. Always back up your data and create a system restore point before making significant changes to your computer’s hardware configuration. By following the steps outlined in this guide, you can successfully disable integrated graphics and make the most of your dedicated graphics card on Windows 10.
