The Windows key, prominently located on your keyboard, is a handy shortcut to access the Start Menu, launch applications, and perform various tasks in Windows 11 and Windows 10. However, it can be a source of frustration when accidentally pressed during gaming sessions or focused work. Fortunately, Windows provides several methods to enable or disable the Windows key according to your needs. In this article, we’ll explore multiple approaches to help you regain control over this key.
How to Enable and Disable the Windows Key on Windows 11 or 10?
Method 1: Keyboard Settings
Many modern keyboards, especially gaming keyboards, come equipped with a dedicated “gaming mode” or key combinations to enable or disable the Windows key. Here’s how to use these features:-
Step 1. Check for Gaming Mode Switch: Look for a physical switch on your keyboard labeled “Gaming Mode” or a similar term. Toggling this switch will enable or disable the Windows key.
Step 2. Function Key Combination: Some keyboards require a specific key combination, such as “Fn + F10,” to activate or deactivate the gaming mode. Refer to your keyboard’s manual or manufacturer’s website for the exact combination.
Step 3. Customization Software: If your keyboard has customization software like Corsair iCUE, Razer Synapse, or Logitech Options, check the settings within the software. These applications often provide options to enable or disable the Windows key.
By using the keyboard’s built-in features or customization software, you can quickly toggle the Windows key as needed.
Method 2: Microsoft PowerToys
Microsoft PowerToys is a collection of utilities that enhances Windows functionality. Among these utilities is the Keyboard Manager, which allows you to remap and disable keys. Here’s how to disable the Windows key using PowerToys:-
Step 1. Go to the official PowerToys website, download and install PowerToys.
Step 2. After installation, open the PowerToys application.
Step 3. In the left pane of PowerToys, locate and select “Keyboard Manager.”
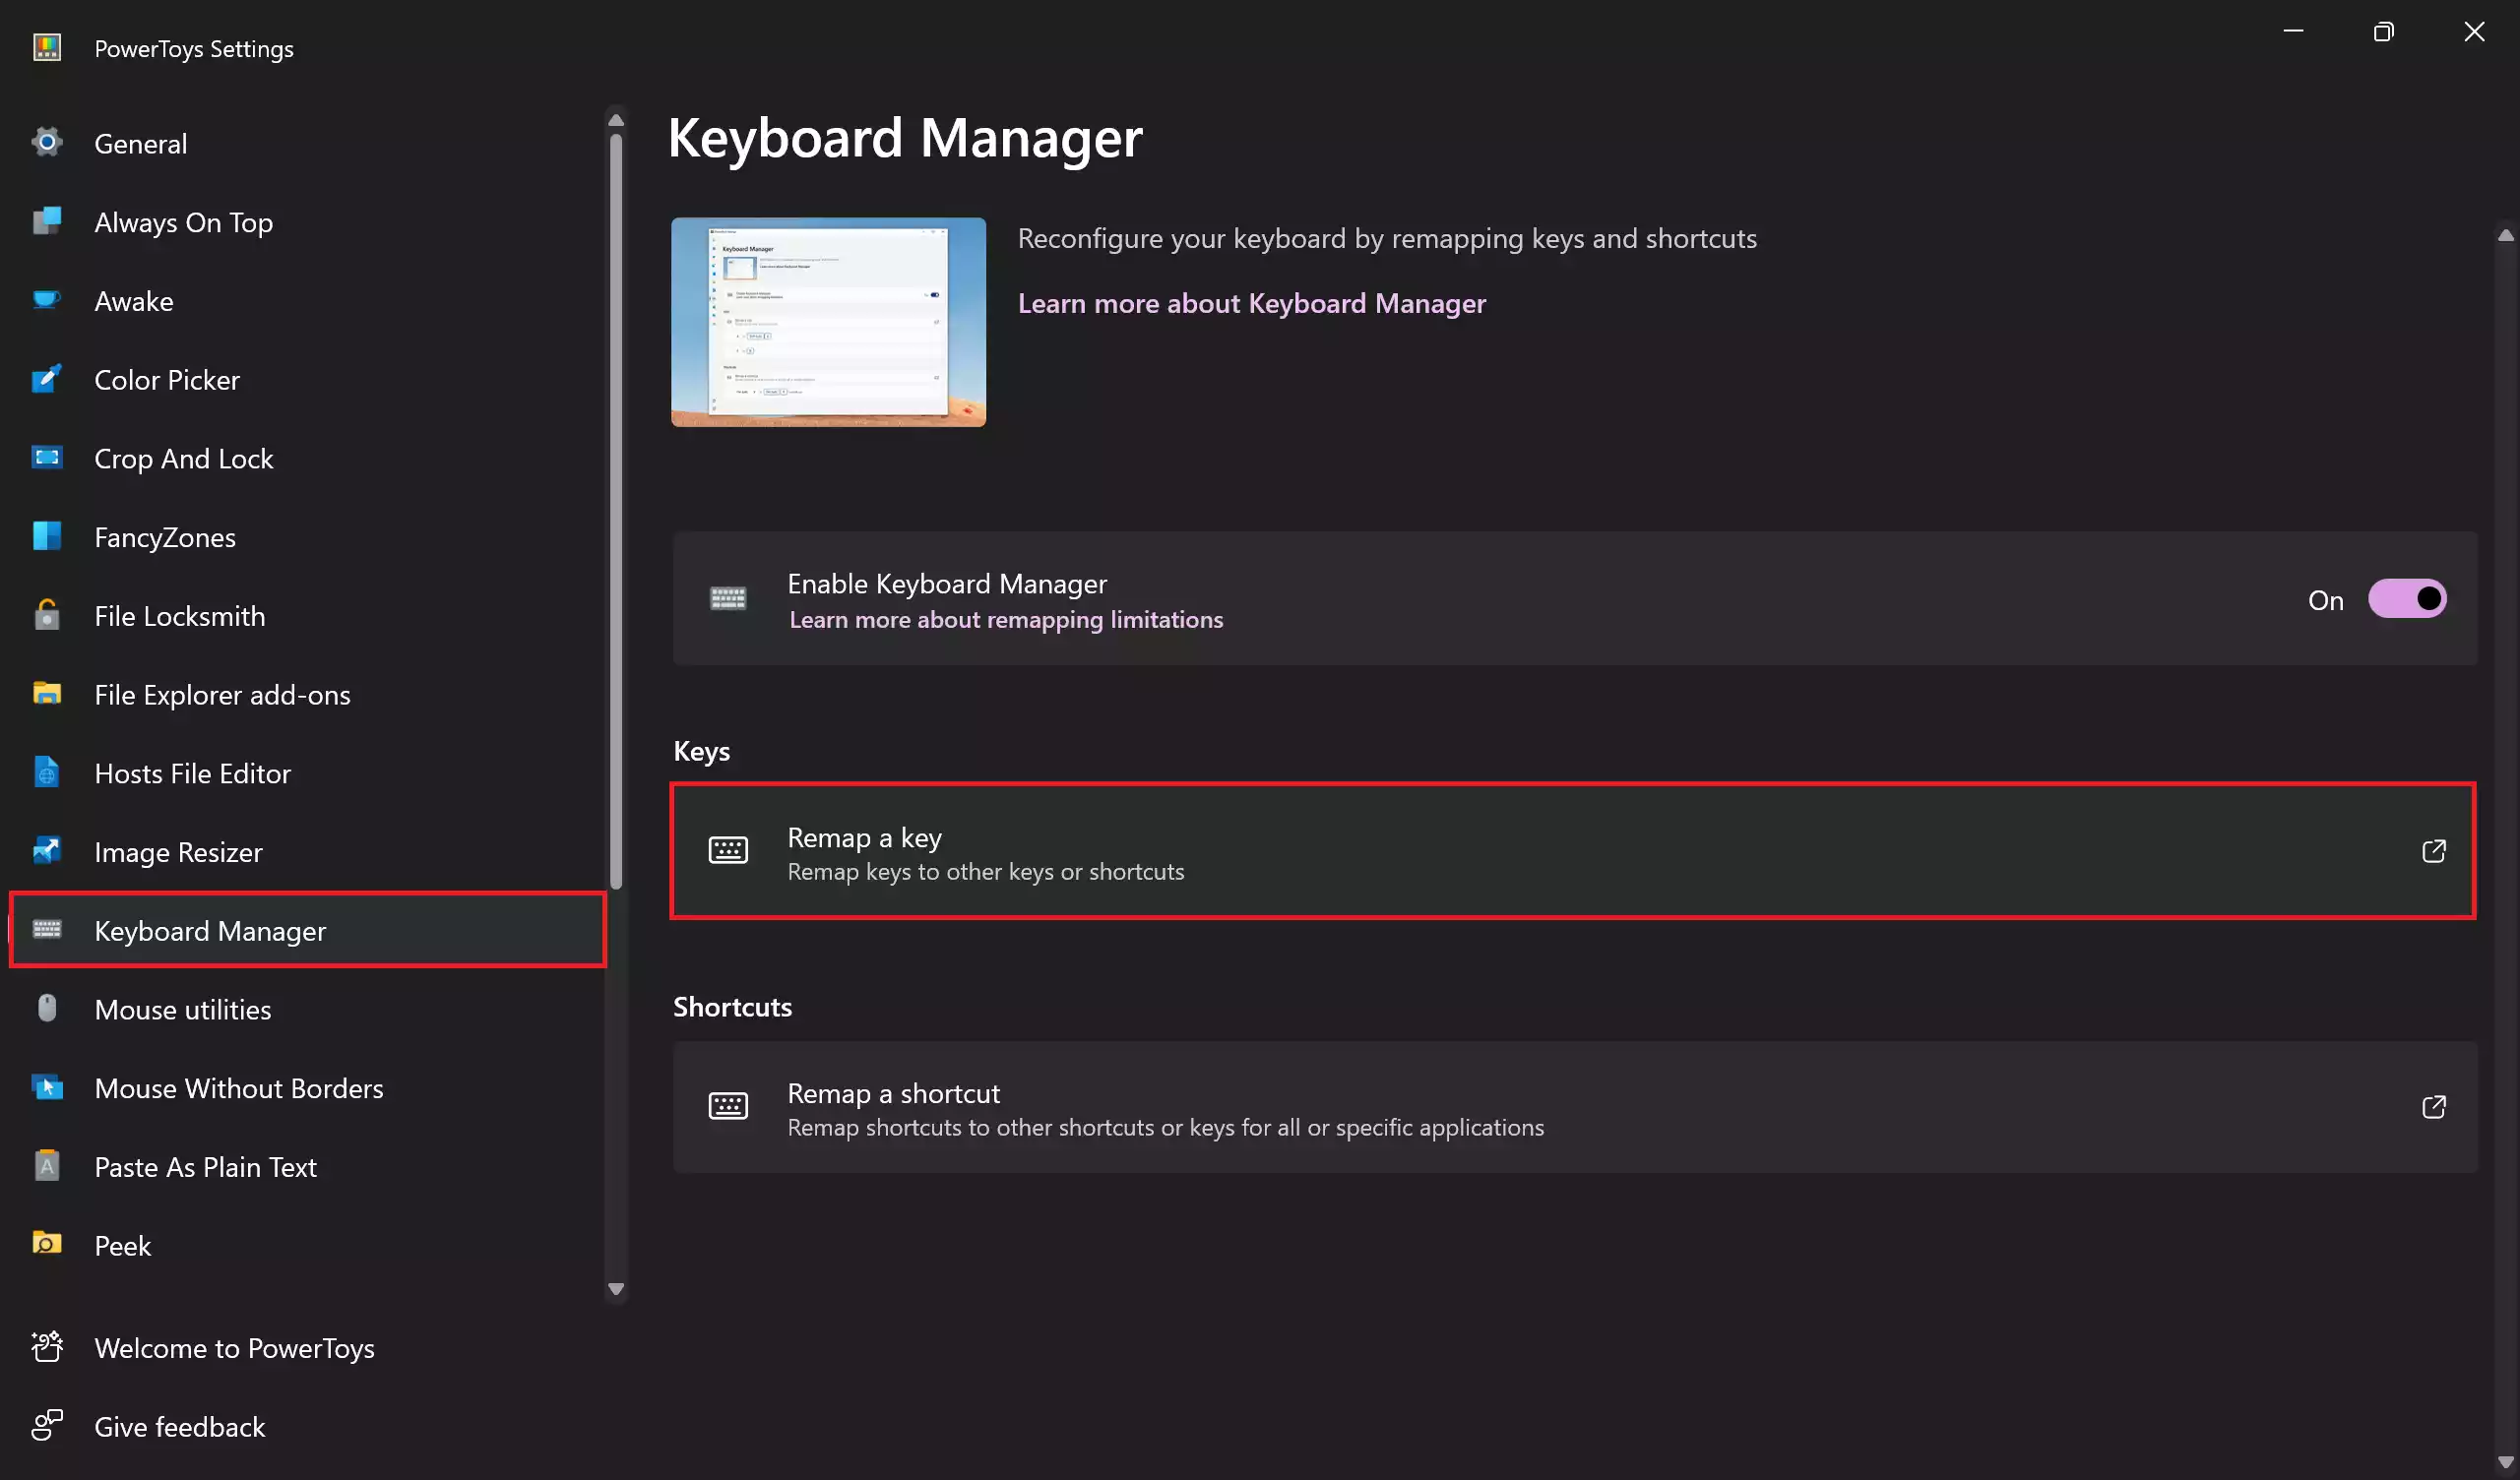
Step 4. Click “Remap a key” under the “Keys” section on the right pane.
Step 5. On the “Remap keys” pop-up window, click the “+” icon next to “Select” and press the Windows key on your keyboard.
![]()
Step 6. Choose either “Windows (Left)” or “Windows (Right),” depending on which Windows key you want to disable.
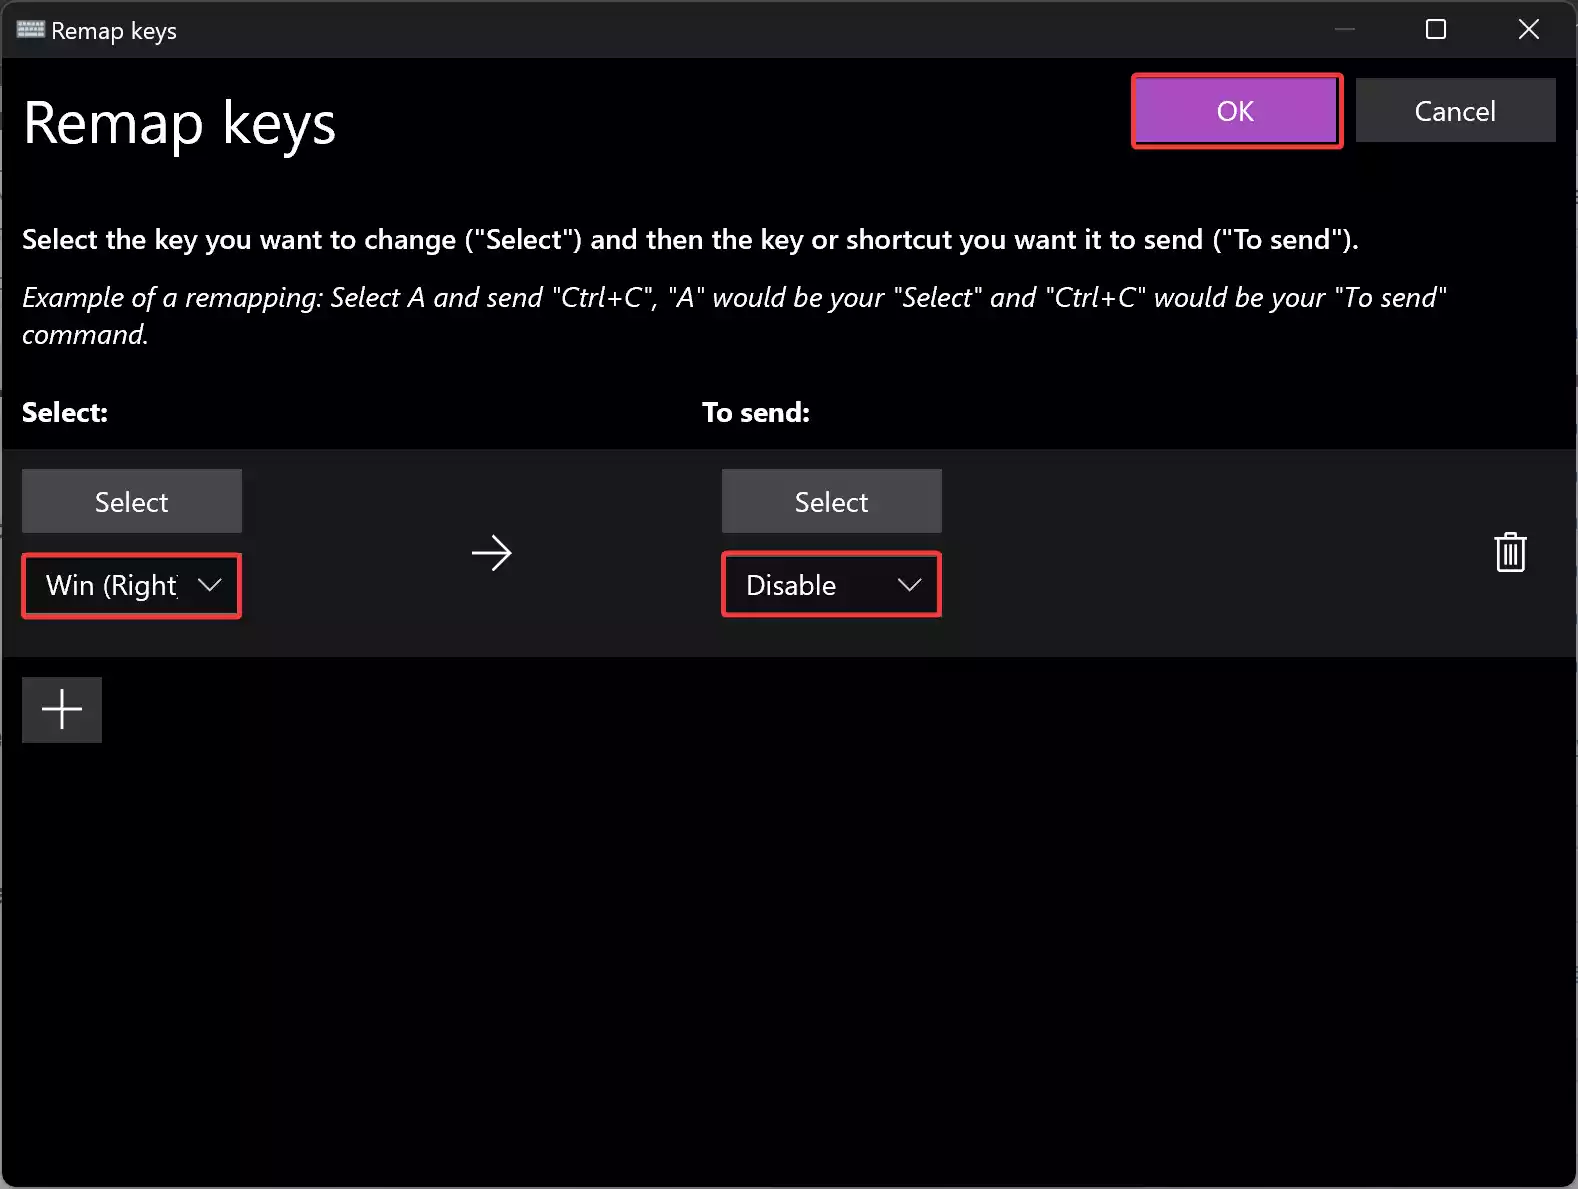
Note: Select Win if you want to disable both left and right Windows keys.
Step 7. Under “To Send,” select “Disable,” or press “D” on your keyboard to find the “Disable” option.
Step 8. Click “OK” to save the changes.
Step 9. To apply the changes, restart your computer.
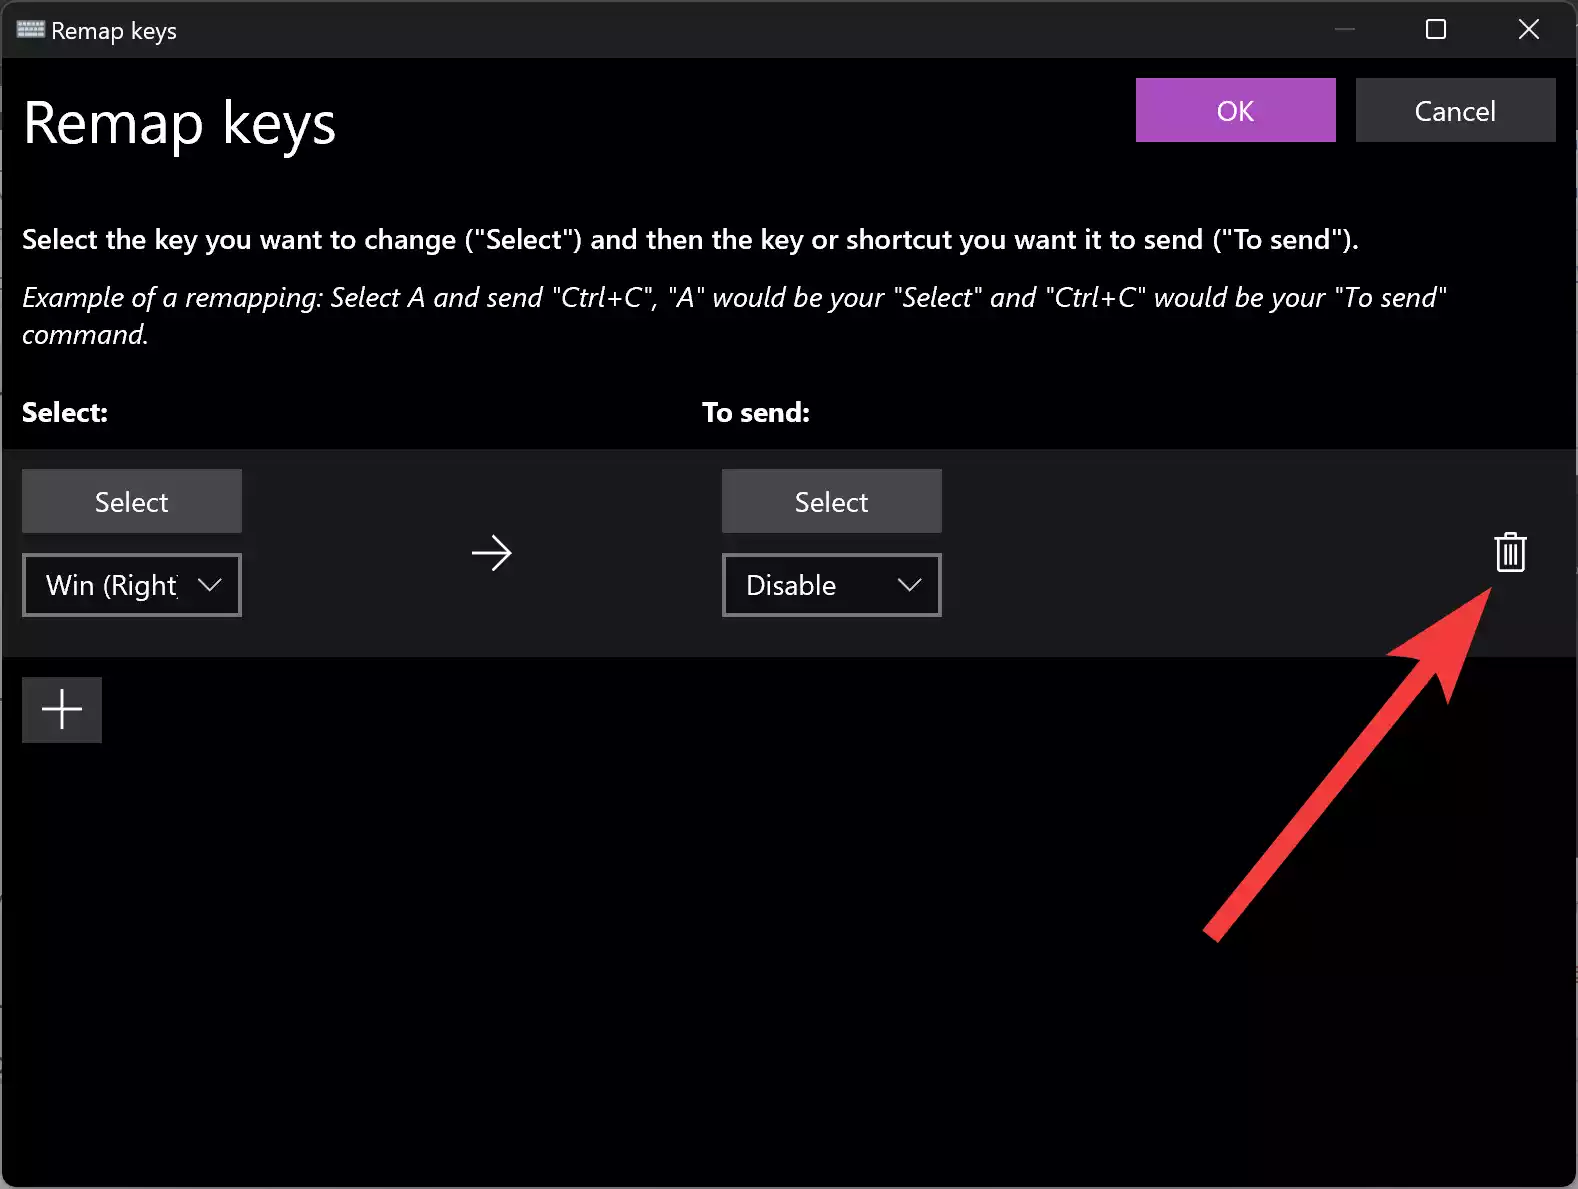
To re-enable the Windows key, open Keyboard Manager and delete the remapping.
Method 3: Registry Editor
Editing the Windows Registry allows you to disable the Windows key. This method should be approached with caution, as modifying the registry can have unintended consequences. Here’s how to disable the Windows key using the Registry Editor:-
Step 1. Before making any changes, create a backup of your registry to ensure you can revert in case of issues.
To create a backup of the registry, press Win + R, type “regedit,” and press Enter to open the Registry Editor. In the Registry Editor, select “File” > “Export.” Save the exported file in a safe location.
Step 2. In the Registry Editor, go to the following path:-
HKEY_LOCAL_MACHINE\SYSTEM\CurrentControlSet\Control\Keyboard Layout
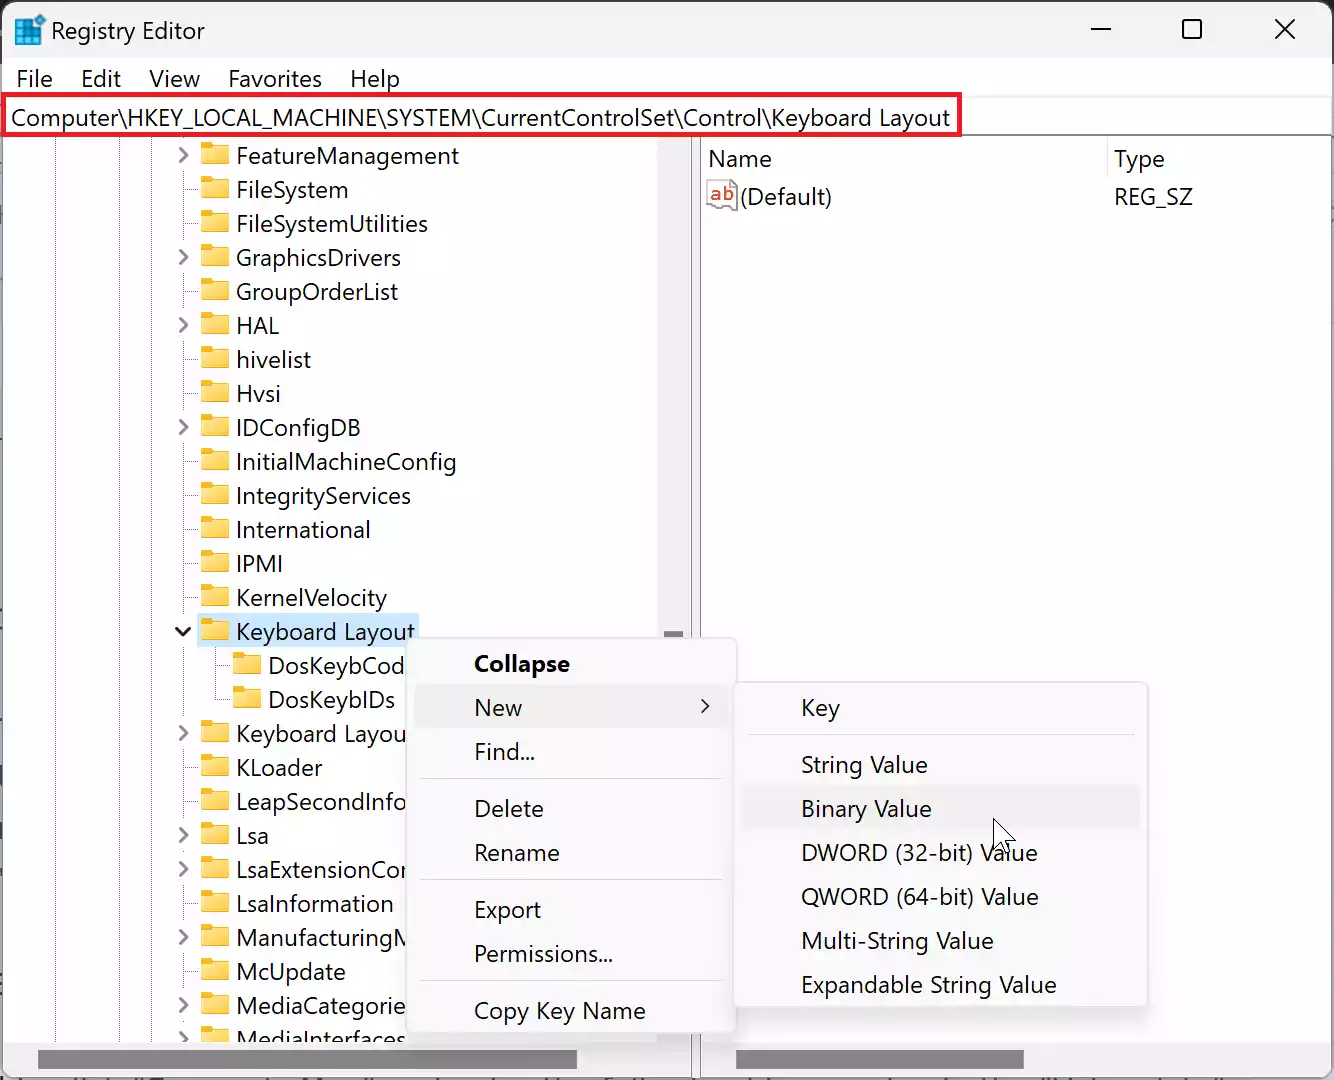
Step 3. In the right pane, look for a binary value named “Scancode Map.” If it doesn’t exist, you’ll need to create it. To create a “Scancode Map,” right-click the “Keyboard Layout” key in the left pane, choose “New” > “Binary Value,” and name it “Scancode Map.”
Step 4. Double-click “Scancode Map” and enter the following binary value in the “Value data” field:-
00, 00, 00, 00, 00, 00, 00, 00
03, 00, 00, 00, 00, 00, 5B, E0,
00, 00, 5C, E0, 00, 00, 00, 00
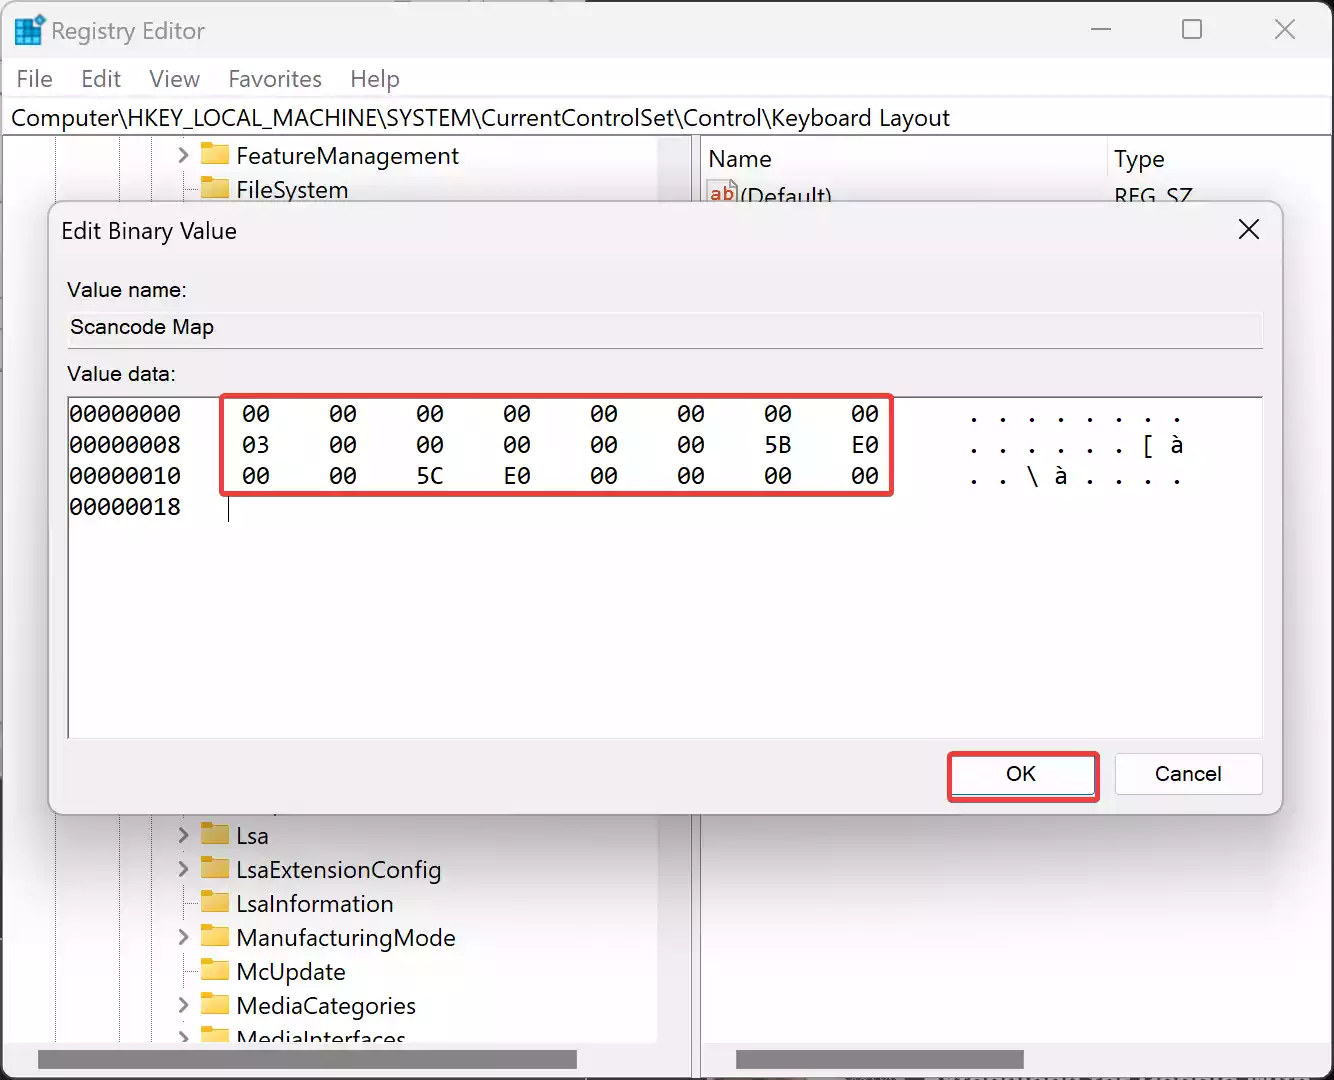
Step 5. Click OK to save the changes.
Step 6. Restart your computer to apply them.
To re-enable the Windows key, delete the “Scancode Map” binary value in the Registry Editor.
Method 4: Group Policy Editor (Pro, Enterprise, and Education Editions Only)
For Windows Pro, Enterprise, and Education editions, you can disable Windows key hotkeys while keeping the Windows key active using the Group Policy Editor. Here’s how:-
Step 1. Open Group Policy Editor.
To do that, press Win + R, type “gpedit.msc,” and press Enter to open the Group Policy Editor. Click “Yes” if prompted by User Account Control.
Step 2. In Group Policy Editor, go to the following location:-
User Configuration > Administrative Templates > Windows Components > File Explorer
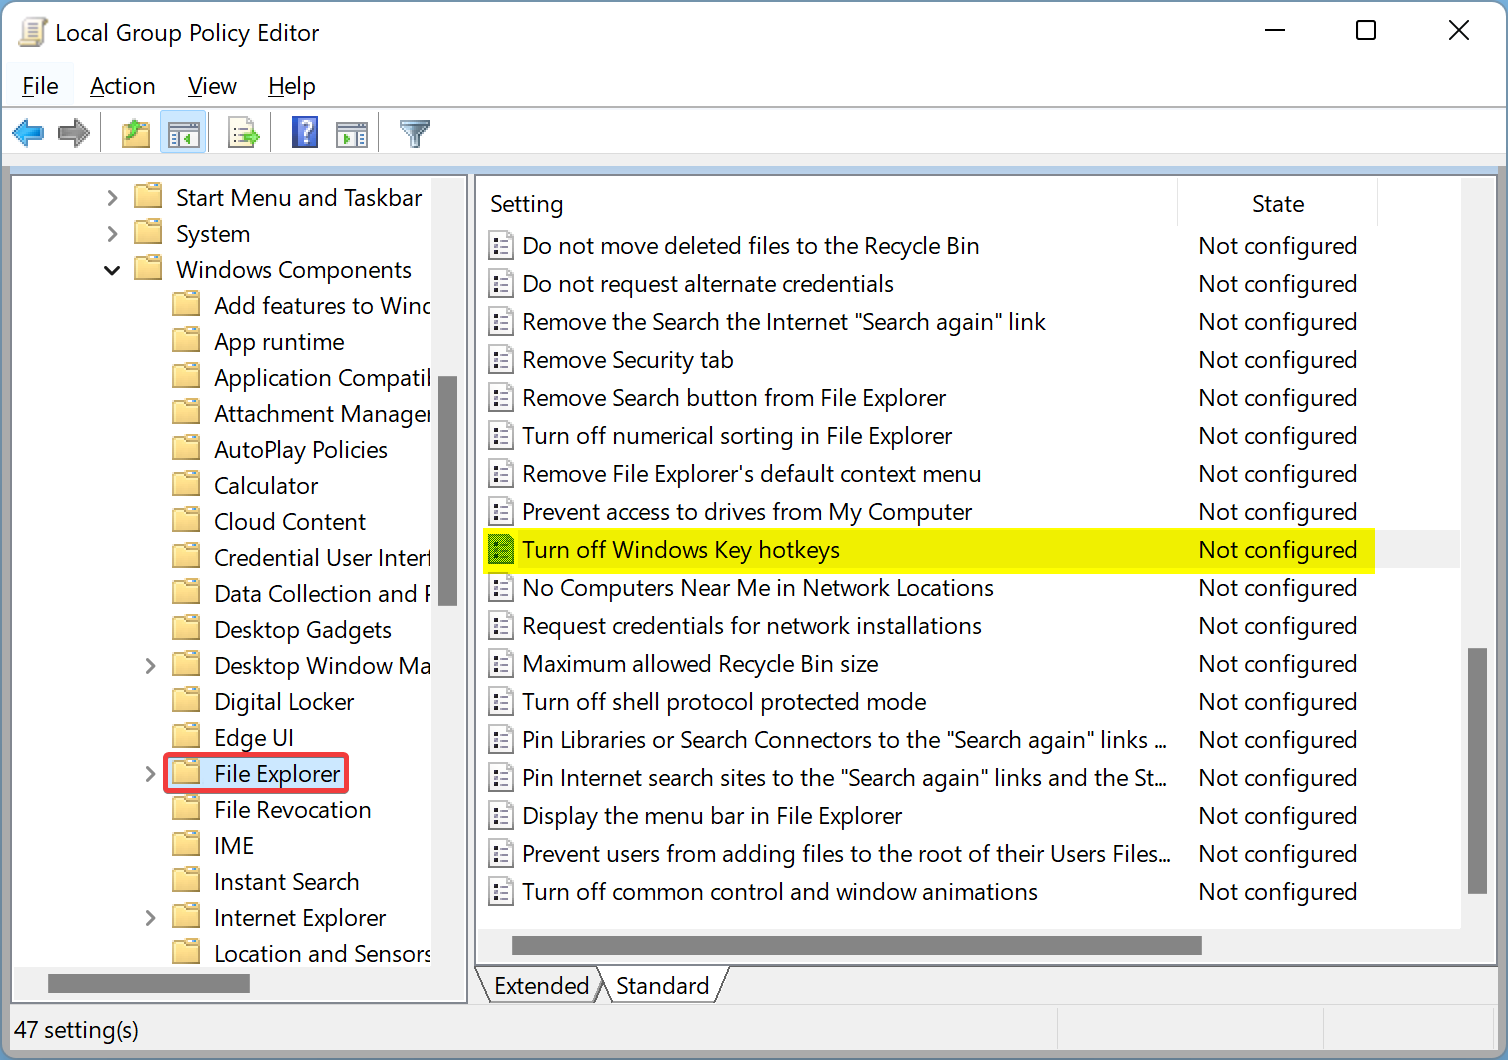
Step 3. In the right pane, locate and double-click “Turn off Windows Key hotkeys.”
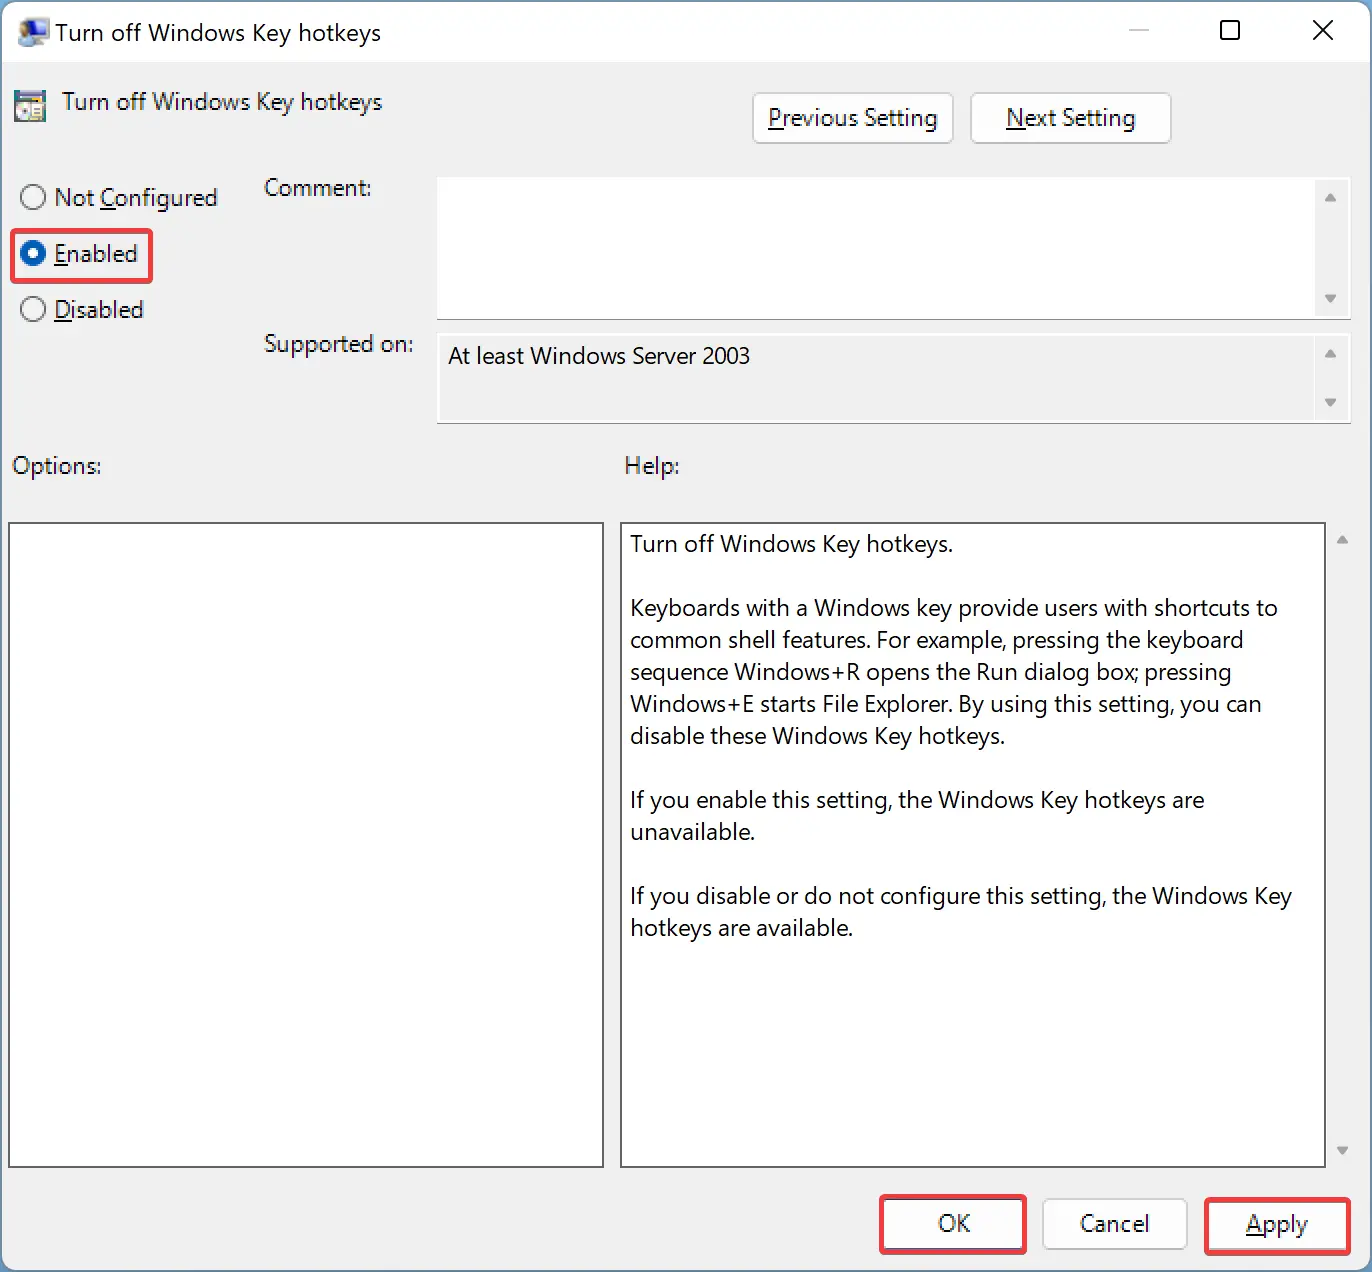
Step 4. Select “Enabled” and click “Apply.”
Step 5. Click OK.
Step 6. To apply the changes, you can either restart your computer or open Command Prompt as an administrator, type “gpupdate /force,” and press Enter.
To re-enable Windows key hotkeys, set the policy to “Not Configured” and apply the changes.
Conclusion
In conclusion, managing the Windows key on your Windows 11 or 10 computer is possible through various methods, allowing you to tailor its behavior to your specific needs. Whether it’s gaming, productivity, or preventing accidental key presses, these methods give you control over this essential keyboard feature. Choose the method that suits your preferences and requirements to enable or disable the Windows key with ease.
