Most people use the Copy and Paste function in Windows 11 and 10. When you copy a new item, Windows forgets about your previous clipboard item. So Microsoft introduced the Clipboard History feature on Windows 10 that remembers up to 25 clipboard items until you restart your machine. You can access your new clipboard experience by pressing Windows+V on your keyboard.
The clipboard history can also be pasted, and items that you use frequently can also be pinned. In addition to plain text, the clipboard history also supports HTML and images. Windows 10 build 18234 has increased the image size limit to 4MB in order to accommodate full-screen screenshots.
You can press CTRL + Shift + C to copy a path to your clipboard when selecting a file or folder in File Explorer. Alternatively, if you do not want Clipboard History to be used by any user on your PC, you can disable it in Windows 11 or 10. In case Clipboard History does not work on your PC, you can enable it using the Registry Editor or Group Policy.
How to Turn On or Off Clipboard History through Local Group Policy Editor?
To enable or disable Clipboard History using Local Group Policy Editor, do these steps:-
Step 1. Open Local Group Policy Editor first.
Step 2. Then, browse to the following path on the left side:-
Computer Configuration > Administrative Templates > System > OS Policies
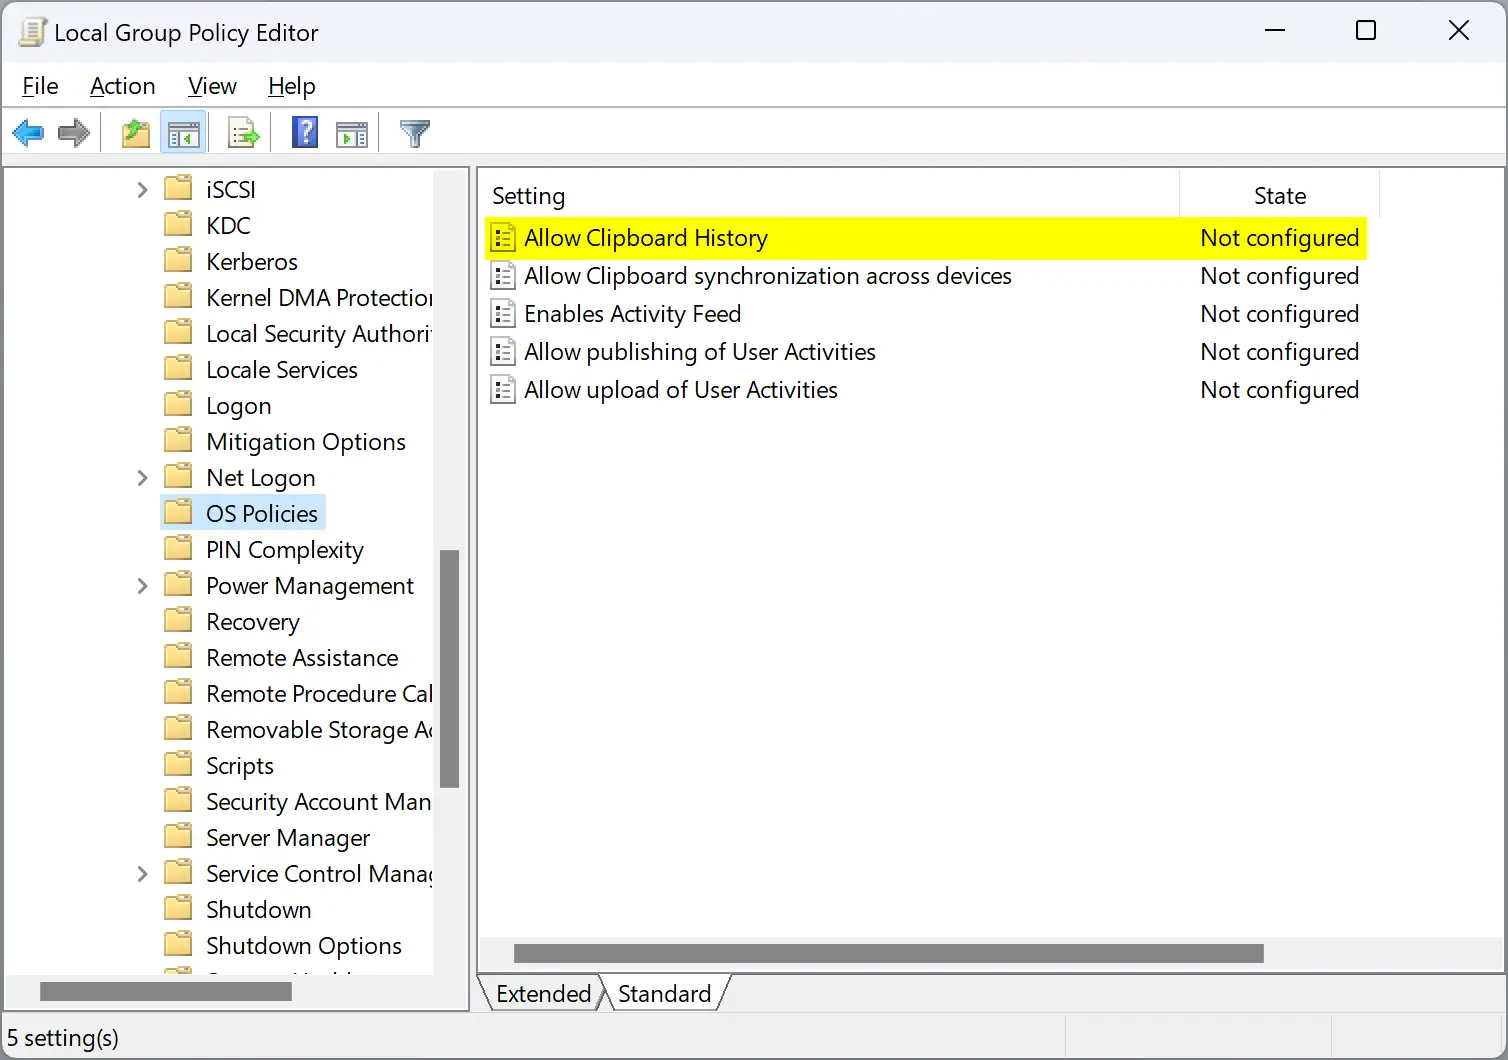
Step 3. On the right side, double-click on the Allow Clipboard History setting.
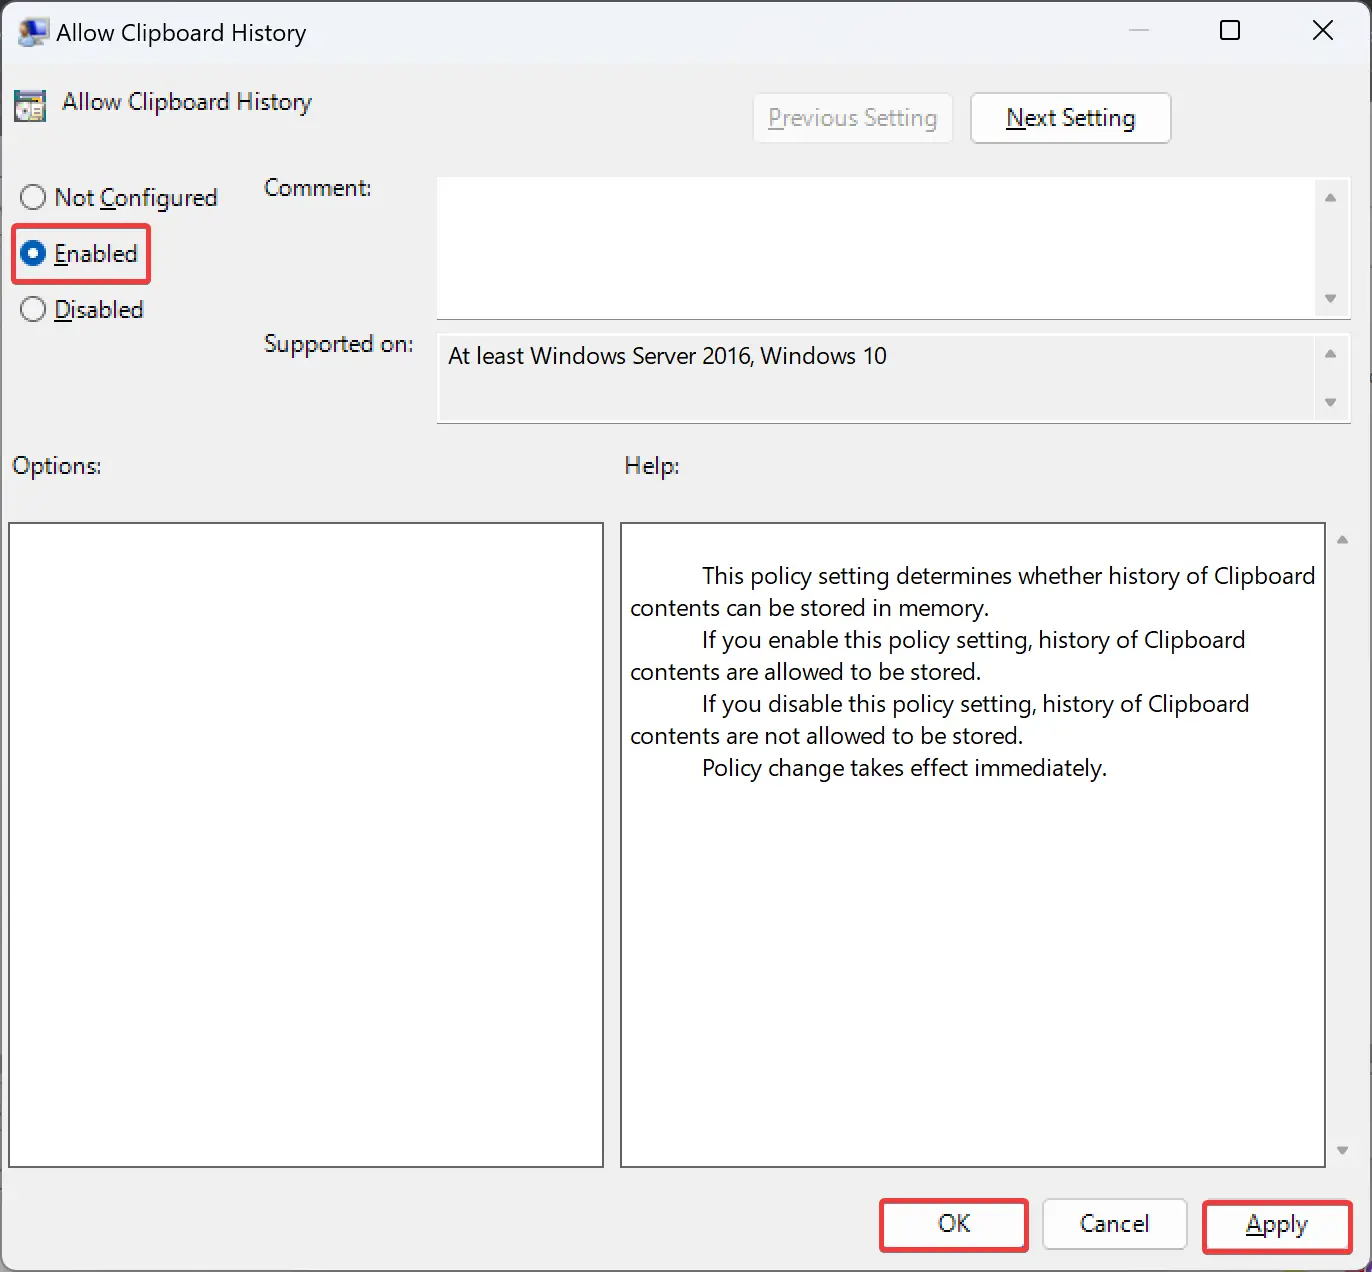
Step 4. Select the Enabled option if you want to allow the history of Clipboard contents can be stored in memory.
Quick Note: If you don’t want to allow Clipboard contents to be stored in memory, select the Disabled option instead.
Step 5. Click Apply.
Step 6. Click OK.
Step 7. Restart your computer to apply the changes.
How to Enable or Disable Clipboard History using Registry Editor?
Follow these steps to turn on or off Clipboard History through Registry Editor:-
Step 1. First, open Registry Editor.
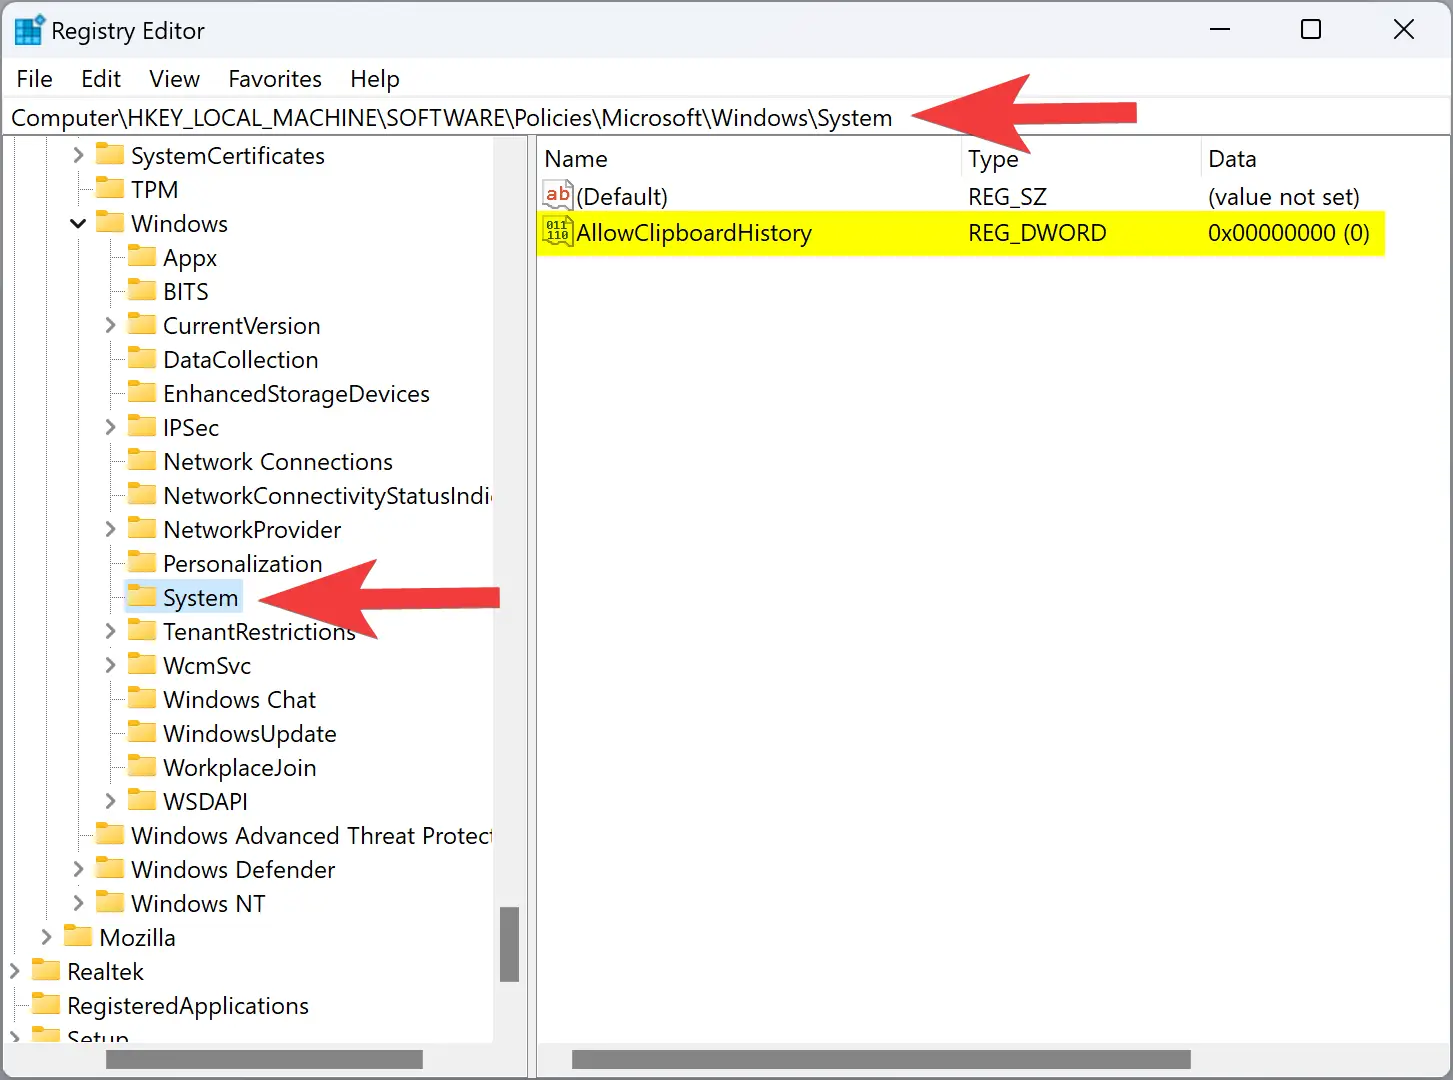
Step 2. Next, browse to the following key in the left sidebar of Registry Editor:-
HKEY_LOCAL_MACHINE\SOFTWARE\Policies\Microsoft\Windows\System
Step 3. If you don’t find the System key under Windows, then right-click on Windows key and select New > Key. Name the newly created key as System.
On the right sidebar, you’ll find a DWORD called AllowClipbloardHistory. If it is missing on your PC, right-click on the System key on the left side and select New > DWORD (32-bit) Value. Name the newly created REG_DWORD to AllowClipbloardHistory.
Now, double-click on the AllowClipbloardHistory REG_DWORD and set its “Value data” to the following:-
- 0: Disallow Clipboard History.
- 1: Allow Clipboard History.
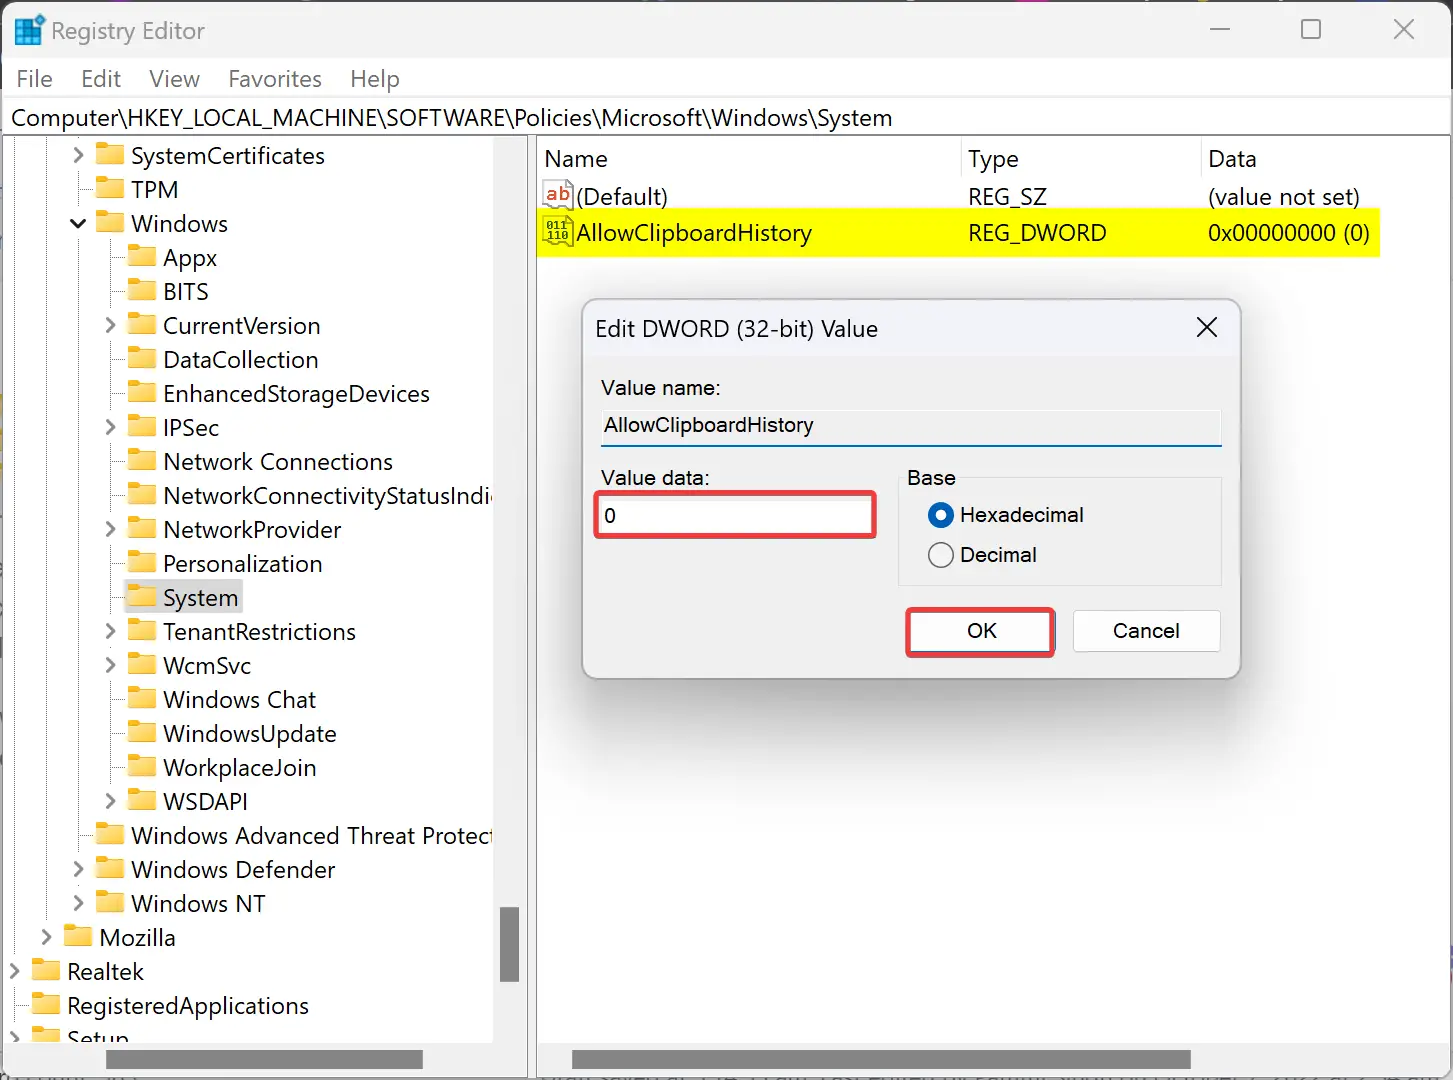
Step 4. Click OK.
Step 5. Reboot your PC to apply the changes.
Using the above steps, you can enable or disable the Clipboard History on your Windows 11 or 10 machine.
Conclusion
In conclusion, the Clipboard History feature in Windows 11 and 10 allows you to remember up to 25 clipboard items until you restart your machine. You can access it by pressing Windows+V on your keyboard. The feature also supports plain text, HTML, and images. However, if you do not want to use Clipboard History or want to disable it for other users on your PC, you can do so through the Local Group Policy Editor or Registry Editor. By following the steps mentioned above, you can easily turn on or off Clipboard History on your Windows 11 or 10 machine.