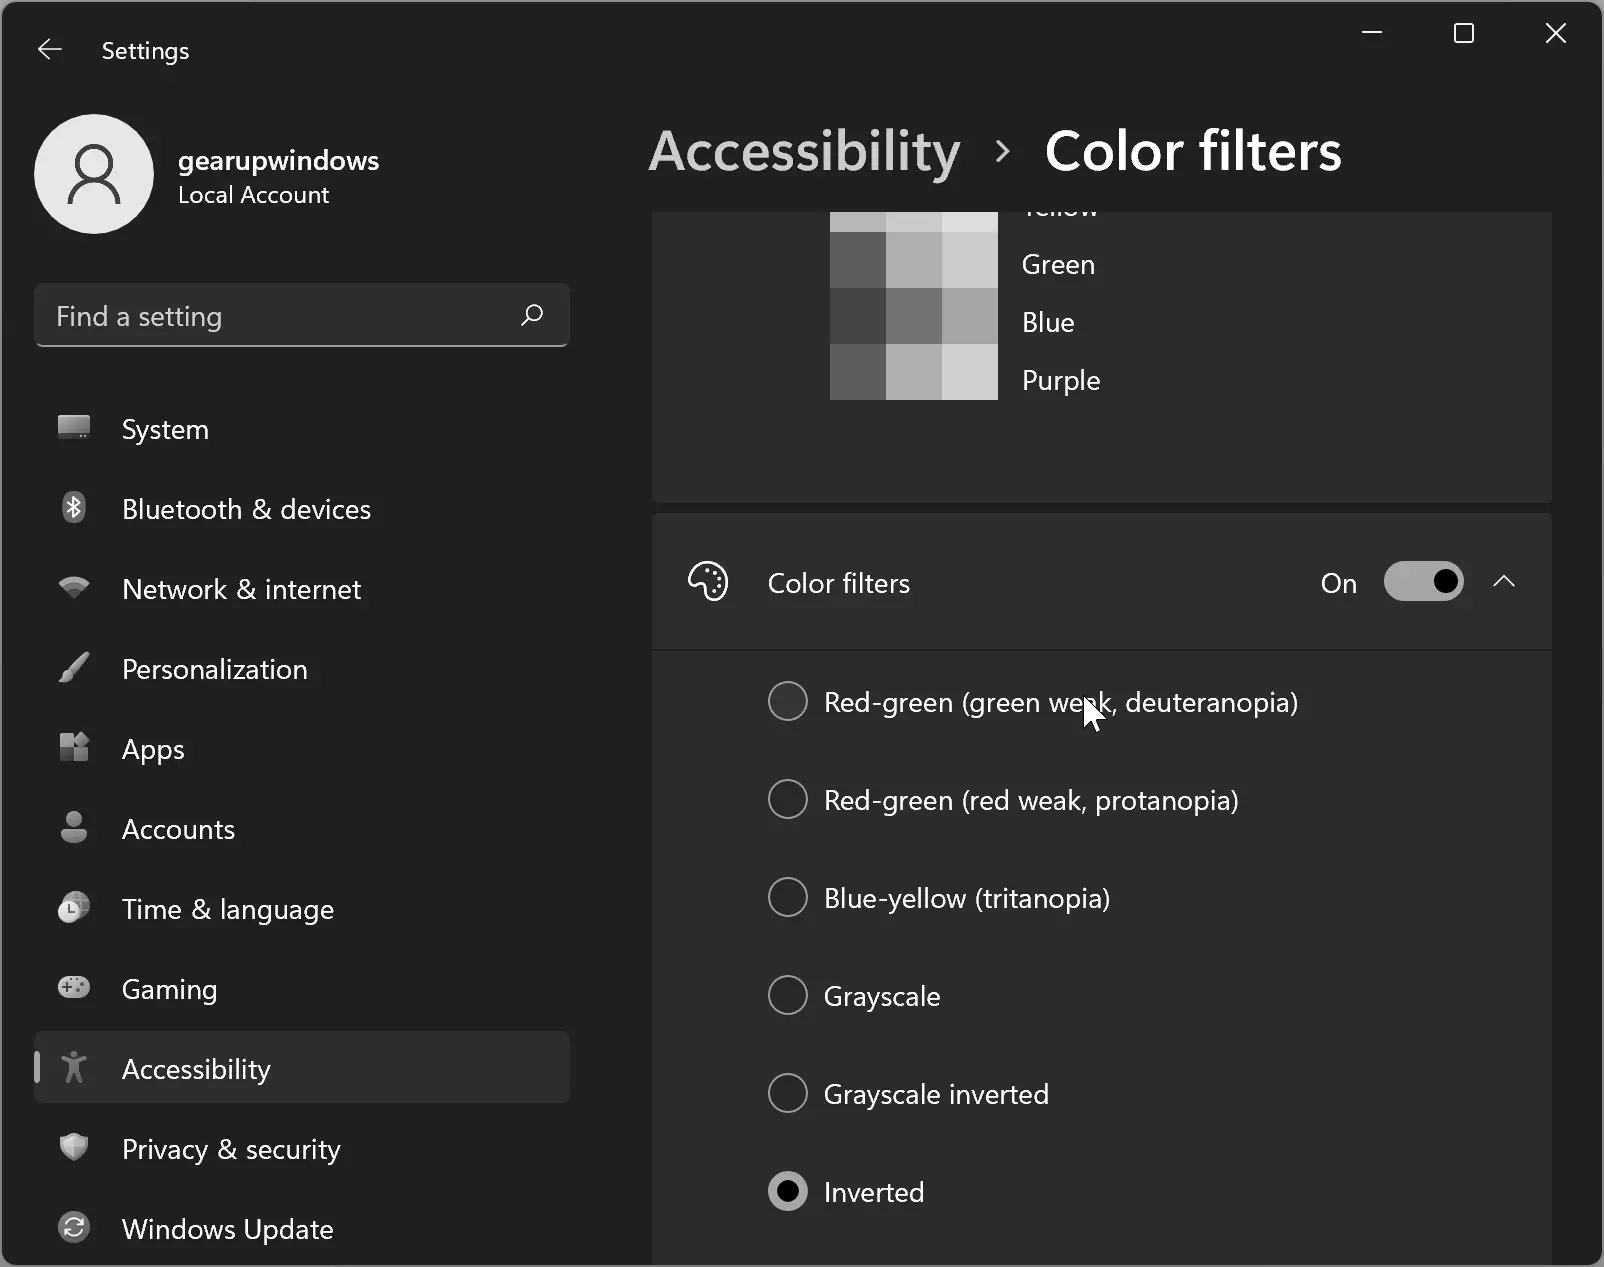
For visual disorders (color blindness) users, Windows 11 has a number of built-in sets of color filters. The Color Filters feature is not new to Windows 11. It was even available on Windows 10 as part of the Ease of Access system. You can select any from the Grayscale, Invert, Grayscale Inverted, Deuteranopia, Protanopia, and Tritanopia classic filters.
How to Enable Color Filters in Windows 11 using Quick Settings?
Step 1. First, click on the volume or network, or battery icon on the right corner of the taskbar to open Quick Settings if you prefer to use keyboard shortcut keys and press Windows + A.
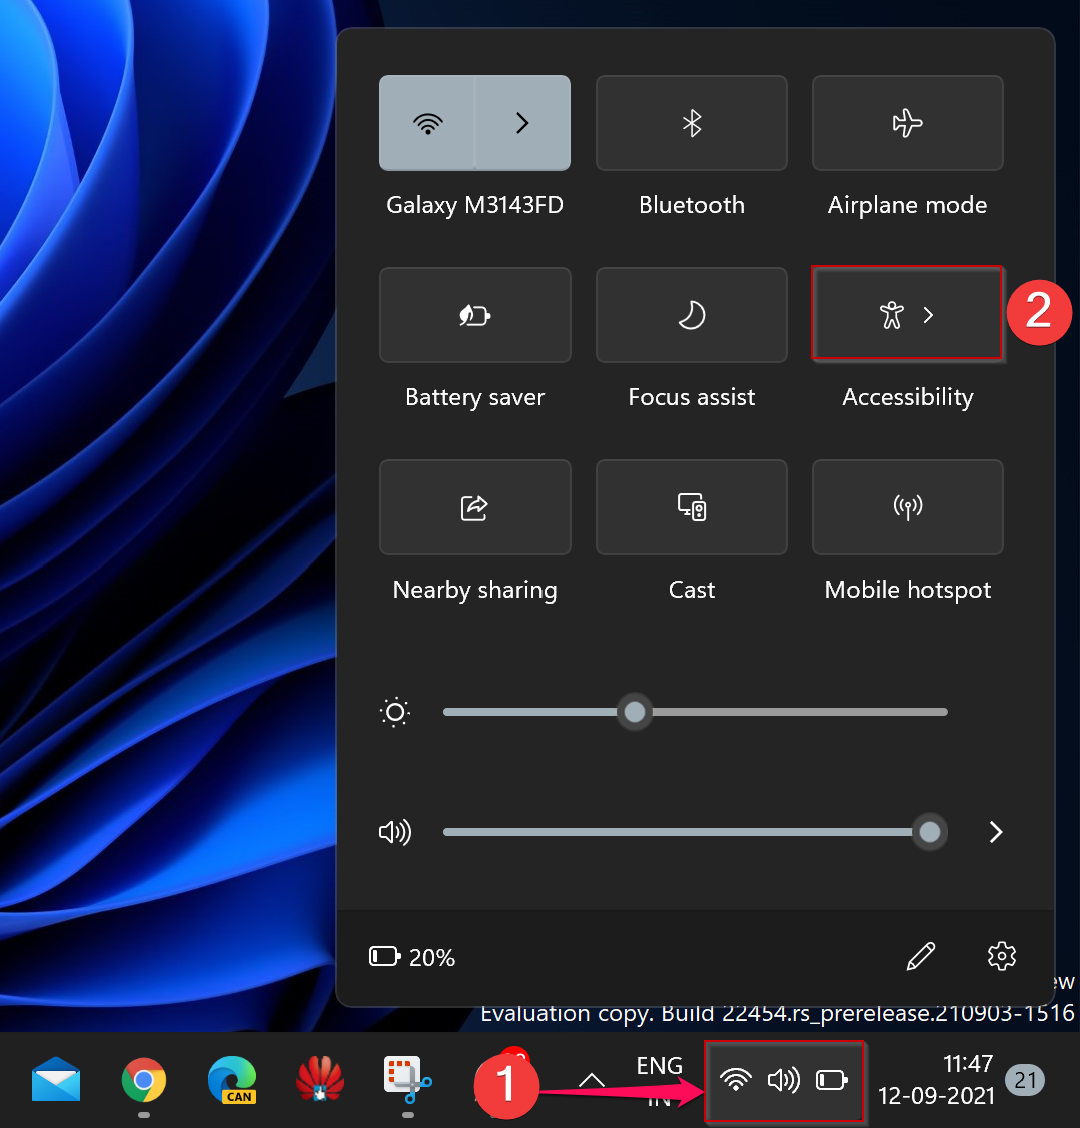
Step 2. In the Quick Settings menu, click the Accessibility tile.
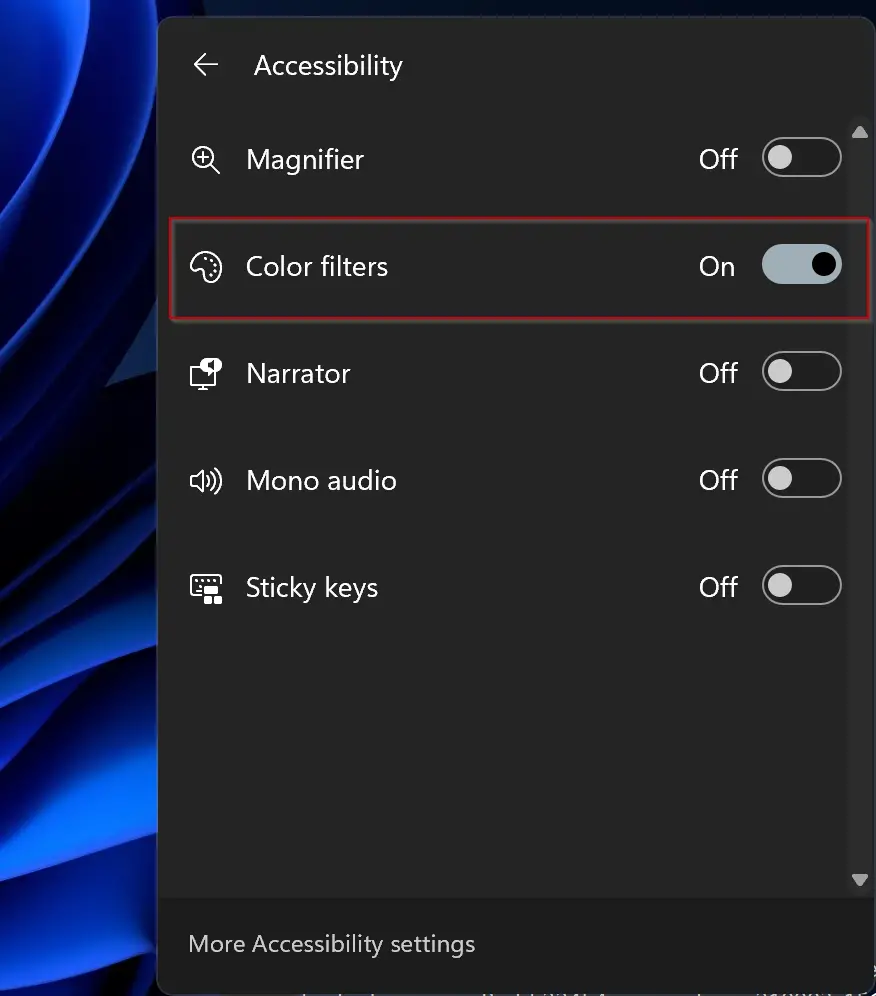
Step 3. After that, in the Accessibility Quick Settings menu, flip the toggle switch beside Color filters to turn it On/Off according to your needs.
How to Turn On Color Filters in Windows 11 through the Settings app?
Step 1. First, open the Settings app by pressing Windows + I keys from the keyboard. Alternatively, right-click on the Start button at the taskbar and select Settings from the pop-up menu that appears.
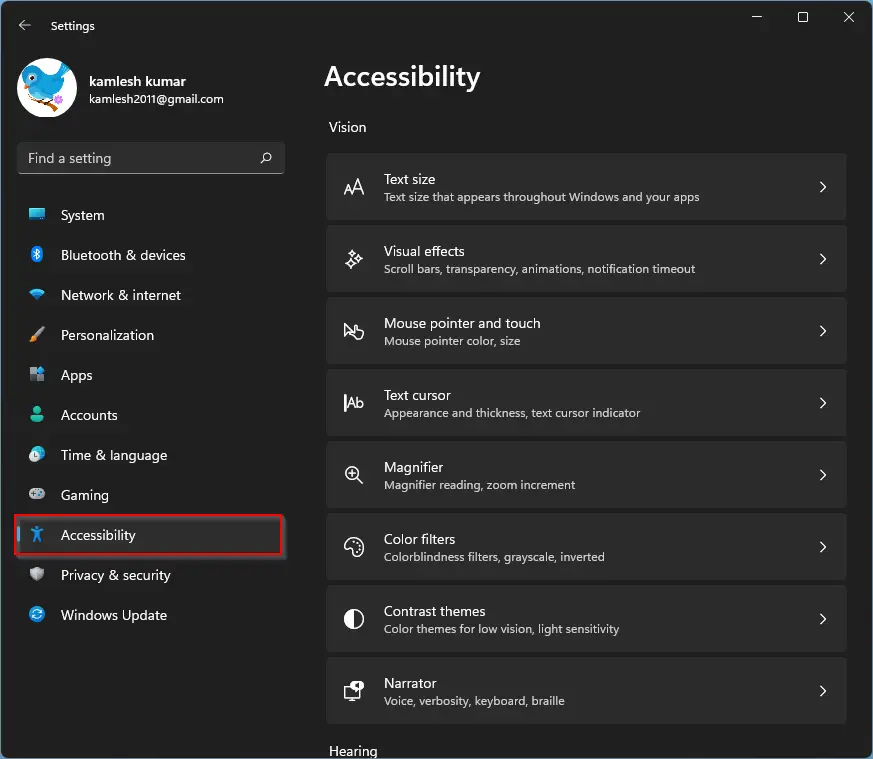
Step 2. When Windows Settings opens, select the Accessibility category in the left sidebar.
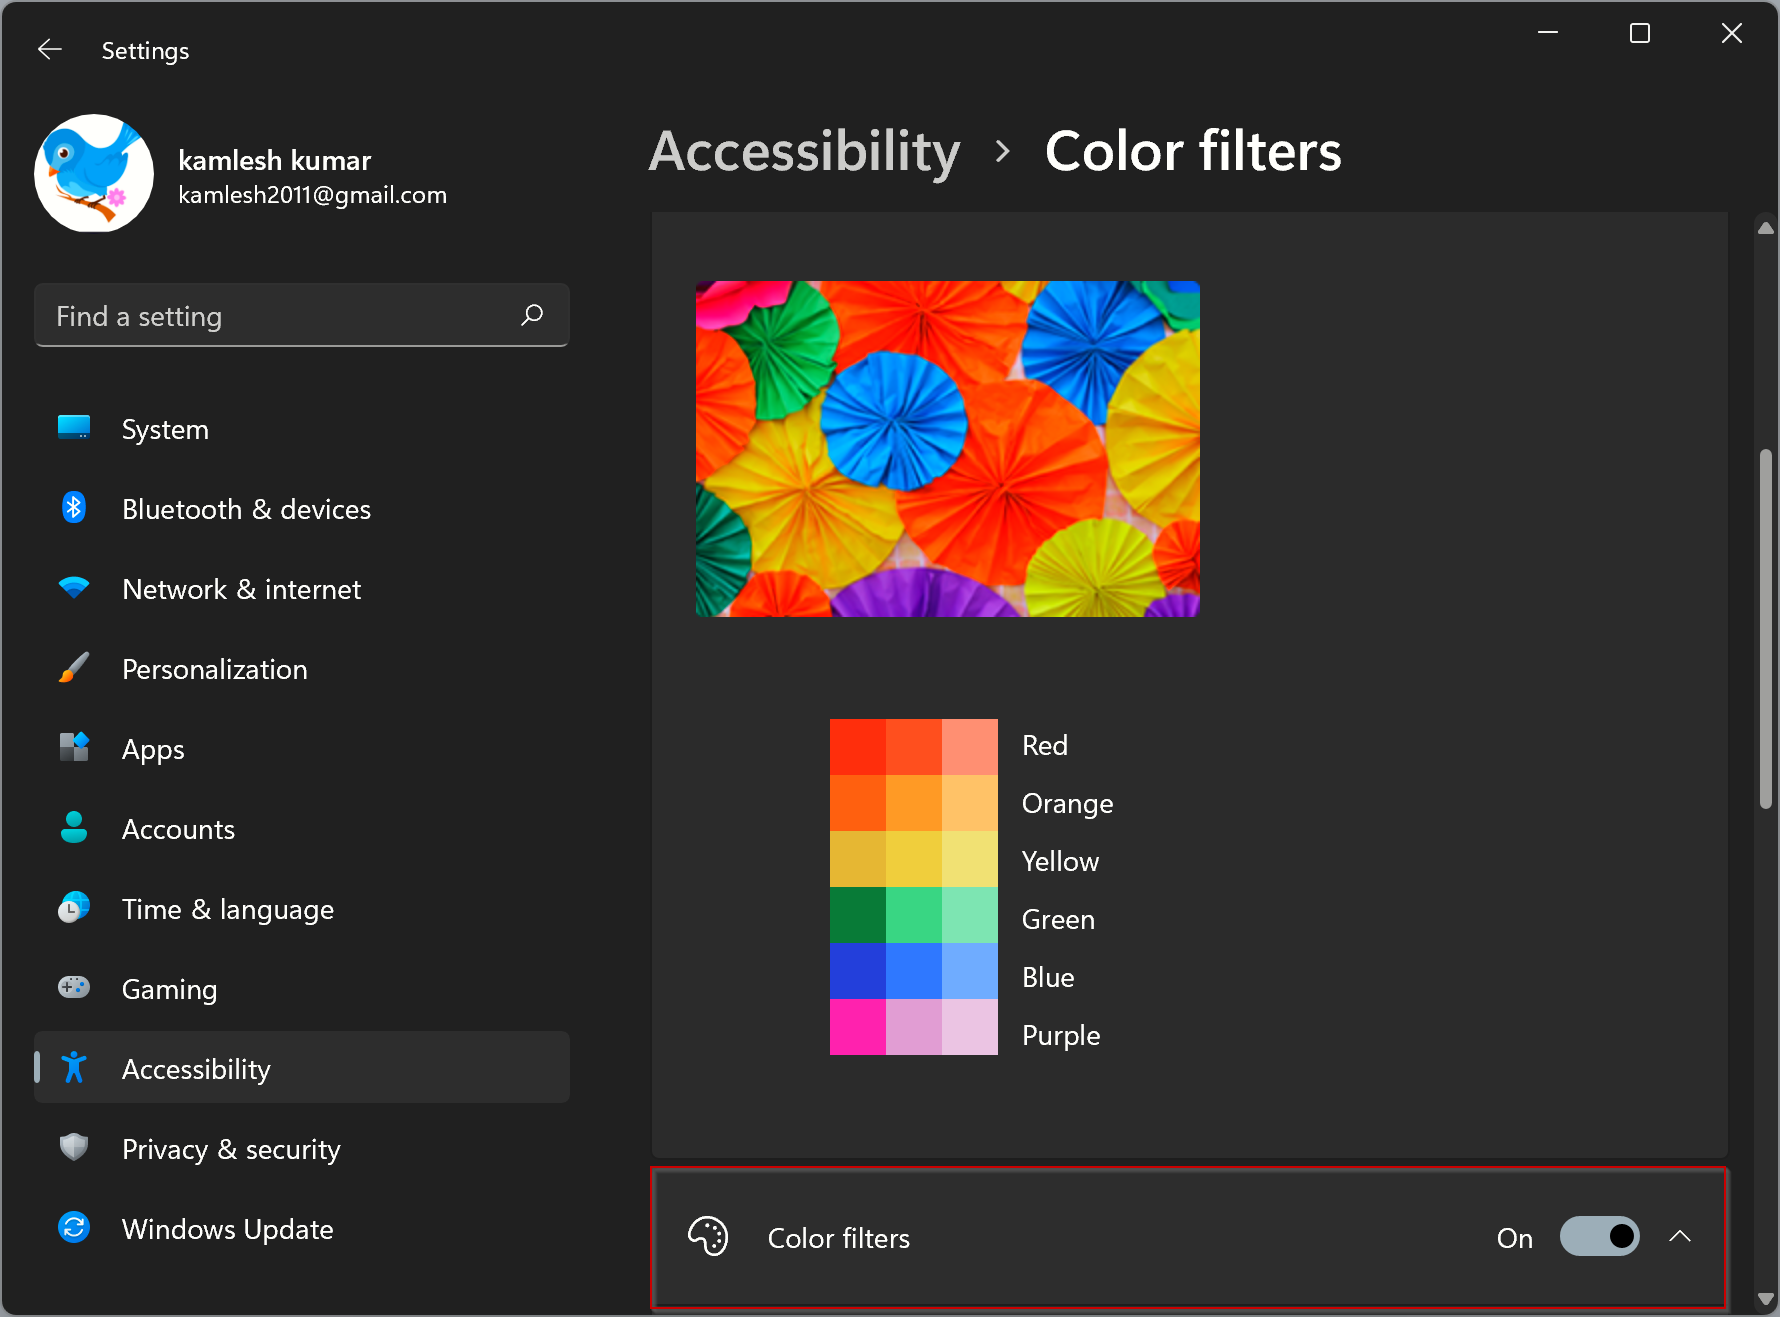
Step 3. After that, select Color Filters in the right sidebar.
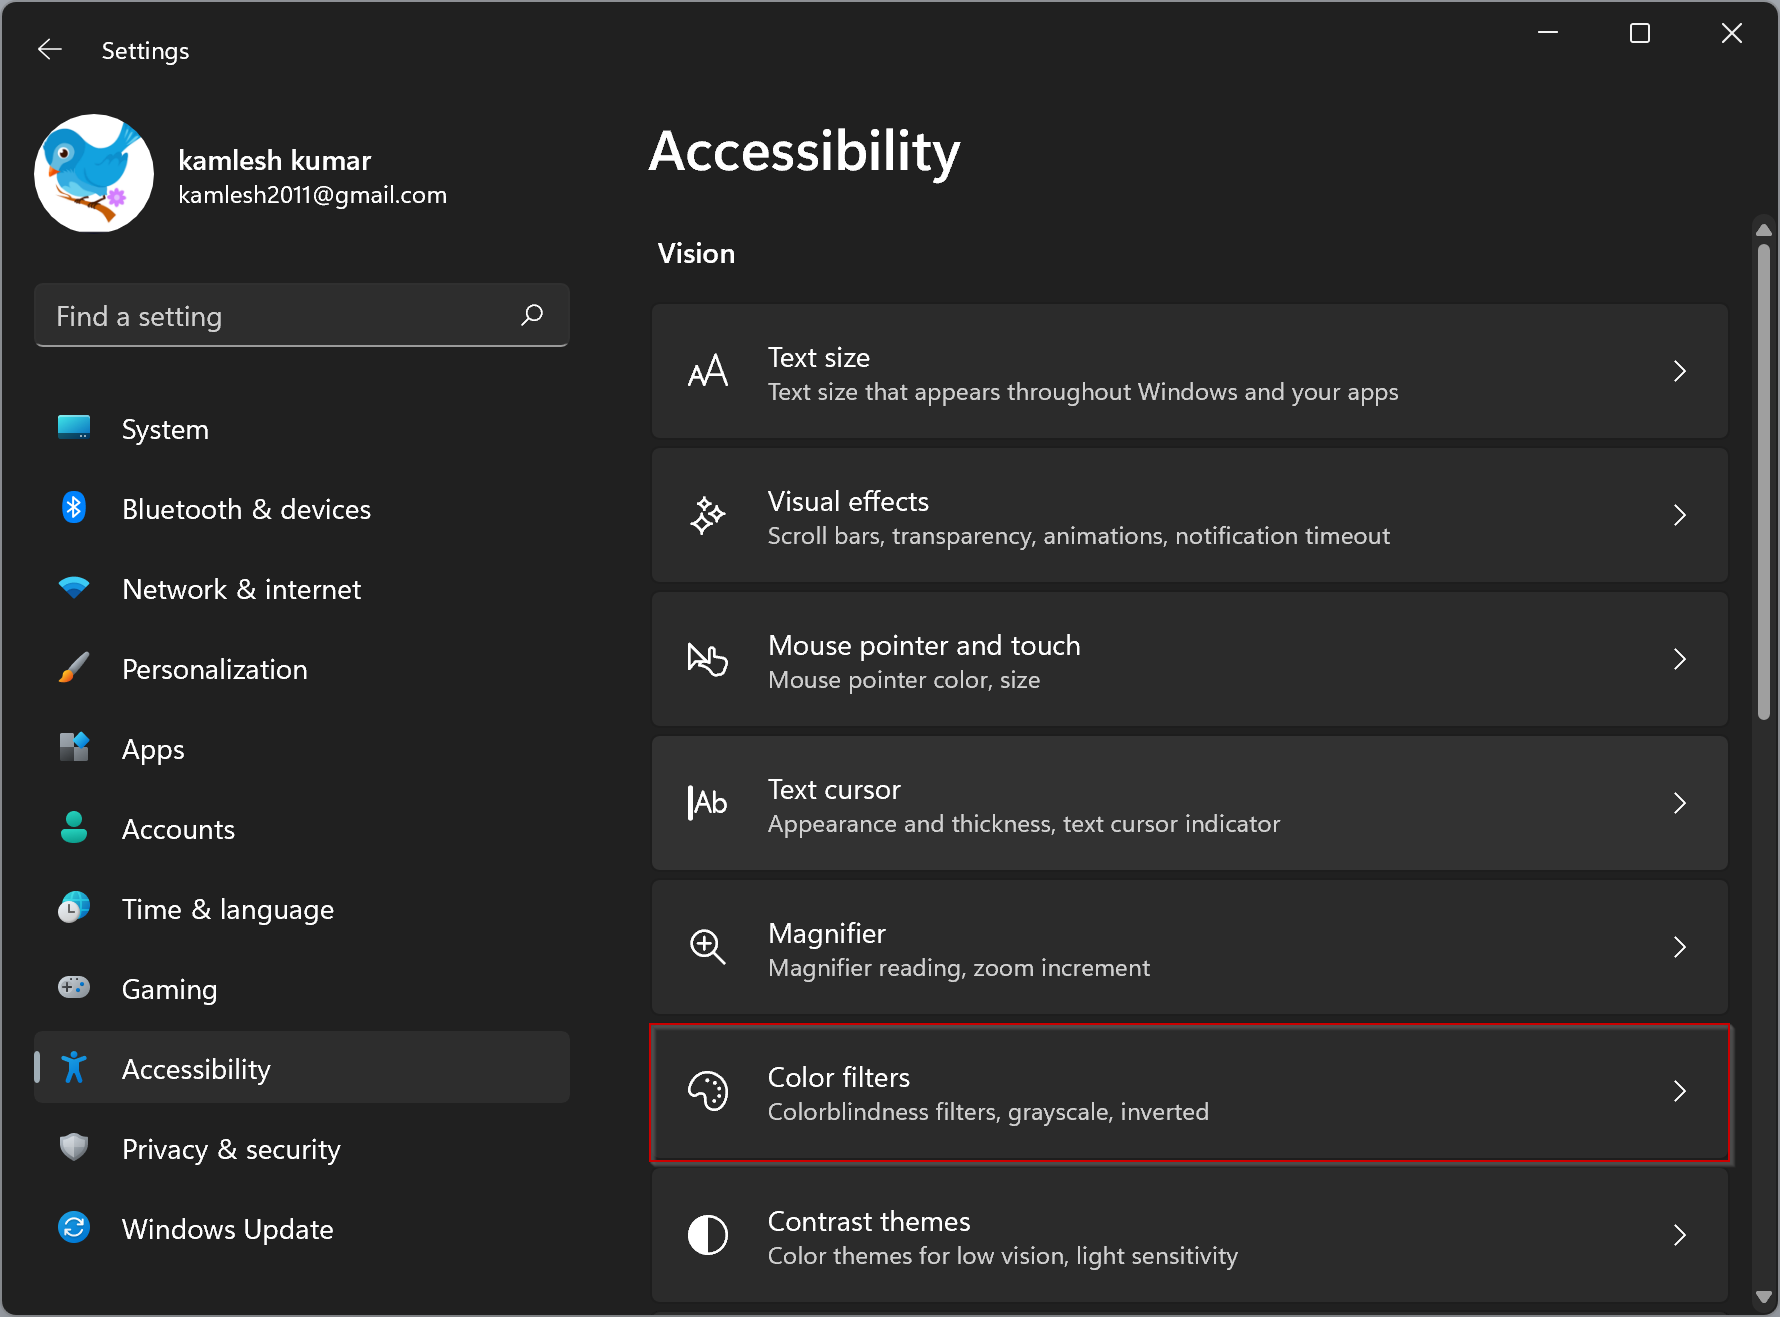
Step 4. In the Color filters settings page, snap the toggle switch to On/Off beside Color filters.
How to Turn On Color Filters in Windows 11 from Keyboard Shortcut?
If you frequently switch Color Filters on a Windows 11 PC, then you might prefer to use a keyboard shortcut.
Step 1. First, open the Settings app by pressing Windows + I keys from the keyboard. Alternatively, right-click on the Start button at the taskbar and select Settings from the pop-up menu that appears.
Step 2. When Windows Settings opens, select the Accessibility category in the left sidebar.
Step 3. After that, select Color Filters in the right sidebar.
Step 4. In the Color filters settings page, enable the toggle switch beside the Keyboard shortcut for color filters.
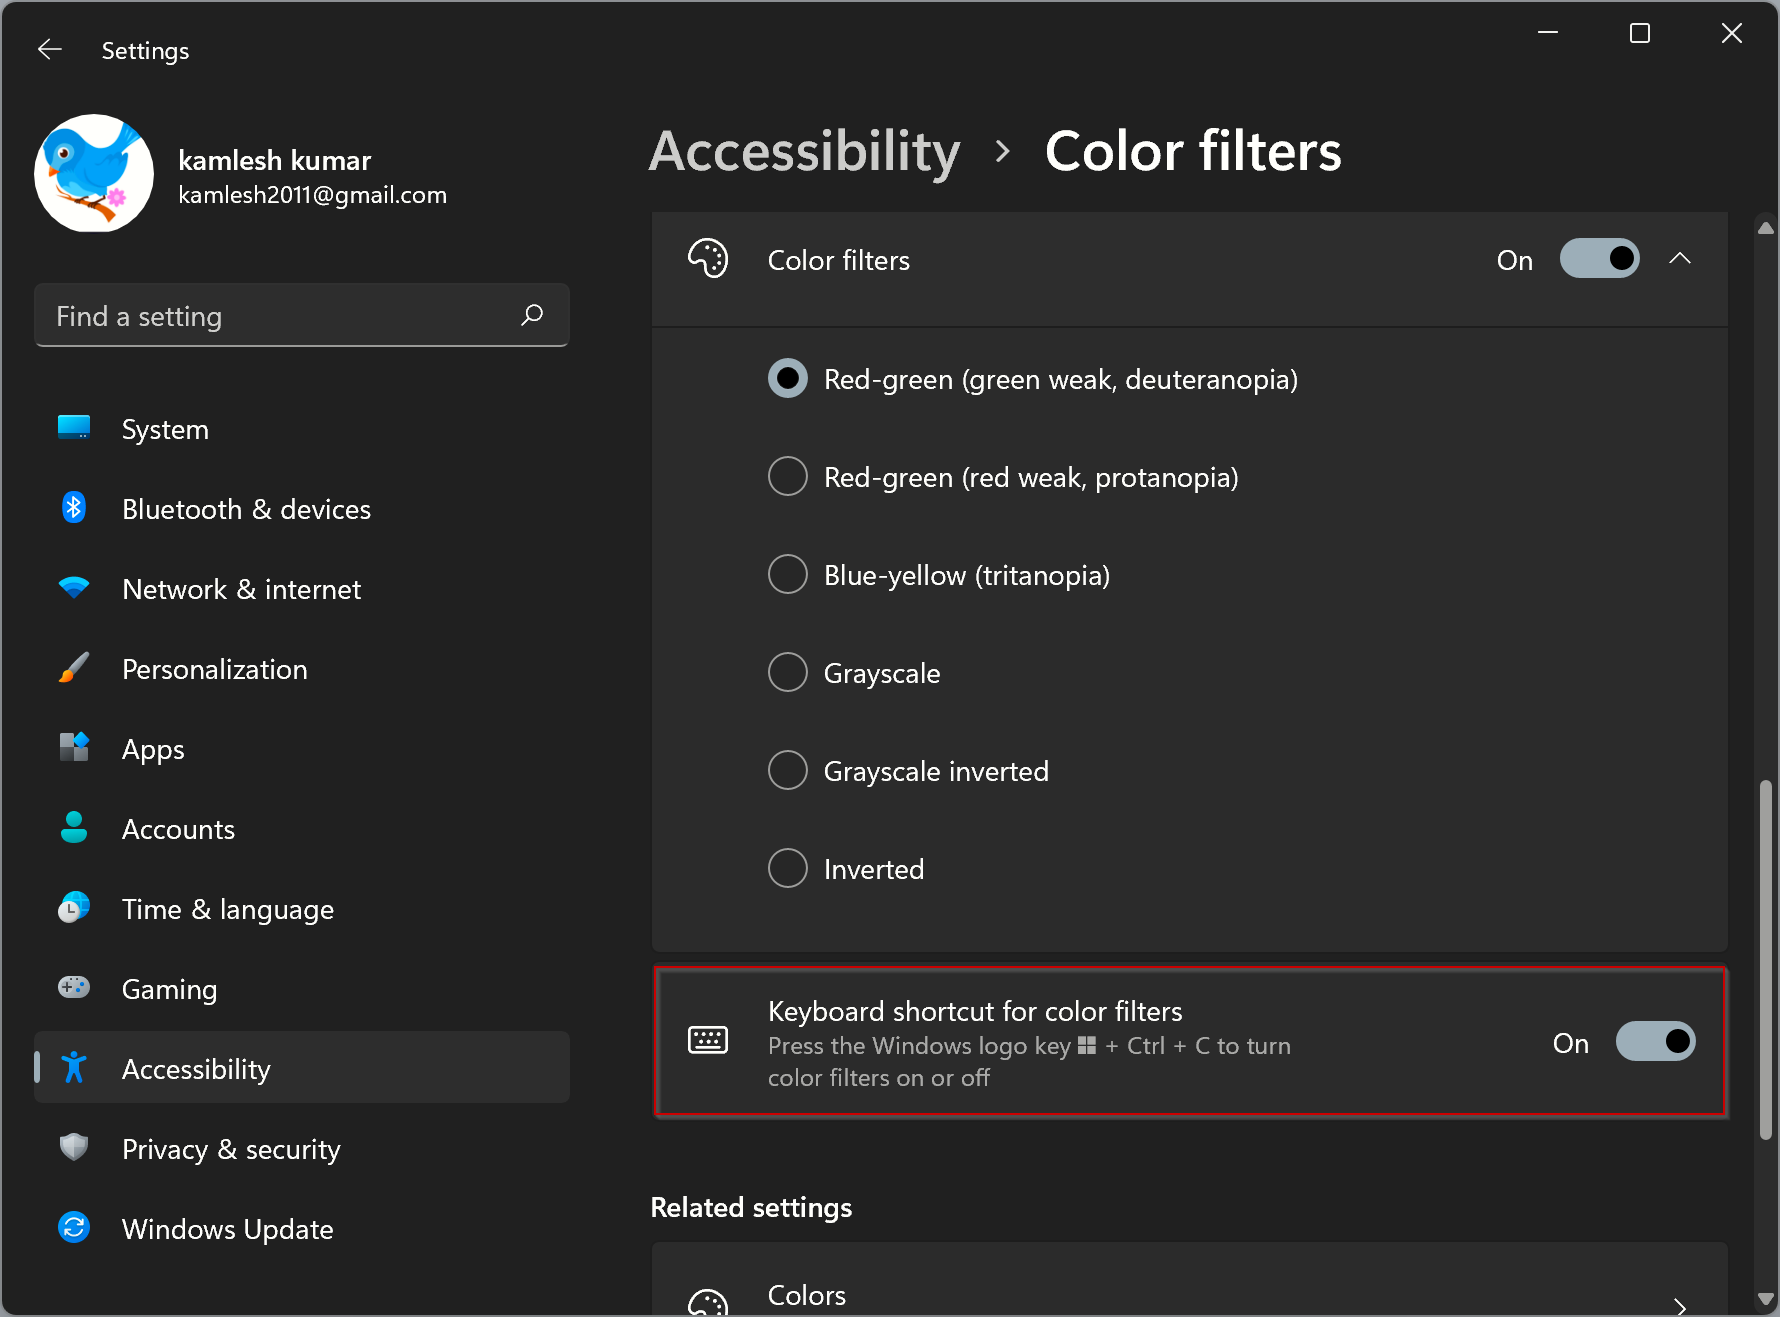
That’s it. When you’re done, close the Settings app. To quickly enable or disable Color filters on your Windows 11 PC, press the Windows + Ctrl + C keyboard sequence. Your preferred color filter will be applied. Again use the same keys to disable the color filter.
How to Turn On Color Filters in Windows 11 using Registry Editor?
To enable Color Filters in Windows 11 using Registry Editor, use these recommended steps:-
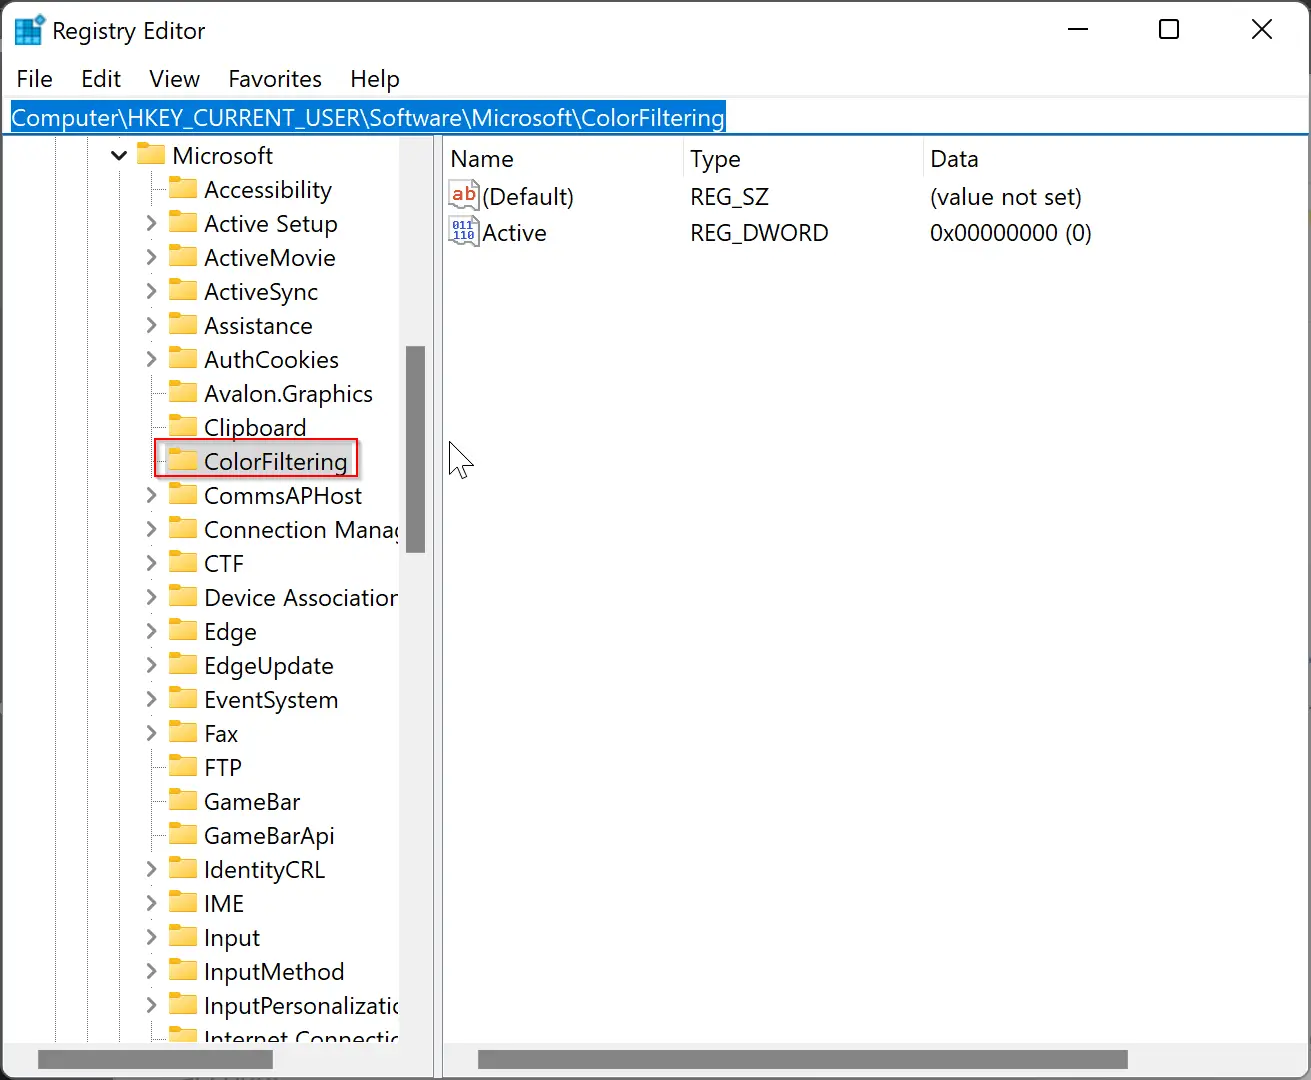
Step 1. First, open the Registry Editor.
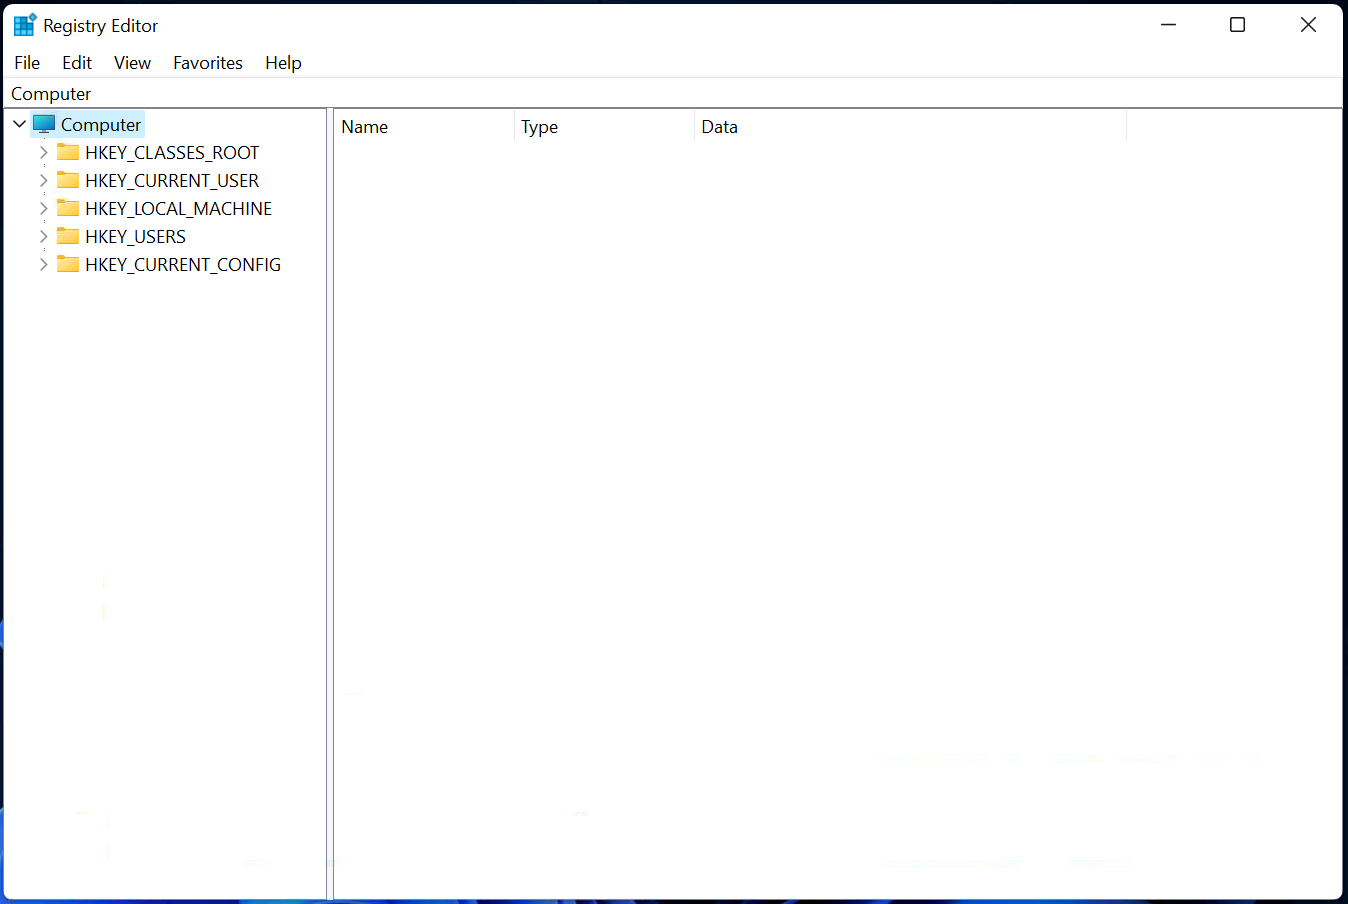
Step 2. When the registry editor window opens, navigate to the following registry key in the left sidebar:-
Computer\HKEY_CURRENT_USER\Software\Microsoft\ColorFiltering
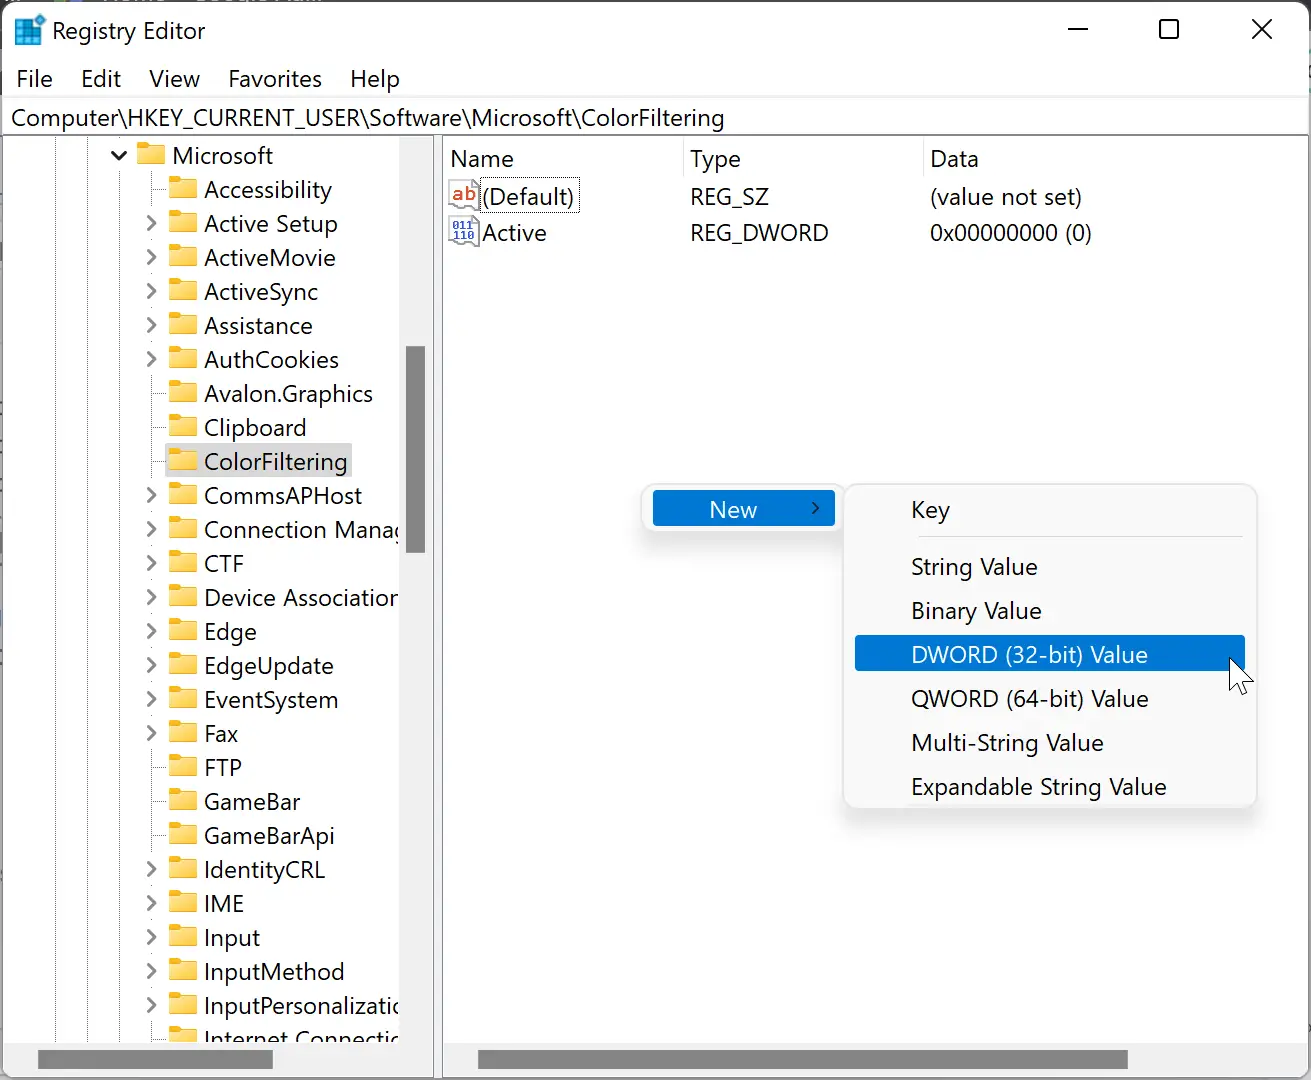
Step 3. After that, right-click in the blank area on the right sidebar and then select New > DWORD (32-bit) value. Name it as HotkeyEnabled.
Step 4. Next, double click on HotkeyEnabled and set its “Value data” to the following:-
- 0 – Disable hotkey Windows + Ctrl + C.
- 1 – Enables hotkey Windows + Ctrl + C.

Step 5. Finally, click the OK button.
Using the above steps, you can enable or disable hotkey for Color filters.
Step 7. Again right-click on the free space on the right sidebar and select the New > DWORD (32-bit) value. Name it FilterType.
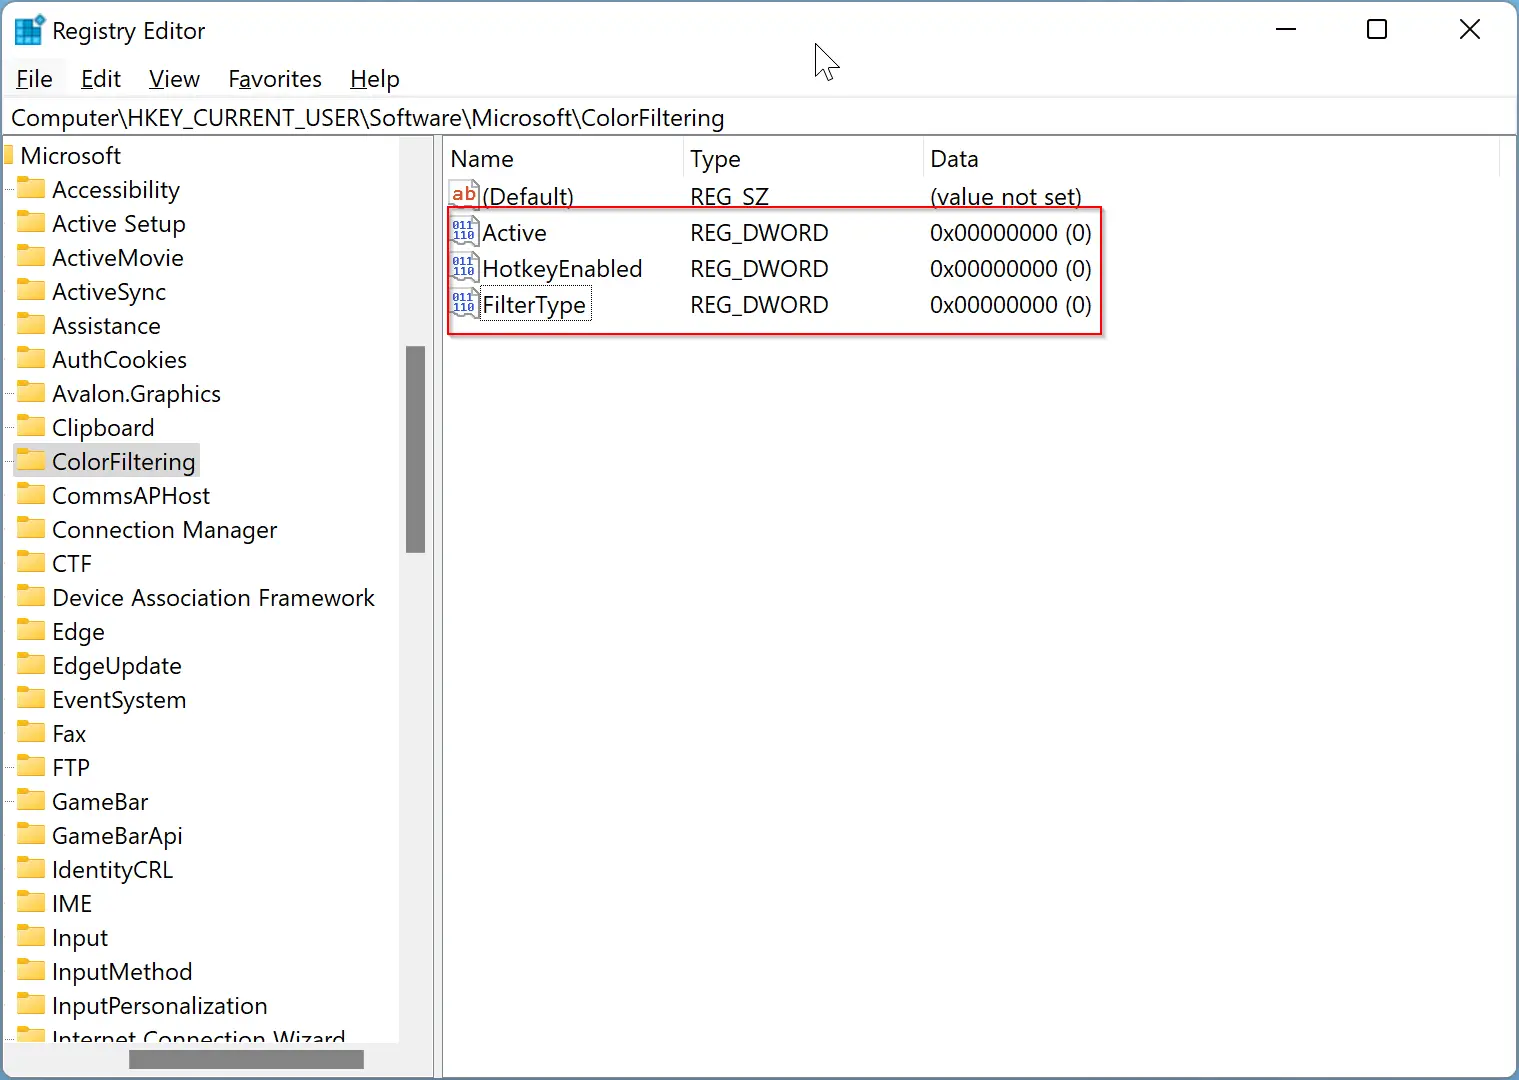
Now, you will have three DWORD (32-bit) values on the right side of the ColorFiltering folder. Before proceeding with the further steps, let me explain their usage.
- Active is responsible for enabling or disabling color filters.
- HotkeyEnabled is used to enable or disable shortcut keys.
- FilterType determines what color filter system uses.
In the above steps, we have already guided you to turn on/off hotkeys. Now, we will advise you regarding the rest of the options.
Step 8. To turn on color filters in Windows 11, double-click the Active value to modify it. Set its value data as follows:-
- 0 – To disable.
- 1 – To enable.
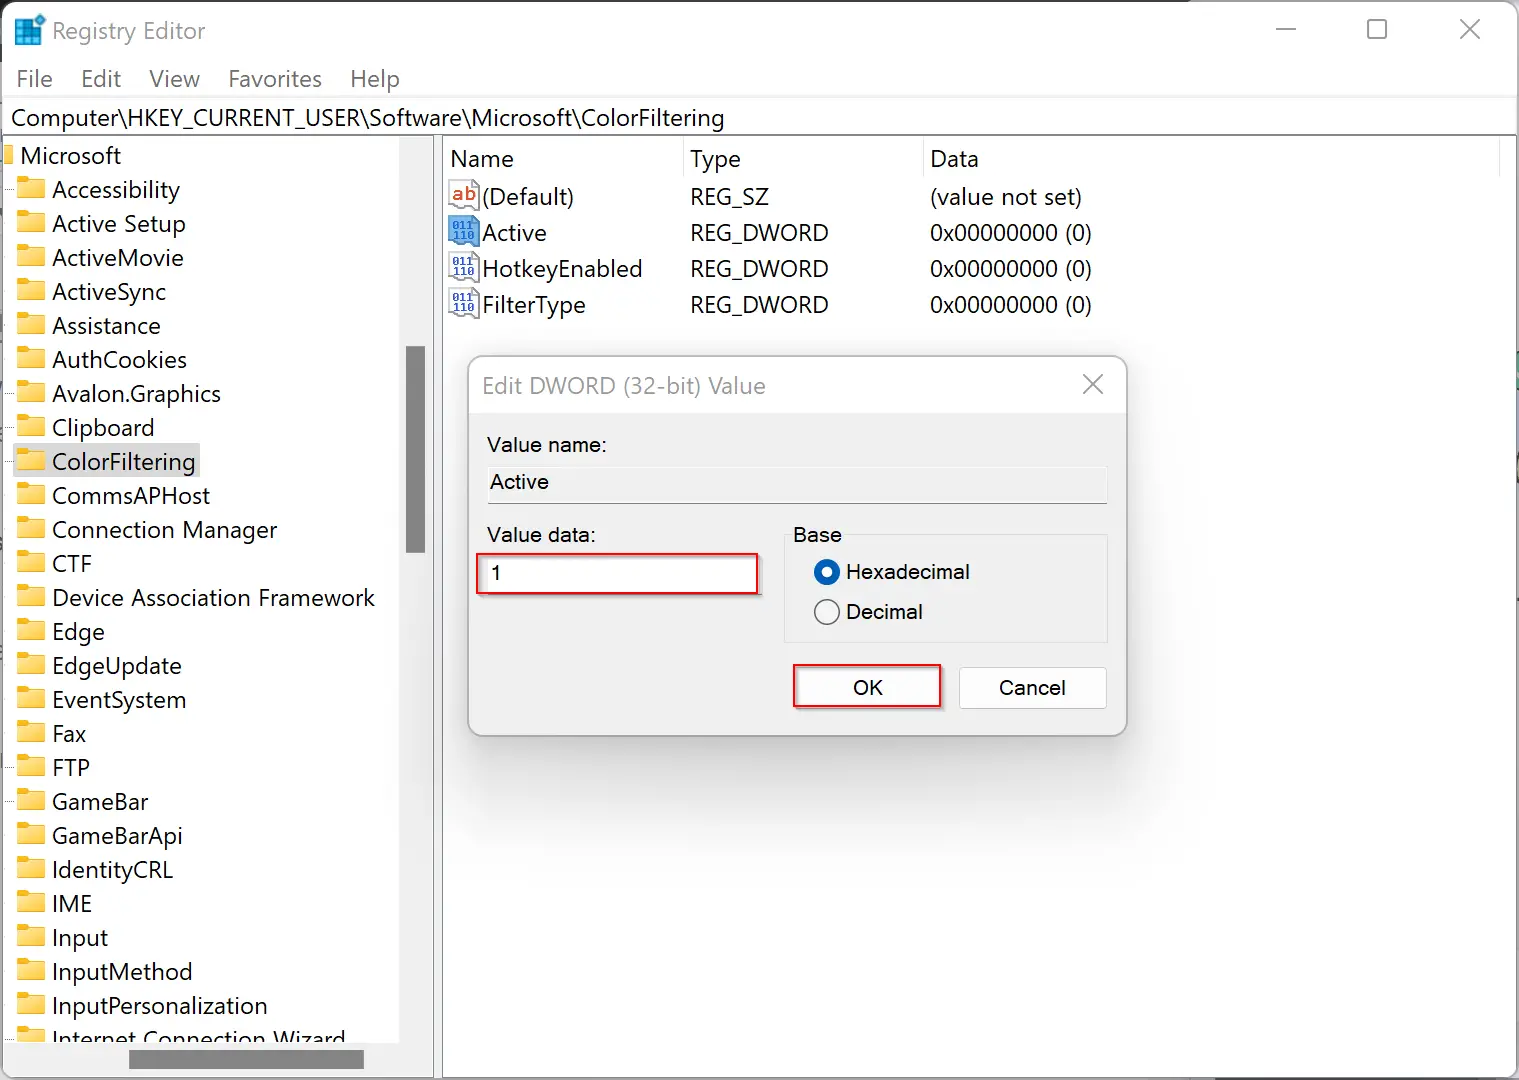
Step 9. When you’re done, click the OK button.
Step 10. After that, double-click on the FilterType to set its value data. Set the “Value data” as follows:-
- 0 = Grayscale.
- 1 = Inverted.
- 2 = Grayscale inverted.
- 3 = Red-green (green weak, deuteranopia).
- 4 = Red-green (red weak, protanopia).
- 5 = Blue-yellow (tritanopia).
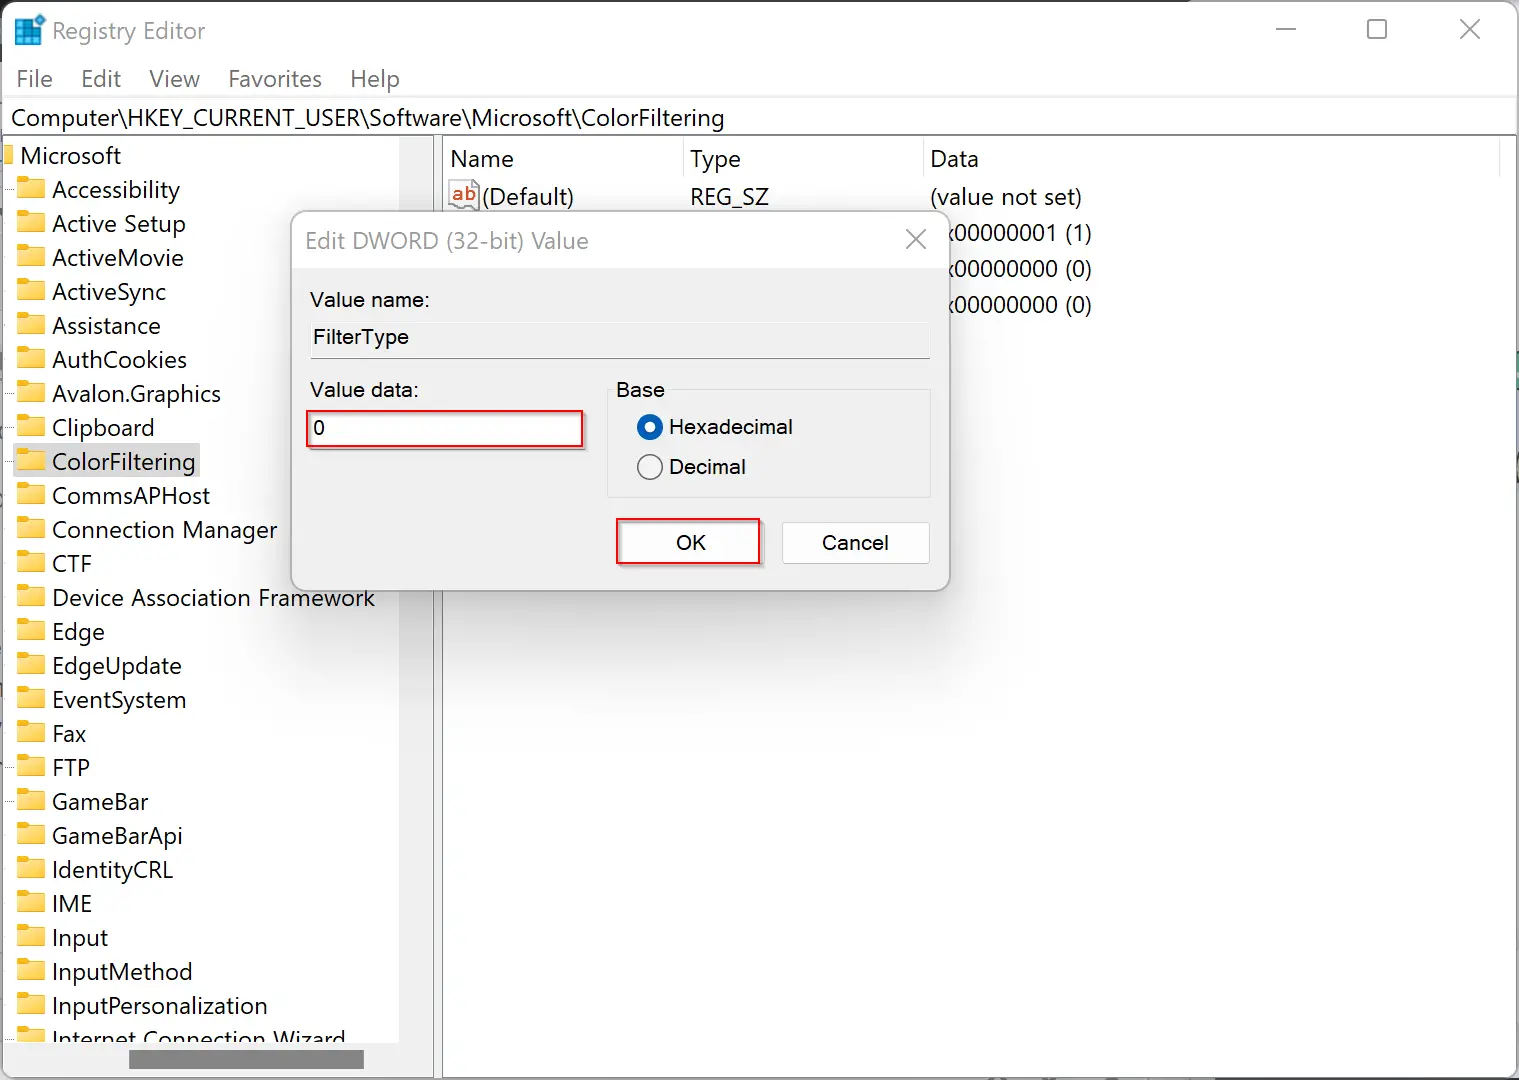
Step 11. Click OK.
Step 12. Sign out and then sign in again to your PC to see the changes.
Good luck.
Conclusion
In conclusion, Windows 11 offers several built-in sets of color filters that can be helpful for users with visual disorders, such as color blindness. These filters were already available on Windows 10 as part of the Ease of Access system. Windows 11 provides various ways to enable these filters, including using Quick Settings, the Settings app, keyboard shortcuts, and even the Registry Editor. By following the steps provided, users can easily turn on or off their preferred color filter or even set up a hotkey to quickly toggle the filter on and off. These accessibility features demonstrate Microsoft’s commitment to inclusivity and making technology accessible to everyone.
