All Windows laptop ships with a touchpad. If you have purchased a new laptop or are on an old laptop whose touchpad is not working and want to disable it, this gearupwindows article will help you. It may also happen that the touchpad is broken, and you want to disable it to troubleshoot them. Windows 11/10 lets you disable and enable the touchpad using the built-in Settings app or Registry Editor.

In this gearupwindows article, you will learn how to enable or disable Touchpad through Windows 11 Settings.
How to Enable or Disable Touchpad using Windows 11 Settings?
You can enable or disable the touchpad on Windows 11 using two ways. First, if you have installed the manufacturer software for your touchpad, you can use it to turn it off. Next, using the Windows 11 Settings app, you can also enable or disable the touchpad settings. We will see how to turn or turn off the touchpad using the Settings app in this post.
Step 1. Open the Settings app.
To do that, press Windows + I keyboard from the keyboard.
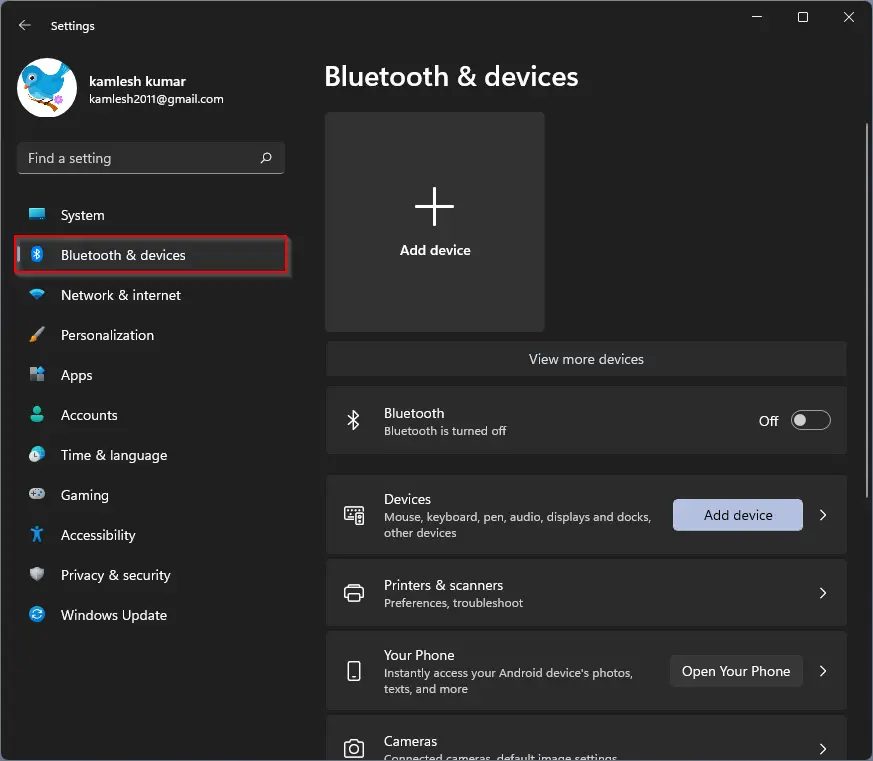
Step 2. When Windows Settings opens, click the Bluetooth & devices from the left sidebar.
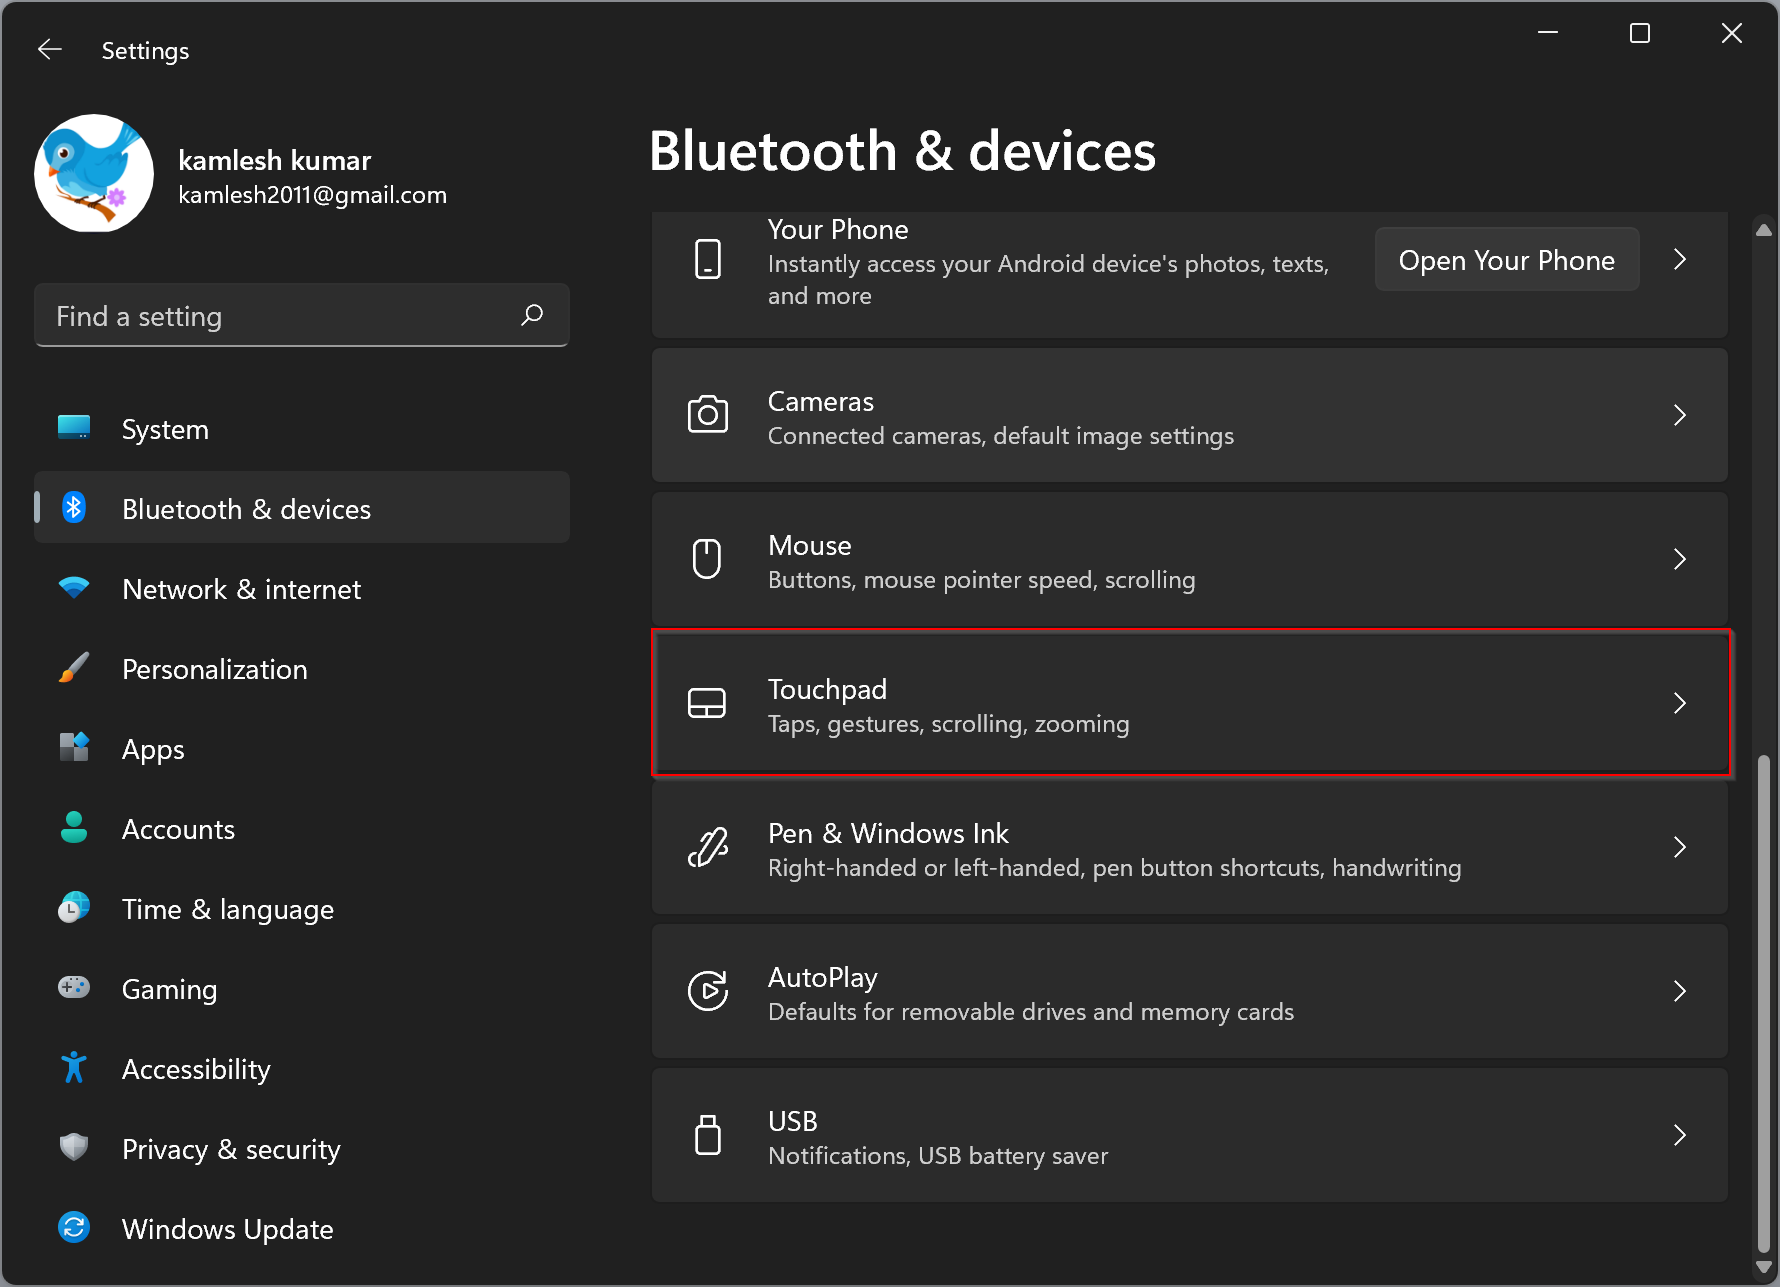
Step 3. On the right side, select the Touchpad option.
Step 4. Now, to disable the Touchpad, turn its toggle switch to the Off position. And when you want to enable the Touchpad, slide the toggle switch of the Touchpad to the On position.
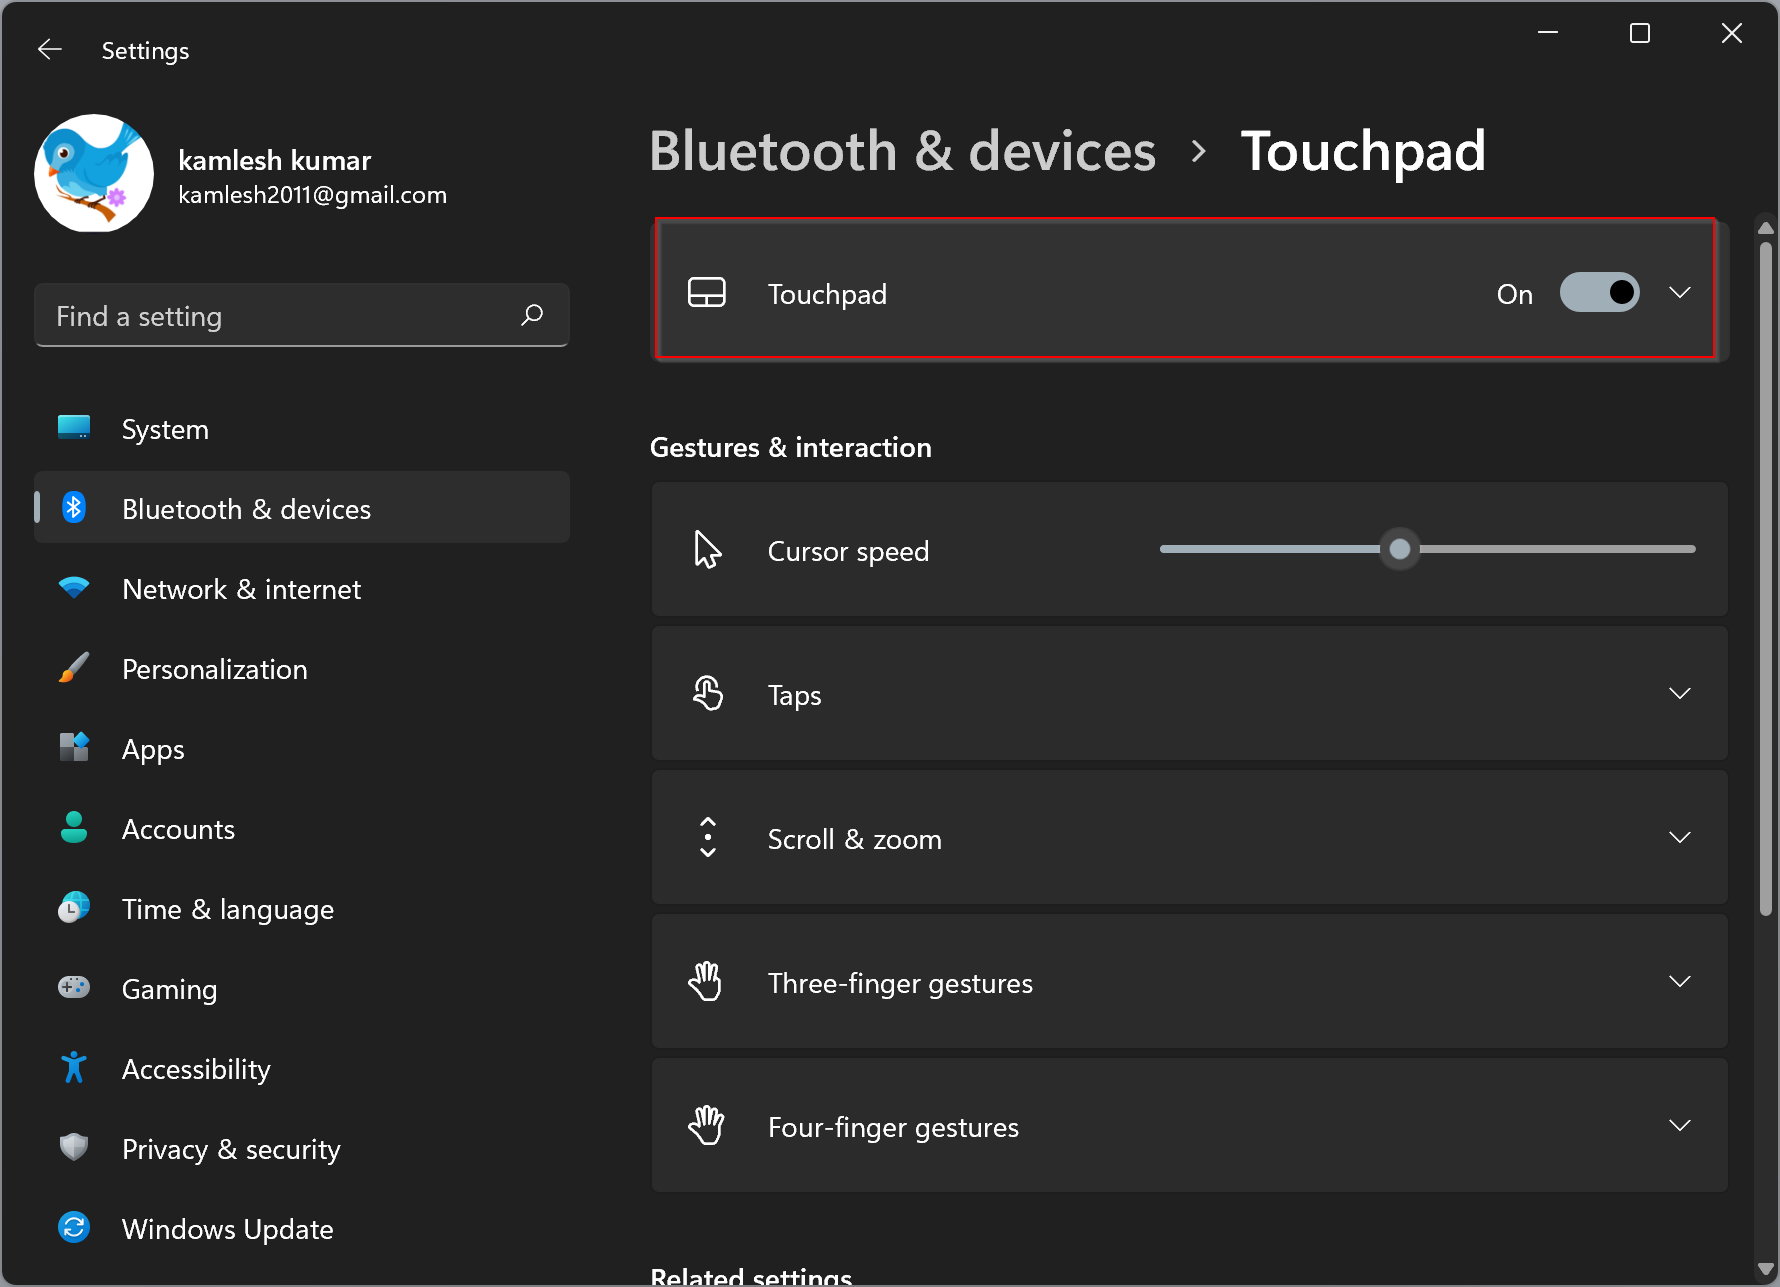
That’s it. If your Touchpad is not working as expected while troubleshooting your Windows 11, you can try enabling and disabling the Touchpad.
How to Turn On or Off Touchpad through Windows 10 Settings?
To enable or disable the touchpad through Windows 10 Settings, use these steps:-
Step 1. Open Windows 10 Settings.
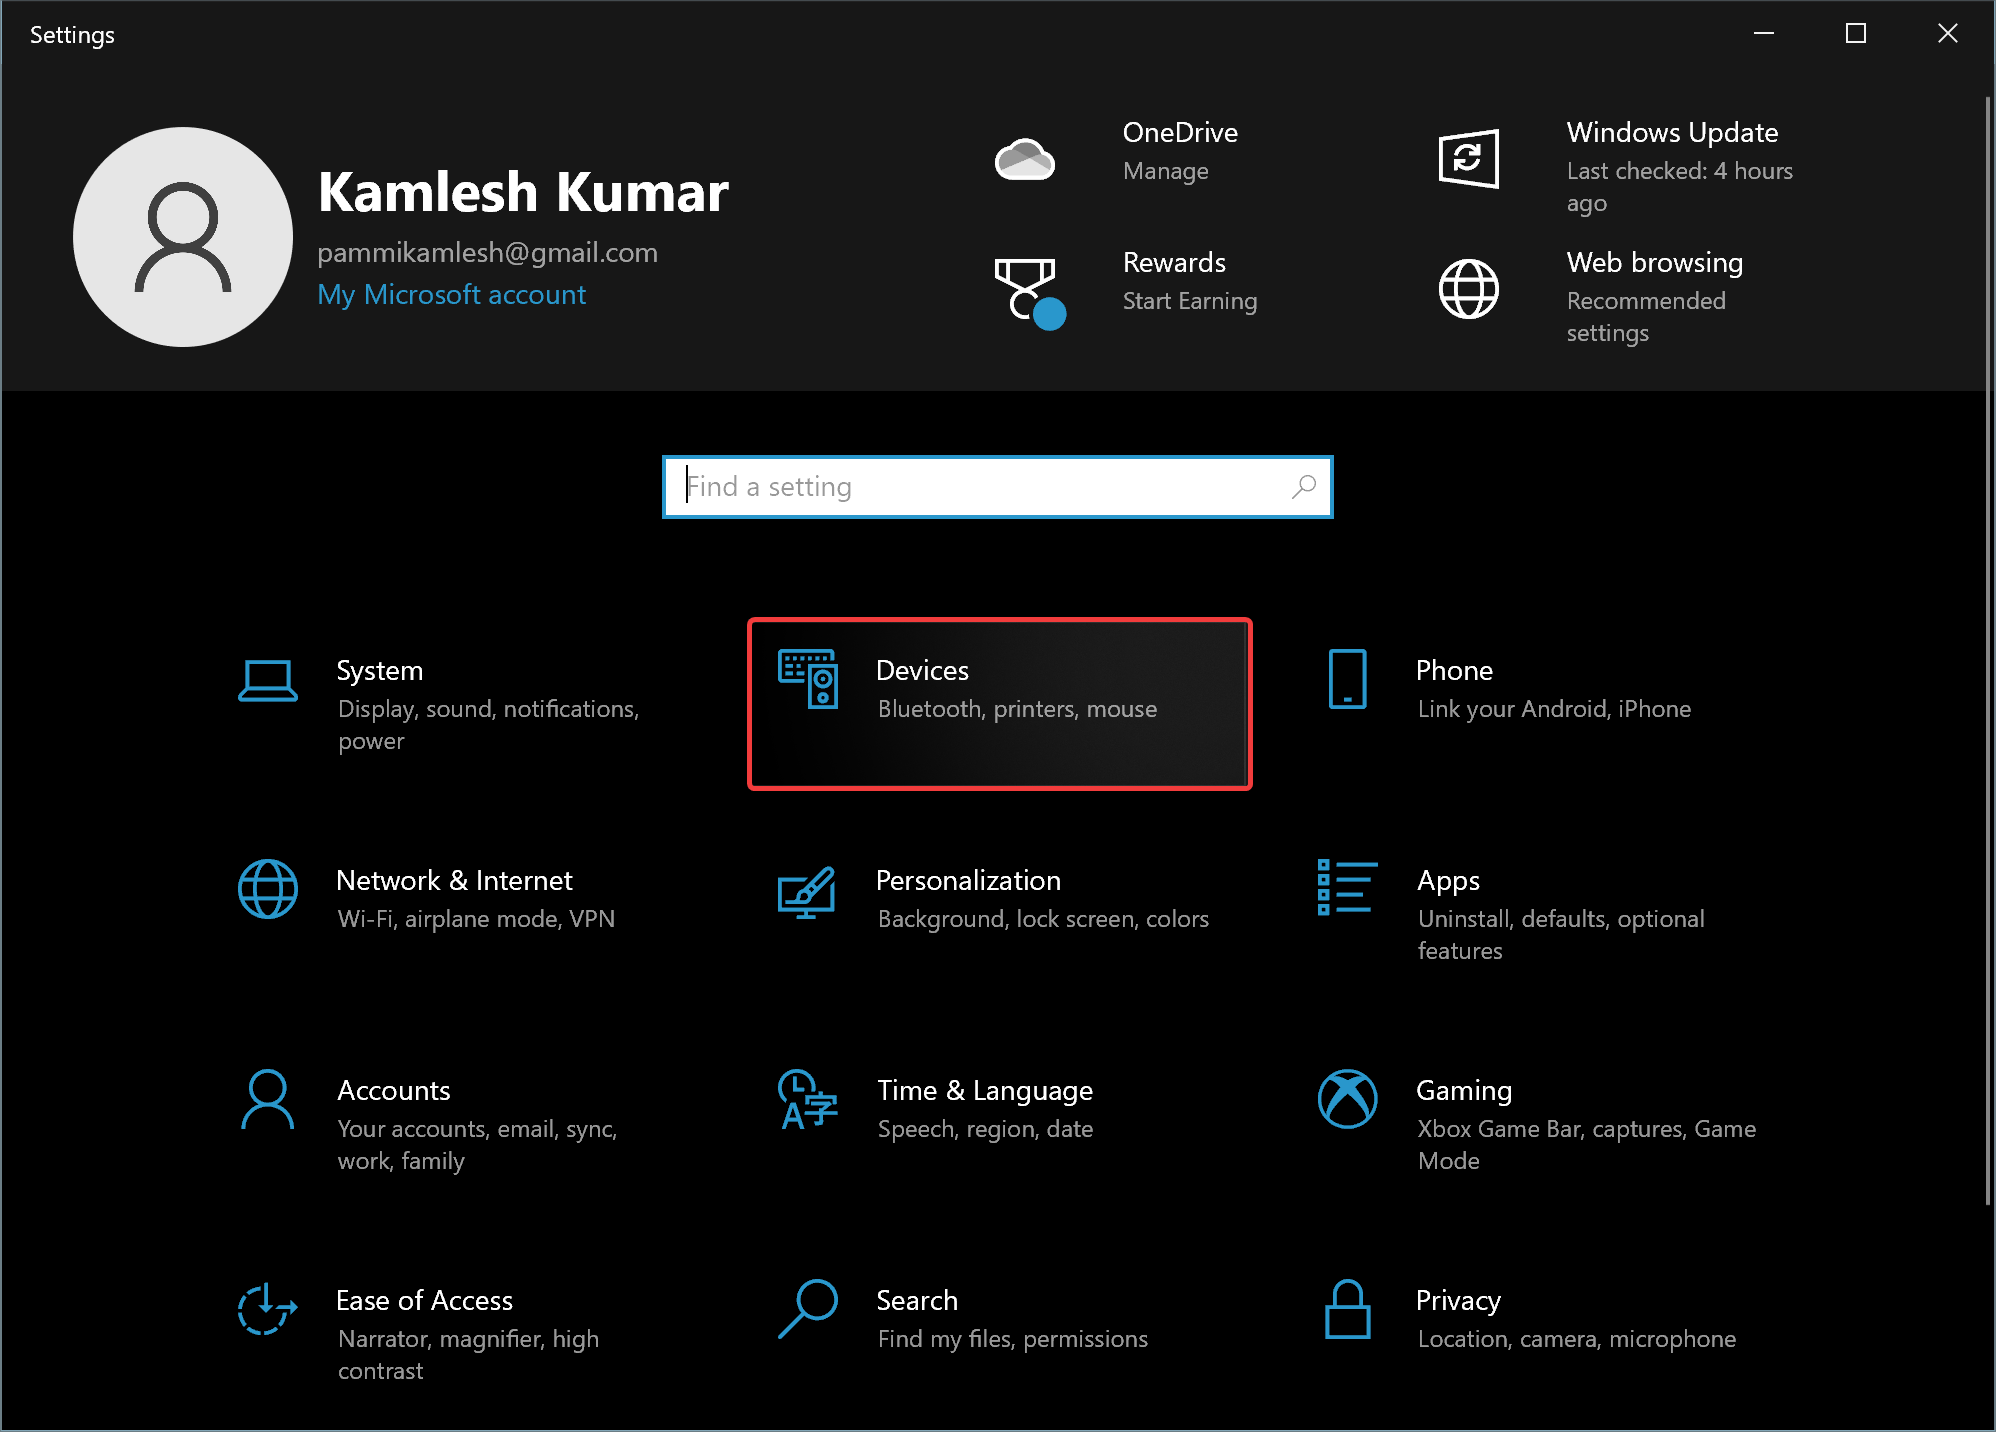
Step 2. Click Devices.
Step 3. Select Touchpad.
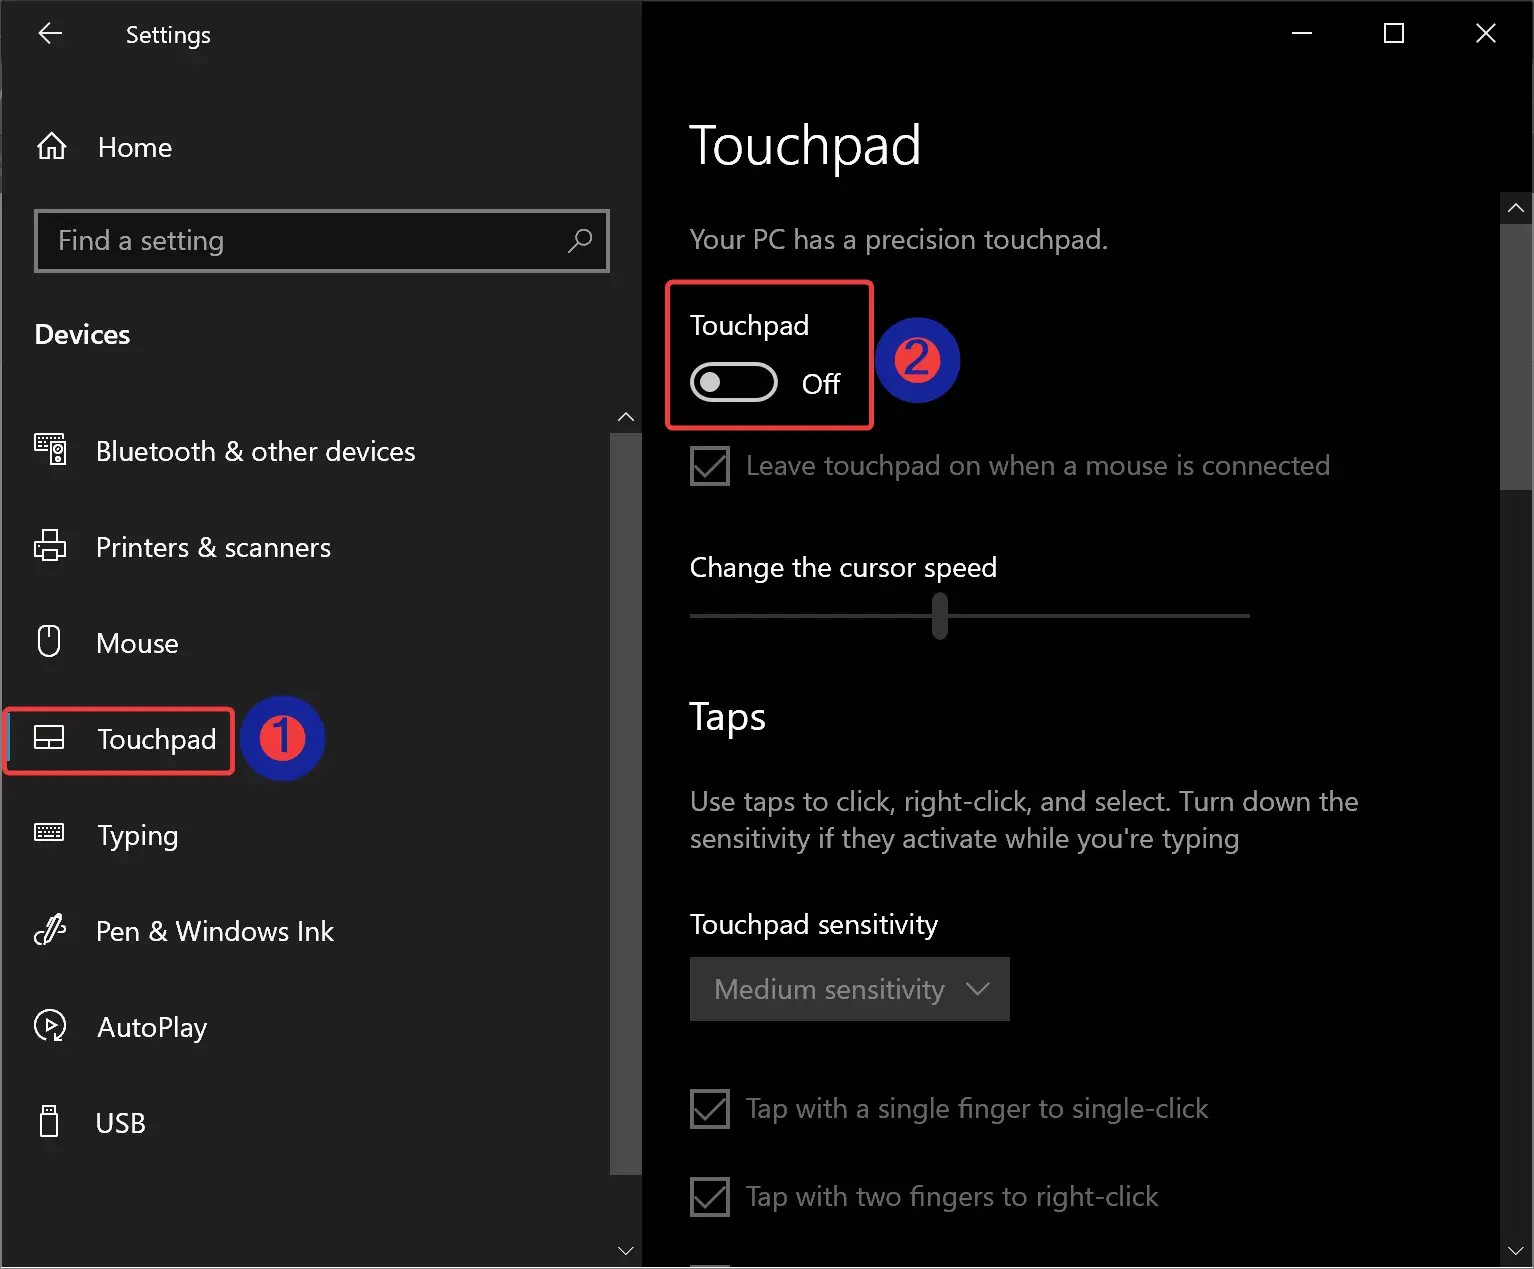
Step 4. On the right sidebar, turn off the toggle switch Touchpad to disable it.
To enable the Touchpad, repeat the above steps, and in step 4 above, turn on the toggle switch Touchpad.
How to Enable or Disable Touchpad using Windows 11 or 10 Registry?
To turn on or off the touchpad through Windows 11 or 10 Registry Editor, use these steps:-
Step 1. Open Registry Editor.
Step 2. Then navigate or browse to the following key in the left sidebar of Registry Editor:-
HKEY_CURRENT_USER\SOFTWARE\Microsoft\Windows\CurrentVersion\PrecisionTouchPad\Status
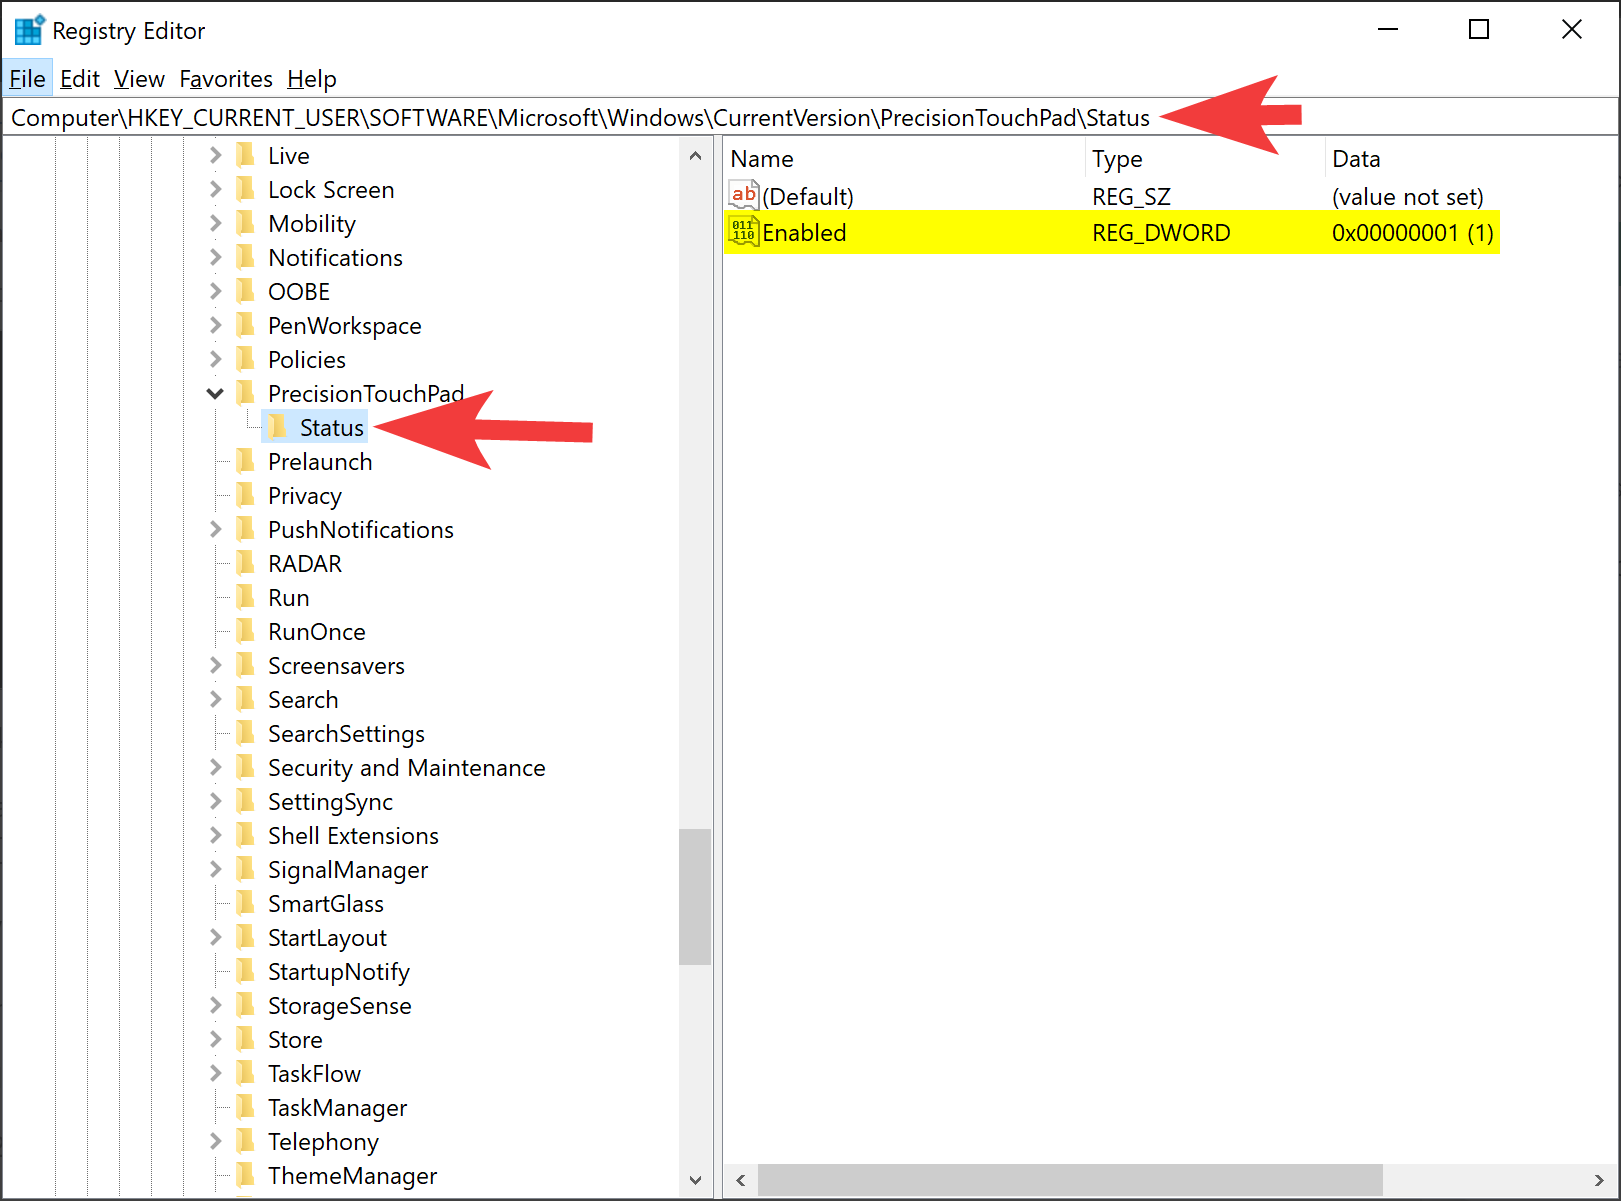
Step 3. On the opposite side of the “Status” folder, double-click on the Enabled REG_DWORD and set its “Value data” to the following:-
- 0: To disable the Touchpad.
- 1: To enable the Touchpad.
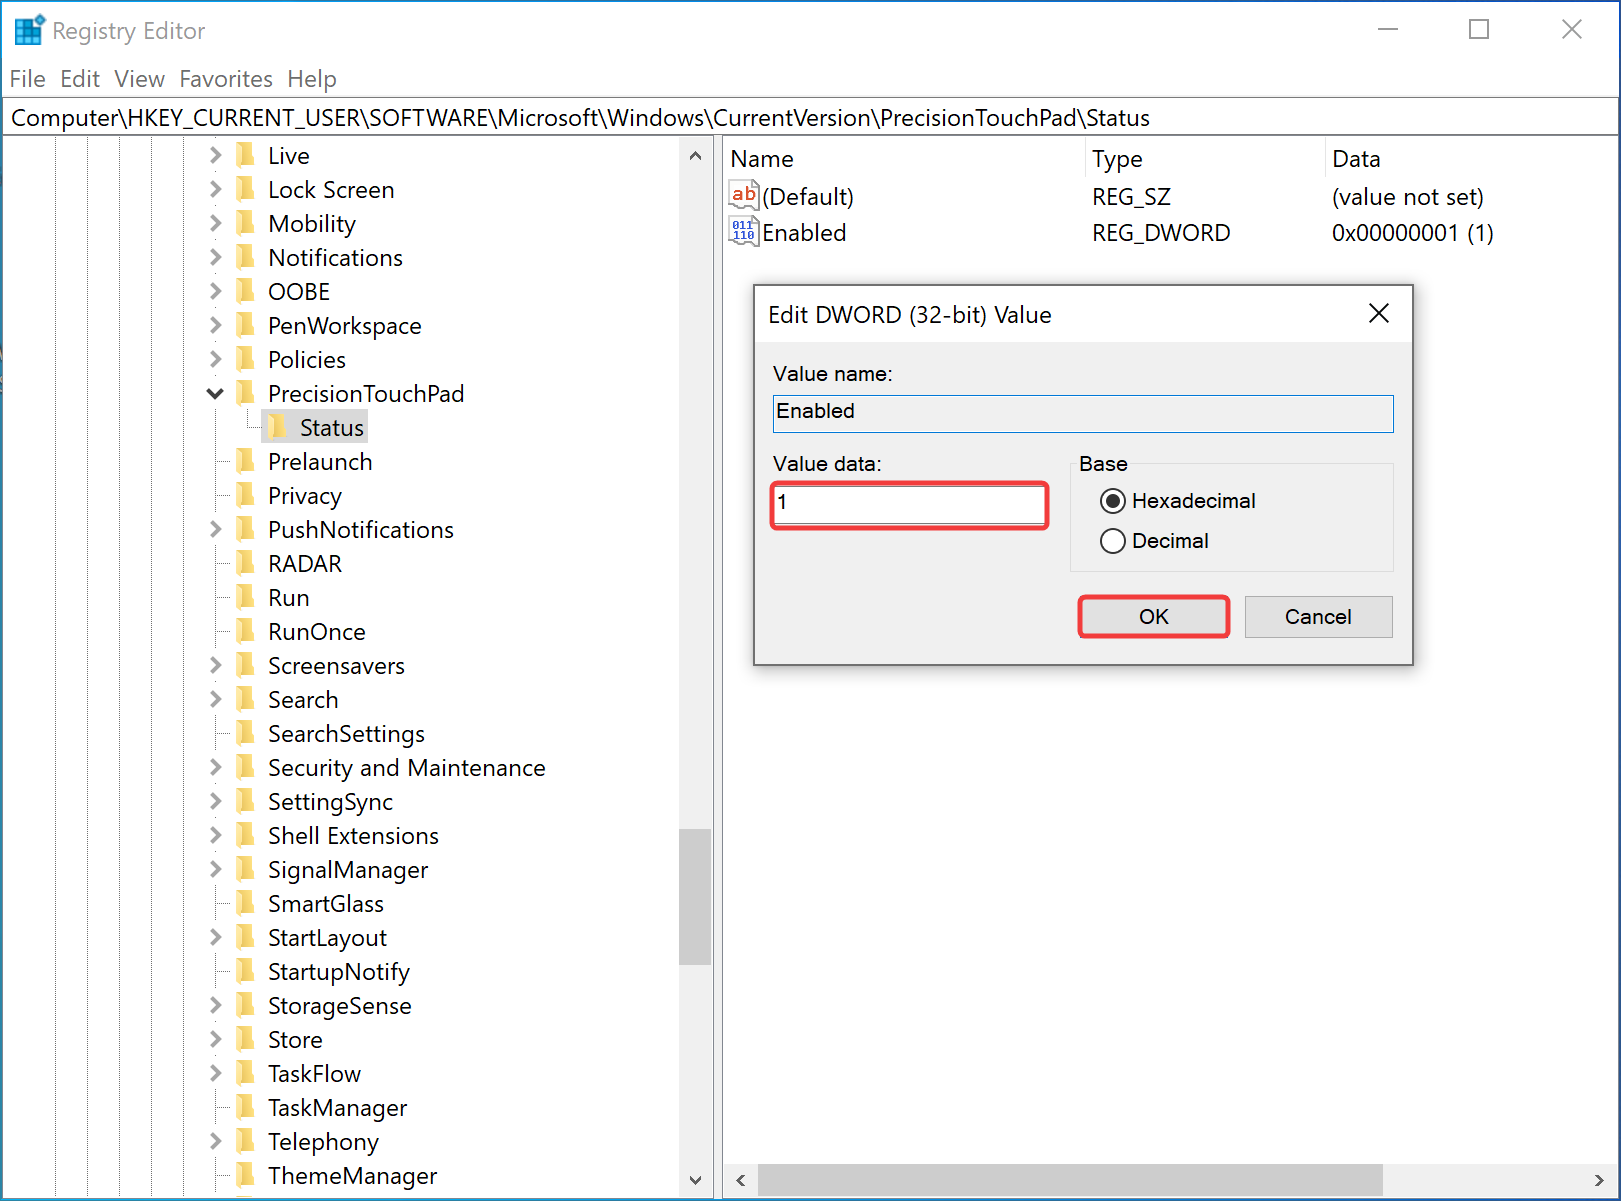
Step 4. Click OK.
Step 5. Reboot your computer to apply the changes.
Conclusion
In conclusion, disabling the touchpad can be useful in situations where it is not working correctly or when you want to troubleshoot problems. Windows 11 provides multiple ways to disable and enable the touchpad, including using the manufacturer software, Settings app, and Registry Editor. By following the simple steps outlined in this gearupwindows article, you can quickly turn off or turn on the touchpad on your Windows 11/10 laptop.