Icons are the visual representations of applications, files, and folders on your Windows operating system. Sometimes, you may find yourself in need of a specific icon for a project or customization purposes. Luckily, Windows stores a wealth of icons within EXE files of various applications. In this gearupwindows guide, we’ll explore the process of extracting icons from Windows EXE files, enabling you to access a plethora of high-quality icons for your needs.
Understanding the Significance of Icons
Icons serve as visual cues, aiding users in quickly identifying and accessing applications, files, and folders on their Windows systems. Whether it’s a program shortcut on the desktop or a file in File Explorer, icons play a crucial role in user interface design, enhancing usability and navigation.
Why Extract Icons from EXE Files?
While Windows provides a diverse collection of default icons, extracting icons from EXE files offers several advantages:-
1. Customization: Extracted icons can be used to personalize desktop shortcuts, folders, and applications, adding a unique touch to your Windows experience.
2. Project Requirements: Design projects, presentations, and documents often require specific icons to convey concepts or enhance visual appeal.
3. Application Development: Developers may need access to application icons for software development or interface design purposes.
4. Backup and Recovery: Extracting icons allows users to preserve and backup unique icons associated with applications, ensuring they’re readily available if needed.
How to Extract an Icon from a Windows EXE File?
Follow these simple steps to pull an icon from a Windows Exe file:-
Step 1. Begin by downloading IconViewer from the developer’s website and follow the installation instructions. IconViewer seamlessly integrates into the Properties window of EXE files, facilitating icon extraction.
Step 2. Navigate to the directory containing the EXE file from which you wish to extract the icon. You can typically find application EXE files in the “Program Files” or “Program Files (x86)” directories. If not then locate the program shortcut and select the Properties option from the context menu.
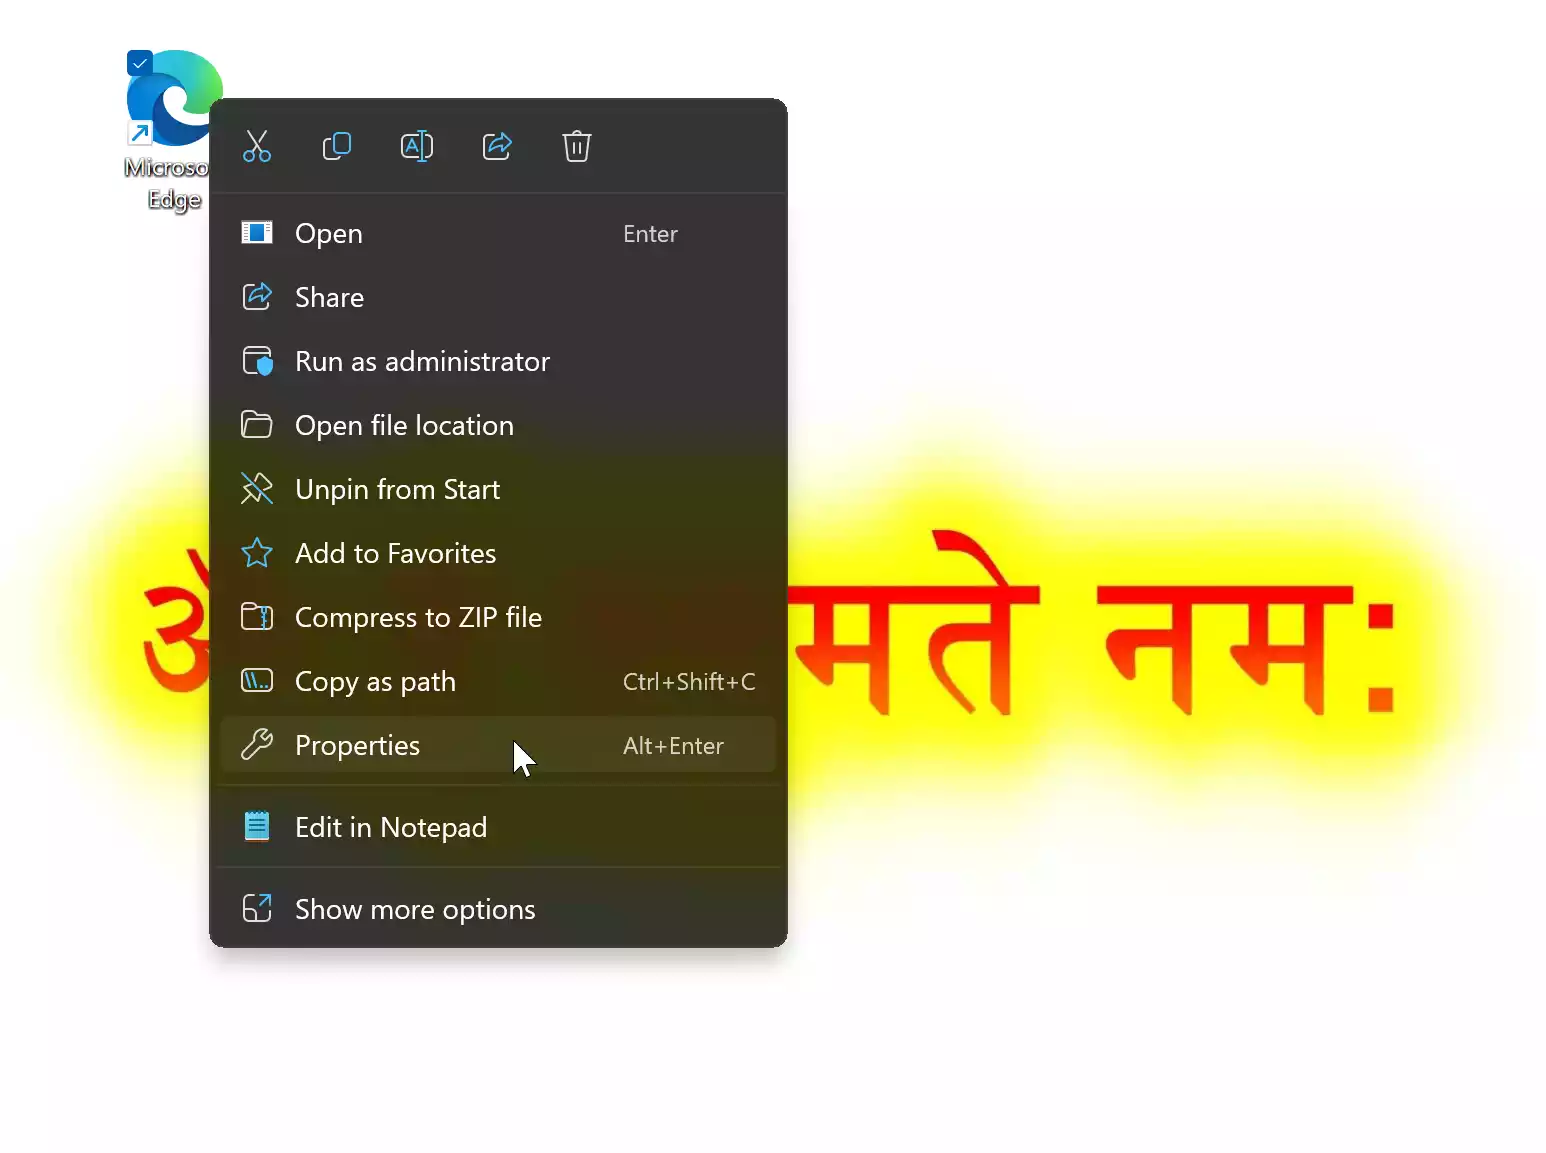
Step 3. In the Properties dialogue box, click on the “Open File Location” button.
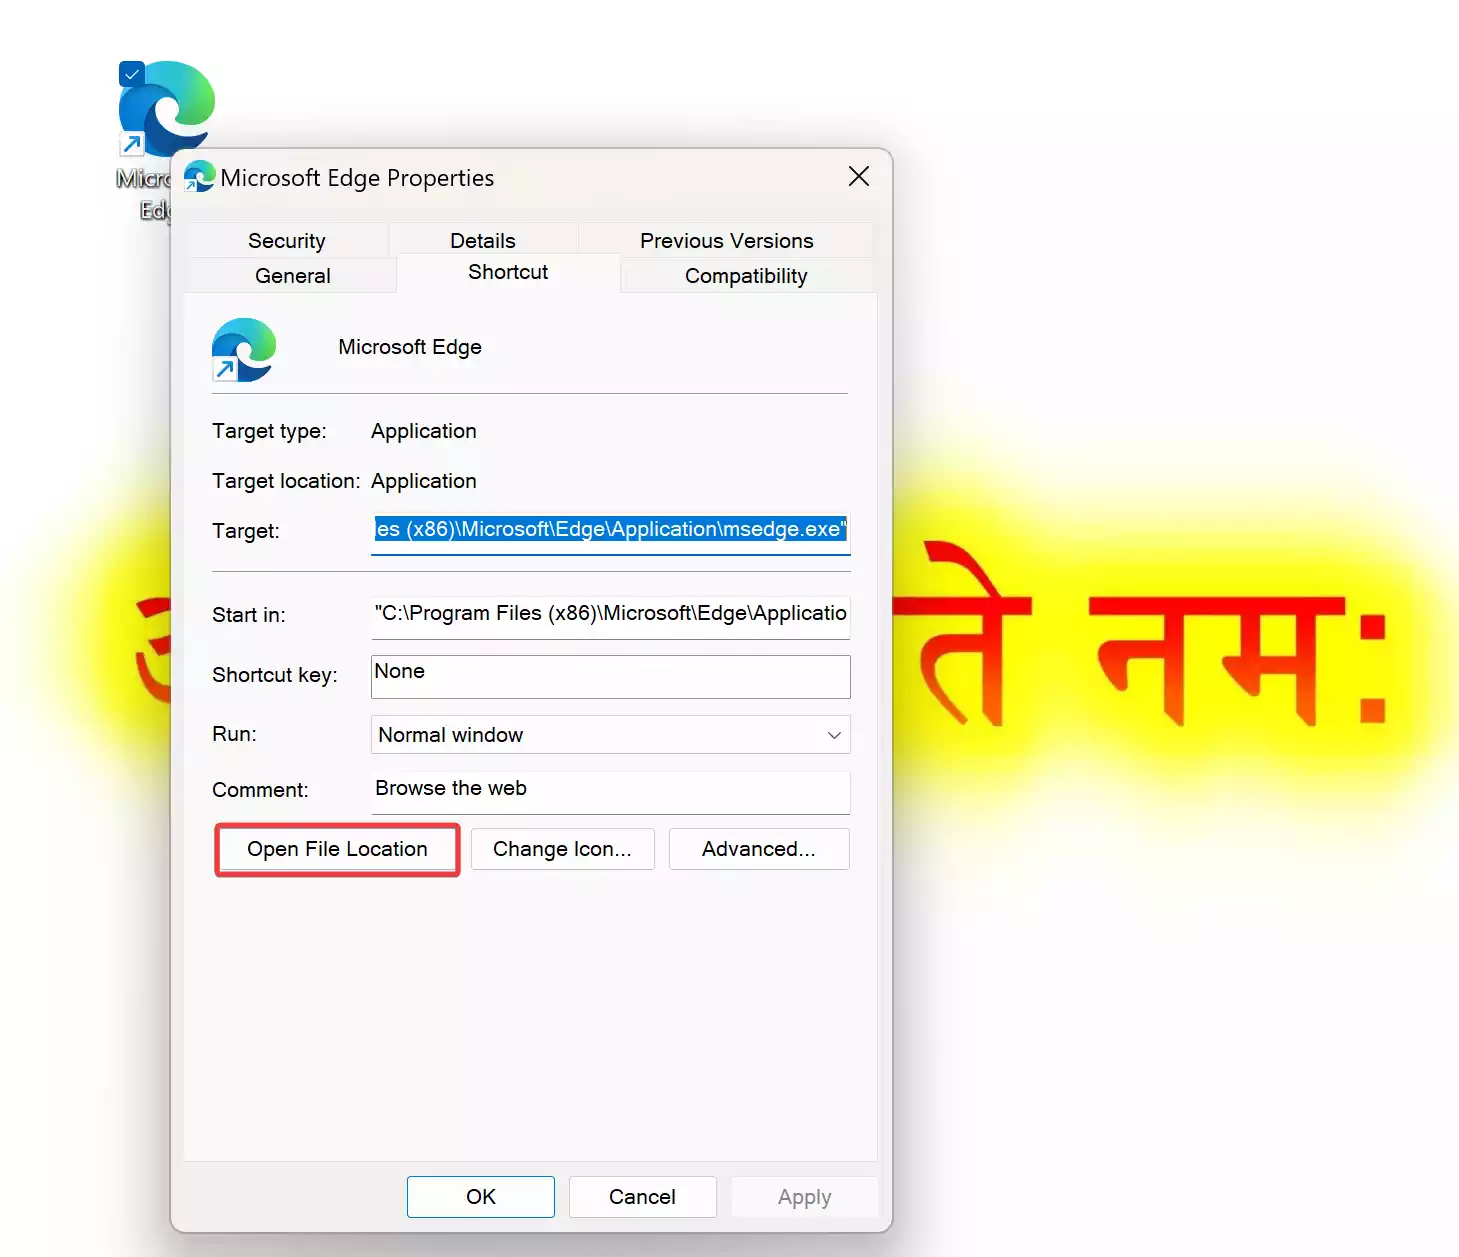
Step 4. Now, right-click on the desired EXE file and select “Properties” from the context menu. Within the Properties window, navigate to the “Icons” tab, which appears after installing IconViewer.
![]()
Step 5. In the Icons tab, a list of available icons within the EXE file will be displayed. Browse through the icons and select the one you wish to extract.
Step 6. Choose the desired size of the icon from the “Device images” box. Typically, larger sizes offer higher resolution and quality.
Step 7. Click on the selected icon and then click the “Save” icon (resembling a vintage 3.5″ floppy disk) to initiate the extraction process.
Step 8. A “Save As” dialog box will appear. Choose the location where you want to save the extracted icon and provide a suitable file name.
Step 9. Select the desired file format for the extracted icon. Options include “Icon (*.ico),” “Bitmap Image (*.bmp),” or “PNG Image (*.png).”
Step 10. Click “Save” to finalize the extraction process. The extracted icon will be saved to the specified location in the chosen format.
You can now utilize the extracted icon for customization, design projects, application development, or any other purpose as needed.
Download IconViewer
You can download the IconViewer freeware tool from its official website.
Conclusion
Extracting icons from Windows EXE files using IconViewer is a straightforward process that empowers users to access a wealth of high-quality icons for various purposes. Whether you’re looking to customize your desktop, enhance design projects, or streamline application development, extracting icons from EXE files offers unparalleled flexibility and convenience. With this comprehensive guide, you can unlock the treasure trove of icons hidden within your Windows system, adding a touch of personalization and creativity to your computing experience.