Microsoft Word is a versatile word processing program that allows users to create, edit, and format documents with ease. One of the essential features for organizing and presenting data in a structured manner is the ability to insert and format tables. In this article, we will walk you through the step-by-step process of inserting tables and formatting them to meet your specific needs.
How to Insert a Table in Microsoft Word Document?
To insert a Table in a Microsoft Word Document, follow these steps:-
Step 1. Launch Microsoft Word and open the document in which you want to insert a table.
Step 2. Click on the location in your document where you want to insert the table. This is where the upper-left corner of your table will appear.
Step 3. Go to the “Insert” tab in the Ribbon at the top of the Word window.
Step 4. Click on the “Table” option. A grid will appear, allowing you to specify the number of rows and columns for your table by hovering your mouse over it and clicking to select the desired size.
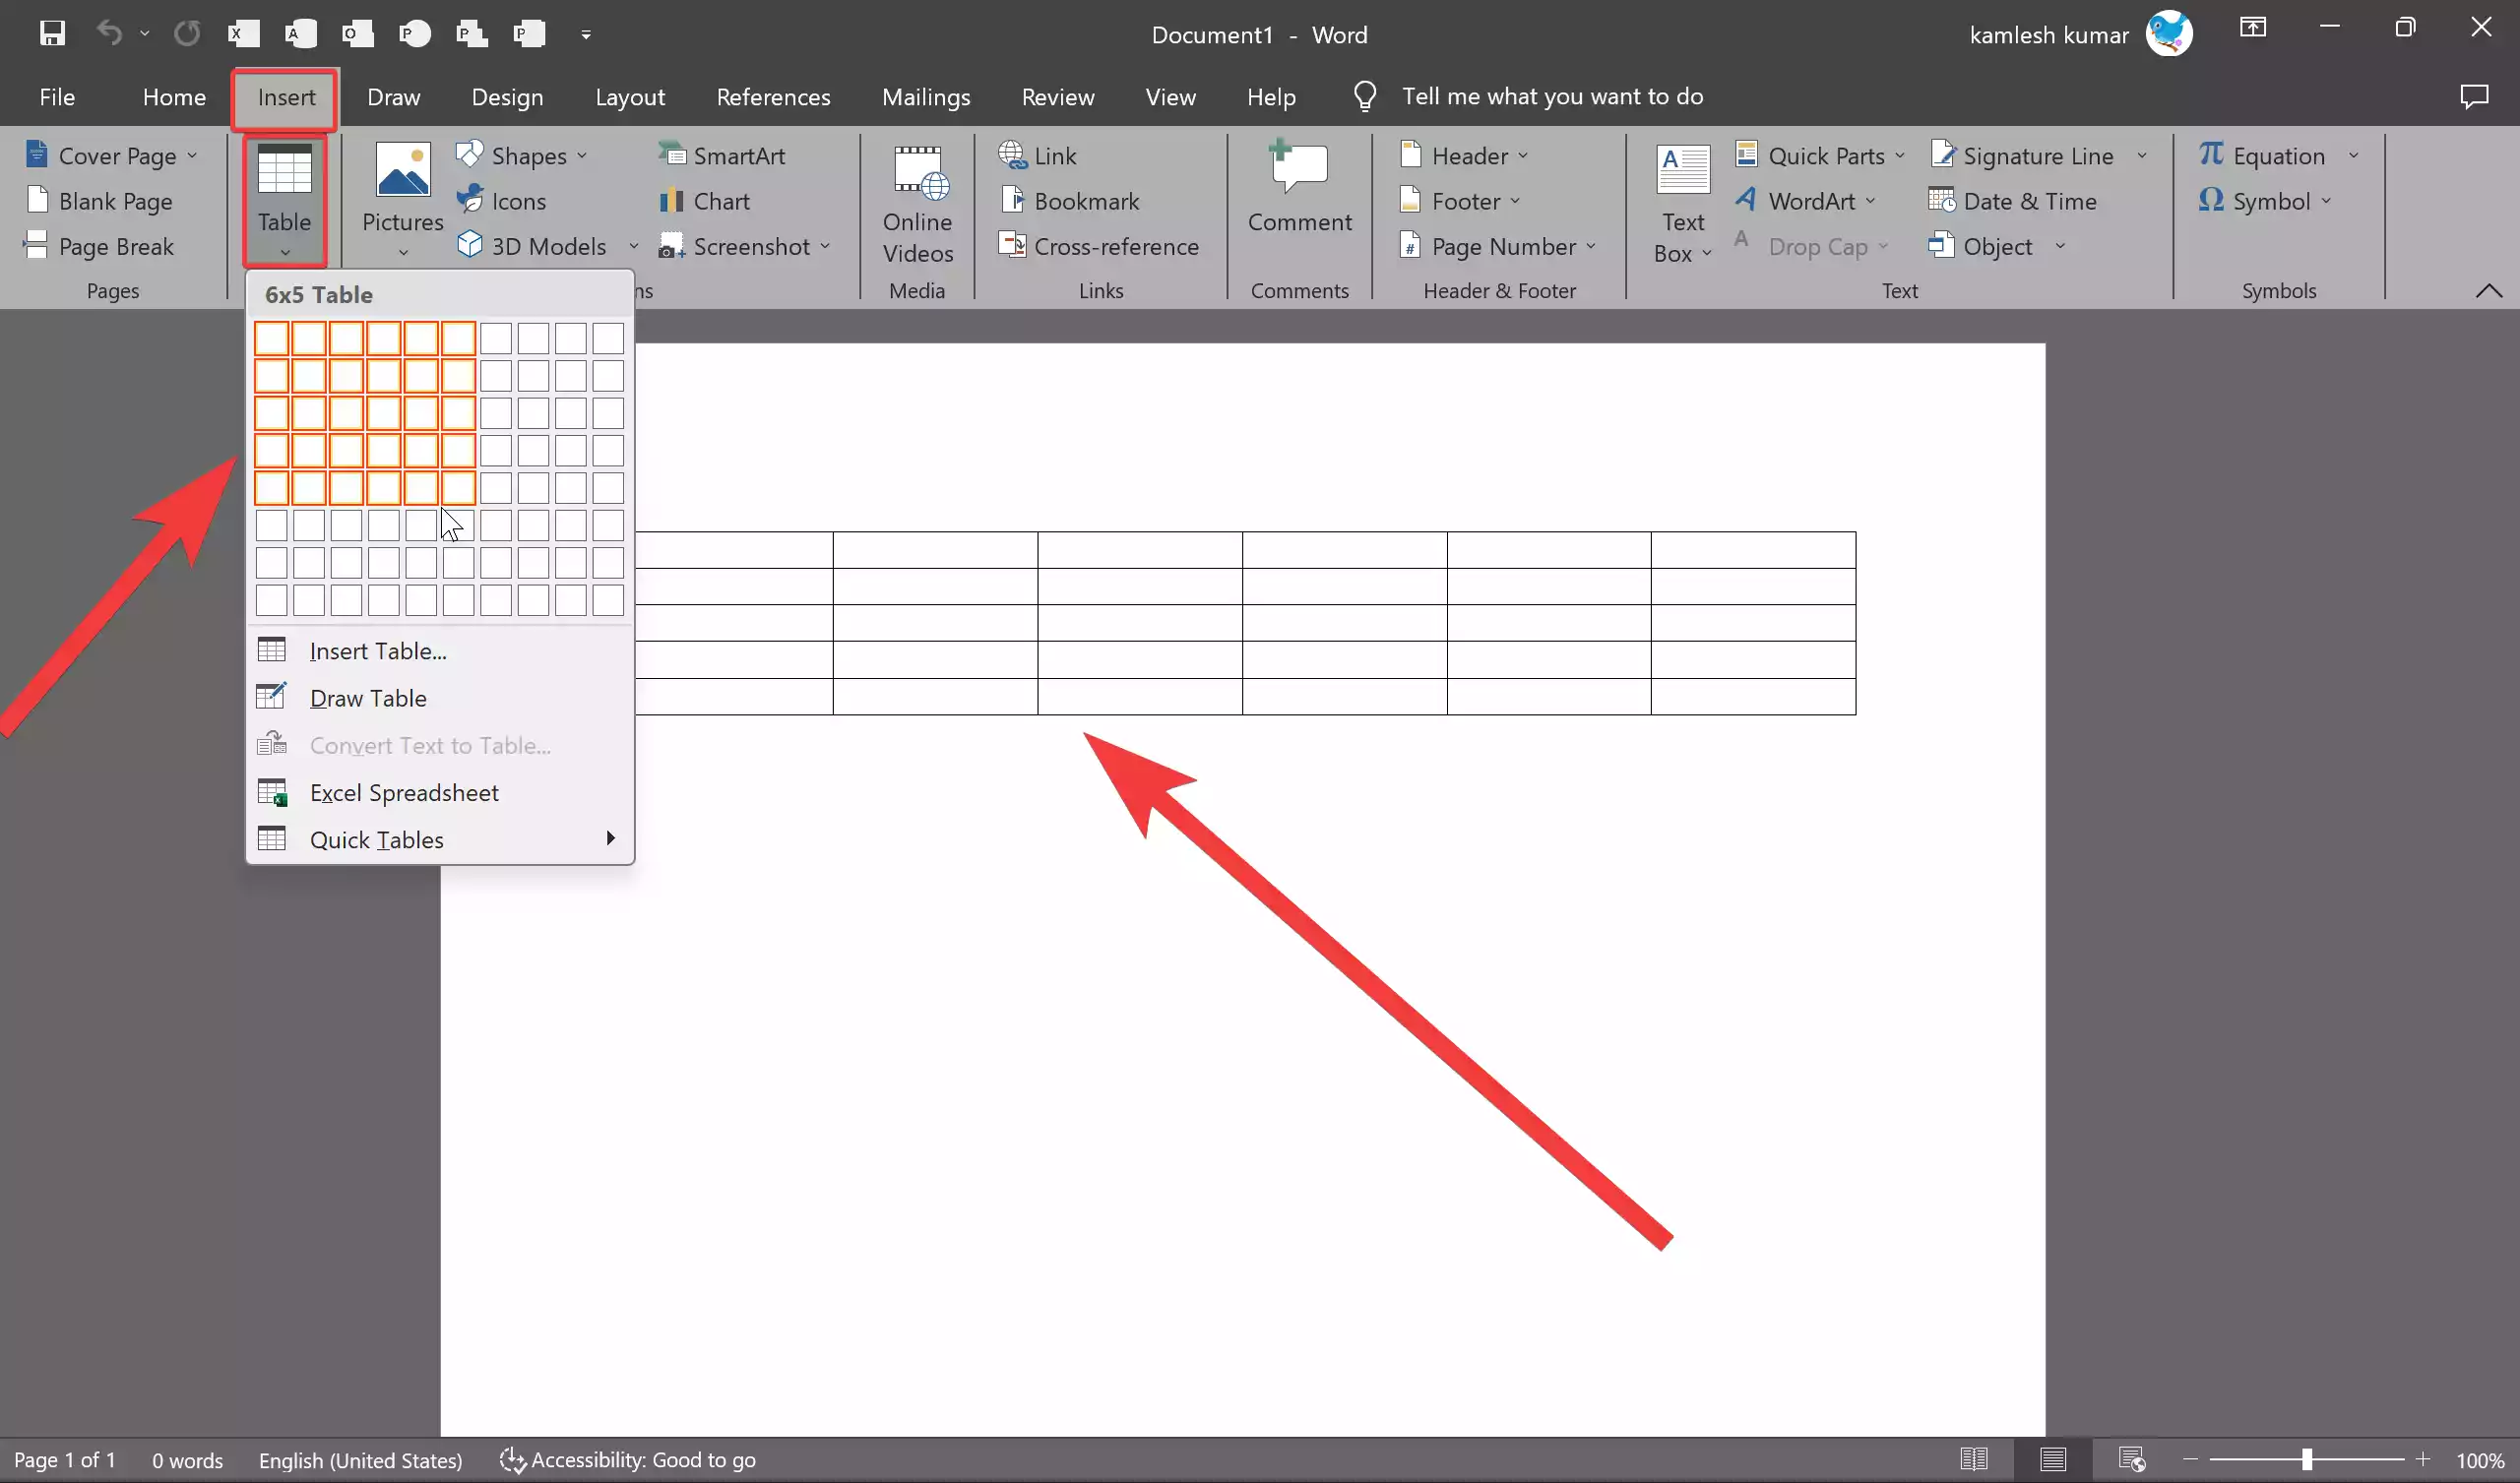
Step 5. Once you’ve selected the desired size, your table will appear in the document, and you can start entering data into it.
How to Format Your Table in Microsoft Word Document?
Now that you’ve inserted your table, let’s explore how to format it to make it more visually appealing and better suited for your document’s purpose.
Adjusting Column Width and Row Height
Resizing Columns: To change the width of a column, hover your cursor over the column boundary (the vertical line between columns) until it turns into a double-headed arrow. Click and drag left or right to adjust the width.
 Resizing Rows: Hover your cursor over the row boundary (the horizontal line between rows) until it turns into a double-headed arrow. Click and drag up or down to change the row’s height.

Adding and Deleting Rows and Columns
Adding Rows or Columns: Right-click on a cell within your table. From the context menu, you can choose to insert rows or columns above or below the selected cell.

Deleting Rows or Columns: Select the row or column you want to delete by clicking on the corresponding row or column boundary. Right-click and choose “Delete Rows” or “Delete Columns” from the context menu.


Merging Cells
To merge two or more adjacent cells, select them by clicking and dragging your cursor over the cells. Right-click and choose “Merge Cells” from the context menu.

Applying Borders and Shading
Adding Borders: Select the cells or the entire table. Go to the “Table Design” tab in the Ribbon, and you can choose various border styles, line weights, and colors from the “Borders” group.
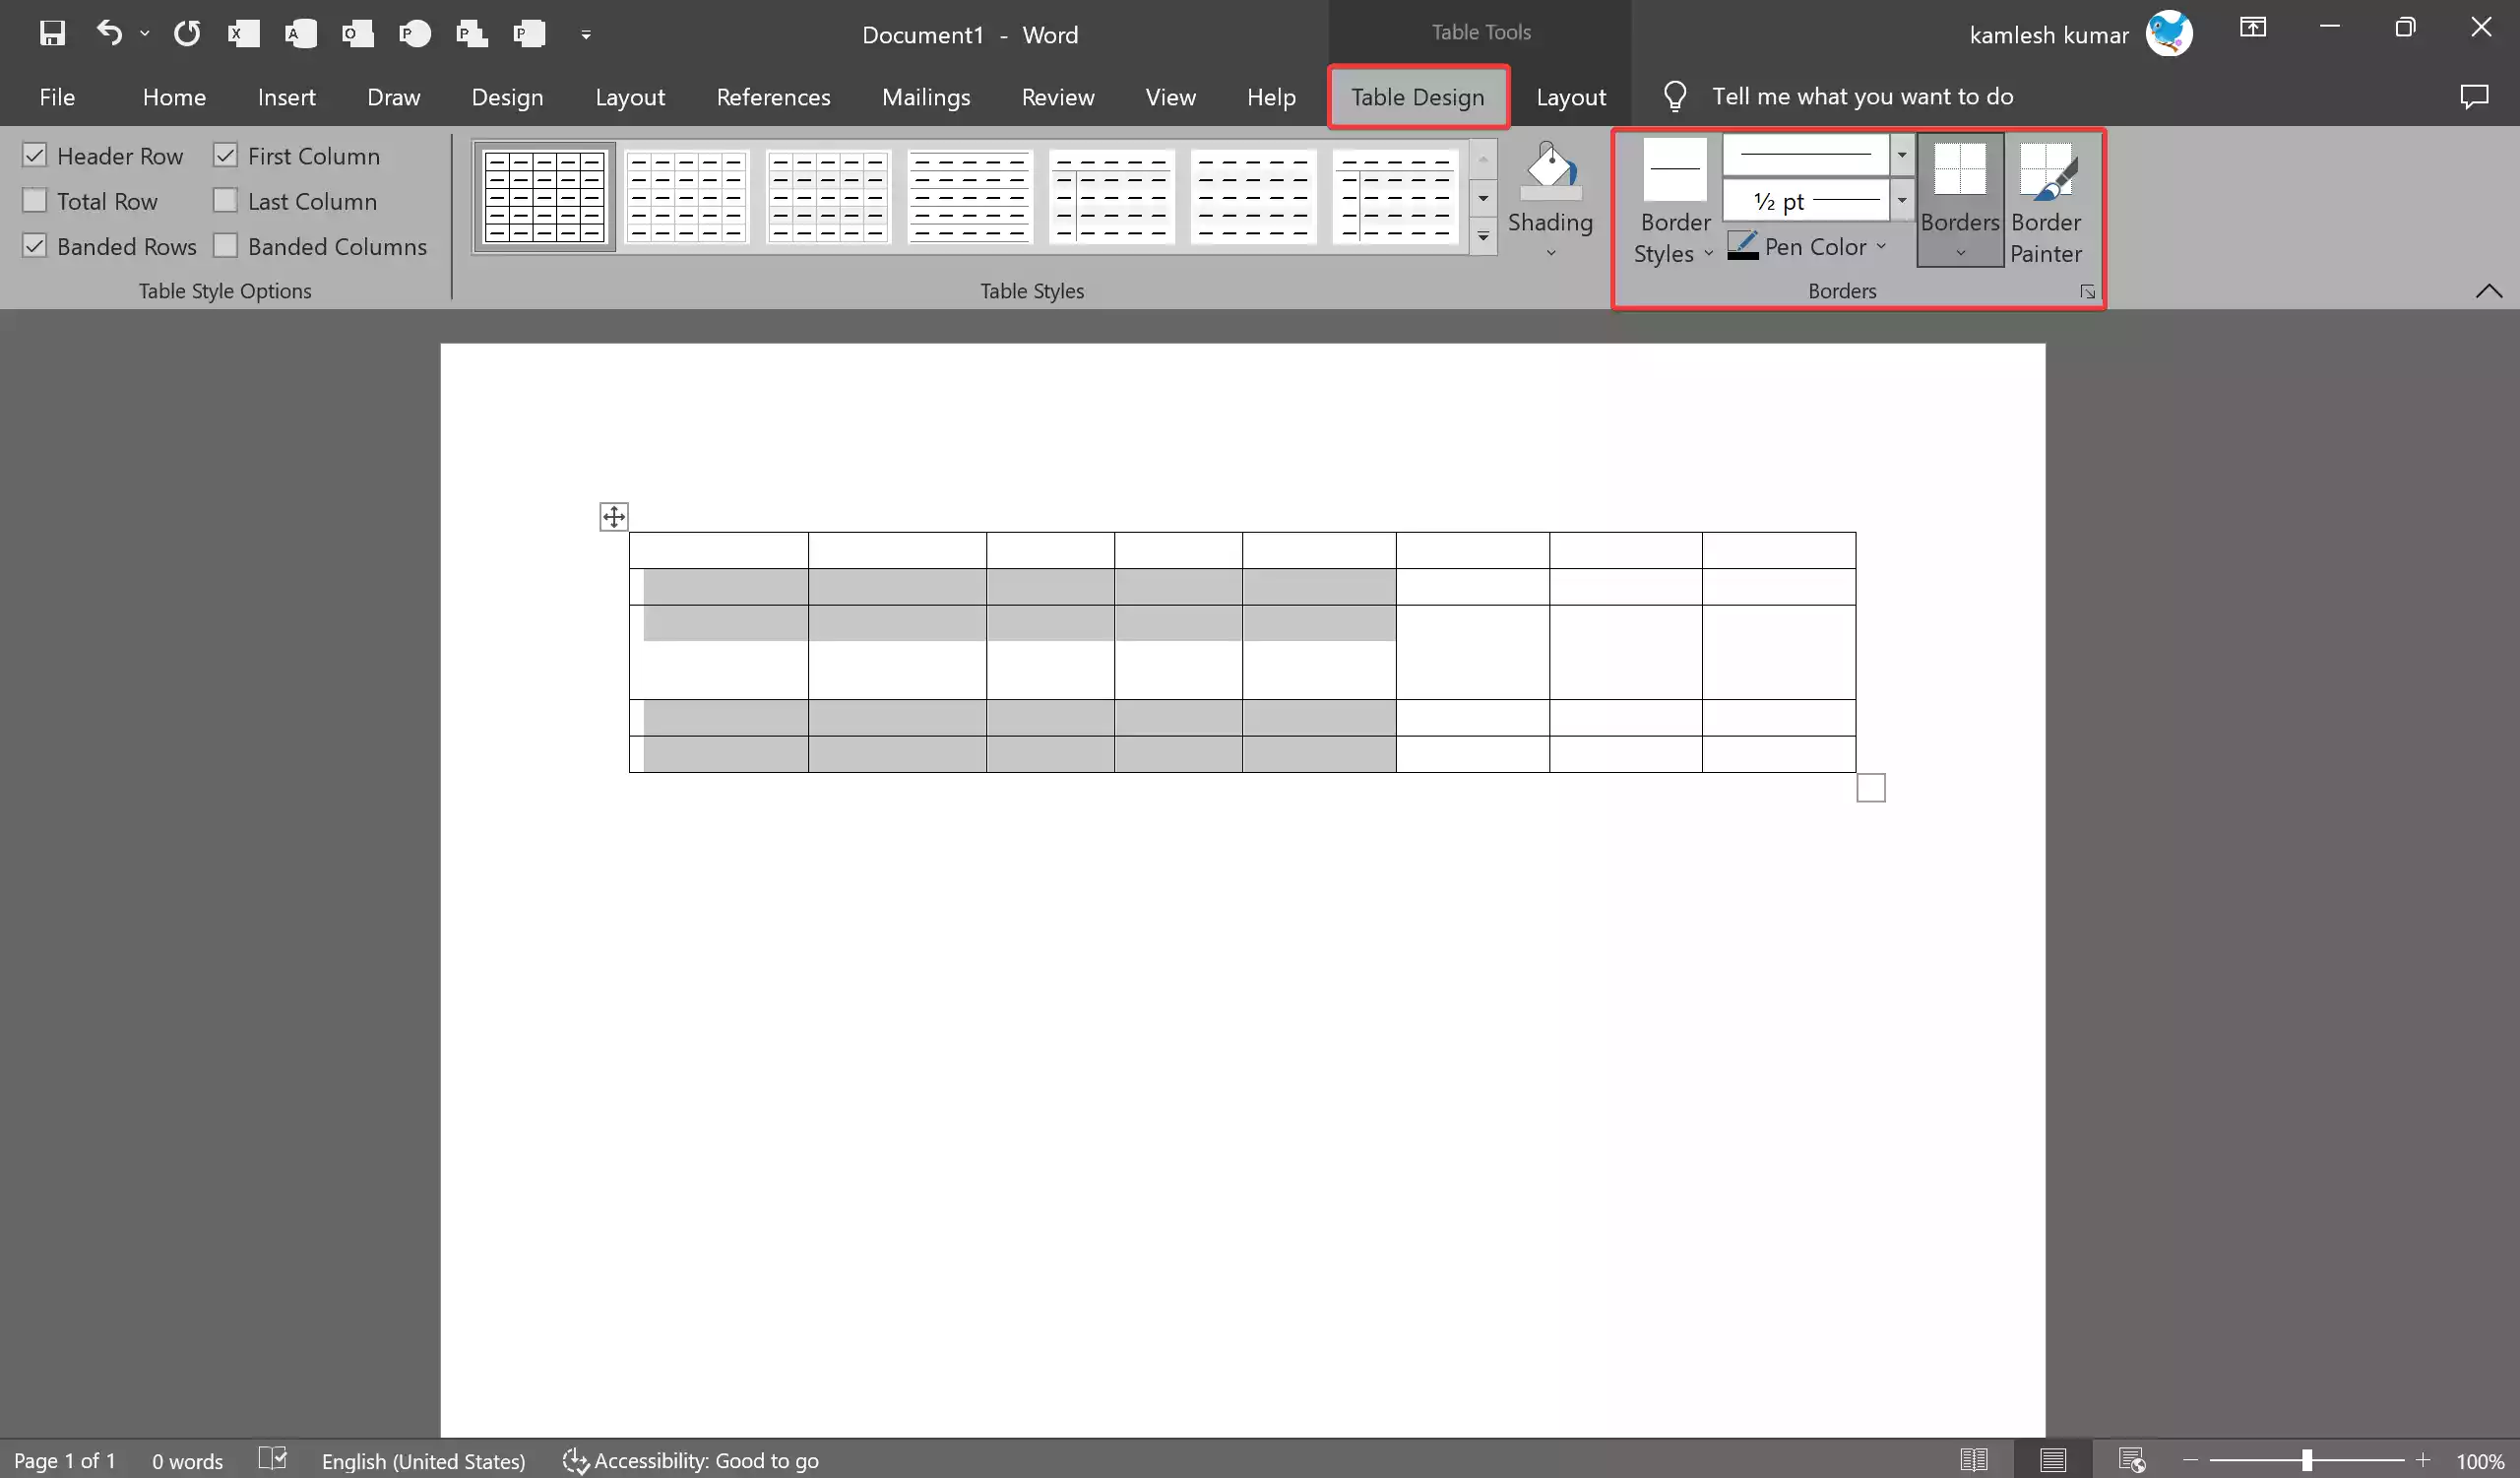
Shading Cells: To add background color to cells, select the cells you want to shade and choose a color from the “Shading” option in the “Table Design” tab.

Table Styles
Microsoft Word offers pre-designed table styles. In the “Table Design” tab, click on the “Table Design” button in the Table Styles group to see a variety of style options. Click on a style to apply it to your table.

Autofit to Content
If you want Word to automatically adjust column width based on the content, select the entire table. Right-click, choose “AutoFit,” and select “AutoFit to Contents.”

Sorting Data
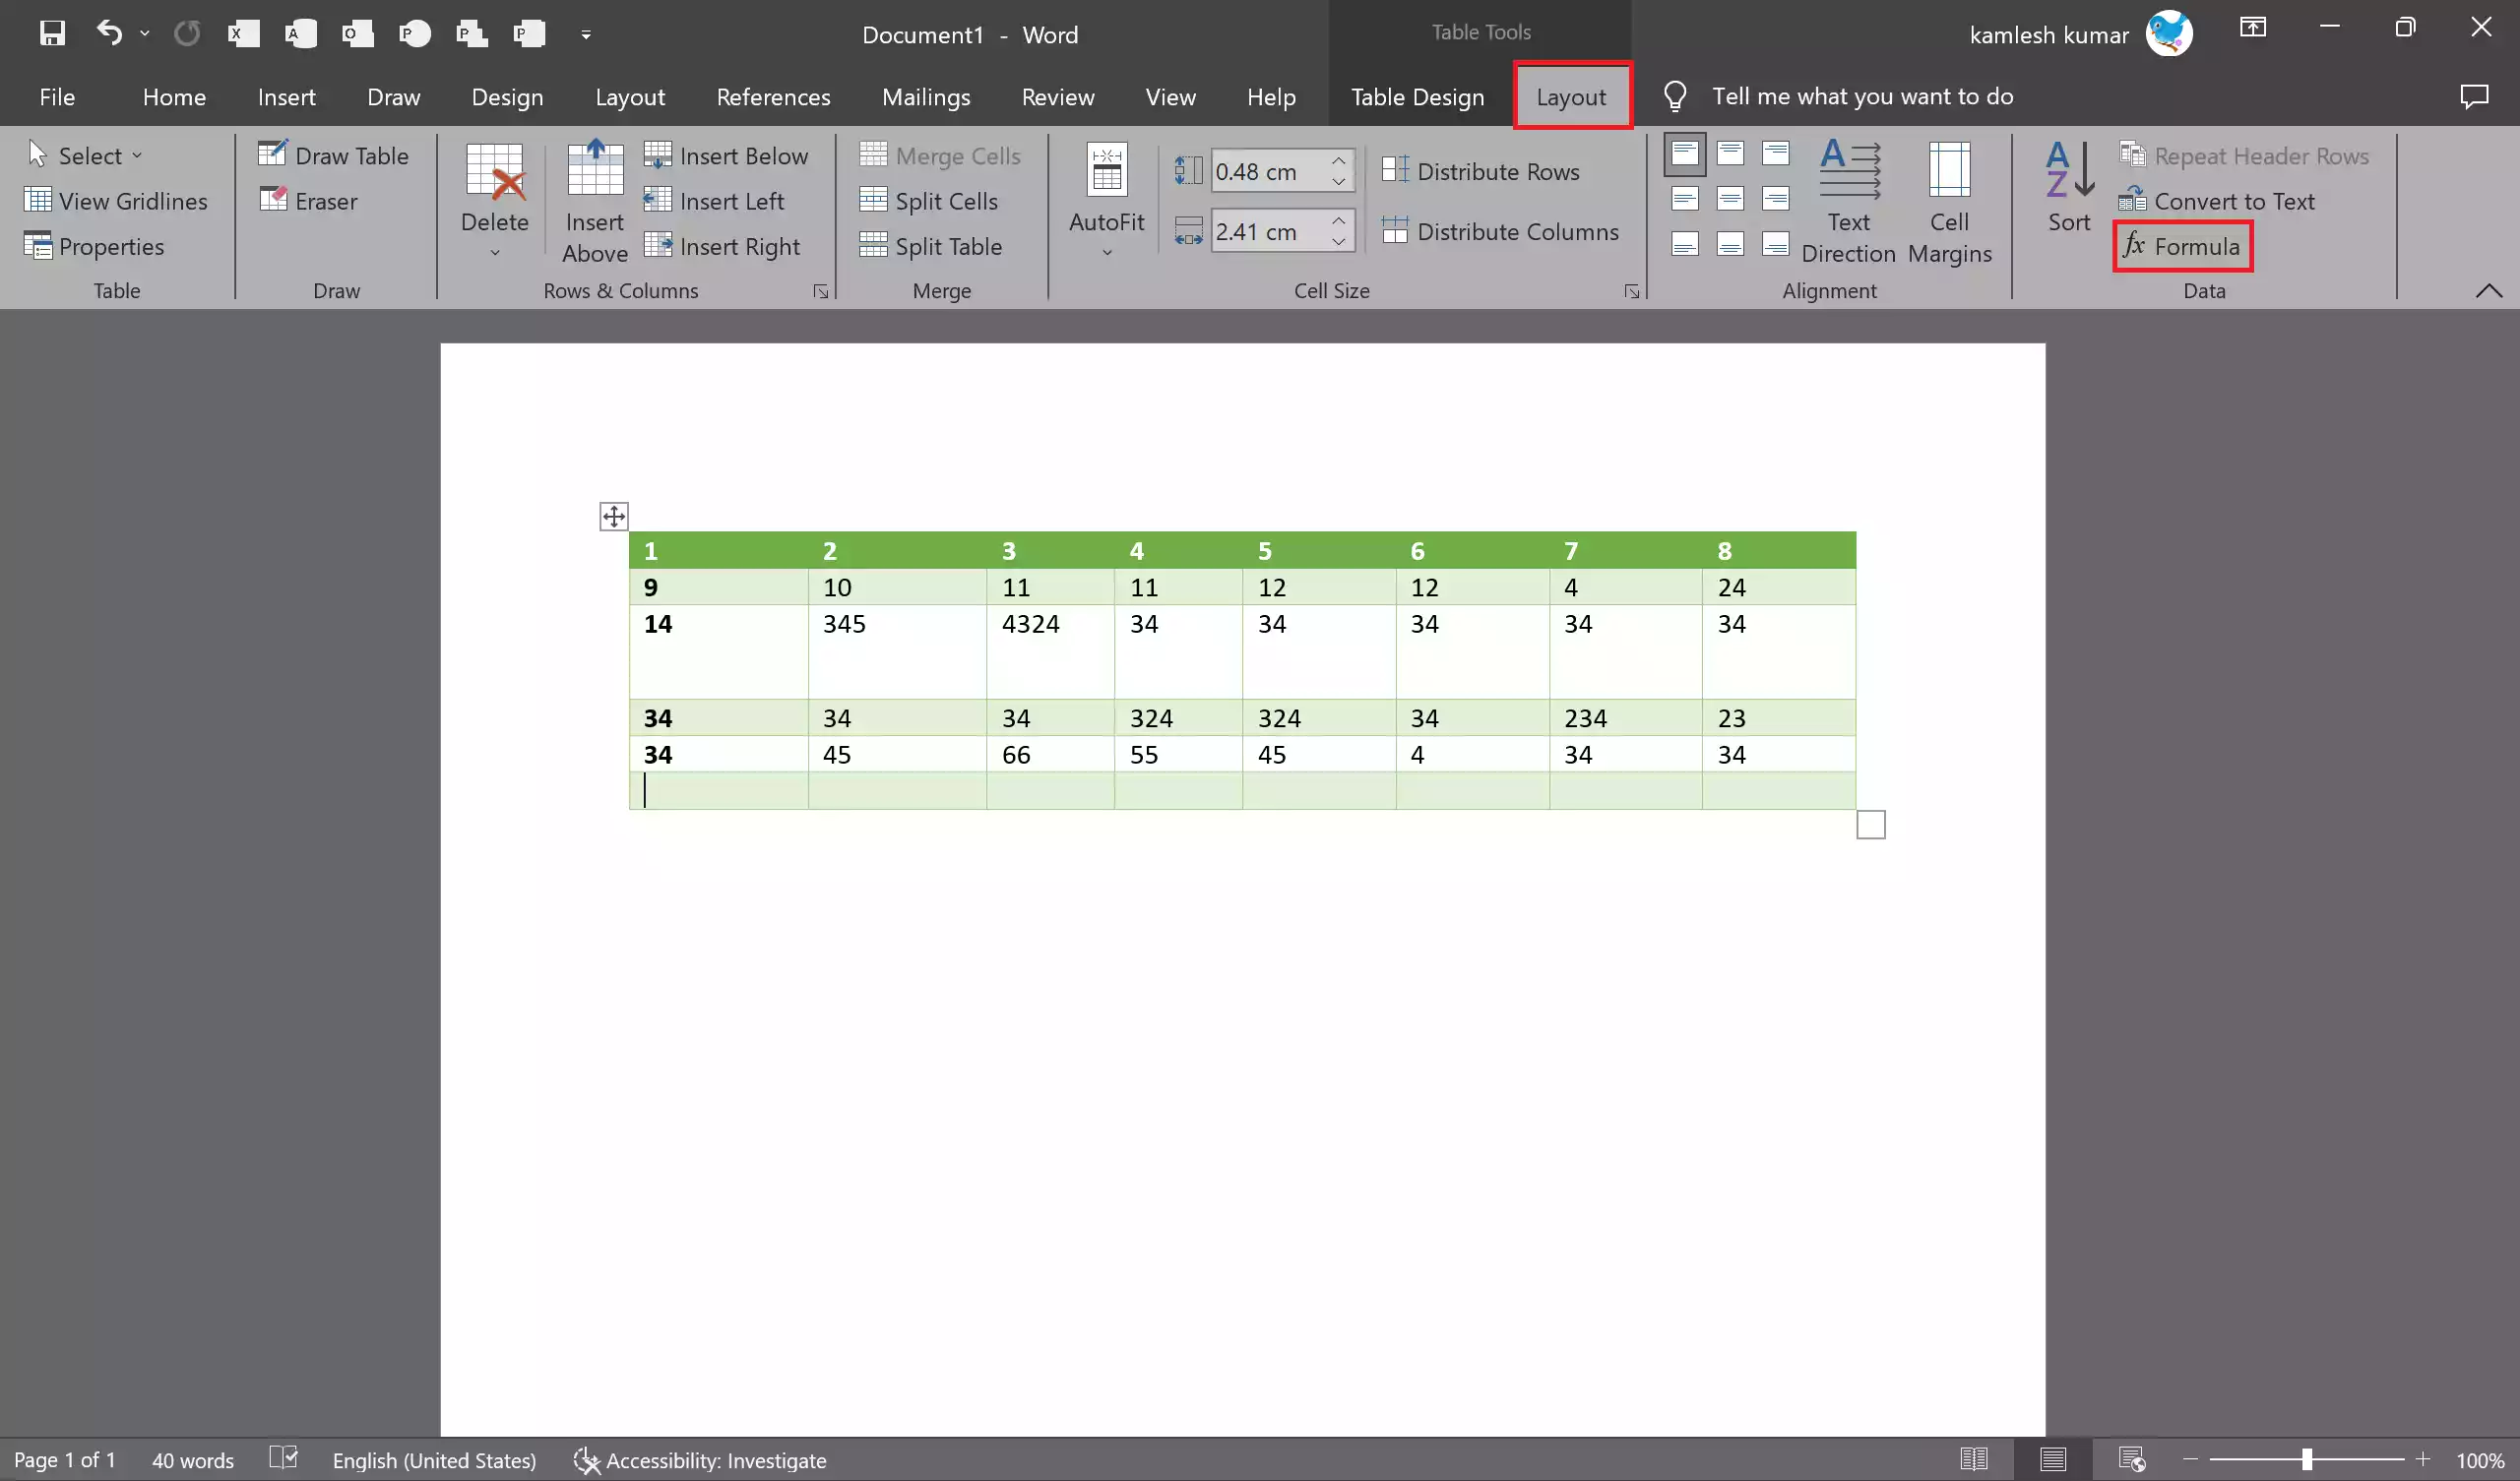
You can sort data within a table by selecting the entire table or specific columns and then going to the “Layout” tab in the Ribbon. Under the “Data” group, use the “Sort” button to arrange the data in ascending or descending order.

Formulas
Using Formulas: If you need to perform calculations within your table, you can use formulas similar to those in Excel. Select the cell where you want the result to appear and use the “Formula” button in the “Layout” tab to create your formula.
By following these steps, you can easily insert and format tables in Microsoft Word, allowing you to present your data in a clear and organized manner. Whether you’re working on a report, a research paper, or any document that requires tabular data, mastering these table formatting techniques will enhance the visual appeal and readability of your work.
