Installing or uninstalling optional features on Windows 11 23H2 provides users with the flexibility to personalize their operating system by incorporating or removing components that are not essential for basic system functionality but can enhance the overall user experience. These optional features encompass a variety of tools and applications, ranging from Internet Explorer mode, Notepad, Print Management, Windows Media Player, to advanced functionalities like Facial Recognition. While Windows 11 comes with certain optional features pre-installed, such as those mentioned earlier, users have the freedom to further customize their system by adding components like XPS Viewer, Wireless Display, Microsoft Quick Assist, Windows Storage Management, and more.
To manage these optional features, Windows 11 offers the Settings app, providing a user-friendly interface for customization. However, if the desired feature is not available in the Settings app, users can resort to the legacy “Windows Features” tool. This tool allows users to add various components, including but not limited to Hyper-V, Windows Subsystem for Linux, and .NET. Whether you seek to expand your system’s capabilities or streamline its functionalities by removing unused features, this gearupwindows guide will lead you through the step-by-step process of installing or uninstalling optional features on Windows 11 23H2, empowering you to tailor your computing environment to your specific needs.
Understanding Optional Features on Windows 11
On Windows 11, optional features are components that aren’t essential for the basic functioning of the system but can significantly enrich the user experience. By default, the operating system comes with pre-installed optional features such as Internet Explorer mode, Notepad, Print Management, Windows Media Player, Facial Recognition, and more. However, users have the freedom to install additional features or remove those no longer needed.
Accessing Optional Features on Windows 11
To access optional features on Windows 11, open the Settings app and navigate to the System section. From there, click on the Optional features page, and you’ll find various options to add or remove features.
How to Install Optional Features using the Settings App?
Follow these steps to install Optional Features using the Settings App:-
Step 1. Open Settings on Windows 11 and navigate to the System section in the left sidebar.

Step 2. On the right, click on the Optional features tile.
Step 3. Choose “View features” in the “Add an optional feature” setting.

Step 4. Once done, a new pop-up window, “Add an optional feature” will open.
Step 5. Select the desired optional feature you want to install (e.g., Wireless Display) and click Next.
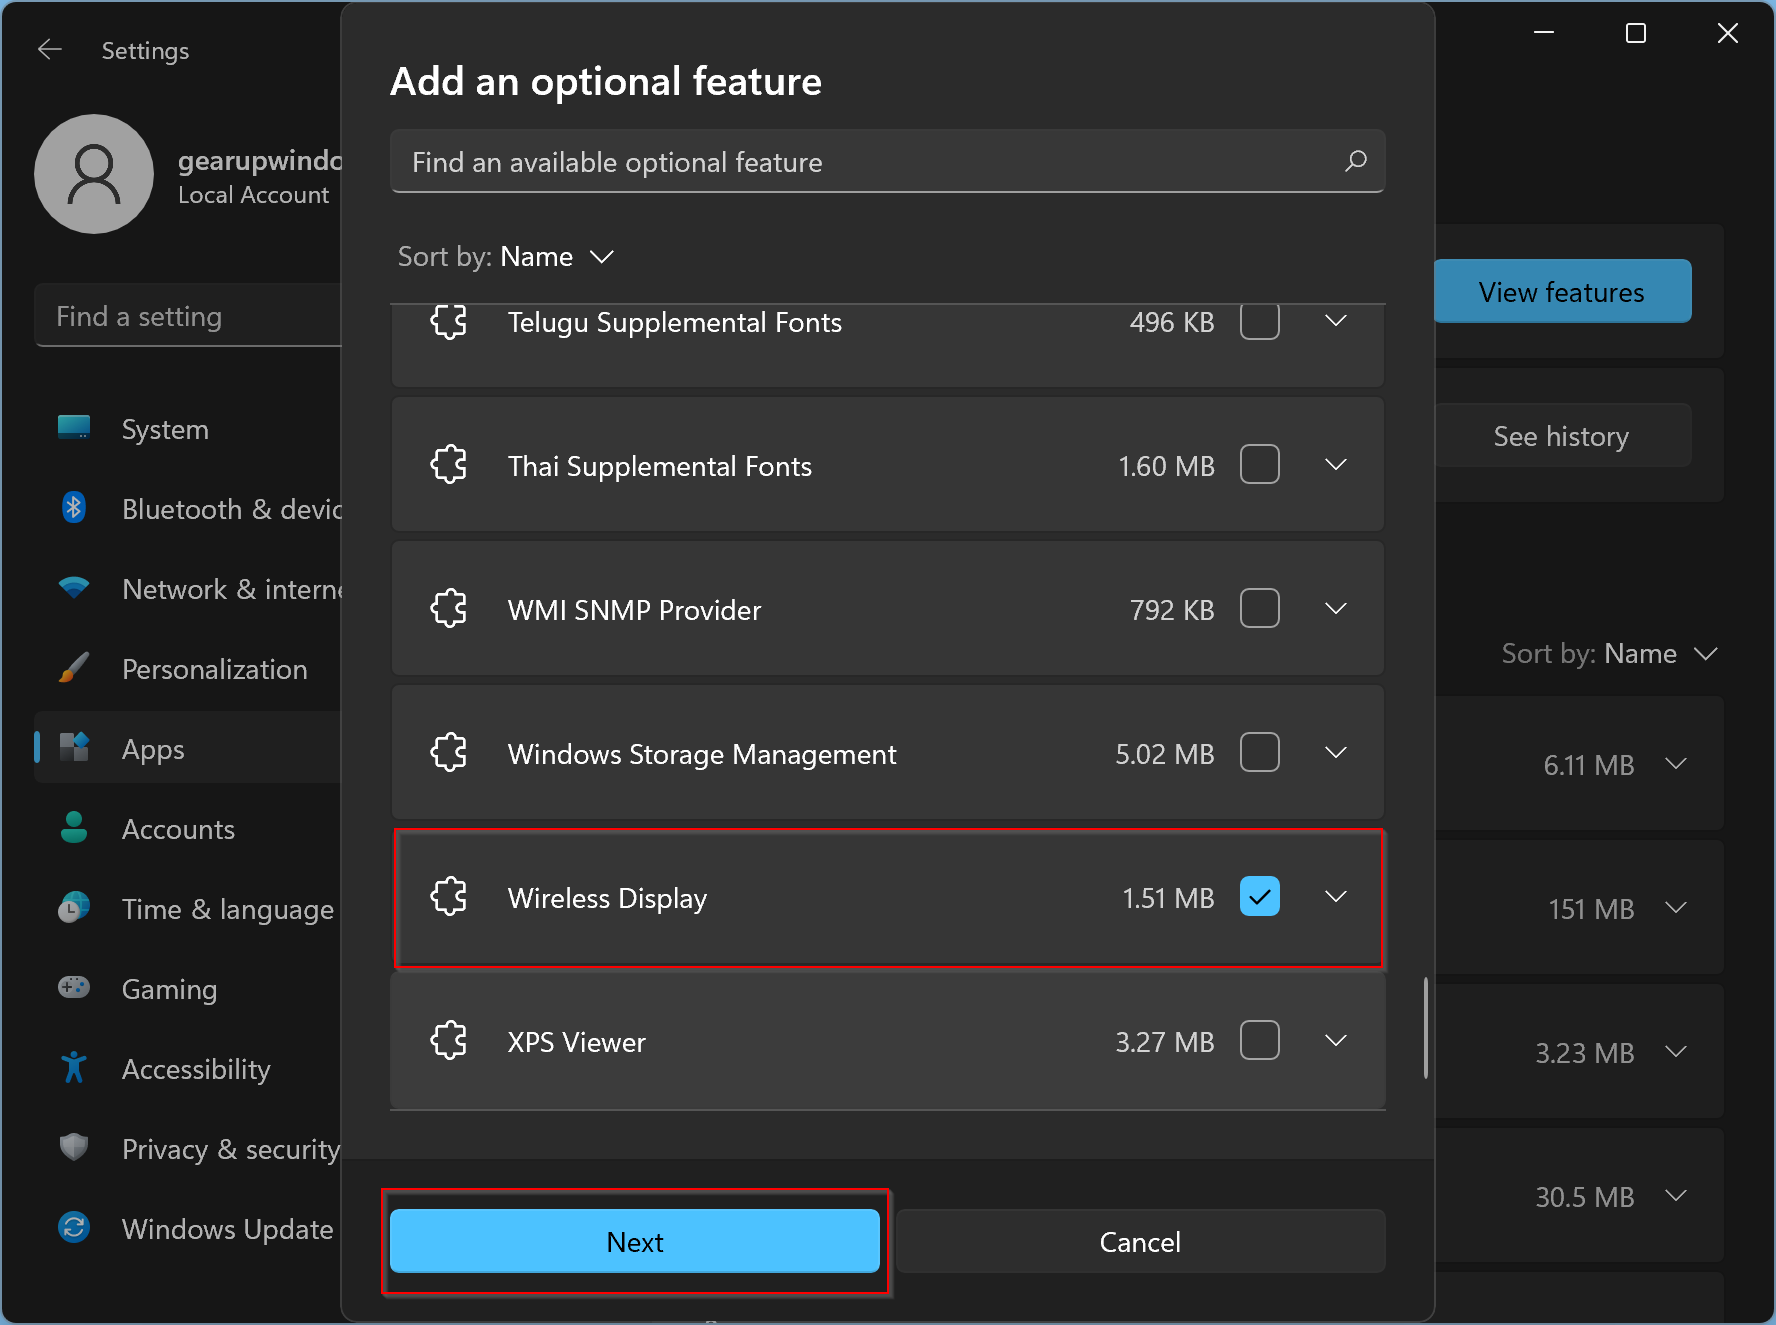
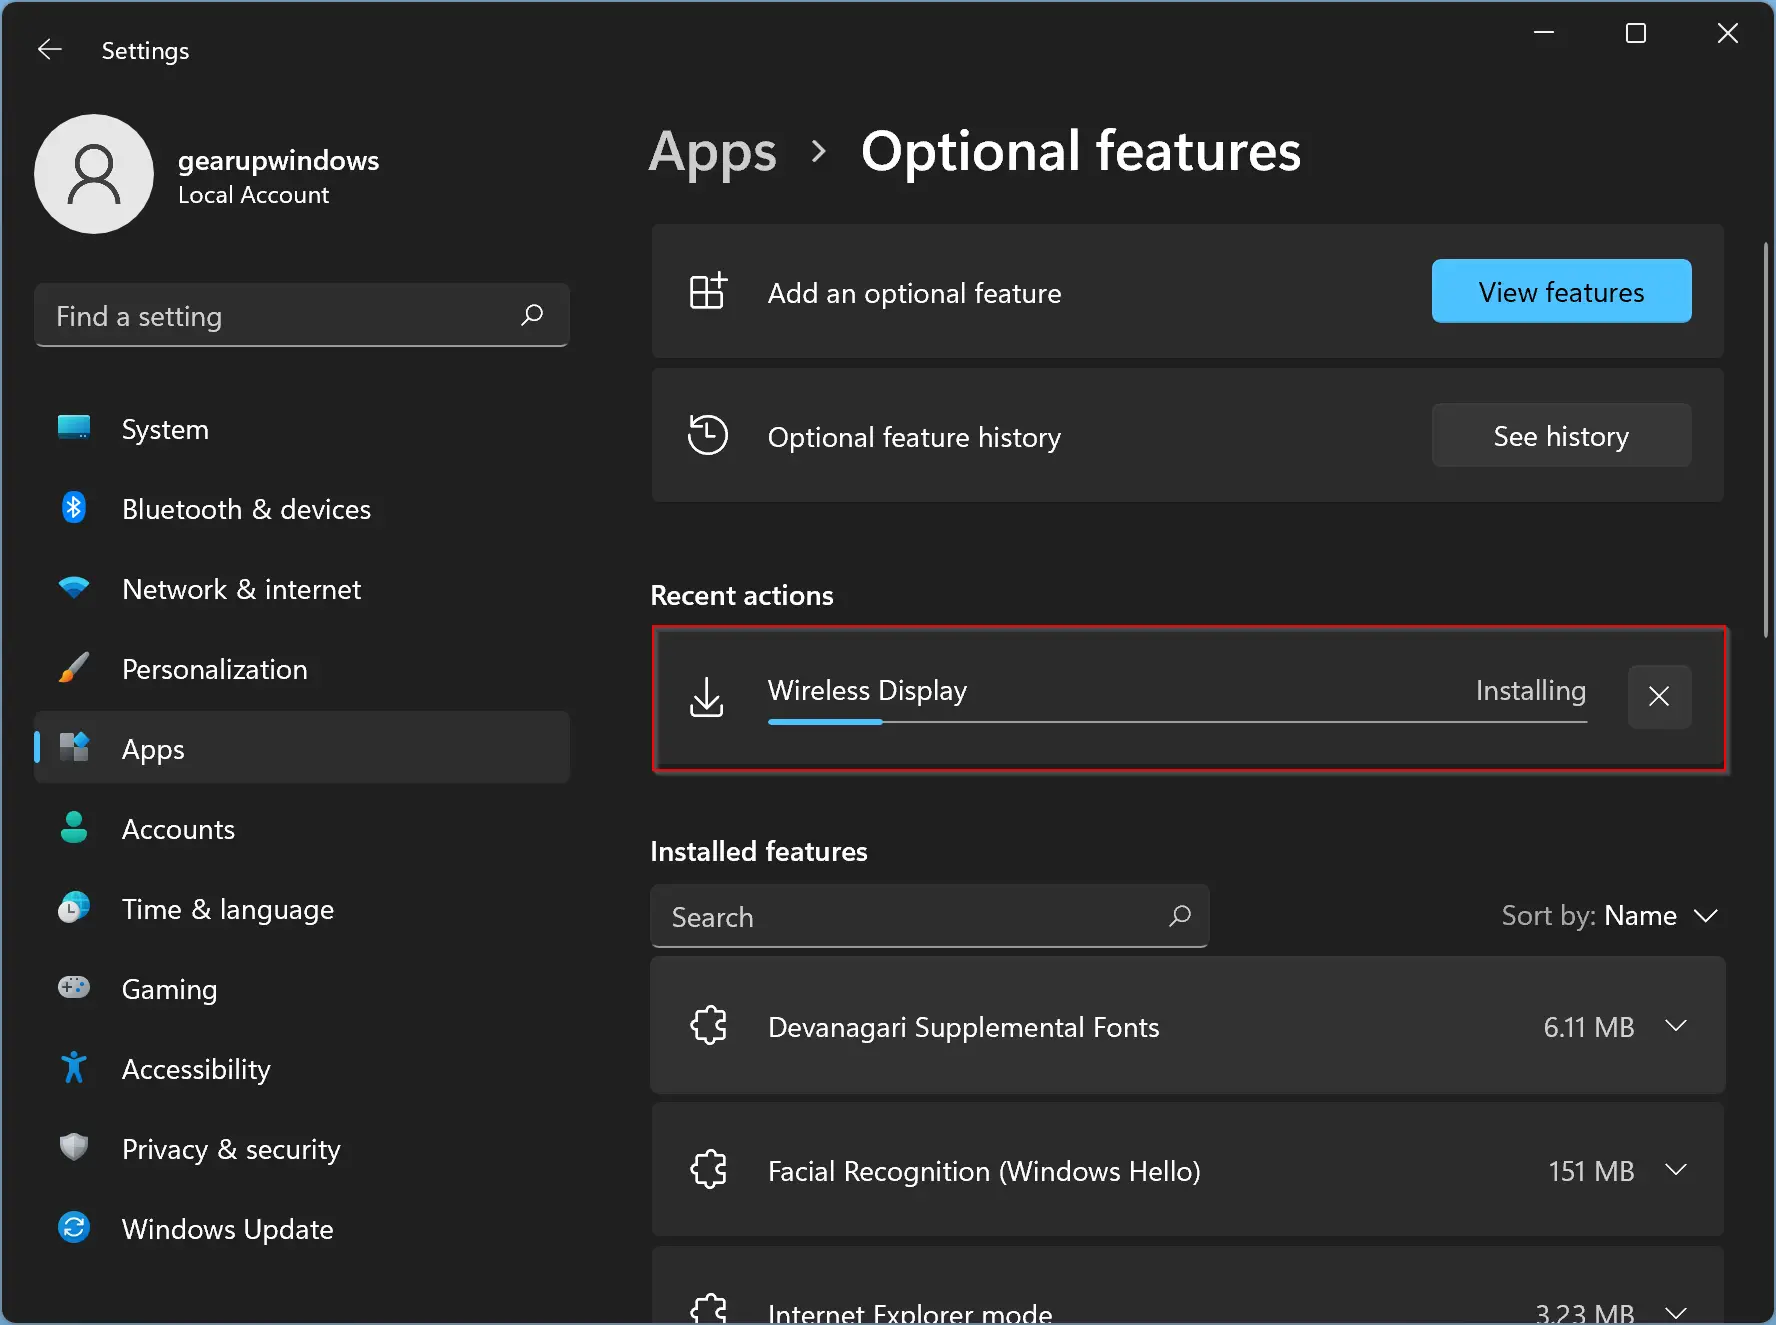
Step 6. Click Install to initiate the download and installation process.

That’s it. Windows 11 will now start installing your selected component.
Although Microsoft has streamlined the process through the Settings app, some components, like Hyper-V, remain exclusive to the legacy Control Panel interface. Whether you’re using the modern Settings app or the traditional Control Panel, our step-by-step instructions ensure a seamless process. Tailor your system effortlessly, enhancing functionality and customizing your computing environment on Windows 11 23H2.
How to Install Legacy Optional Features Using Control Panel?
To install Legacy Optional Features using Control Panel, follow these steps:-
Step 1. Open Settings, click on System and go to the Optional features page.
Step 2. Opt for “More Windows features” under the “Related settings” section.

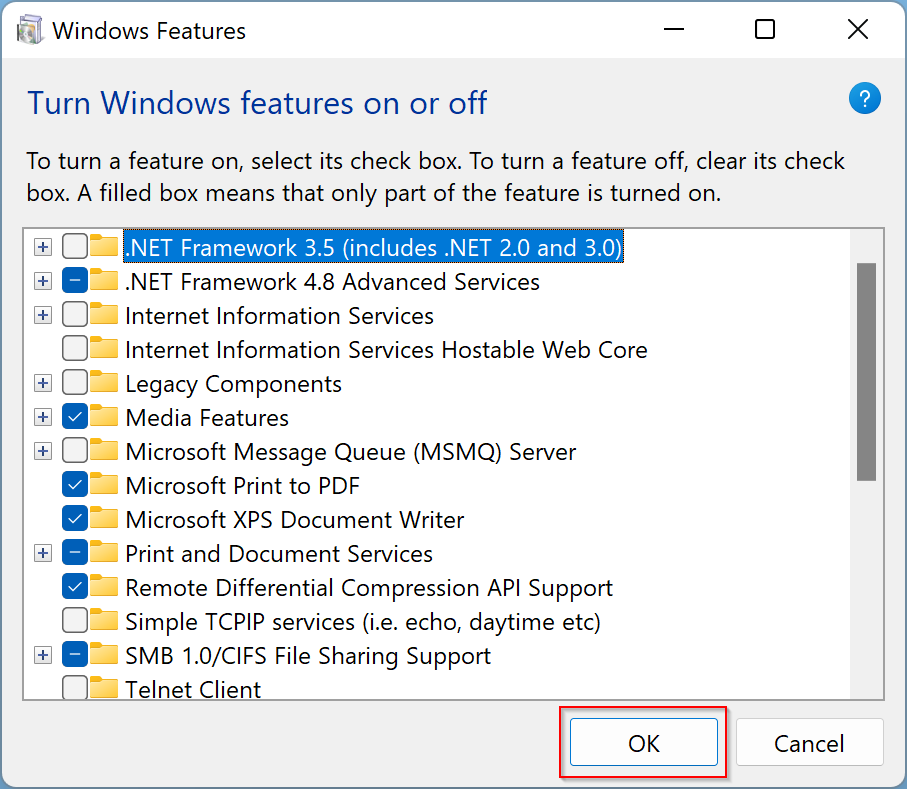
Step 3. When you’re done, you will see the Windows Features dialog. Select a feature (e.g., Hyper-V, Windows Sandbox, Windows Subsystem for Linux) you want to enable. Then click the OK button.
Step 4. Click Restart now to complete the installation of legacy features.
How to Uninstall Optional Features using the Settings App?
Follow these steps to uninstall and remove Optional Features using the Settings App:-
Step 1. Open Settings (Windows+I) and navigate to the System section.
Step 2. Click on the Optional features page.
Step 3. In the “Installed features” section, select the optional feature to remove.

Step 4. Click Uninstall to remove the feature from Windows 11.
How to Uninstall Legacy Optional Features using Control Panel?
If you prefer to use Control Panel, follow these steps to uninstall and remove Legacy Optional Features on your Windows 11 PC:-
Step 1. Open Settings, click on System and go to the Optional features page.
Step 2. Opt for “More Windows features” under the “Related settings” section.
Step 3. Uncheck the feature you want to remove (e.g., Wireless Display, Hyper-V, Windows Sandbox, Windows Subsystem for Linux) and click OK.
Step 4. Click Restart now to complete the removal process of legacy features.
Conclusion
In conclusion, the ability to install and uninstall optional features on Windows 11 23H2 provides users with unparalleled customization options. Whether you’re a casual user seeking additional functionalities or an advanced user looking to optimize your system, this guide ensures that the process is accessible and user-friendly. By following these detailed steps, you can confidently shape your Windows 11 experience according to your unique preferences and requirements.
