Sometimes you need to enable or disable optional features of a Windows 11 PC. For example, you want to install a virtual operating system on your PC using the Hyper-V feature. When you don’t need it, you can remove the optional feature from your computer.
If you need to use some components, Windows 11 allows installing them using several methods. We will review all the ways which are easy to use.
How to Install Optional Components in Windows 11 using the Settings app?
To install optional components in Windows 11 using the settings app, do the following:-
Step 1. First, open the Settings app using Windows + I keys.
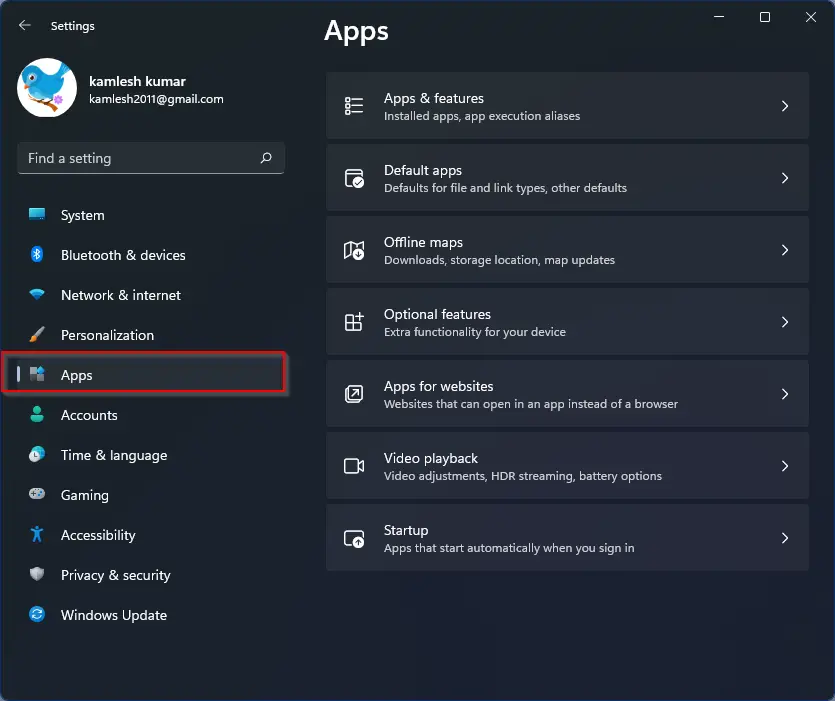
Step 2. When Windows Settings opens, select the Apps category in the left sidebar.
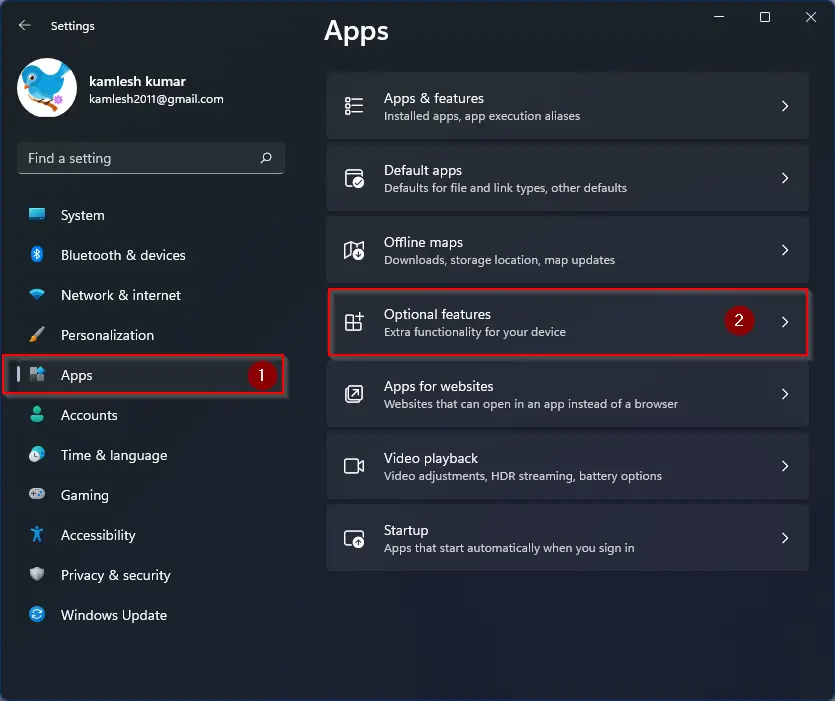
Step 3. After that, click on the Optional features on the right sidebar.
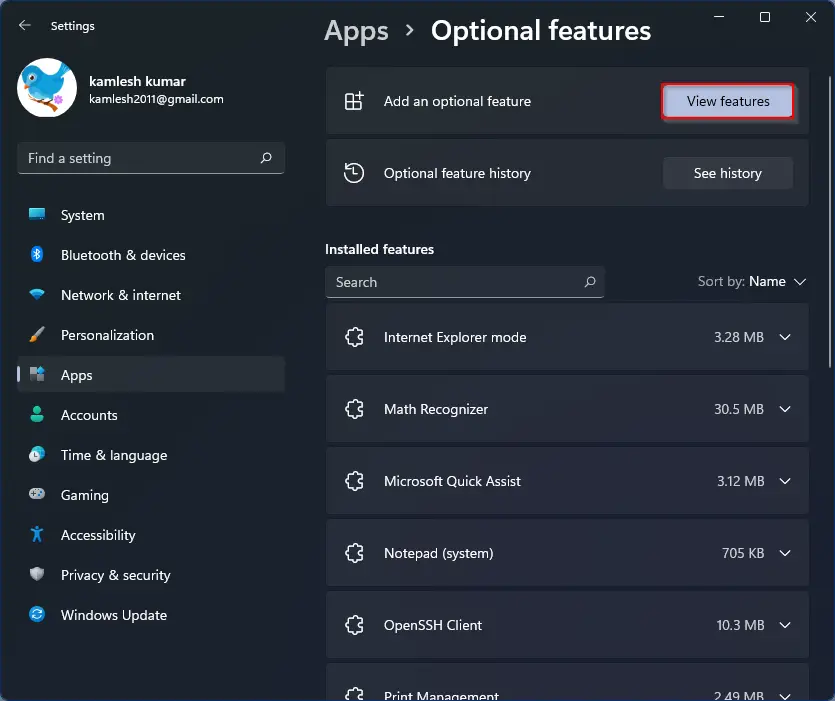
Step 4. Then, click the View features button to open a new window with a list of all optional components available to install.
Step 5. When you’re done, a new pop-up window, “Add an optional feature” will open.
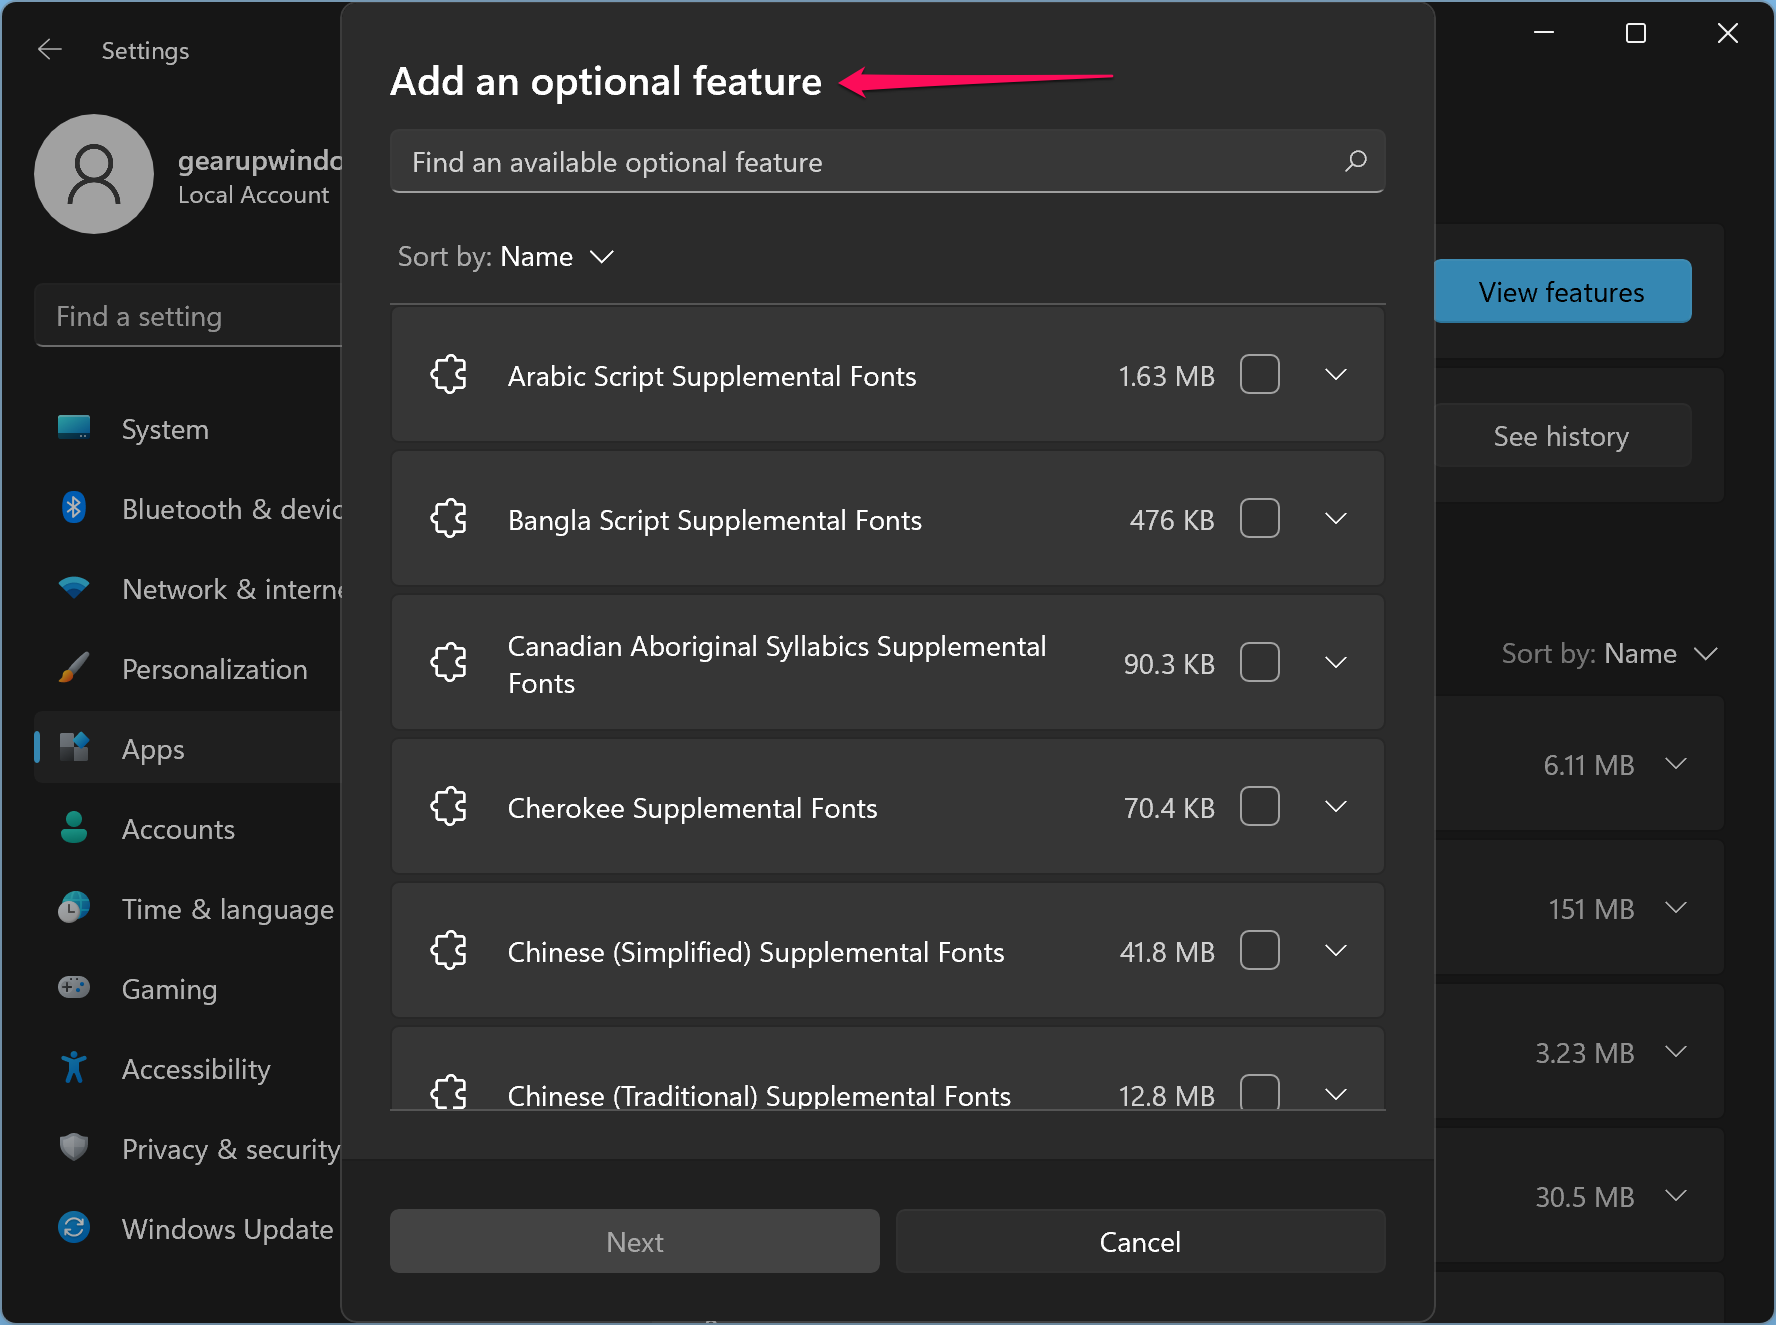
Step 6. In the list of optional features, look for the function you want to install on your computer. Alternatively, use the search box to locate it. Click the checkbox beside the feature name.
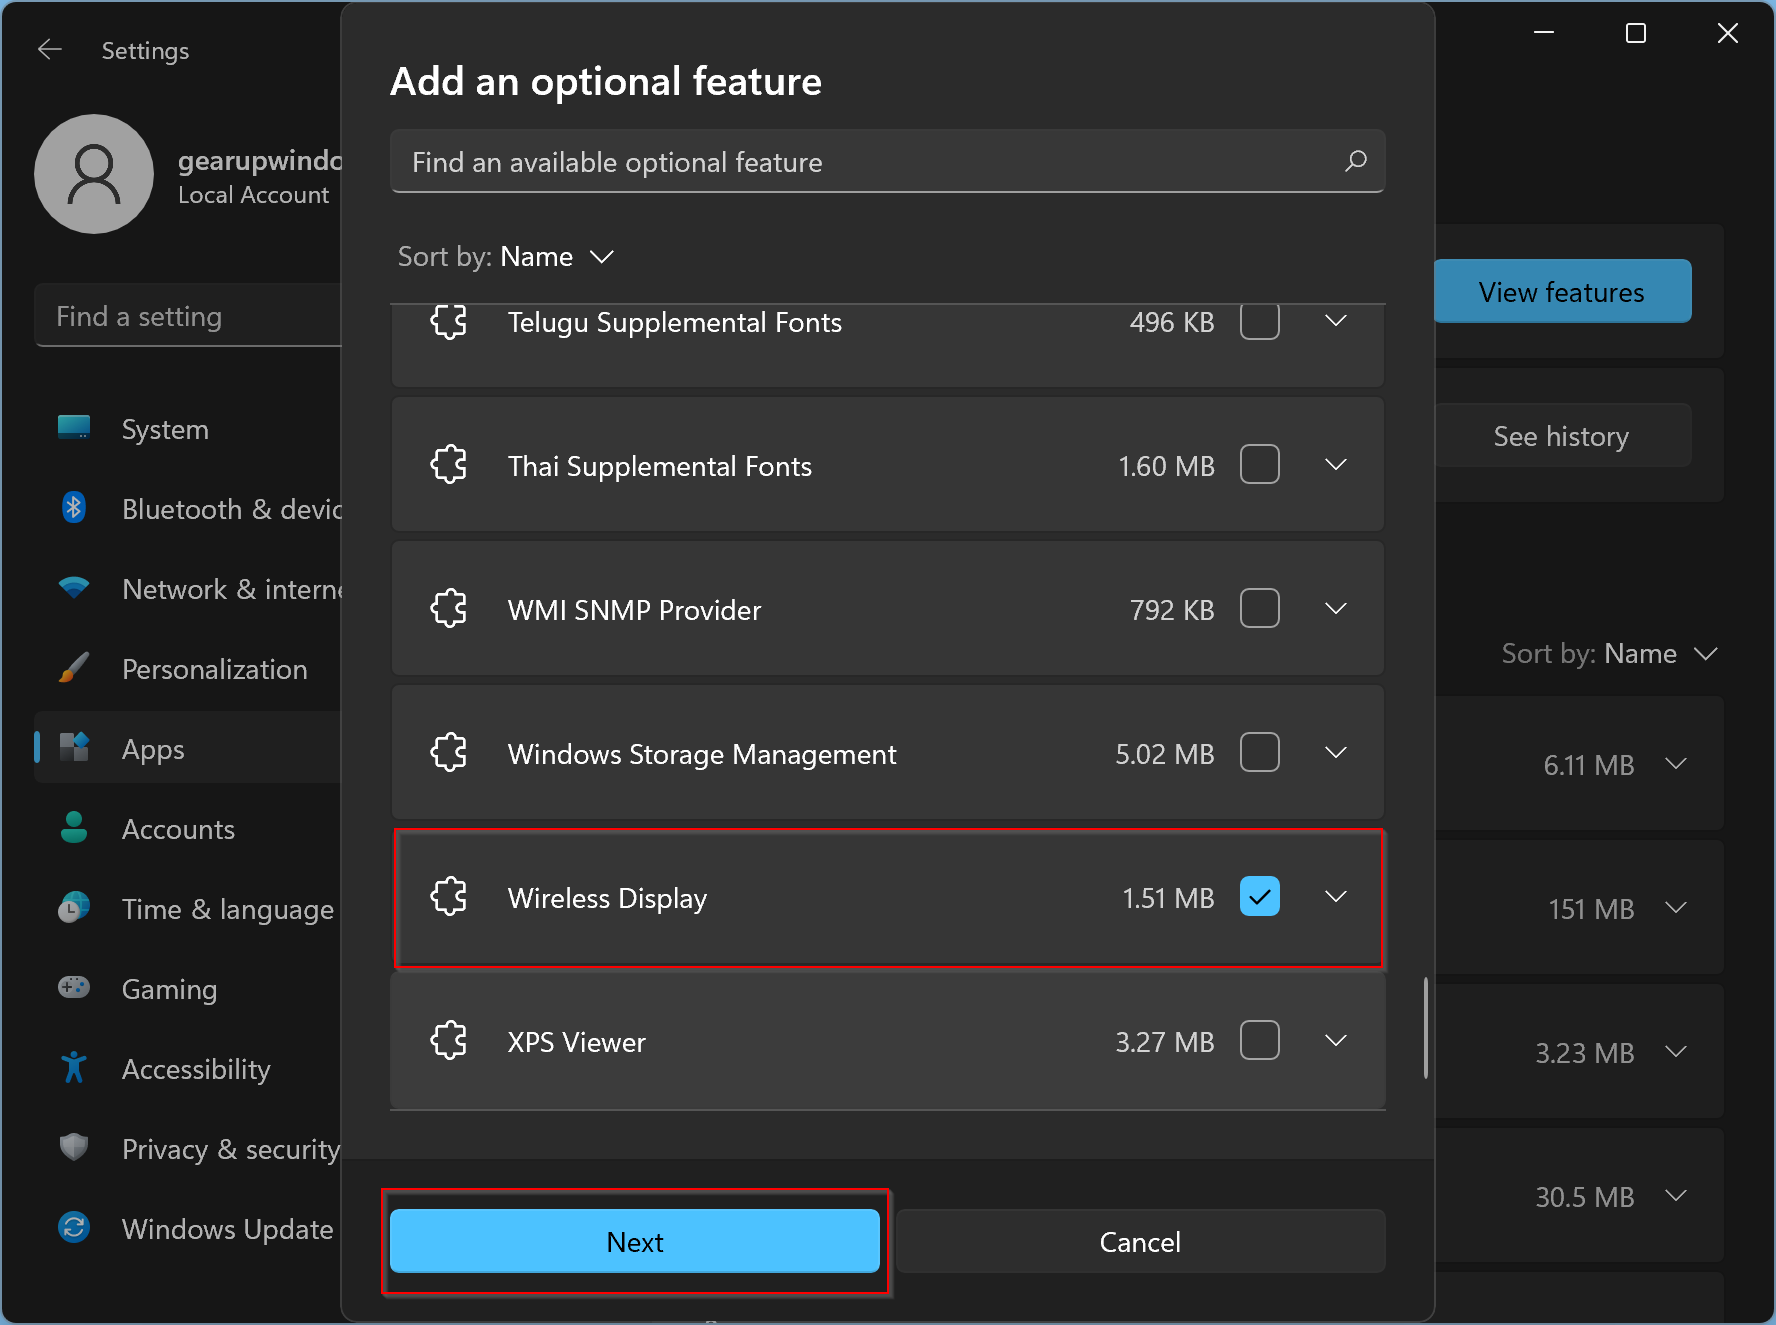
Quick Note: To remove a feature from your computer, uncheck the box.
Step 7. After that, click the Next button.
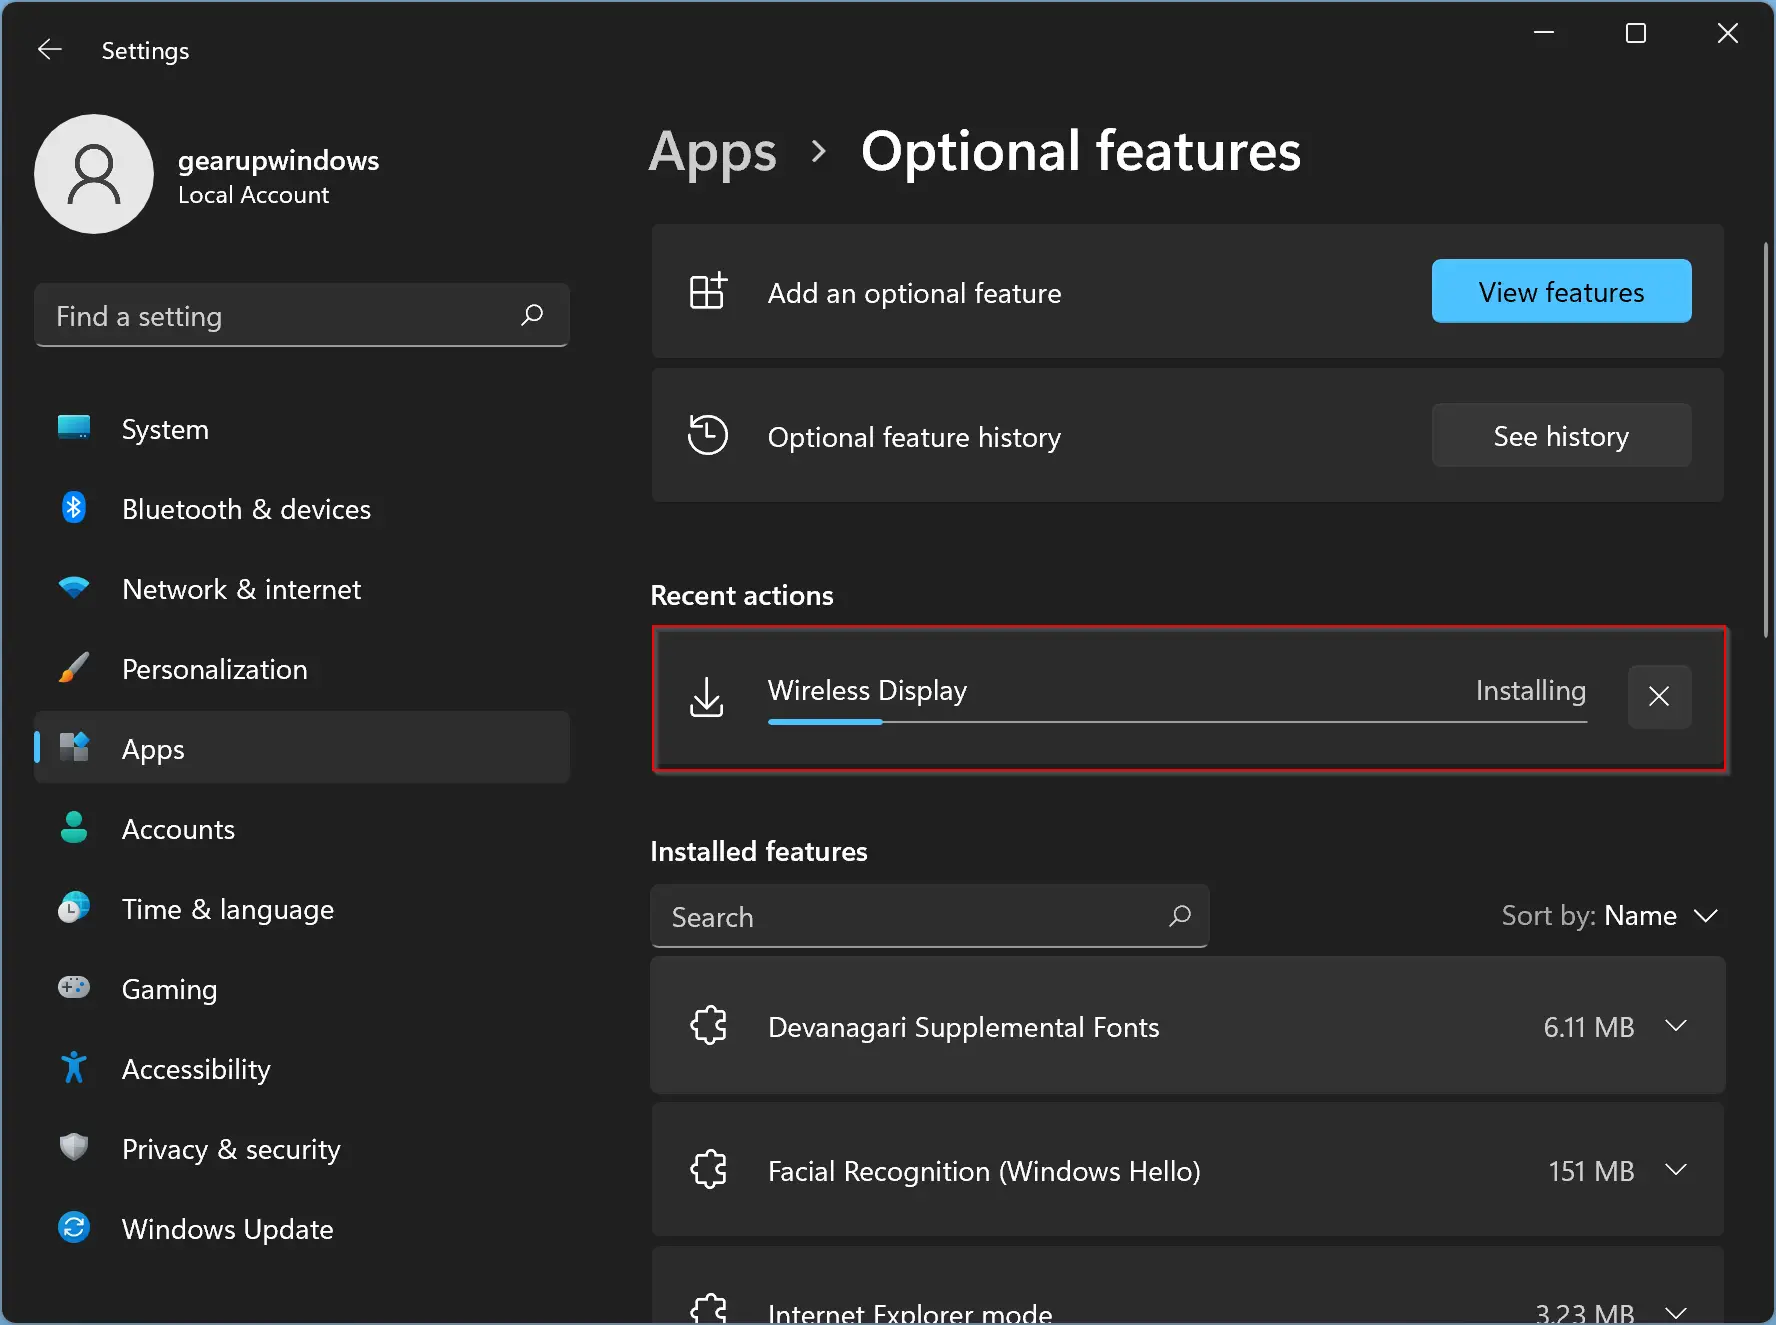
Step 8. Again, click the Install button.

That’s it. Now, you will see your selected component is getting installed.
Although Microsoft has provided an option to install and uninstall optional features using the Settings app, some optional components in Windows 11 are only available in the legacy Control Panel interface. For example, to install a Hyper-V on Windows 11, you need to go through Control Panel only.
How to Install Optional Components in Windows 11 using the classic Windows Features dialog?
To install optional components in Windows 11 from the classic “Windows features” dialog, perform the following steps:-
Step 1. First, open the Settings app using Windows + I keys.
Step 2. When Windows Settings opens, select the Apps category in the left sidebar.
Step 3. After that, click on the Optional features on the right sidebar.
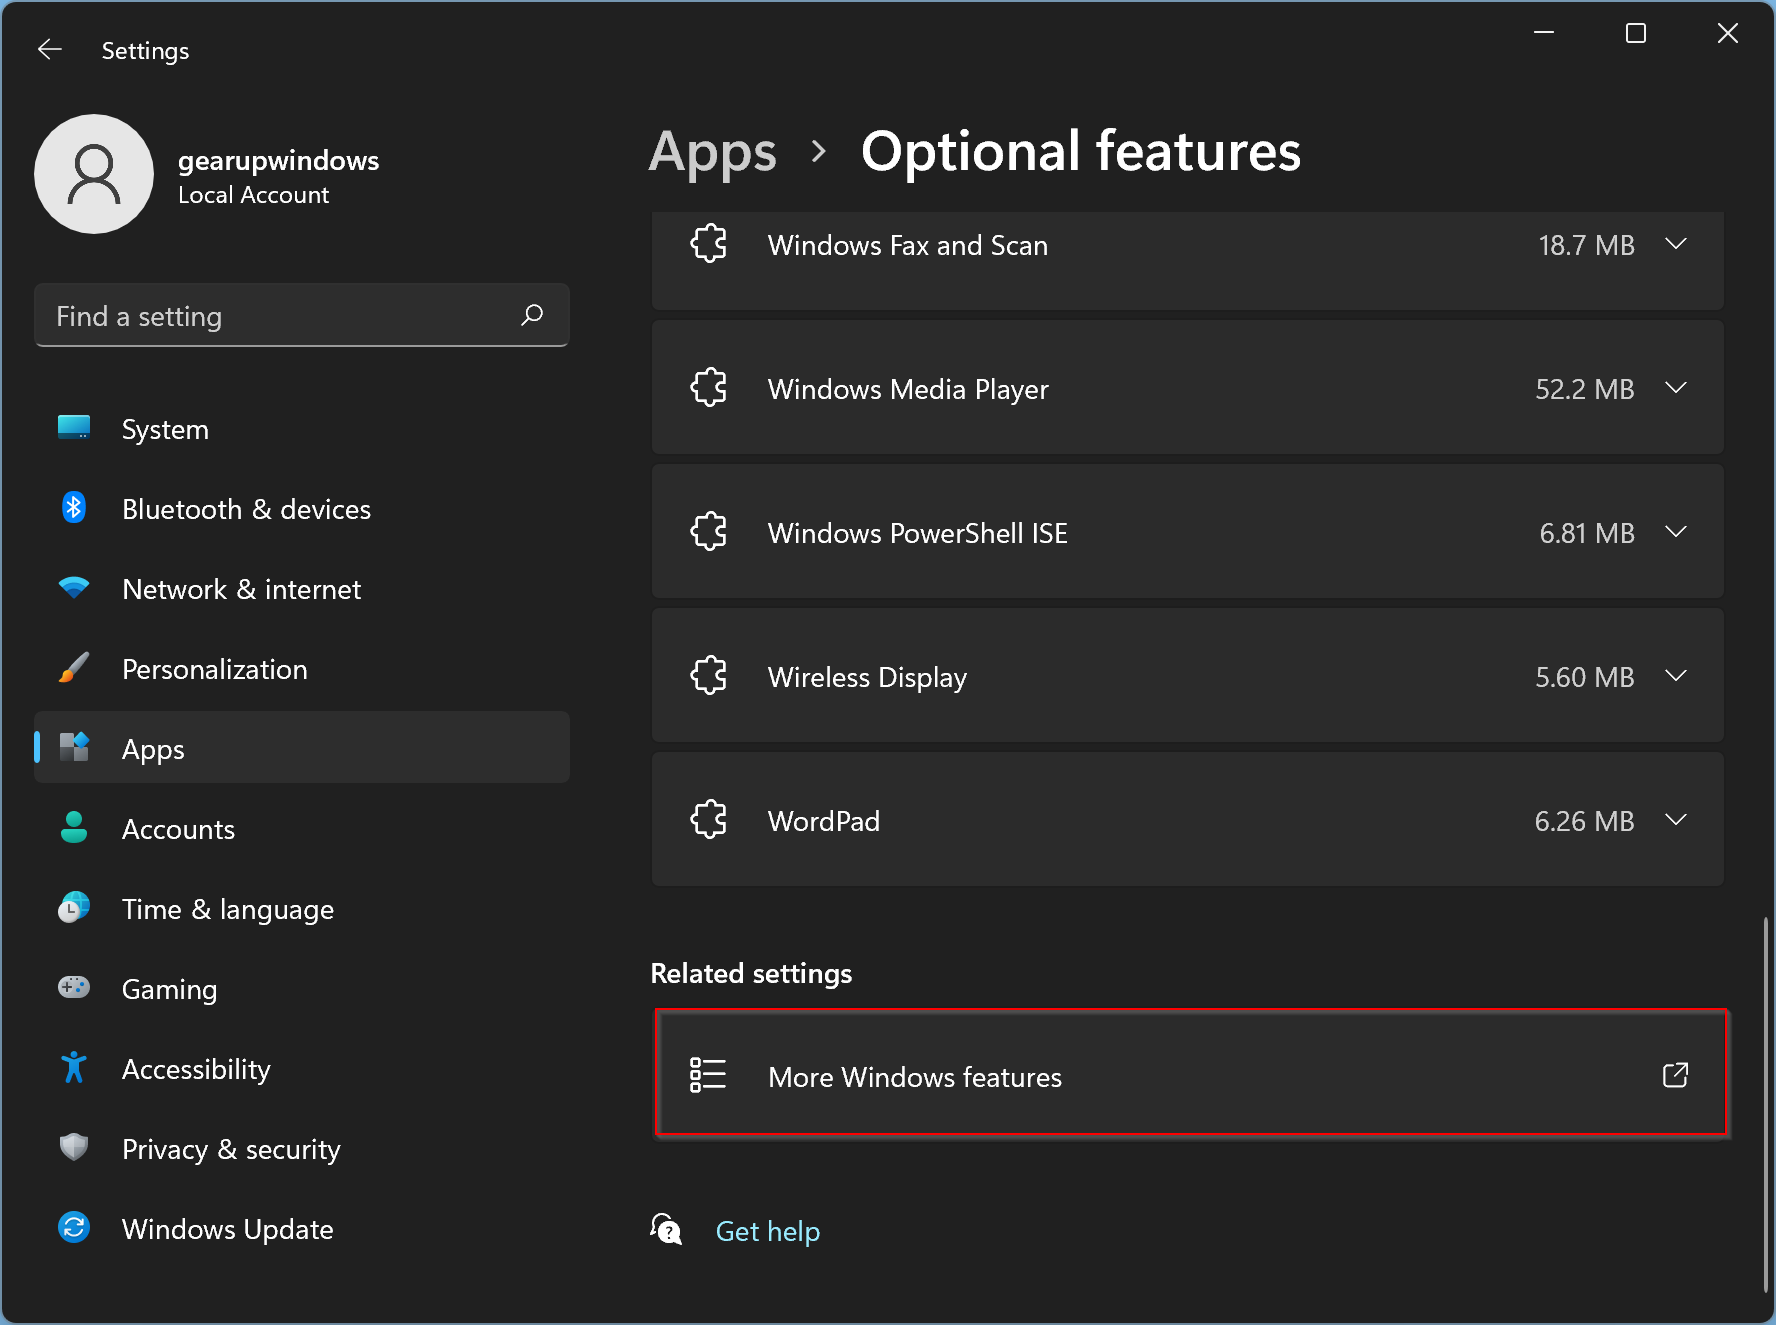
Step 4. When you’re at the Optional features settings page, scroll down at the bottom and then click the More Windows features under the “Related settings” section.
Step 5. When you see the Windows Features title, select a feature you want to enable or disable. Then click the OK button.
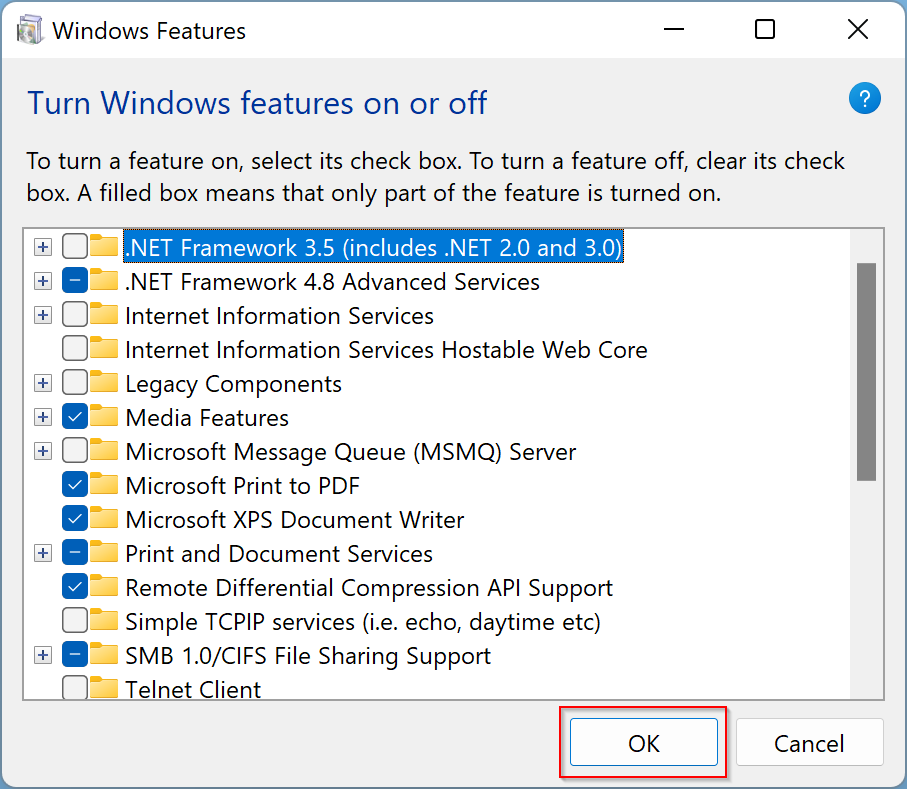
Depending upon the feature, Windows 11 may take a while and ask you to reboot your computer.
Conclusion
In conclusion, enabling or disabling optional features of a Windows 11 PC is a straightforward process that can be done using the Settings app or the classic Windows Features dialog. Whether you need to install a virtual operating system, language pack, or any other optional component, Windows 11 provides several easy-to-use methods to do so. By following the steps outlined in this article, you can quickly add or remove the features you need to enhance your Windows 11 experience.
Also Read: How to Install or Uninstall Optional Features on Windows 11 23H2?
