Starting Windows 11 build 22557, you need an active internet connection to finish the initial setup (out-of-box experience (OOBE)) for the Home and Pro editions. Microsoft wants users to connect their computers with a Microsoft account, so the firm is making changes to the initial Windows 11 setup. It is almost impossible to continue installing a fresh Windows 11 without an internet connection.
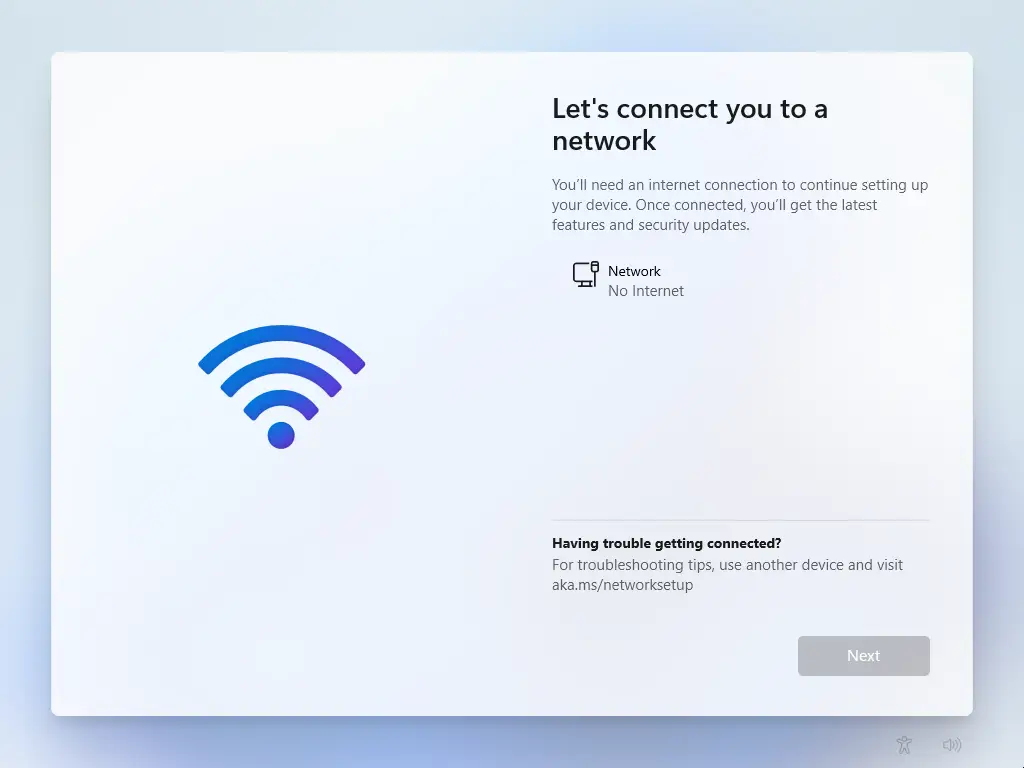
During the Windows 11 setup, if there is no active internet connection on the device, you will now land on the “Oops, you’ve lost internet connection page. Let’s go back and connect to your network again.” page. When you click the Retry button, you will get a prompt to connect to the internet.
In older Windows 11 releases, people could skip this requirement and continue installing Windows 11 offline with a local account, but the same is no longer possible in the latest build.
For those who don’t have an internet connection when installing Windows 11 Home or Pro or want a more traditional offline experience, you need to bypass the requirement and finish configuring the OOBE out-of-box experience) without an internet connection.
If you want to install Windows 11 from scratch without an active internet connection, this gearupwindows article will guide you to bypass the same.
How to Install Windows 11 without an Internet Connection?
To install Windows 11 without an internet connection, use these steps:-
Step 1. Connect the Windows 11 USB flash drive to your PC and start your computer.
Step 2. When prompted, press any key to boot from the USB drive.
Step 3. Select language, time & currency format, and keyboard input method. Then, click the Next button.

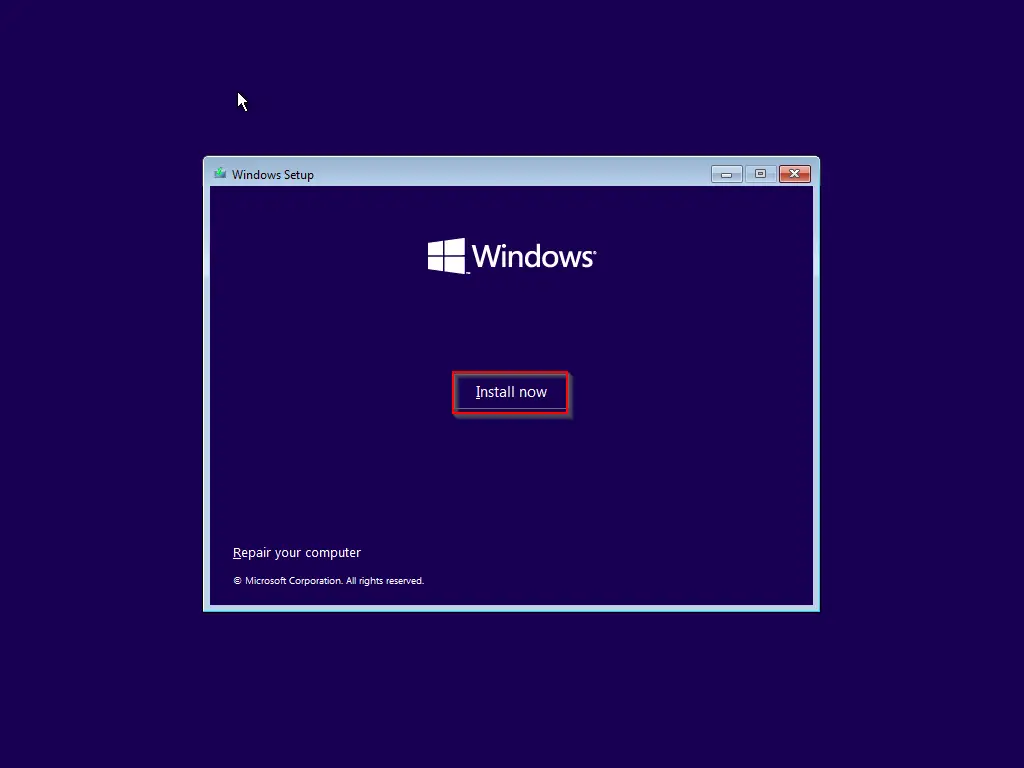
Step 4. Click Install now.
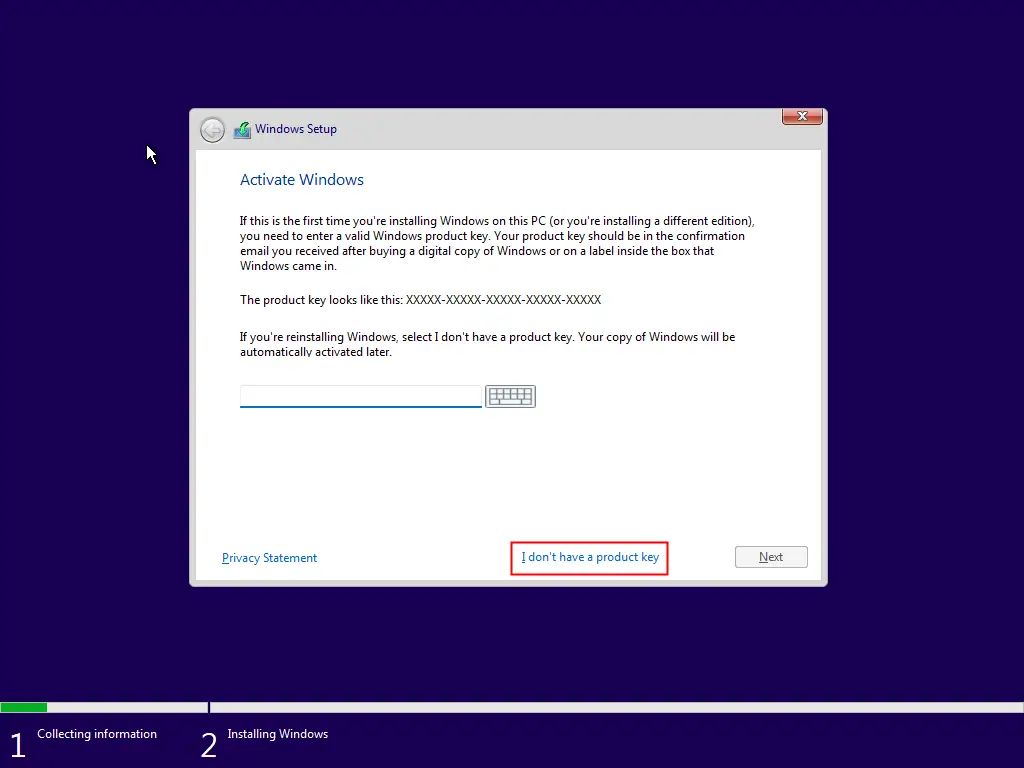
Step 5. When prompted for a product key, type the genuine product key if you have one or click the link I don’t have a product key.
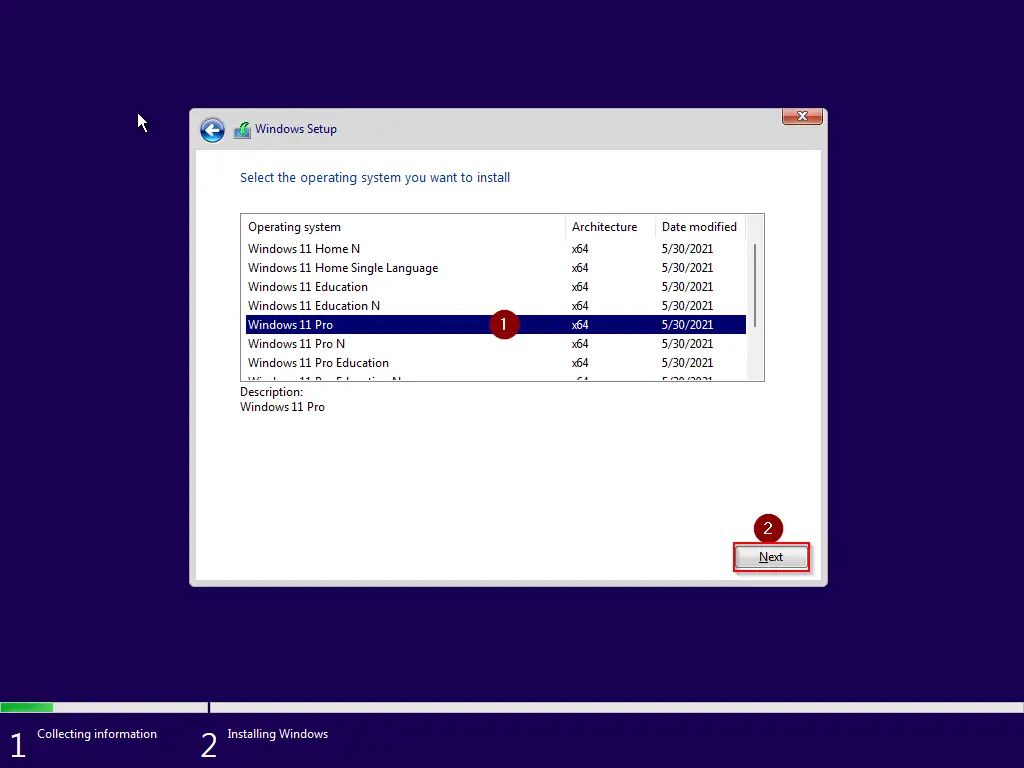
Step 6. Select the Windows 11 edition you would like to install and then click the Next button.
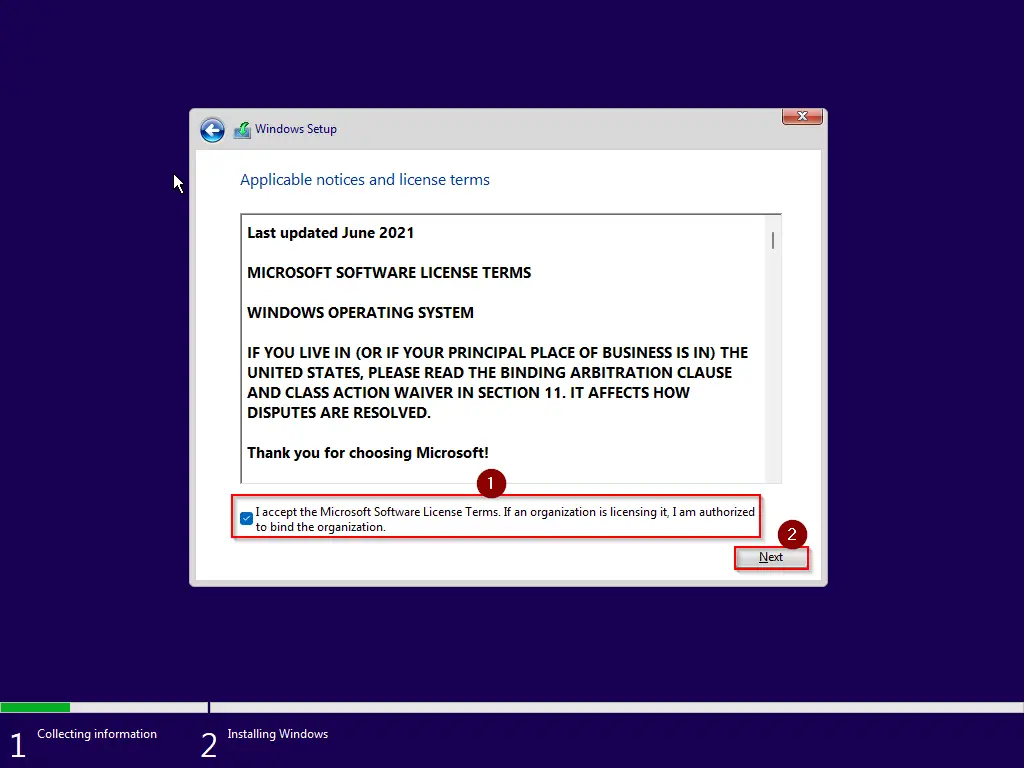
Step 7. Check the checkbox, “I accept the Microsoft Software Licence Terms. If an organization is licensing it, I am authorized to bind the organization,” and click the Next button.
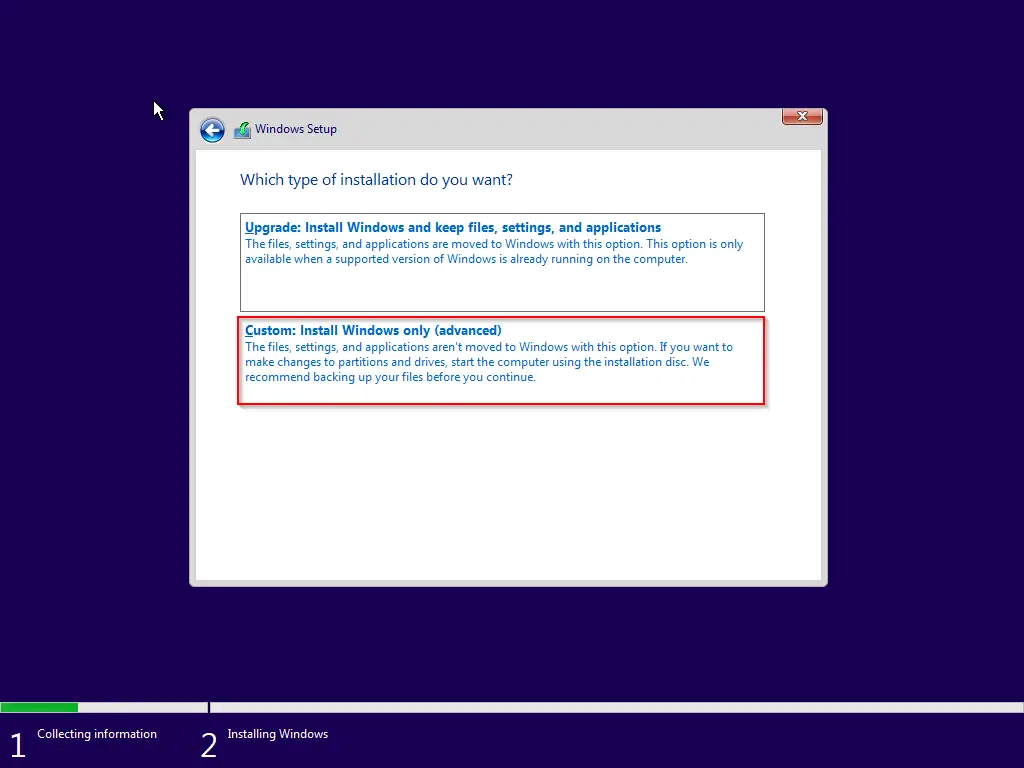
Step 8. Now, you will see two options:-
- Upgrade: Install Windows and keep files, settings, and applications.
- Custom: Install Windows only (advanced).
Since you will install a fresh Windows 11, choose the second option, “Custom: Install Windows only (advanced).”
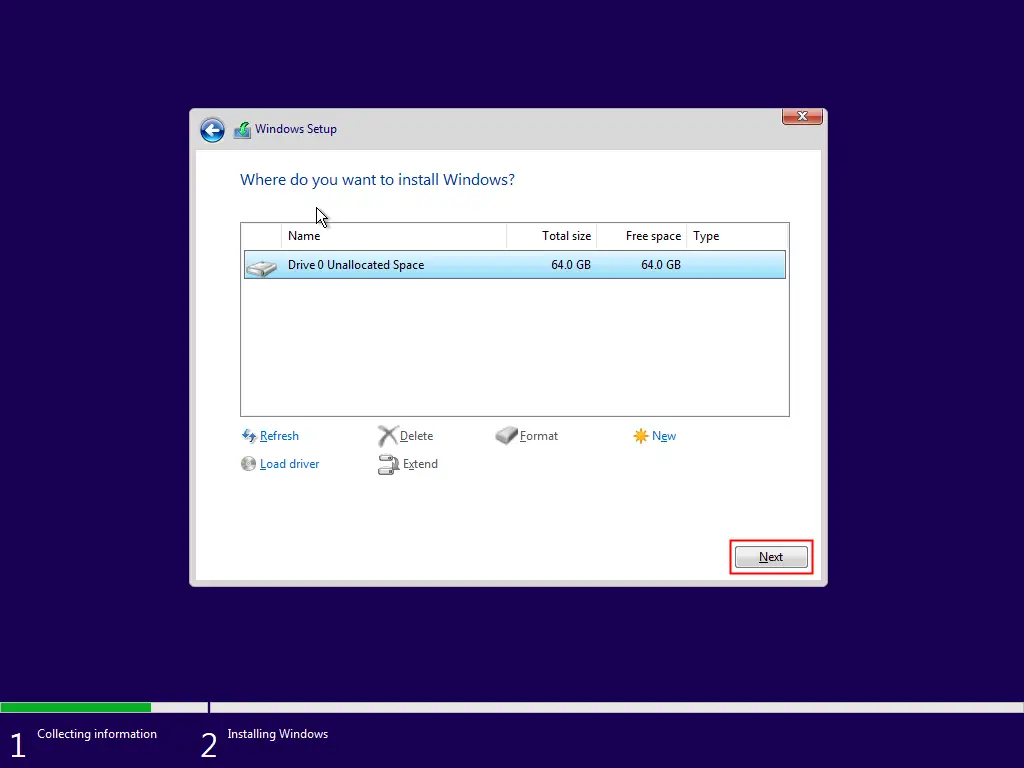
Step 9. Select a partition on which you want to install Windows 11 and click the Next button.
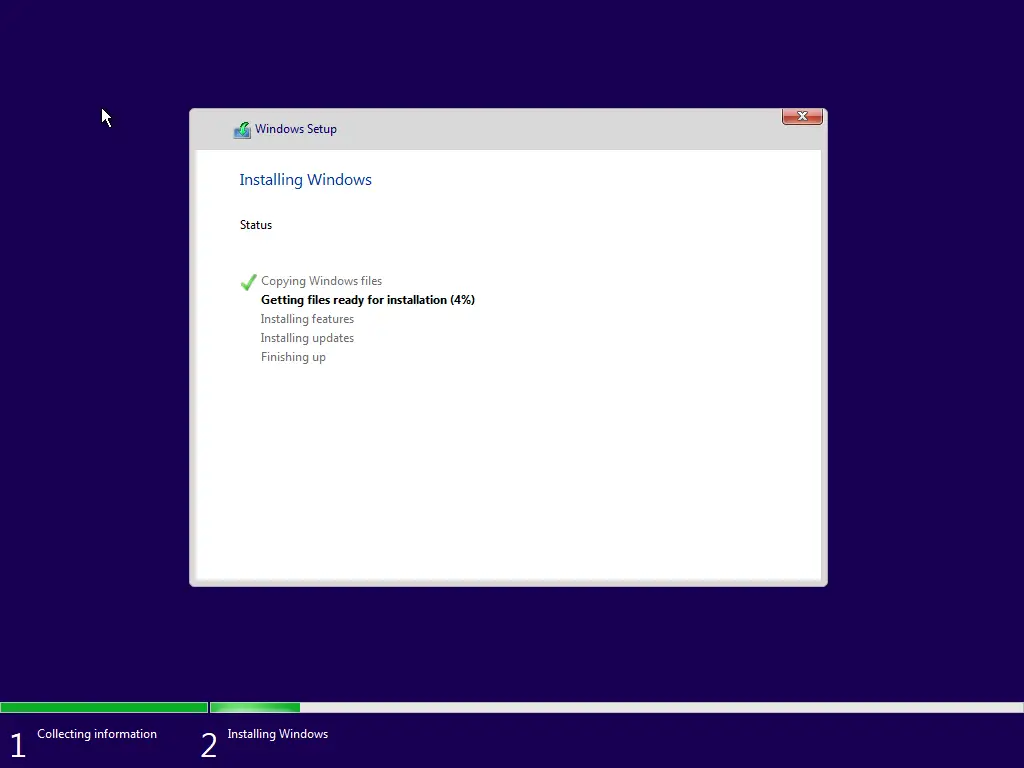
Step 10. Now, you should see the installation progress of your Windows 11. Your system will start copying the required files to run Windows 11. Once done, it will be restarted automatically.
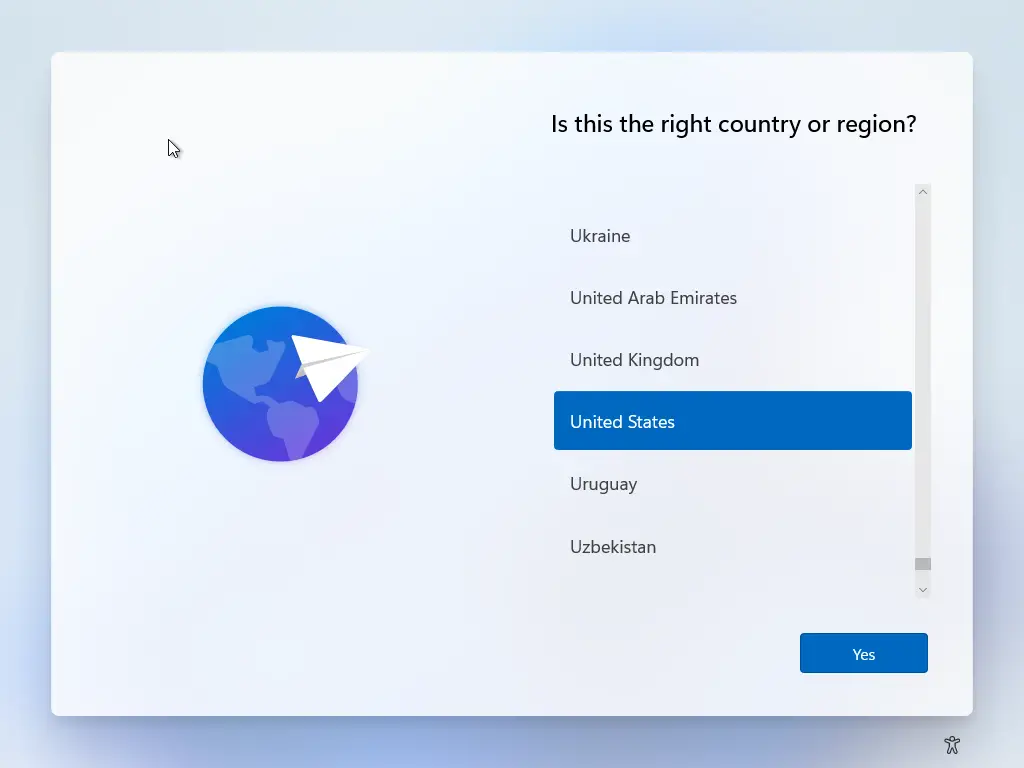
Step 11. Select the country and click the Yes button.
Step 12. Select the keyboard layout setting.
Step 13. Click the Yes button.
Step 14. Click the Skip button if you do not want to add a second layout.
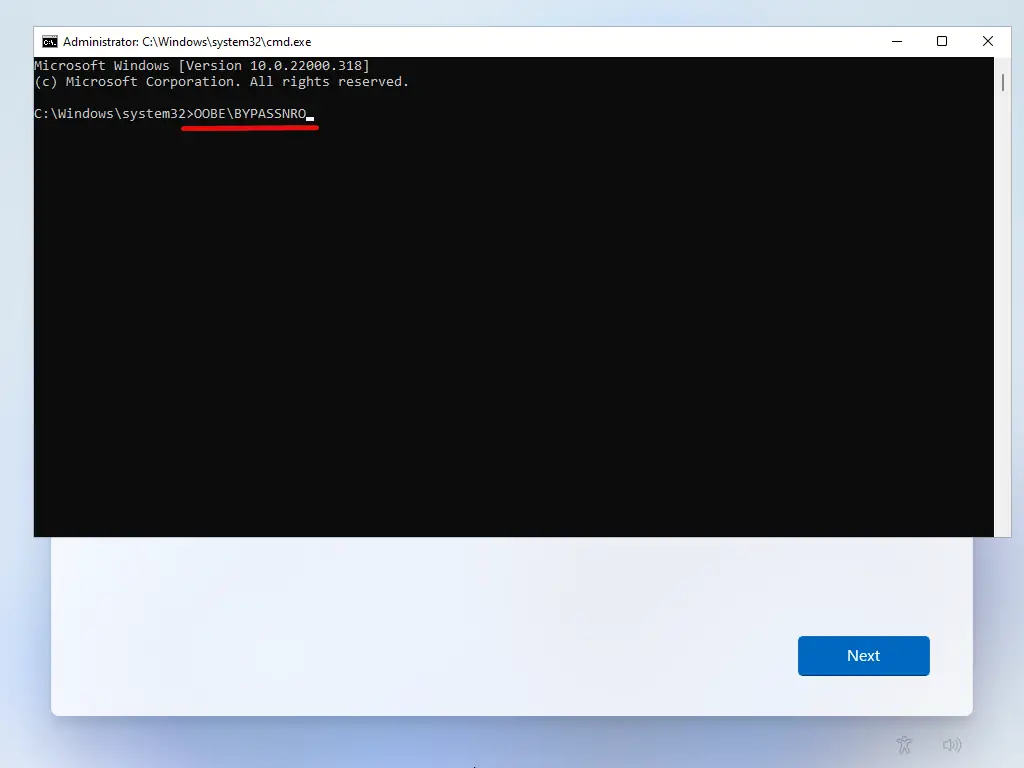
Step 15. When you see on the screen “Let’s connect you to a network,” press the Shift + F10 (If your keyboard includes the Function key, then use Fn + Shift + F10 keys) keyboard shortcut to open Command Prompt.
Step 16. In the Command Prompt window, type OOBE\BYPASSNRO and hit Enter key on the keyboard to bypass network requirements on Windows 11.
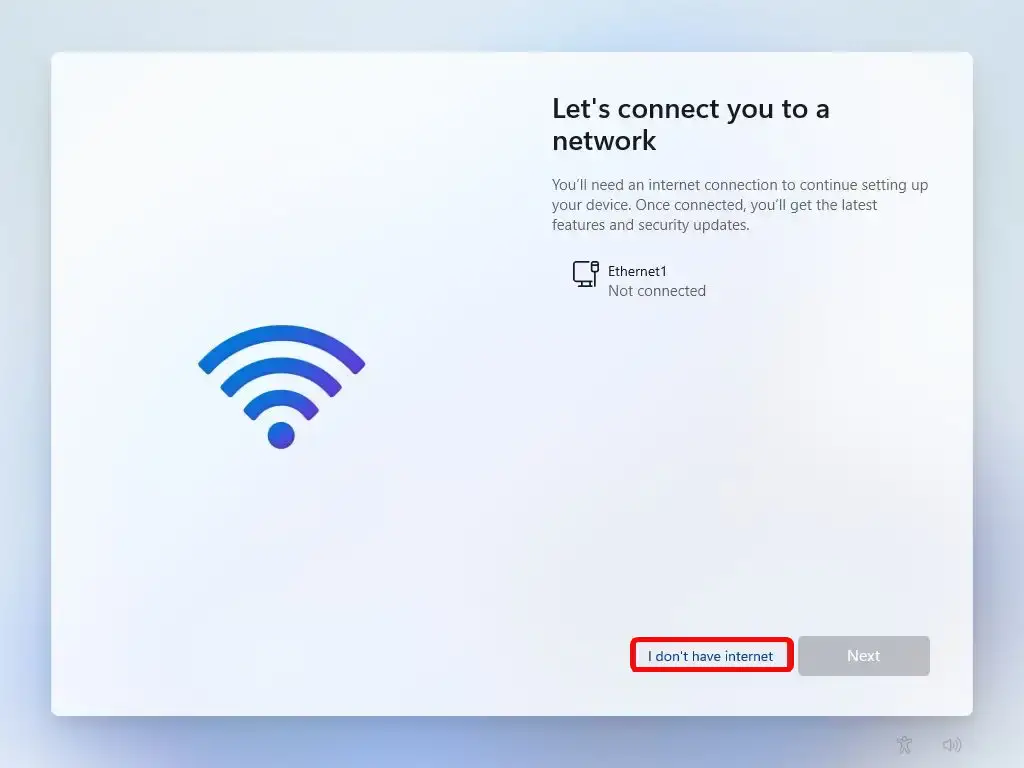
Step 17. When you’re done, your computer will restart automatically. After a reboot, the out-of-box experience (OOBE) will open again. Here, choose your country and click the Yes button.
Step 18. Select the keyboard layout and click the Next button.
Step 19. Click the link I don’t have internet.
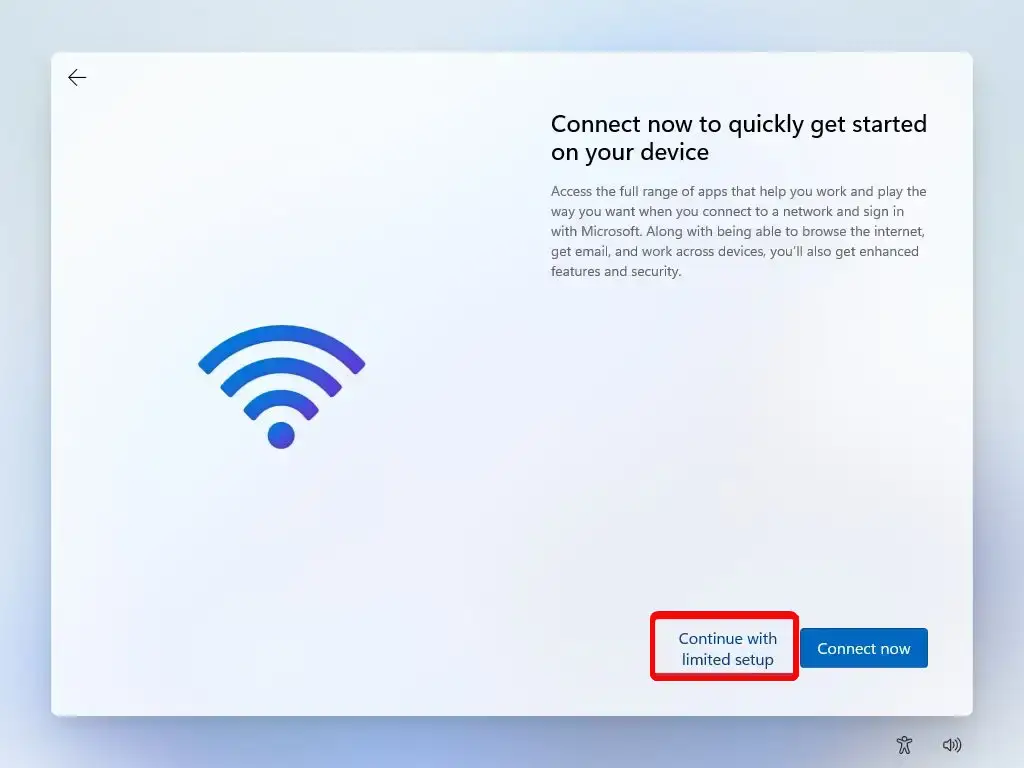
Step 20. Click the link Continue with limited setup.
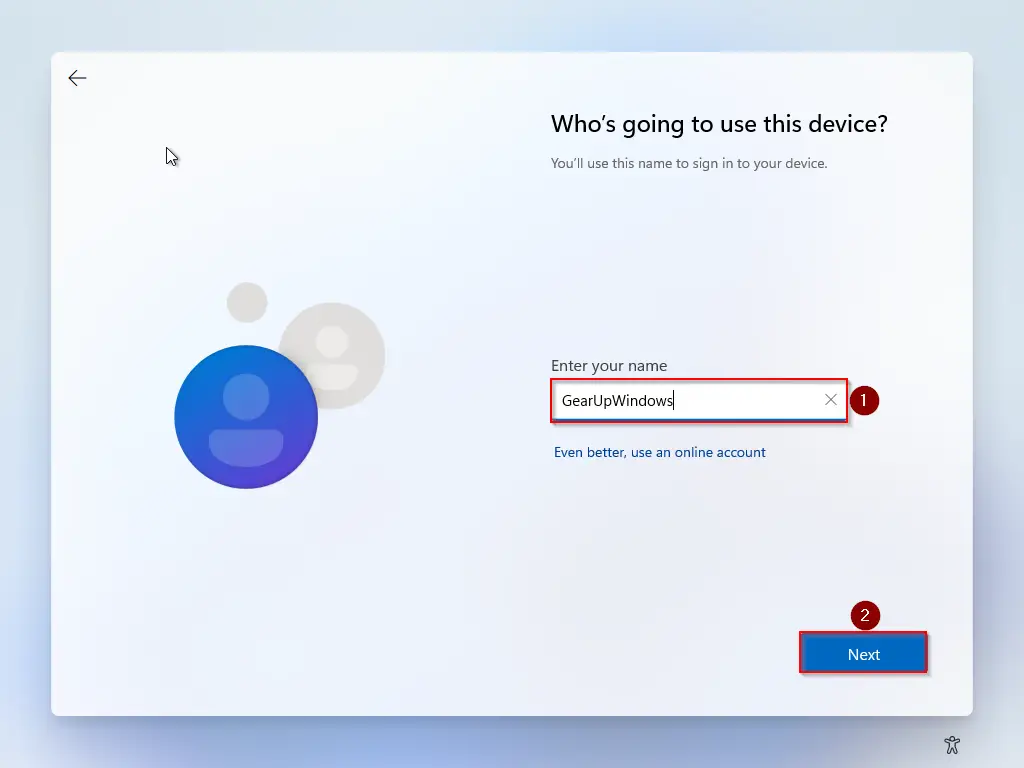
Step 21. In the “Enter your name” field, type the user name you would like to use on your Windows 11 PC and then click the Next button.
Step 22. Enter the password for the user name and then click the Next button.
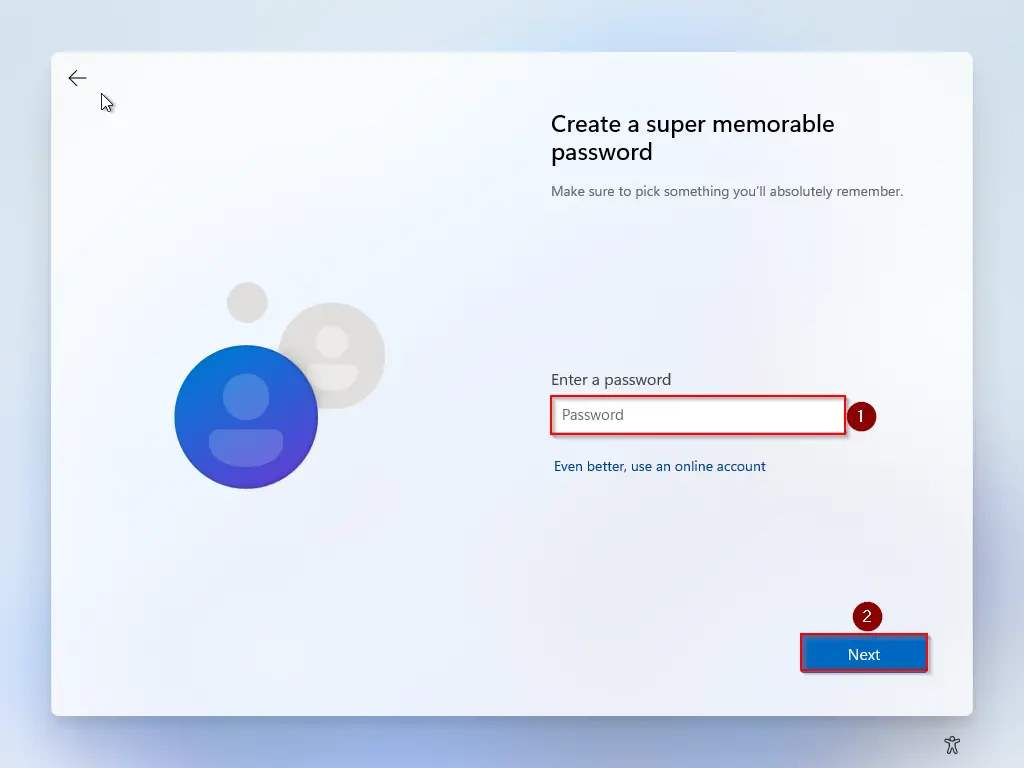
Step 23. In the next window, confirm the password and then click the Next button.

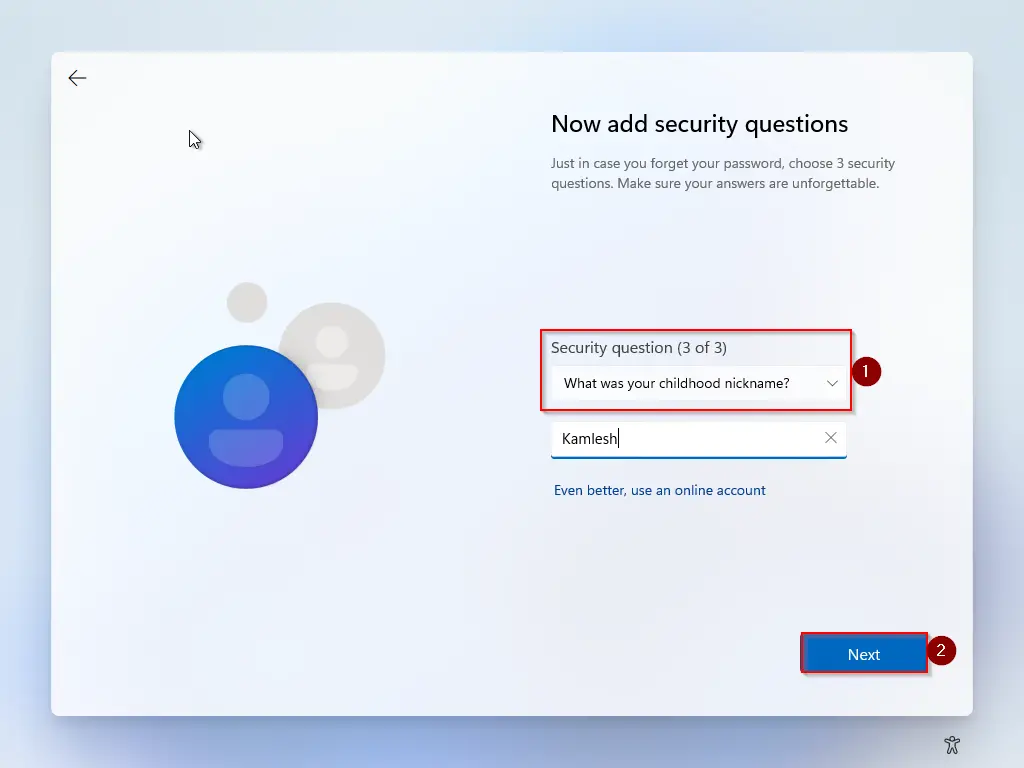
Step 24. Now, you need to select the security question and reply with the answer. You have to select three security questions one by one and need to reply to them. Once done, click the Next button.
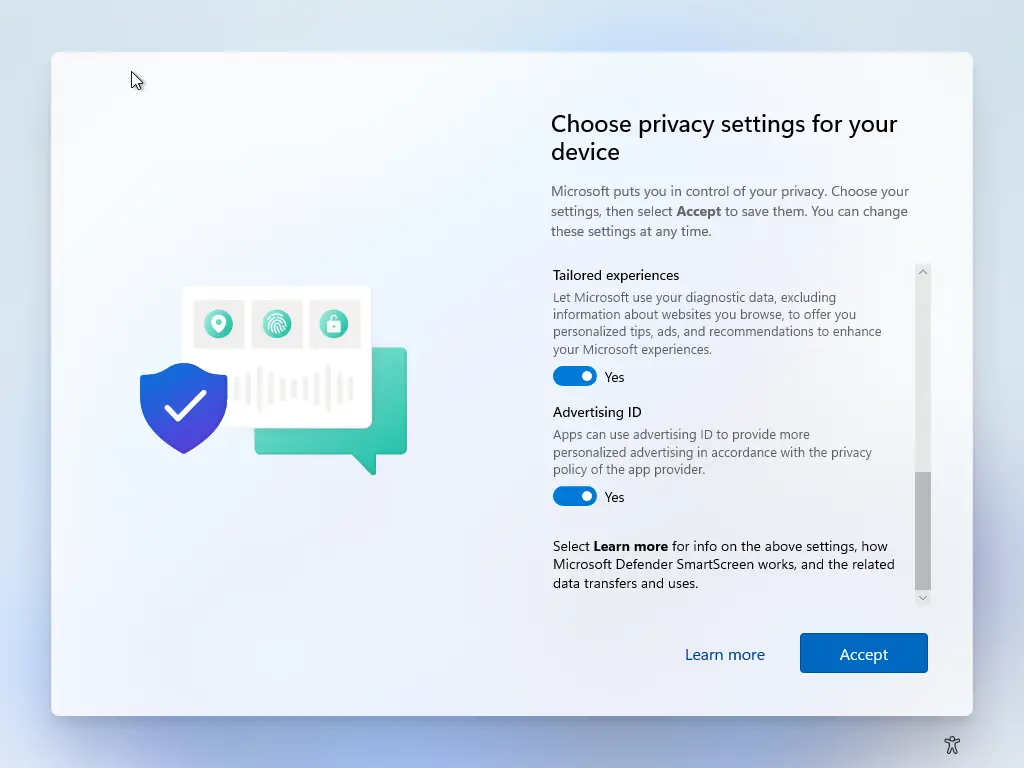
Step 25. Now you will see privacy settings options. By default, all the options will be turned On. If you wish, you can toggle Off to disable them. Finally, click the Accept button.
That’s all. Now, you have successfully installed Windows 11 without an active internet connection. The Settings app will be opened automatically after completing the Windows 11 installation.
Conclusion
In conclusion, Windows 11 has made significant changes to its initial setup process, requiring an active internet connection to complete the out-of-box experience (OOBE) for the Home and Pro editions. However, there may be instances where users want to install Windows 11 without an internet connection. The process of installing Windows 11 offline without an internet connection has been explained in this article. By following the step-by-step guide provided, users can install Windows 11 from scratch and bypass the internet connection requirement during the OOBE. While Microsoft has made it almost impossible to continue installing Windows 11 without an internet connection, the gearupwindows article’s instructions provide a workaround.