Many free and paid applications are available over the internet, letting you encrypt and safeguard the contents in a zip file. In this gearupwindows article, you will learn to protect ZIP archives with a password on Windows 11 and 10 computers. Since Windows doesn’t have a built-in option to save a zip file with a password, you can use free tools such as 7-Zip and WinRAR to add password protection. Once you password protects a zip file, you’ll need to enter the password each time you want to extract files from your password-protected ZIP.
How to Password Protect a ZIP Archive using 7-Zip?
7-Zip is a free as well as an open-source program that lets you create and extract files from various archive formats, including ZIP. Using this tool, you can add your files or folders to a ZIP archive and also set a password to secure your archive’s contents.
To create a ZIP file and add protection to that using a 7-Zip application, do these steps:-
Step 1. First, download and install the 7-Zip application on your Windows 11 or 10 machine.
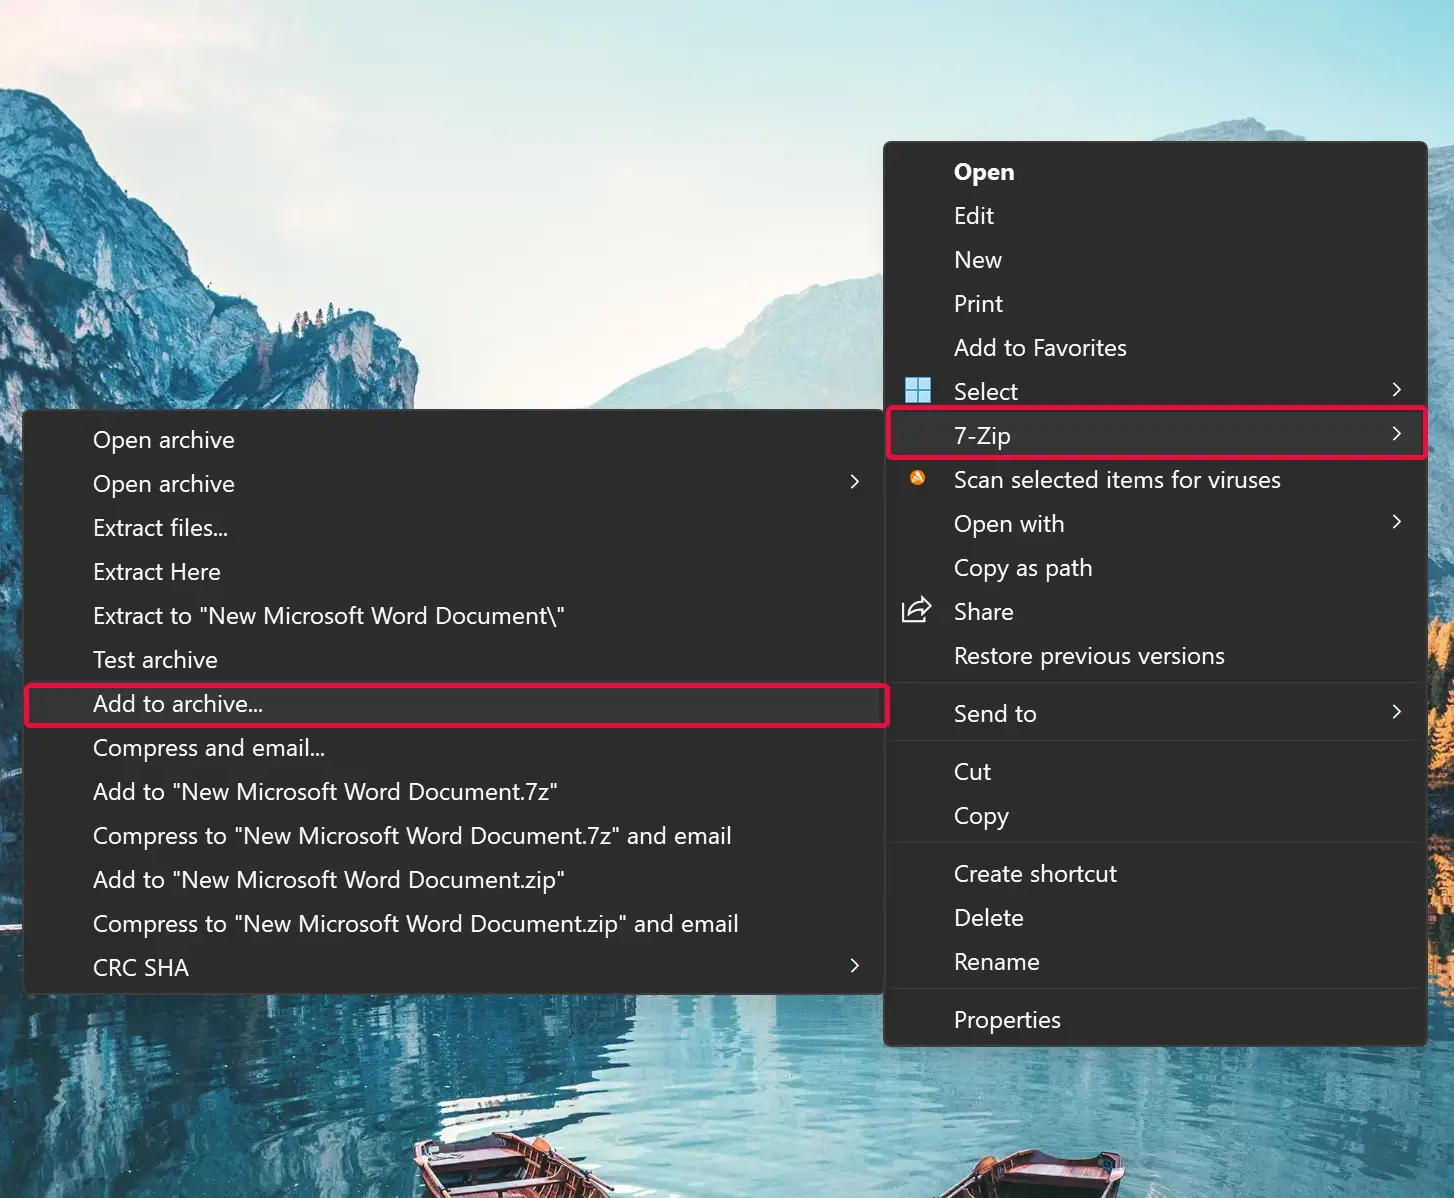
Step 2. Next, open File Explorer (Keyboard Shortcut Windows + E) and locate the file(s) or folder(s) you want to create a ZIP archive. Select file(s) or folder(s), right-click on it, and choose 7-Zip > Add to archive.
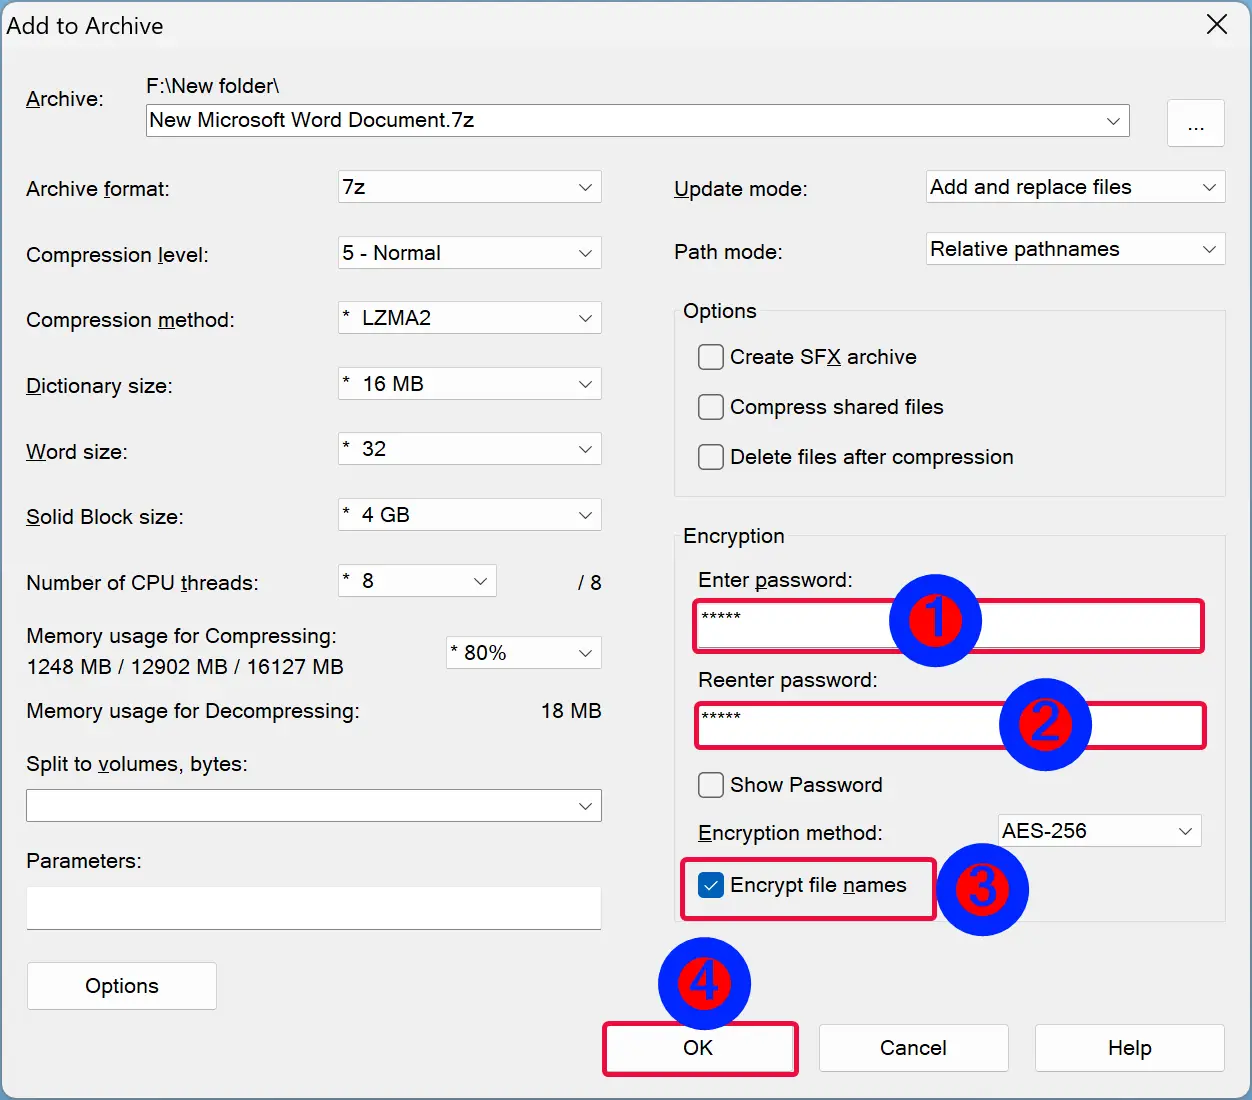
Step 3. When you’re done, an “Add to Archive” window will open. Here, in the “Encryption” section, type the password in the “Enter Password” field and type the same password in the “Reenter Password” field. Ensure to check the checkbox Encrypt file names. If you don’t want to adjust any other options, click the OK bottom to make a password-protected archive.
Once you complete the above steps, 7-Zip will create a password-protected ZIP archive in the same folder you selected file(s) or folder(s).
When you open, or someone tries to access that ZIP archive, you need to enter the password.
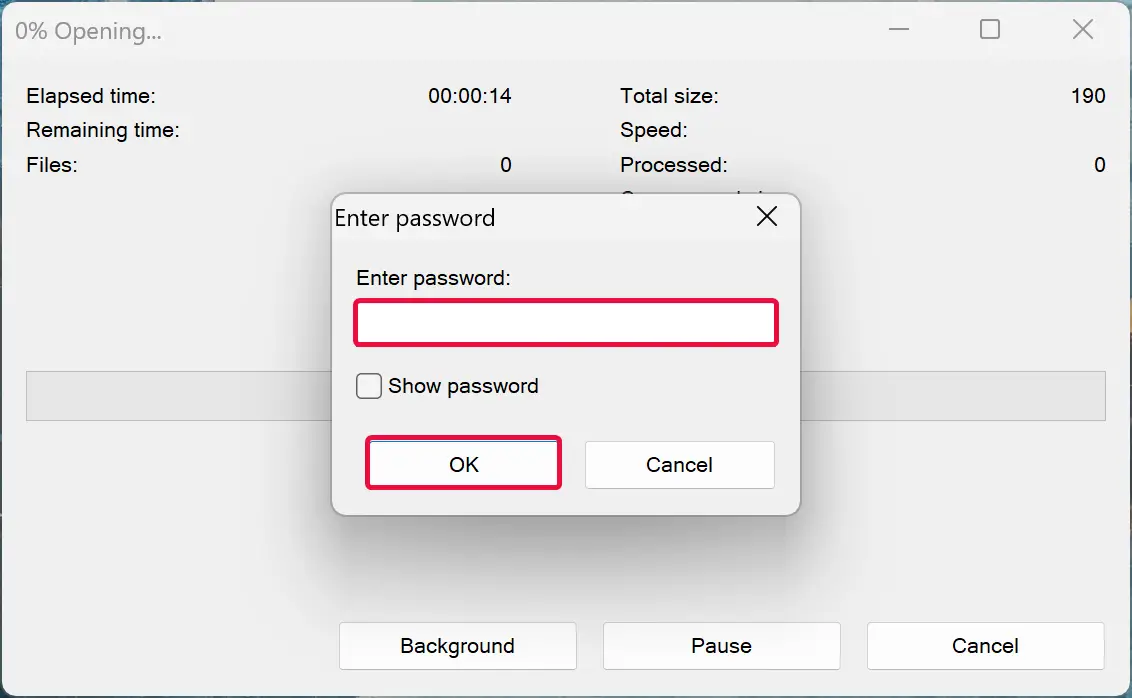
After entering the correct password, click the OK button to access the files within the Zip archive.
Download 7-Zip
You can download 7-Zip from its official website.
How to Encrypt a ZIP Archive through WinRAR?
WinRAR is one of the most popular applications that allows you to compress file(s) and folder(s). It supports several file formats, including Zip. Apart from that, using WinRAR, you can also secure your archives with a password.
To make an archive and protect that using WinRAR, do these steps:-
Step 1. First, download and install the free version of WinRAR on your Windows PC.
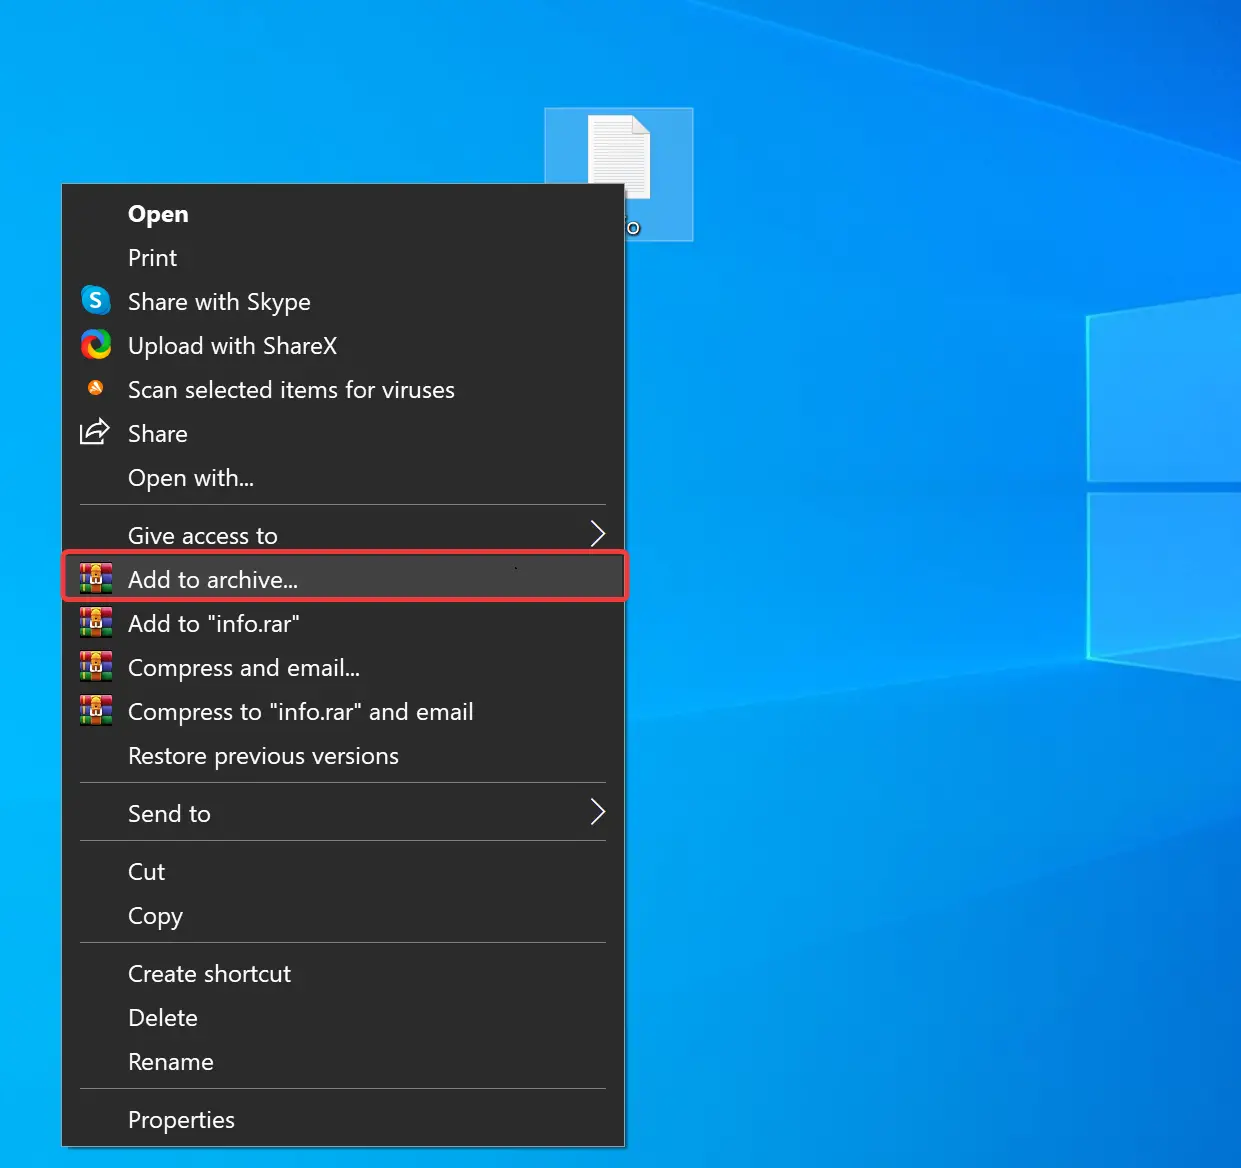
Step 2. Next, select the file(s) or folder(s), right-click on it, and choose the “Add to Archive” option.
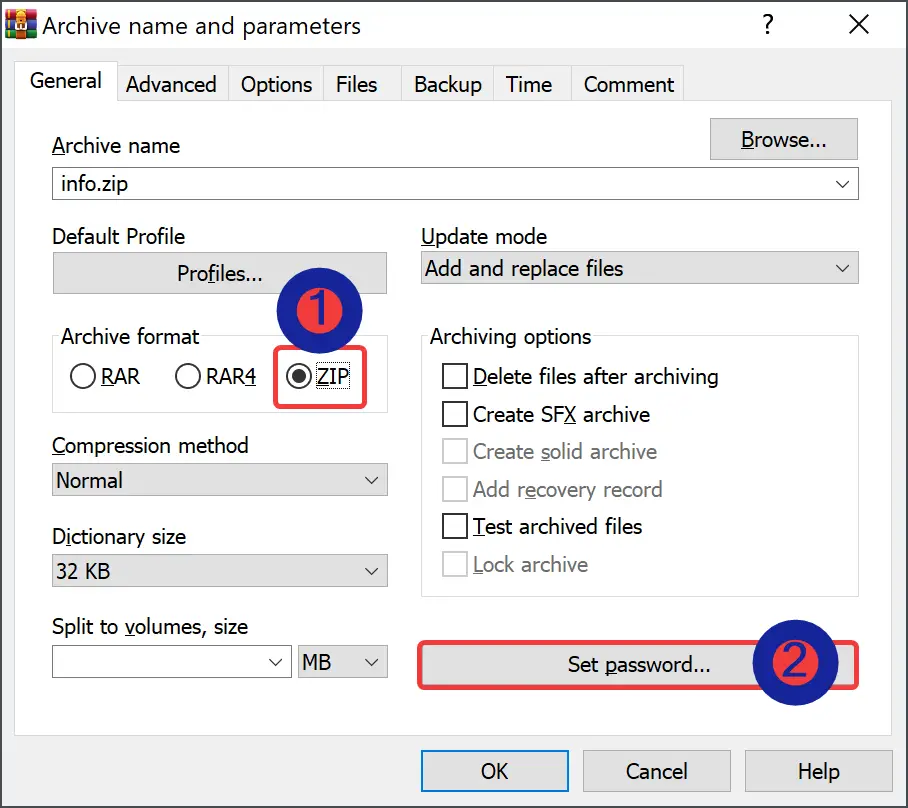
Step 3. When you’re done, the “Archive name and parameters” window will open. In the “Archive Format” section, select the ZIP option to make a ZIP archive. Next, click the Set Password button.
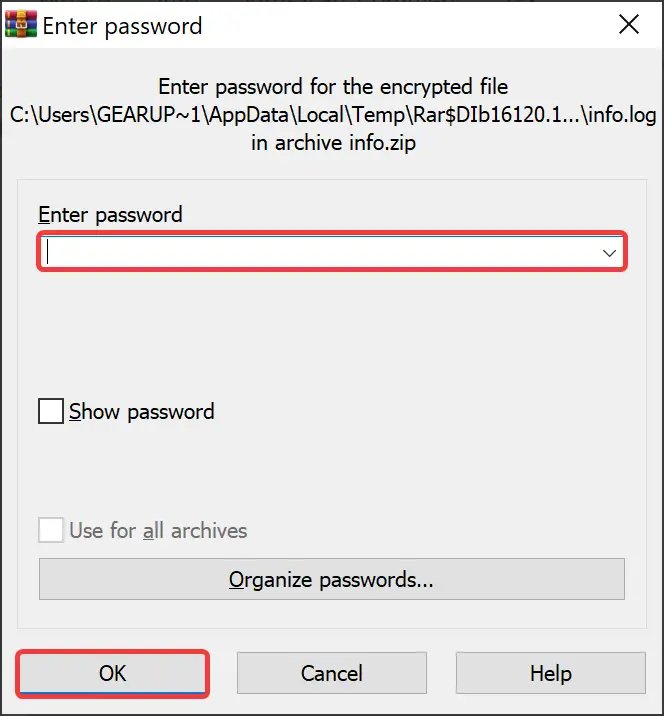
Step 4. On the “Enter Password” field, type your password and enter the same password in the “Reenter Password for Verification” field.

Step 5. Click OK.
Step 6. Click OK.
Once you complete the above steps, WinRAR will make a new password-protect ZIP archive. When you try to open this zip file, you need to enter the password that you have set in the above steps.
After entering the password, click the OK button to decrypt the zip archive and access the file or folder within that file.
Conclusion
In conclusion, password-protecting your ZIP archives is a crucial step to safeguard your files and folders from unauthorized access. Although Windows doesn’t have an in-built option to password-protect a ZIP file, you can use third-party applications such as 7-Zip and WinRAR to add password protection. In this article, we have discussed step-by-step instructions to password-protect your ZIP archives using both 7-Zip and WinRAR applications. It is essential to remember the password that you set, as you need to enter it every time you try to access your password-protected ZIP file. Download the free applications and keep your files safe and secure.