Microsoft Excel is a powerful tool for managing and analyzing data, but sometimes you may encounter issues or experience unexpected behavior due to customized settings. In such cases, resetting Excel settings to their default values can help resolve problems and restore the program to its original state. If you’re facing issues and want to learn how to reset Excel settings on Windows, this article will guide you through the process step by step.
Please note that resetting Excel settings will revert all customization and preferences you’ve made within the application. Make sure to back up any important customizations or files before proceeding.
How to Reset Excel Settings to Default on Windows?
Follow these steps to reset Microsoft Excel settings to default on Windows 11 or 10:-
Step 1. Before you begin resetting Excel settings, ensure that Excel and any associated Office applications are closed. This ensures that no Excel processes are running in the background, which is important for a successful reset.
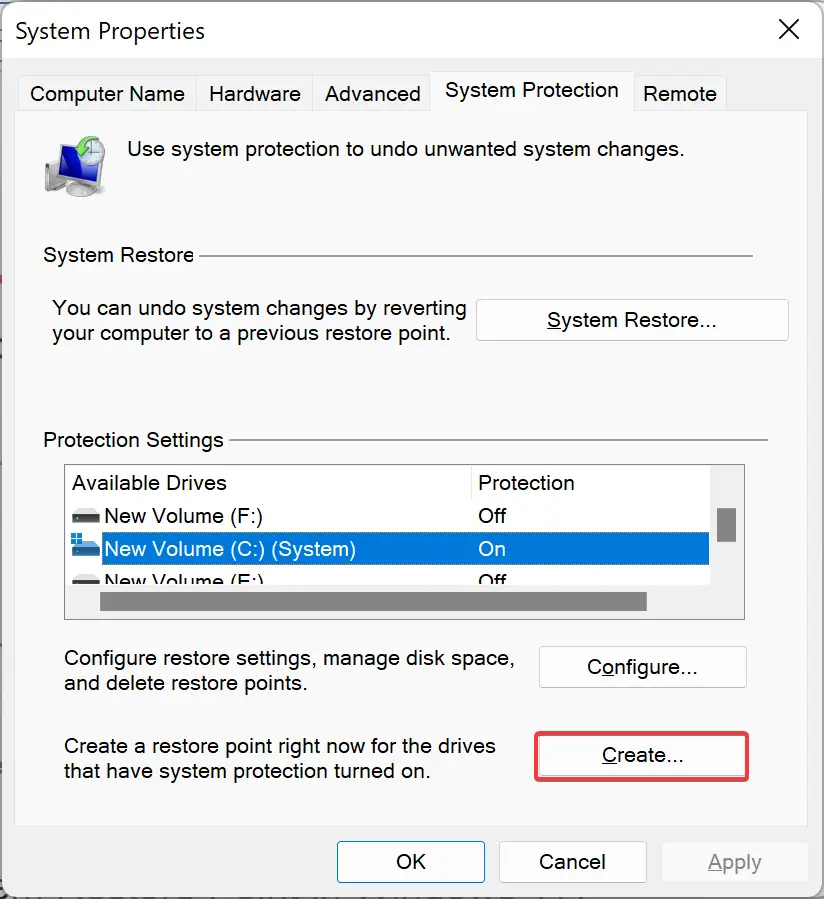
Step 2. Creating a system restore point is a crucial precautionary measure before making any changes to your system settings. It allows you to revert back to your previous system state if needed.
To create a restore point, press the Windows key and search for “Create a restore point.” Then, click on the “Create a restore point” option from the search results. In the System Properties window, click on the “Create” button and follow the prompts to create a restore point for your system.
Step 3. Once you’ve completed the above steps, you are to proceed with resetting Excel settings. For that, open the Registry Editor.
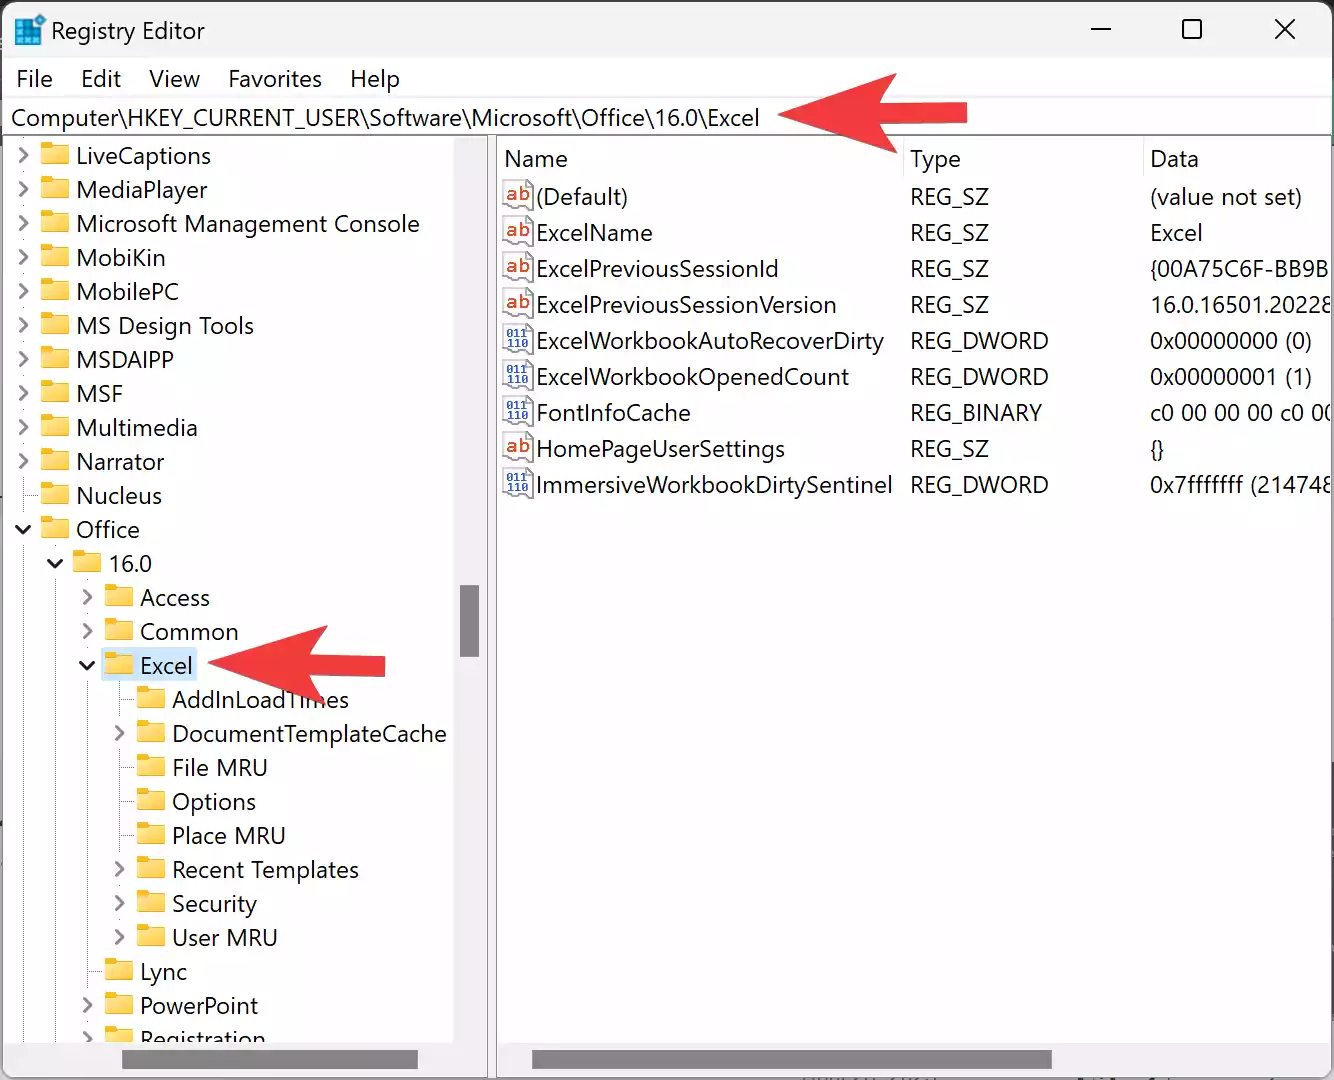
Step 4. In the Registry Editor, navigate to the following key, depending on your installed version of Excel. If you’re using Office 365, Office 2016, or 2019, the full path is as follows:-
HKEY_CURRENT_USER\SOFTWARE\Microsoft\Office\16.0\Excel
Step 5. Within the Excel key, locate the “Options” folder or key. Right-click on it and select “Delete” from the context menu. Confirm the deletion by clicking “Yes” when prompted.
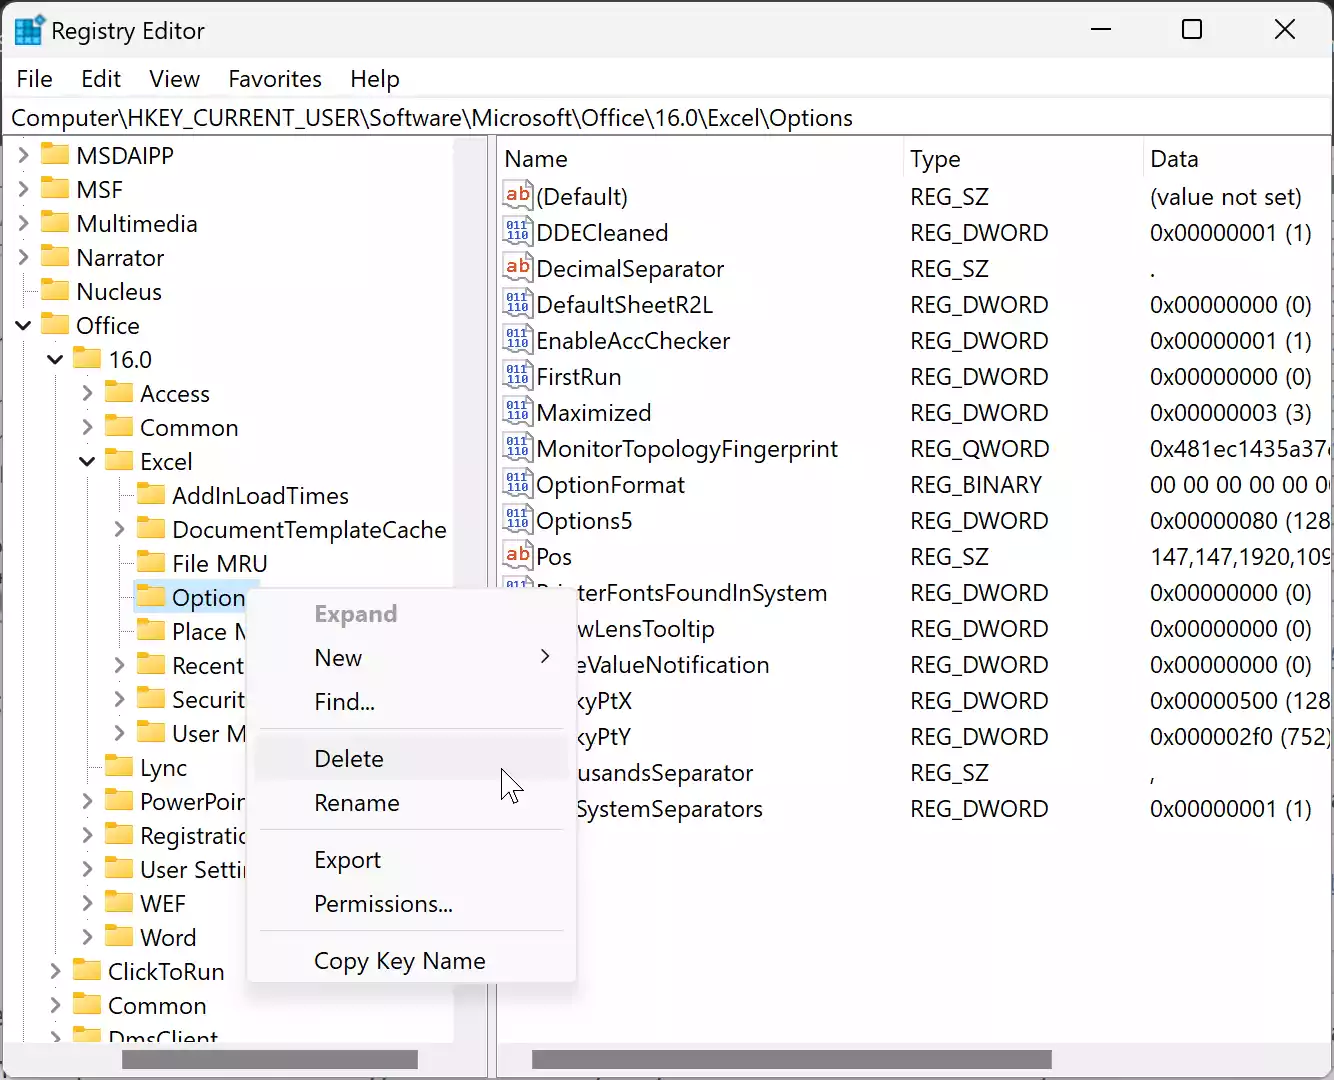
Step 6. After deleting the “Options” folder or key, close the Registry Editor.
Step 7. Reboot your PC to apply the changes.
Finally, open Microsoft Excel. You will be greeted with a fresh instance of Excel with the default settings restored.
Congratulations! You have successfully reset Excel settings to their default values on Windows. Excel should now function as it did when it was first installed.
It’s important to note that resetting Excel settings will remove any customizations or preferences you’ve made within the application. This includes changes to options, toolbar settings, macros, and add-ins. Before resetting, make a note of any important customizations so you can reapply them later.
If you encounter any difficulties or have further questions, it’s always a good idea to consult official Microsoft documentation or contact Microsoft support for specific guidance tailored to your Excel version and Windows configuration.
Conclusion
In conclusion, resetting Excel settings to default on Windows can be a valuable troubleshooting step when encountering issues or unexpected behavior. By following the steps outlined in this guide, you can easily reset Excel settings and restore the application to its original state, ensuring a smoother user experience.
