Setting an alarm on your Windows 11 PC can be a useful way to remind yourself of important tasks, appointments, or events. The Clock app in Windows 11 offers a built-in alarm feature that can be easily configured to meet your specific needs. In this article, we will provide you with a step-by-step guide on how to set an alarm on Windows 11.
Before setting up an alarm, there are a few things you should check to ensure that it works correctly:-
- Check your Time and Date Settings
- Disable Sleep Mode on Windows
- Update the Clock App
Check your Time and Date Settings
Before using the Clock app to set up an alarm, it is essential to ensure that your Windows 11 PC’s date and time or time zone are set correctly. If the date and time are incorrect, your alarm will not work as expected.
To check and adjust your date and time settings, follow these steps:-
Step 1. Click on the Start button and search for “date and time settings.”
Step 2. Select “Date and time settings” from the results.
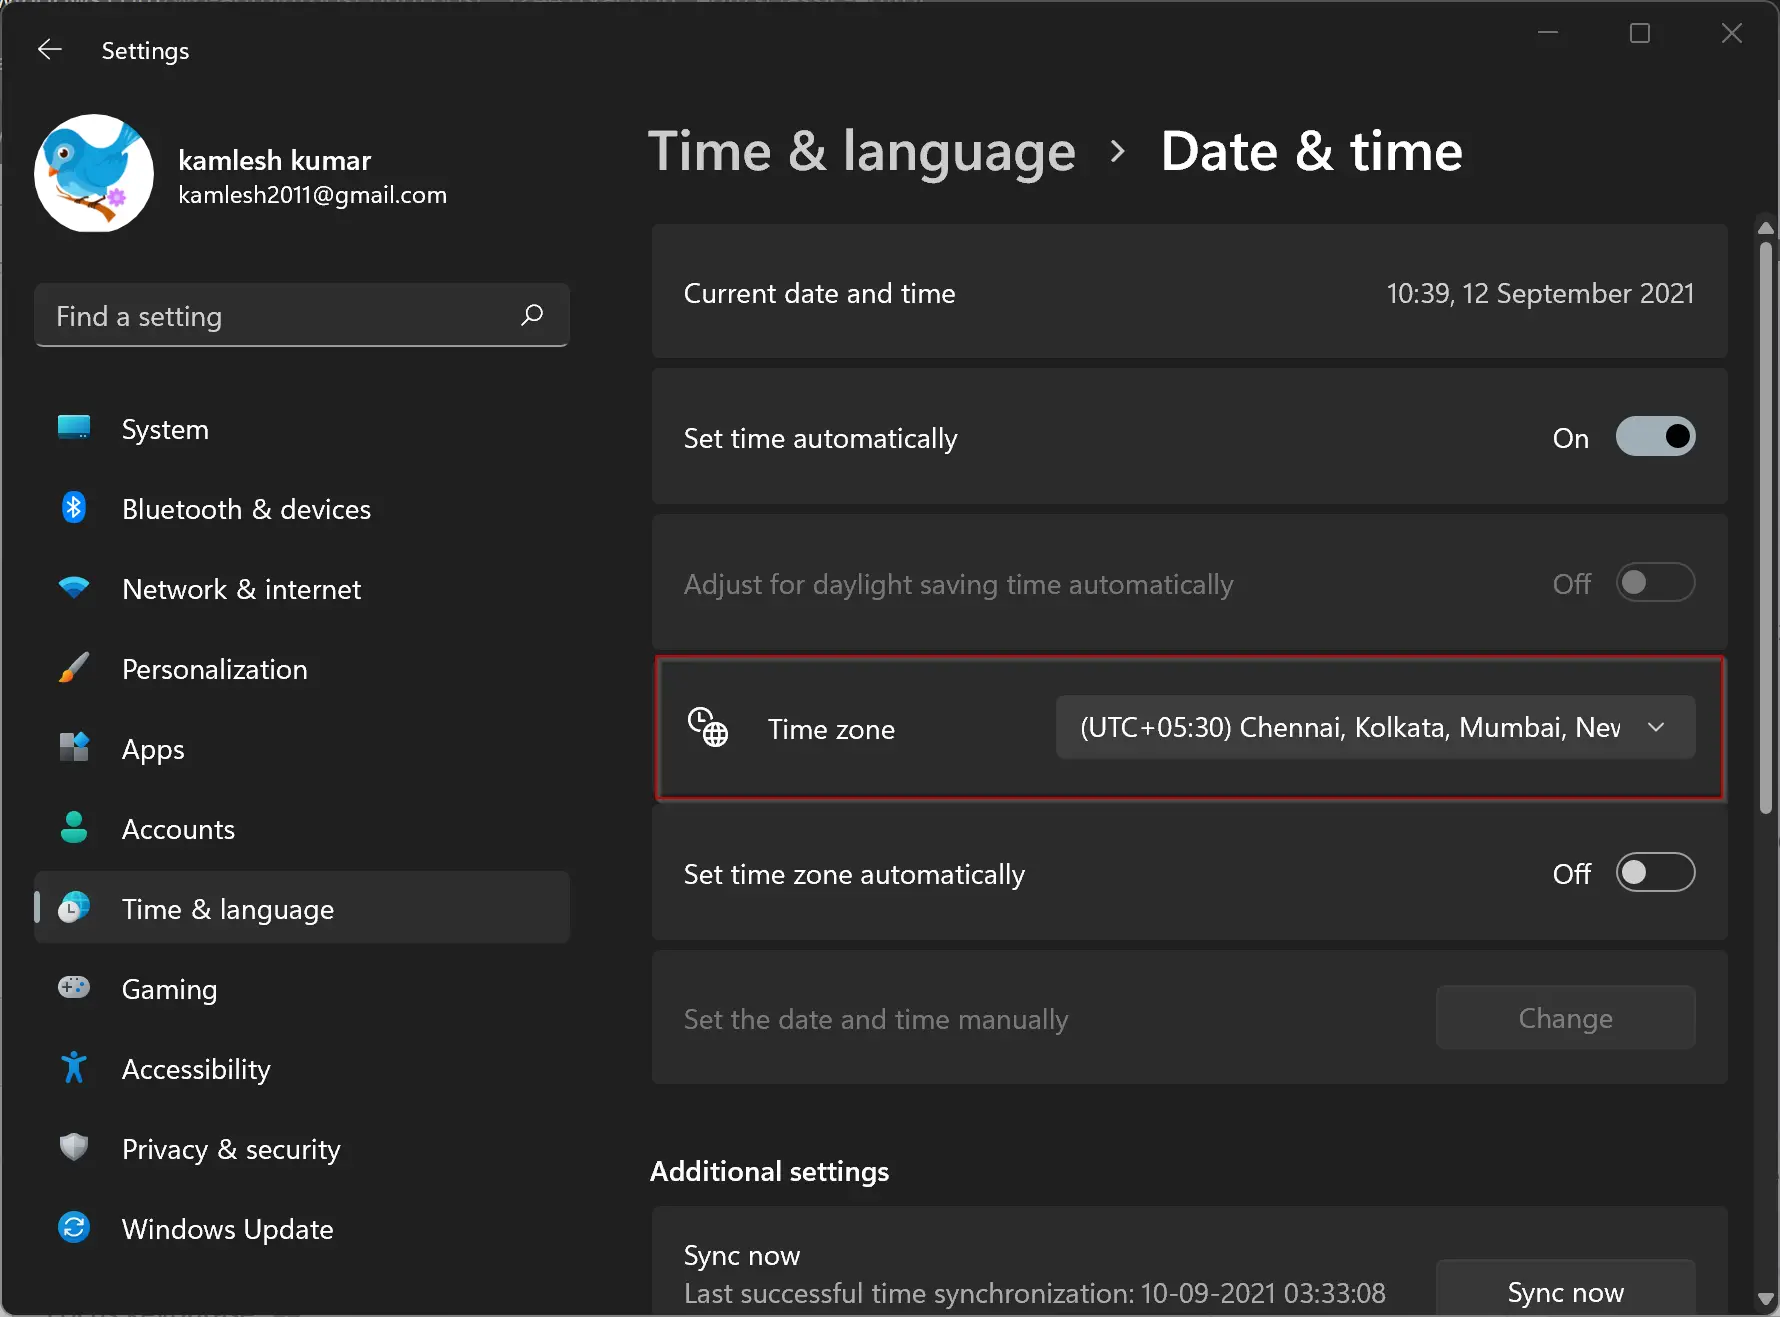
Step 3. In the “Date & time” settings page, turn off “Set time zone automatically.”
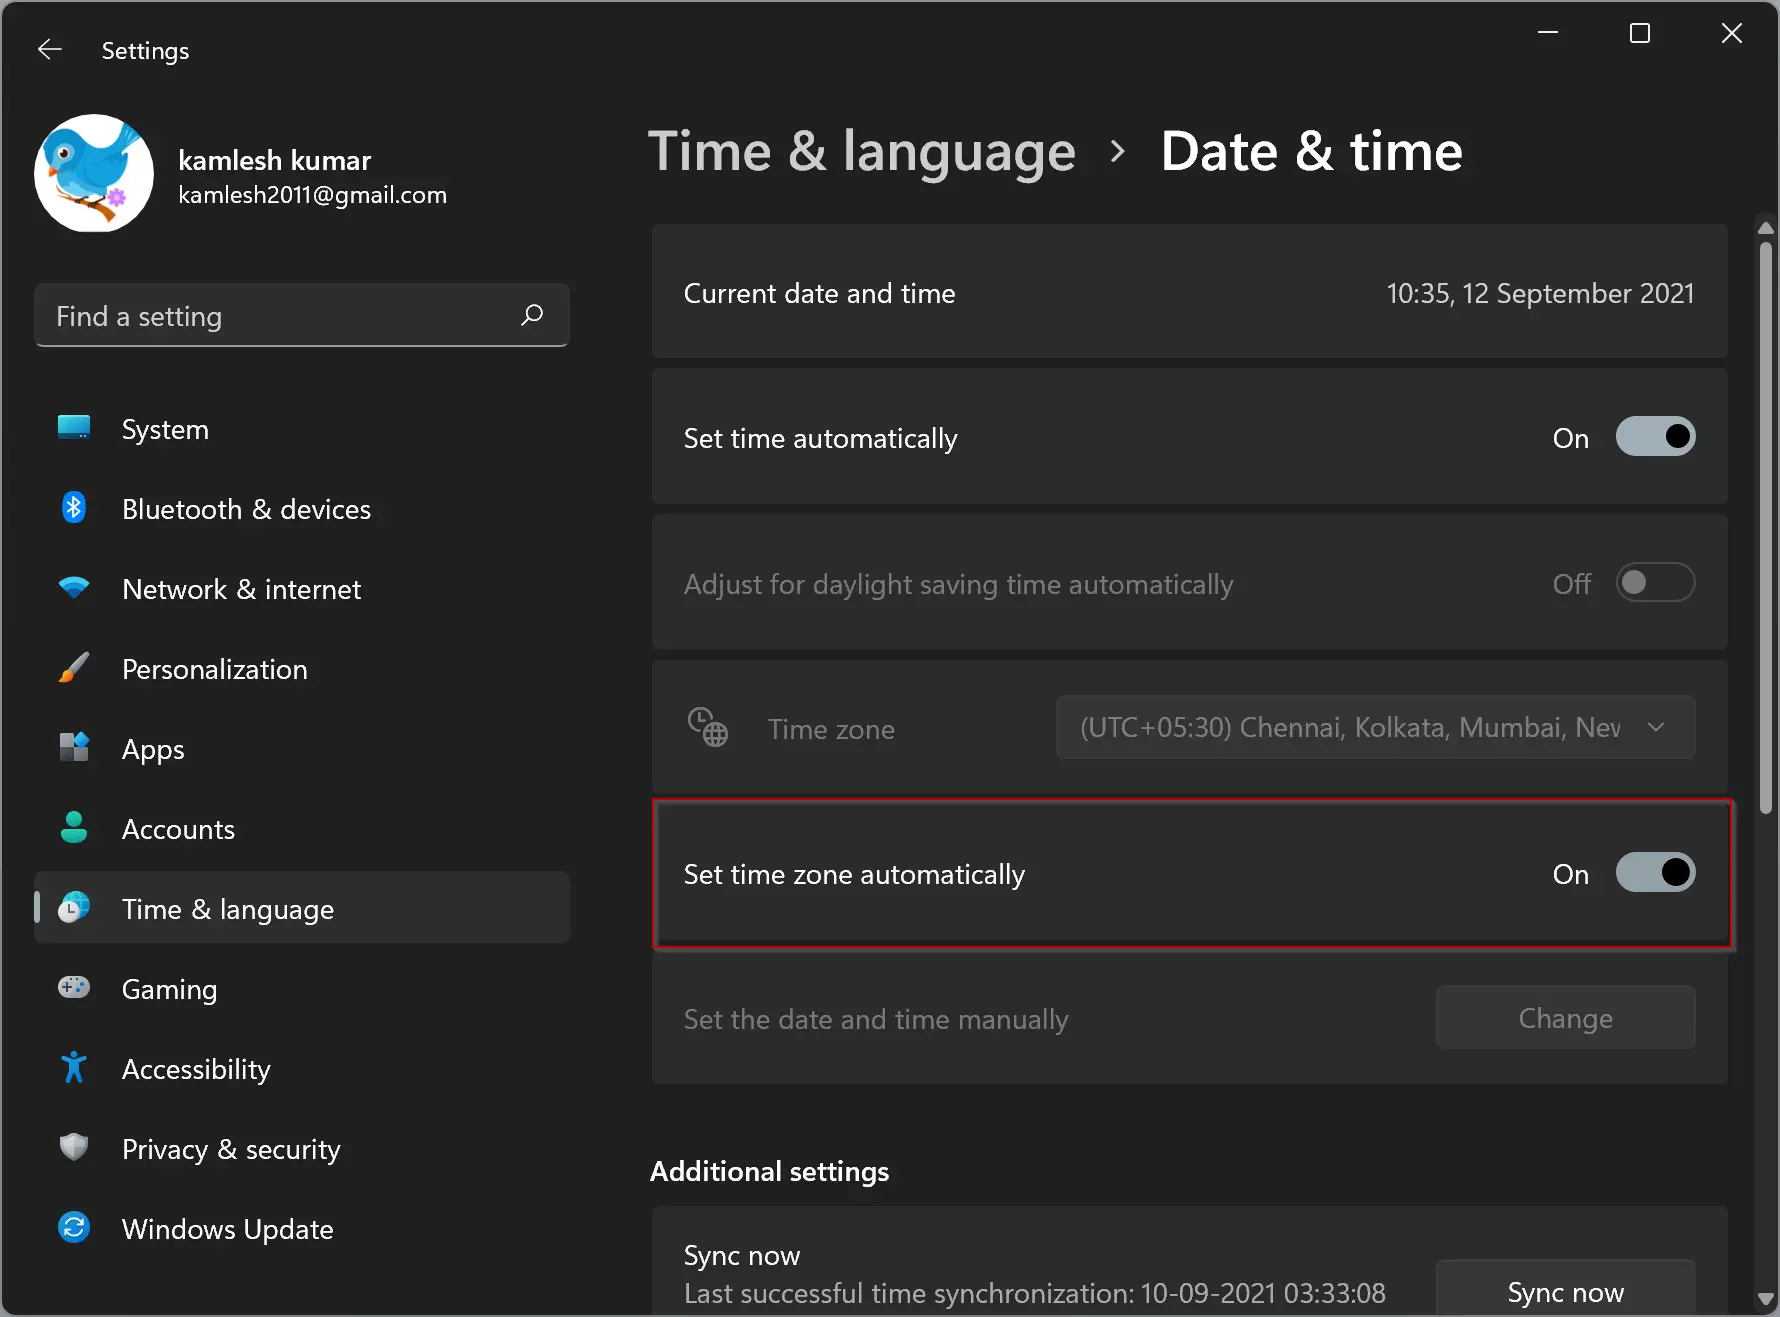
Step 4. Select your correct time zone from the drop-down menu.
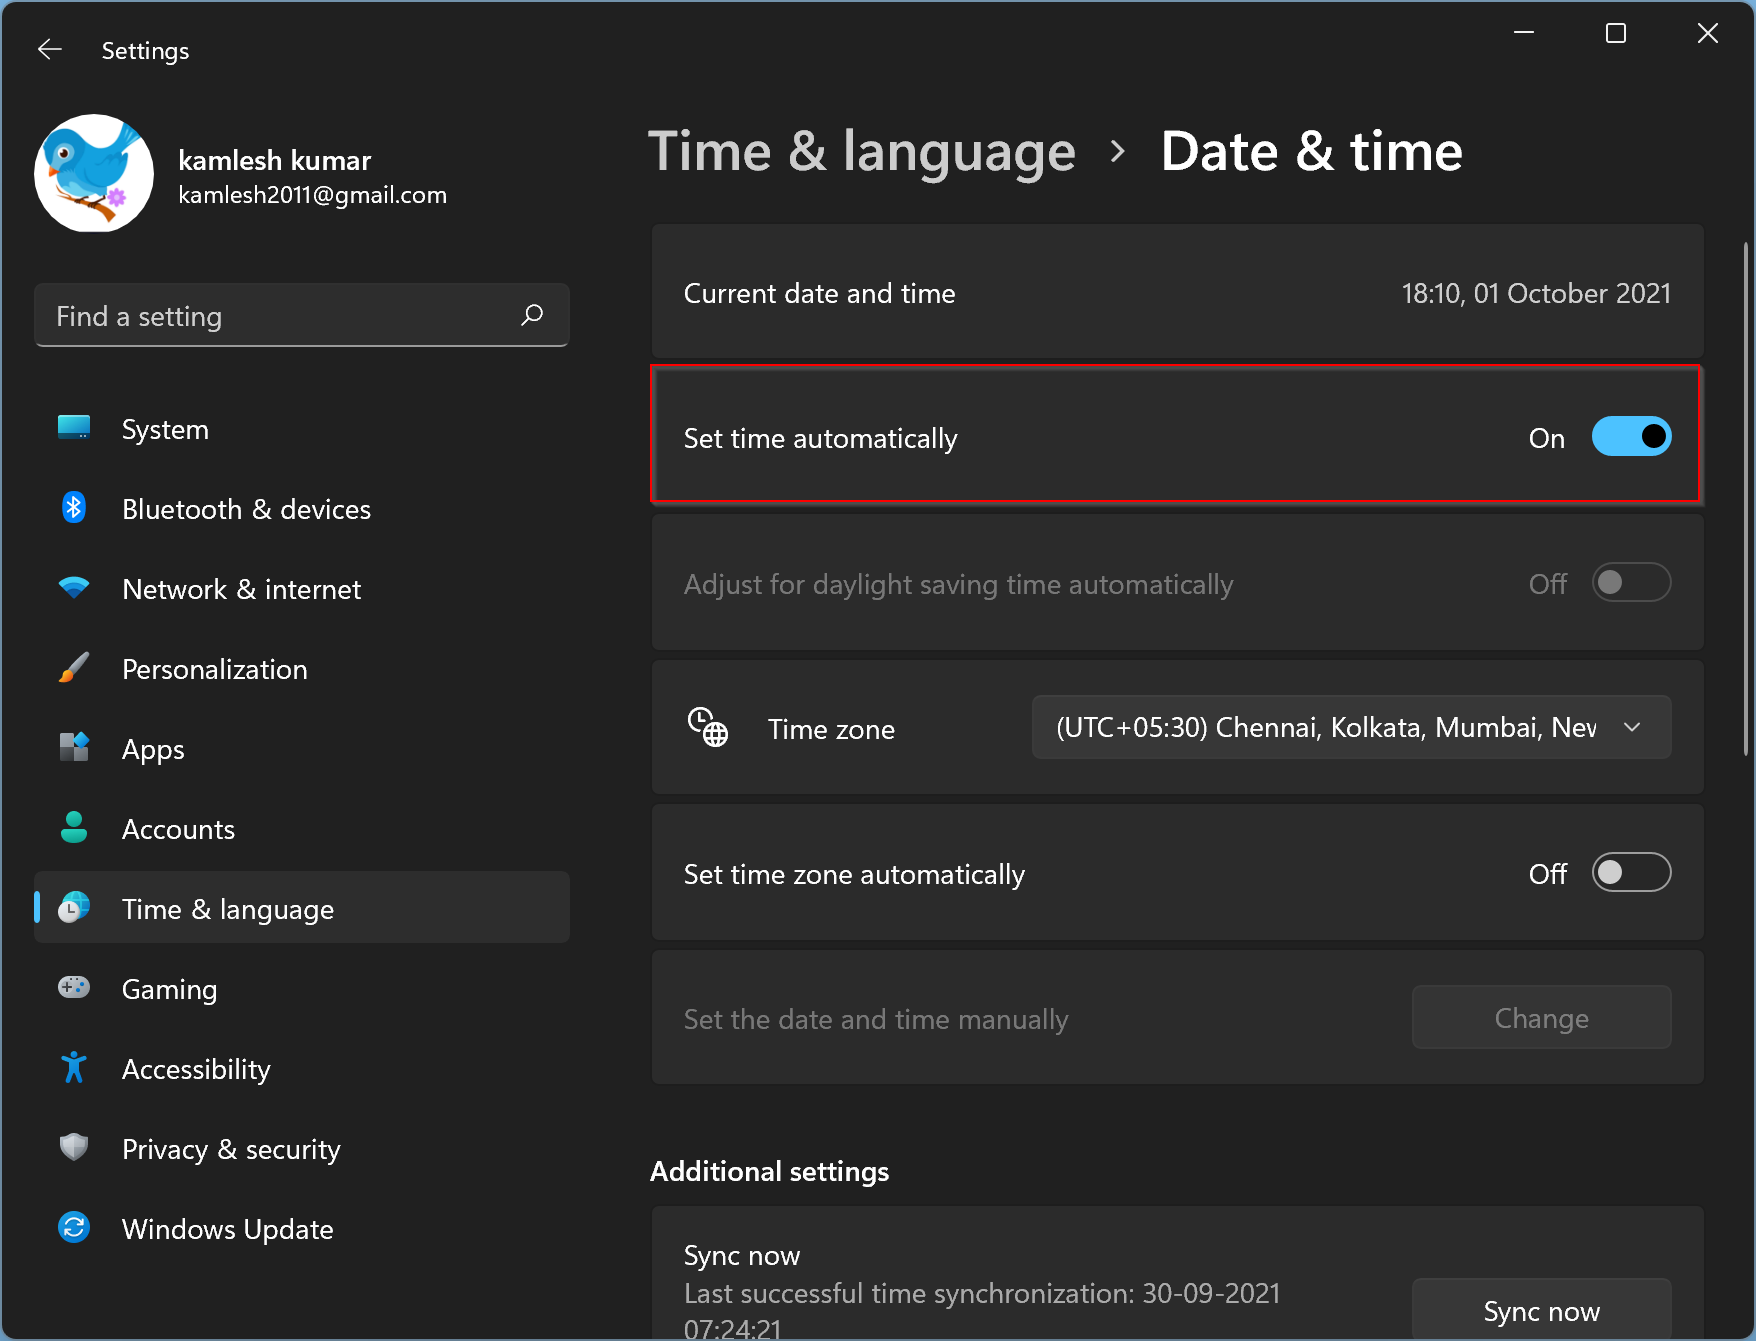
Step 5. Scroll up and turn off the toggle switch “Set time automatically.”
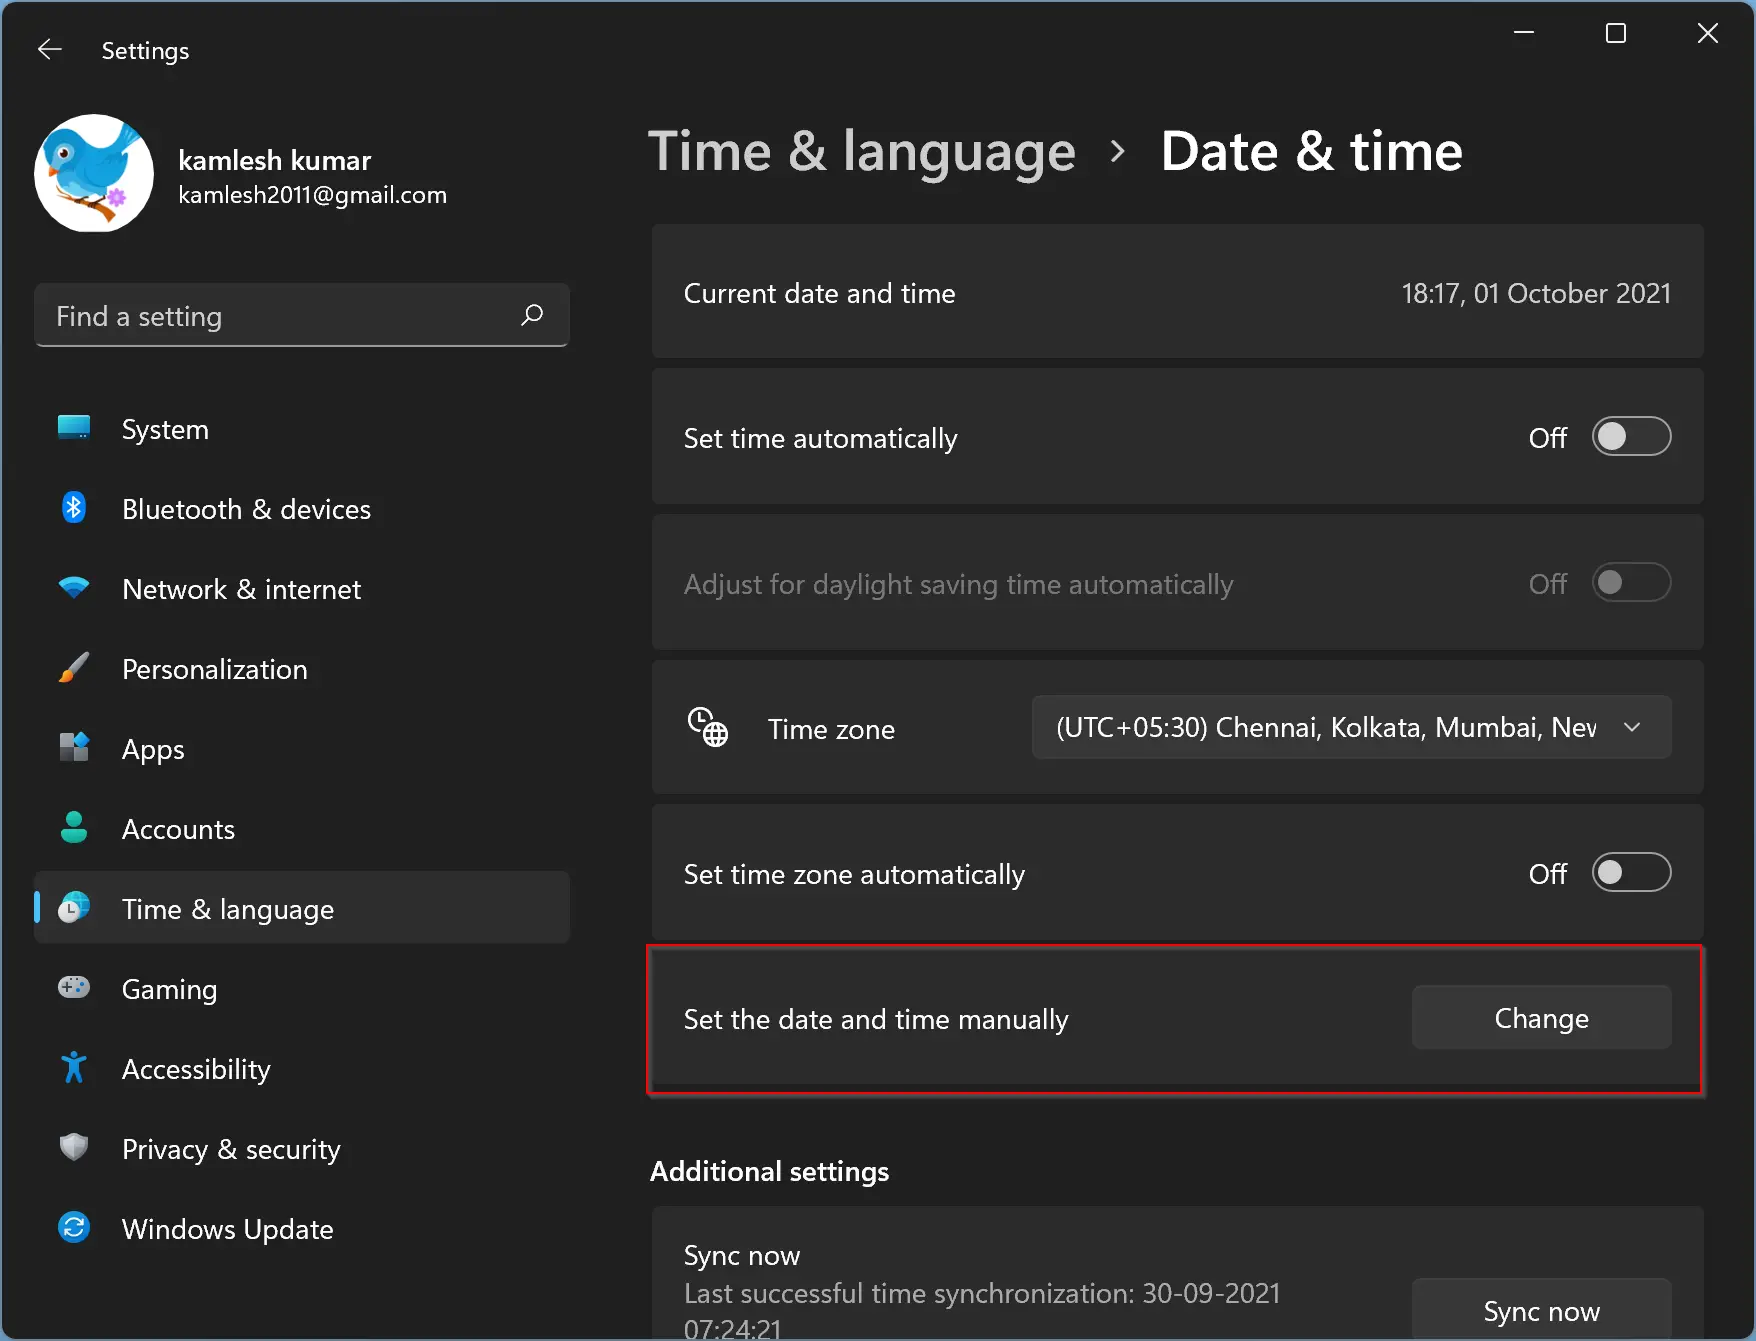
Step 6. Click on “Change” next to “Set the date and time manually” and select the correct date and time.
Disable Sleep Mode on Windows 11
If your Windows 11 PC is set to sleep mode, the Clock app will not ring the alarm when the PC goes to sleep. So, before setting up an alarm, you should disable sleep mode.
To disable sleep mode, follow these steps:-
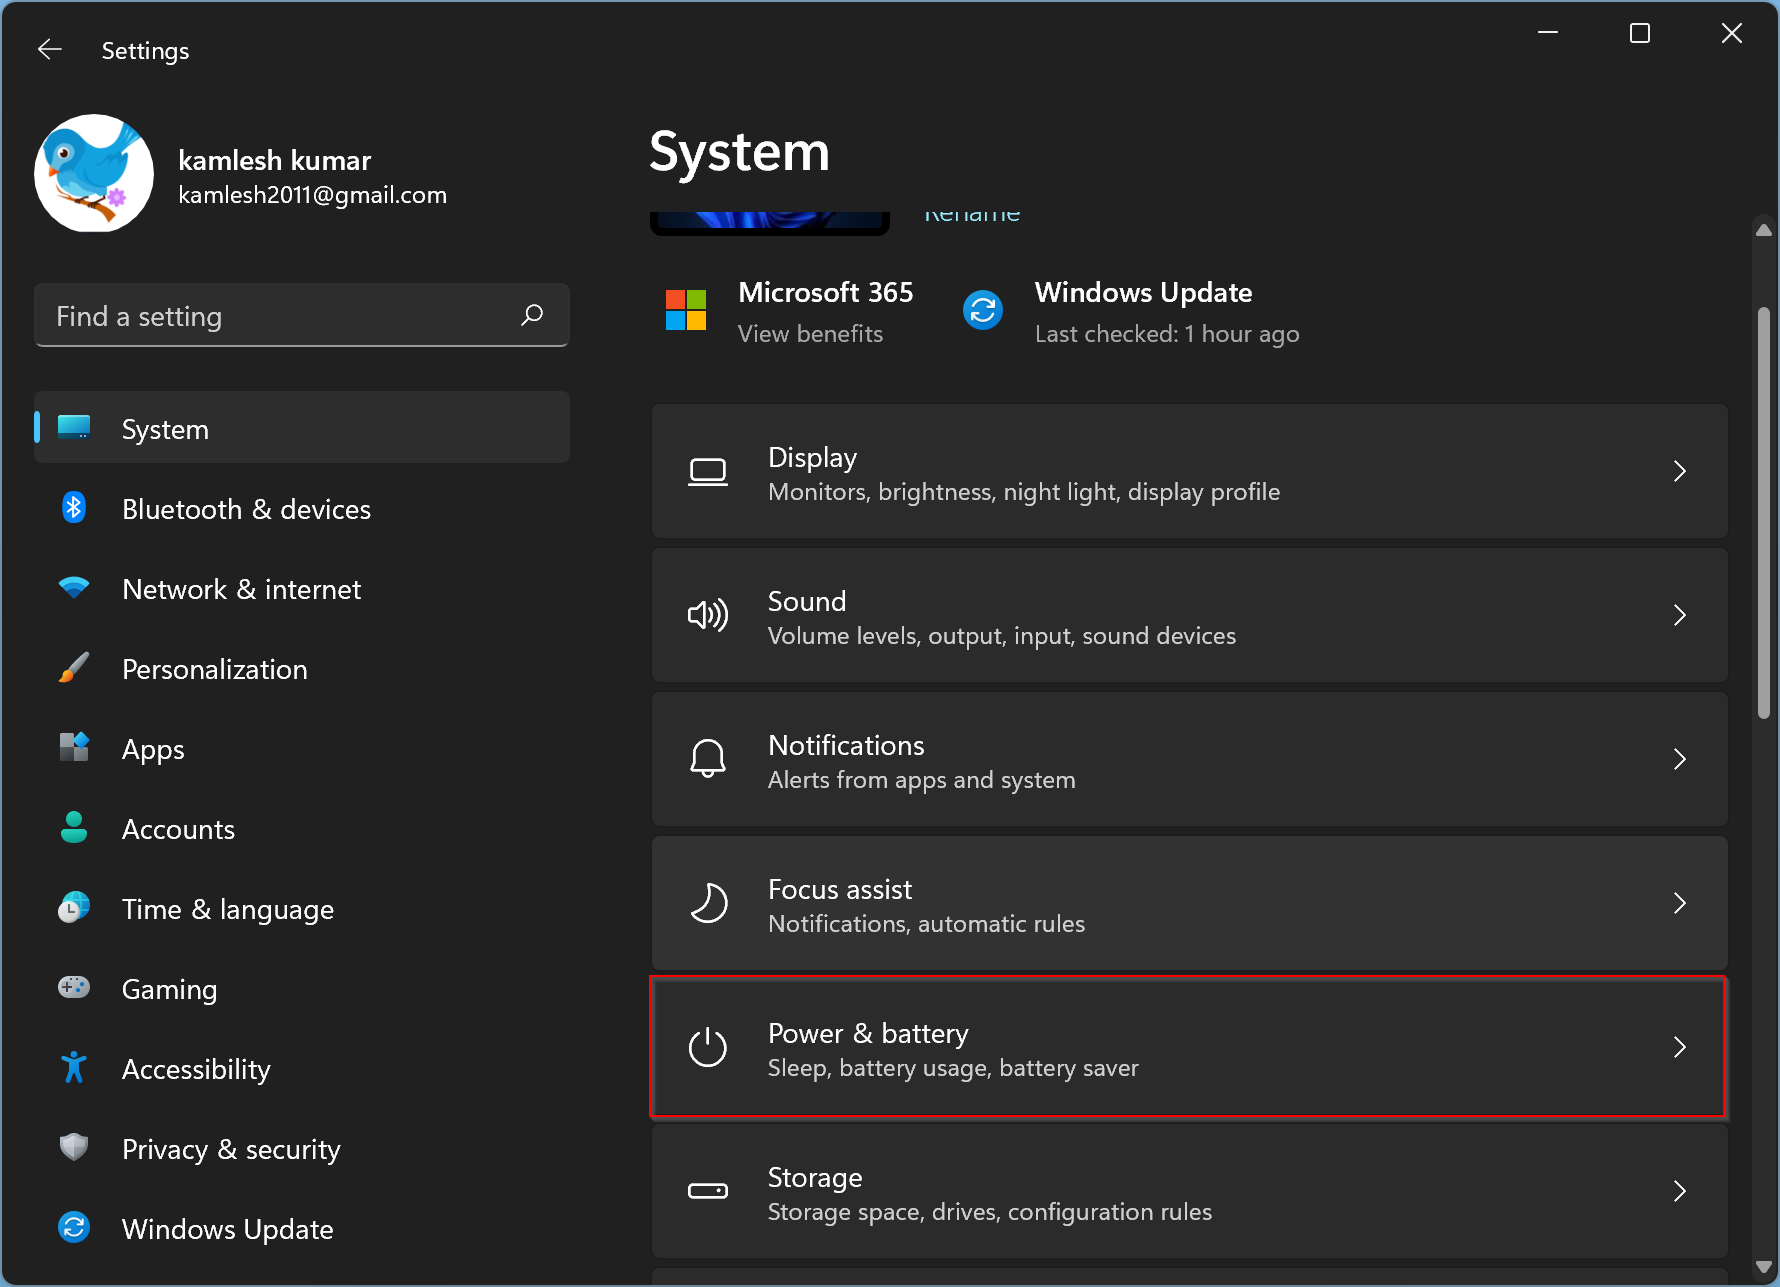
Step 1. Press the Windows key + I to open the Settings app.
Step 2. Click on “System” on the left panel.

Step 3. Click on “Power & battery” on the right panel.
Step 4. Under “Power,” expand the “Screen and sleep” section.
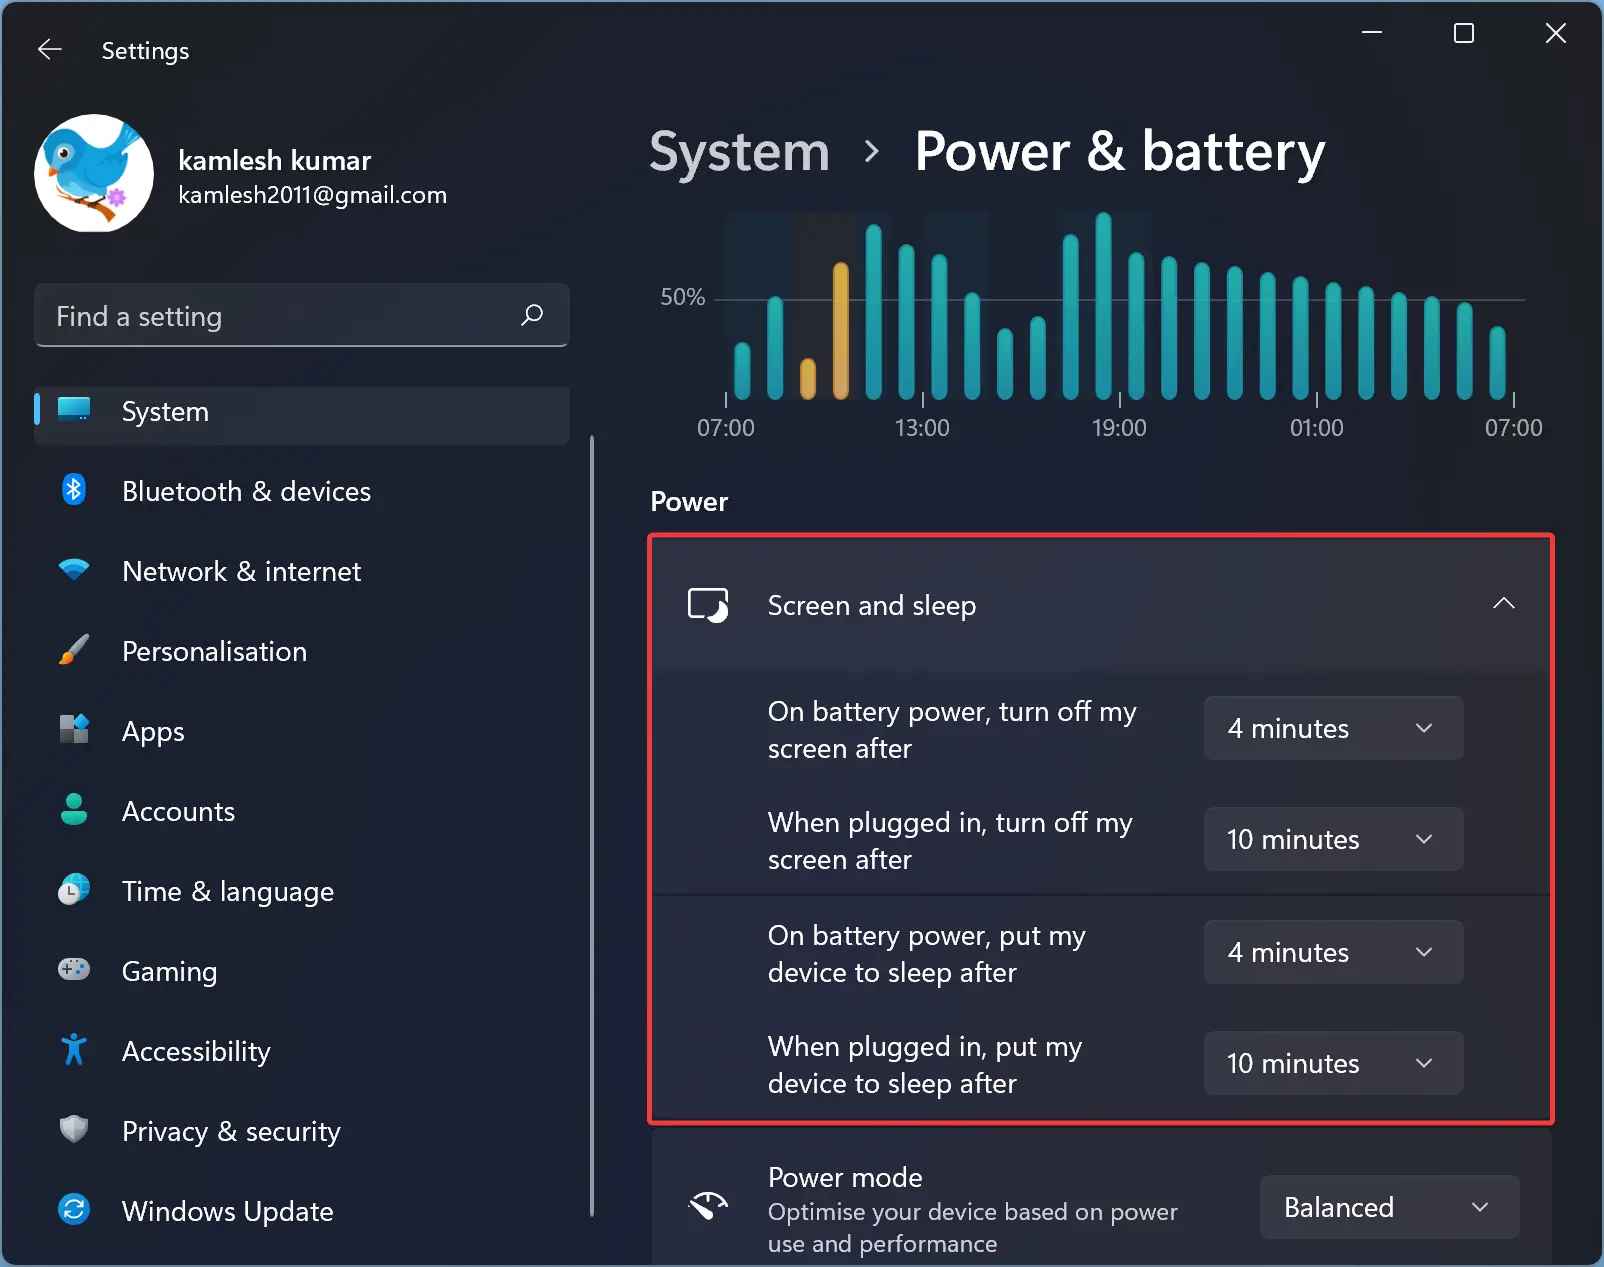
Step 5. Set all the options to “Never.”
Update the Clock App
It is essential to keep the app up-to-date to make sure you can use all the new features of the Clock app. Make sure you have the latest version of the Clock app installed.
How to Set an Alarm on Windows 11?
Now that you have checked the essential requirements, let’s get into the steps of how to set the alarm on Windows 11:-
Step 1. Open the Clock App.
To open the Clock app, click on the Start button, and search for “Clock” in the search bar. Click on the Clock app to open it.
Step 2. Once the Clock app is open, click on the “Alarm” option on the left side of the screen.
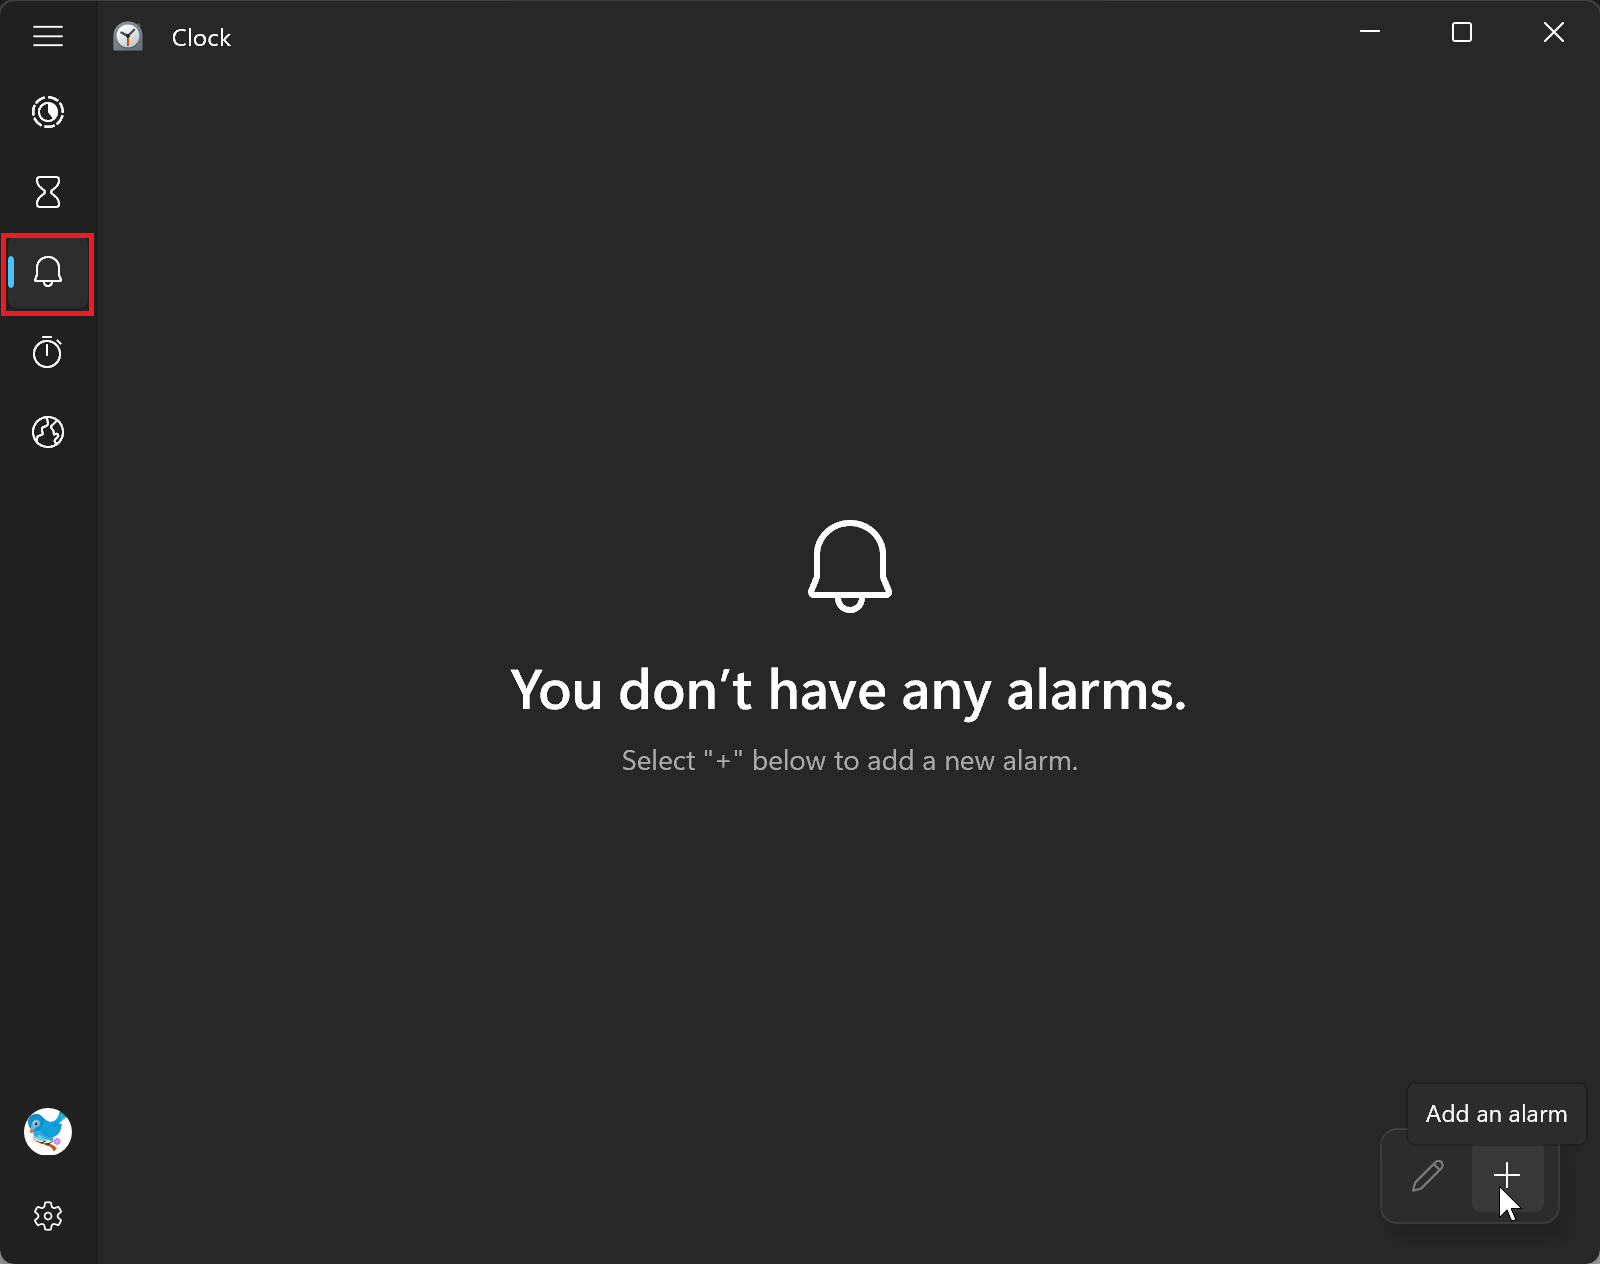
Step 3. Click on the + icon (Add an alarm) to set a new alarm.
Step 4. In the Add new alarm window, you can set the alarm time by clicking the up and down arrows or manually typing in the time. You can also select AM or PM.

Step 5. In the Alarm name field, enter a suitable name for the alarm. For example, “Meeting.”
Step 6. You can select the day(s) on which you want the alarm to repeat. If you want it to repeat every day, click on the “Repeat alarm” checkbox.
Step 7. Select an alarm sound from the drop-down menu in the Alarm “Chimes” field.
Step 8. Select the snooze time from the drop-down menu in the “Snooze Time” field if you want to enable the snooze feature.
Step 9. Once everything is set, click the “Save” button to apply the changes and turn the alarm on.
Note: You need to repeat the above steps if you want to add more alarms on your Windows 11 machine.
How to Enable or Disable Alarms in Windows 11?
If you have already set the alarm, follow these steps to enable or disable it:-
Step 1. Open the Clock App.
To open the Clock app, click on the Start button, and search for “Clock” in the search bar. Click on the Clock app to open it.
Step 2. Once the Clock app is open, click on the “Alarm” option on the left side of the screen.
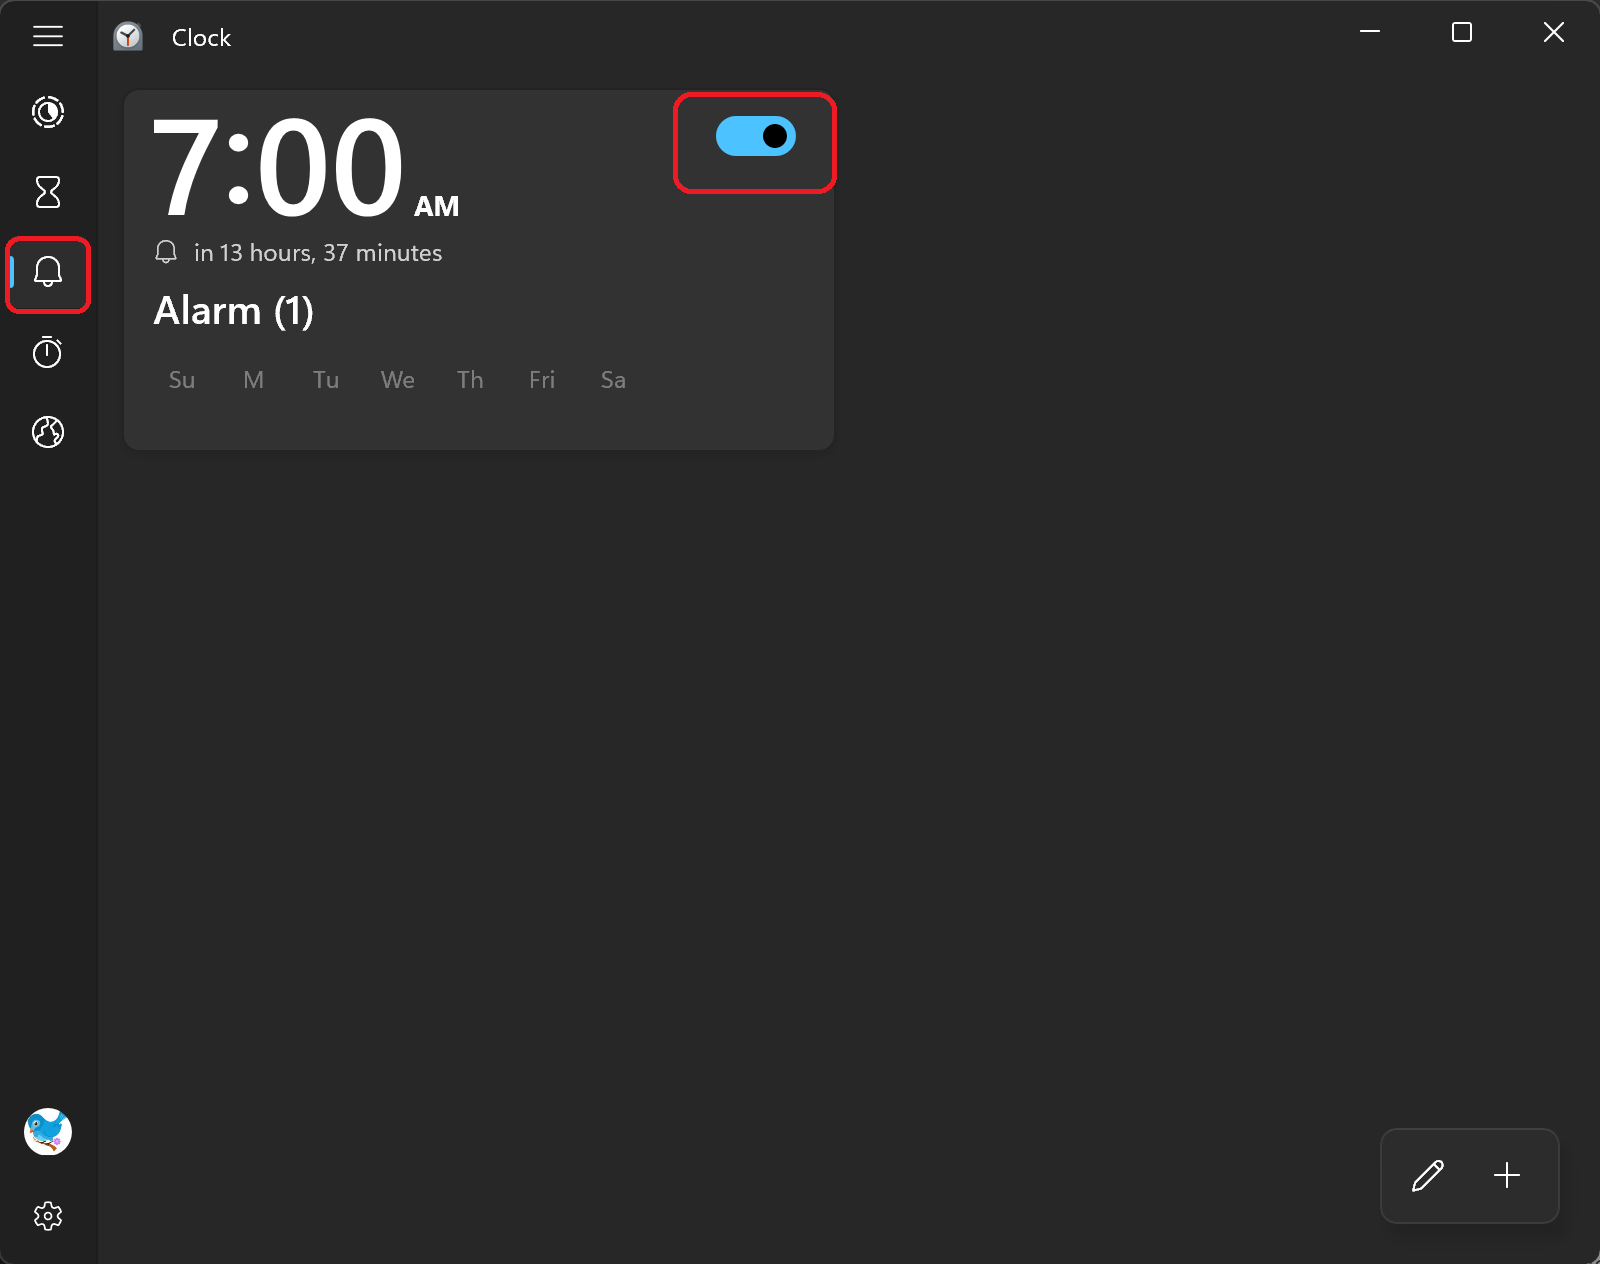
Step 3. Turn the On or Off toggle switch beside an alarm to enable or disable it.
How to Edit an Alarm in Windows 11?
Follow these steps to edit an alarm in Windows 11:-
Step 1. Open the Clock App.
To open the Clock app, click on the Start button, and search for “Clock” in the search bar. Click on the Clock app to open it.
Step 2. Once the Clock app is open, click on the “Alarm” option on the left side of the screen.

Step 3. On the bottom right corner, click on the Edit alarms button.
Step 4. Click on the Alarm tile you want to edit.
Step 5. After editing the alarm, click on the Save button.
Step 6. Click on the Done button.

How to Delete an Alarm in Windows 11?
Follow these steps to delete and remove an alarm in Windows 11:-
Step 1. Open the Clock App.
To open the Clock app, click on the Start button, and search for “Clock” in the search bar. Click on the Clock app to open it.
Step 2. Once the Clock app is open, click on the “Alarm” option on the left side of the screen.
Step 3. On the bottom right corner, click on the Edit alarms button.
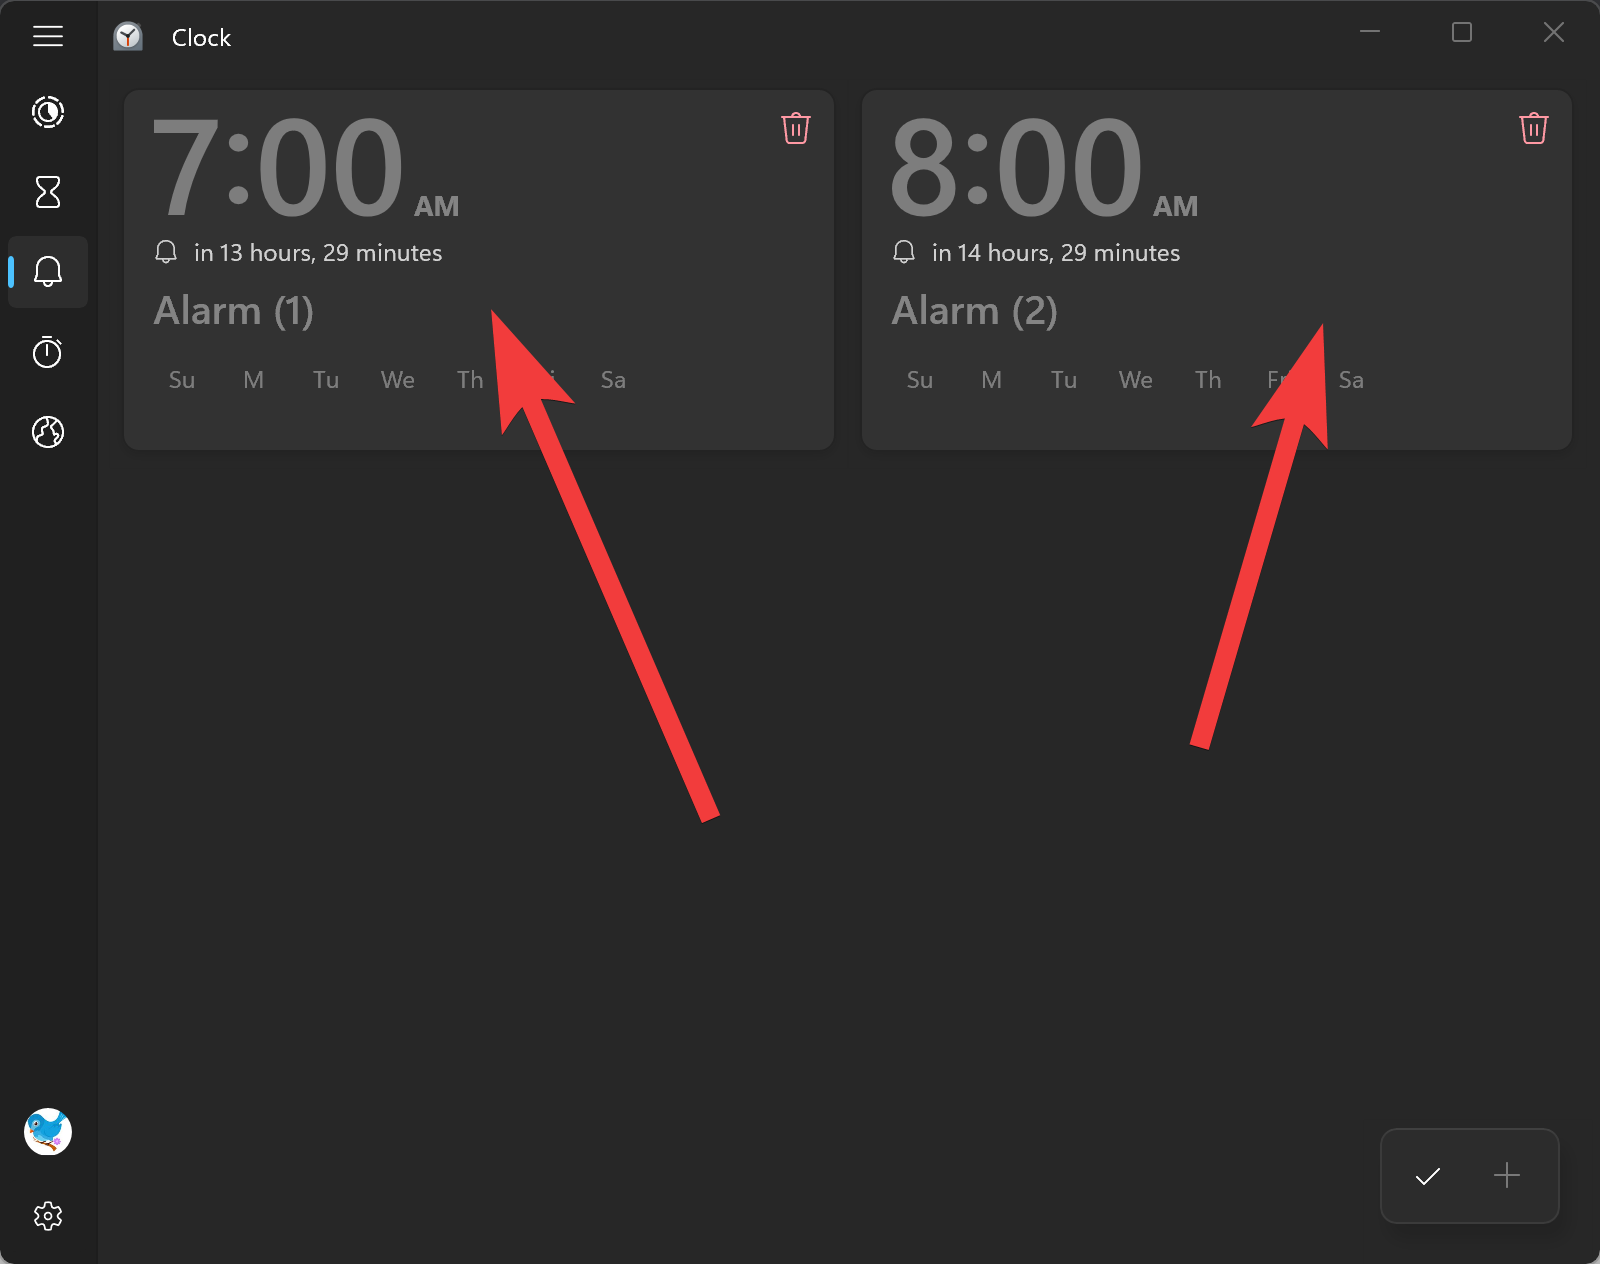
Step 4. Click on the Delete icon in the alarm tile you want to remove.

Conclusion
In conclusion, setting up an alarm on Windows 11 can be an effective way to stay on top of important tasks, appointments, or events. Before setting up an alarm, ensure that your Windows 11 PC’s time and date settings are correct, sleep mode is disabled, and the Clock app is up-to-date. To set an alarm on Windows 11, open the Clock app, select the “Alarm” option, and click on the + icon to add a new alarm. You can set the alarm time, repeat alarm, alarm name, snooze time, and alarm sound. To edit or delete an alarm, click on the “Edit alarms” button, select the alarm tile, and make the necessary changes. With these simple steps, you can create multiple alarms and customize them to suit your specific needs.
