Microsoft ships Windows 10 with a modern browser that is called Edge. Chromium-based Microsoft Edge browser is the default browser in Windows 10, and most of us are happy and use it. Most of us use the latest browser as it comes with new features and security bug fixes. Internet Explorer is still a part of Windows for decades and is available in Windows 10 too. A few use this browser, and many of us want to remove it from our PC as it unnecessarily occupies the spaces.
If you are one of those who want to remove Internet Explorer from his Windows 10 PC, this post will guide them to do so.
How to Uninstall Internet Explorer in Windows 10?
To completely uninstall or remove Internet Explorer from your Windows 10 PC, perform the following steps:-
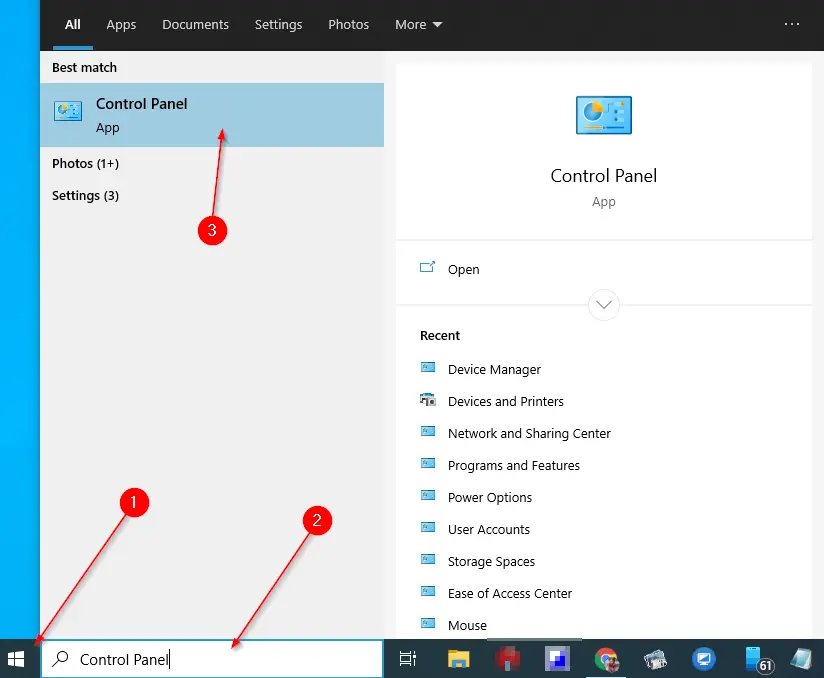
Step 1. Open Control Panel in Windows 10.
To open the Control Panel on Windows 10, click on the Start button and type Control Panel. In the available top results, click on the Control Panel entry to launch it.
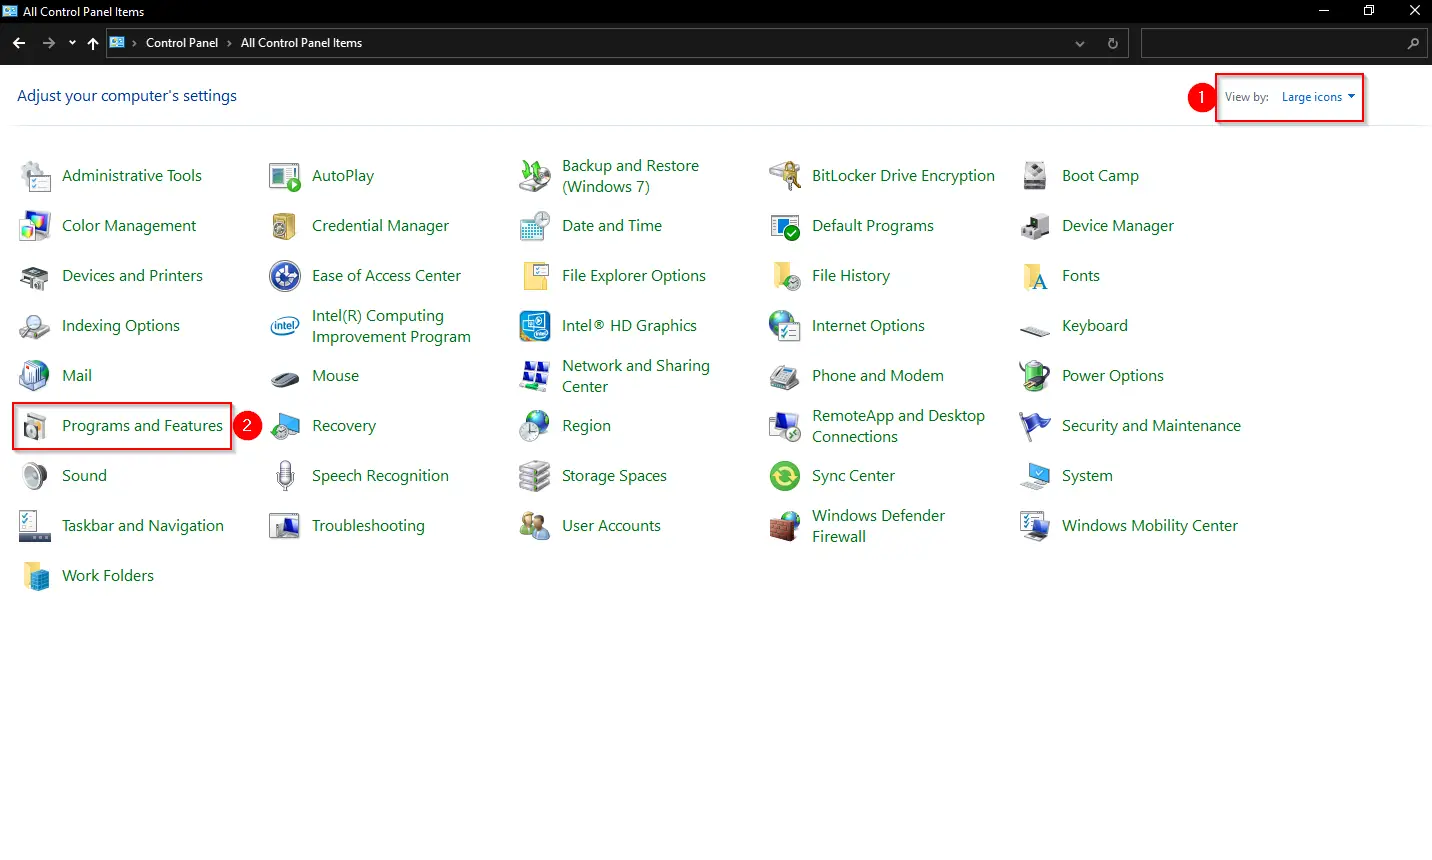
Step 2. In the Control Panel window, change the “View by” to “Large icons” and then select the Programs and Features.
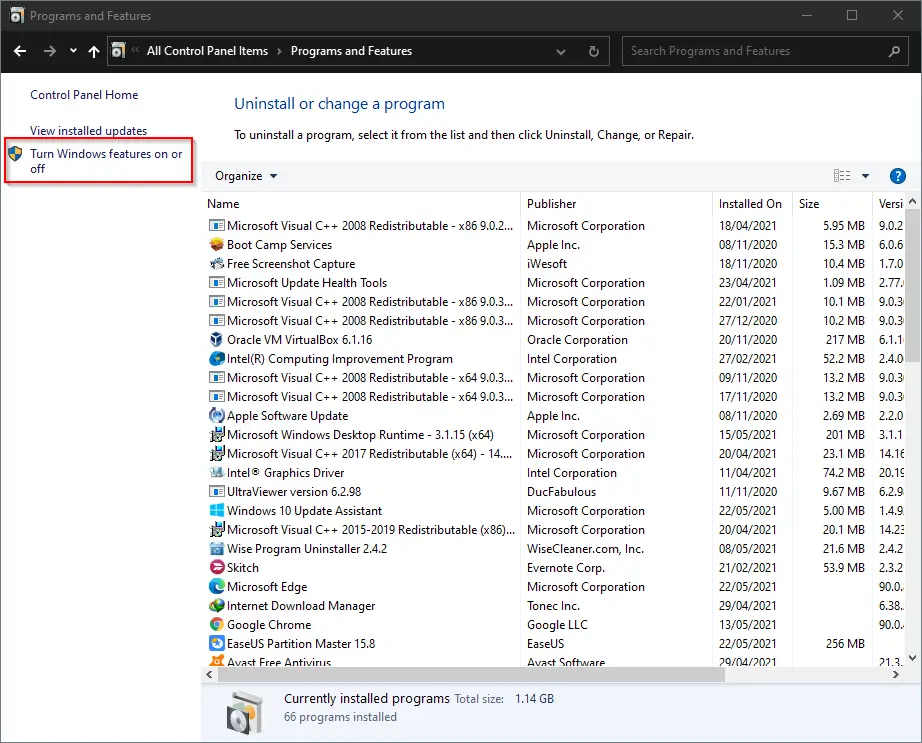
Step 3. Click the “Turn Windows features on or off” from the left side pane of the “Program and Features” window.
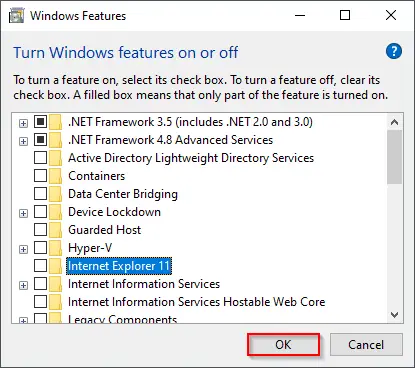
Step 4. A pop-up dialog box appears with the title “Windows Features.”
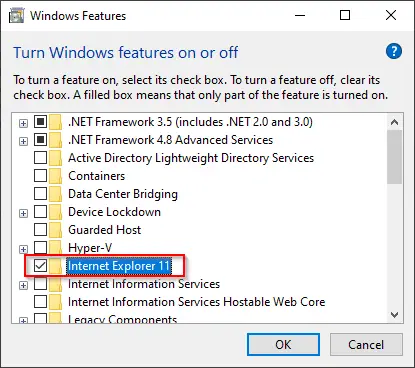
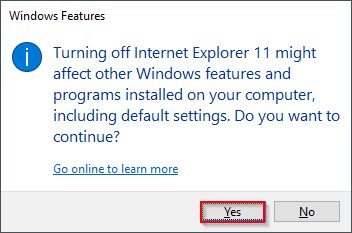
Step 5. Uncheck the “Internet Explorer 11.”
Step 6. A new pop-up dialog box will appear again. Click Yes to continue.
Step 7. Click OK.
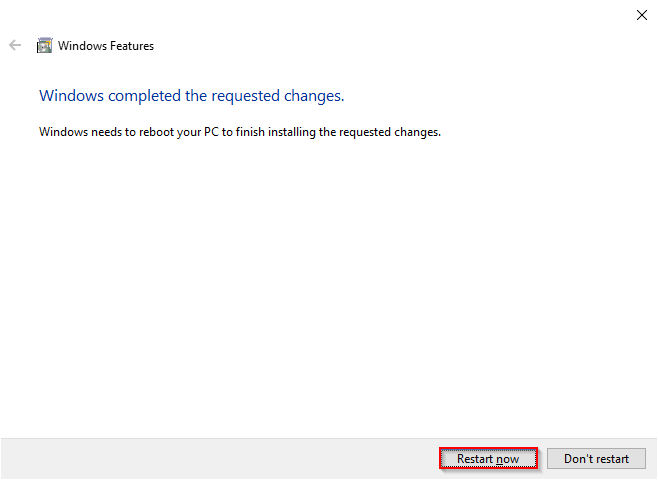
Step 8. Wait for the process to complete.

Step 9. Click the button “Reboot now” to restart your computer or laptop.
Once you complete the above steps, the Internet Explorer browser is completely removed from your Windows 10 PC.